
How to Create a New Schedule
This document will walk you thru how to Build a new schedule from scratch, publish, send, and print it.
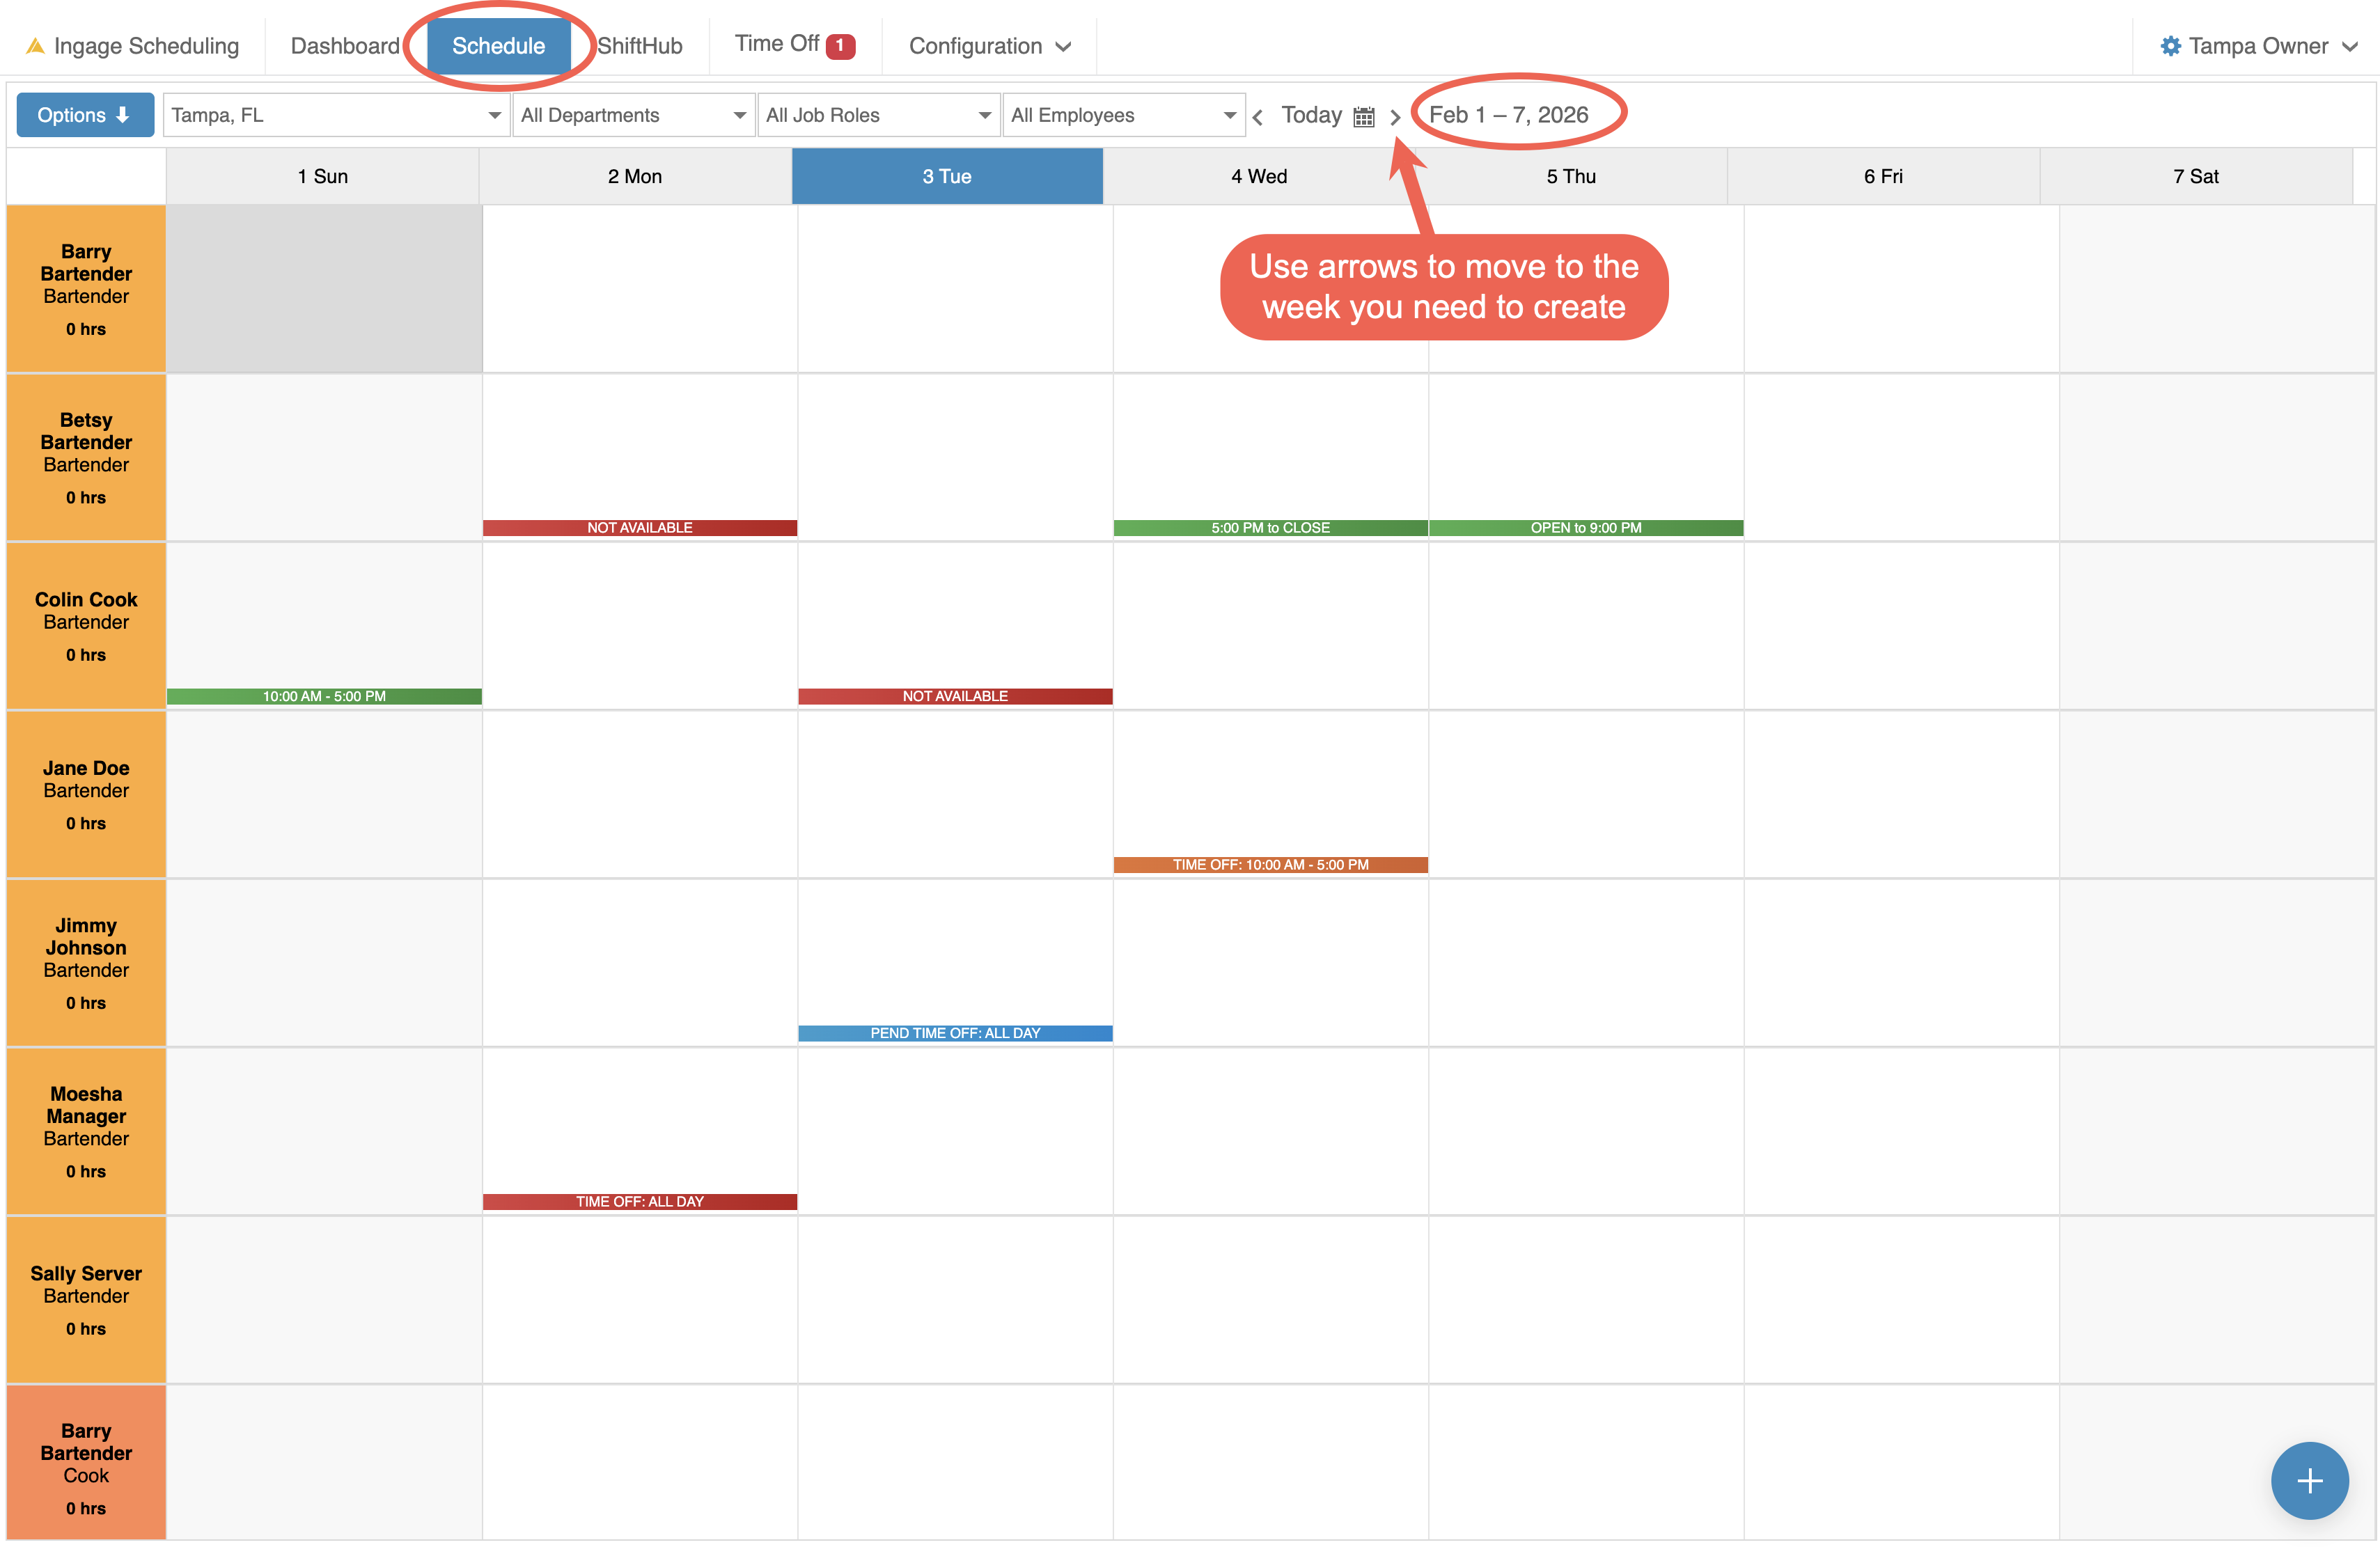
Step 1: Open the Schedule View
-
Go to the Schedule tab from the top toolbar.
-
Confirm you are viewing the correct week.
-
Use the date selector at the top to move forward or backward between weeks.
Step 2: Review Availability & Time-Off Requests
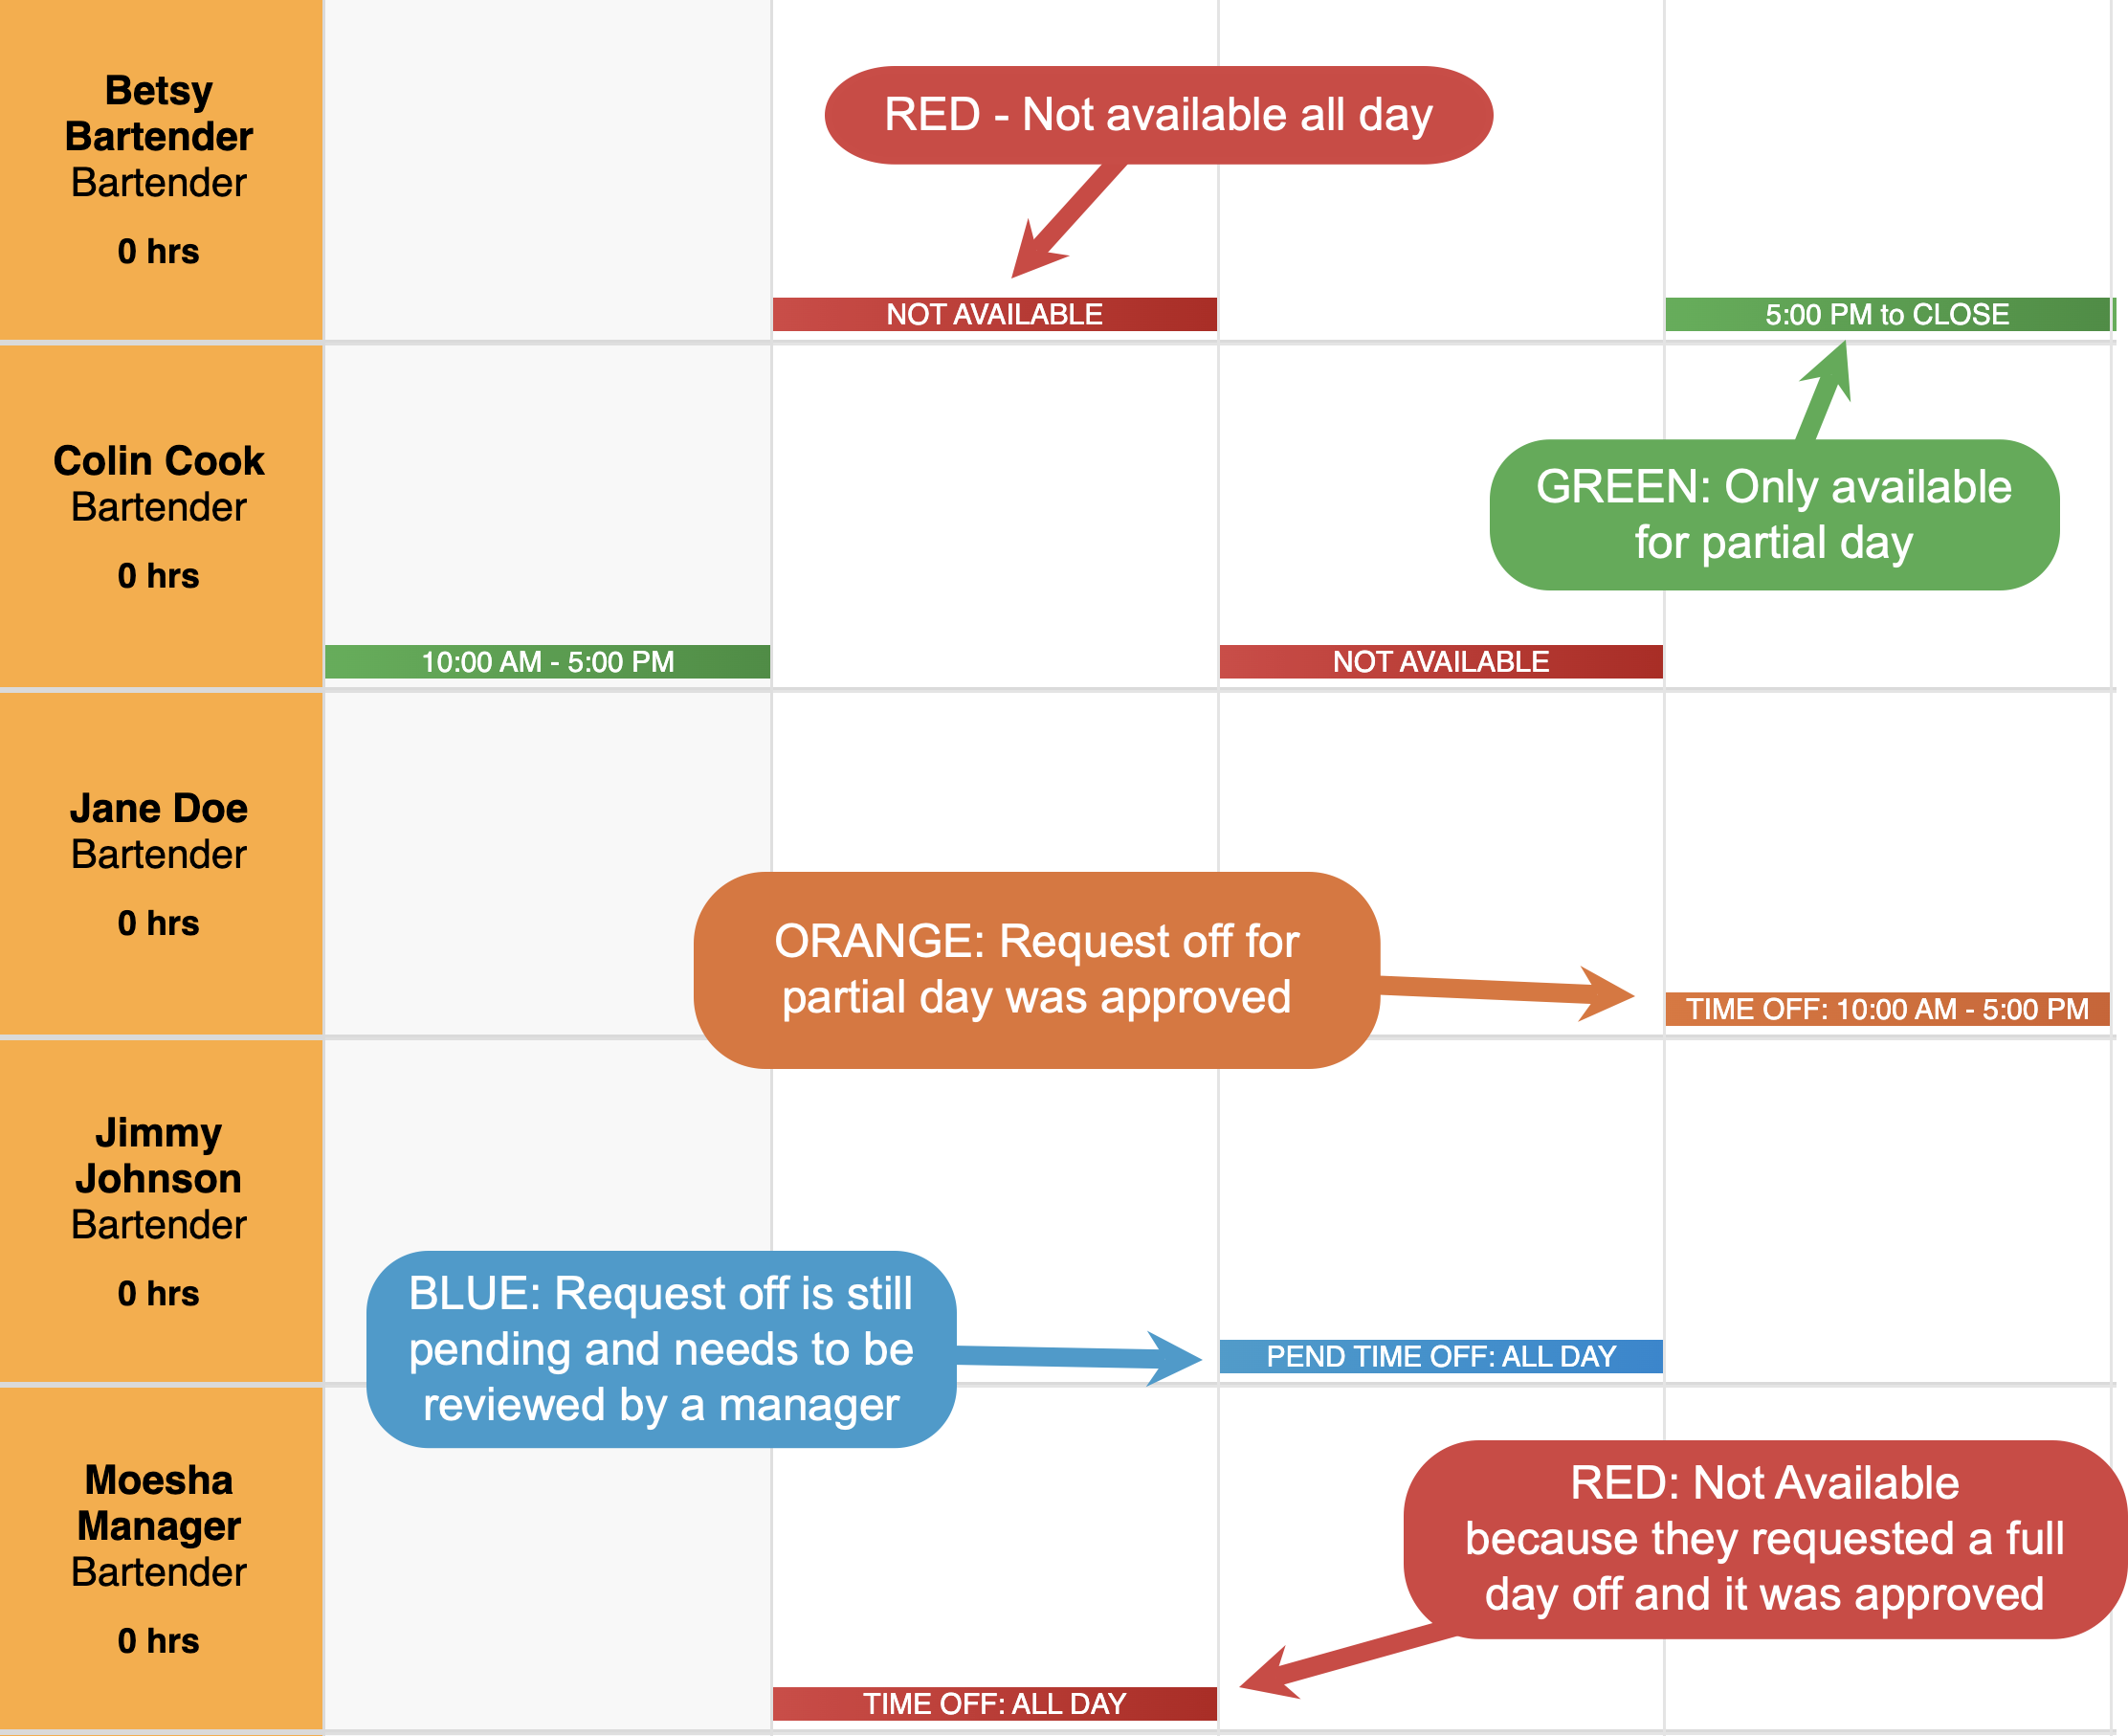
Before adding shifts:
-
Look for color-coded availability blocks
- RED - Not available for the whole day
- GREEN - Only available for part of the day
-
Check for approved time-off requests
- RED - Request off for the full day was approved
- ORANGE - Request off for part of the day was approved
- BLUE - Still has a pending request off that needs to be reviewed by a manager
-
Ensure employees are scheduled only when they are available
Step 3: Add Shifts
-
Click on the day and employee row where you want to add a shift
-
How to schedule an employee
-
How to filter departments and job roles
Step 4: Adjust & Balance Coverage
-
Review each day for proper staffing
-
Check total hours per employee
-
Make adjustments as needed to avoid over- or under-scheduling
Step 5: Publish the Schedule
Once the schedule is ready:
-
Click Options in the top-left corner
-
Select Publish Schedule
Step 6: Send the Schedule to Employees
After publishing:
-
Select Send Schedule
-
Employees will receive their schedules by email or text
Step 7: Print the Schedule
After publishing:
-
Select Send Schedule
-
Employees will receive their schedules by email or text
Optional
Each week if you don't want to create a new schedule from scratch you can use one of our two shortcuts.
-
Copy Last Week's Schedule
-
Use a schedule template