
Running Payments in MX Merchant
The process for running a credit card payment within MX Merchant.
Getting to Quick Pay
Step 1 - Login to MXM
Go to www.mxmerchant.com and login using your credentials. If you do not have credentials, request your user account be added to the merchant in question.

Step 2 - Select Location
Verify you are connected to the proper account. You may have to edit your "Location". To do this, select the ![]() in the top right-hand corner. Select "Edit" next to "Location". A pop-up will appear. Search for the correct merchant location by name. Select the checkbox next to the correct location and hit "Save".
in the top right-hand corner. Select "Edit" next to "Location". A pop-up will appear. Search for the correct merchant location by name. Select the checkbox next to the correct location and hit "Save".
Step 3 - Access Quick Pay
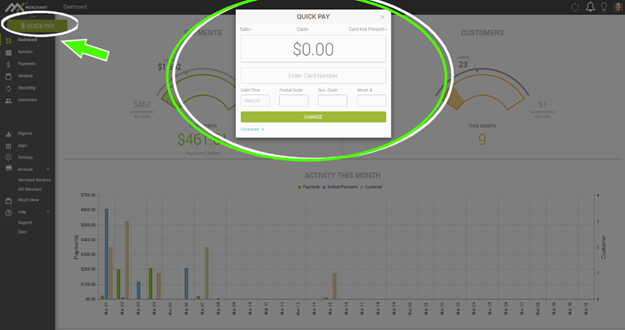
Quick Pay transactions are just as they sound: quick transactions that require little detail in order to process the payment! Transactions that can be made through Quick Pay are card, cash, check, and ACH transactions.
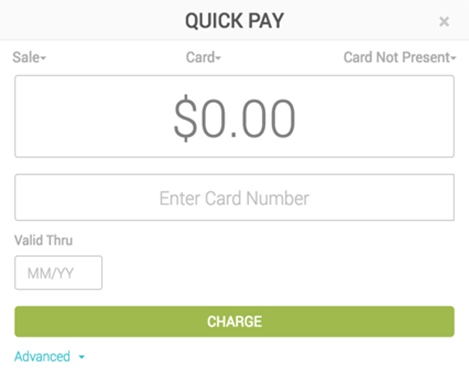
Across the top are drop downs with the default selection showing. To change them for the current transaction, click on the down arrows to the right of each word (defaults can be set in payment settings).
- Type of sale: Sale or refund
- Tender type: Card, cash, check or ACH
- Presentment type:
1. For card: card present, card not present, swiped, terminal.
2. For ACH: CCD, PPD, Tel, Web.
The type and presence of tender will determine the fields available to process the payment.
Step 4 -
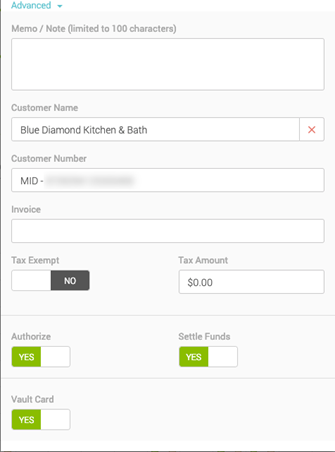
Now you will see the pop-up has expanded with the following fields:
- Memo / Note: a free-form textbox
- Customer Name: you can either search for a customer here or enter a new customer name. If a customer name is entered that does not already exist, a new record will be created for them
- Customer Number: search for an existing customer by customer number or use this field to enter your own unique number
- Invoice: here you can enter your own invoice number for this payment
- Tax Exempt: Yes/No; Defaults to "No"
- Tax Amount: how much of the total above is tax. If nothing is entered the system will default to 7% for reporting purposes only to help you qualify for the best rate
- Authorize: If toggle to no, a field is displayed to enter an offline authorization code. This option is not available to Clerks
- Settle Funds: If toggle to yes, it will add funds to the day’s settlement. If toggled to no, it does not add funds to the day’s settlement. This option is not available to Clerks.
- Vault Card: If toggled to "Yes", card information will be saved. If toggled to "No", card information will not be saved. Card will display with only the last four digits.