Product Mix Report
This is the Product Mix Report
Where to find the report
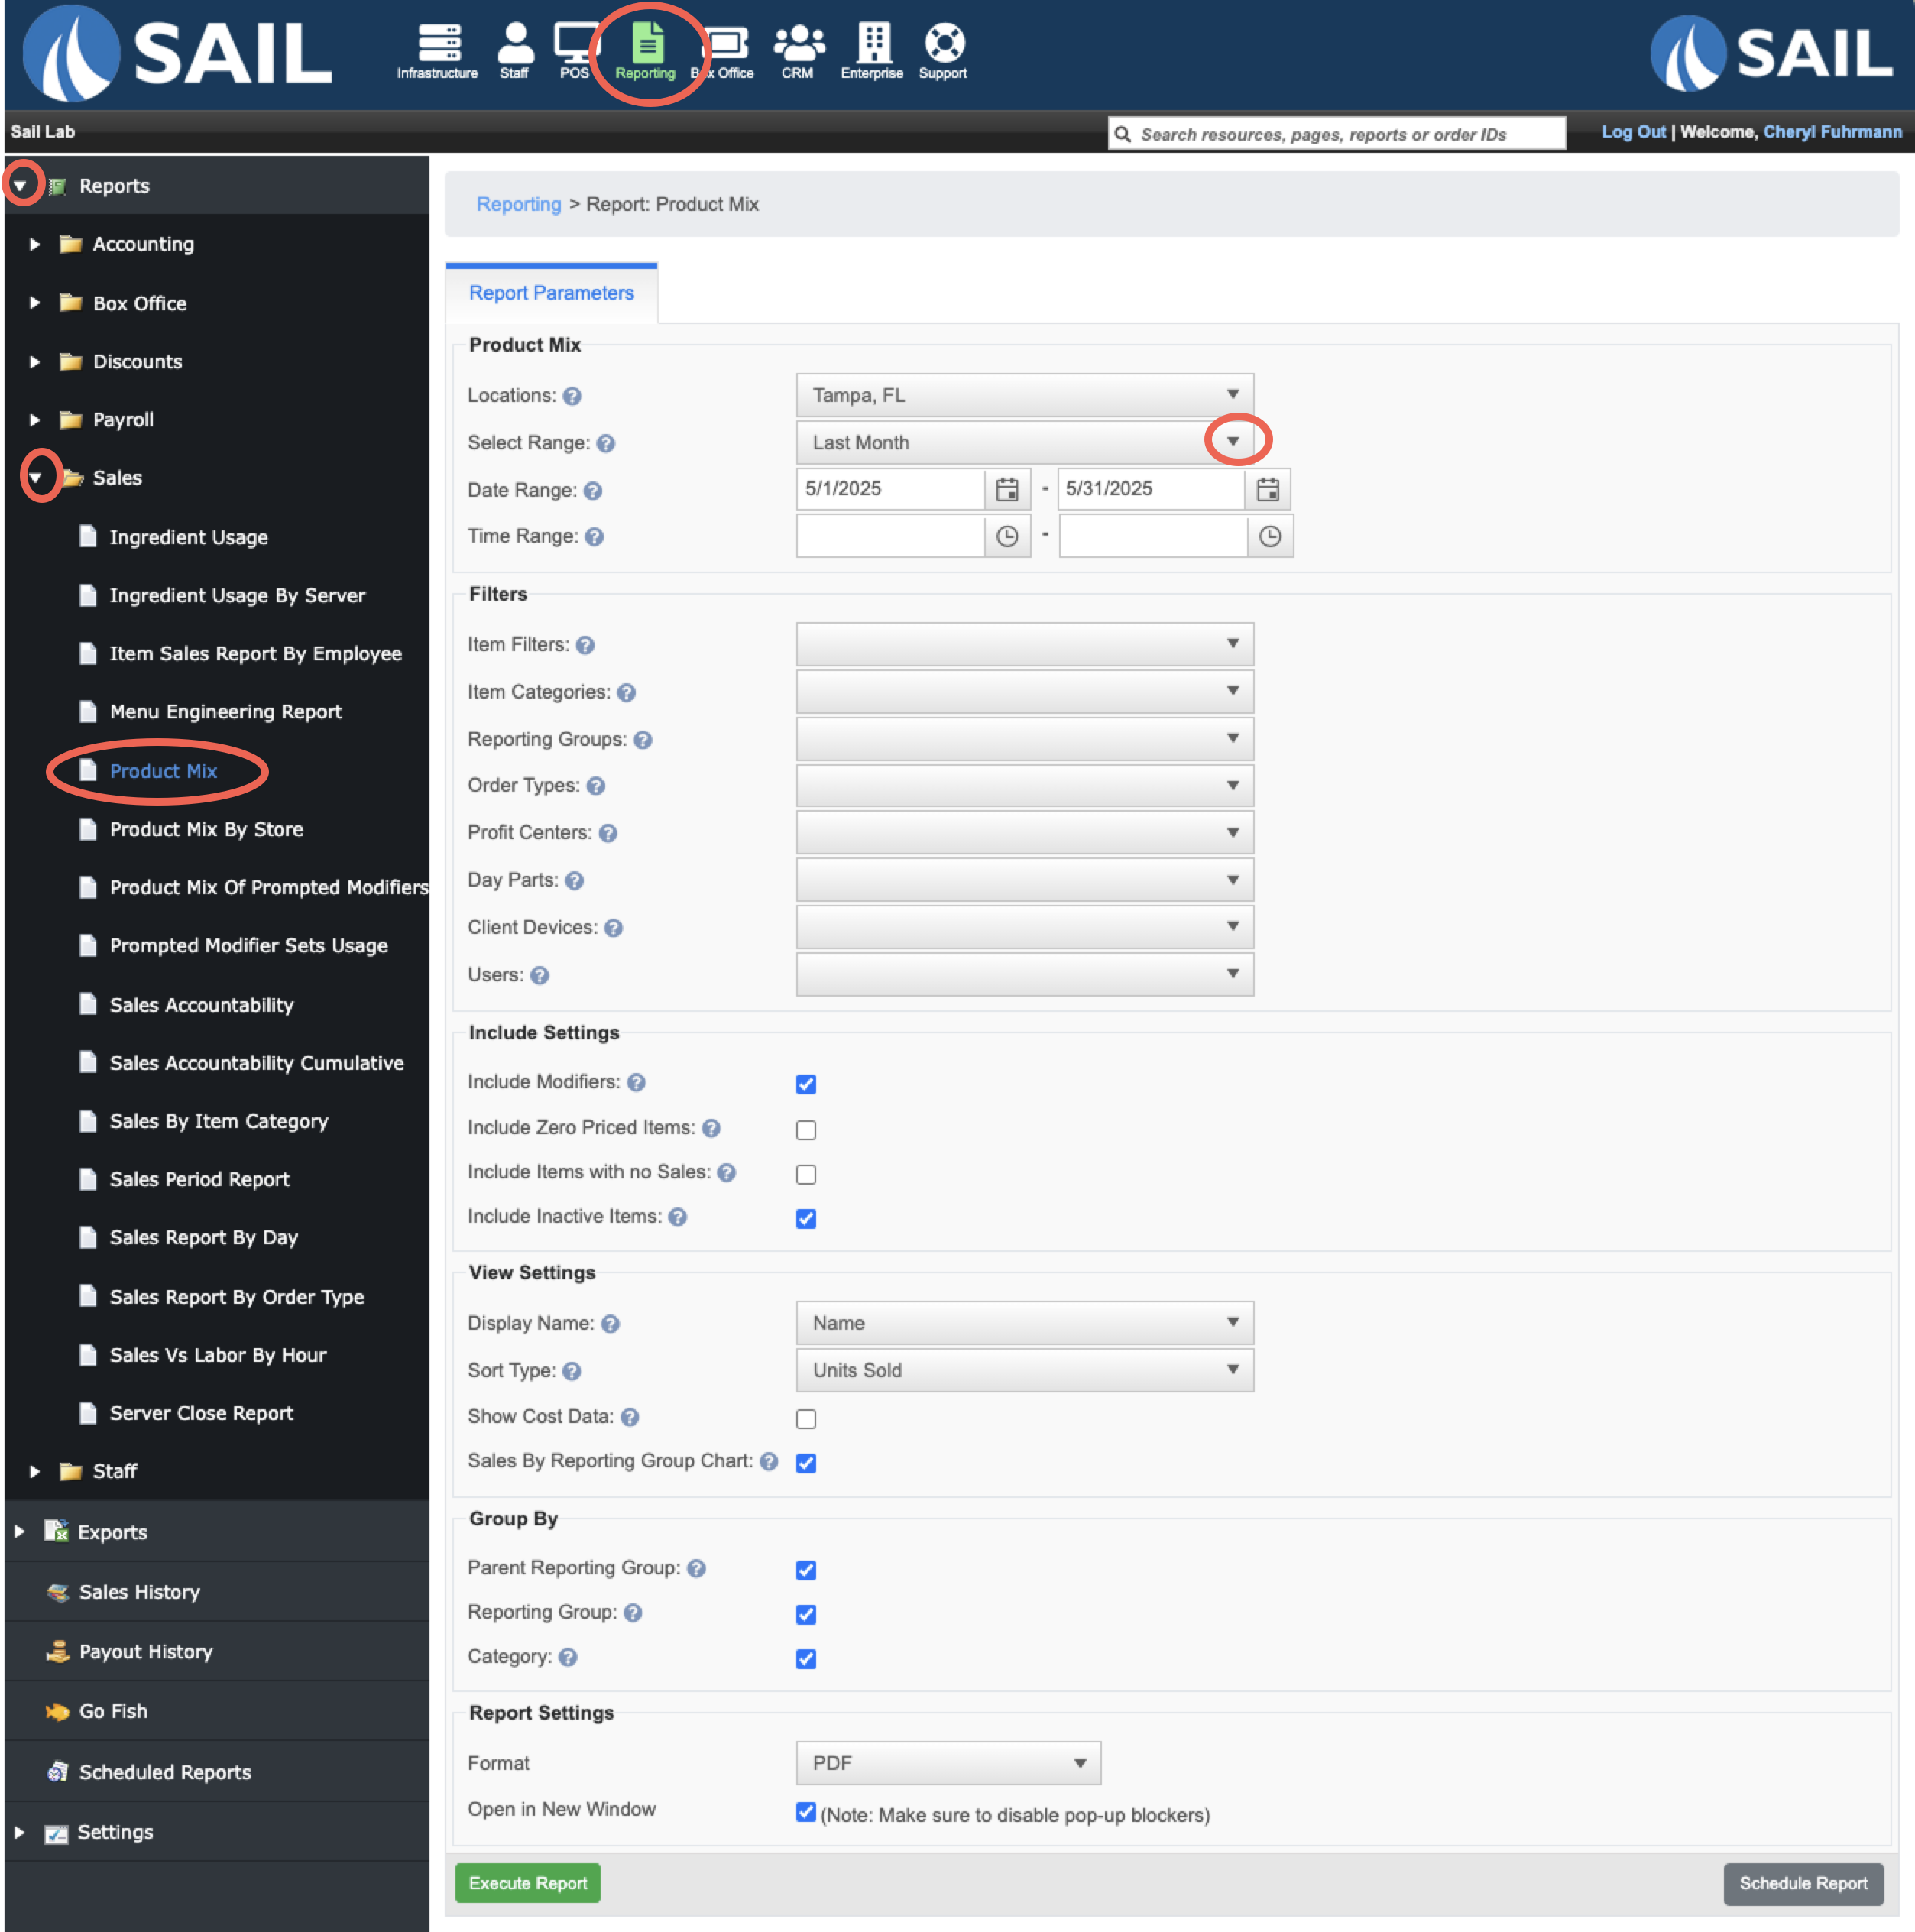
- Backoffice --> Reporting --> Reports --> Sales folder --> Product Mix --> Select Date Range --> Execute
Report Options
-
Locations – Select one or more locations to include in the report.
When multiple locations are selected, all sales are combined into a single total. -
Select Range / Date Range / Time Range – Choose a preset date range (e.g., Today, Last Week, Last Month) or manually enter custom start and end dates/times.
Filters
All filters are multi-select, allowing you to narrow results to one or more options in each list.
If no filters are chosen, the report includes everything within the selected date range.
When combining filters, the report will only return data that matches all selections.
(For example, filtering by “Beer” category and “Terminal 1” device will show only beer sold on Terminal 1.)
-
Item Filters – Custom item groups configured in Backoffice (e.g., Food Specials, Top 20 Items).
-
Item Categories – Menu categories assigned to items (e.g., Appetizers, Entrees, Desserts).
-
Reporting Groups – High-level groupings such as Food, Alcohol, Merchandise.
-
Order Types – Filter by order type such as Dine In, To-Go, Delivery, Online.
-
Profit Centers – Separate sales by operational area, such as Main Dining, Bar, Patio, Online Ordering.
-
Day Parts – Filter by preconfigured time periods (e.g., Lunch, Dinner, Late Night).
-
Client Devices – Filter by the terminal or handheld used to ring in sales.
-
Users – Filter by the employee who rang in the sale.
Include Settings
-
Include Modifiers – Adds each sold modifier item (e.g., Bacon, Ranch, Extra Cheese) as its own line item in the report.
Modifier items are listed alphabetically and are not grouped under their parent menu items. -
Include Zero-Priced Items – Includes items that have a $0 default price.
These are often variable-price items (where the price is entered manually) or non-charged items such as Silverware or Ketchup. -
Include Items with No Sales – Displays every configured menu item, even if it wasn’t sold during the selected time frame.
Useful for menu audits. -
Include Inactive Items – Shows items that have been deactivated but still have past sales history.
View Settings
-
Display Name – Choose how item names are displayed (e.g., Name or Short Name).
-
Sort Type – Determines the order of results, such as by Units Sold or Sales Amount.
-
Show Cost Data – Adds columns for Cost, Total Cost, and Total Profit.
These will only display data if cost values have been entered for each item or modifier. -
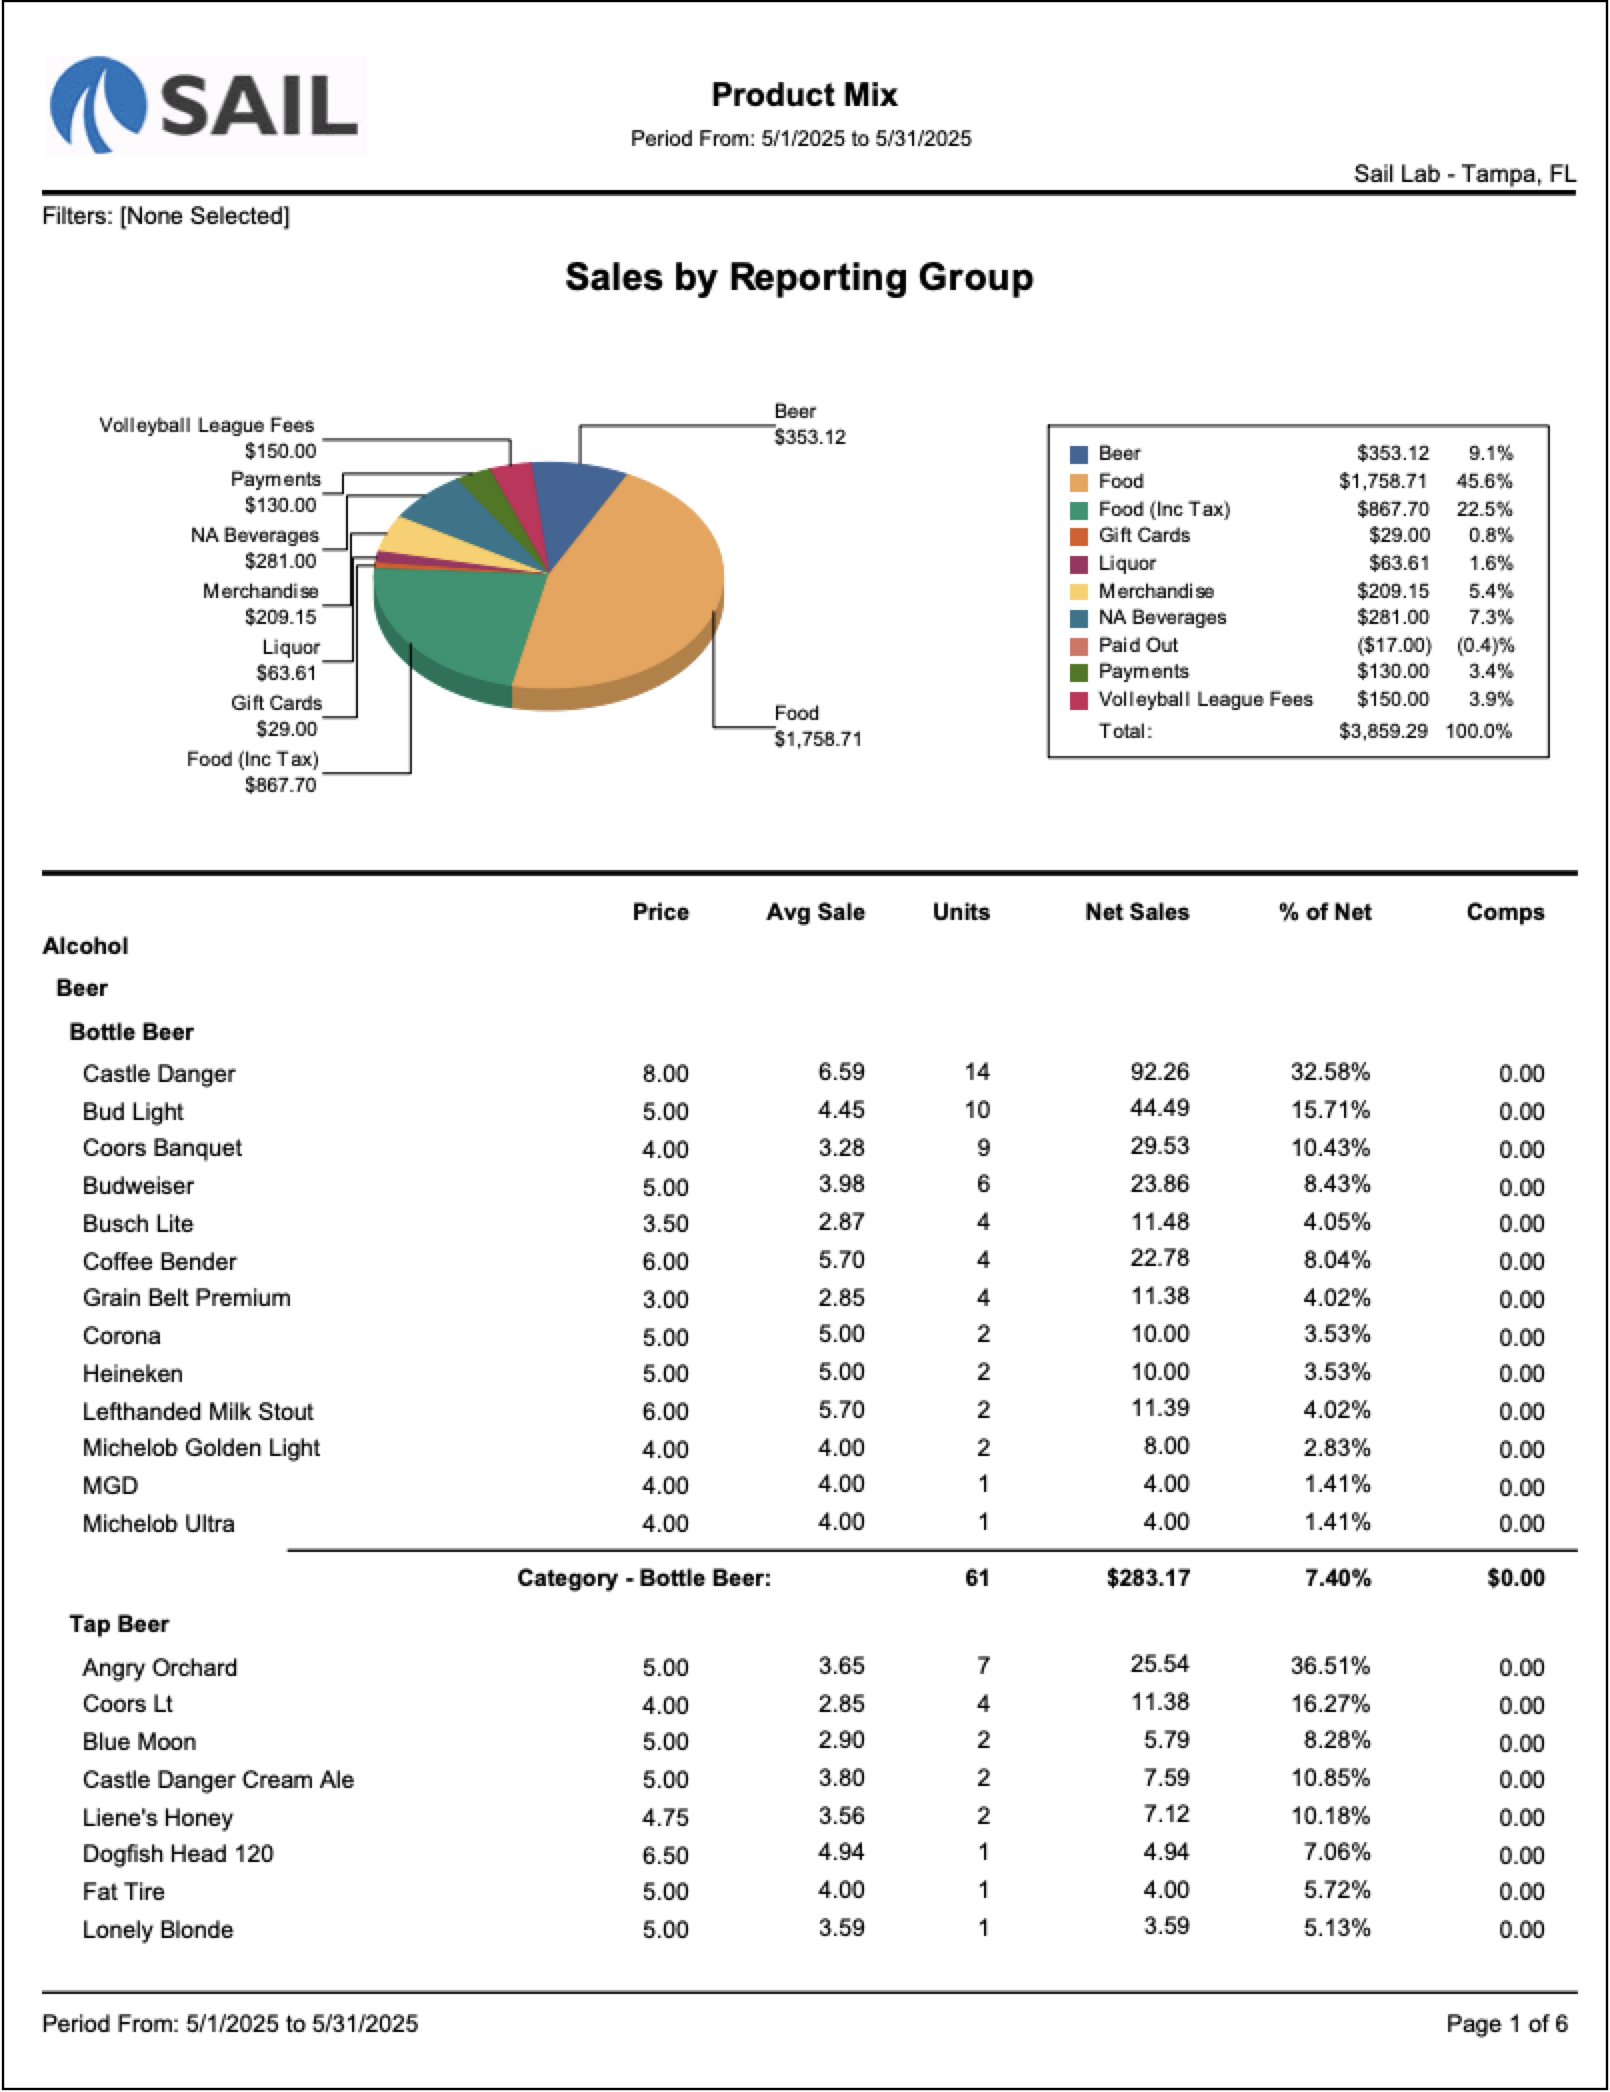
Sales by Reporting Group Chart – Displays a pie chart at the top showing total sales by Reporting Group.
Group By
These options control how the report is organized.
By default, all three boxes are checked, showing four layers:
Parent Reporting Group → Reporting Group → Category → Item.
-
Parent Reporting Group – Top-level grouping (e.g., Alcohol).
-
Reporting Group – Sub-groups within the parent (e.g., Liquor, Beer, Wine).
-
Category – Menu categories under each reporting group (e.g., Cocktails, Bottle Beer, Wine by Glass).
Unchecking any box removes that layer:
-
If Category is unchecked → items appear under their reporting group without category separation.
-
If both Reporting Group and Category are unchecked → all items display in one continuous list, sorted by your selected sort type.
What it looks like