Expo Screen
This document will detail the Expo Screen
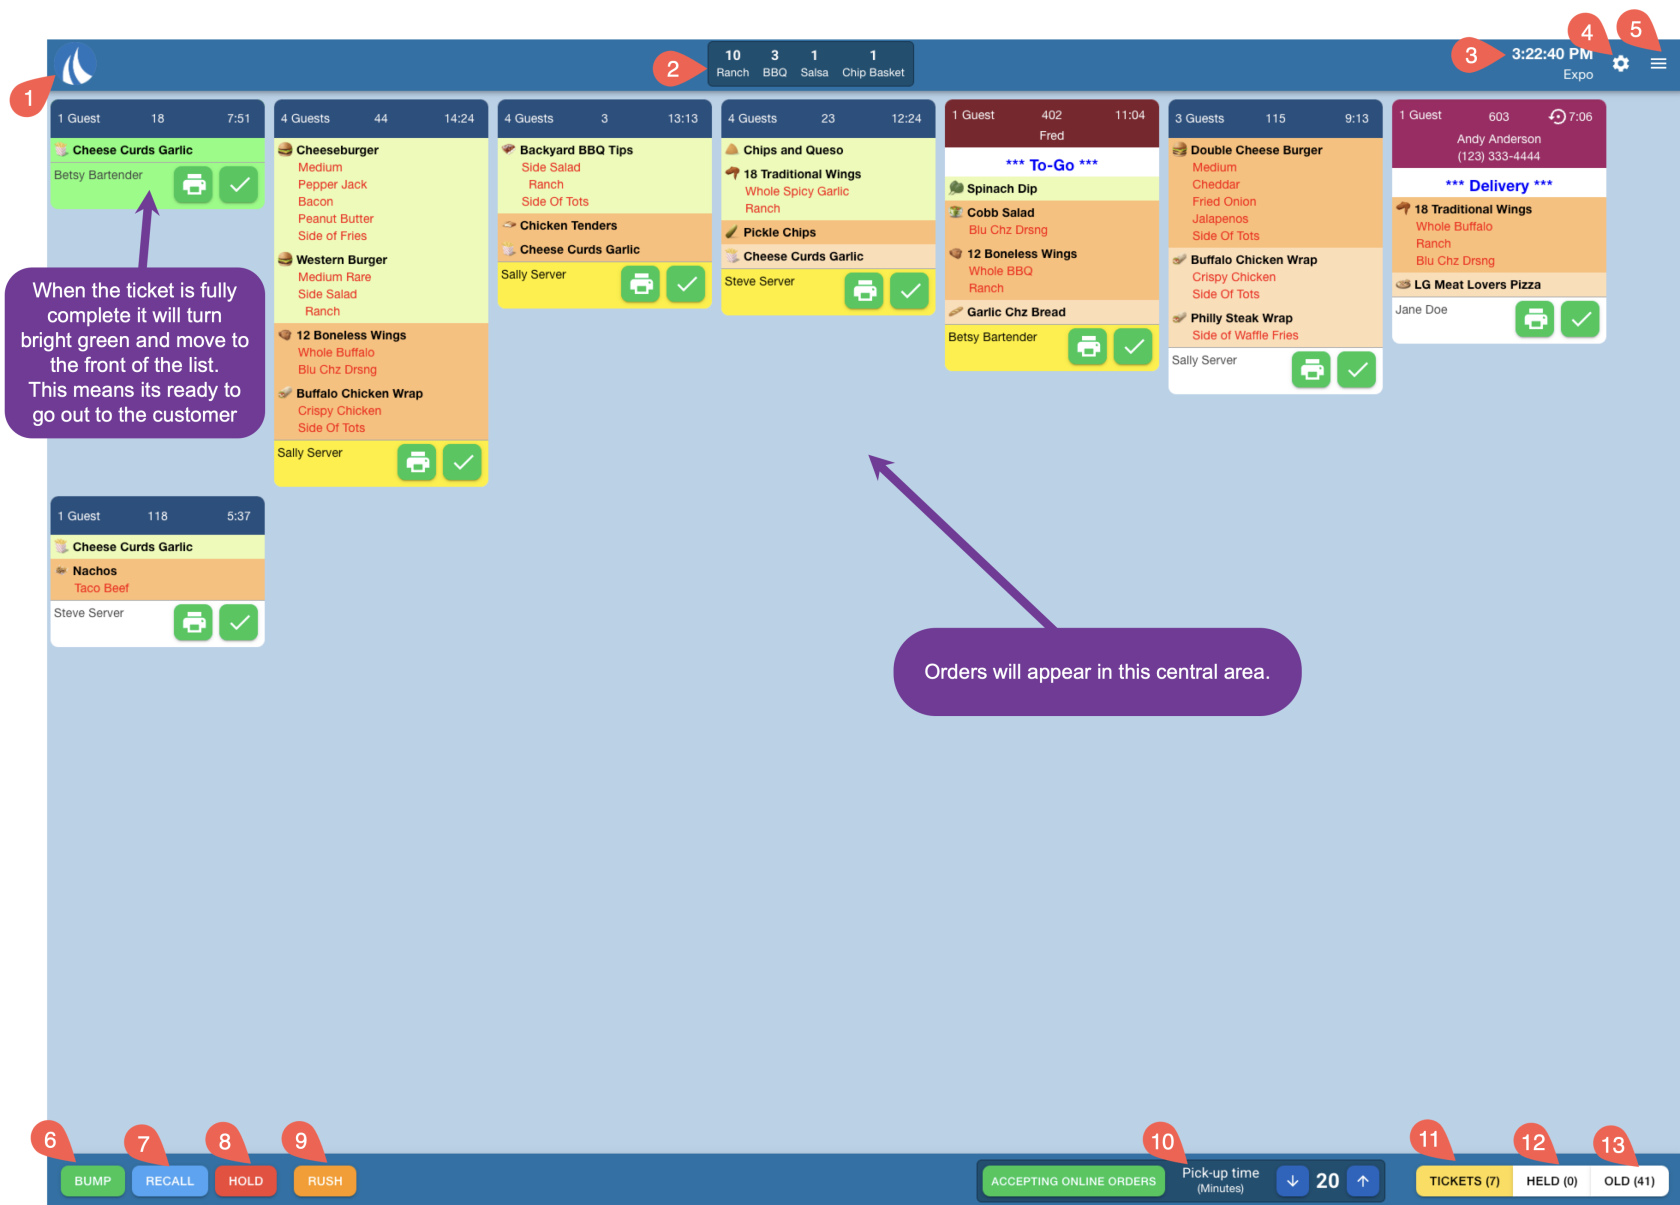
1. Sail Logo - Click the Sail Logo in the top left of the screen to refresh the screen and load any changed that might have happened since the last time the system refreshed
2. All Day Counts - On the top middle of the screen you will find the All Day Counts. These can be configured in Backoffice. Use this link to find out more about how to set up All Day Counts
3. Time and Station name - The current time and the station name is displayed in the top right corner.
4. Station Settings - Click this icon to get to your stations settings. Each station has its own settings that pertain to that station type. Click the link to learn more about each of the station settings.
5. Quick Settings - Click this icon to get to your Quick settings. Quick settings are the same as some of the settings in the station settings icon, but just a faster way to get to them. Each station has its own quick settings that pertain to that station type. Click the link to learn more about the quick settings.
6. Bump - When you BUMP an order from the expo screen that means its completely done and has been brought out to the customer. If the order is highlighted with a yellow circle around it, this button will be lit up. and you can click it to Bump that button off the expo screen, and it will move it into the "Old" orders screen
7. Recall - This button will bring back the last order that was bumped off the screen and moved to the Old orders screen. It will bring orders back in the order that you bumped them.
8. Hold - This button will move the selected order from the Expo Screen into the "Held" orders screen. This means Its not ready to be cooked and they are waiting until later to cook this order. (See below to find out how to bring the ticket back when you're ready to cook it.)
9. Rush - This button will Move a ticket to the front of the screen so the cooks know this is the next order to start cooking. It will also move any items that have been sent to the quick station to the top of the To Do list
- In Backoffice there is a setting called "Rush Order Immediately Sends All Items"
- If Checked: Rushing an order will immediately send all items to all kitchen stations, regardless of cook time. This may result in shorter cook time items being ready well before longer ones.
- If Not Checked: Rushed orders are prioritized and move to the top of the KVS screen, but still respect cook times. This ensures all items are timed to finish together and can be served at the same time.
Click this link to find where to turn that setting on or off in backoffice.
10. Online Ordering controls - This section will only appear on your KVS screen if Online Ordering is enabled at your location. It allows you to:
-
Quickly turn off online ordering during busy periods — without needing to access Backoffice
-
Manually adjust the pickup time customers see when placing an order, so expectations better match your kitchen's pace
11. Tickets - When "Tickets" is selected that means you are looking at the New/current orders
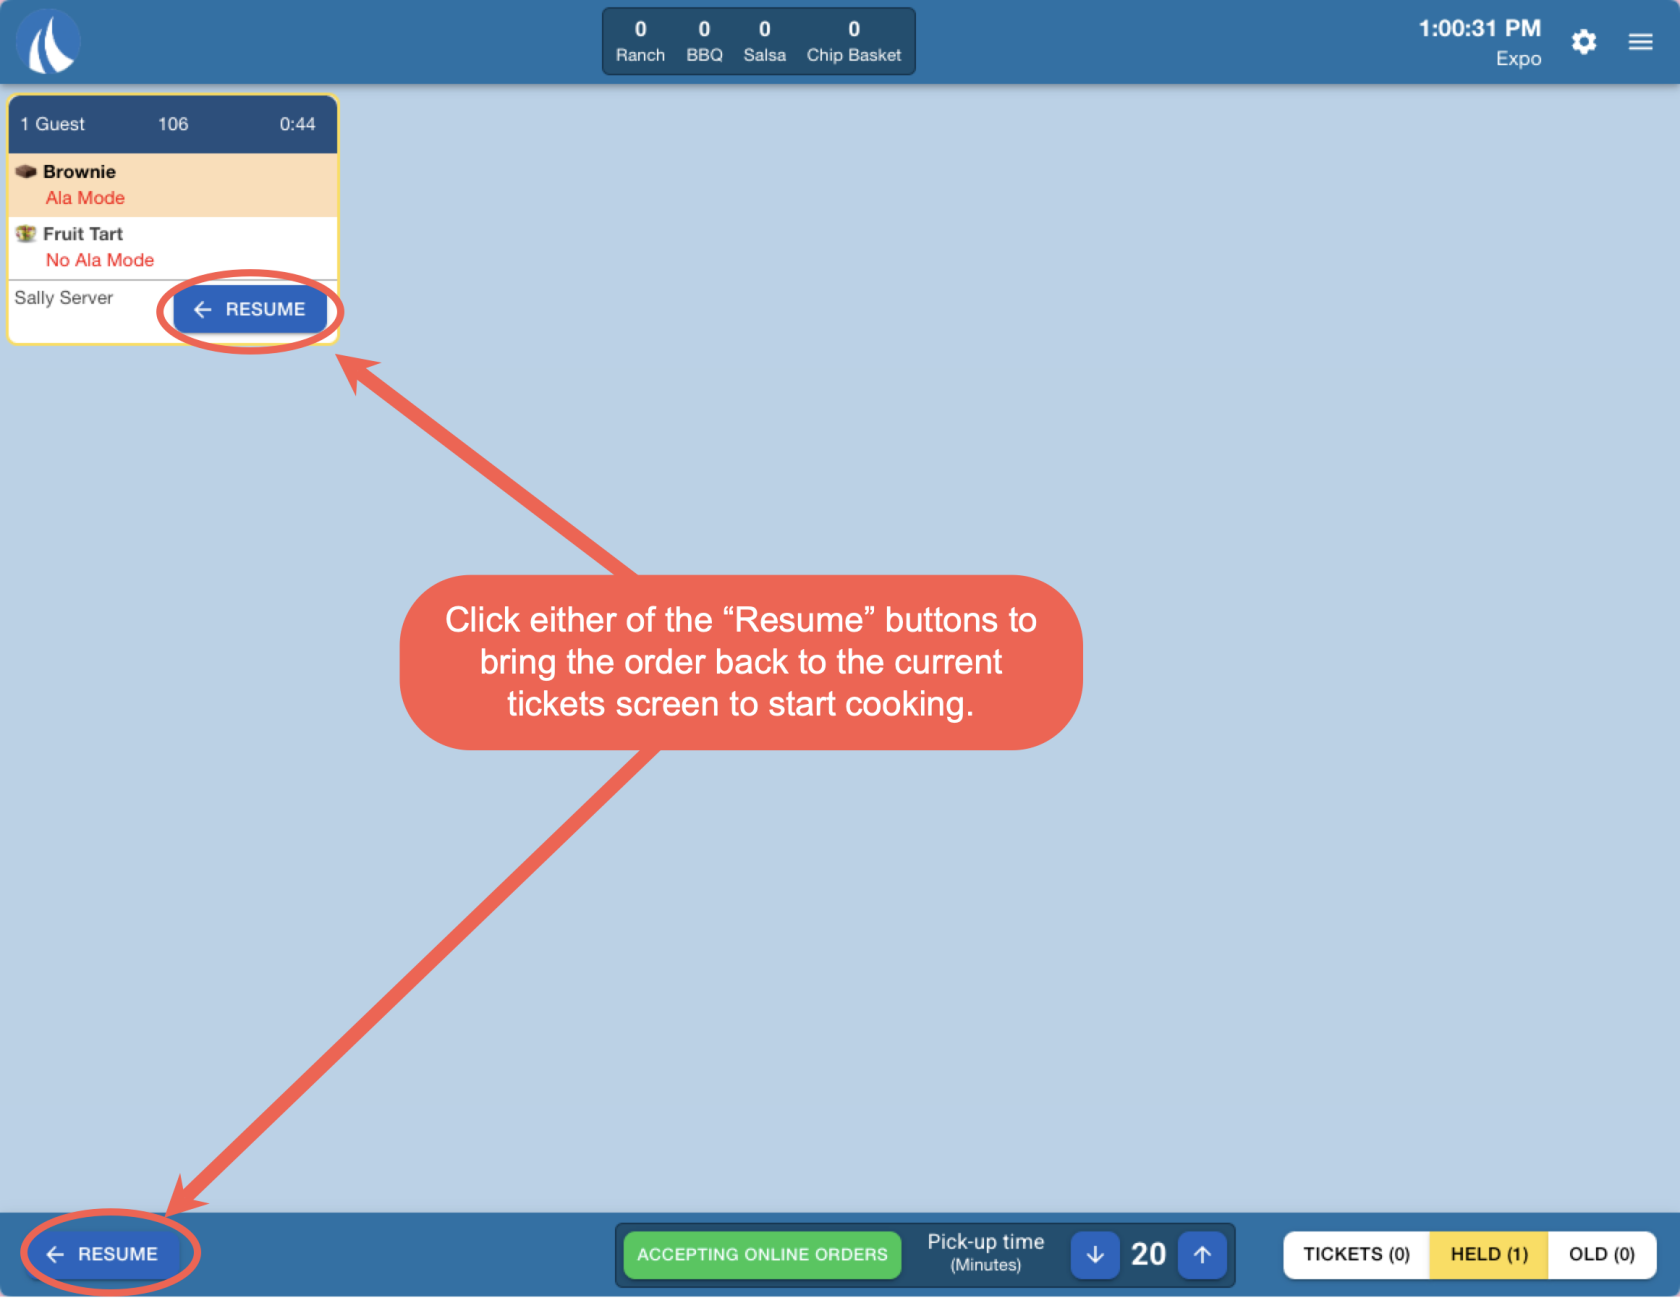
12. Held - When "Held" is selected that means you are looking at tickets that are not ready to be cooked yet.
Here is what the HELD screen looks like.
To move the order back to the current tickets screen, click either the resume button on the order, or select the order and click the resume button on the bottom left
13. Old - When "Old" is selected that means you are looking at orders that have been finished cooking.

