KVS Station Settings
This document will show you all of the Settings that are on the KVS screens
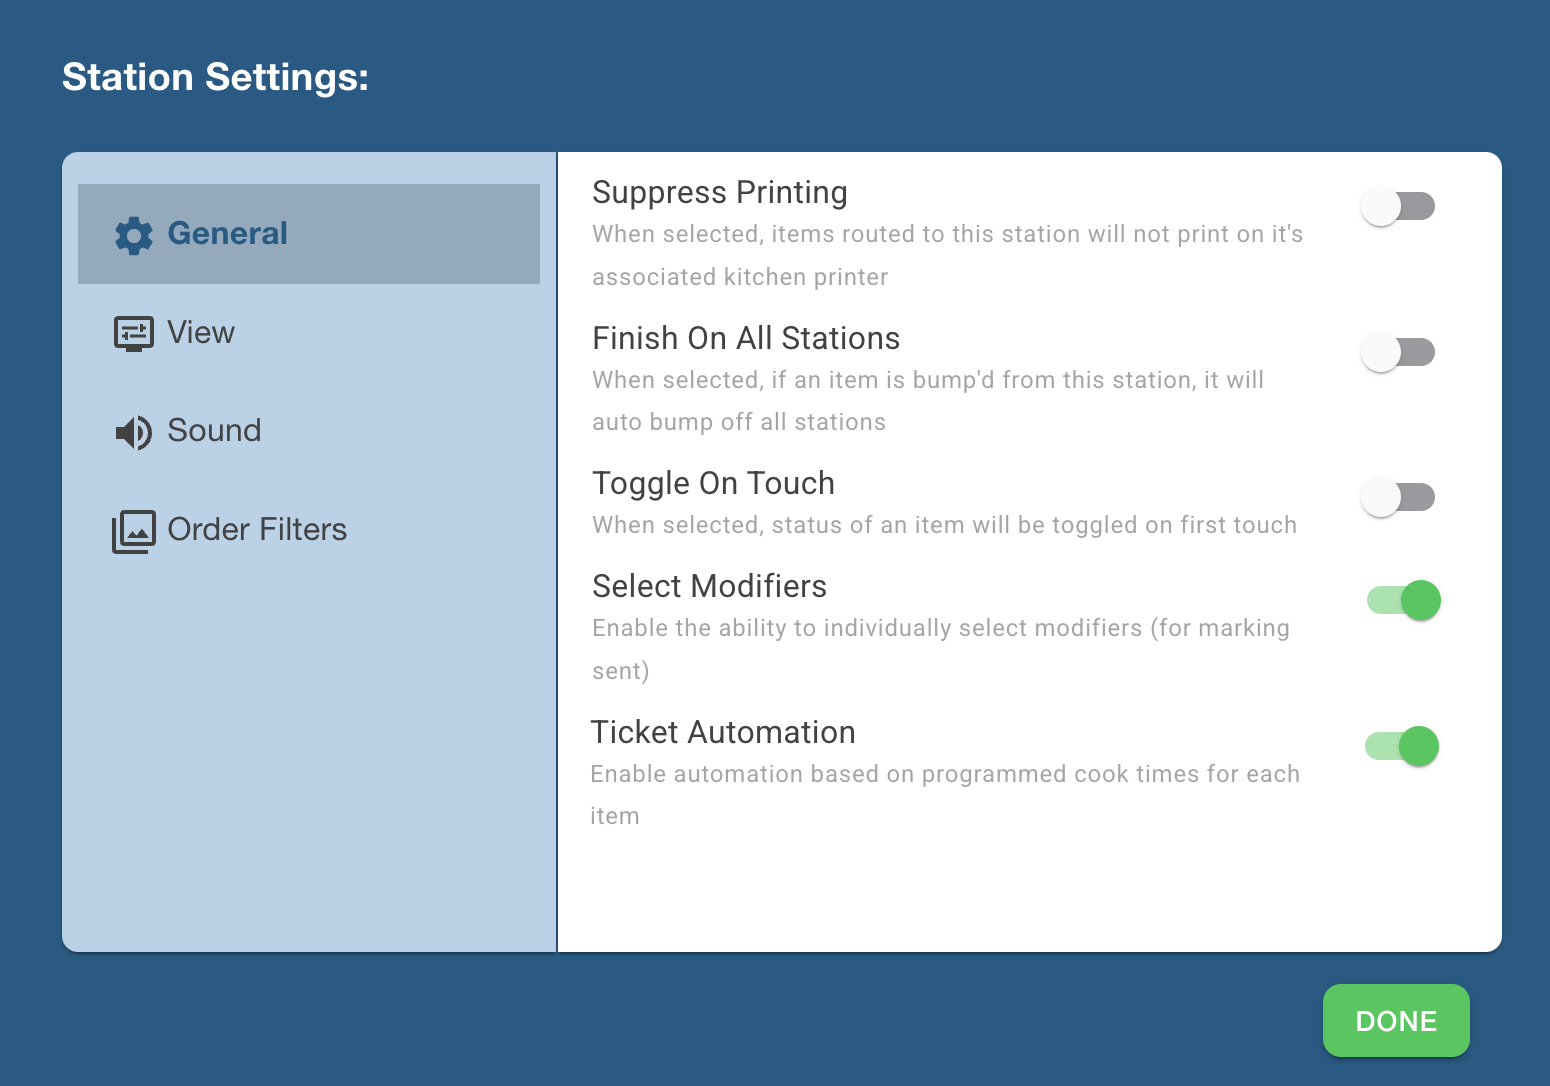
Suppress Printing
- This setting is available on Wheel, Expo, and Quick Stations
-
The Suppress Printing setting controls whether a kitchen ticket is printed at the physical printer when an order is sent to a Kitchen Video Screen (KVS).
-
To use this setting, the KVS station (e.g., Fry) must also have a printer assigned to it, and orders must be routed to both the KVS and the printer in Backoffice.
-
When Suppress Printing is ON: The order will appear only on the KVS screen, and nothing will print at the kitchen printer.
-
When Suppress Printing is OFF: The order will appear on the KVS screen and a paper ticket will print from the kitchen printer.
-
-
Why use this setting?
This is especially helpful for new locations transitioning to Kitchen Video. You can keep printed tickets as a backup while your team gets used to the KVS system. Once your kitchen staff is comfortable, you can enable Suppress Printing to fully switch to a digital workflow without printing paper tickets
Finish on all stations
- This setting is only available on the Expo Station
-
The Finish on All Stations setting controls what happens when an item is bumped from the expo station.
- When enabled: If an item is bumped from this station, it will automatically be bumped from all other stations it was sent to. This is useful when this station is the final step in preparing the item
-
When disabled: Bumping the item from this station will only remove it from this screen. The item will remain active on any other stations it was routed to (e.g., Grill, Fry, Salad).
- Why use this setting?
Enable this setting when your station represents the final touchpoint for an order—such as Expo—and you're confident the item is ready to be cleared from all stations. It prevents confusion and extra steps by automatically clearing the ticket across the system.
Keep it disabled if you want each station to independently bump their portion of the item—useful in kitchens where multiple teams work on the same ticket, and timing or hand-offs are staggered.
Toggle on Touch
- This setting is only available on the Expo Station
-
The Toggle on Touch setting changes how items are marked as delivered on the Expo screen.
-
Default Behavior (Toggle OFF): When an order is sent to the Expo screen, you can tap an item to highlight it in blue, then press the Knife & Fork button to mark it as delivered. The item will turn dark green to indicate it has been sent out ahead of the rest of the order.
-
Toggle on Touch (Setting ON): When Toggle on Touch is enabled, you can simply tap the item once to instantly mark it as delivered (dark green)—no need to press an extra button. Tap the item again to undo the delivery status and return it to normal.
-
-
Why Use This Setting?
This feature is ideal for high-volume or fast-paced kitchens where speed and efficiency are critical. It allows staff to quickly mark items as delivered with a single touch, streamlining the flow on the Expo line.
Select Modifiers
- This setting is only available on the Expo Station
- The Select Modifiers setting controls whether modifiers can be individually selected and marked as delivered on the Expo screen.
- Default Behavior (Setting OFF): When an item is ordered with modifiers, selecting any part of the item (the parent item or any of its modifiers) will highlight the entire group together. You can then mark the whole item—including all modifiers—as delivered. Modifiers cannot be marked delivered individually.
- When Enabled (Setting ON): With Select Modifiers turned on, you can individually select and mark modifiers as delivered. For example, if the side salad is prepped and sent out before the burger, you can mark just the salad as delivered. This helps staff track what has already gone out, even if the rest of the order is still being prepared.
- Why Use This Setting?
This is especially useful in kitchens where parts of an order are prepped and delivered separately—such as sides, that may leave the kitchen before the main item. It allows for better tracking and communication across the team to ensure accurate and timely service.
Ticket Automation
- This setting is only available on the Wheel Station
-
The Ticket Automation setting controls how items are sent from the Wheel screen to individual kitchen stations.
-
When Enabled: Items will be automatically sent to their assigned stations based on their programmed cook times. This helps ensure that each item starts cooking at the right moment so that everything finishes together. It streamlines kitchen timing and reduces the need for manual intervention.
-
When Disabled: Kitchen staff will need to manually send items to their stations by selecting and firing them. This gives the team more control over timing but requires closer attention to each ticket.
-
-
Why Use This Setting?
Ticket Automation is ideal for fast-paced kitchens looking to improve efficiency and ensure items are prepped and finished together. It takes the guesswork out of timing and helps reduce communication breakdowns between stations.
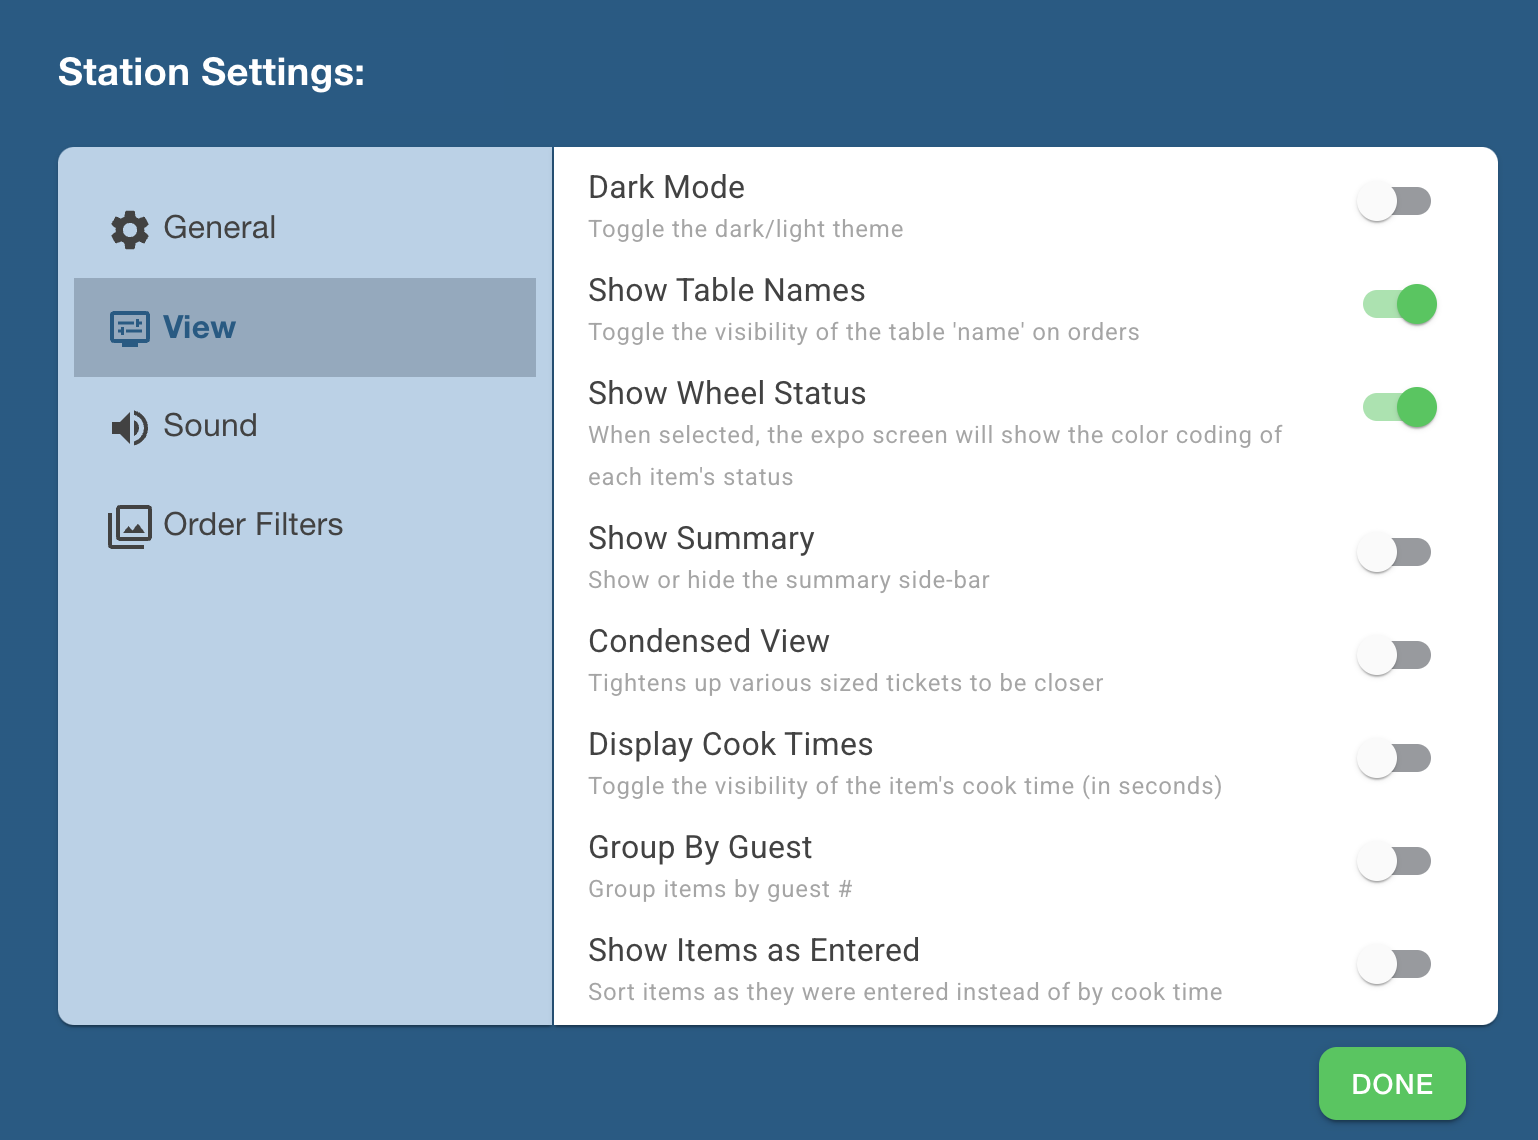
Dark Mode
- This setting is available on Wheel, Expo, and Quick Stations
-
The Dark Mode setting allows you to switch between light and dark themes for your Kitchen Video screen.
-
When Disabled: The system uses Light Mode, with a bright background and dark text.
-
When Enabled: The system switches to Dark Mode, with a dark background and light text
-
-
Why Use This Setting?
It's a personal preference option for teams who prefer a standard or darker display.
Show Table Names
- This setting is available on Wheel, Expo, and Quick Stations
-
The Show Table Name setting controls whether the Table name—entered by the server—appears on kitchen tickets. Table Numbers will always display at the top of the kitchen ticket, so staff knows where the order is going. Table Names, if entered, are optional to show.
-
When Disabled: The customer name will not appear on the ticket—only the table number will be shown.
-
When Enabled: If a server enters a table name, it will appear below the table number on the kitchen ticket, providing additional clarity for staff (especially helpful for to-go or pickup orders).
-
-
Why Use This Setting?
Displaying the table name helps the kitchen identify orders more easily—especially when multiple tickets are for the same table, or when fulfilling takeout, delivery, or online orders where names are used instead of table numbers
Show Wheel Status
- This setting is only available on the Expo Station
-
The Show Wheel Status setting allows the Expo screen to display real-time status updates for items across all kitchen stations.
-
Default Behavior (Setting Disabled): When this setting is turned off, tickets on the Expo screen will appear white while items are still cooking. Once all stations have finished their portion of the order, the ticket will turn bright green and move to the front of the screen, indicating the entire order is ready to be delivered.
-
When Enabled: With this setting on, the Expo screen will display color-coded item statuses, giving a live view of the progress at each station:
-
When the item is sent to a station
-
When the station has started cooking
-
When the item is finished cooking
-
-
This allows the Expo team to track the status of each component of the order and better manage timing and communication.
-
-
Why Use This Setting?
Enabling Show Wheel Status gives Expo a clearer picture of how far along an order is at any moment—making it easier to coordinate plating, staging, and delivery. It’s especially useful in fast-paced kitchens or when preparing multi-item, multi-station orders.
Show Summary
- This setting is available on Wheel and Expo Stations
-
How It Works: When enabled, a summary sidebar appears, showing a real-time count of how many of each item is currently needed. This allows staff to batch-cook or prepare items more efficiently by grouping them together.
-
Default Behavior:
-
Wheel Screen: This setting is enabled by default so cooks can easily see how many of each item are currently needed. It helps streamline prep and improve kitchen efficiency.
-
Expo Screen: This setting is disabled by default, as the Expo team typically focuses on when items are completed and ready to go out. However, Expo users can enable the summary if they want a broader view of item volume.
-
-
Why Use This Setting?
The summary sidebar is especially helpful in high-volume kitchens where batching items can save time. It gives cooks a clear overview of demand, helping reduce redundancy and improve coordination across stations.
Condensed View
- This setting is available on Wheel and Expo Stations
-
The Condensed View setting controls how tickets are spaced and organized on the screen.
-
Default Behavior (Setting OFF): Tickets are aligned neatly at the top of the screen in uniform rows, regardless of ticket length. This makes it easy to see the order in which tickets were received and ensures a clean, consistent layout.
-
When Enabled: Condensed View reduces the spacing between tickets by tightening up the layout—especially for shorter tickets. This allows more tickets to fit on the screen at once, which can be helpful in high-volume kitchens. However, because long and short tickets are packed closely together, it may be more difficult to visually track the order of incoming tickets.
-
-
Why Use This Setting?
Enable Condensed View if your team prefers to see more tickets at once on the screen. It’s great for fast-moving environments, but may take a little extra attention to manage ticket sequence when order sizes vary.
Display Cook Times
- This setting is available on Wheel, Expo, and Quick Stations
-
The Display Cook Time setting shows the total cook time for each item directly on the Kitchen Video screen, displayed in seconds.
-
Default Behavior (Setting OFF): Cook times are not shown on the screen. The system still uses them behind the scenes for timing and routing, but they aren’t visible to staff.
-
When Enabled: The cook time (in seconds) will appear on each item, including the combined time from the parent item and any modifiers. This gives a clear view of how long each item is expected to take.
-
-
Why Use This Setting?
This setting is primarily intended for technical support and development teams during setup or troubleshooting. It helps confirm that cook times are correctly configured and applied. Most kitchen staff won’t need this enabled during day-to-day operations.
Group by Guest
- This setting is available on Wheel and Expo Stations
-
The Group by Guest setting changes how items are displayed on kitchen tickets—organizing them by the individual guest who ordered them.
-
Default Behavior (Setting OFF): Items are listed based on cook time, from longest to shortest, with no guest separation. This helps the kitchen prioritize prep to ensure everything finishes at the same time, but it doesn't show which guest ordered which item.
-
When Enabled: Items will be grouped by guest, showing a label like "Guest 1," "Guest 2," etc., followed by the items each guest ordered. This layout provides clarity on who ordered what, which is helpful for expediting and plating individual meals—especially in dine-in settings.
-
-
Why Use This Setting?
Enable Group by Guest when it's important for your team to know which items belong to each guest—such as when plating, running food, or packing to-go orders. It improves accuracy and presentation when guest-specific handling is needed.
Show Items as Entered
- This setting is available on Wheel and Expo Stations
-
The Show Items as Entered setting controls the order in which items appear on the Kitchen Video screen.
-
Default Behavior (Setting OFF): Items are automatically sorted by cook time, from longest to shortest. This helps the kitchen prioritize preparation to ensure all items finish together.
-
When Enabled: Items will appear in the exact order the server entered them into the system—regardless of cook time. This mirrors how the order was taken at the table, which can help with pacing or following a guest’s preferred sequence.
-
-
Why Use This Setting?
This setting is useful when staff want to follow the server’s flow or when cook time prioritization isn’t necessary. It can also be helpful in environments where item order affects plating or prep preferences.
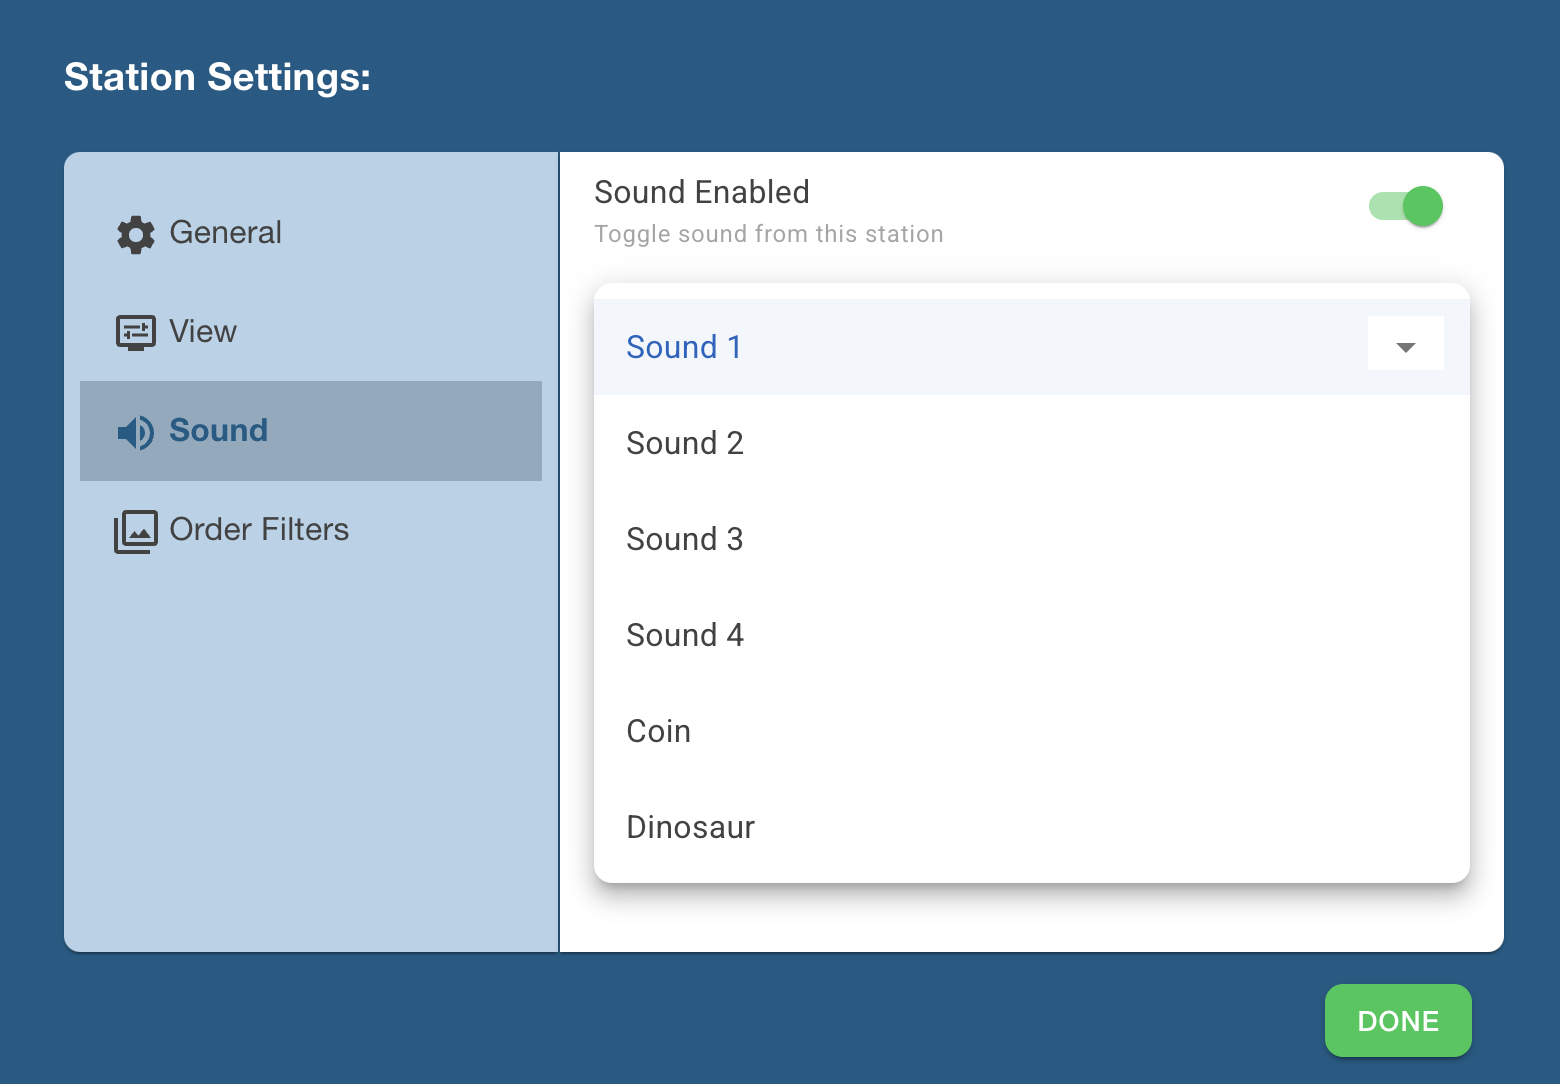
Sound Enabled
- This setting is available on Wheel, Expo, and Quick Stations
-
The Sound setting controls whether a station plays an audible alert when new items or orders arrive.
-
When Enabled: A sound will play each time an order or item is sent to this station, helping staff stay alert and responsive. There are six different sounds to choose from, so you can pick the one that works best for your kitchen environment. Each station can be assigned its own unique sound. This allows team members to distinguish where the item is going just by the sound alone, without needing to check the screen.
-
When Disabled: No sound will play when new items arrive. Staff will need to visually monitor the screen to stay on top of incoming orders.
-
-
Why Use This Setting?
Enabling sound alerts helps reduce missed tickets and is especially useful in loud or high-traffic kitchen environments, where visual cues might be overlooked.
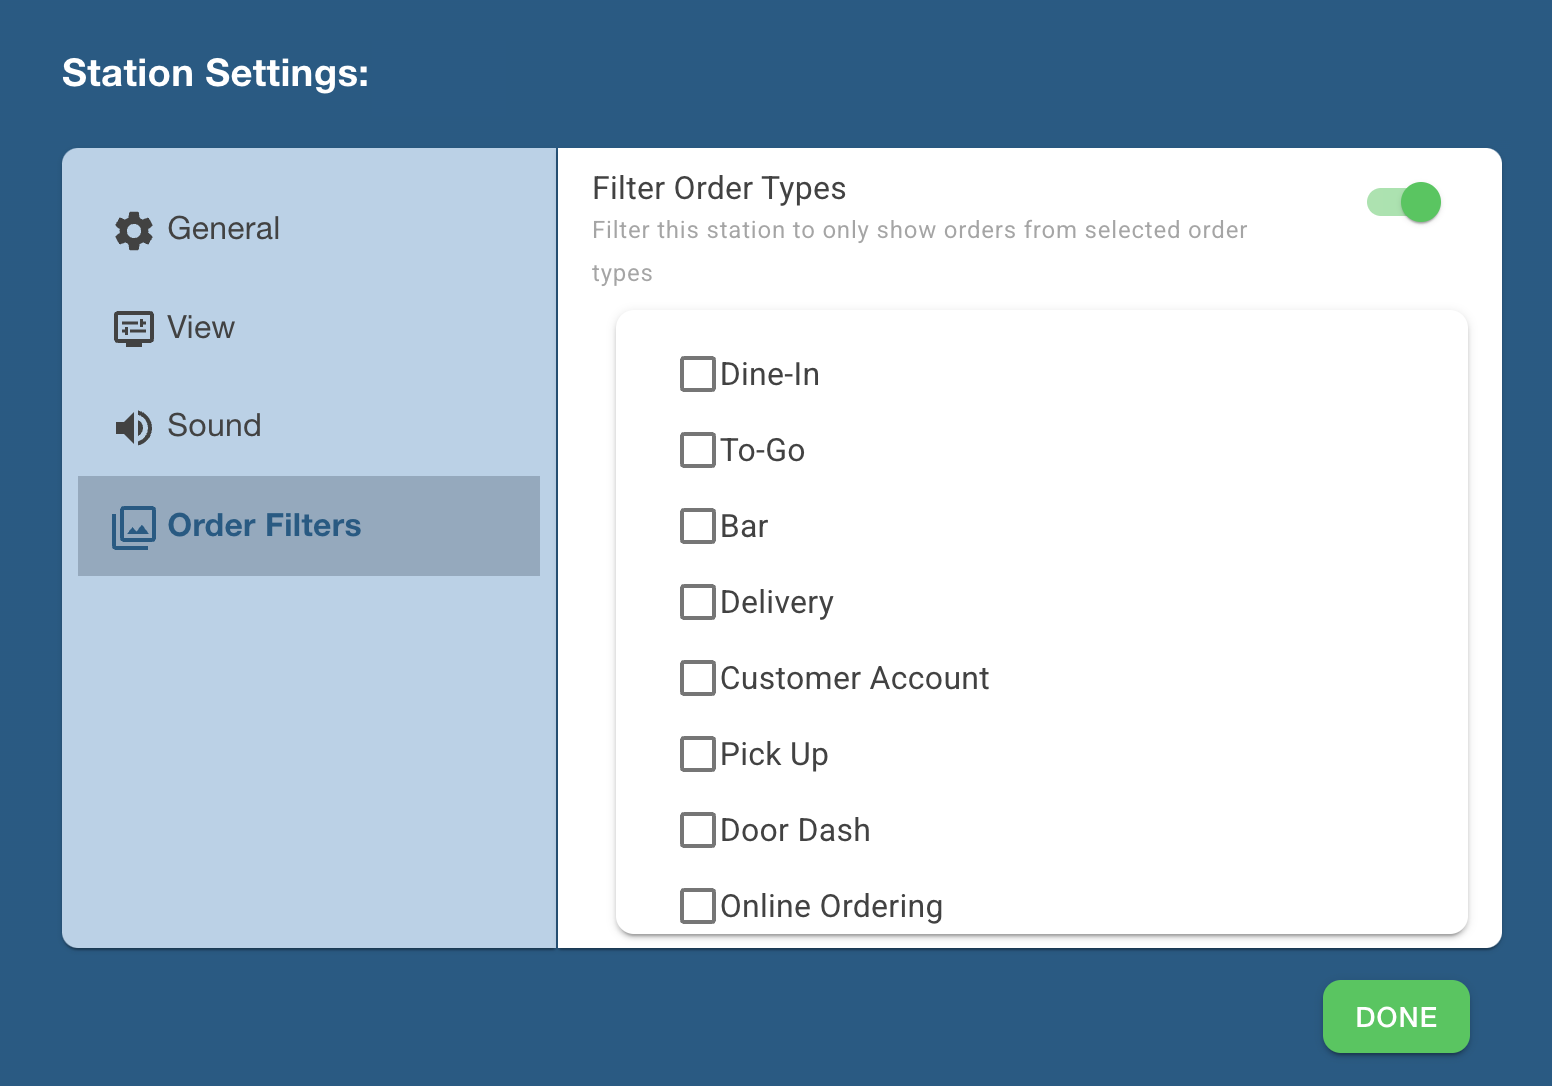
Filter Order Types
- This setting is available on Wheel, Expo, and Quick Stations
-
The Filter Order Types setting controls which types of orders appear on a specific Kitchen Video station.
-
When Disabled (Default): All orders—regardless of type—will appear on this station. This includes dine-in, takeout, delivery, online orders, etc.
-
When Enabled: You can customize which order types are visible on the station by selecting specific types (e.g., only dine-in or only online orders). Any order types not selected will be filtered out and won’t display on this station.
-
-
Why Use This Setting?
This is helpful in kitchens where different stations are responsible for specific order flows. For example, a prep station may only need to see dine-in orders, while a packaging station may only need to see to-go or delivery orders. Filtering order types reduces clutter and helps staff stay focused on the tasks relevant to their station.
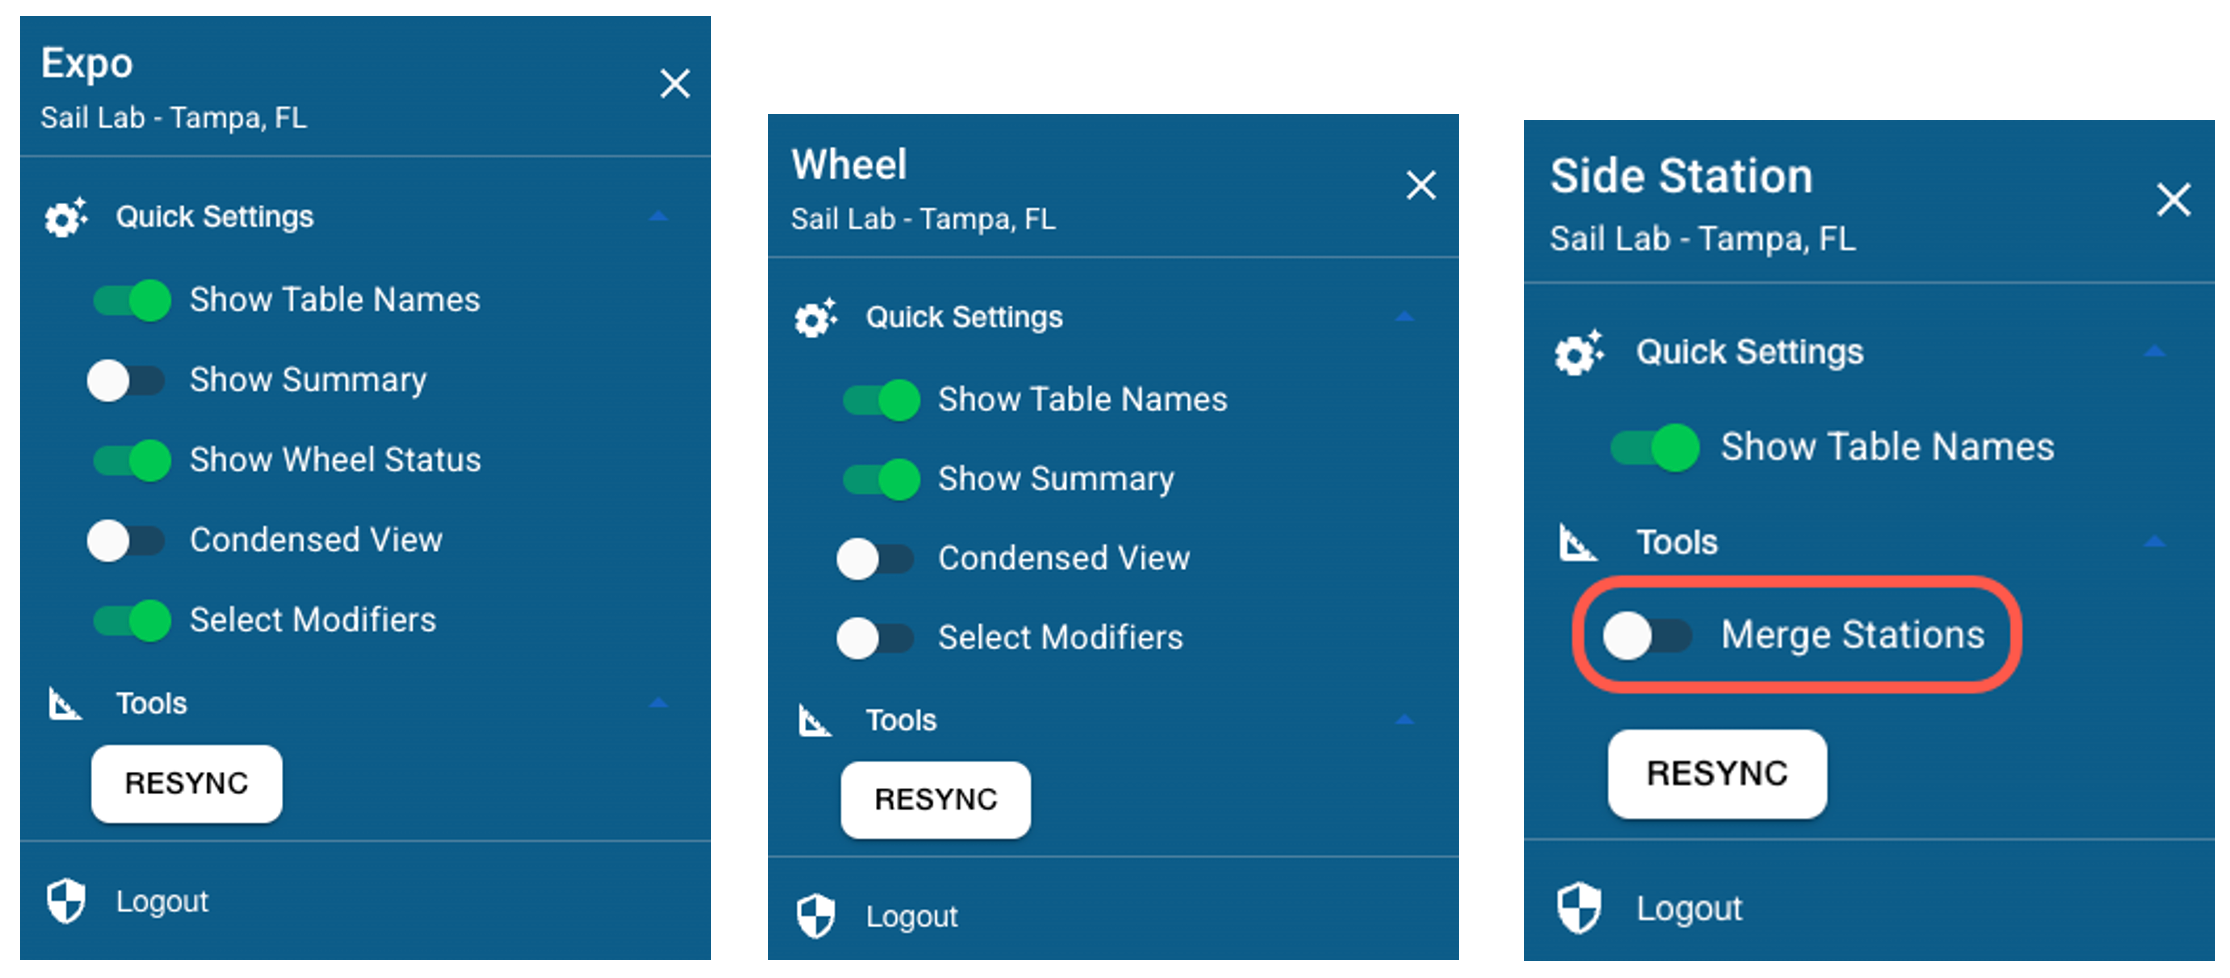
Stations Quick Settings