Release: 2023.8.2 "Utonagan"
Notes: This release consists of 7 New features and Improvements. Use the page navigation section on the top left of this screen to jump between the features you'd like to read about.
**This release WILL require you to update your handheld to version 2023.8.2**
If you would like any additional information or help setting up any of these new features, please contact support at:
Support@ingageit.com or call (612) 861-5277
New Features
Terminal: Order Type Settings
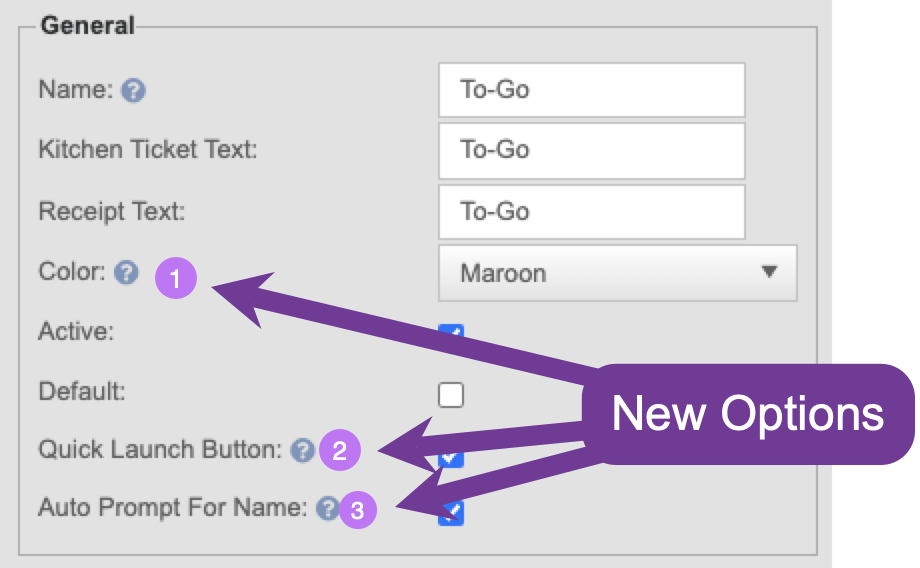
1. Order Type Colors
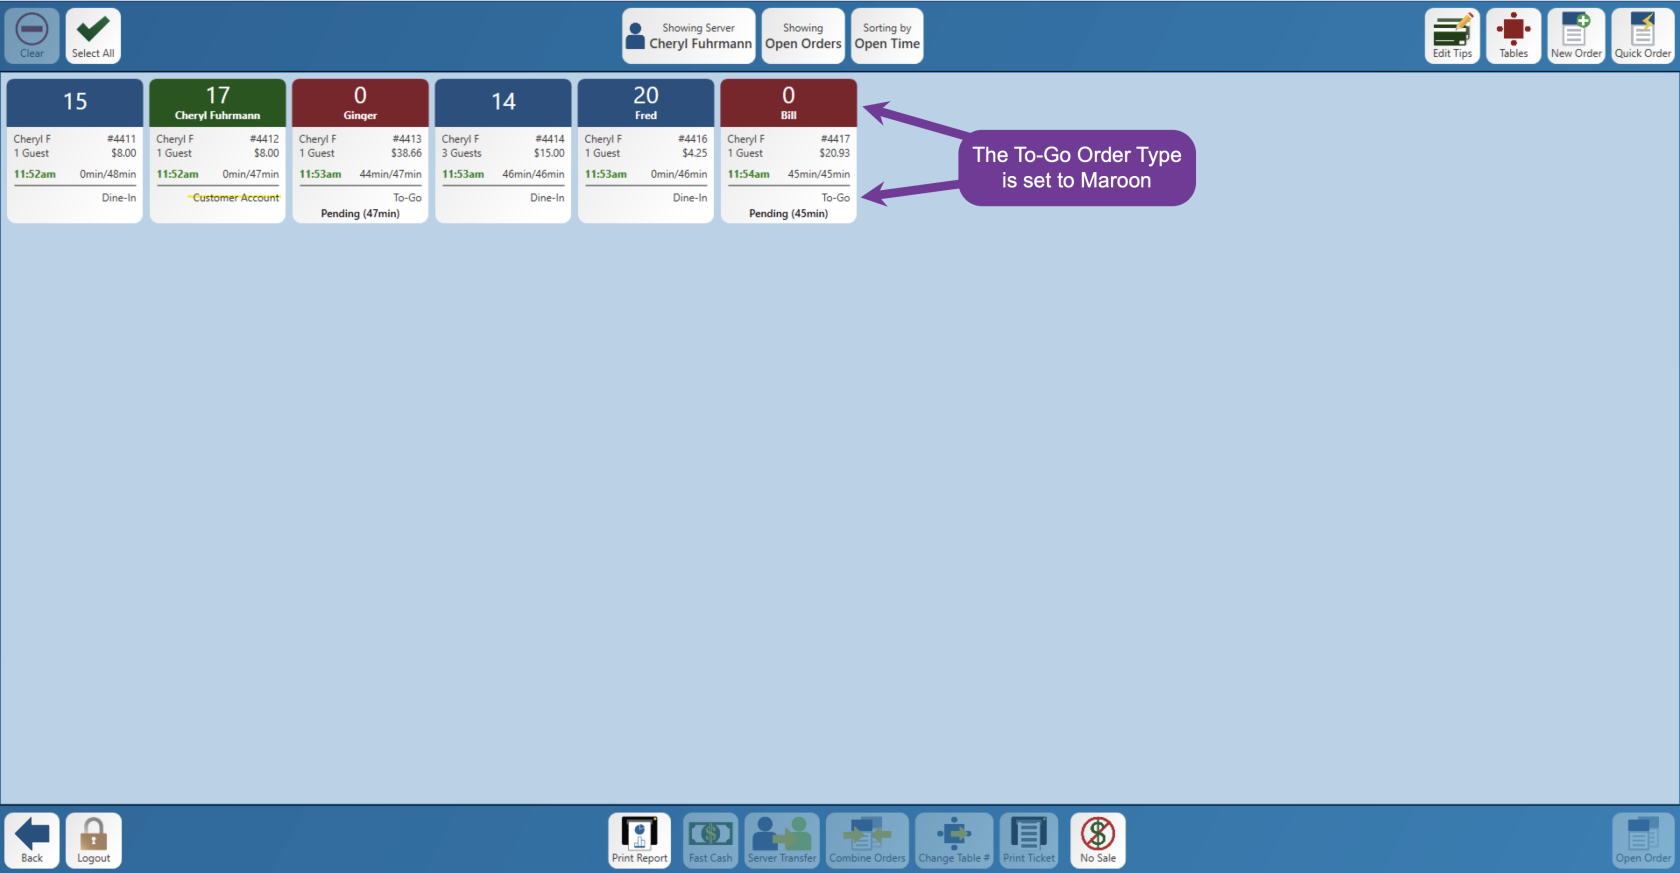
- Each order type can have its own color, So when you view the orders on the Orders View screen it will be easy to distinguish the different order types.
- Here is an example of it on the Orders View screen
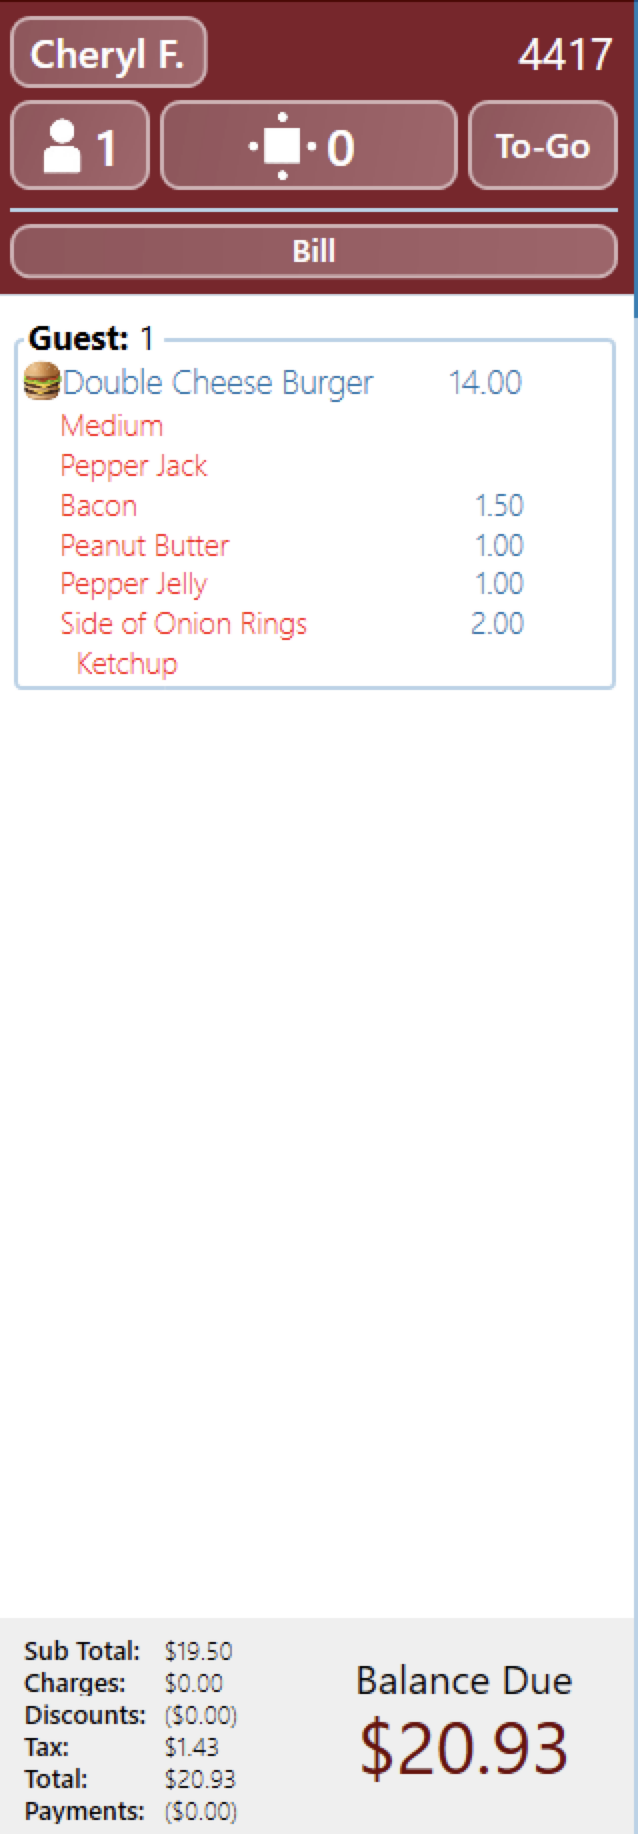
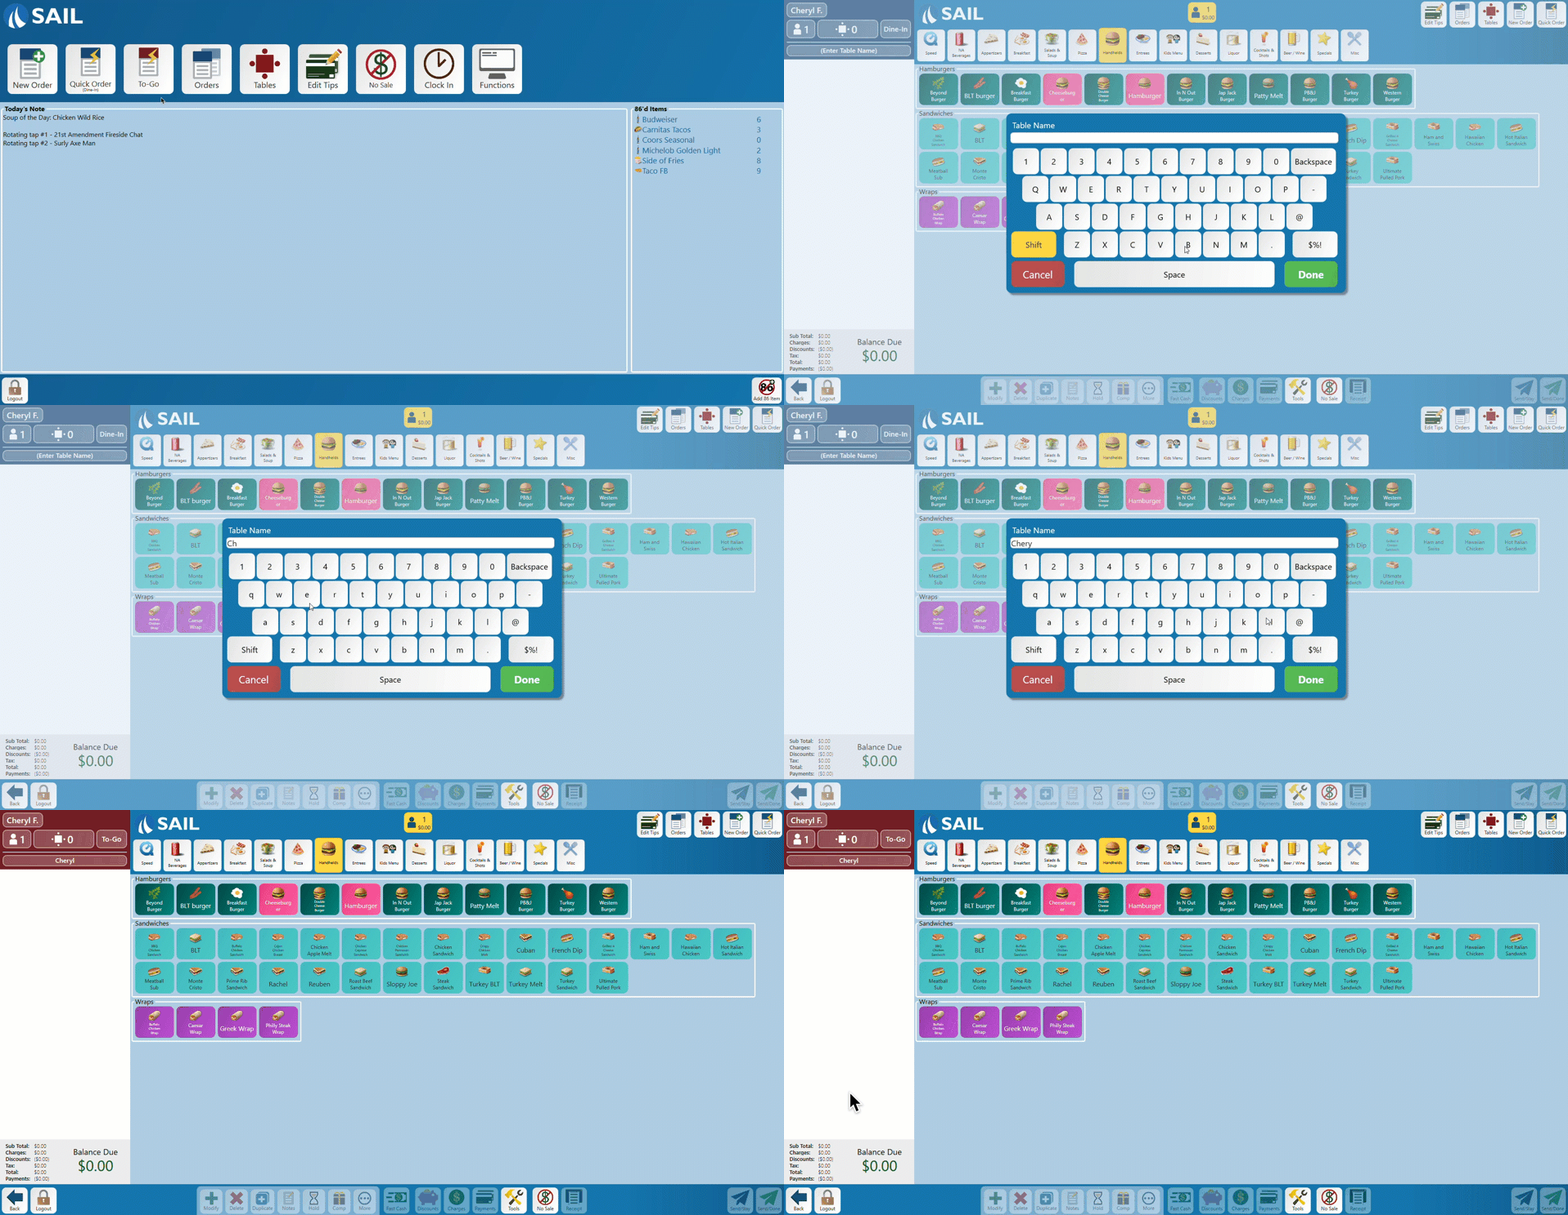
- Here is what it will look like inside the order entry screen. The top check header will change to Maroon.
2. Add an Order Type to the Launch screen
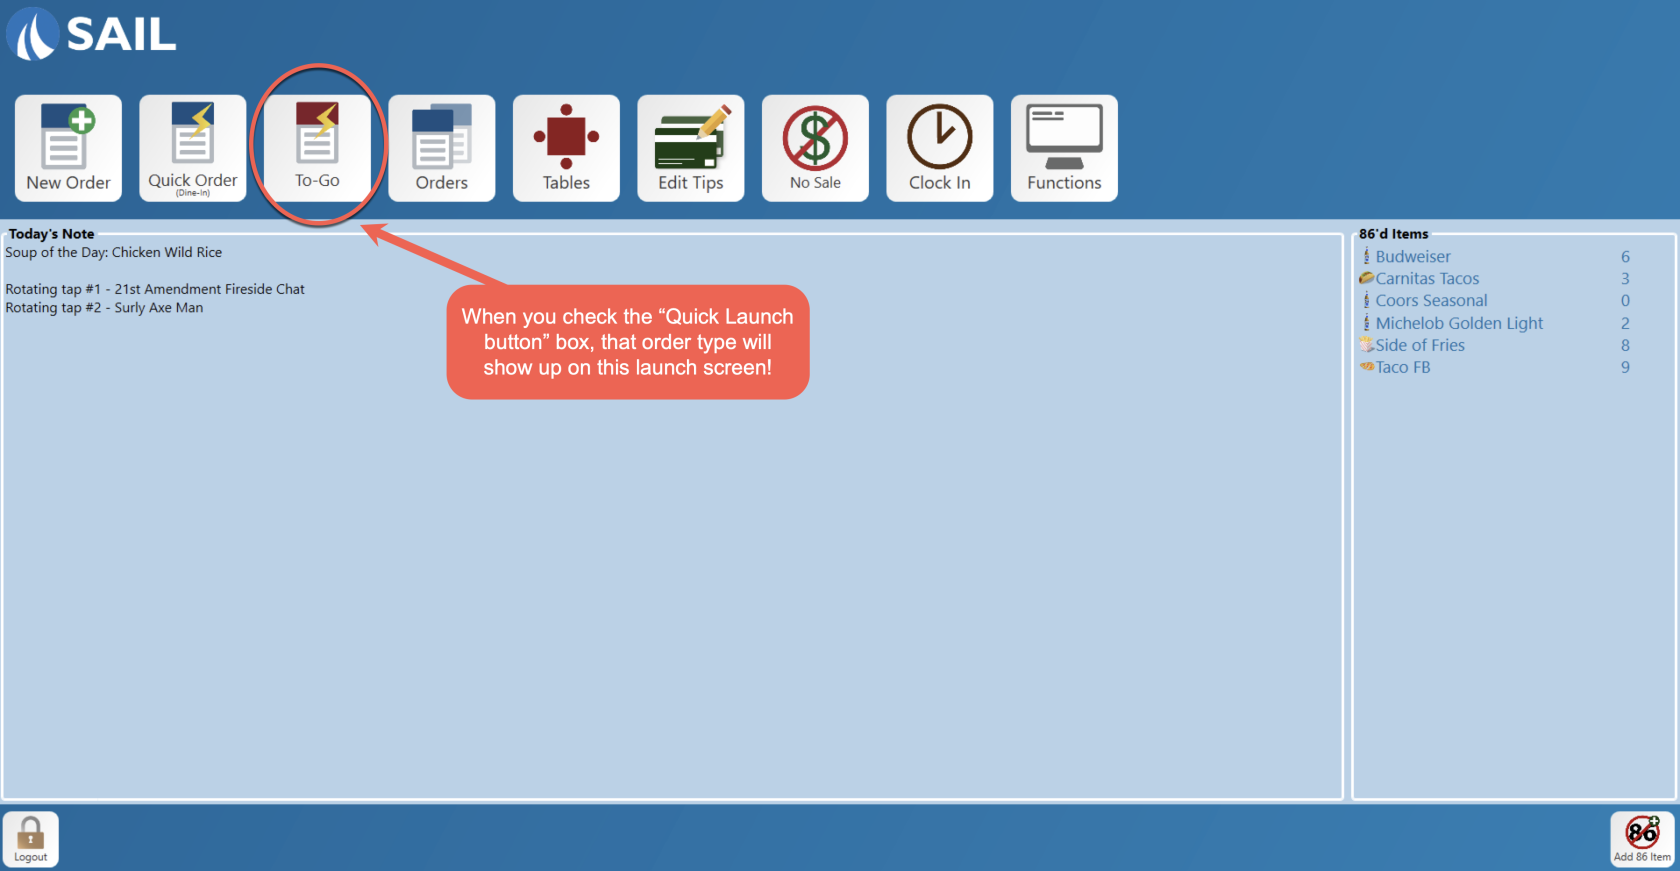
- If you check this box, that order type will now appear on the Launch screen.
- And the color you choose (see above) will be the check header color on the icon
- So when you click on that button it will bring you directly into an order using that order type.
- Here is what it looks like on the launch screen:
3. Order Type can prompt for name
- If you check the box "Auto Prompt for Name," that order type will automatically prompt for a name when you click the button or change to that order type in the order screen.
- The name will appear in the Table Name field on the check header
- Here is what it looks like:
Terminal: Update a prompted modifier
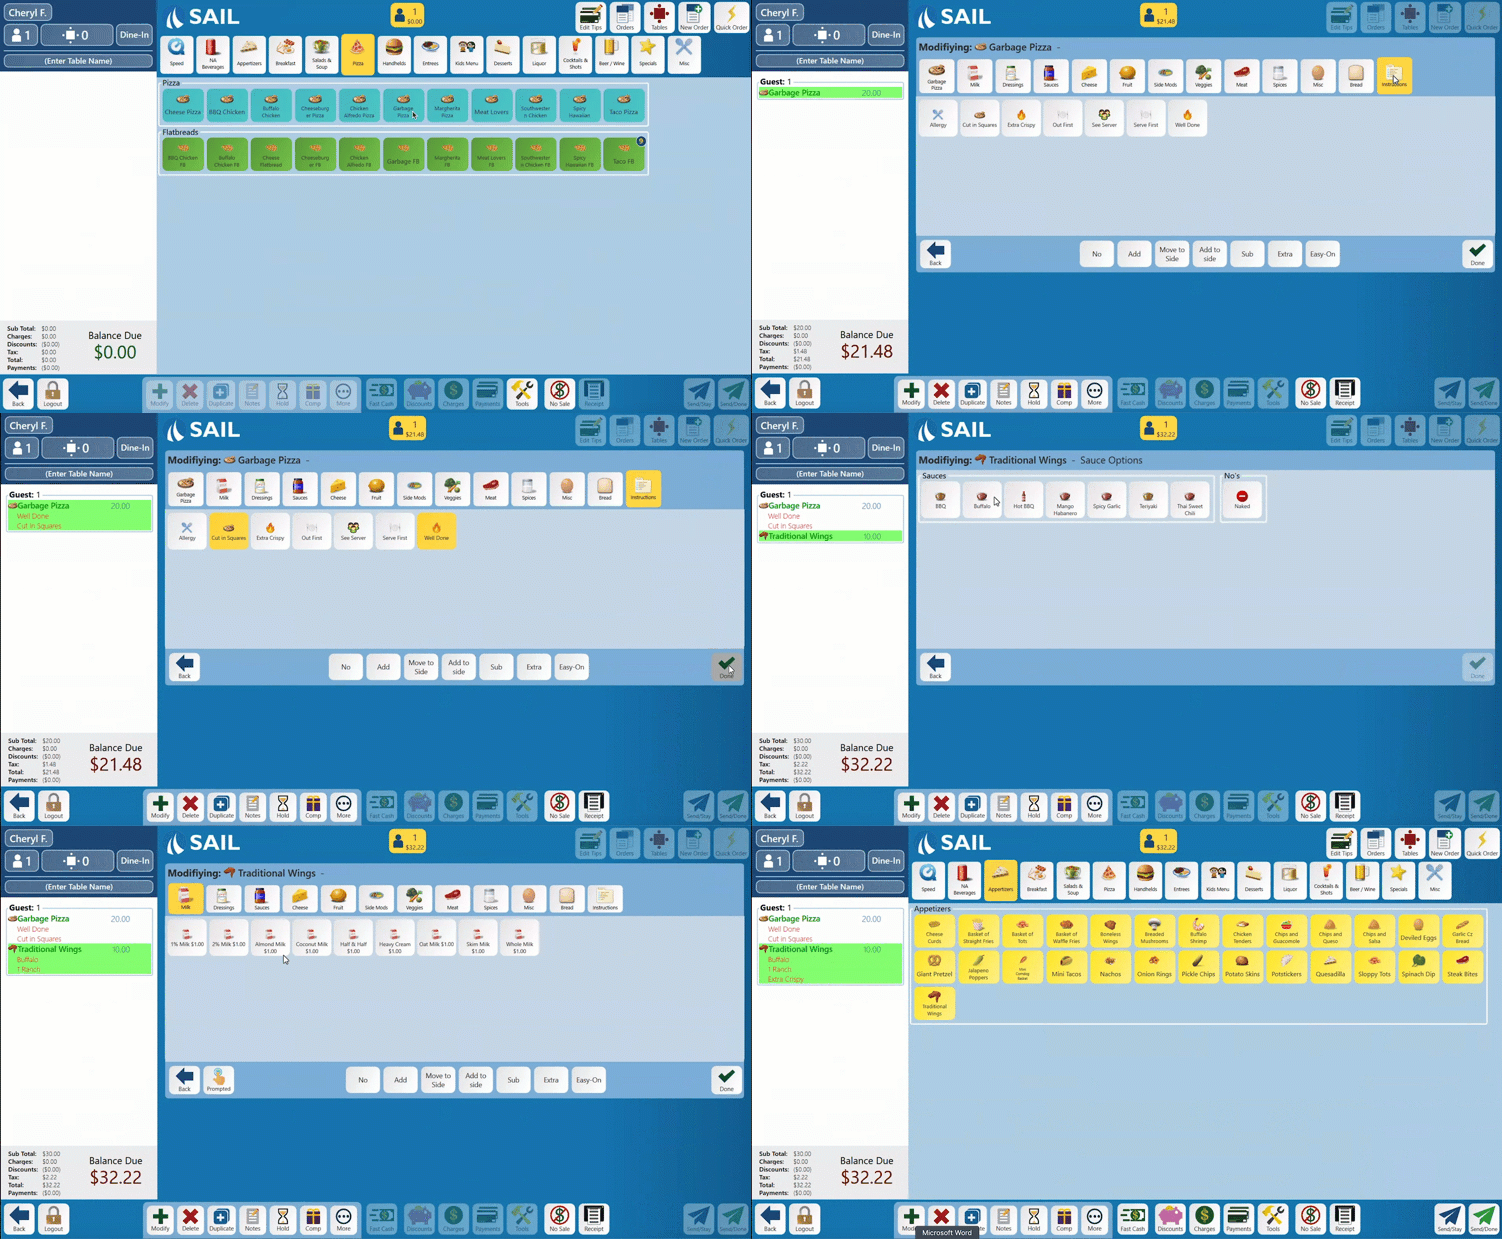
- You can now go back and edit a promoted modifier without having to delete the whole item and start over again.
- There are three ways to do this
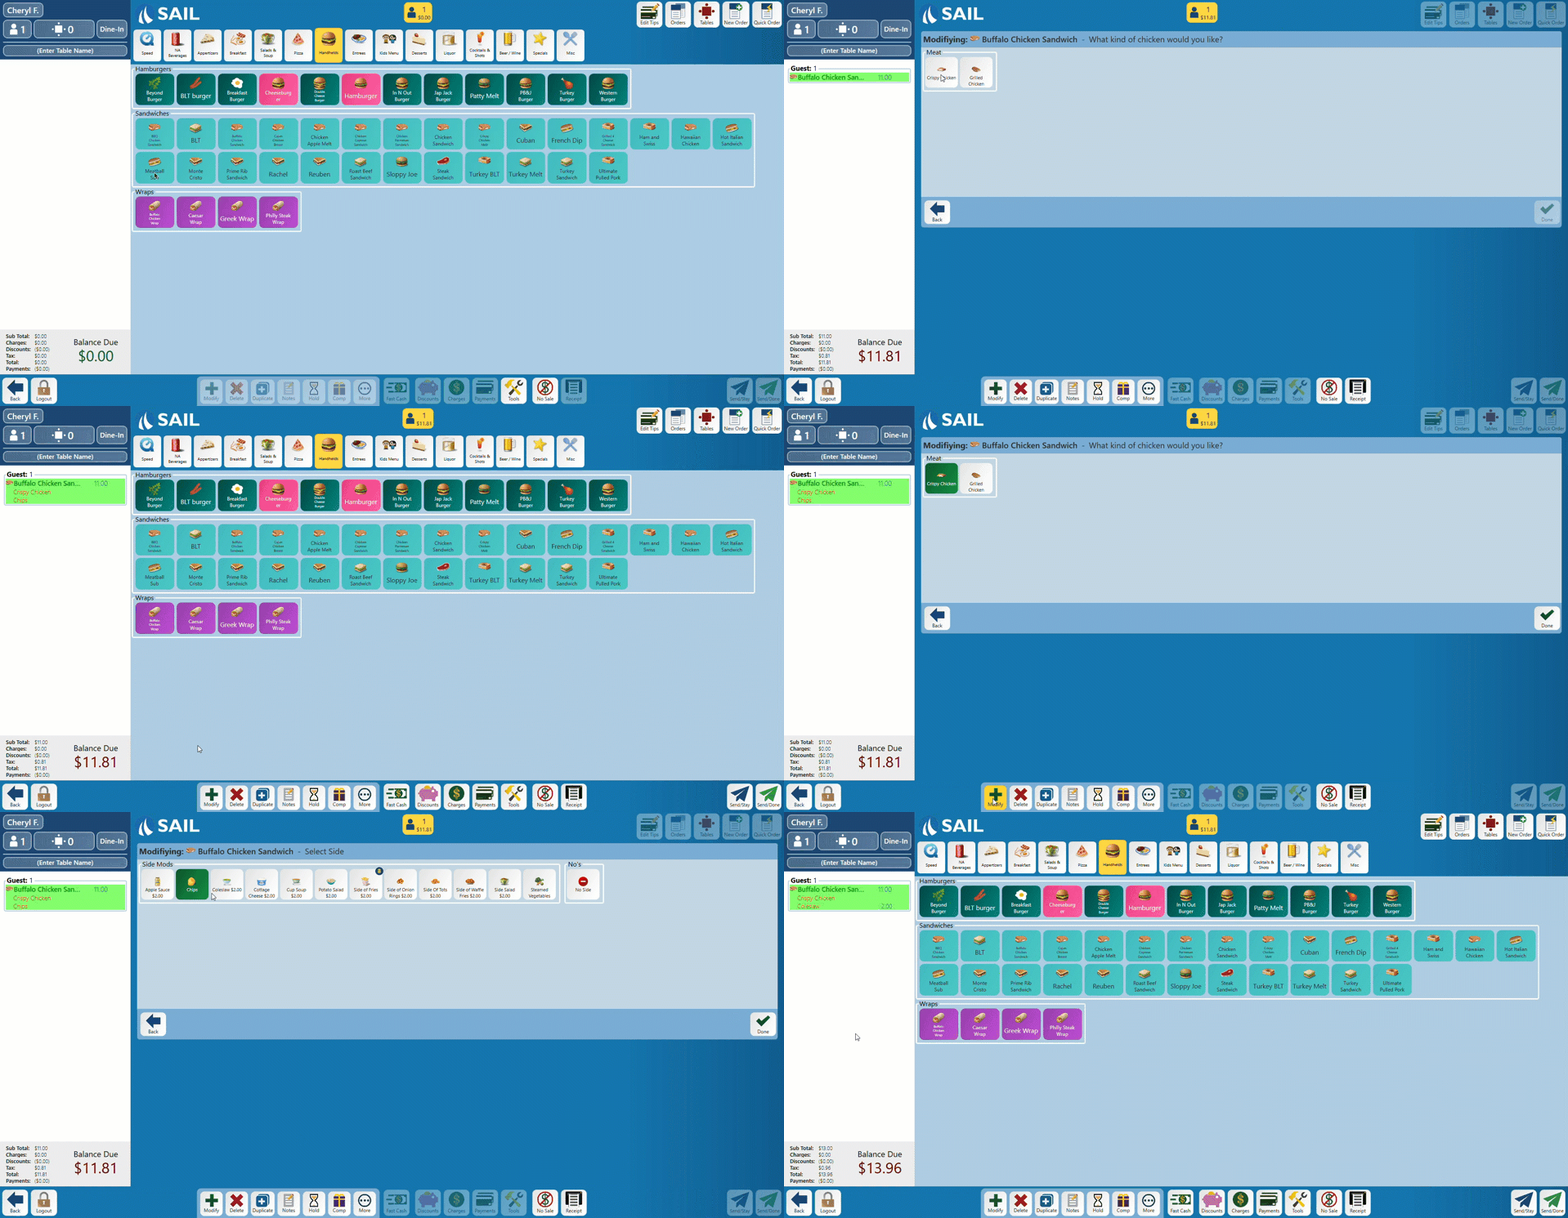
- 1. Ring in your item, then press and hold the "Modify" button on the bottom toolbar, and it will walk you thru the prompted modifiers again from the beginning. If you do not want to change
oneany you can click done until it brings you to the prompt you'd like to change, and then you can make a new selection.
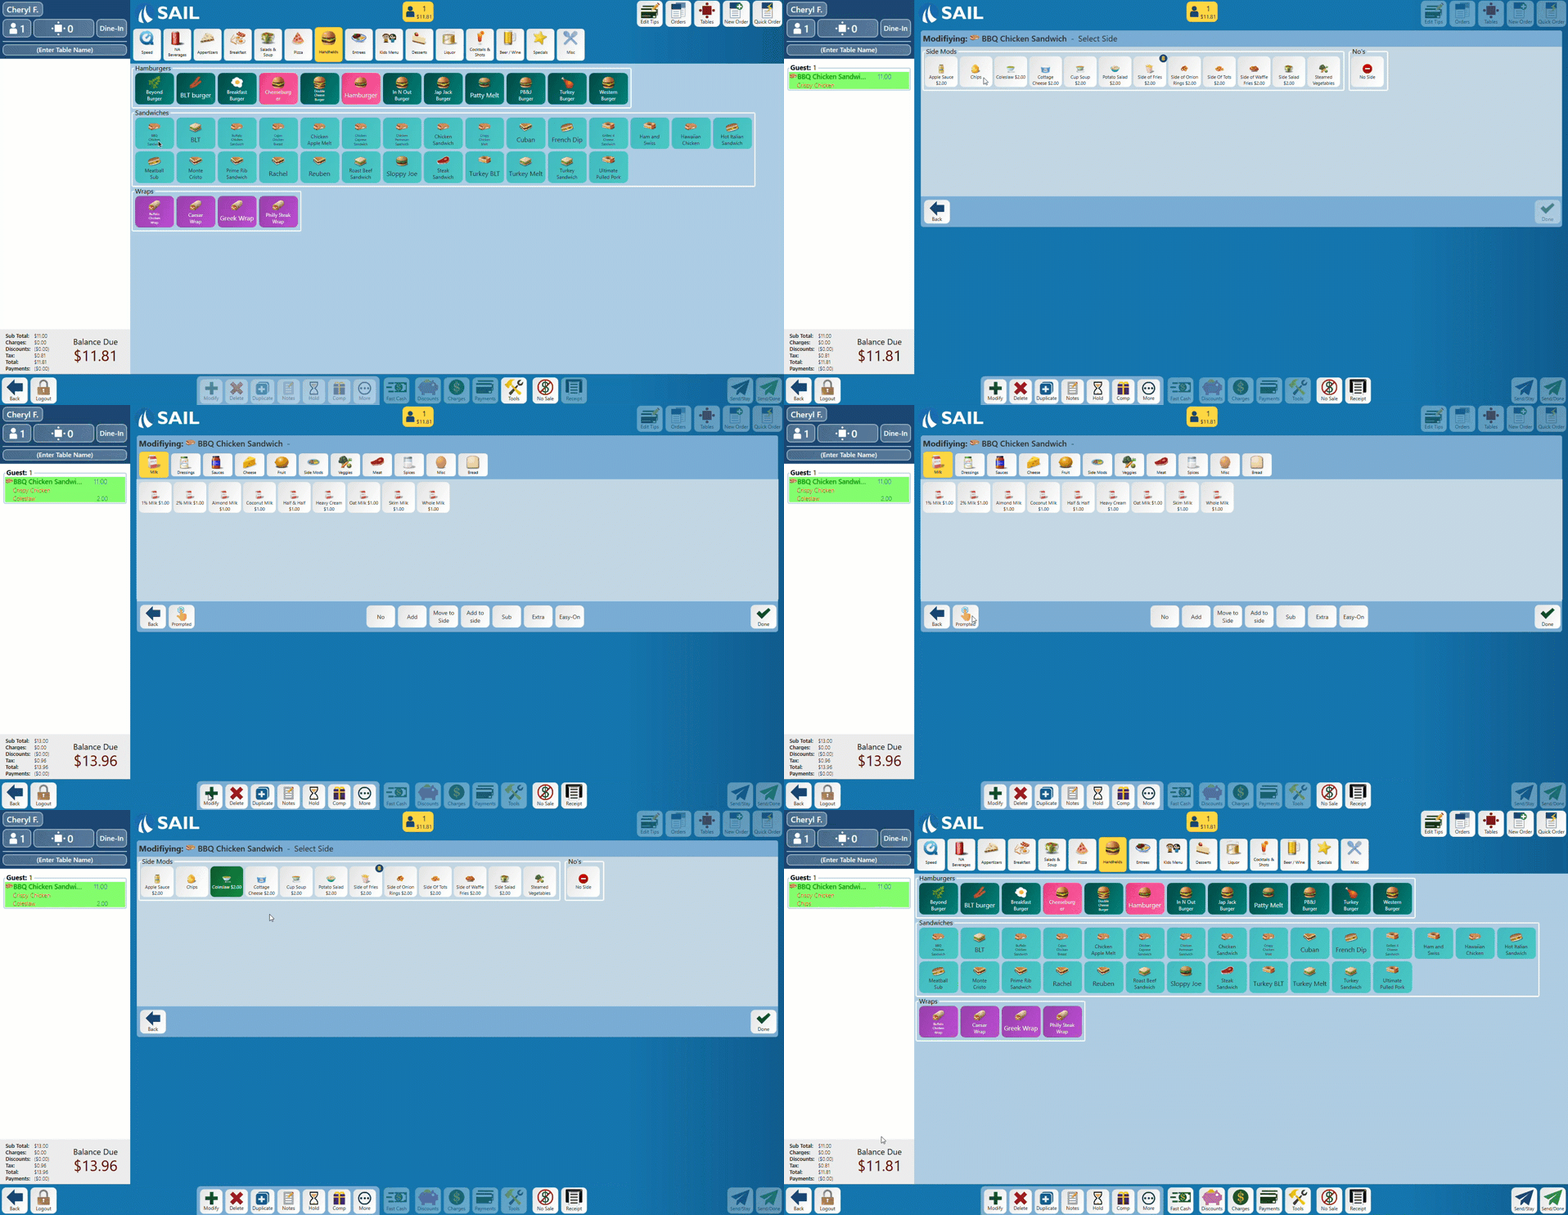
- 2. Ring in your item, press the "Modify" button on the bottom toolbar, and it will bring you to the All Ingredients set. From here you can click on the "Prompted" button and it will walk you thru the prompted modifiers again from the beginning, like option 1.
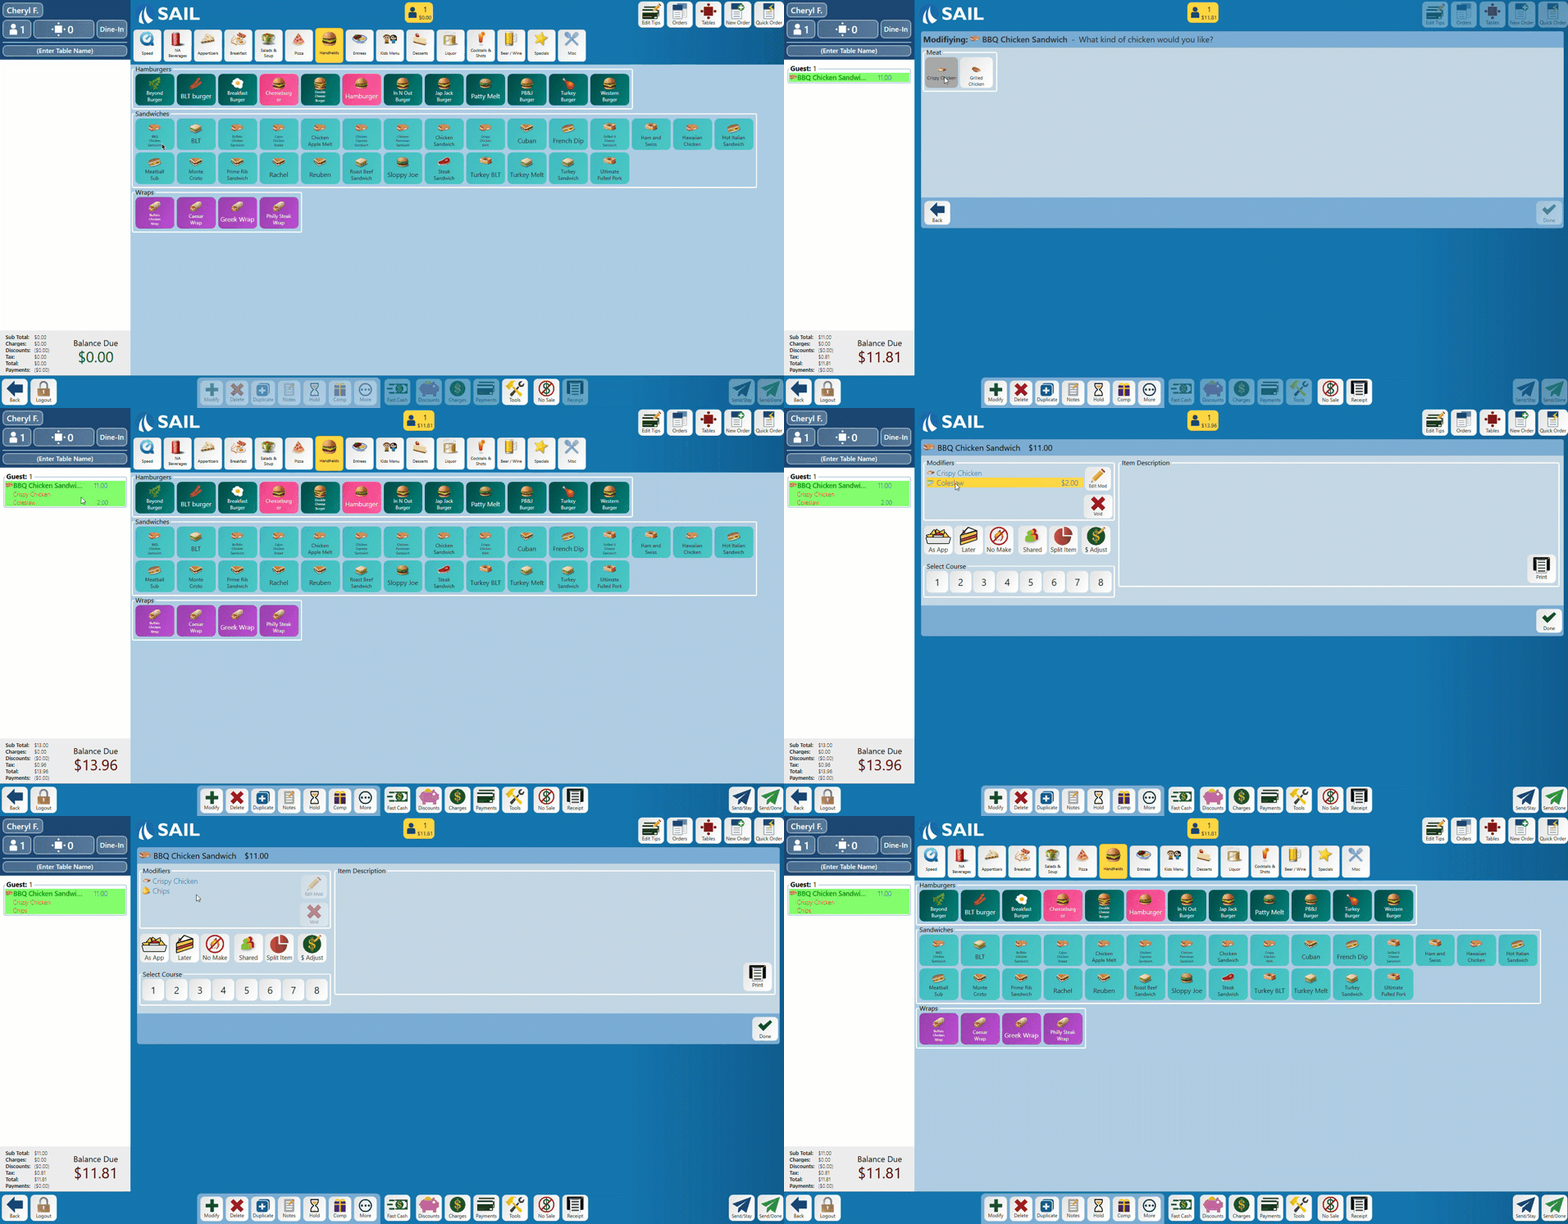
- 3. Ring in your item, then press the "More" button on the bottom toolbar. In the modifier box on the top left, select the modifier you'd like to change. You can either void it, and it will bring you back to that prompt to make a new selection, or you can select edit, and it will bring you directly to that prompt to make a new selection.
- 1. Ring in your item, then press and hold the "Modify" button on the bottom toolbar, and it will walk you thru the prompted modifiers again from the beginning. If you do not want to change
Terminal: Server Close Report Option
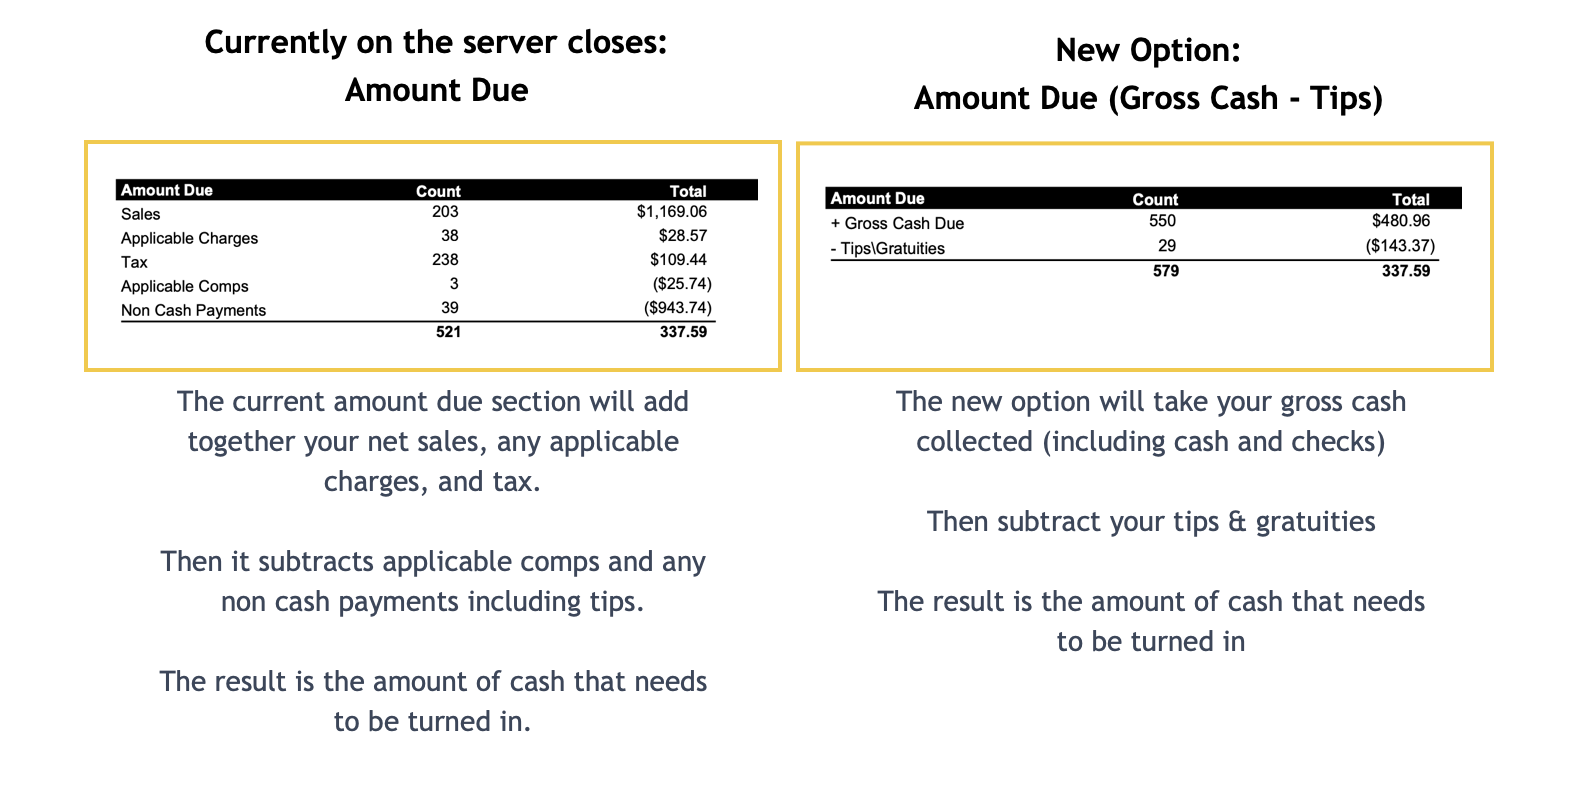
- We now have another option to put on a server close to show how much cash is due at the end of their shift
- If you would like your server reports switched to use the new
amount"AmountdueDue" section, you can call or email into the support line and we will make the switch foryou.you - Support@ingageit.com or call (612) 861-5277
Terminal: Cash Paid / Cash Received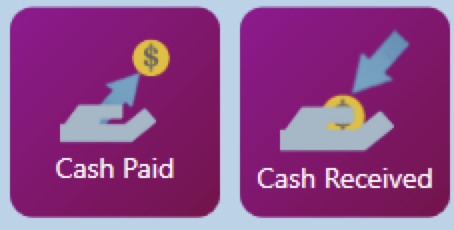
- We now have a new feature that will allow you to transfer money from one employee to another to balance out their amount due at the end of a shift.
- The most common example is:
- Sally Server does her close out at the end of her shift and had more credit cards than cash and is owed ($20).
- Betsy Bartender takes the ($20) out of her till and gives it to Sally to make her even
- Betsy would go into Functions, and use the "Cash Paid" button to transfer $20 from herself to Sally. This will reprint Sally's close receipt to show that she has been paid the $20 and is now even. And it will show on Betsy's report that she paid Sally $20 so her amount owed on her report will be $20 less.
- To learn more about this feature, or to get it turned on please contact support at: Support@ingageit.com or call (612) 861-5277.
Improvements
Backoffice: Change Modifier Type in a Modifier Set
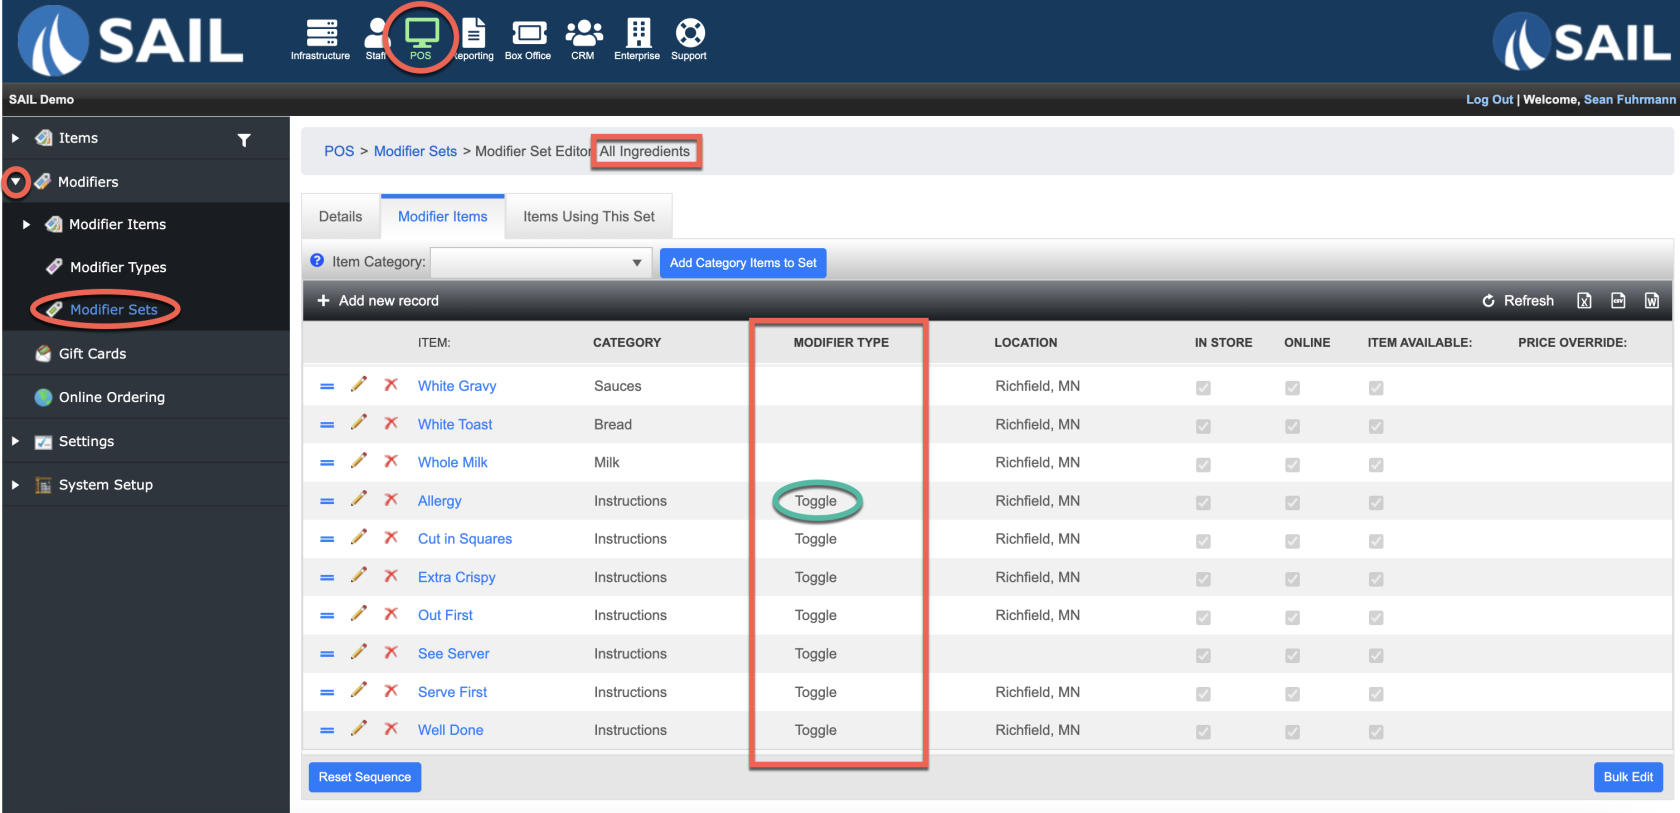
- You can now change the modifier type of an individual modifier item inside of a modifier set
- A good example of this is to be able to add instructions to the "All Ingredients" set
- The "All ingredients" modifier set uses the STANDARD modifier type (which means the hot mod buttons like Add, No, Sub, Extra, etc)
- When you add the Instruction modifier items, you can change the modifier type to TOGGLE. This will just select and unselect the items without putting the Add, No, Sub, Extra, words in front of them.
- Here is what it will look like in Backoffice
- Here is what it will look like on the terminal
Backoffice: Additional fields on the Day Summary
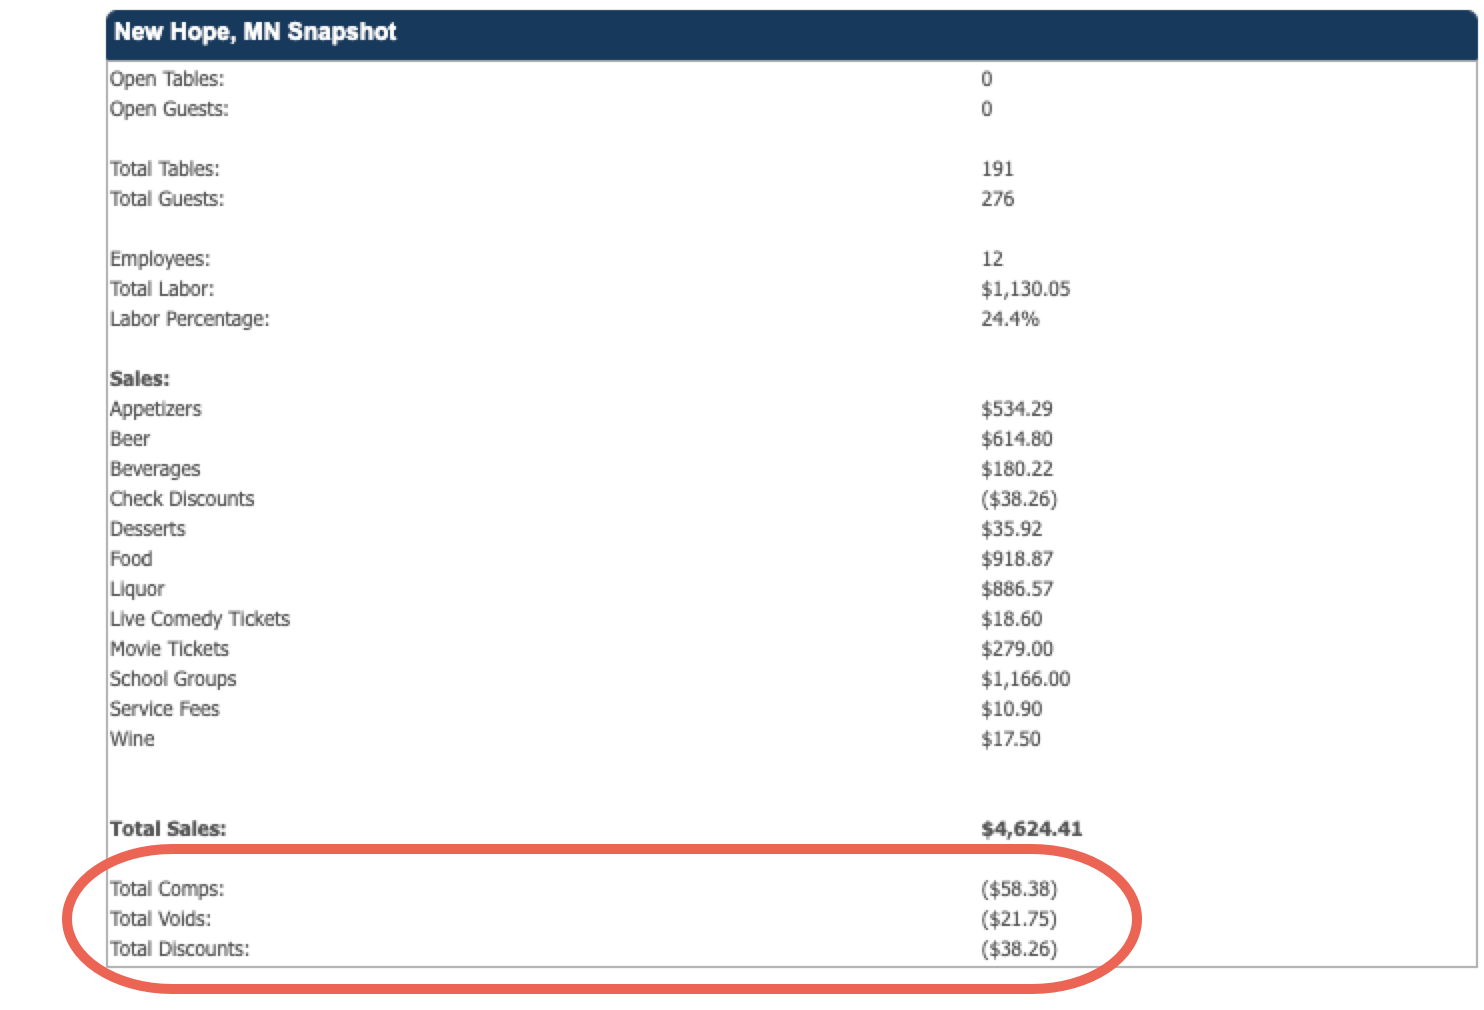
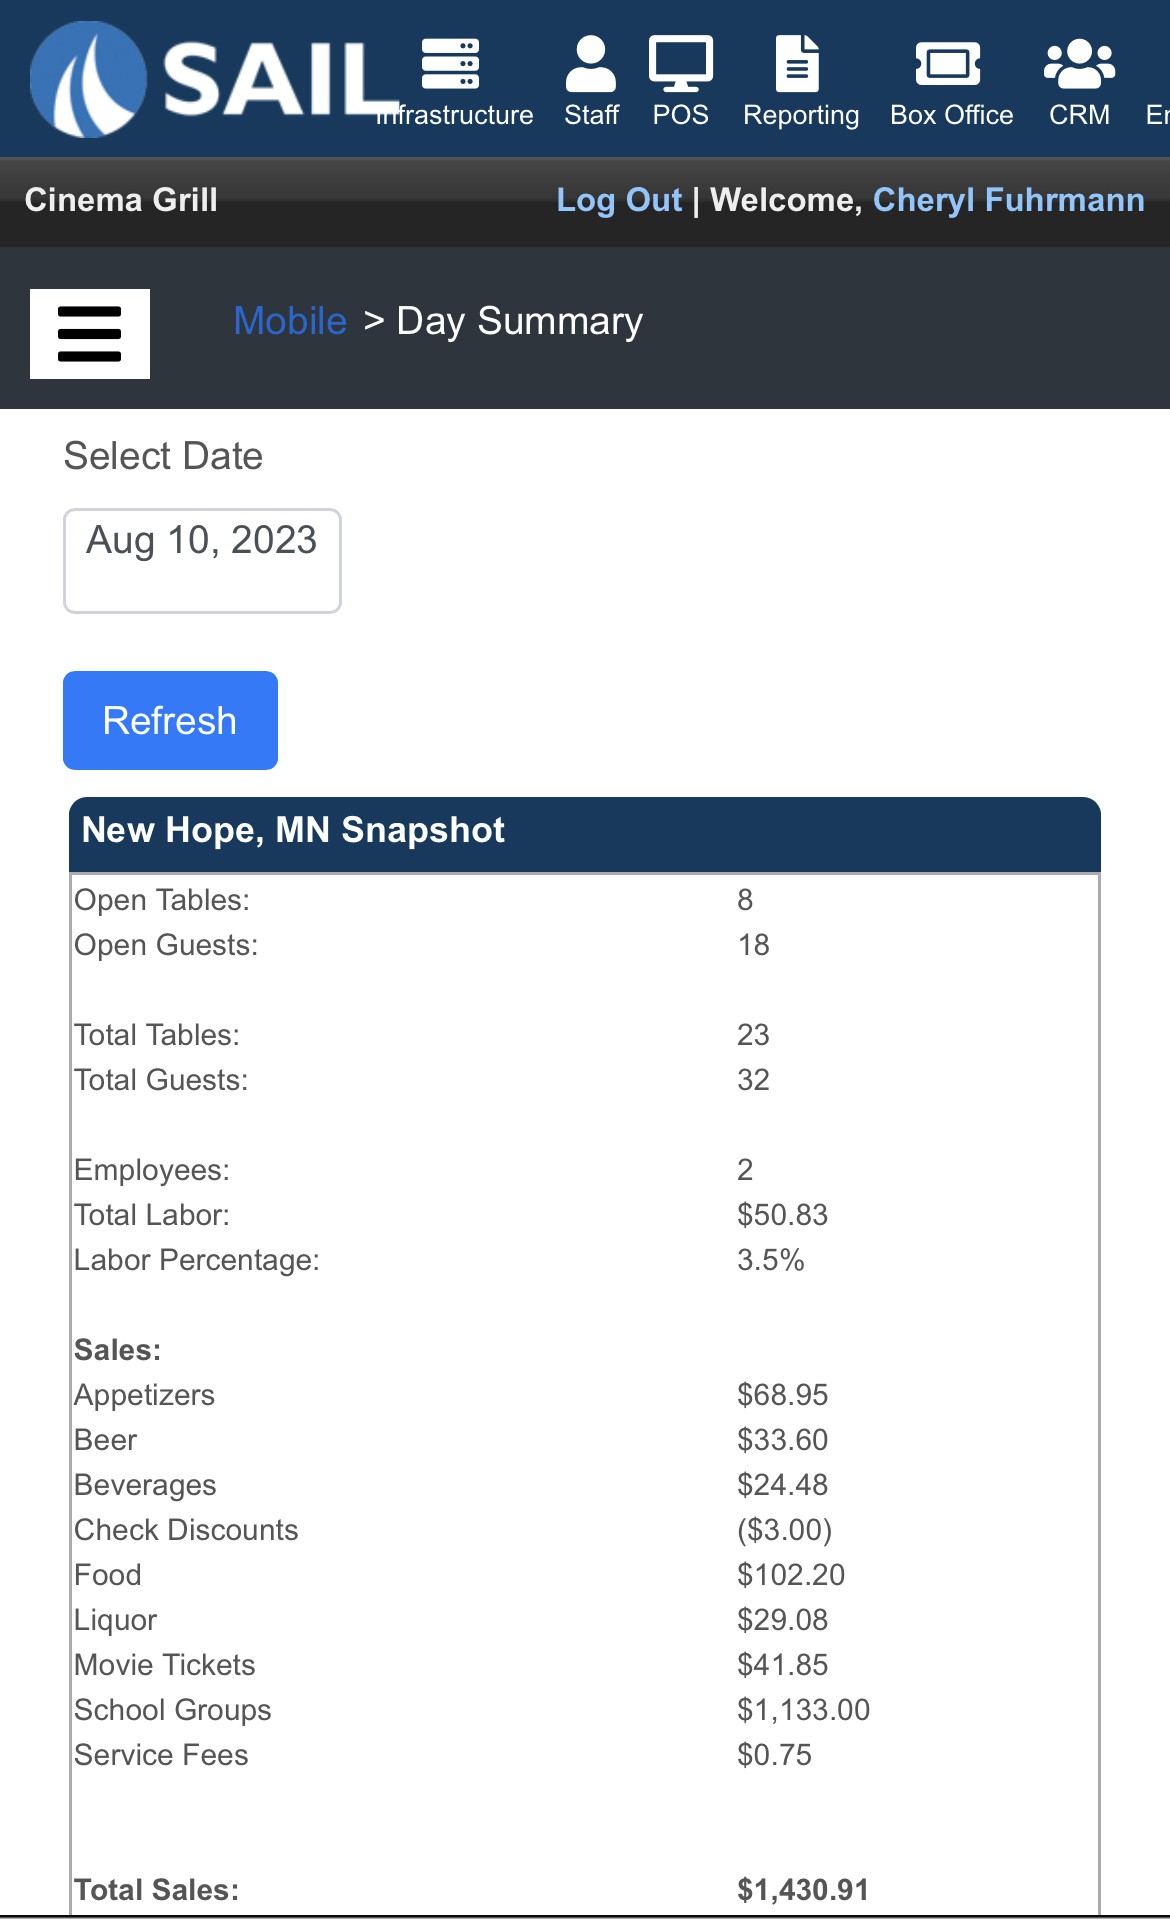
- We have added 3 new sections to the Day Summary view
To Find Day Summary
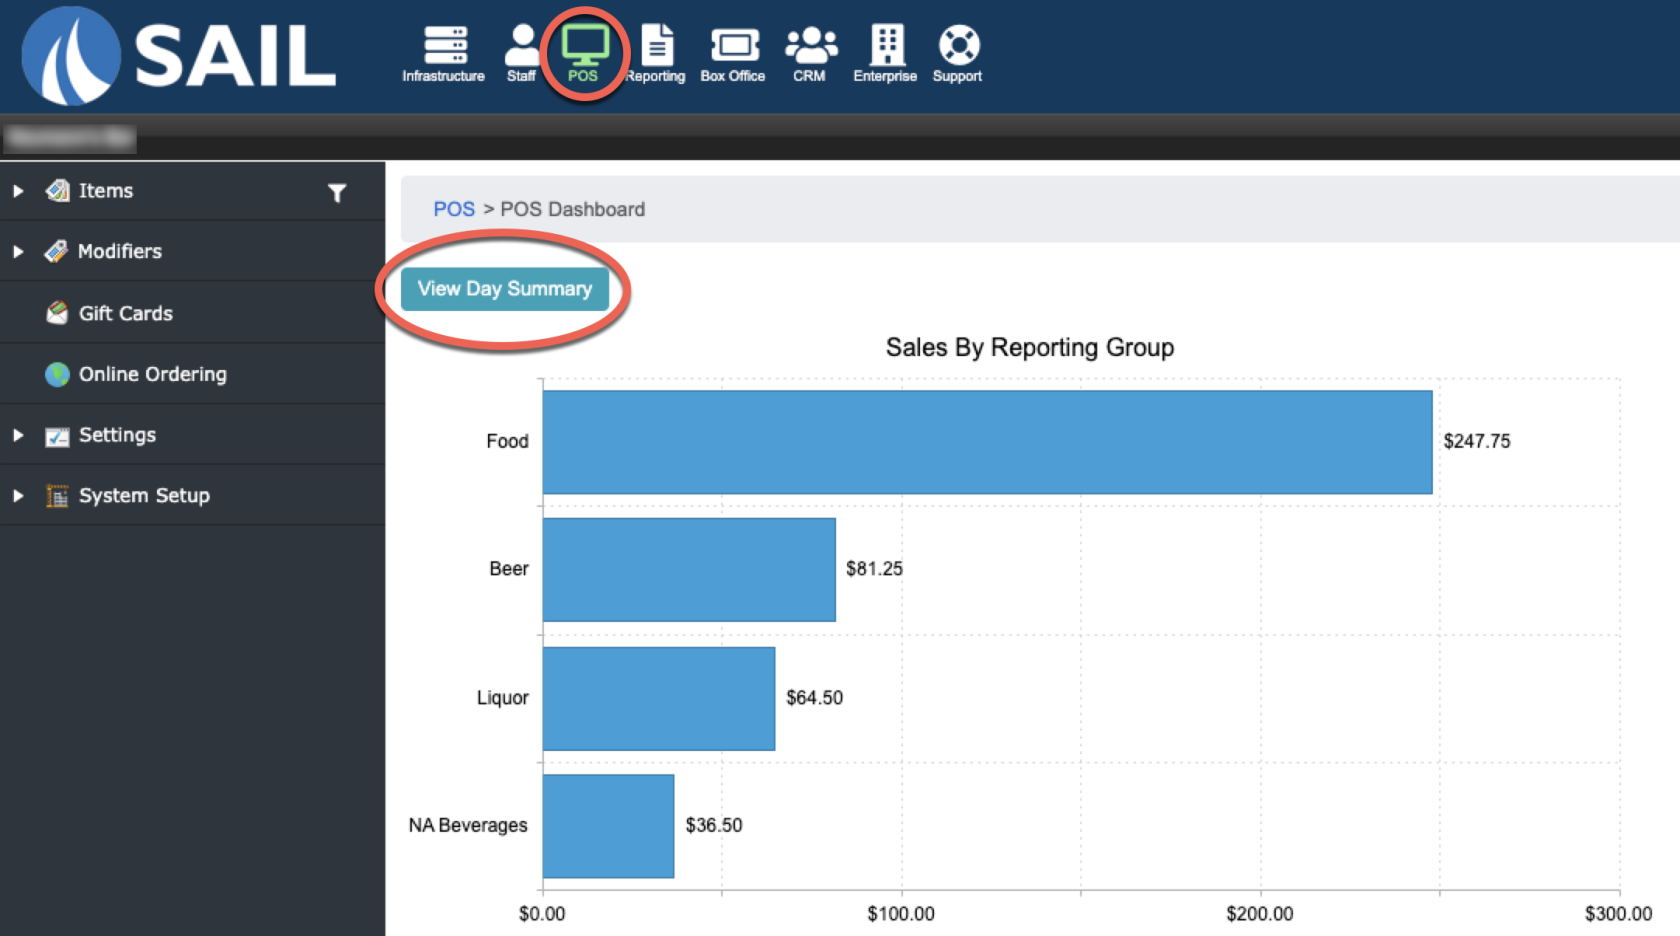
- Log into Backoffice, Click on the POS tab at the top. This will bring you to the POS dashboard. At the top of the Dashboard there will be a button that says "Day Summary" This will bring you to the report.
Bug Fixes
General: Day Parts are working again.

