Release 2024.11.1 "Adobo"
Notes: If you have a location that does or would like to do Delivery please read below to see our new features. And if you are interested in any additional information or help setting up any of this new features, please contact support at:
Support@ingageit.com or call (612) 861-5277
New Feature
1. Create Delivery Zones
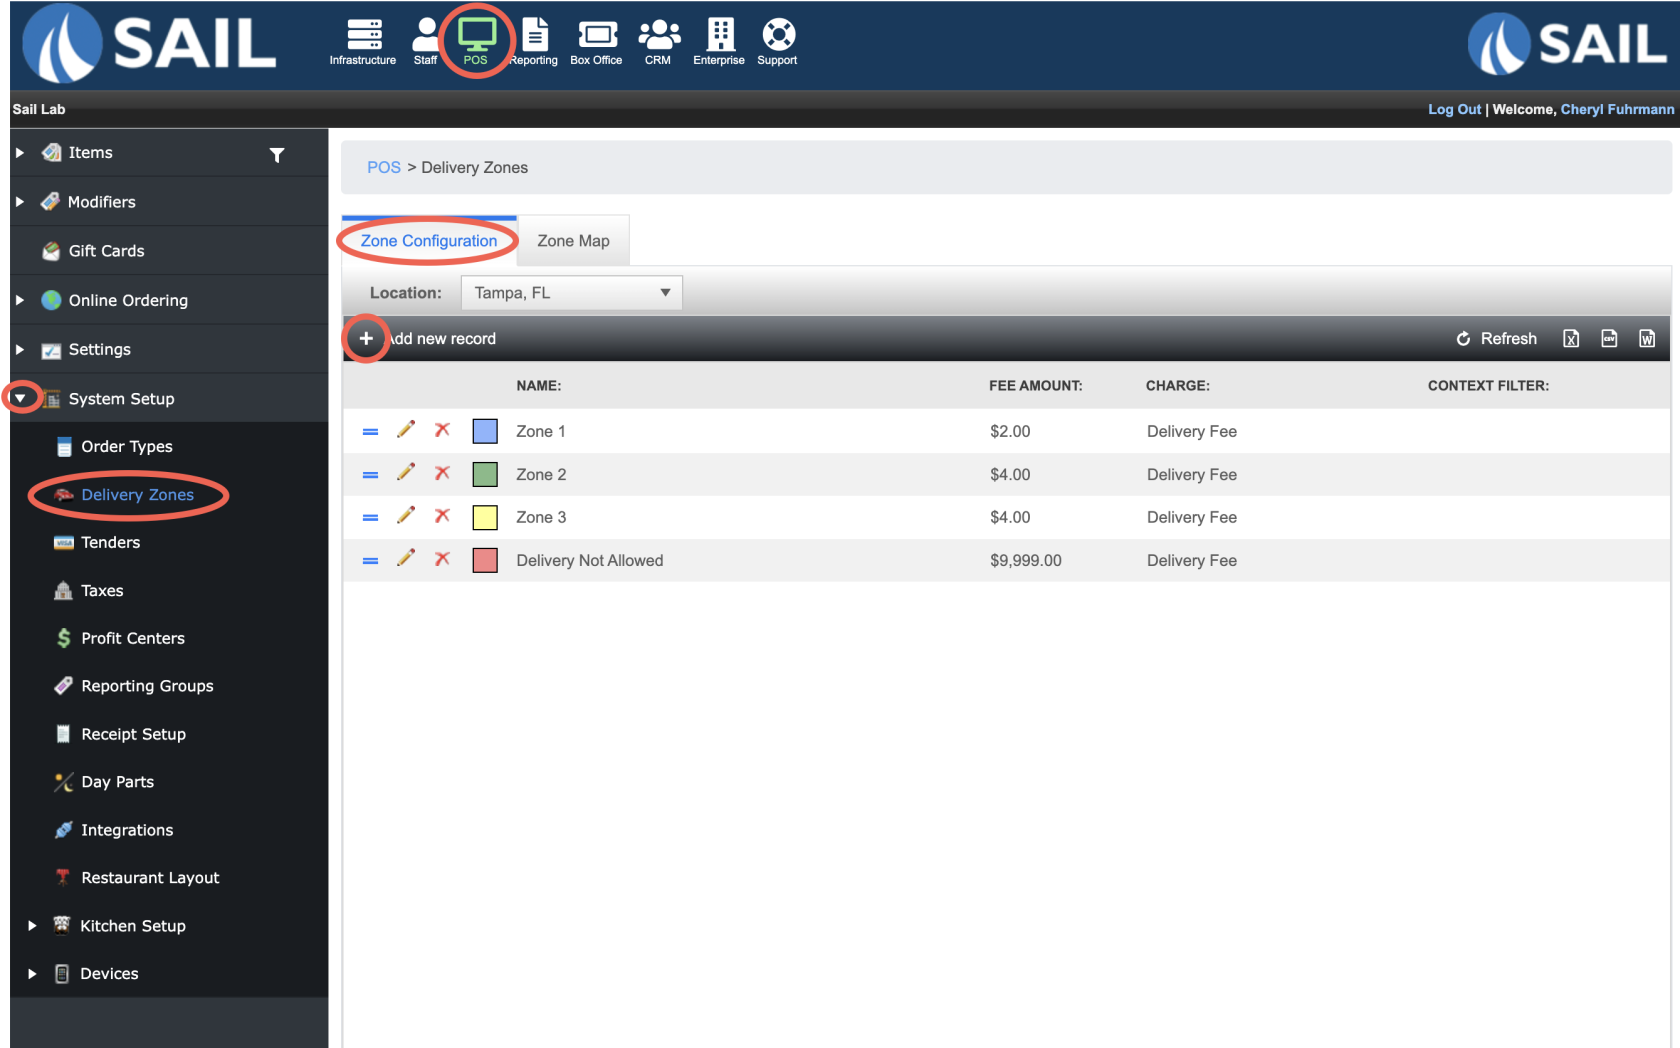
- To set one up log into Backoffice --> POS --> System Setup --> Delivery Zones --> Add new record
- You can create as many delivery zones as you'd like
- They will work on the terminals as well as online
- Delivery fees are optional

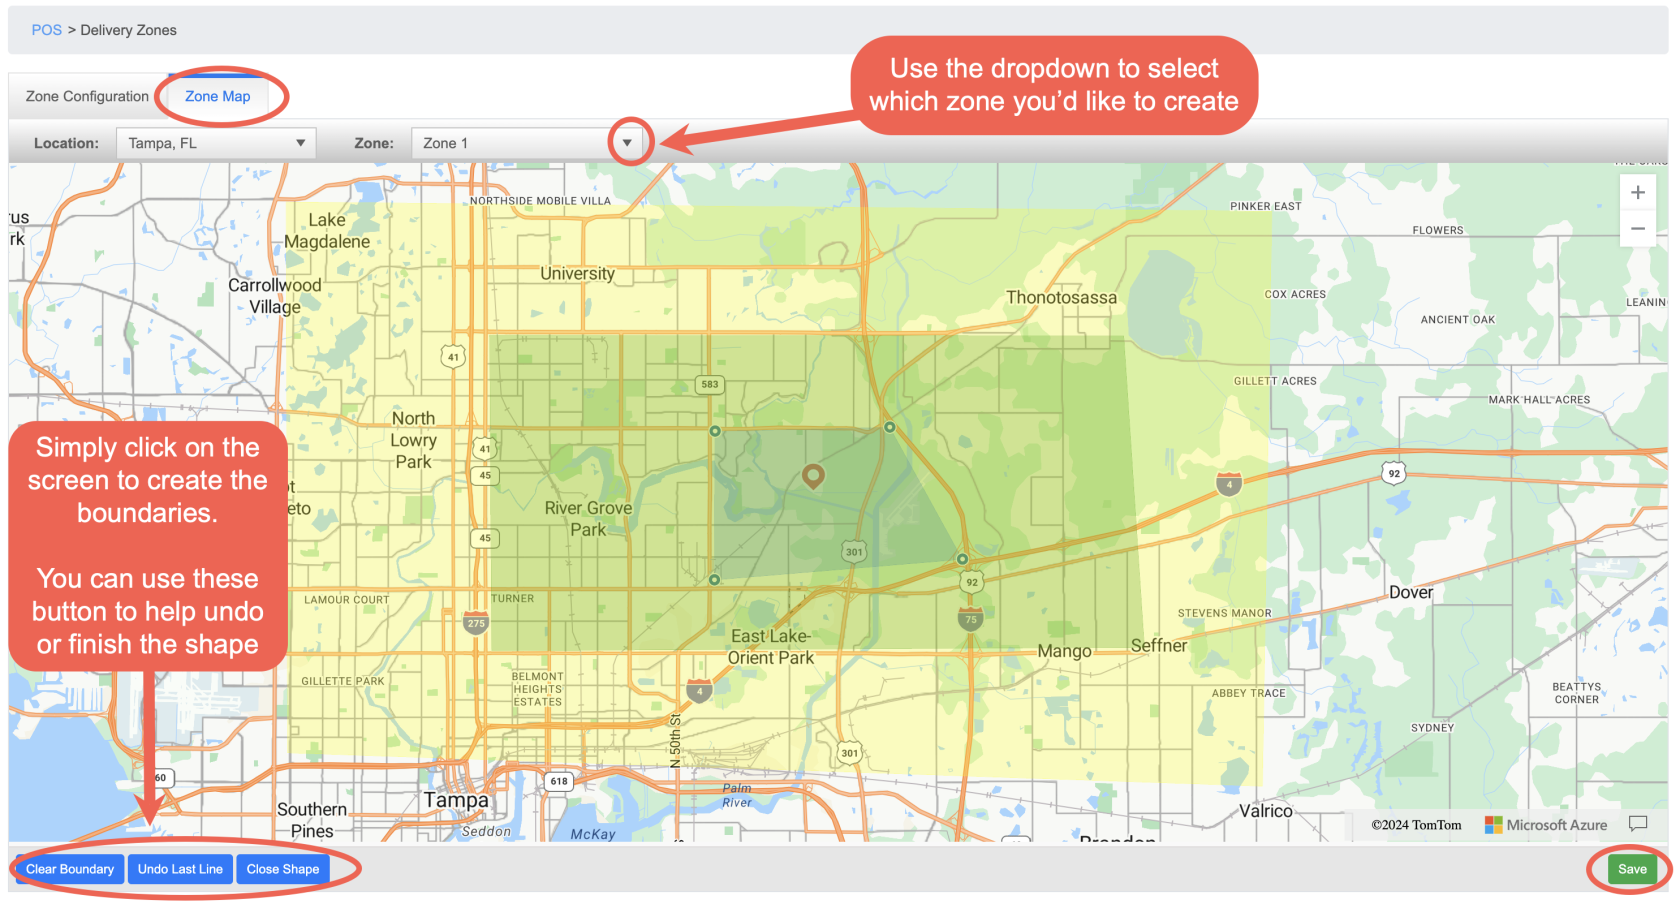
- Go to the Zone Map to create the zones
- Use the Zone Drop down to move between the different zones you've created
- Simply click on the map (in a circle or square rotation) to create the boundaries of your zone
- The buttons on the bottom left can help you undo a line, Start over, or complete the shape
- Then save it

2. Setting up dispatch in Backoffice
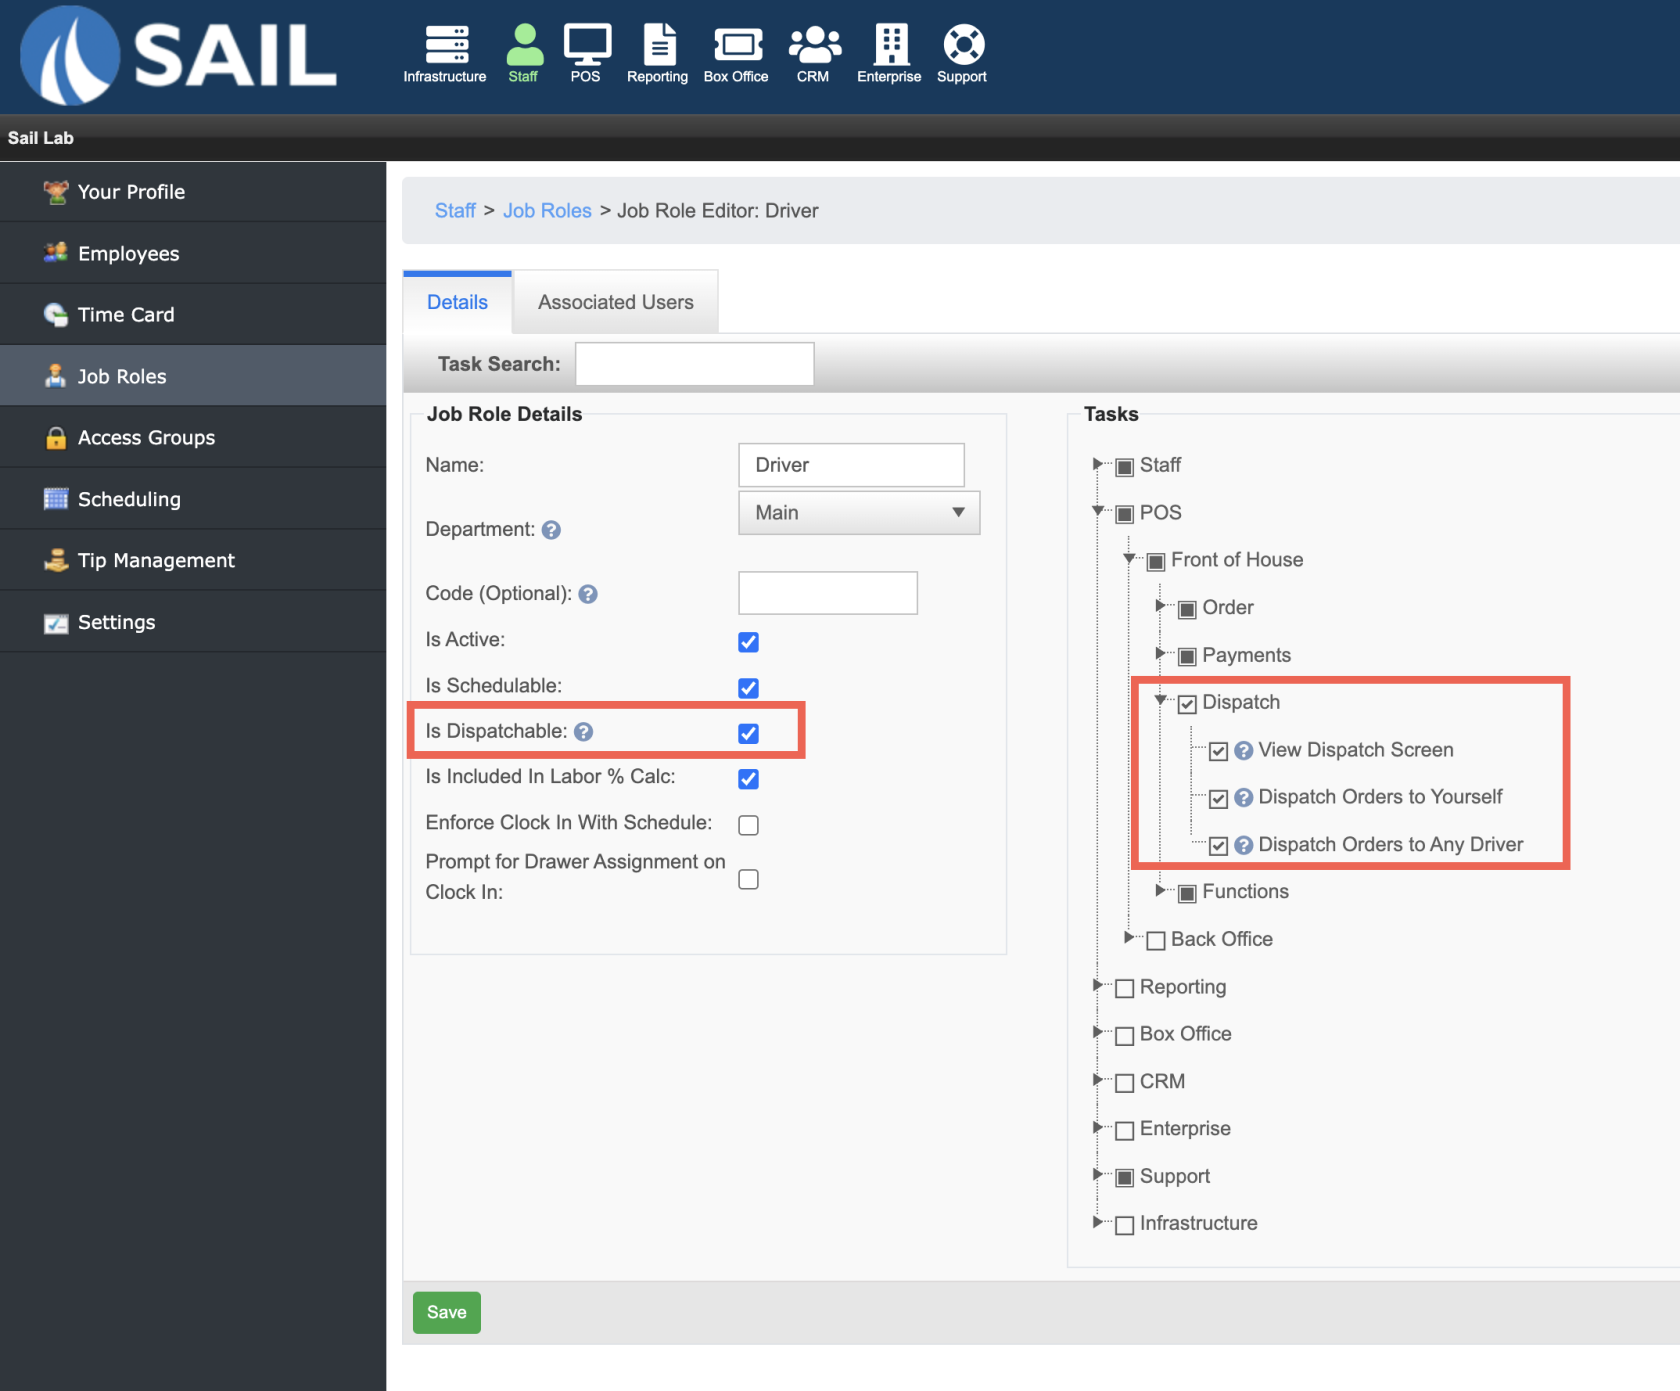
- Dispatchable Job Role
- There is a checkbox to make a job role dispatchable, it allows an order type to be assigned to this job role so they can deliver it to the customer
- There are job role tasks that allow users to be able to see the dispatch screen or assign orders to drivers.

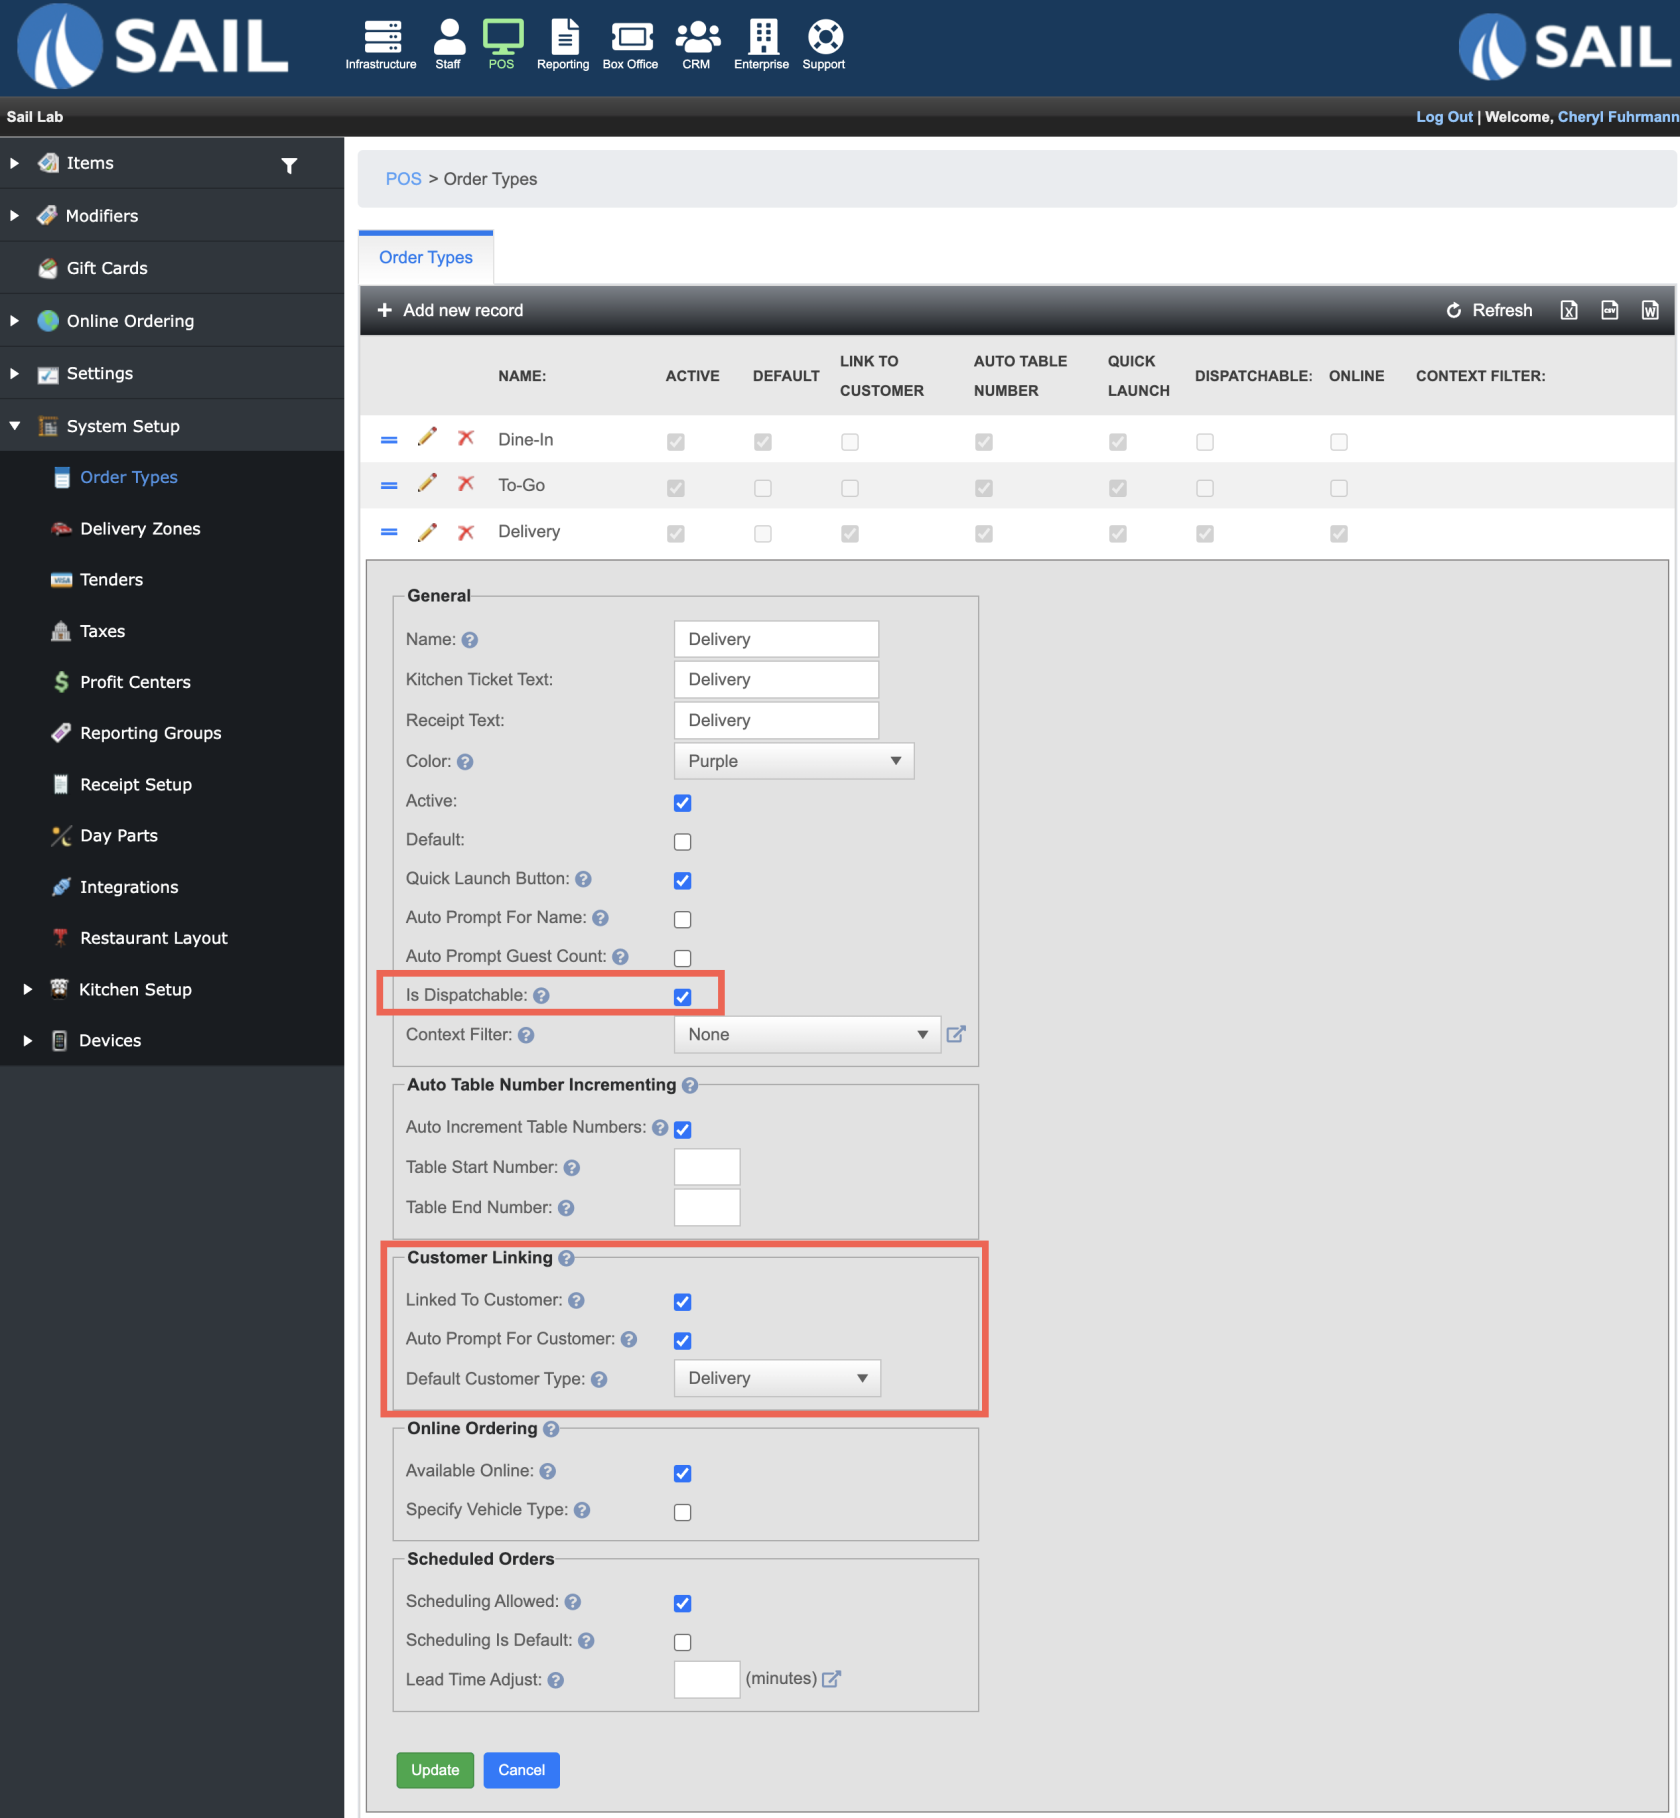
- Dispatchable Order Type
- Check the Is dispatchable checkbox if you'd like this order type to be able to be assigned to drivers to be delivered to the customer
- You can also link this job role to a customer for easy phone number or name lookup.
- and it will keep the customer information and order history in Backoffice

Delivery on the terminals
- There is now a Dispatch button on the launch screen that will bring you to a screen to view and dispatch the orders
- When you click on the delivery order type you will be prompted to enter the customers information, you can type in their name or phone number


