Rewards: Creating Events
This guide explains how to create and manage Events to communicate with members based off of their data points (Birthday, Anniversary, Last visit, etc.)
Key Terms:
Event: Emails automatically sent to members based off of the member data points (Birthday, Anniversary, Last visit, etc.) These emails can include Rewards if desired.
Email Templates: Pre-designed email layouts that can be used in Email Campaigns, Events and Points Rules.
Rewards: Discounts that can be attached to Email Campaigns, Events, or Points Rules.
Creating a new Event:
-
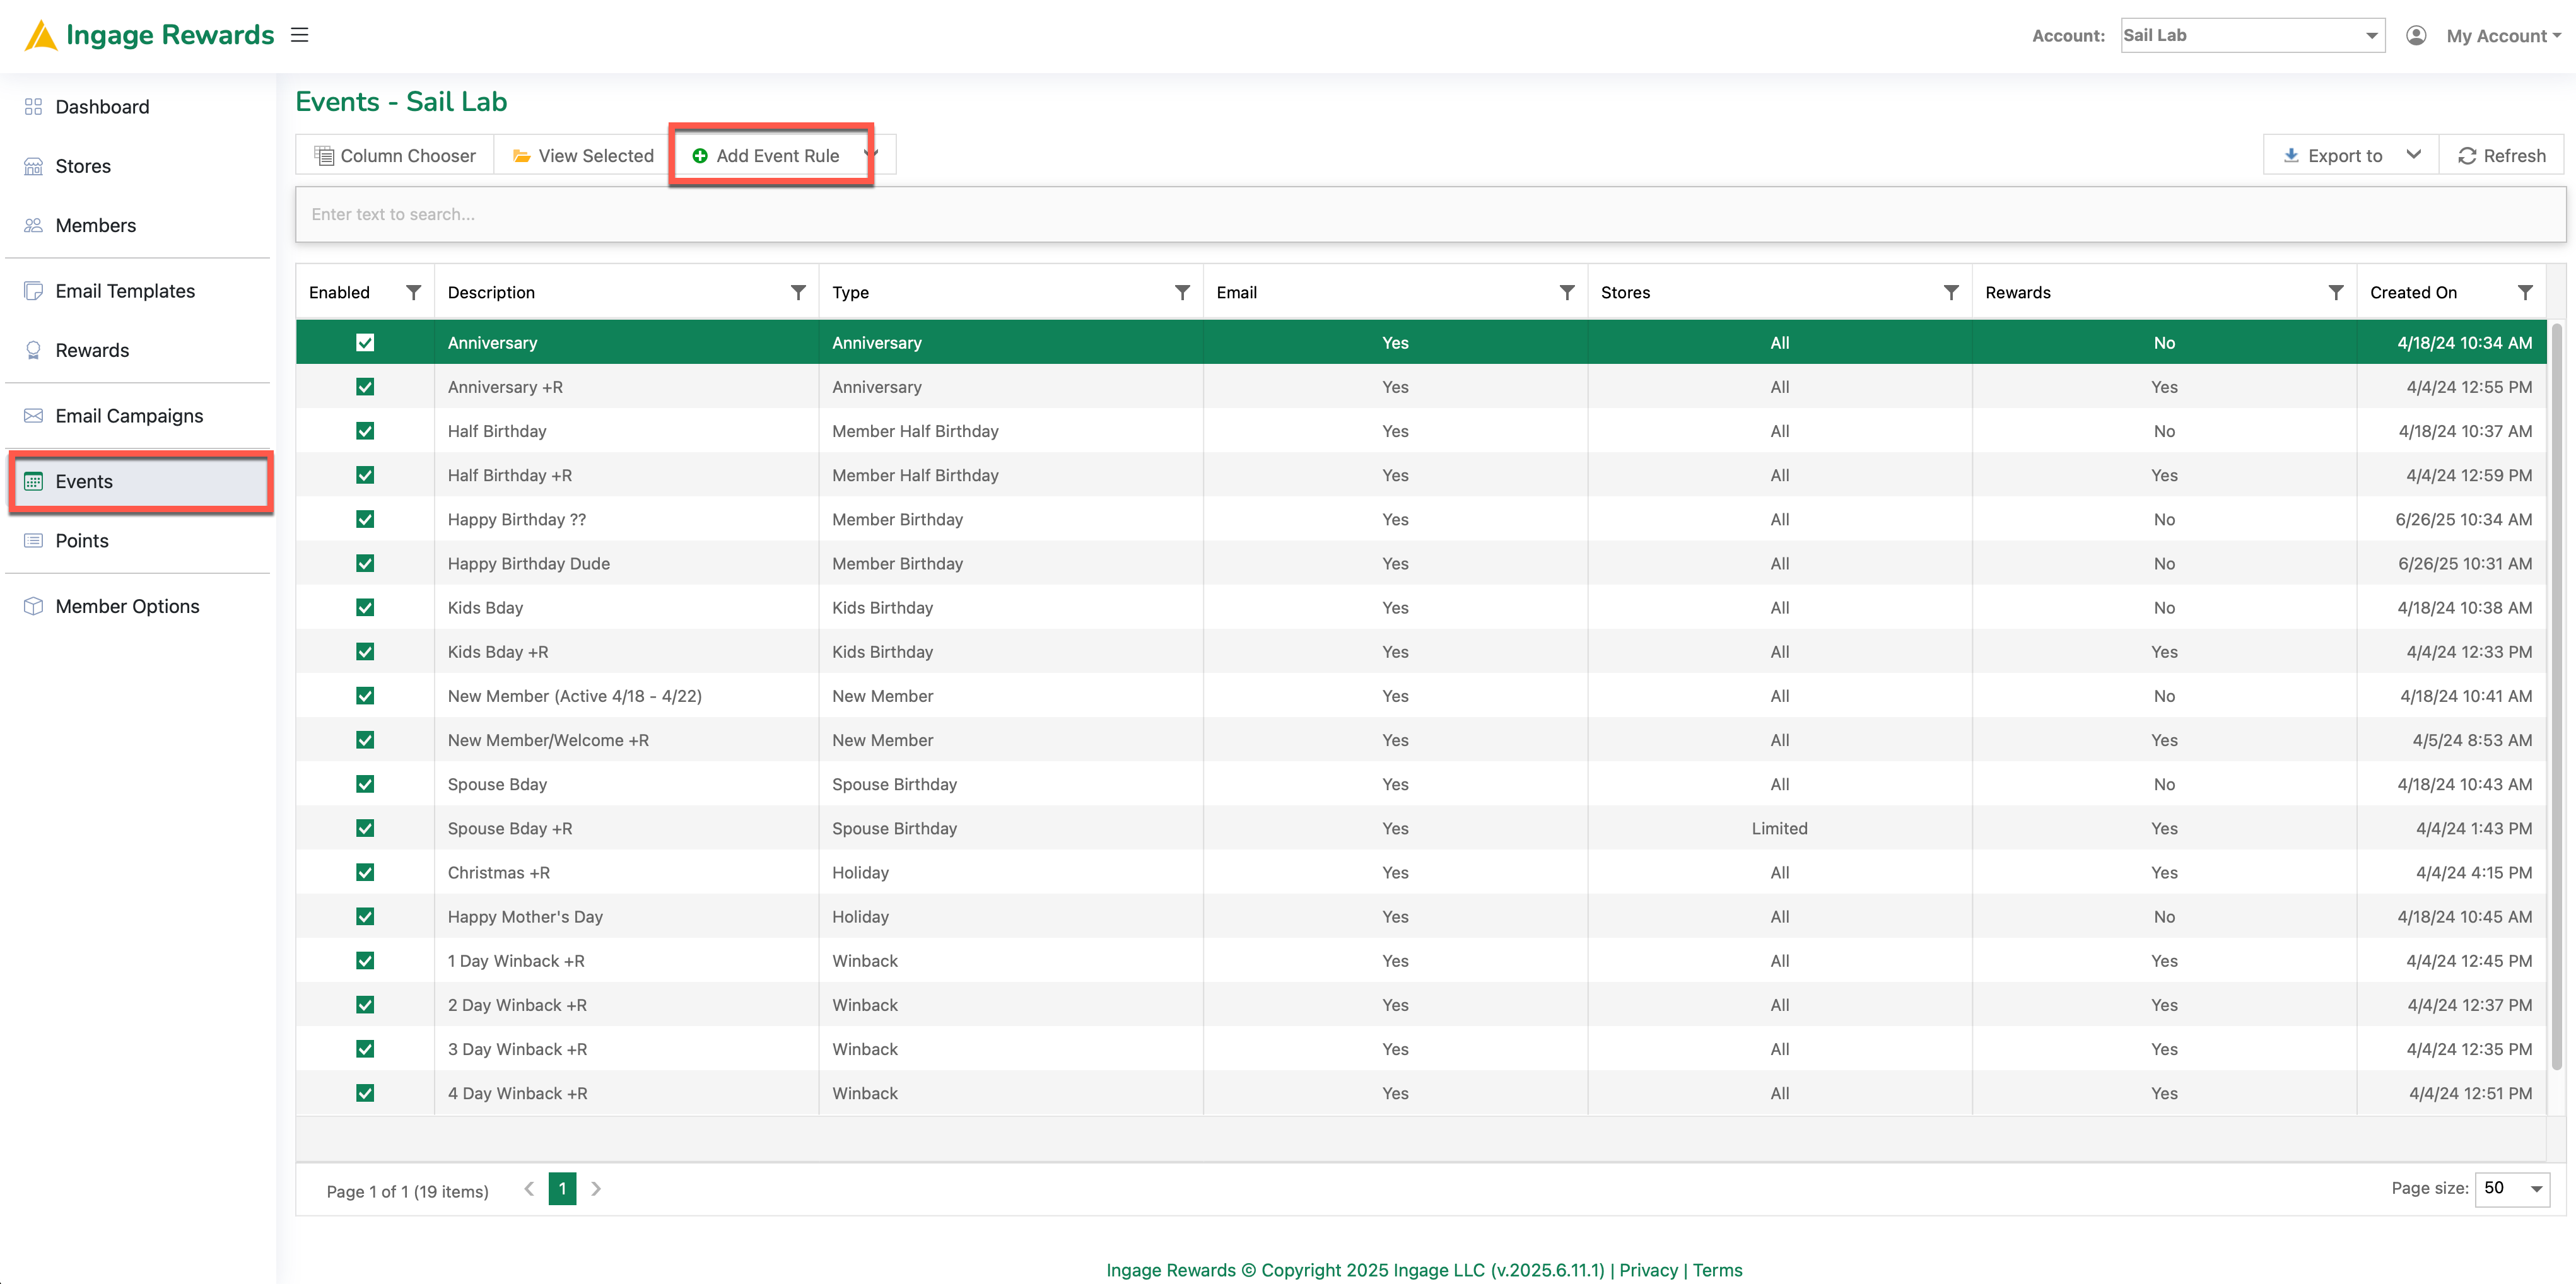
- Click the Add Event button and select from the available Event Types (Birthday, Anniversary, Kids Birthday, Spouse Birthday, Half Birthday, New Member, Winback or Holiday) to start creating a new Email Campaign.
- Click the Add Event button and select from the available Event Types (Birthday, Anniversary, Kids Birthday, Spouse Birthday, Half Birthday, New Member, Winback or Holiday) to start creating a new Email Campaign.
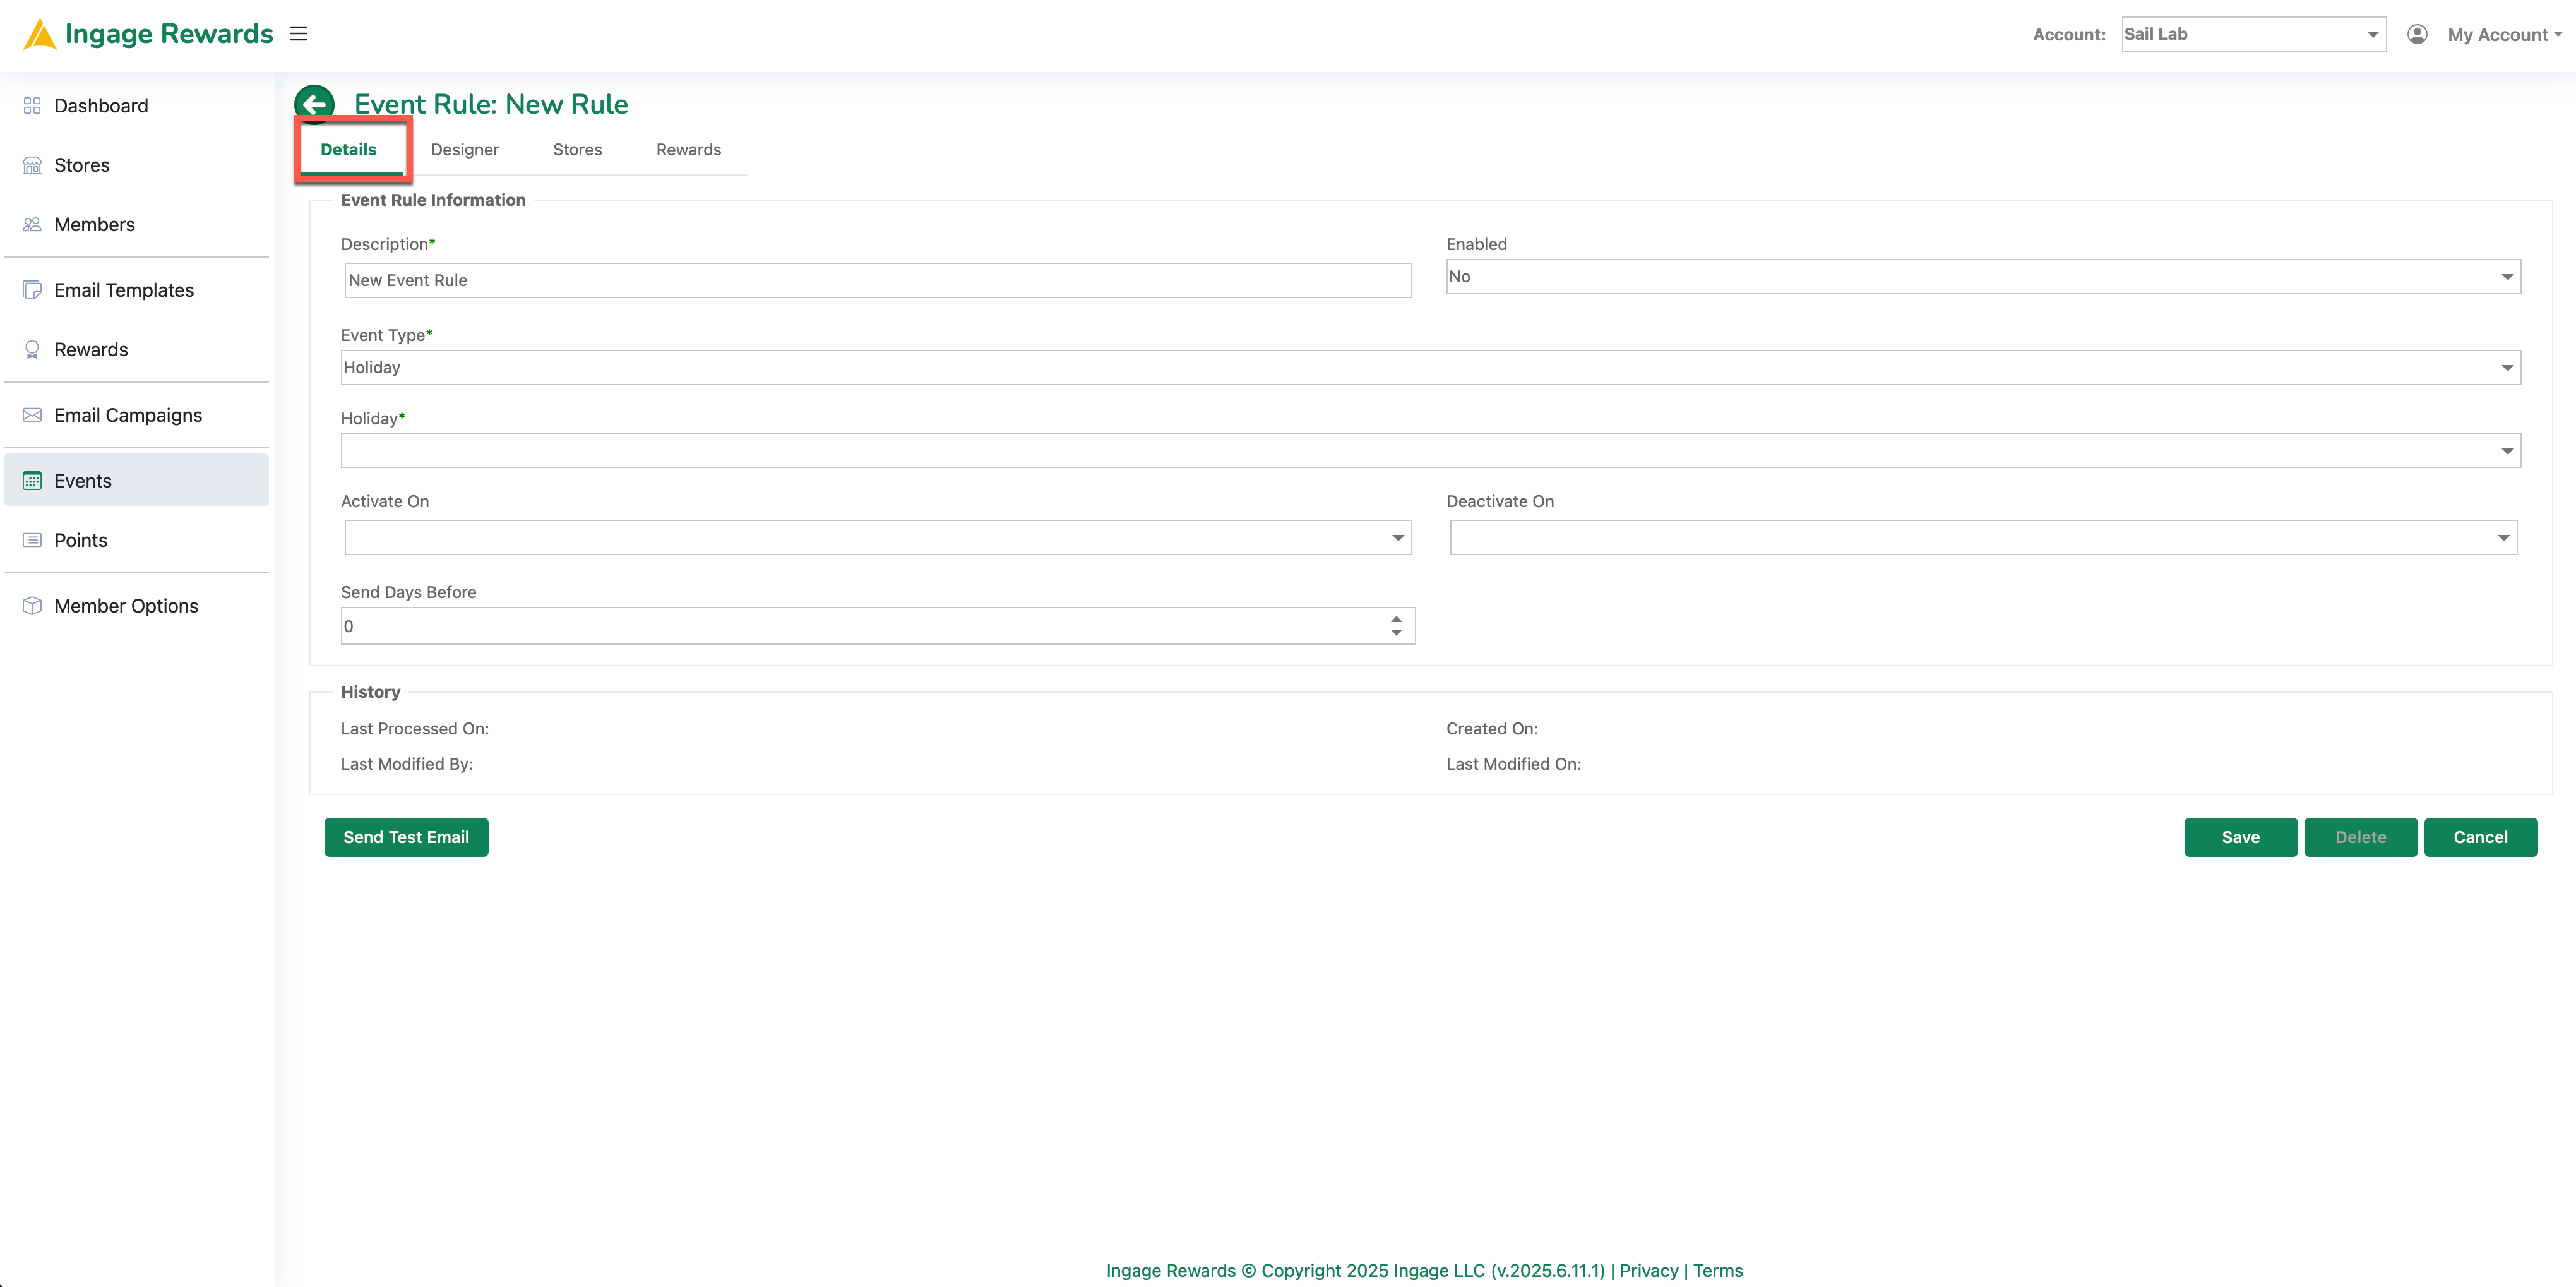
2. Configure Event Details.
- Description: Provide a brief summary of the campaigns purpose.
- Event Type: verify or select the desired Event Type.
- Enabled: Toggle this option to activate the Event.
- Activate/Deactivate: Select a date range to mark when this event should be activate.
- Send Days Before: Input the number of days before the event you would like the event to run.
- Click Save to finalize the campaign settings.
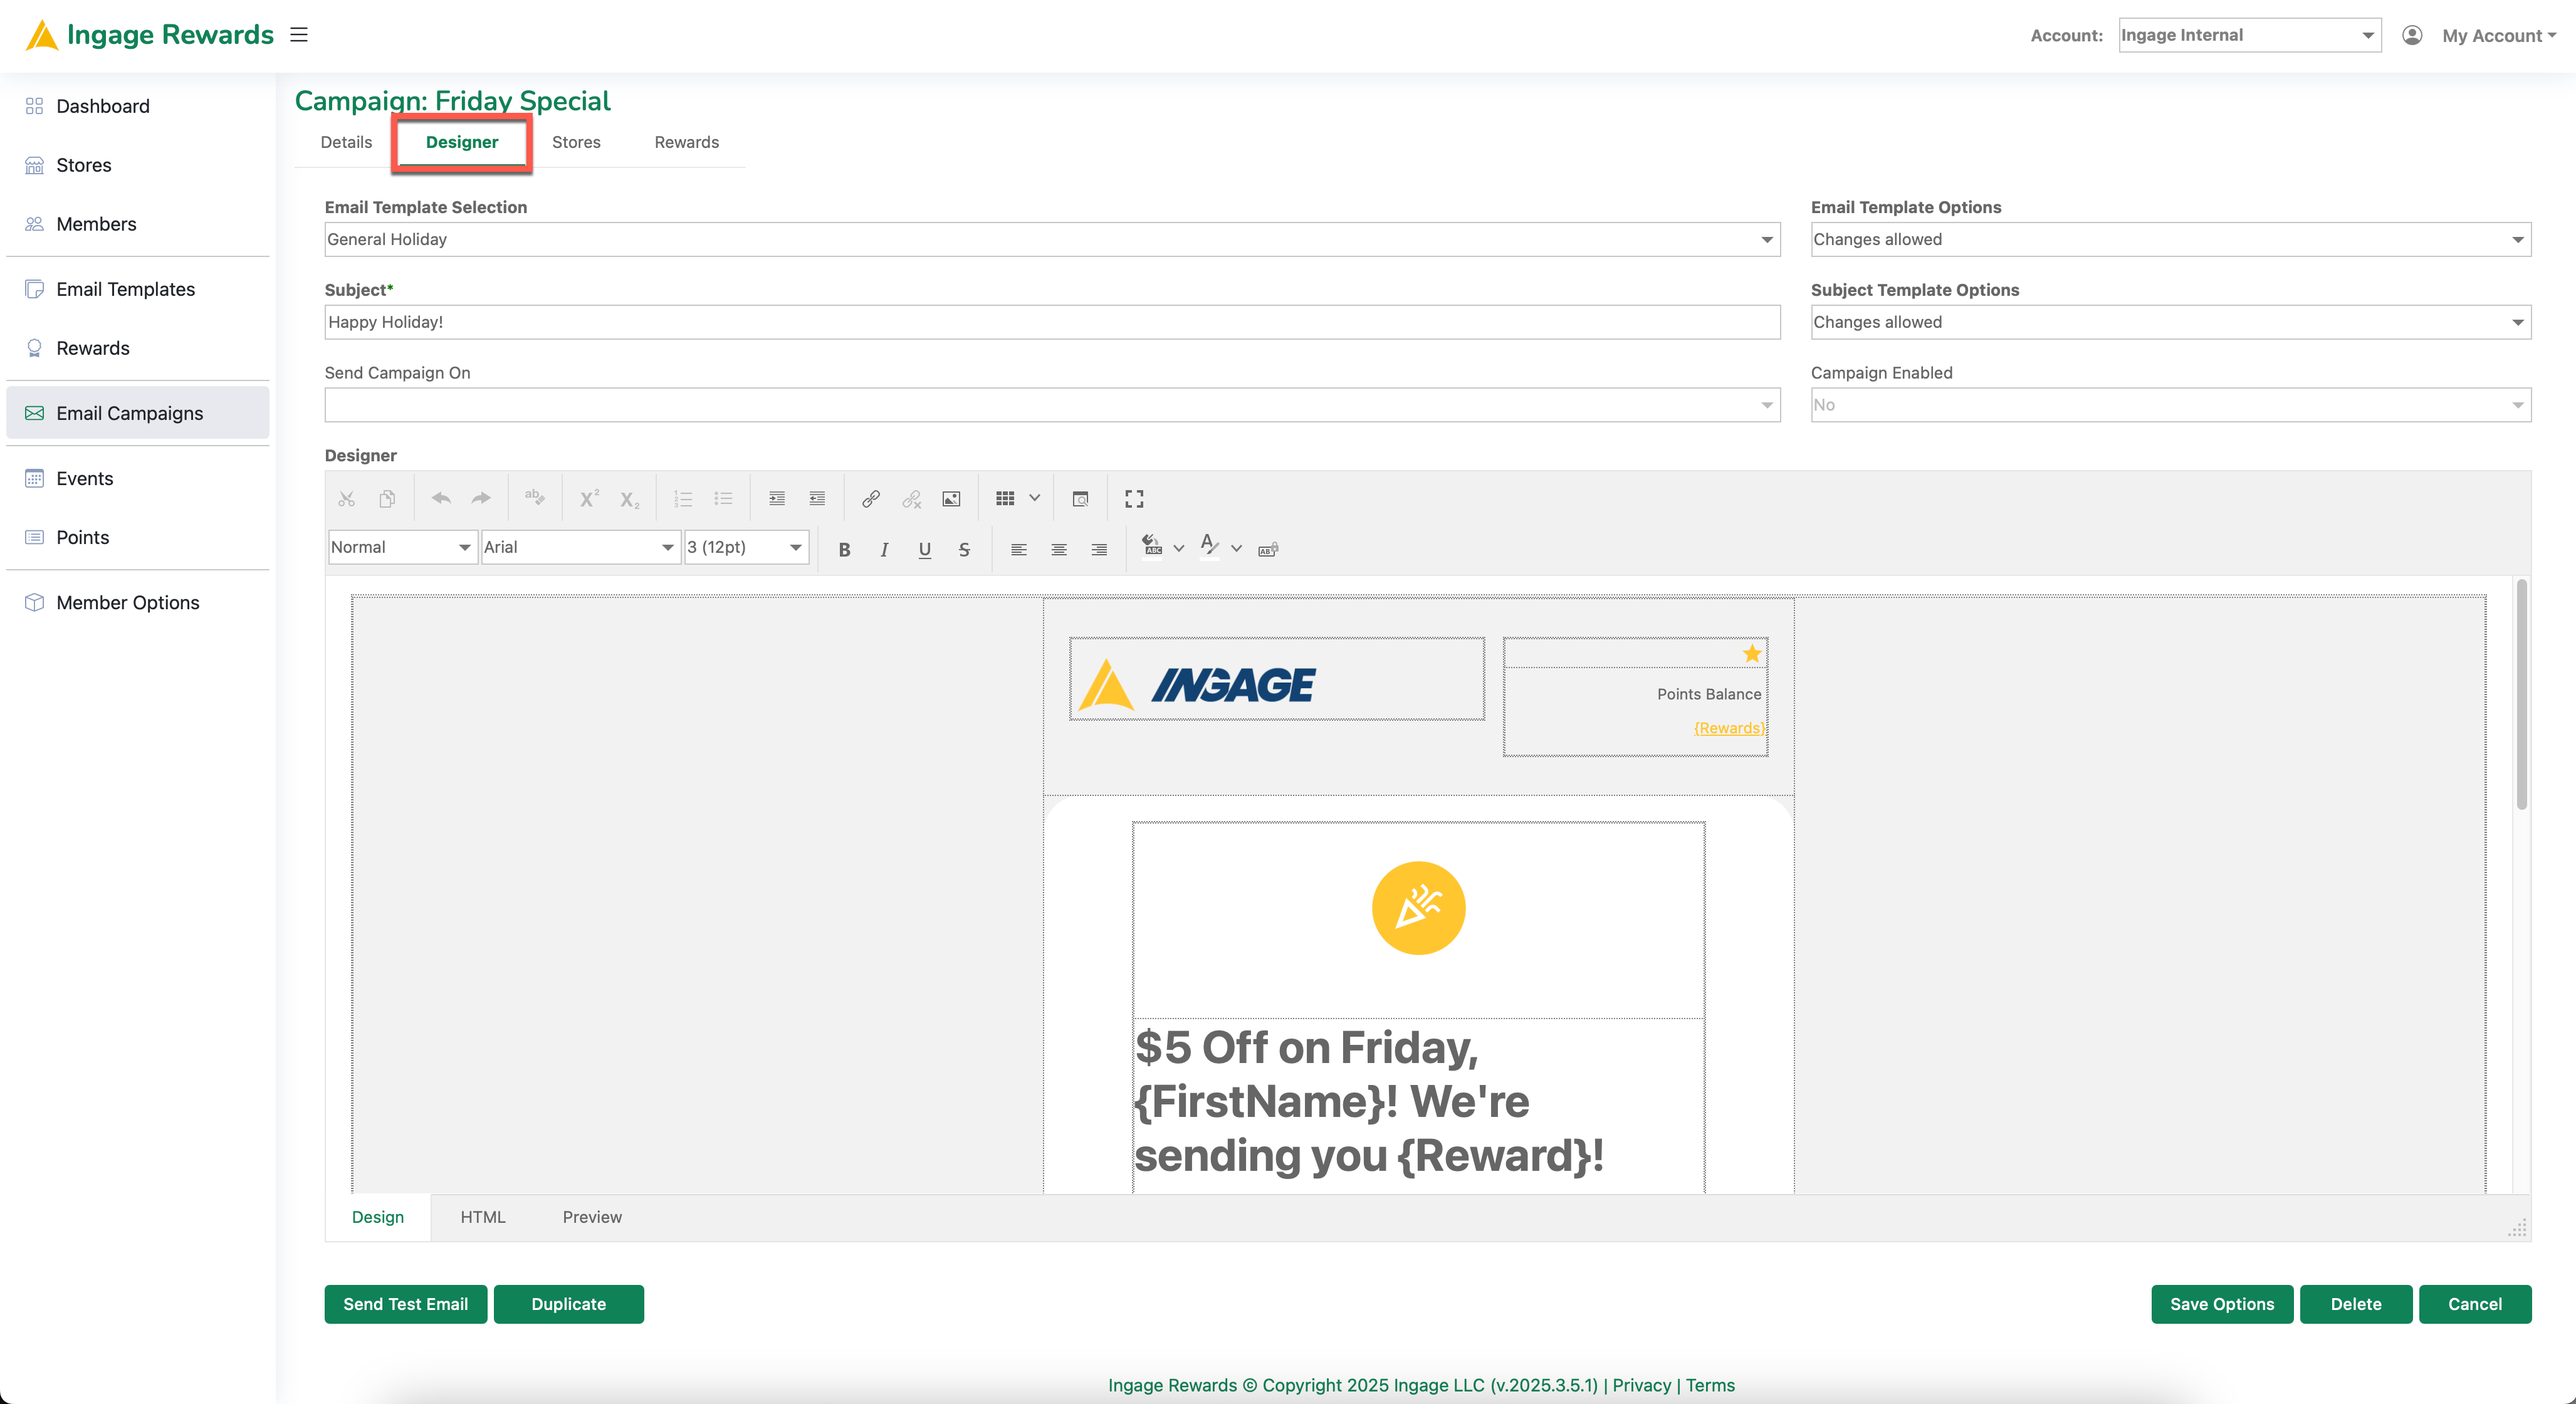
3. Design Your Email or Use an Email Template
Email Template Selection:
- Design my own: Create an email design directly from the Event
- Email Template: use the dropdown to choose from a list of email templates
Template and Subject Options:
- Use Template Body/Subject: If using an email template and this option is selected the email subject or body will use the same Body and/or Subject as the Email Template
- Changes Allowed: If using an email template and this option is selected the email subject and/or body can be edited
- Click Save to finalize the campaign settings.
4. Select Store(s) and/or Store Groups
- Choose individual Stores, Store Groups or a mix of both to determine the events recipients.

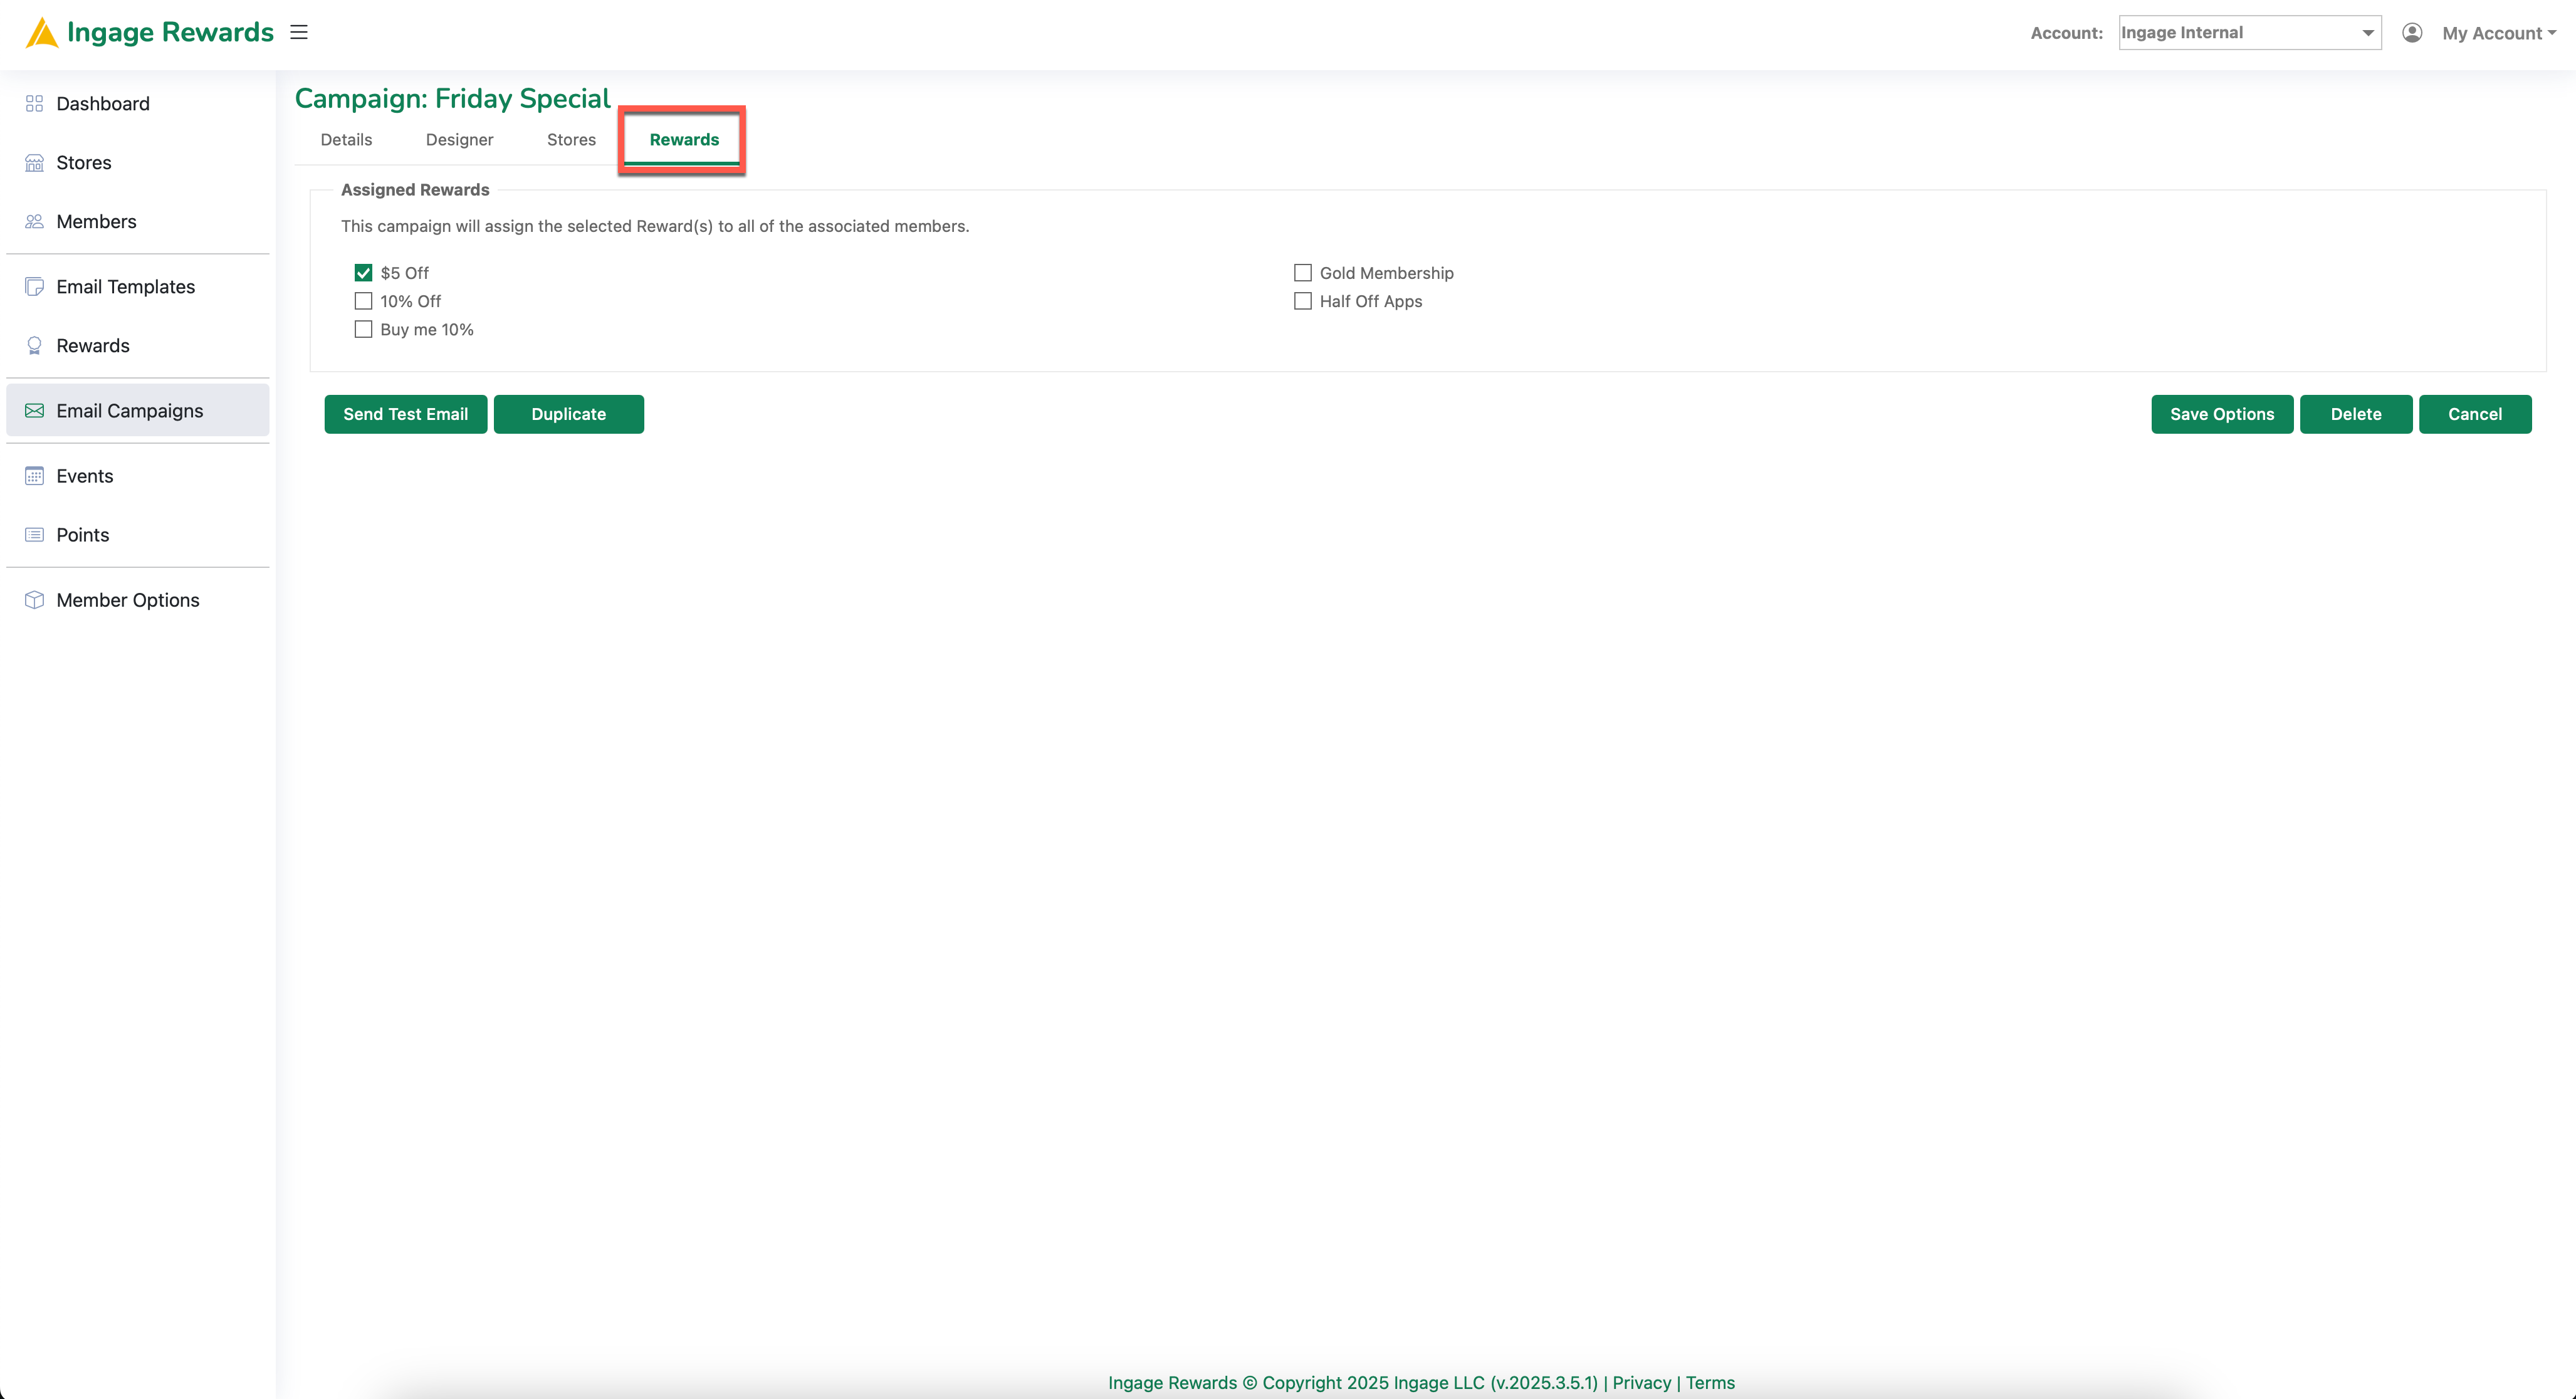
5. Adding a Reward to an Event
- Attach one or more rewards to a Event.
- IMPORTANT Ensure the reward is properly configured and mapped to the POS before scheduling the email. Once the email is sent, the reward settings are saved to the member's profile.