
How to Invite Employees to Ingage Scheduling
Whether you location is new to Ingage scheduling or you have a new employee starting, you will need to invite employees to the Scheduling system.
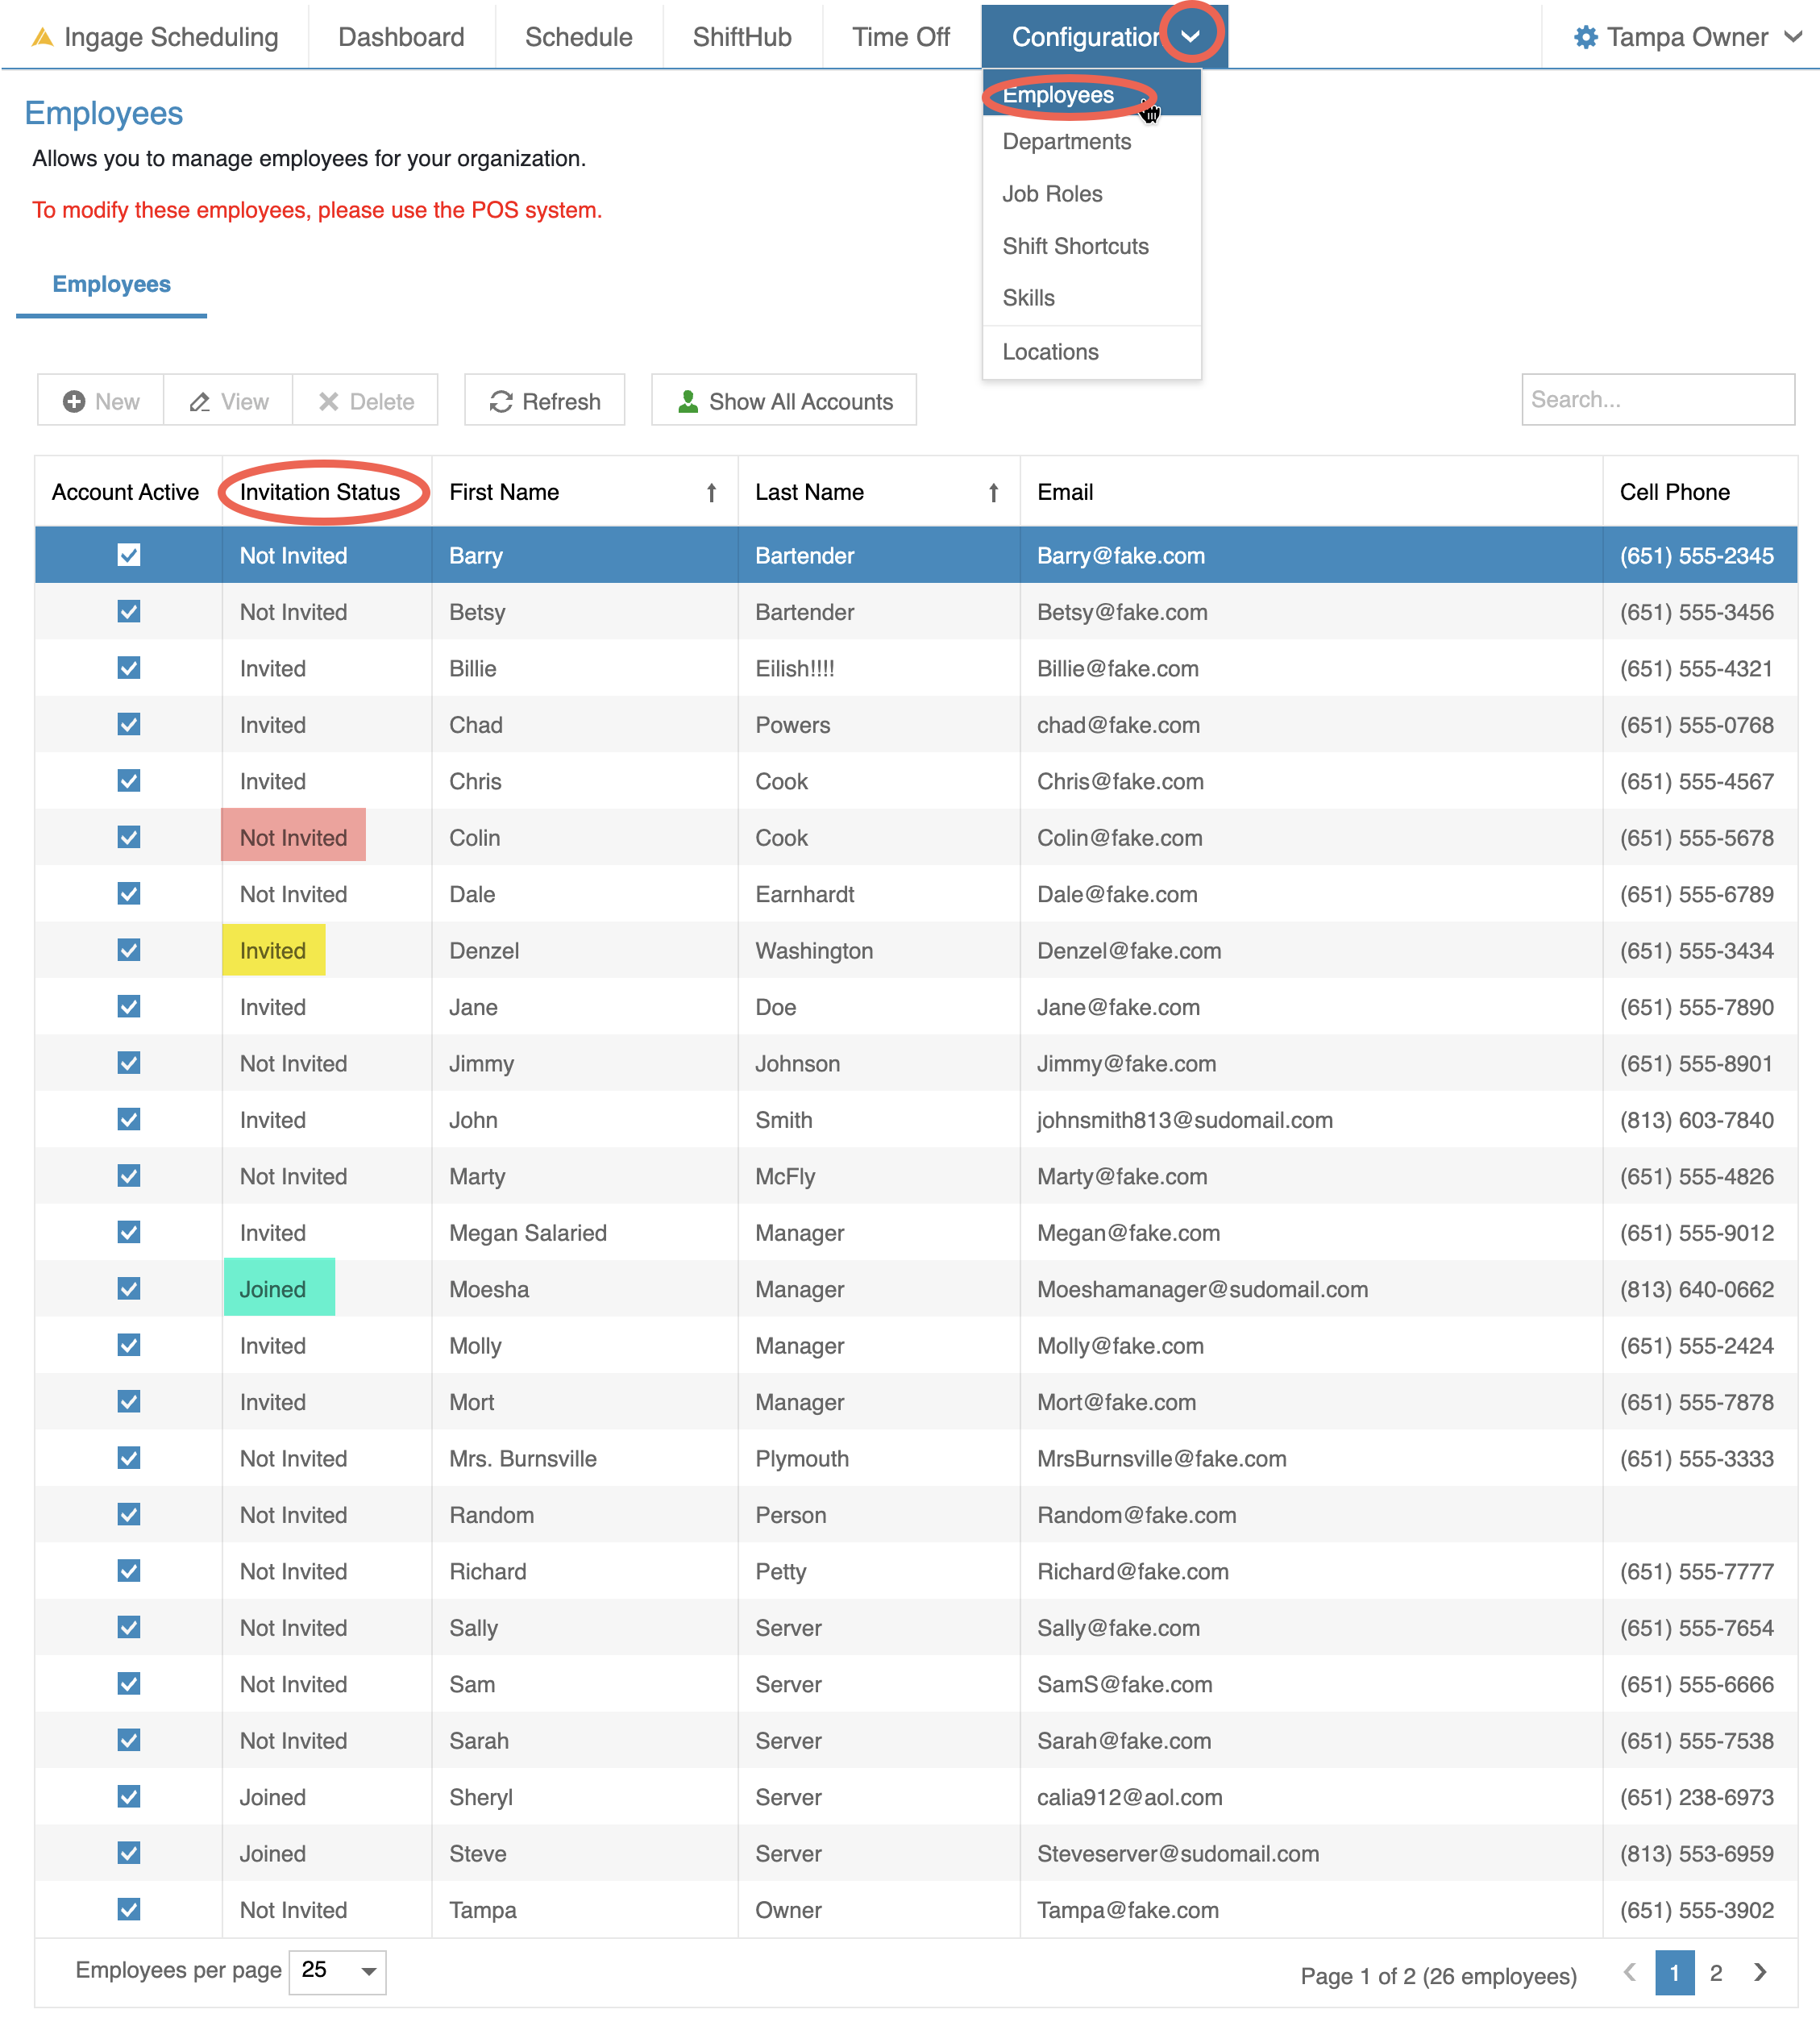
To see the invitation status
- To got Configuration --> Employee
- The second column will let you know each employees status
- The goal is to have all employees "Joined" the system
To send and invitation (For individual employees)
- Double Click on the Employees name
- Scroll all the way to the bottom of the Details tab to find the "Invitation status" section
- If an employee has not yet been invited you will see a red box that says "Not invited - Send Invite"
- By clicking this box it will send the employee the invite via email and change the status to invited
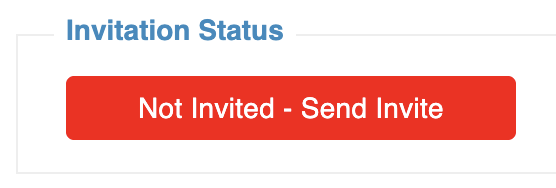
- By clicking this box it will send the employee the invite via email and change the status to invited
- Once the employee has been invited there will be an orange box that says "Invited - Resend"
- It will stay this status until the employee has opened the email and clicked on the link to join Scheduling. If the employee doesn't join, or you need to send them this link again, you can click that button to give them the invitation again.

- It will stay this status until the employee has opened the email and clicked on the link to join Scheduling. If the employee doesn't join, or you need to send them this link again, you can click that button to give them the invitation again.
- Once the employee has opened the email and clicked Join the status will change to "Joined"
- The status button will then stay green and be greyed out because it can't be sent again.
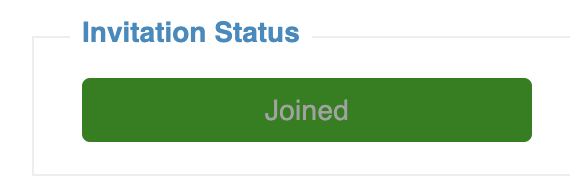
- The status button will then stay green and be greyed out because it can't be sent again.
- If an employee has not yet been invited you will see a red box that says "Not invited - Send Invite"


We will eventually have the ability to send the invite to all employees at one time to help with new locations going live with Scheduling for the firs time. So that you don't need to click into each individual employee