
How to Configure a Kitchen Video in Backoffice
This document will walk you thru setting up a kitchen video system
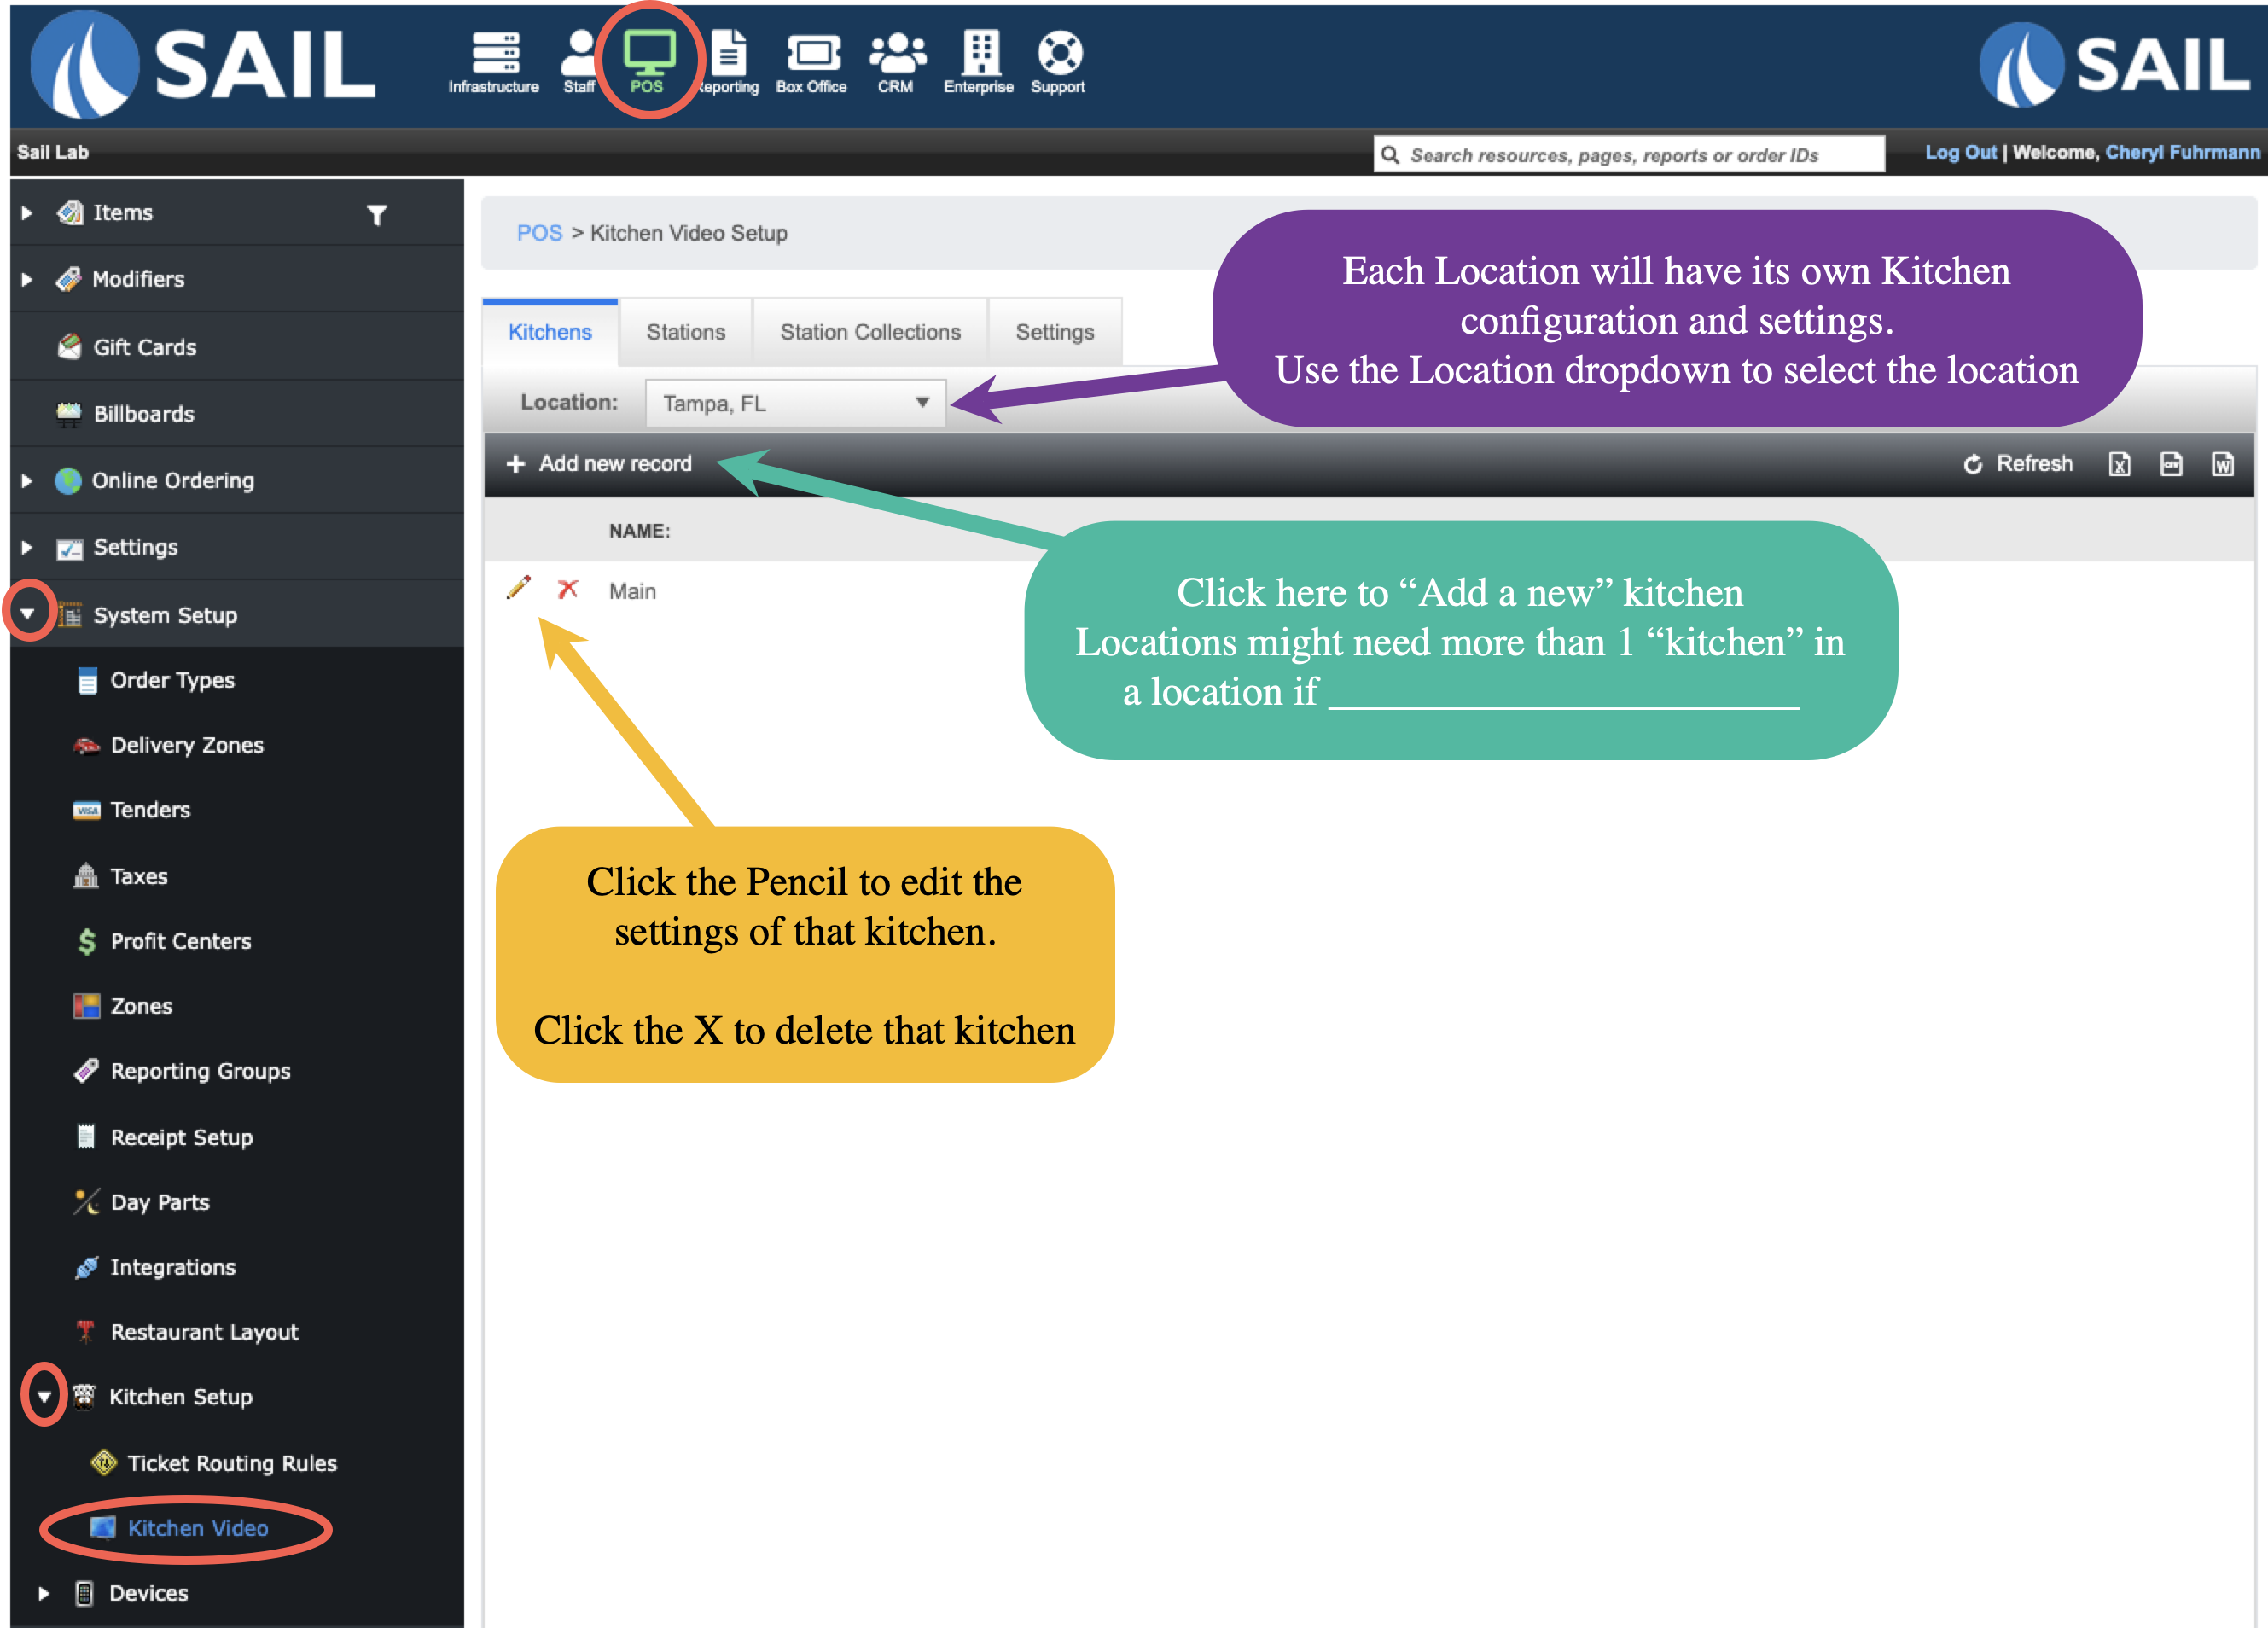
To Find Kitchen Video configuration
Backoffice --> System Setup --> Kitchen Setup --> Kitchen Video
- If you are a multi store location, each location will have its own Kitchen configuration. So you can use the location dropdown to switch between the different locations
- Add New record allows you to add as many different "Kitchens" as the location needs
- Each location will display the Kitchen names, a pencil to edit, and an X to delete it
Step 1 - Add a Kitchen
When you click on "Add new record" you will get a screen to Name it and configure the settings for this kitchen
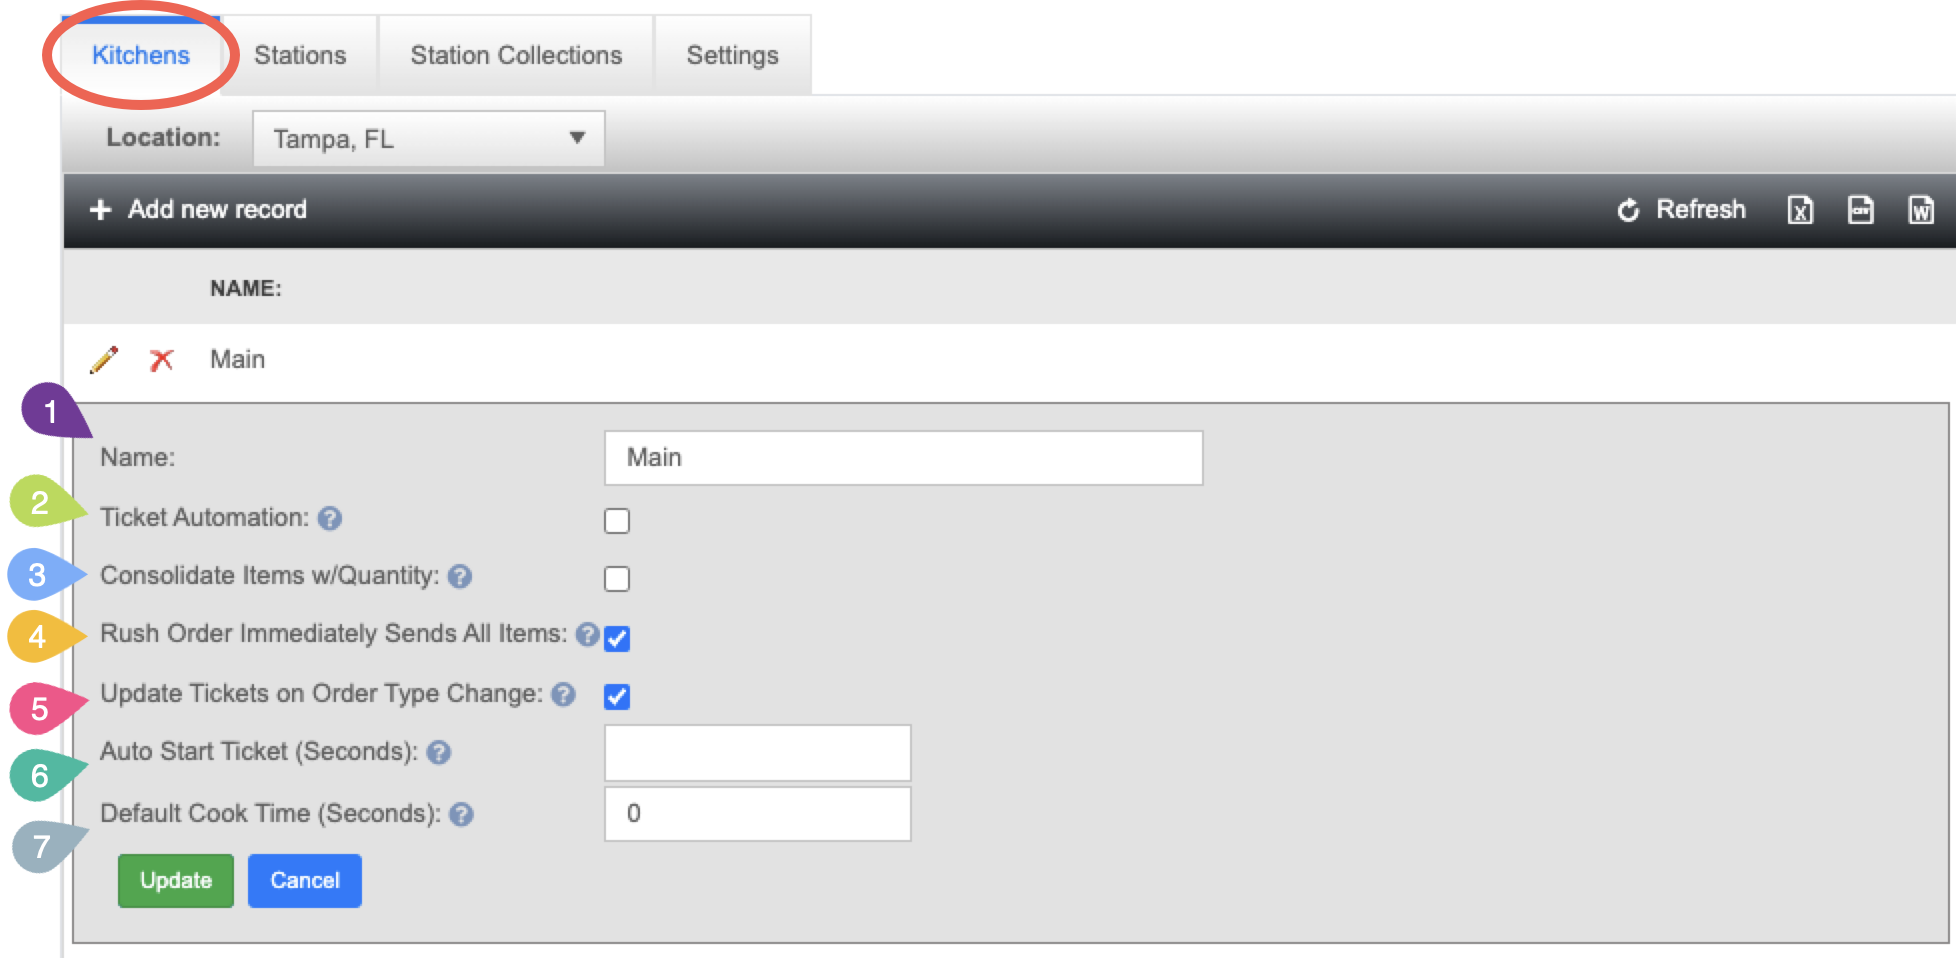
Kitchen Settings
- Name: Name the Kitchen. If there is more than 1 you might want to name it with the location (ex: Kitchen & Bar)
- Ticket Automation: Do you want items to automatically send to the kitchen? or would you like a person to be responsible for sending them to each station?
- Checked: Items will automatically send to the kitchen based of their cook time
- Not Checked: Items will need to be manually sent to each station
- Consolidate Items with Quantity:
- Checked:
- Not Checked:
- Rush Order Immediately Sends All Items:
- Checked:
- Not Checked:
- Update Tickets on Order Type Change:
- Checked:
- Not Checked:
- Auto Start Ticket (Seconds):
- Default cook Time (Seconds):
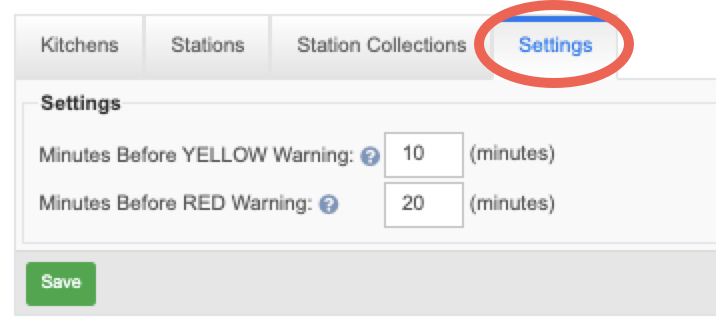
Additional Settings Tab
Warning color settings
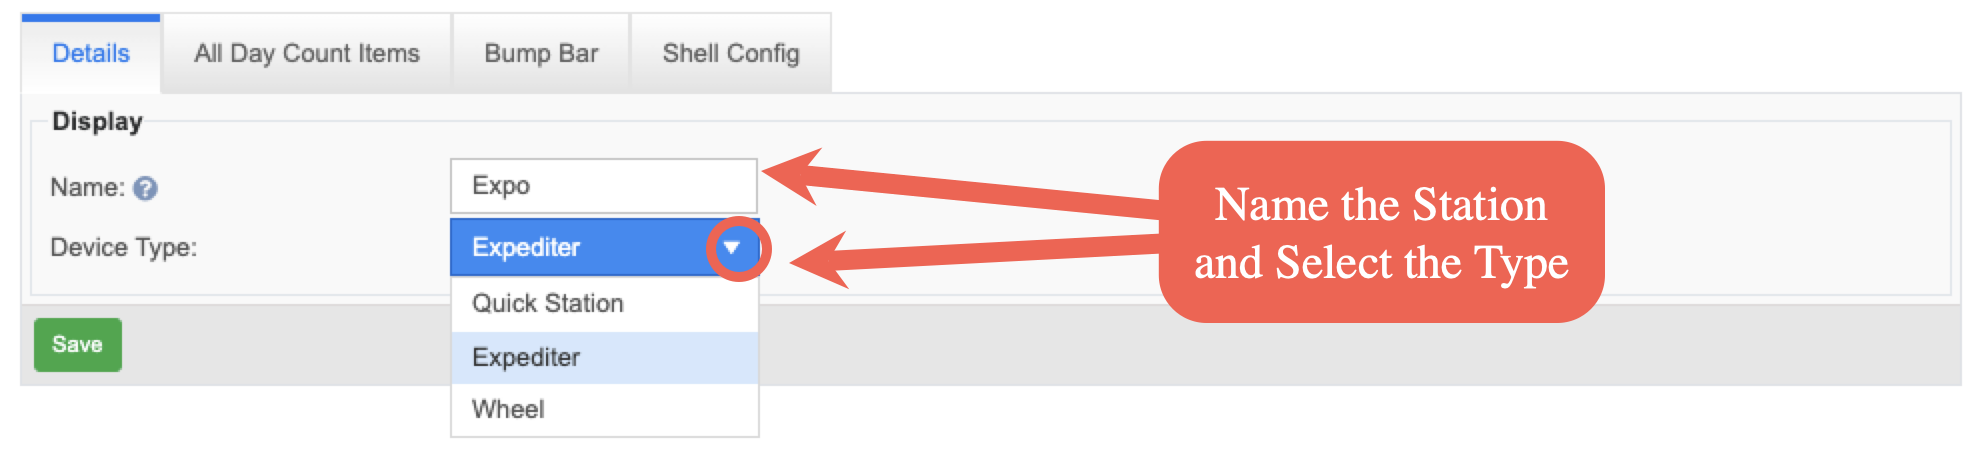
Step 2 - Add stations
How to add a new station
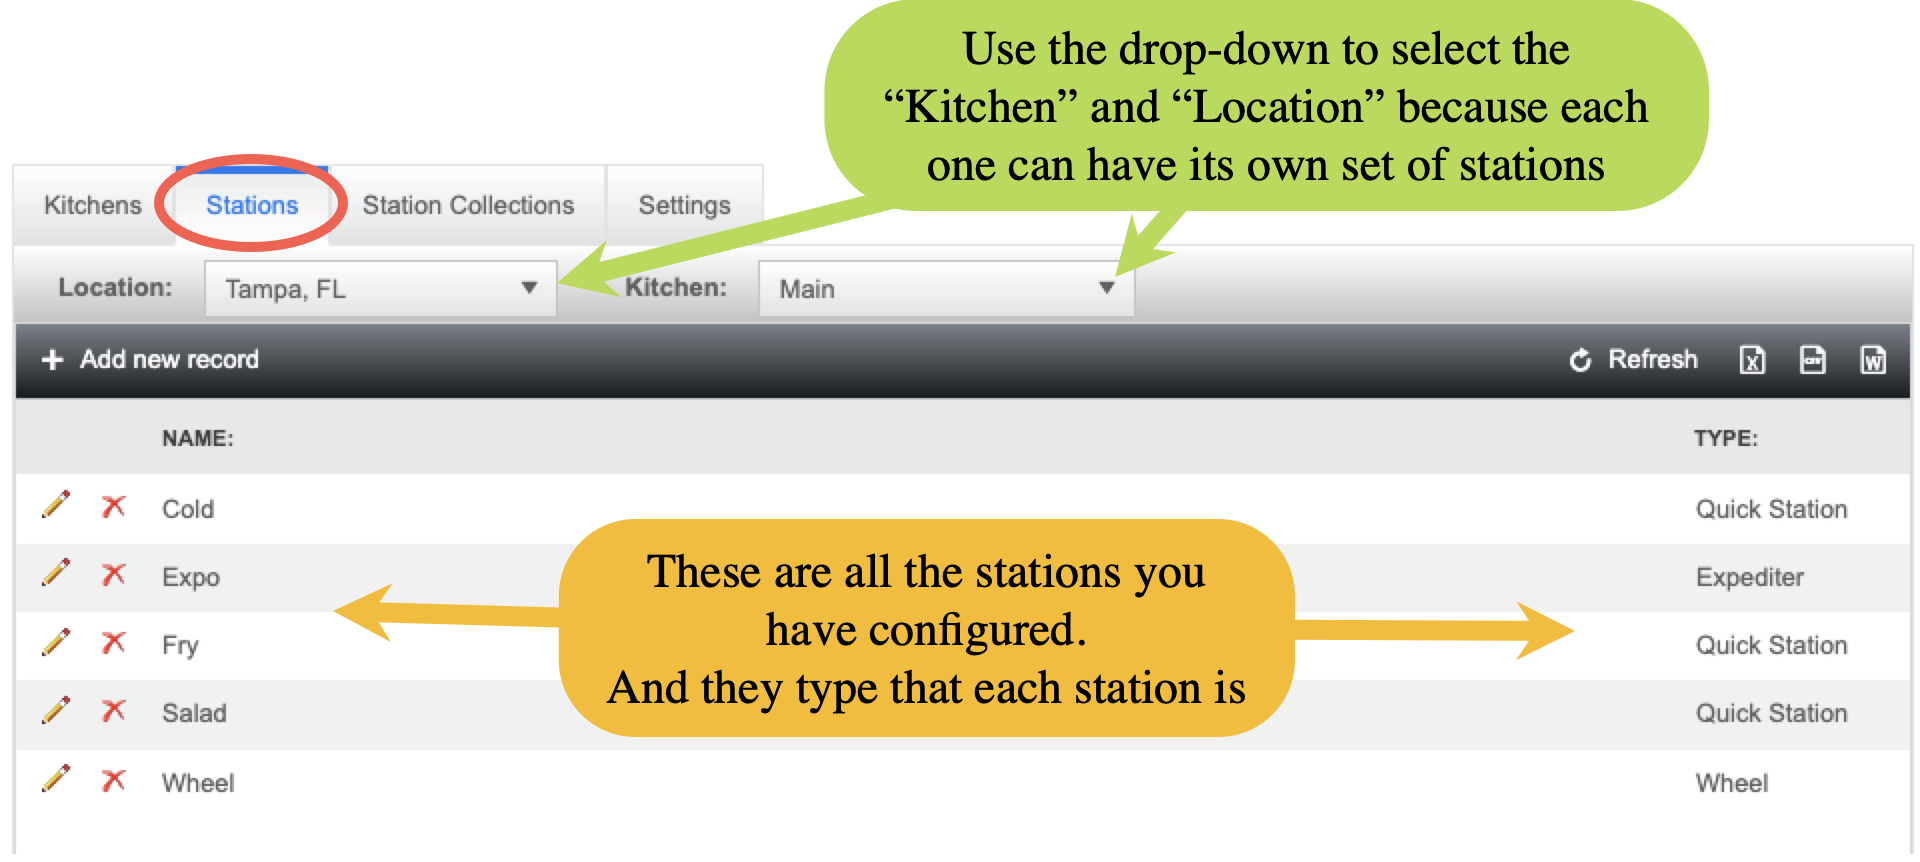
Station settings
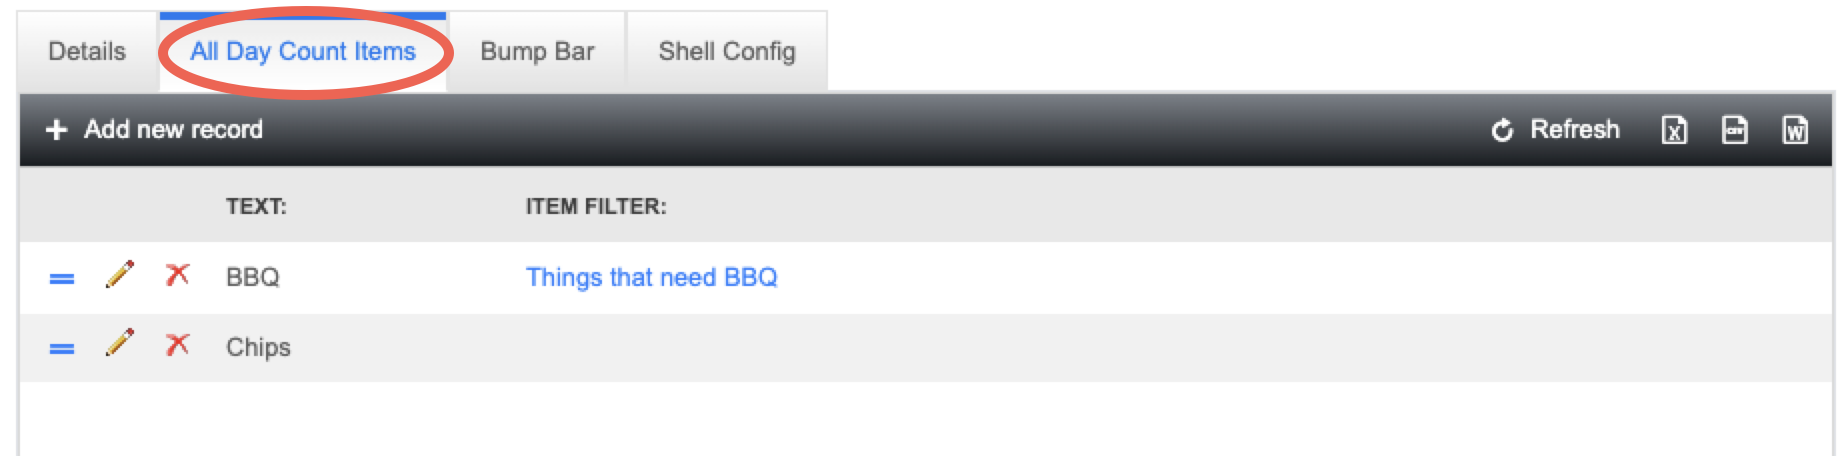
All Day counts
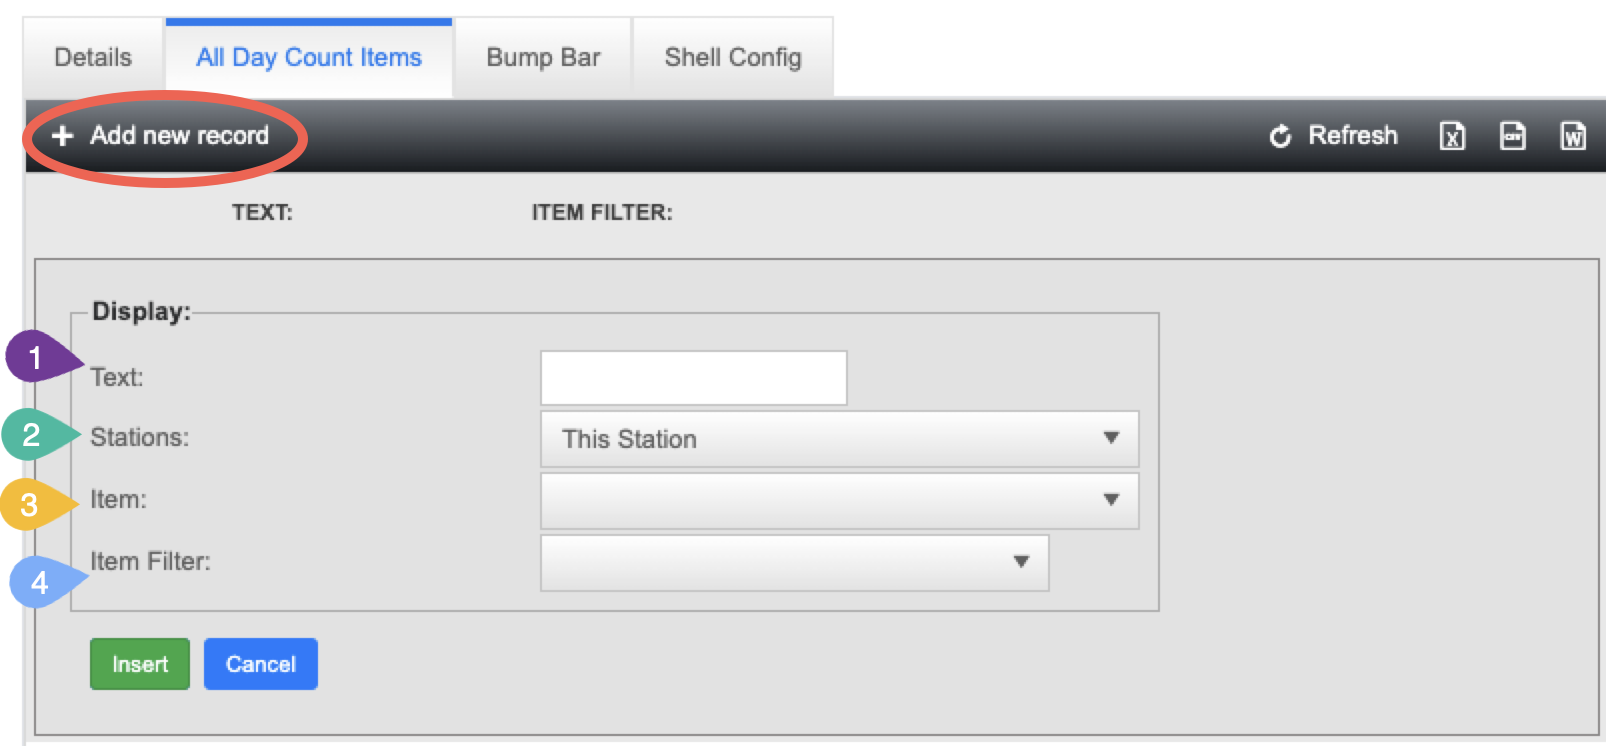
- Text:
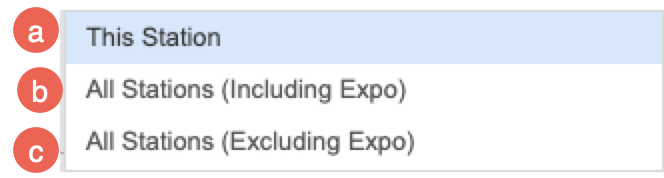
- Stations:

- This Station
- All Stations (Including Expo)
- All Stations (Excluding Expo)
- Item:
- Item Filter:
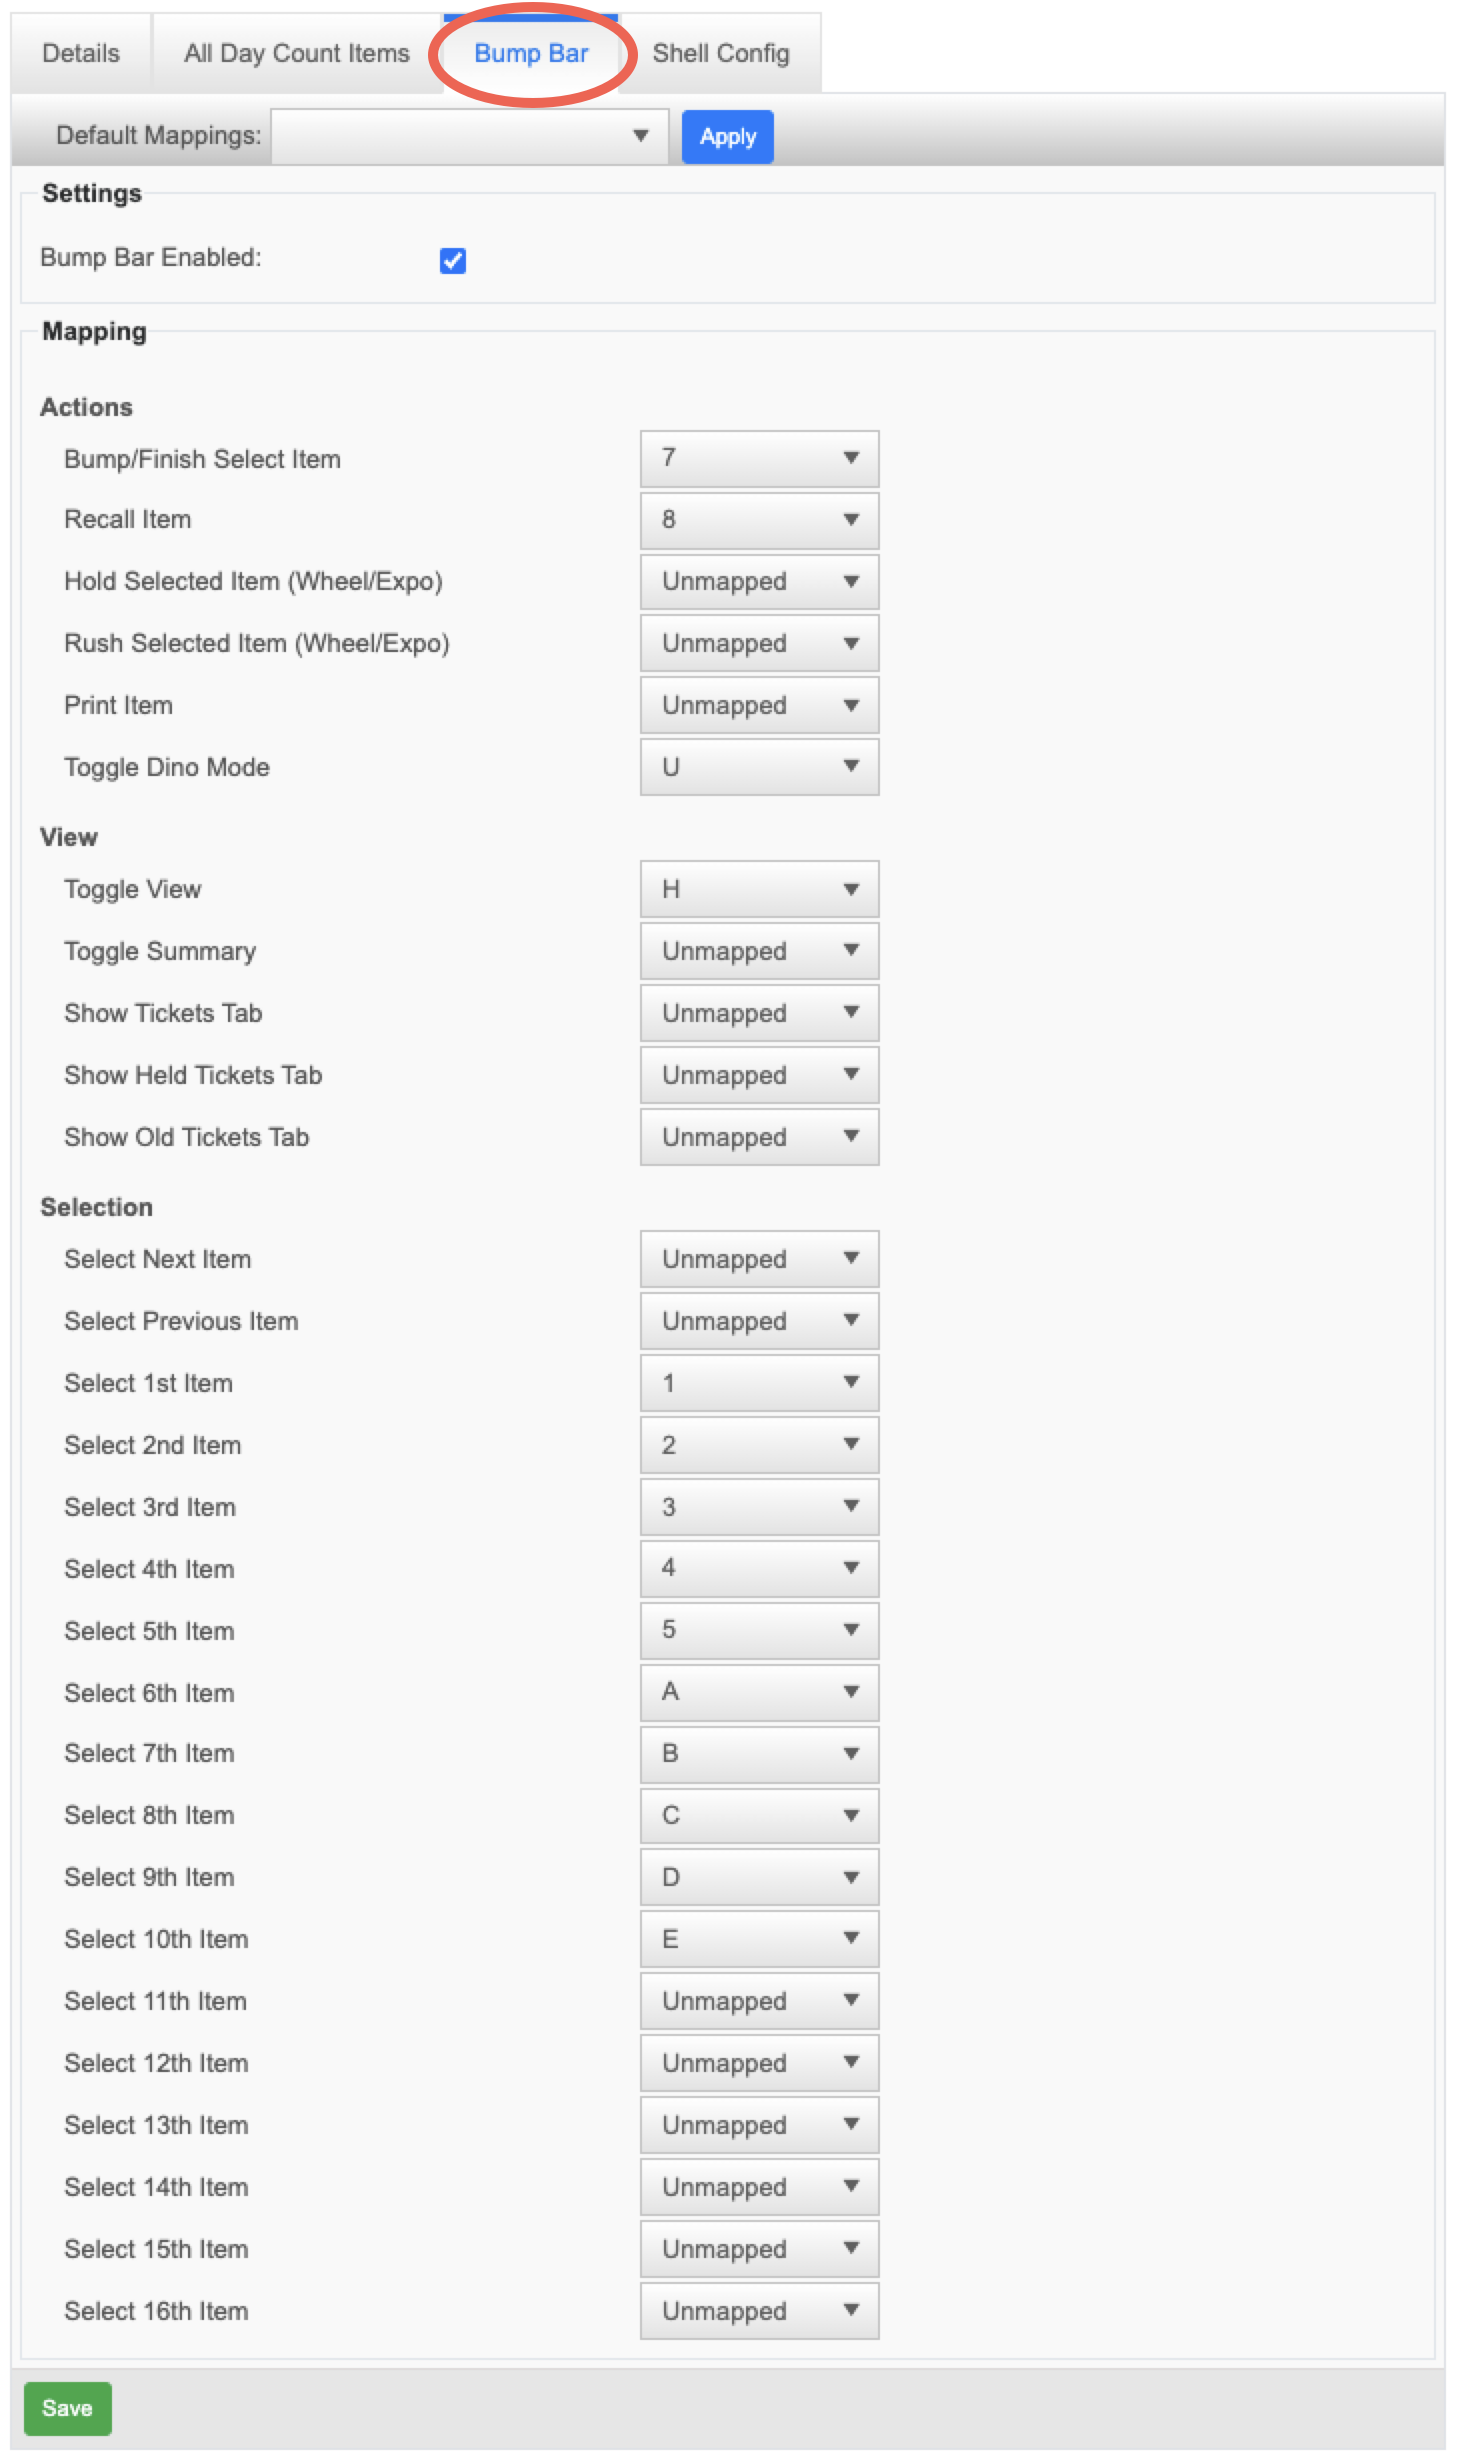
Bump Bar
Station Collections
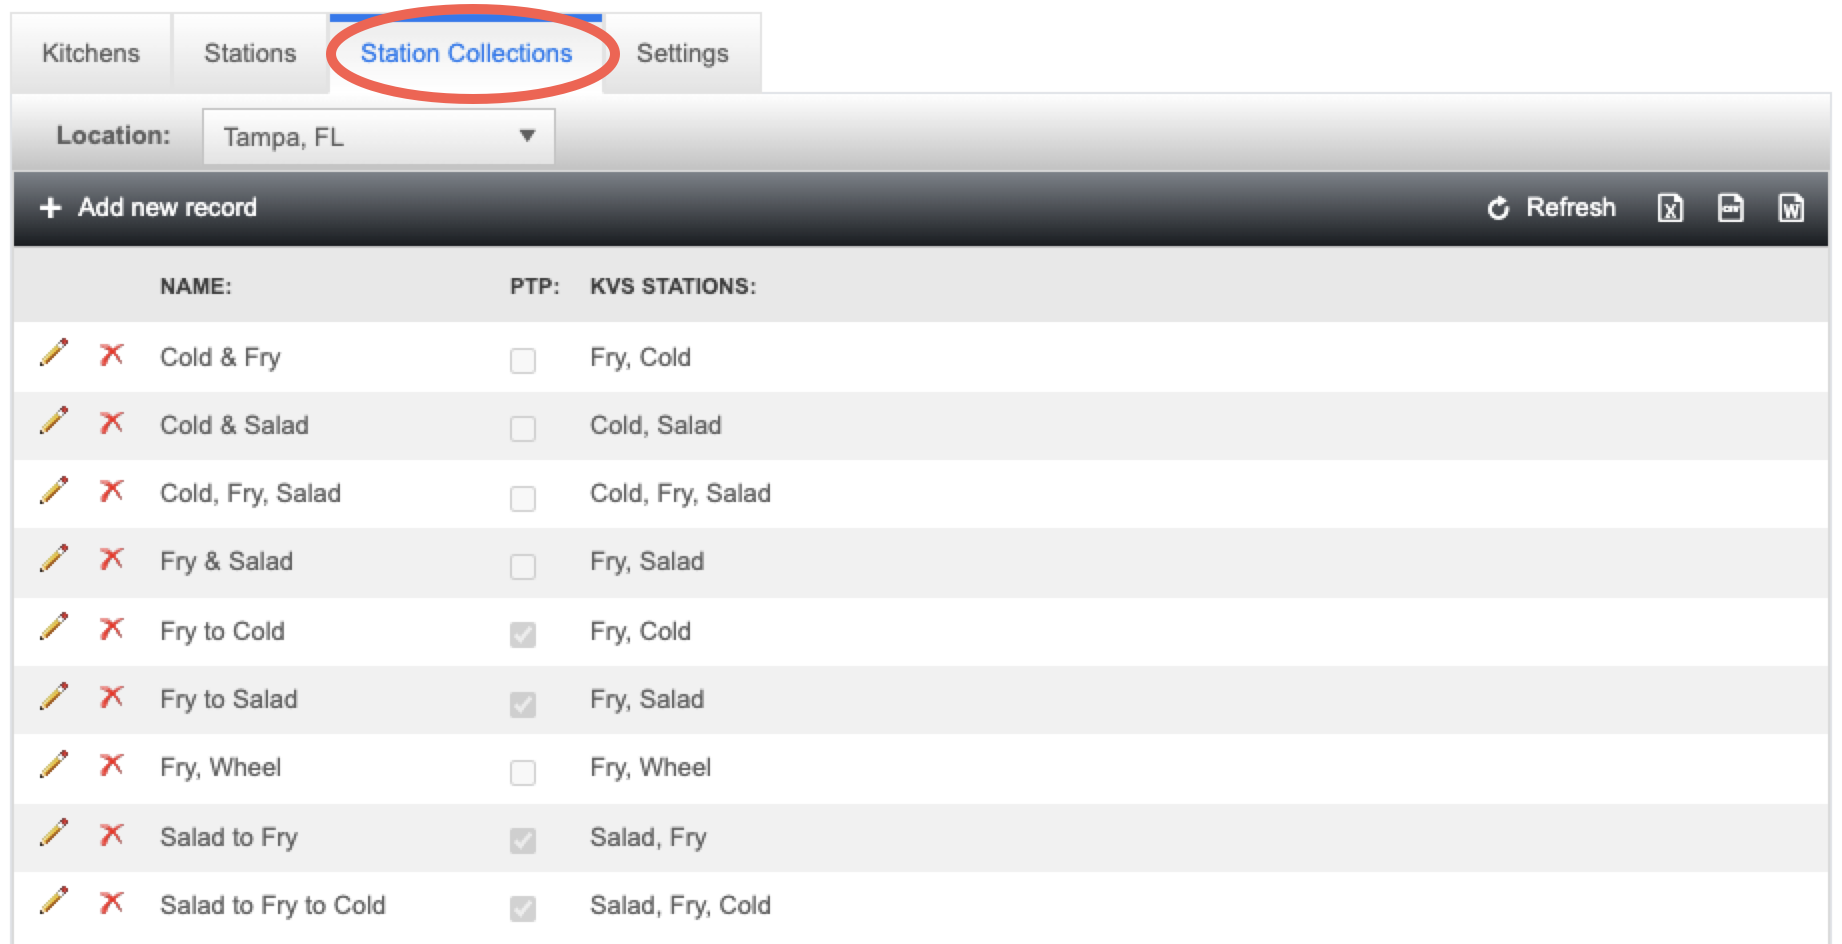
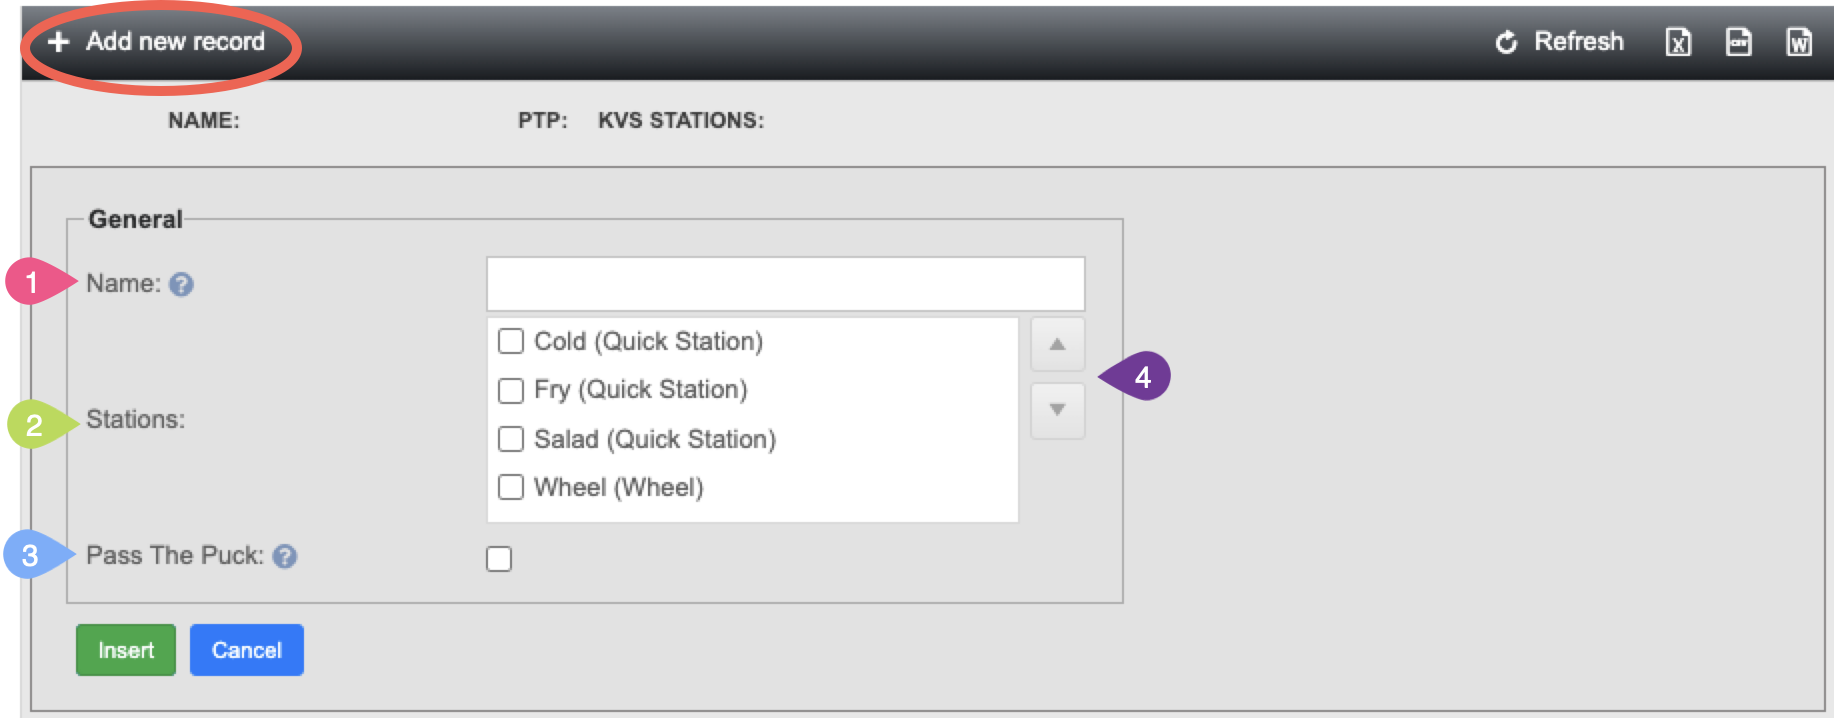
- Name:
- Stations:
- Pass The Puck:
- Arrows:
Step 3 - Set steering on the item
How to set steering on an item
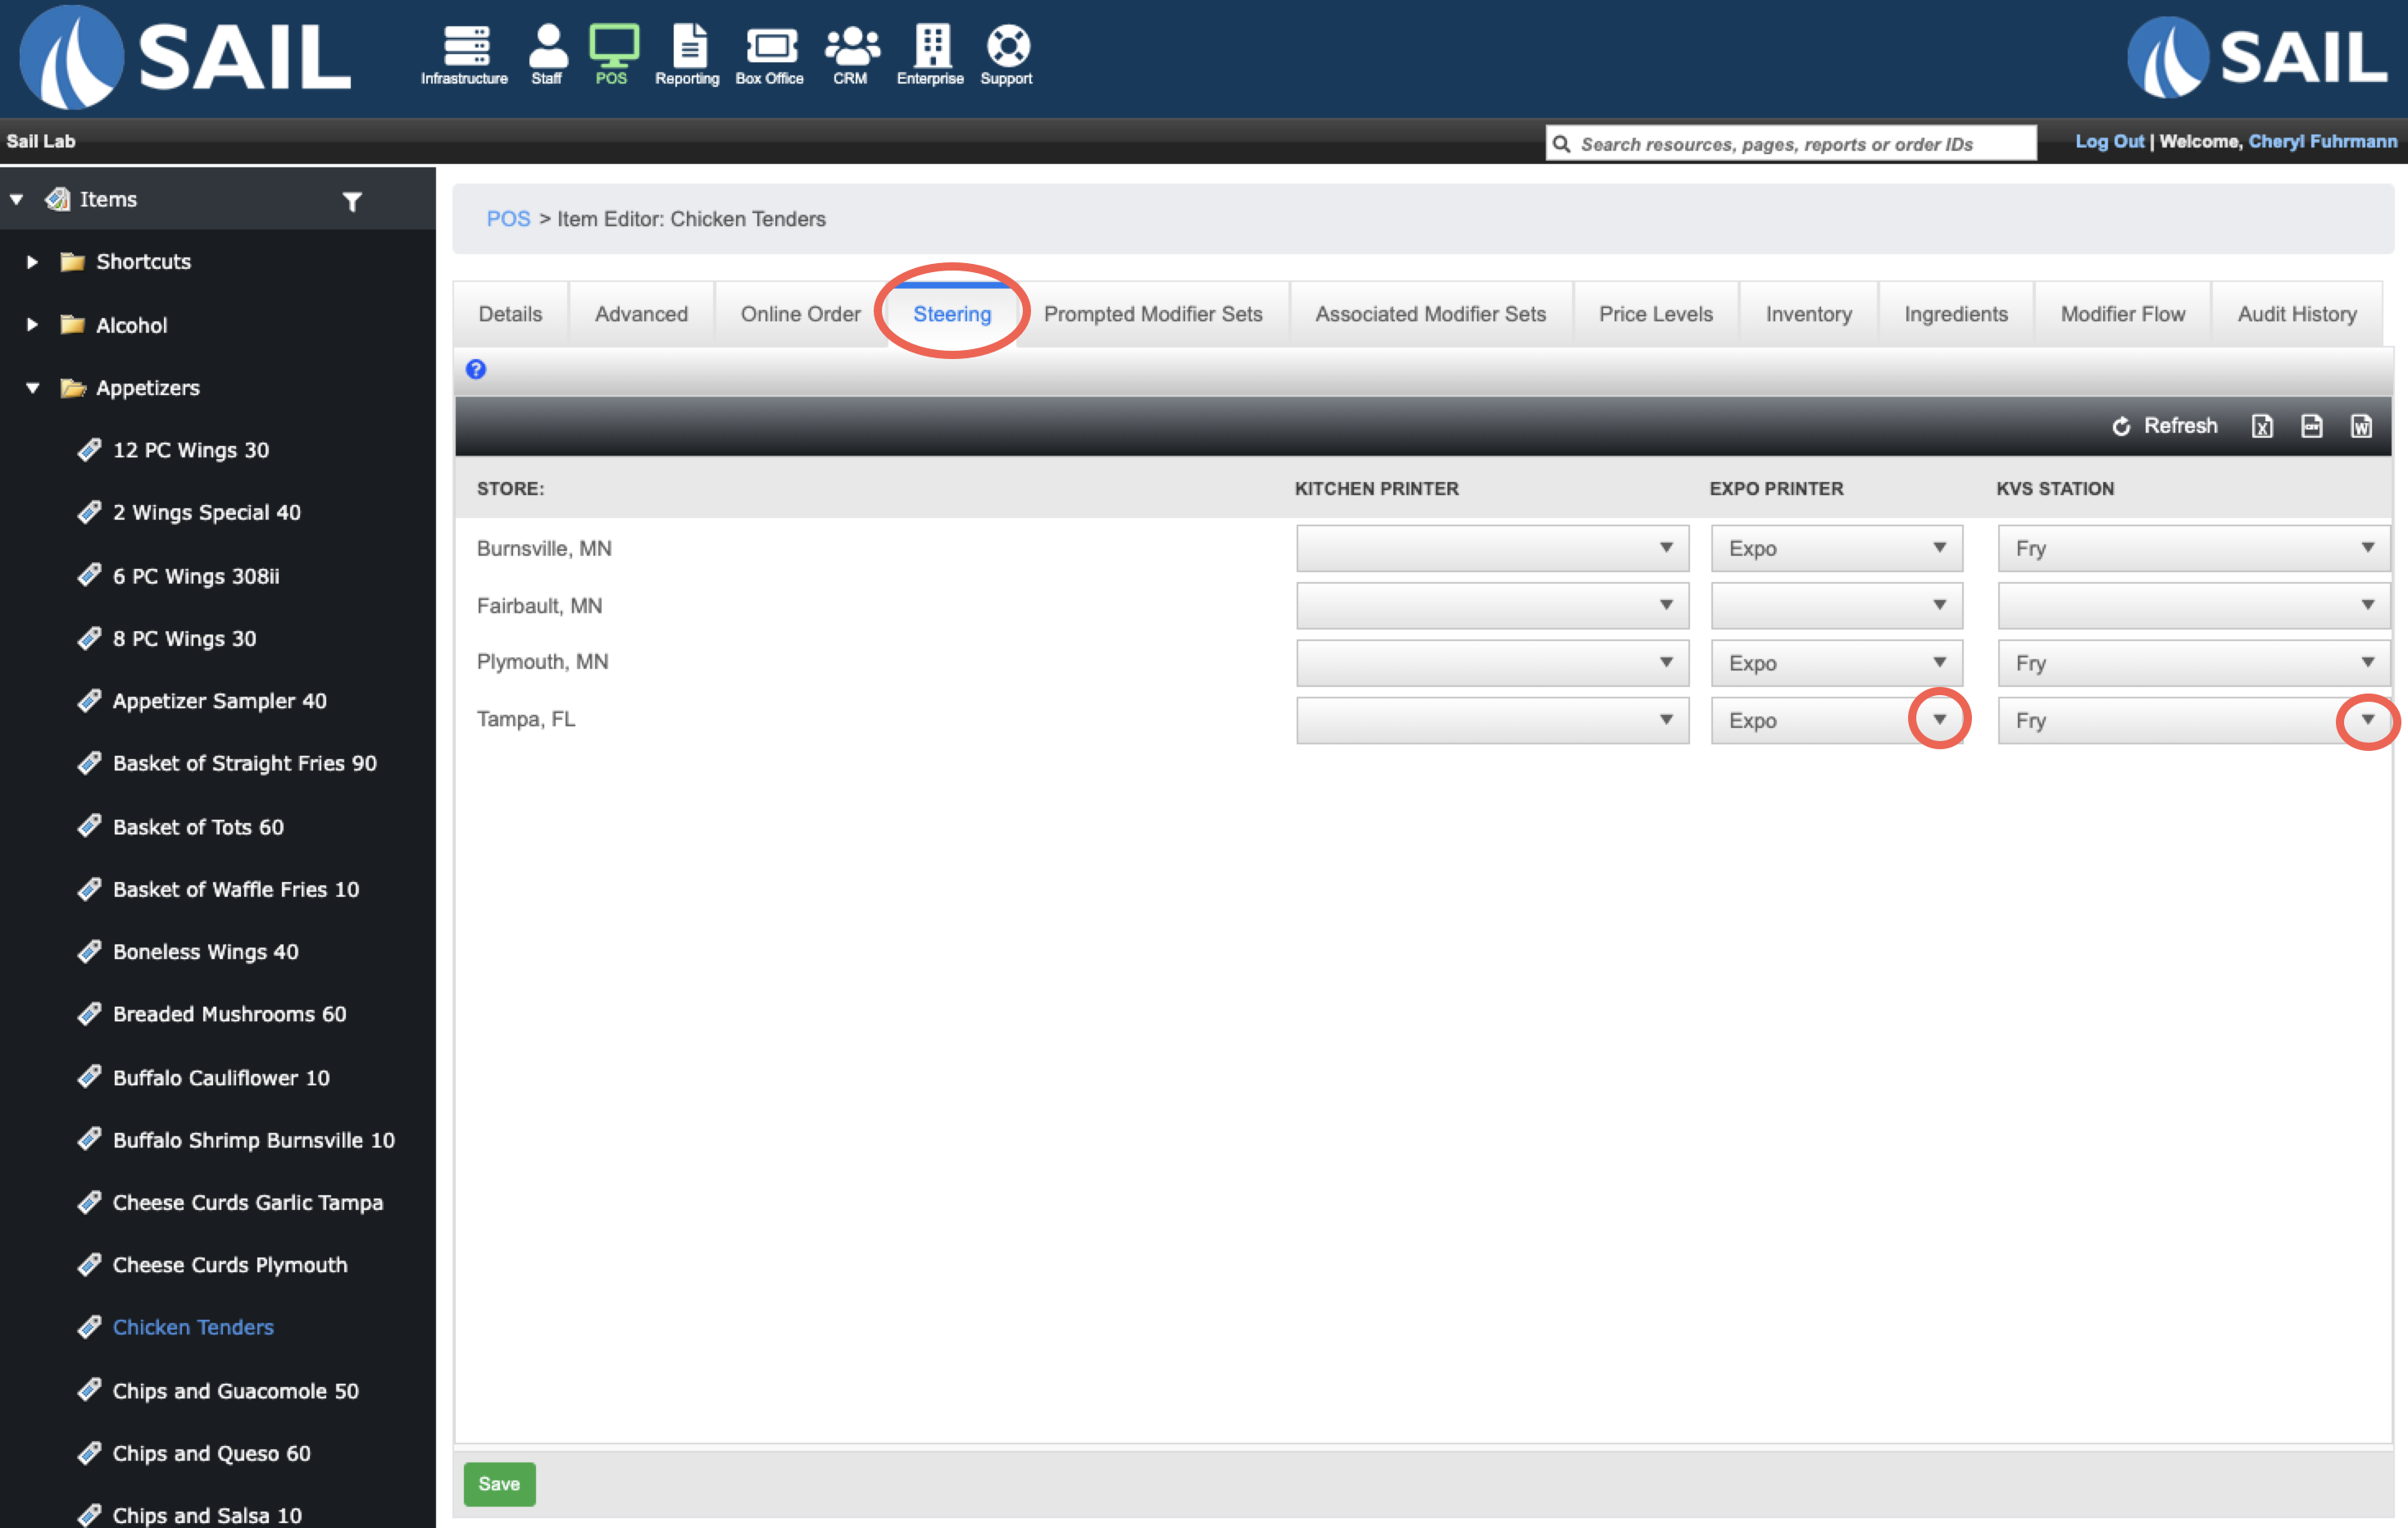
Settings on the Advanced Tab of an item
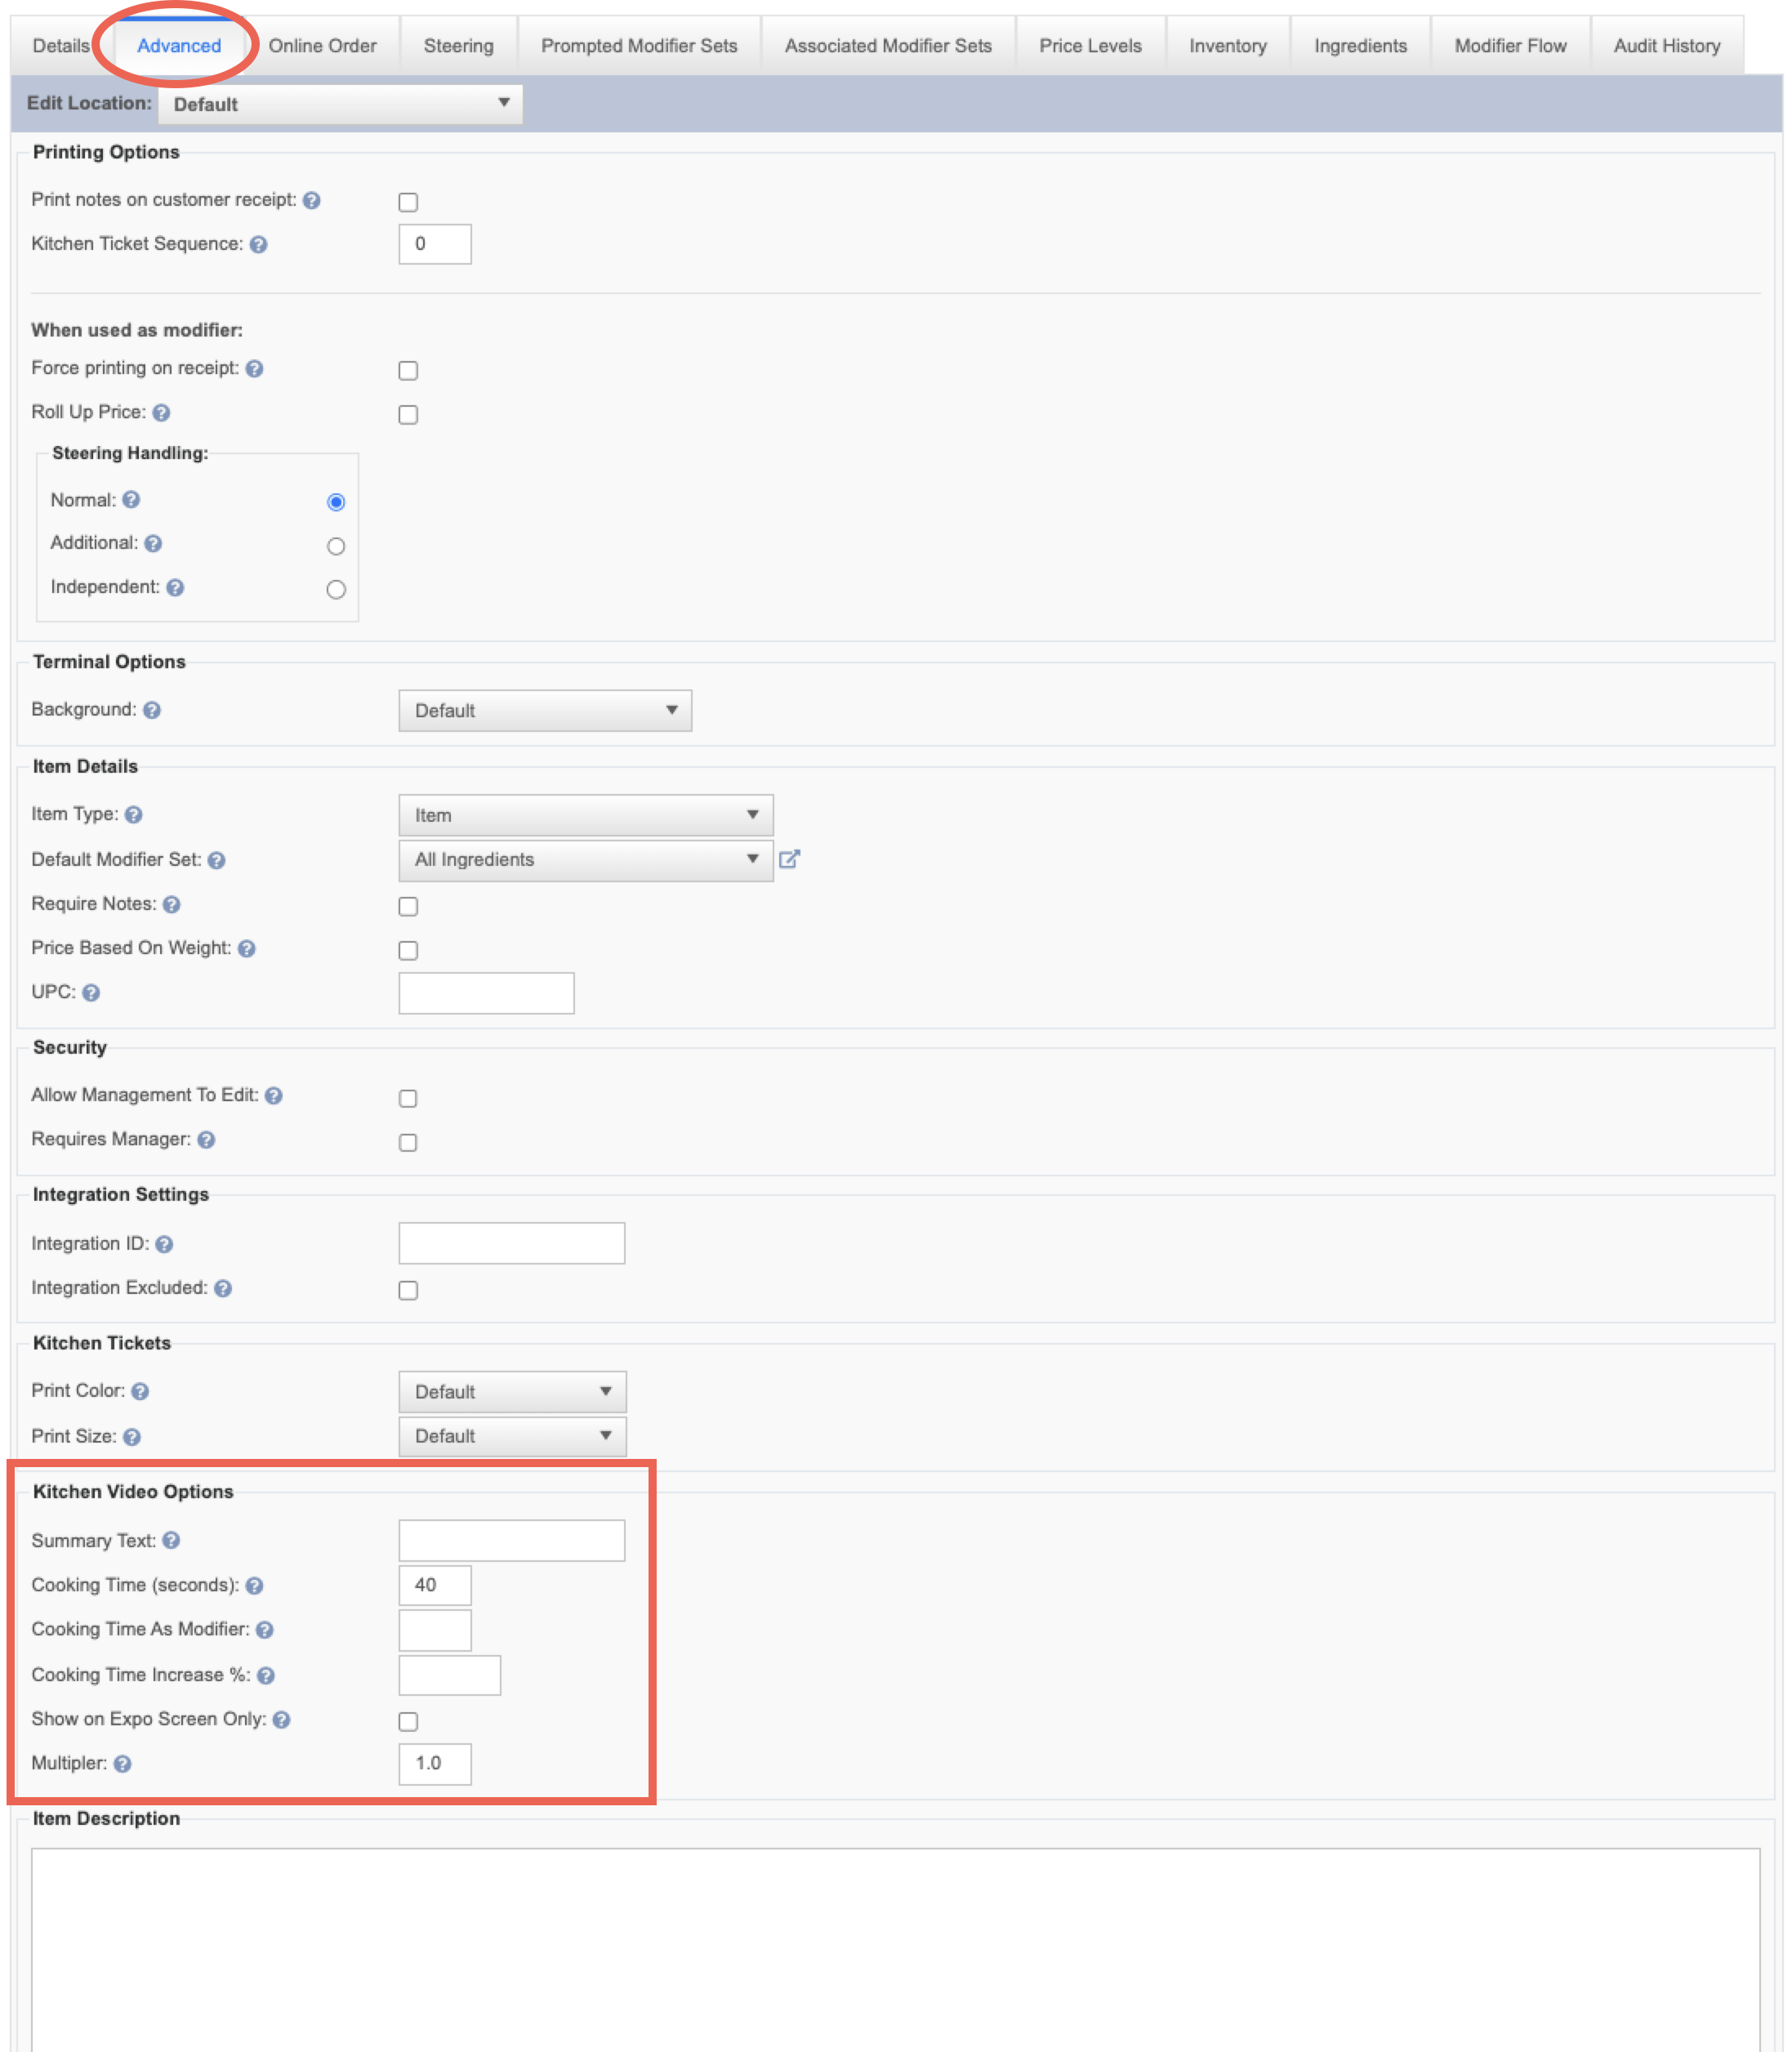

- Summary Text:
- Cooking Time (Seconds):
- Cooking Time As Modifier:
- Cooking Time Increases %:
- Show on Expo Screen Only:
- Multipler: