
How to make a Menu Item
There are two ways to create an item: start from scratch, or duplicate one that already exists. Starting from new gives you a blank item with nothing filled in, while duplicating starts from an existing item's settings and lets you choose exactly which parts carry over to the copy.
Making a New Item
- Log into Backoffice --> POS -->
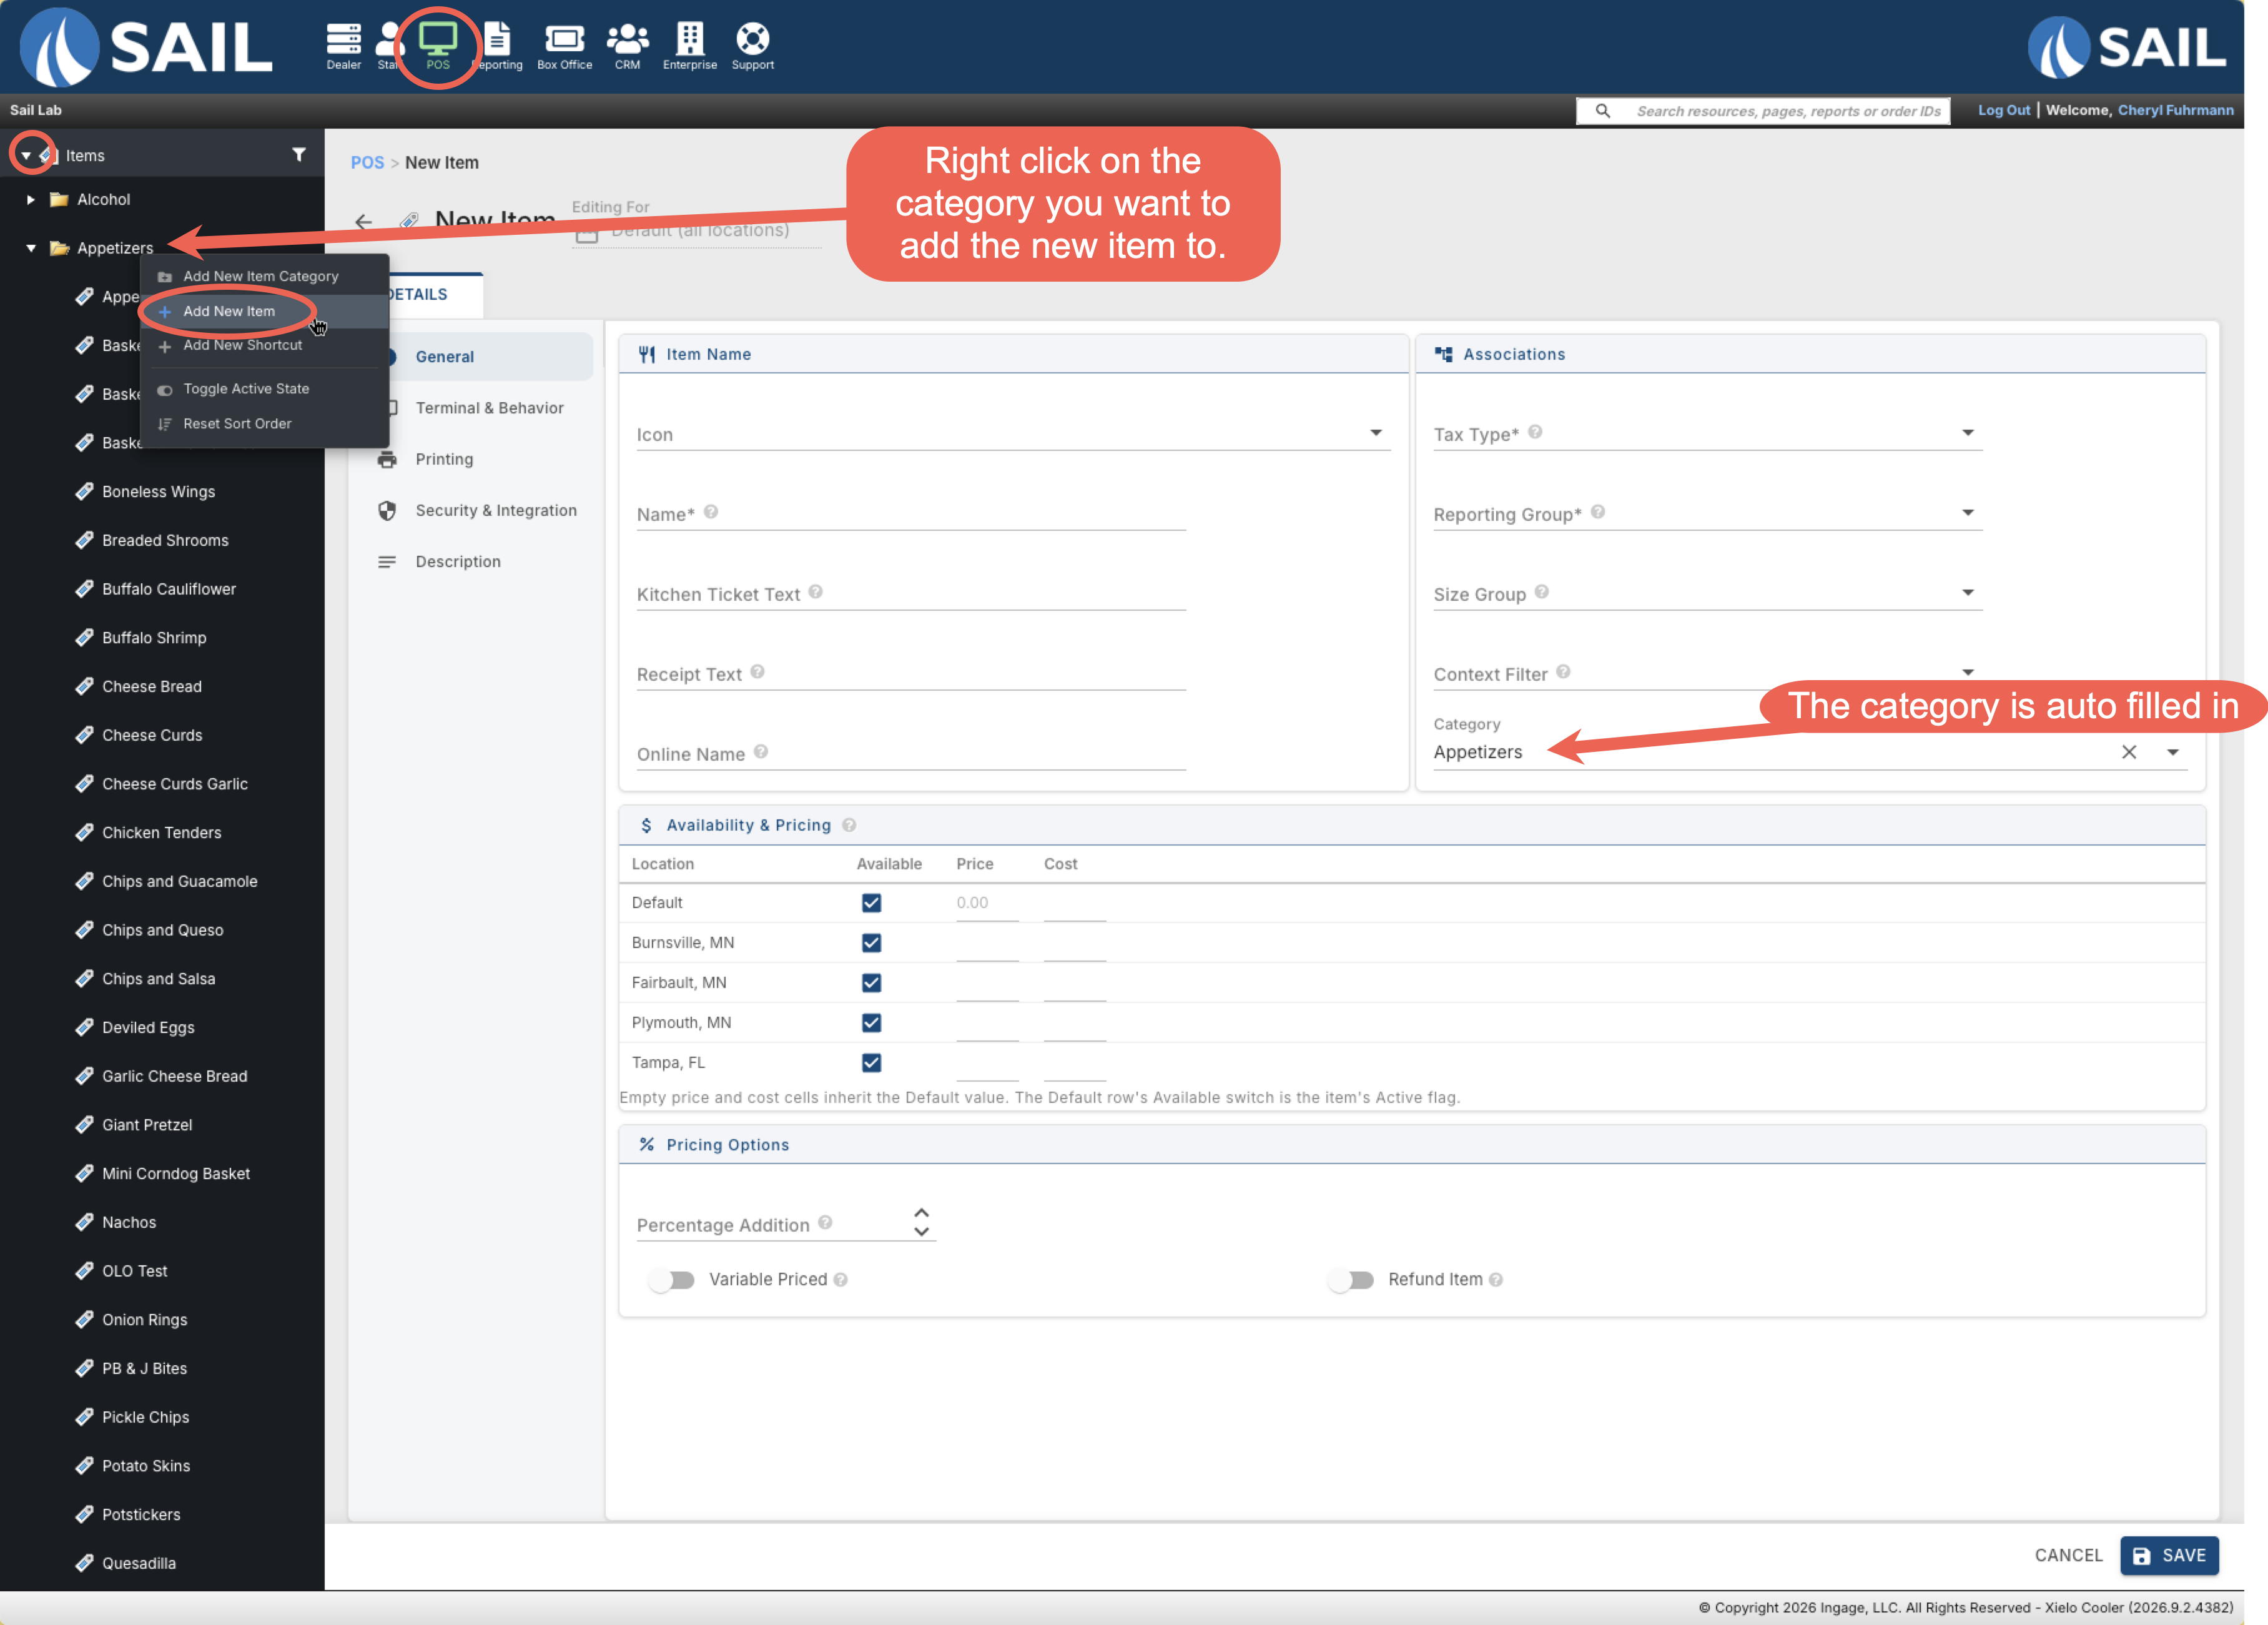
- In the item tree, right-click the category the item belongs to and choose Add New Item. The category is automatically filled in for you.
- A page will appear for you to fill in the detail of you new menu item. The item will not be created until this page has been completed and saved.
Jump to the Configuring a new item for next steps
Duplicating an Item
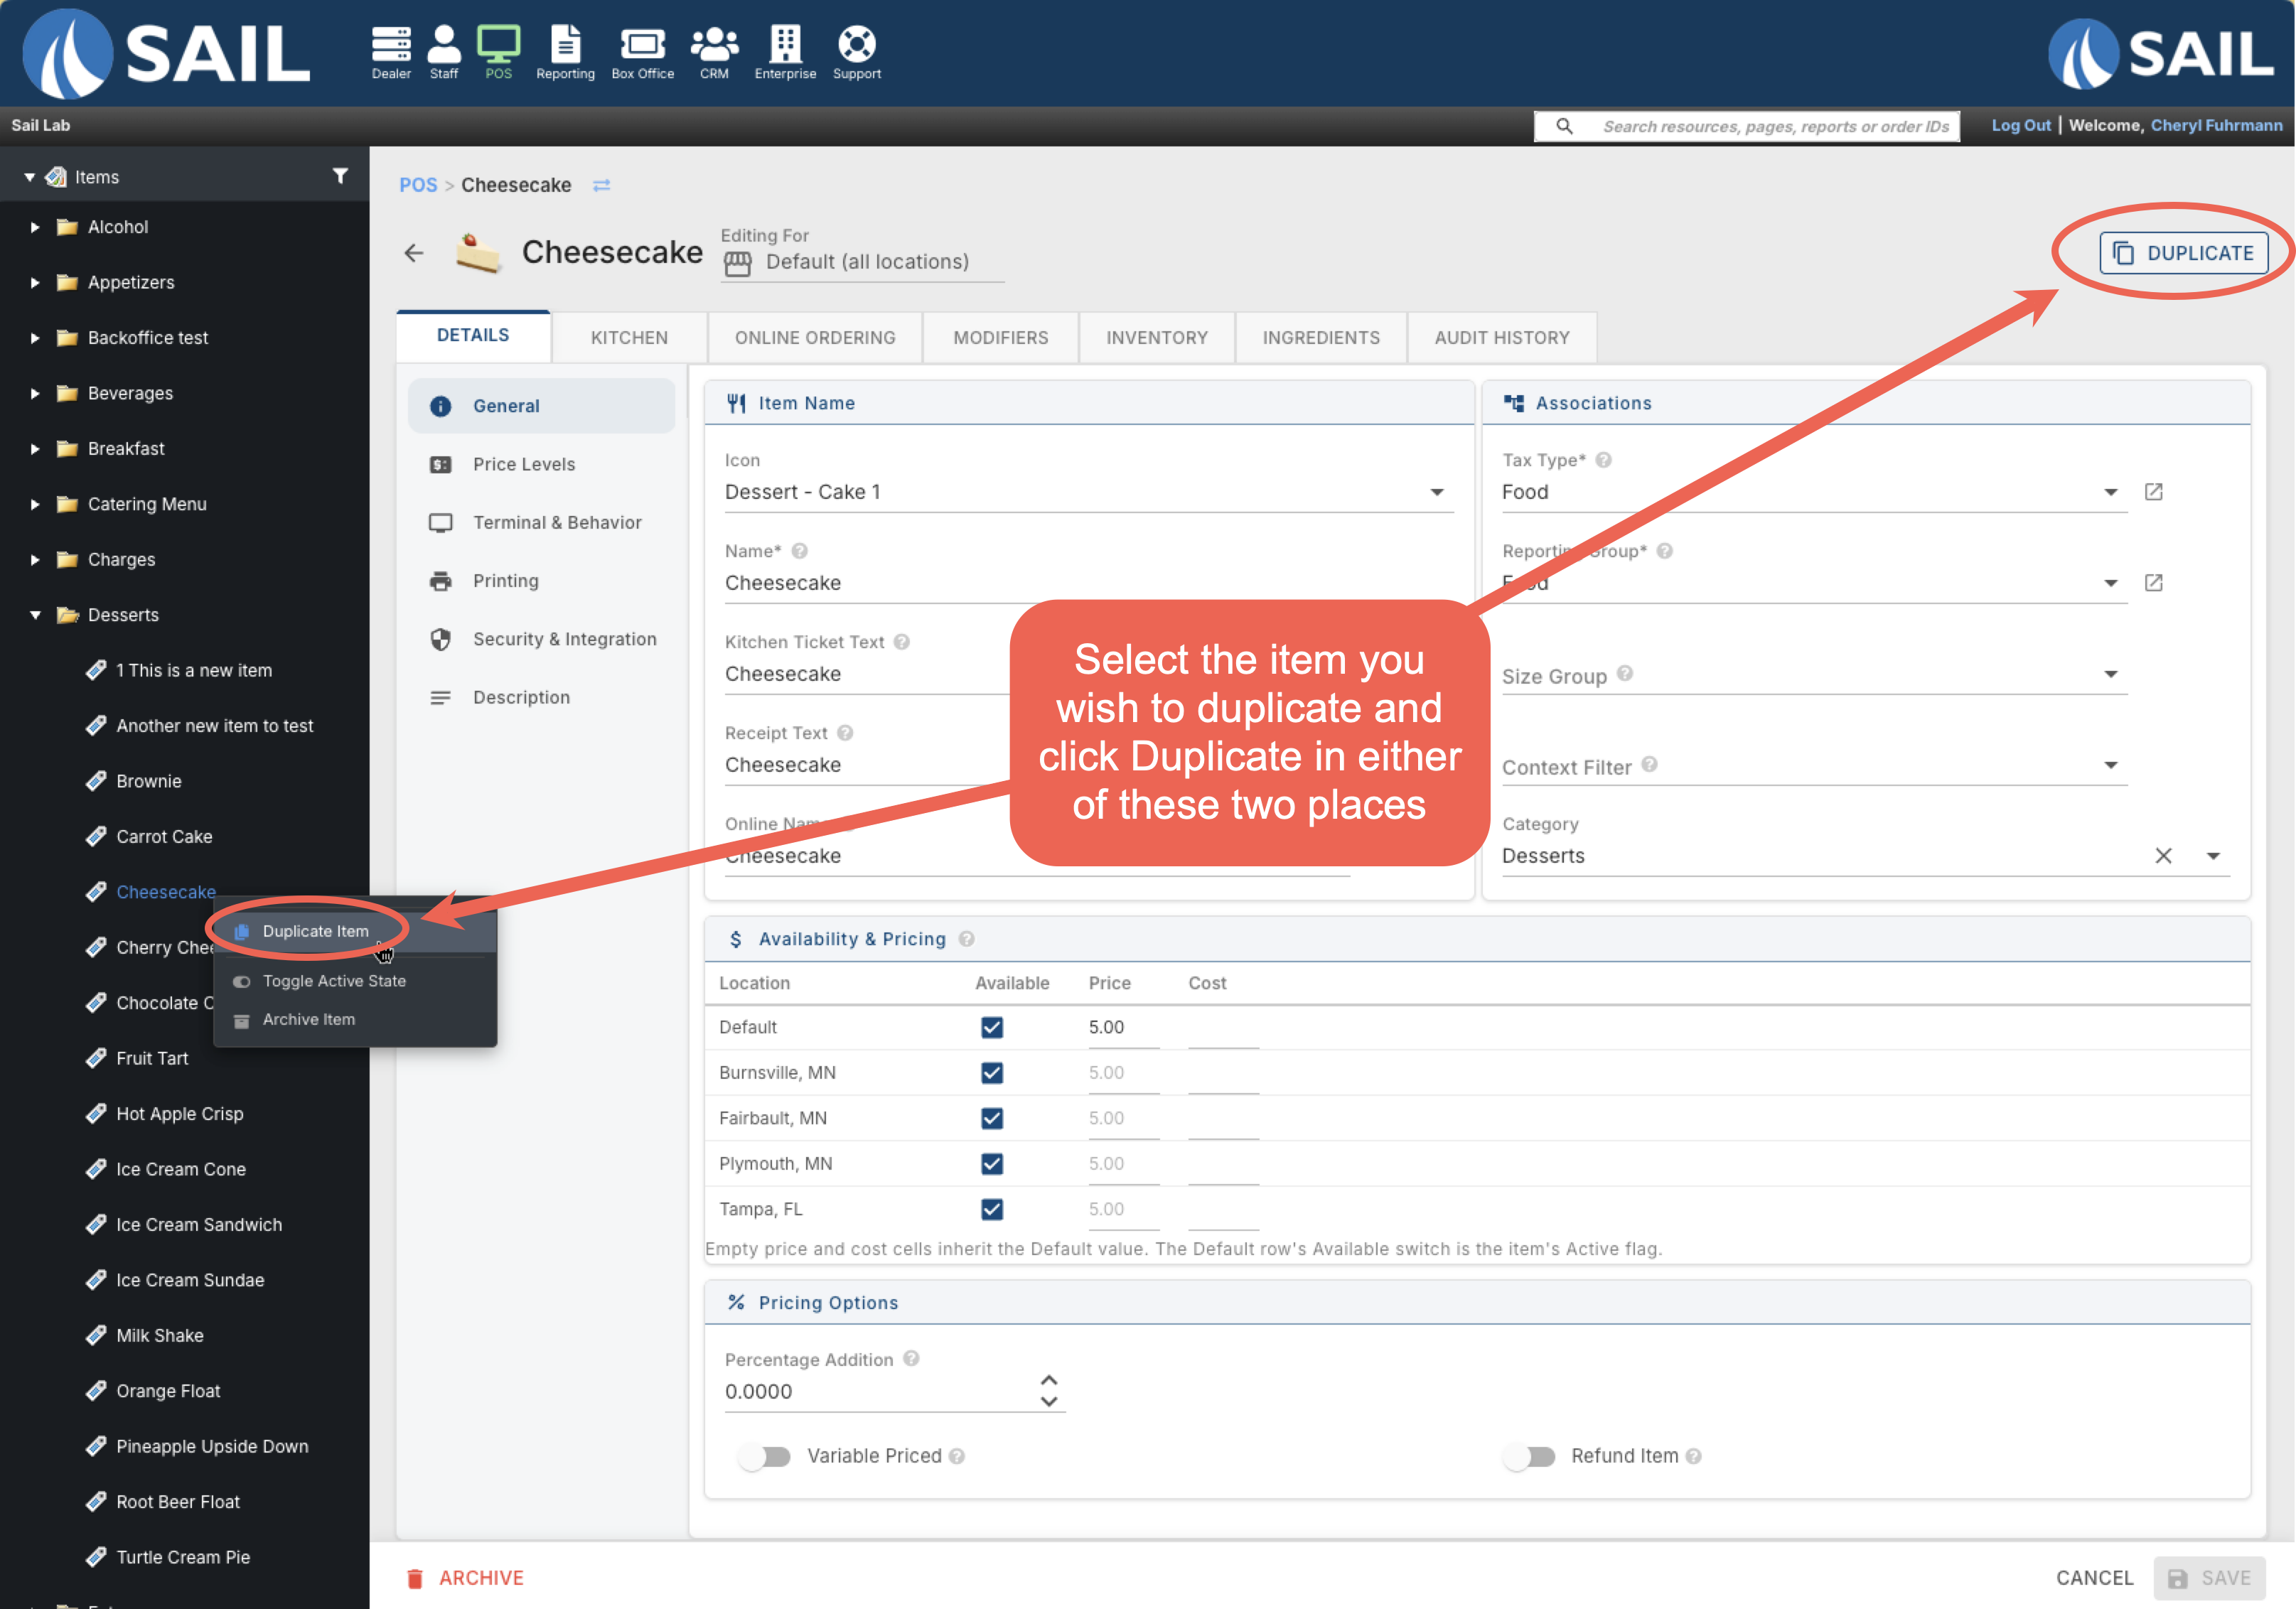
OpenDuplicating a similar item, when one exists, is usually faster than filling out every field by hand.
There are two ways to duplicate an item. Select the item youon wantthe totree, copythen either right click on the item and select Duplicate Item in the pop-up or click Duplicate at the top right of the page. Next you will get a dialog box to choose exactly which parts you want to carry over to the copy.
In the dialog, enter a New Item Name and New Item Price, then use the toggles under Copy to the New Item — Location Availability, Steering, Prompted Modifier Sets, Associated Modifier Sets, Price Levels, and Ingredients — to choose which of the original item's settings carry over to the copy. Click Create New Item when you're done.
Duplicating a similar item, when one exists, is usually faster than filling out every field by hand.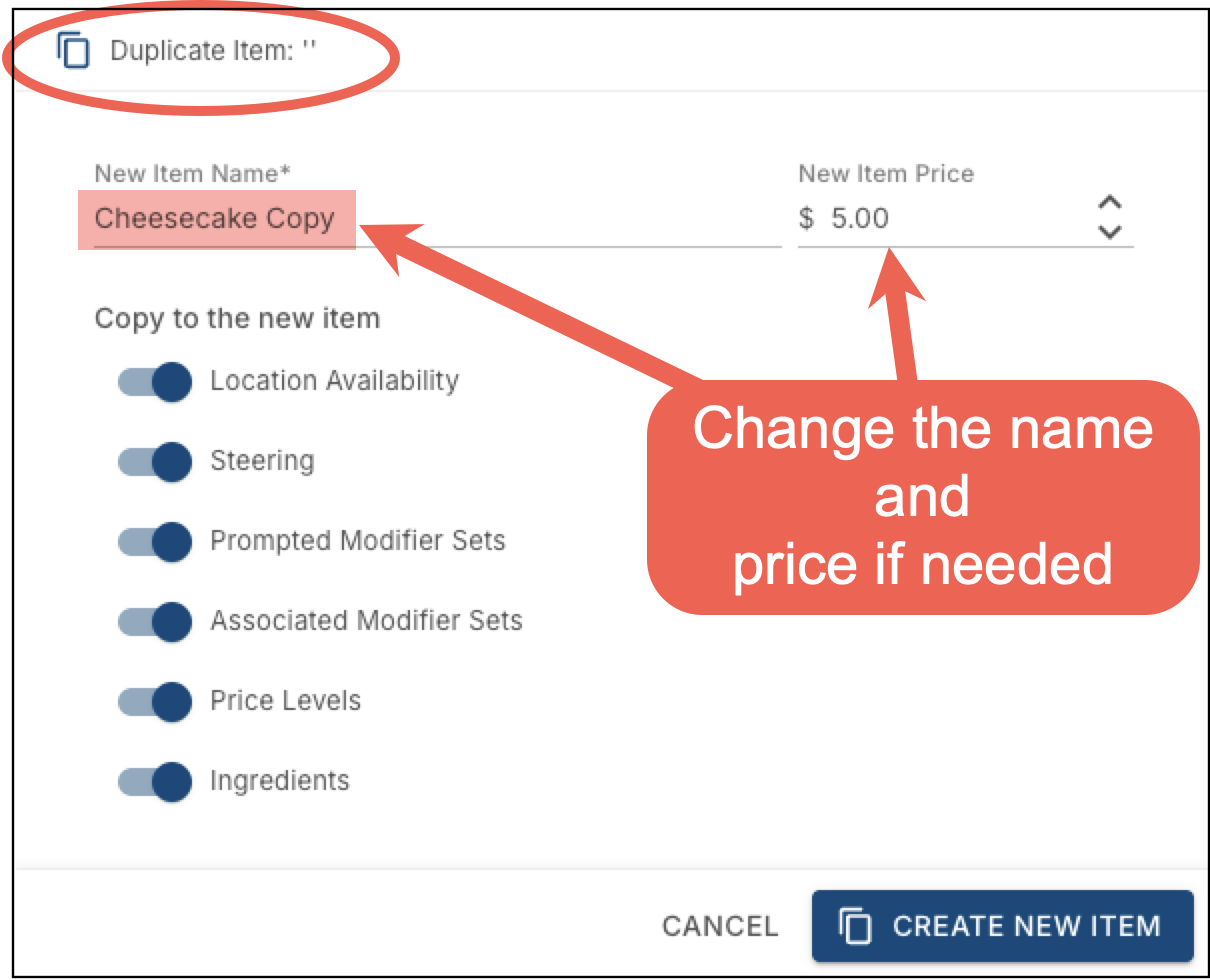
Configuring a New Item
-
Go toDetails > General. UnderItemName, enter the item's Name, then fill in Kitchen Ticket Text and Receipt Text — these are what print on the ticket and on the receipt. If the item sells online, also set the Online Name. Pick an Icon if you'd like one to show on the terminal button.Underneath, in Associations, choose the Tax Type and Reporting Group — both are required — and set a Size Group or Context Filter if this item uses either. Confirm the Category is correct.Name -
ClickSave. Until you do, none of the other tabs are available — saving is what actually creates the item.Associations -
Back onDetails > General, scroll down toAvailability &Pricing. Set the Price and Cost on the Default row, then check Available for every store that should sell it. If a store's price should differ from the default, enter it directly in that store's row; leave it blank and it will use the default price. If the item comes in sizes, its size prices show as extra columns in the same grid, to the right of Price.Pricing - Pricing
Go toKitchen > Steering. For each store, choose the Prep Printer, Expo Printer, and KDS station that should receive this item. If you only have one location, you'll just see one row. Go toModifiers > Prompted Sets. Click+ New Prompted Modifier Setfor each modifier set you want the register to prompt for when this item is ordered — a sauce choice, a size, an add-on. Give it a Title (this is what shows on the terminal), choose the Modifier Set from the dropdown, and set Min Quantity and Max Quantity for how many choices a customer can make. Set Min Quantity to 0 if the customer can skip this modifier set entirely. If some of the choices should be included in the price, use Qty Included In Price and Included Price Override. Click Save to add it to the item.If this item sells online, go toOnline Ordering. Under Online Options, turn on Available Online, and Available to 3rd-Party (DSP) if delivery apps carry it. Turn on Allow Special Instructions if customers should be able to leave a note. Under Online Image, upload the Online Ordering Image. Under Online Description, write the description customers will see.ClickSave.
Setting Up Everything Else
Once the item is saved, more tabs and sub tabs are available:
- Details (Price Levels, Terminal & Behavior, Printing, Security & Integration, Description)
- Kitchen (steering, kitchen tickets, and kitchen display settings)
- Online Ordering
- Modifiers (prompted and associated modifier sets, and the modifier flow)
- Inventory
- Ingredients
- Audit History