
How to make a Menu Item
There are two ways to create an item: start from scratch, or duplicate one that already exists. Starting from new gives you a blank item with nothing filled in, while duplicating starts from an existing item's settings and lets you choose exactly which parts carry over to the copy.
Making a New Item
- Log into Backoffice --> POS -->
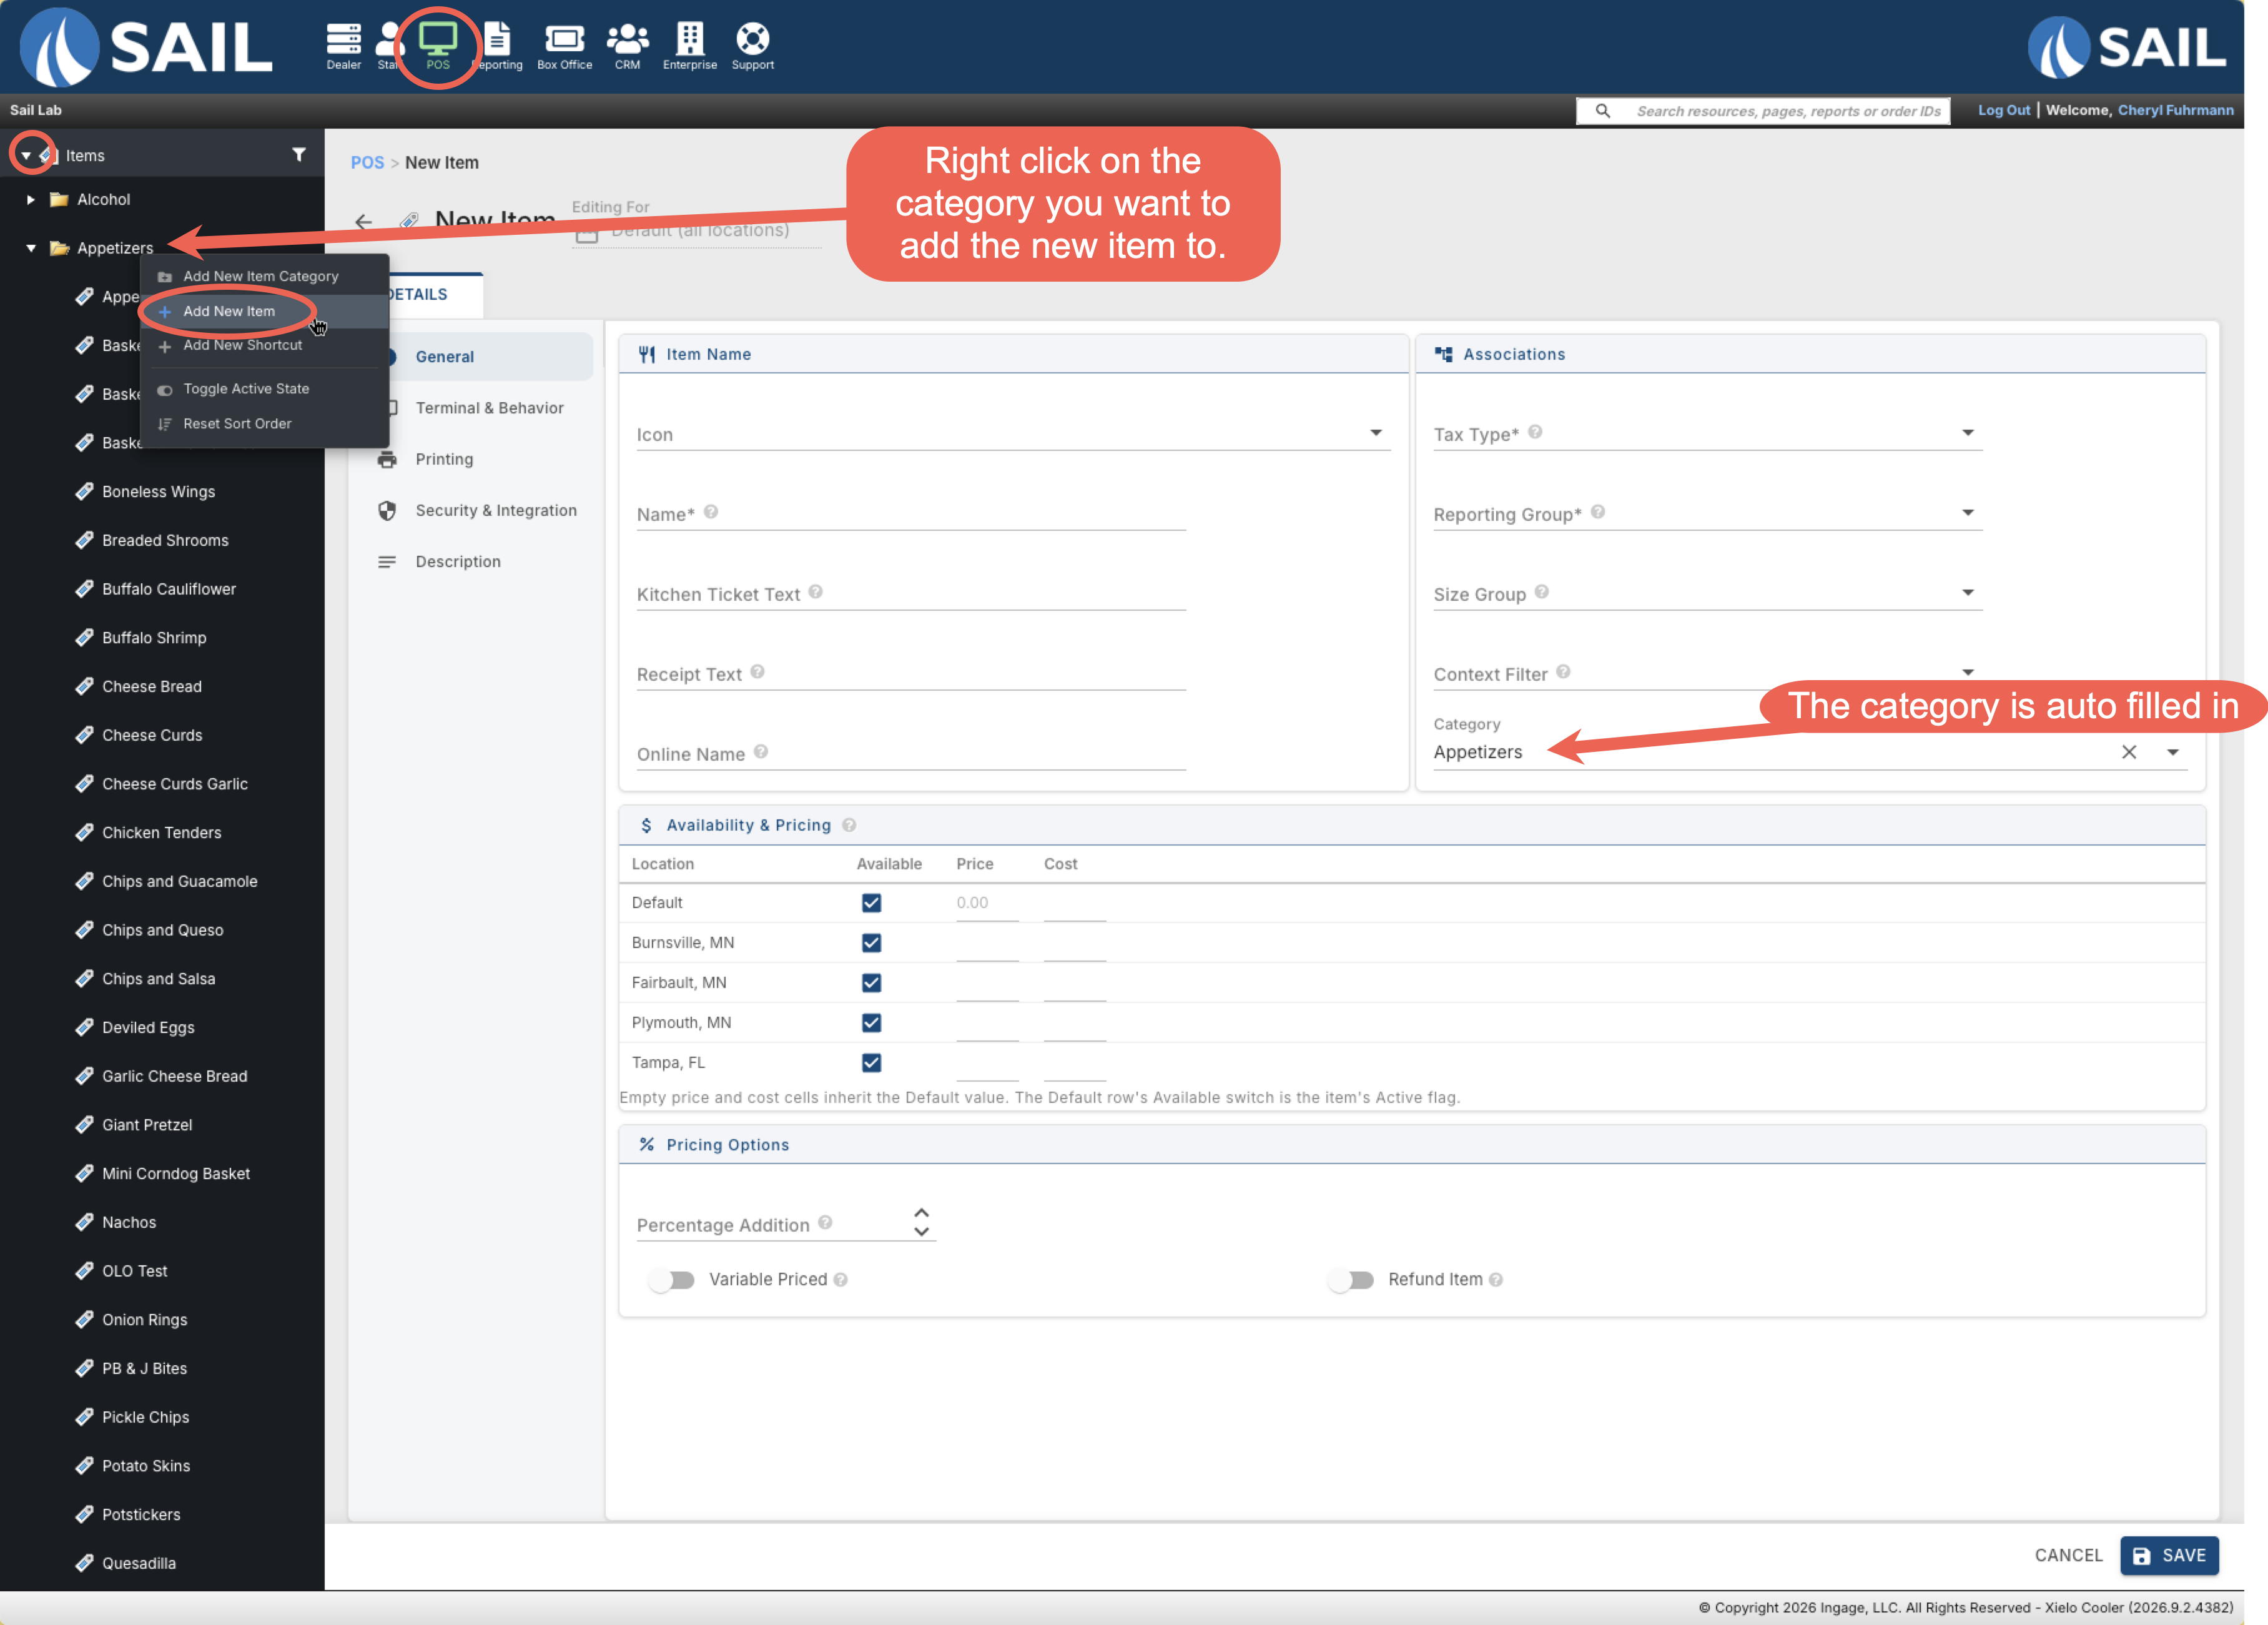
- In the item tree, right-click the category the item belongs to and choose Add New Item. The category is automatically filled in for you.
- A page will appear for you to fill in the detail of you new menu item. The item will not be created until this page has been completed and saved.
Jump to the Configuring a new item for next steps
Duplicating an Item
Duplicating a similar item, when one exists, is usually faster than filling out every field by hand.
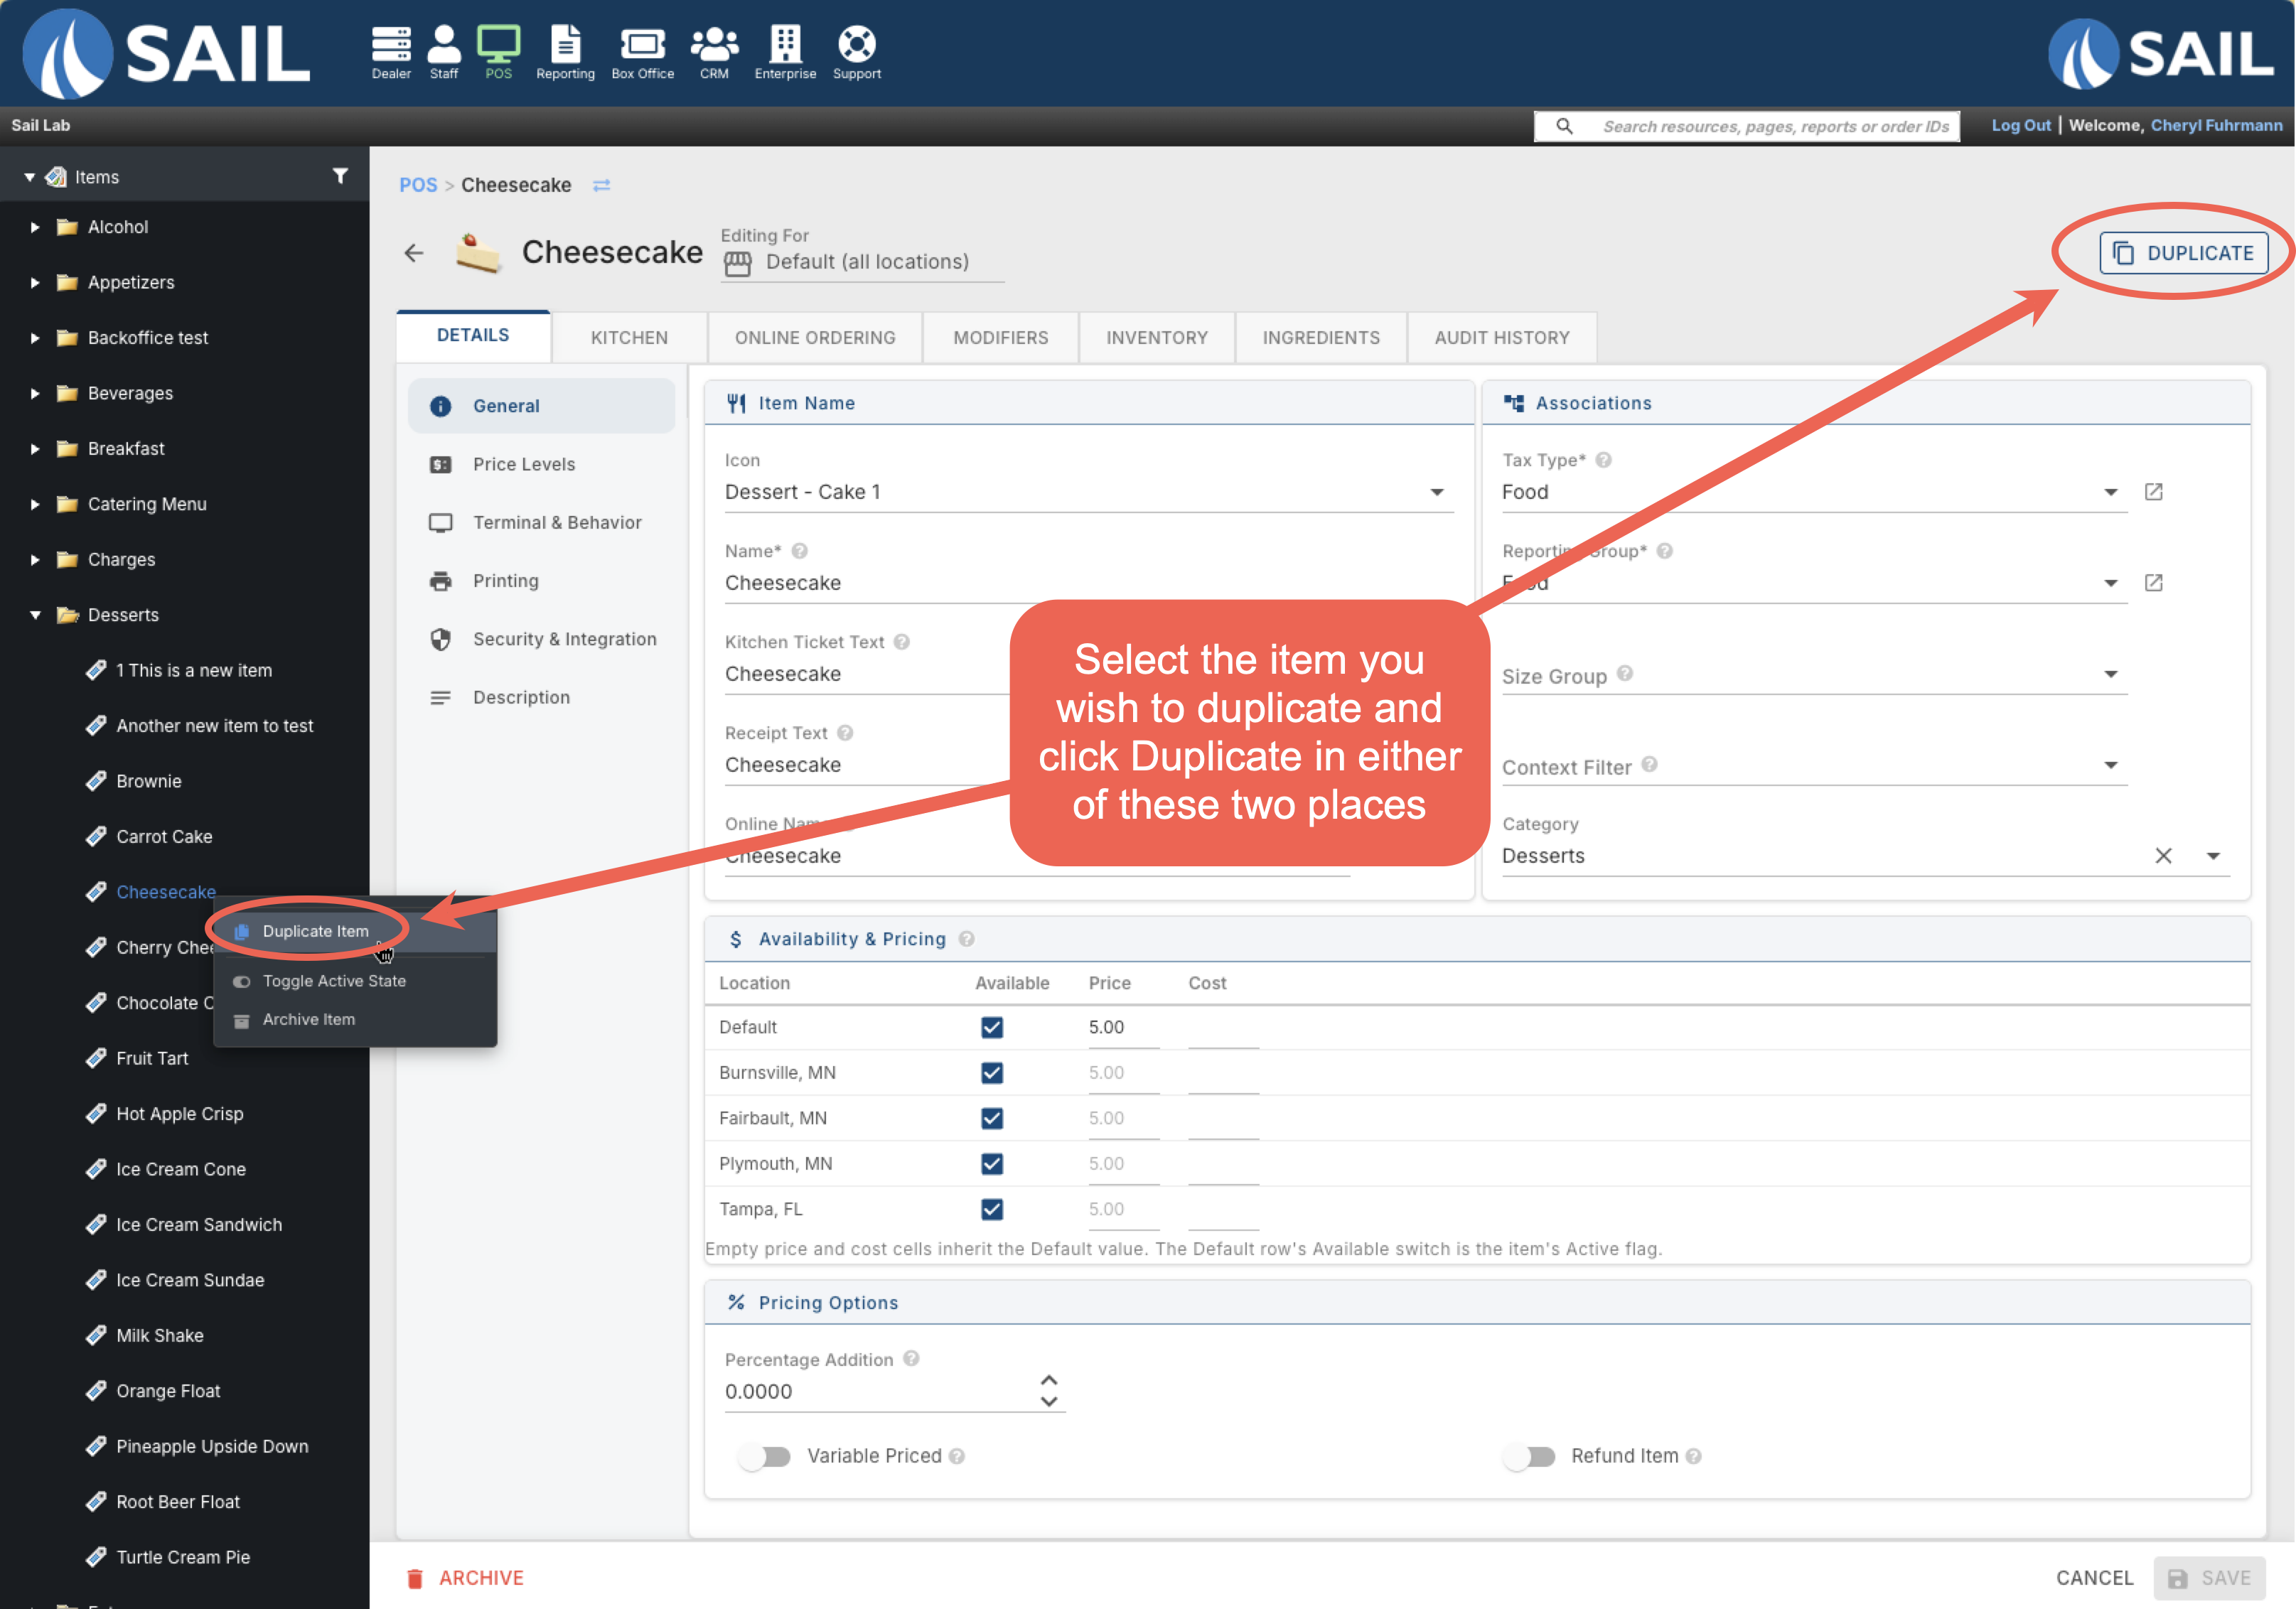
There are two ways to duplicate an item. Select the item on the tree, then either right click on the item and select Duplicate Item in the pop-up or click Duplicate at the top right of the page. Next you will get a dialog box to choose exactly which parts you want to carry over to the copy.
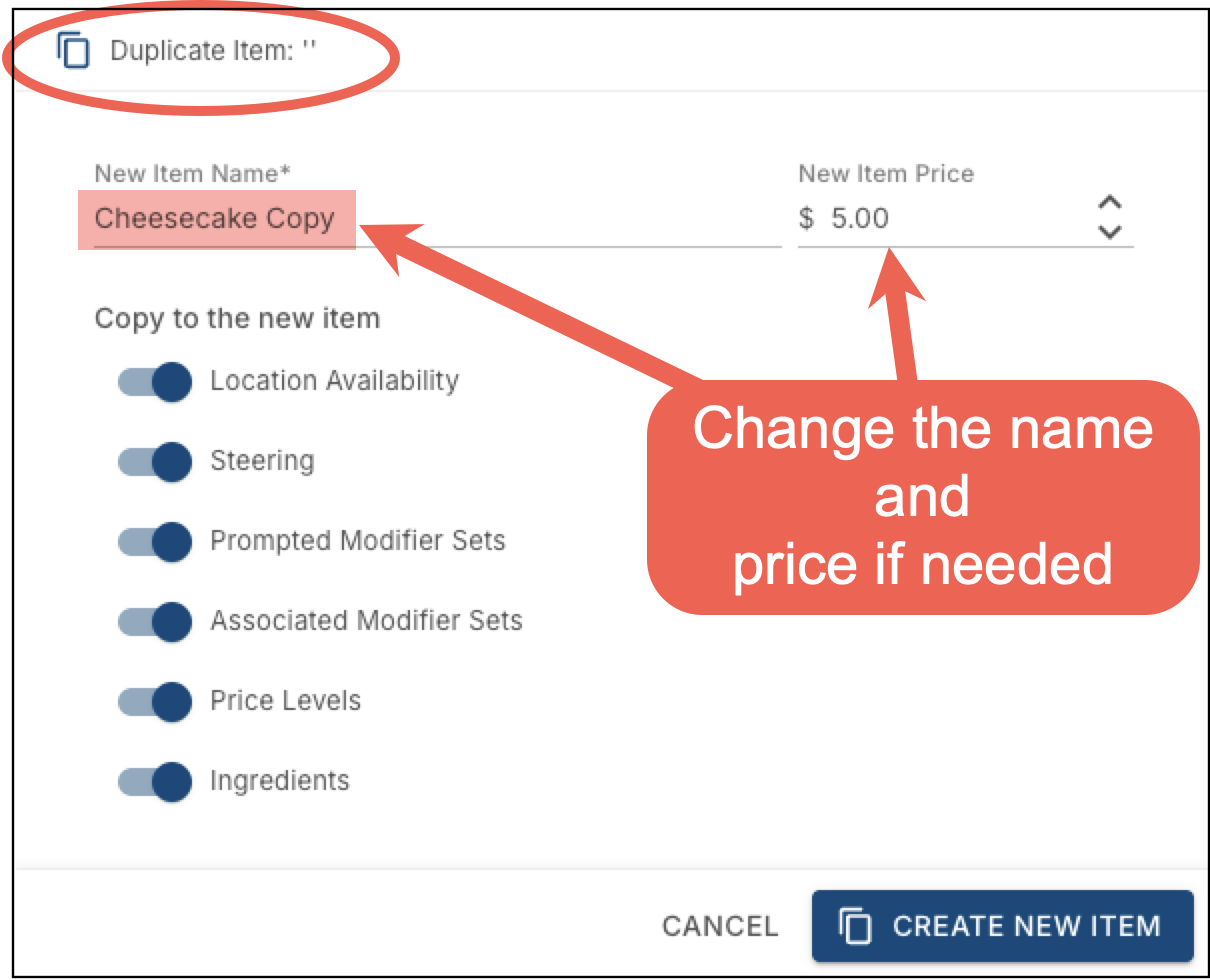
In the dialog, enter a New Item Name and New Item Price, then use the toggles under Copy to the New Item — Location Availability, Steering, Prompted Modifier Sets, Associated Modifier Sets, Price Levels, and Ingredients — to choose which of the original item's settings carry over to the copy. Click Create New Item when you're done.
Configuring a New Item
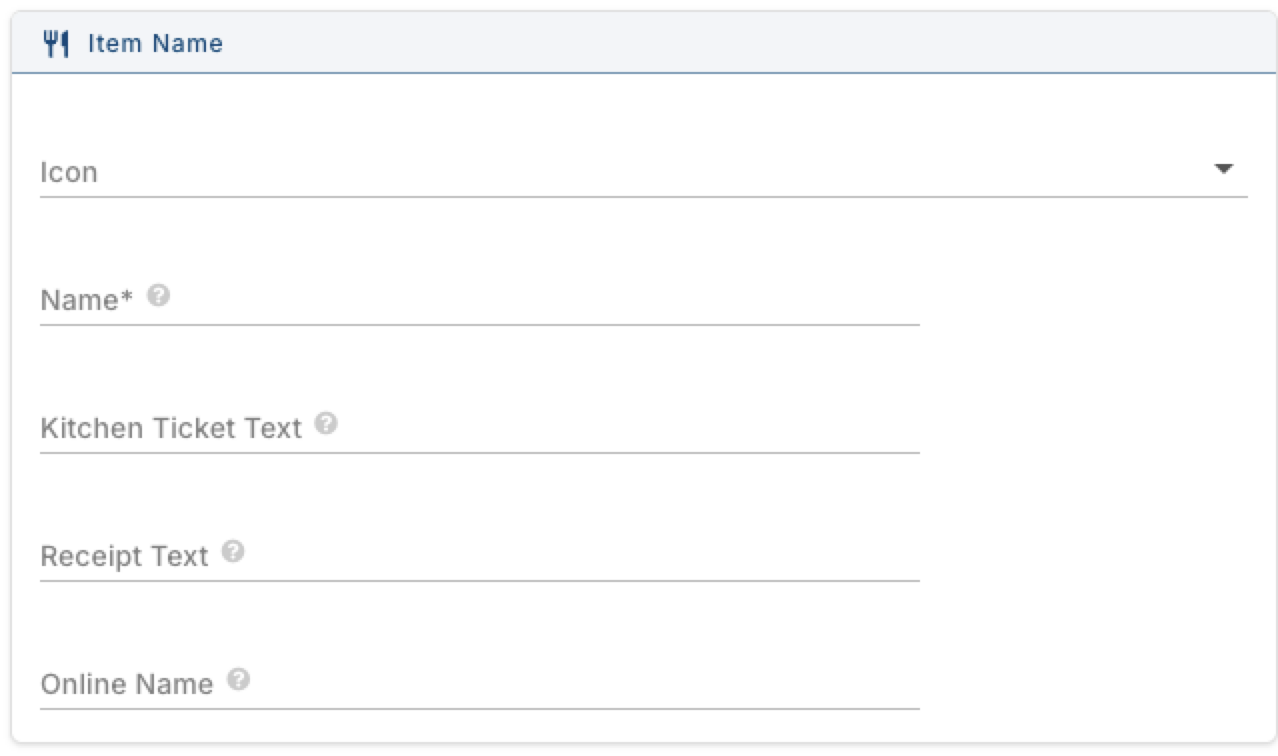
1. Item Name
Icon — the icon that shows on the terminal button for this item. Click the dropdown arrow to browse the list, or type to filter it down.
Name — Required. The item's name. This is the item's core identity throughout Backoffice, the terminal and the handheld.
Kitchen Ticket Text — Required. What prints on the kitchen ticket.
Receipt Text — Required. What prints on the customer's receipt.
Online Name — the name customers see when ordering this item online. (This will only appear if your location is configured to use Online ordering)
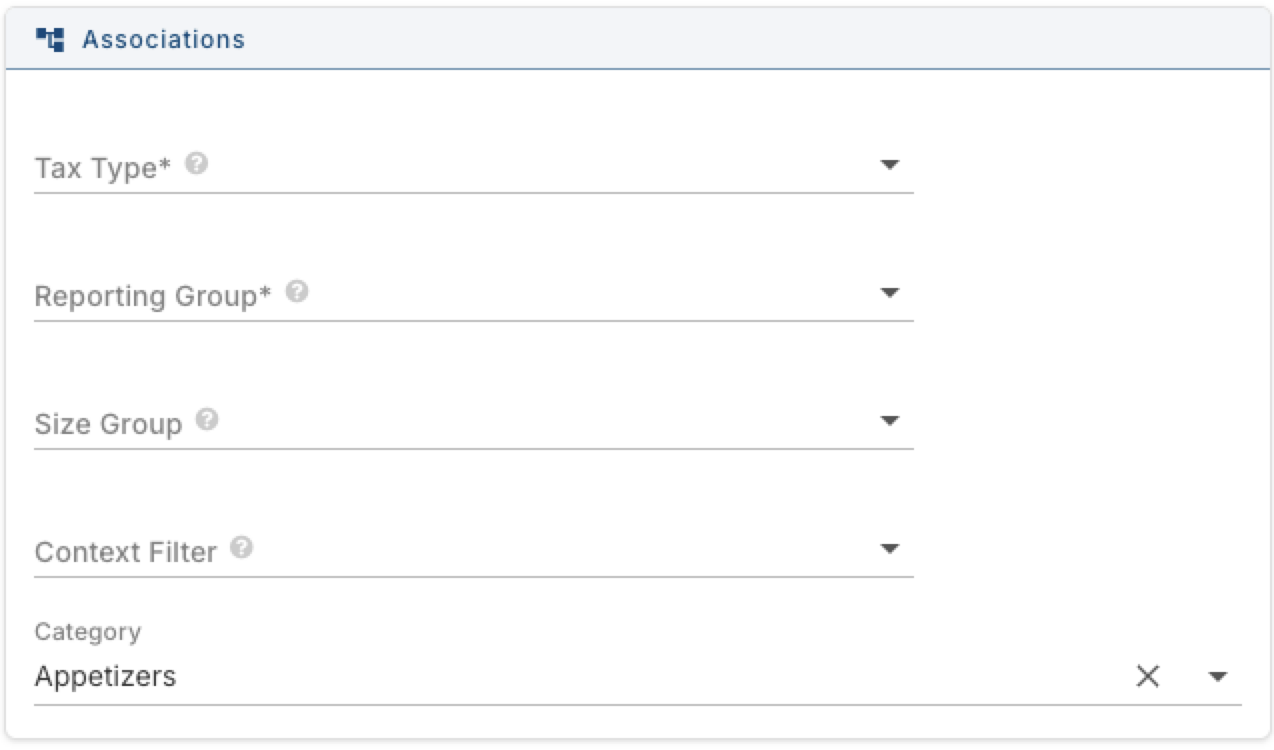
2 Associations
Tax Type — required. Sets how this item is taxed.
Reporting Group — required. A reporting group is what ties an item's sales into a category on the Daily Sales Report
Size Group — optional. If this item comes in multiple sizes, choose the preconfigured size group that defines them. Adding one here is what makes the extra size columns appear in Availability & Pricing below.
Context Filter — optional. Lets you restrict when this item is available based on rules you've built. For example, only at certain locations, only on certain devices, or only for certain order types (dine-in, online, etc.). Leave it blank and no extra conditions apply.
Category — the category this item lives in. Carries over from when you right-clicked to create it, but you can change it here.
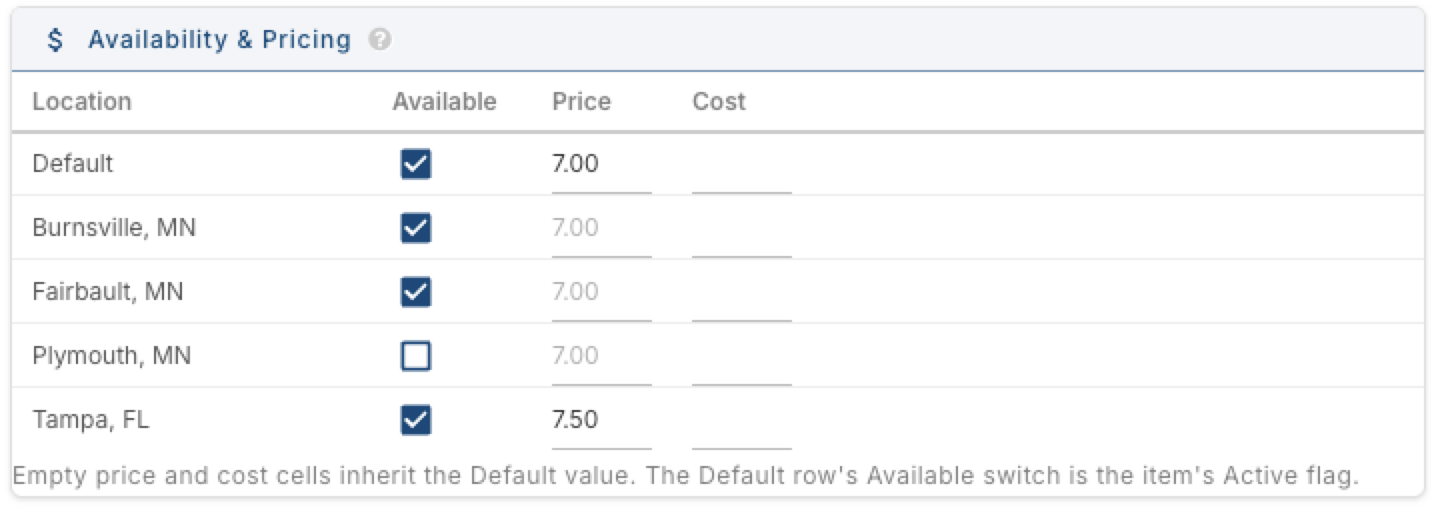
3. Availability & Pricing
Location — Default, plus every store you operate. If you only have one location, you'll just see the Default row — there won't be any store rows underneath it.
Available — turn off to stop a location from selling this item. On the Default row, this checkbox is the item's overall Active flag — turn it off and the item is inactive everywhere unless a specific store overrides it.everywhere.
Price — the item's price at that location. Leave a store's cell blank and it uses the Default row's price instead.
Cost — what the item costs you to make or stock, at that location. Stays blank unless you fill it in; leave a store's cell blank and it uses the Default row's cost instead. Cost is mainly used by the Menu Engineering Report and Product Mix Report — leave it blank and those reports' cost and profit numbers won't be accurate (or won't show at all).
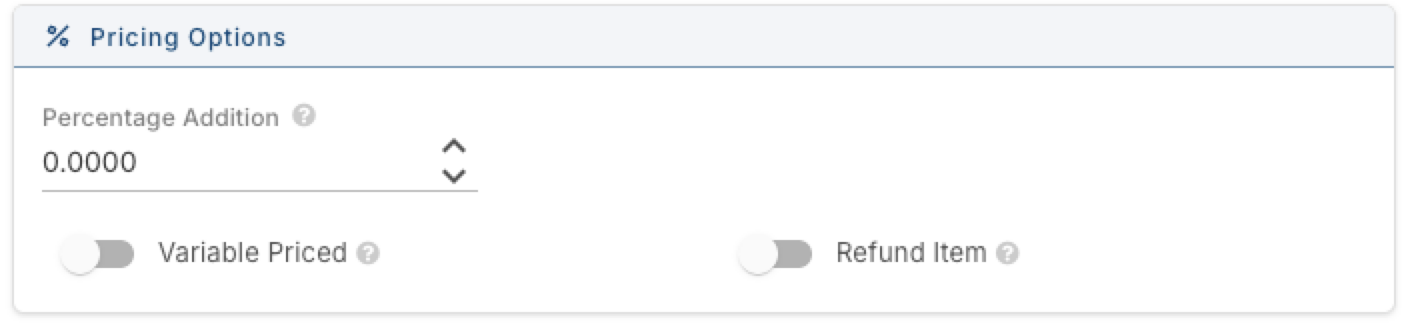
4. Pricing Options
Percentage Addition — adds an amount on top of the item's price. Rung in on its own, the amount is this percentage of the order's subtotal at the time it's added (all guests, before discounts and tax). Rung in as a modifier, it's this percentage of the parent item's price instead. Not applied to online orders. This is rarely used on regular items — its most common use is on a modifier like "Double." For example, if a Whiskey Coke is $6 and its Double modifier has a Percentage Addition of 50%, selecting Double adds $3 to the price.
Variable Priced — turn on if the price should be entered at the register rather than fixed.
Refund Item — turn on to markwhen this asitem is used to process a refundrefund. item.It creates a negative price instead of a normal charge.
Setting Up Everything Else
Once the item is saved, more tabs and sub tabs are available:
- Details (Price Levels, Terminal & Behavior, Printing, Security & Integration, Description)
- Kitchen (steering, kitchen tickets, and kitchen display settings)
- Online Ordering
- Modifiers (prompted and associated modifier sets, and the modifier flow)
- Inventory
- Ingredients
- Audit History