
KitchenHub Integration
KitchenHub Integration Setup
This document walks through the steps required to configure the KitchenHub DSP (Delivery Service Provider) integration in Sail Back Office. Once complete, the integration will allow you to connect DoorDash, Uber Eats, and Grubhub to a Sail location so that these online orders flow directly into the POS.
Step 1: Create the Integration
In Sail Back Office, navigate to POS → System Setup → Integration.
1. Add a new record.
2. Name: Ingage DSP
3. Connection Type: Kitchen Hub
4. Click SAVE.
Step 2: Add the DSP Void, Discount, and Placeholder Item
Before continuing, create the supporting void reason, discount, and placeholder item that the integration will reference.
DSP Void
• Create a new Void Reason called "DSP Void".
DSP Discount
• Create a new Discount called "DSP Discount".
DSP Placeholder Item
• Name: DSP Adjust
• Price: $0.00
• Tax Type: Food
• Reporting Group: Food
• Steering: All Printers / KVS Stations (common but not required)
Step 3: Online Ordering Configuration
1. Update the Site Name. By default the Online Ordering site is named "Main". Update this to "Restaurant Name — Location" so the menu is easy to identify once it syncs over to KitchenHub.
2. Associations Tab. Add the integration created in Step 1 to the DSP Integration field, then click SAVE.
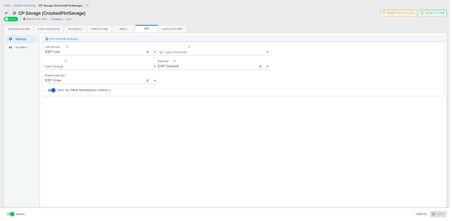
Step 4: DSP Tab Configuration
Once the DSP integration is added on the Associations tab, a new DSP tab becomes available within Online Ordering Configuration. The remaining setup happens here.
Settings
1. Void Reason: Select the new DSP Void from the dropdown.
2. Discount: Select the new DSP Discount from the dropdown.
3. Placeholder Item: This is a "catch-all" item used for special instructions, delivery instructions, and driver information. Select the DSP Adjust item created in Step 2 from the dropdown.
4. Zero Tax When Marketplace Collects: Toggle ON (always required in MN).
5. Sync to DSP: Click Sync and wait for the provider status to change from "Waiting" to "Connected" before continuing. This is an important step — do not skip it.
Providers
DoorDash, Uber Eats, and Grubhub are each added from this section. Use the Provider dropdown to select the provider you would like to add and then click Add Provider.
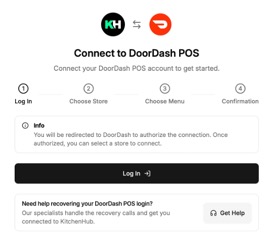
After clicking Add Provider you will be redirected to the KitchenHub Connect website to complete the connection.
Step A: Log In
Click the Log In button and enter the restaurant’s DSP provider username and password.
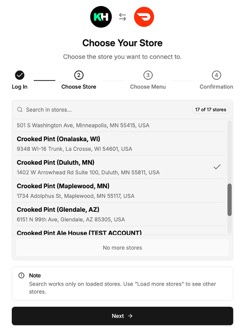
Step B: Choose Store
Use the Choose Store screen to select the restaurant or location you would like to connect.
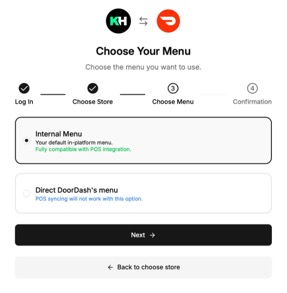
Step C: Menu Selection
Select the Internal Menu when prompted.
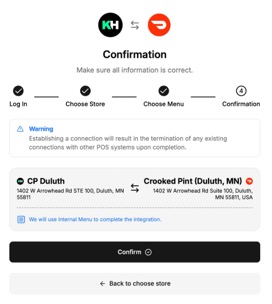
Step D: Confirmation Screen
Verify that the location matches the restaurant being connected, then click Confirm.
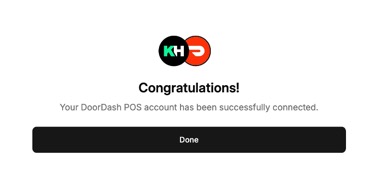
Step E: Completed
Once the connection completes, click the Done button to return to Sail Back Office.
Grubhub Exception
Grubhub does not require you to log in. Instead, you will be prompted to paste in the restaurant’s Grubhub URL. Once submitted, it can take up to 7 days for Grubhub to approve the integration on their side.
Sail Provider Settings
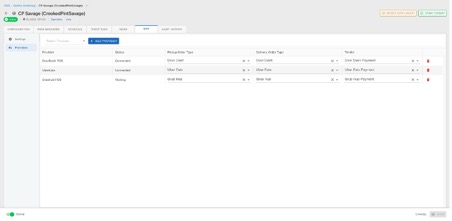
Once you return to Sail Back Office, you will need to map the order types and tender for each provider on the Sail Provider Settings screen.
1. Pickup Order Type: Set to a Provider Order Type (create a new order type if one does not exist).
2. Delivery Order Type: Usually set to the same value as Pickup, but it can be different if the restaurant prefers to report pickup and delivery separately.
3. Tender: Set to the provider tender type (e.g. DoorDash Payment).
Final Sync
A final sync is required every time a new provider is added. After completing the steps above for each provider (DoorDash, Uber Eats, Grubhub), run the sync to push the menu and configuration out to KitchenHub.