How to Void & Comp
This will detail the process of editing and moving orders after they have been added to a guest.
Timing/Communication
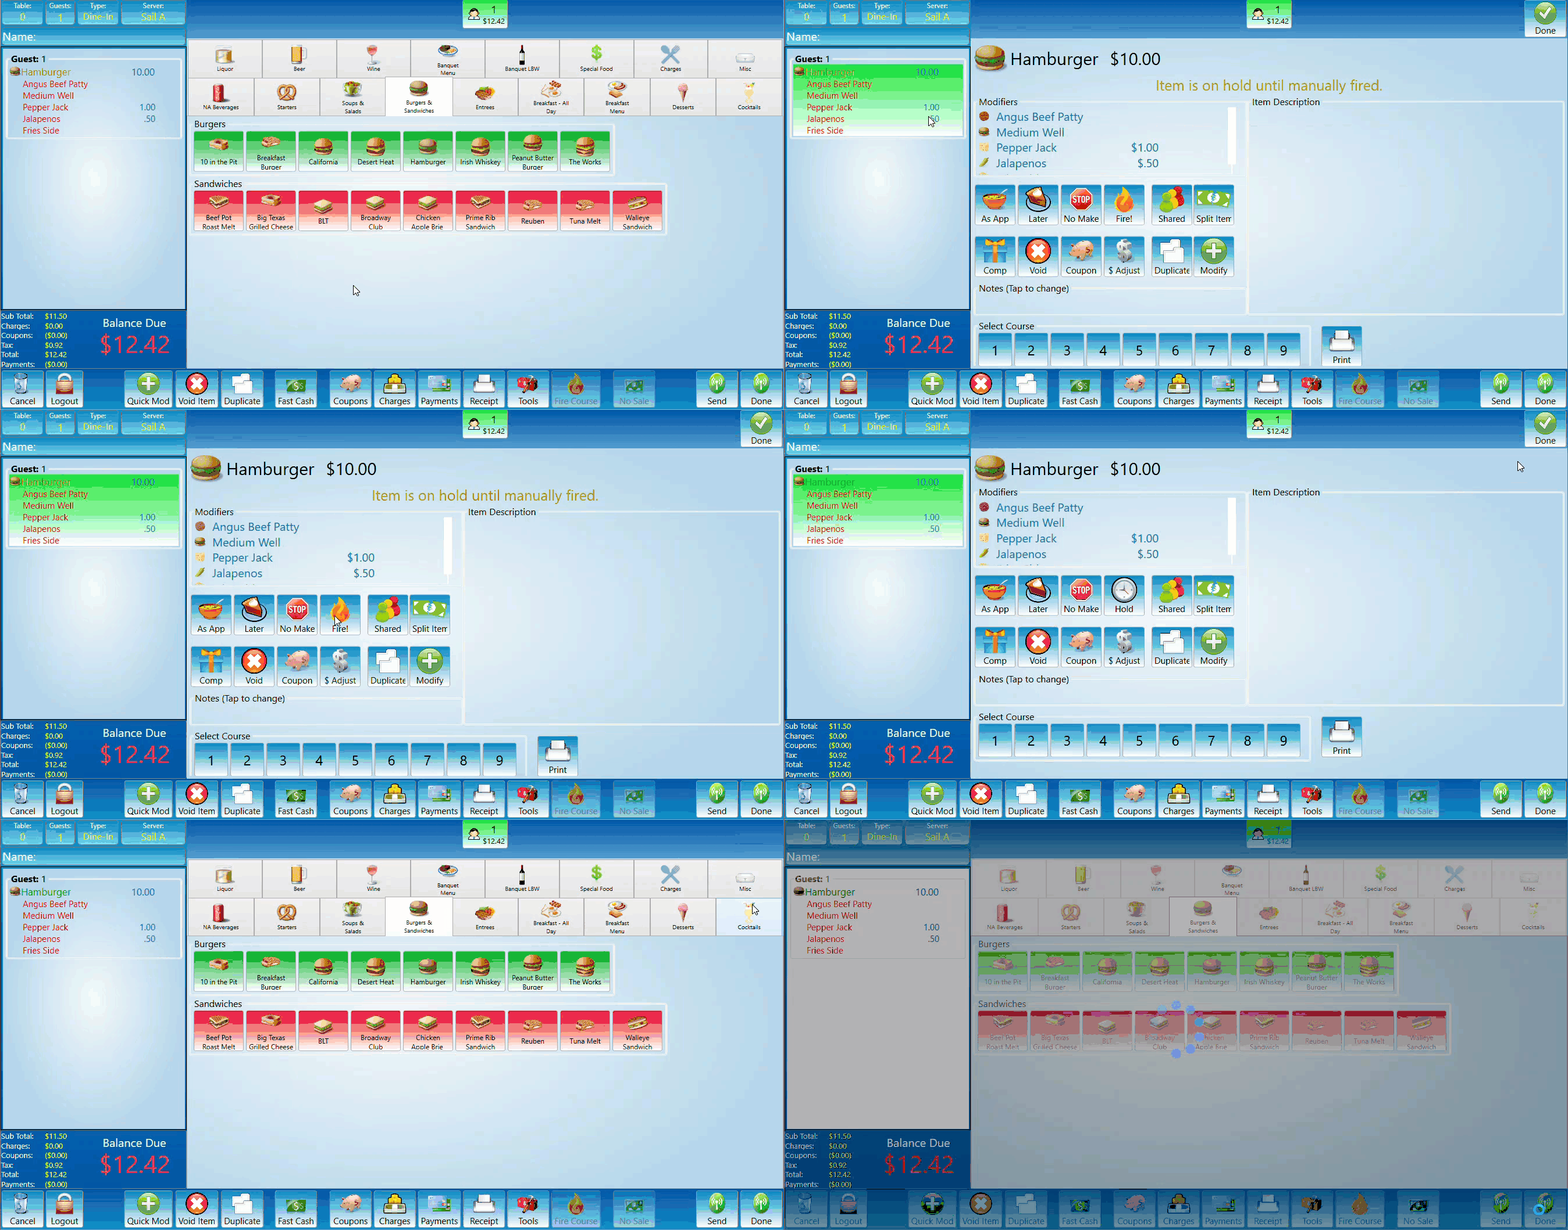
Select an item:Click on an order to select it. This will bring up theedit page.Voids
&
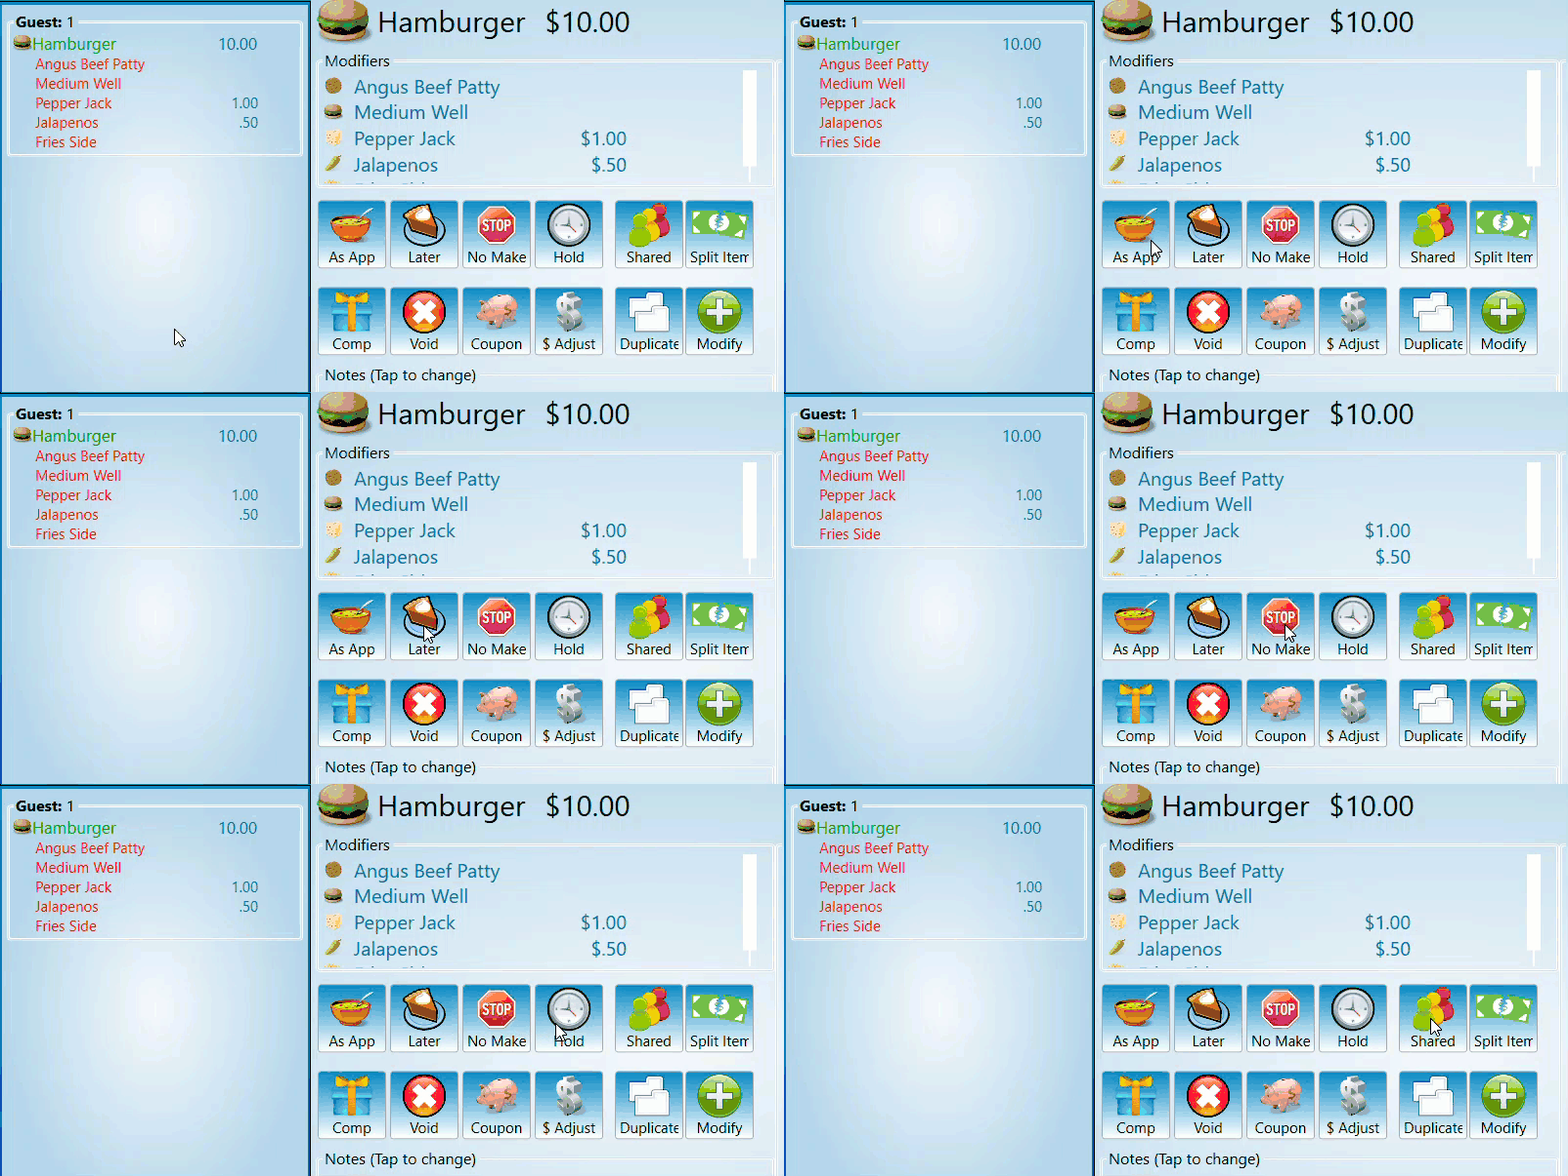
Timing and preparation indicators:There are several buttons in the edit page that can be used to indicate preparation and timing. Each indicator will be reflected by a short string of related letters that populate at the beginning of the selected food item. When printing at the bar or kitchen printers each item that was modified by one of these buttons will have a message matching the button that was selected.As App: This indicates that the item should come out before the main course as an appetizer.Later: This indicates that the item should come after the main course like a dessert.No Make: This indicates that the item does not need to be made. This would be used in a situation where the customer already received an item but it needs to be put on the bill without making the item. In the case of a no make item it does not print at the bar or kitchen printers.Shared: This indicates that the item will be shared and should come out with any necessary items to let the guests share the item. ie extra utensils and/or dishes.Press the done button to save the changes that were made before sending.
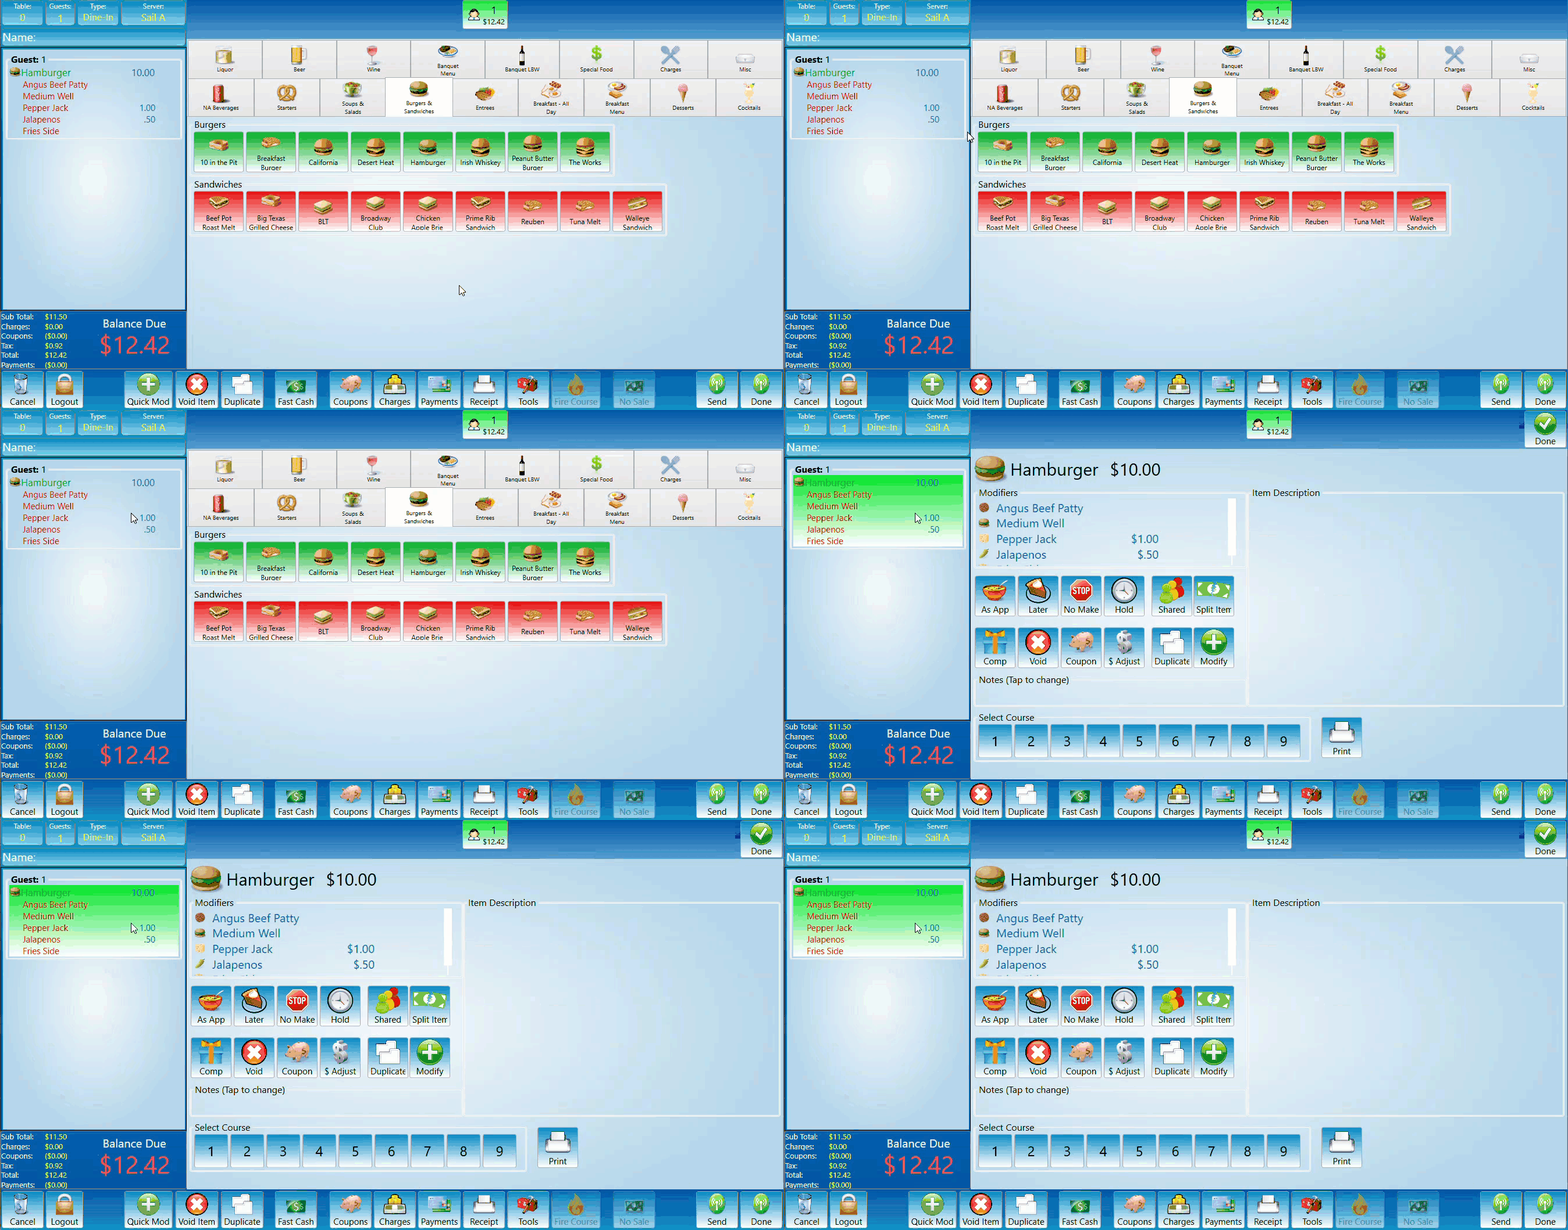
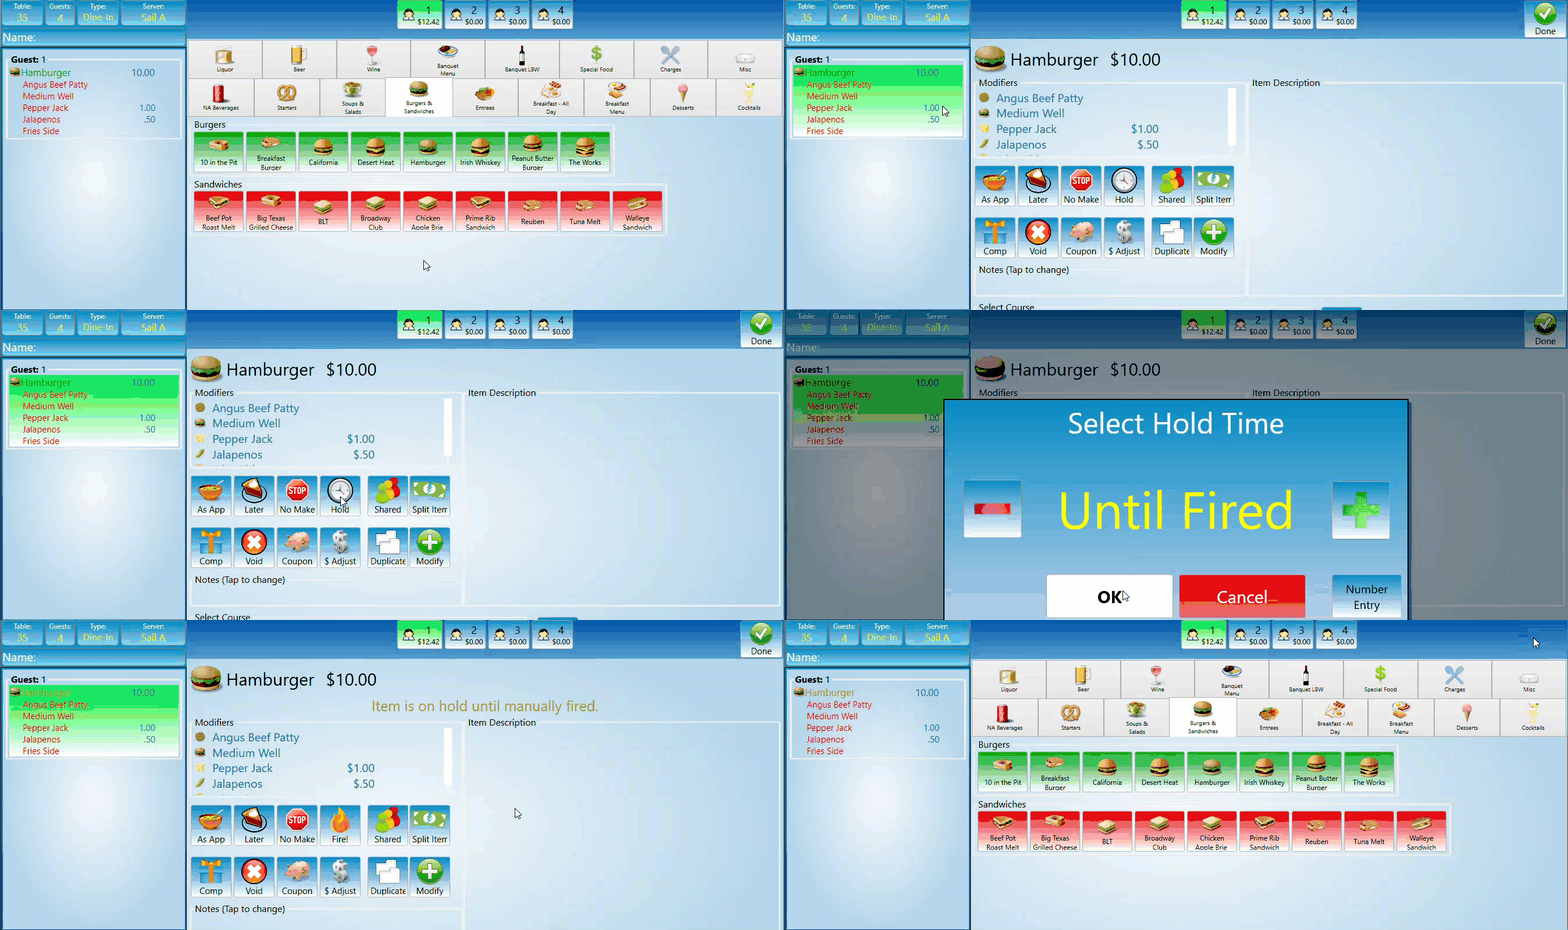
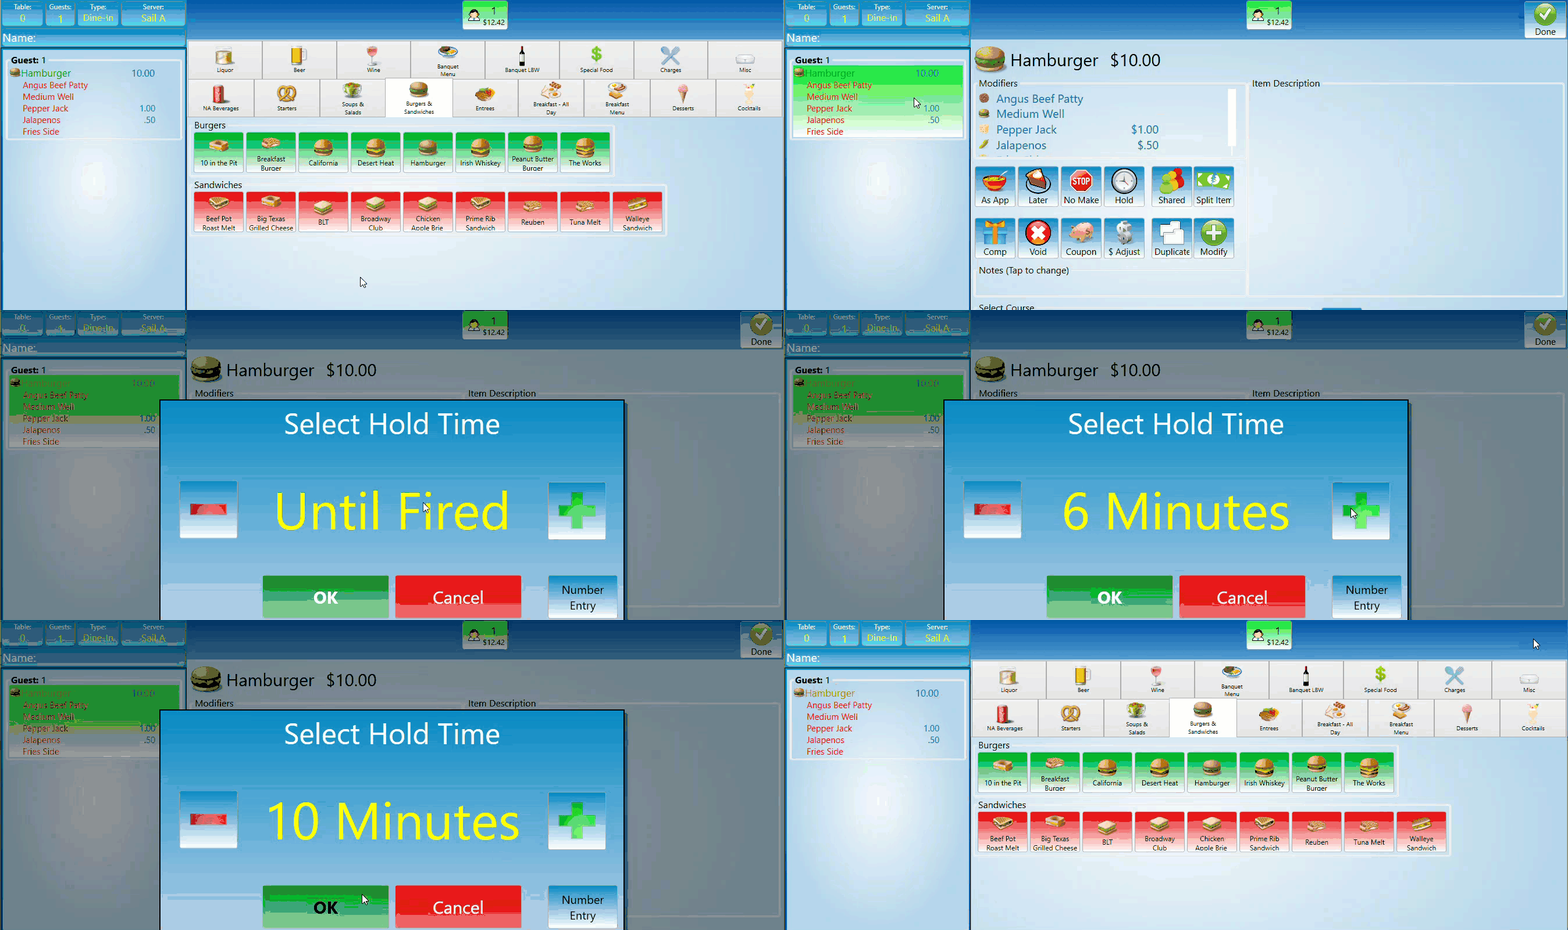
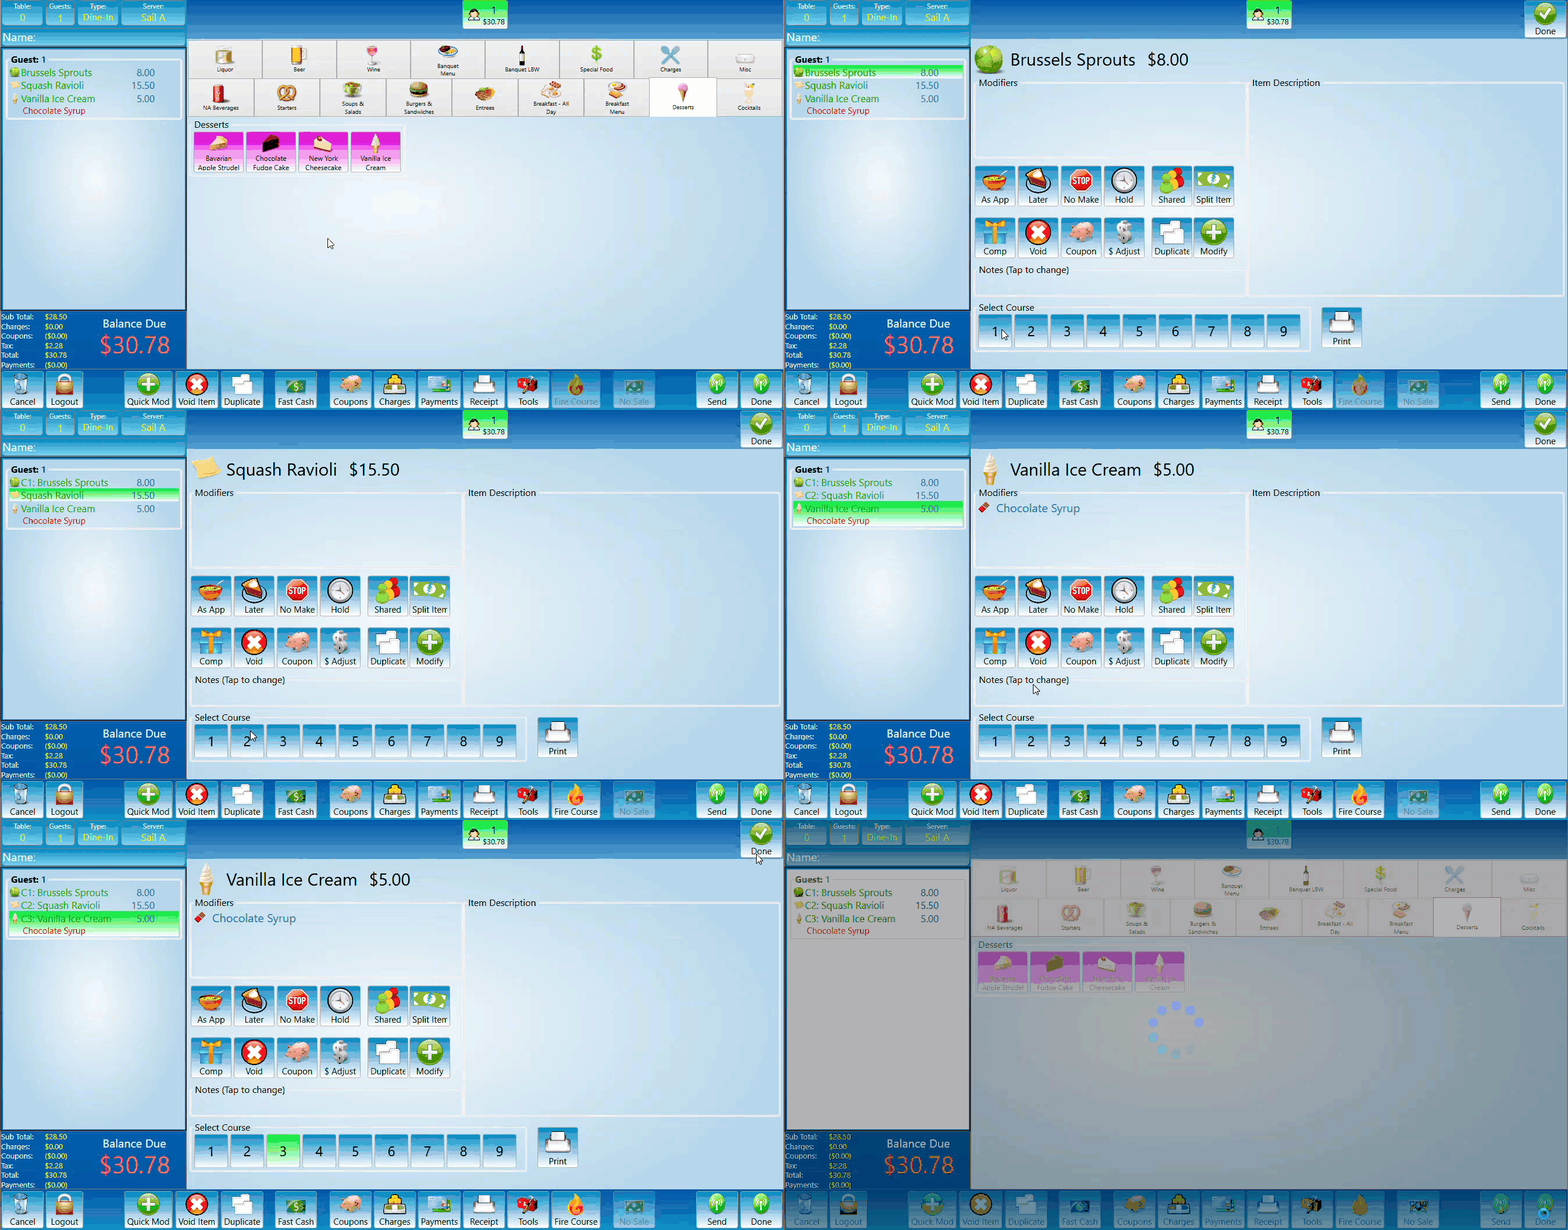
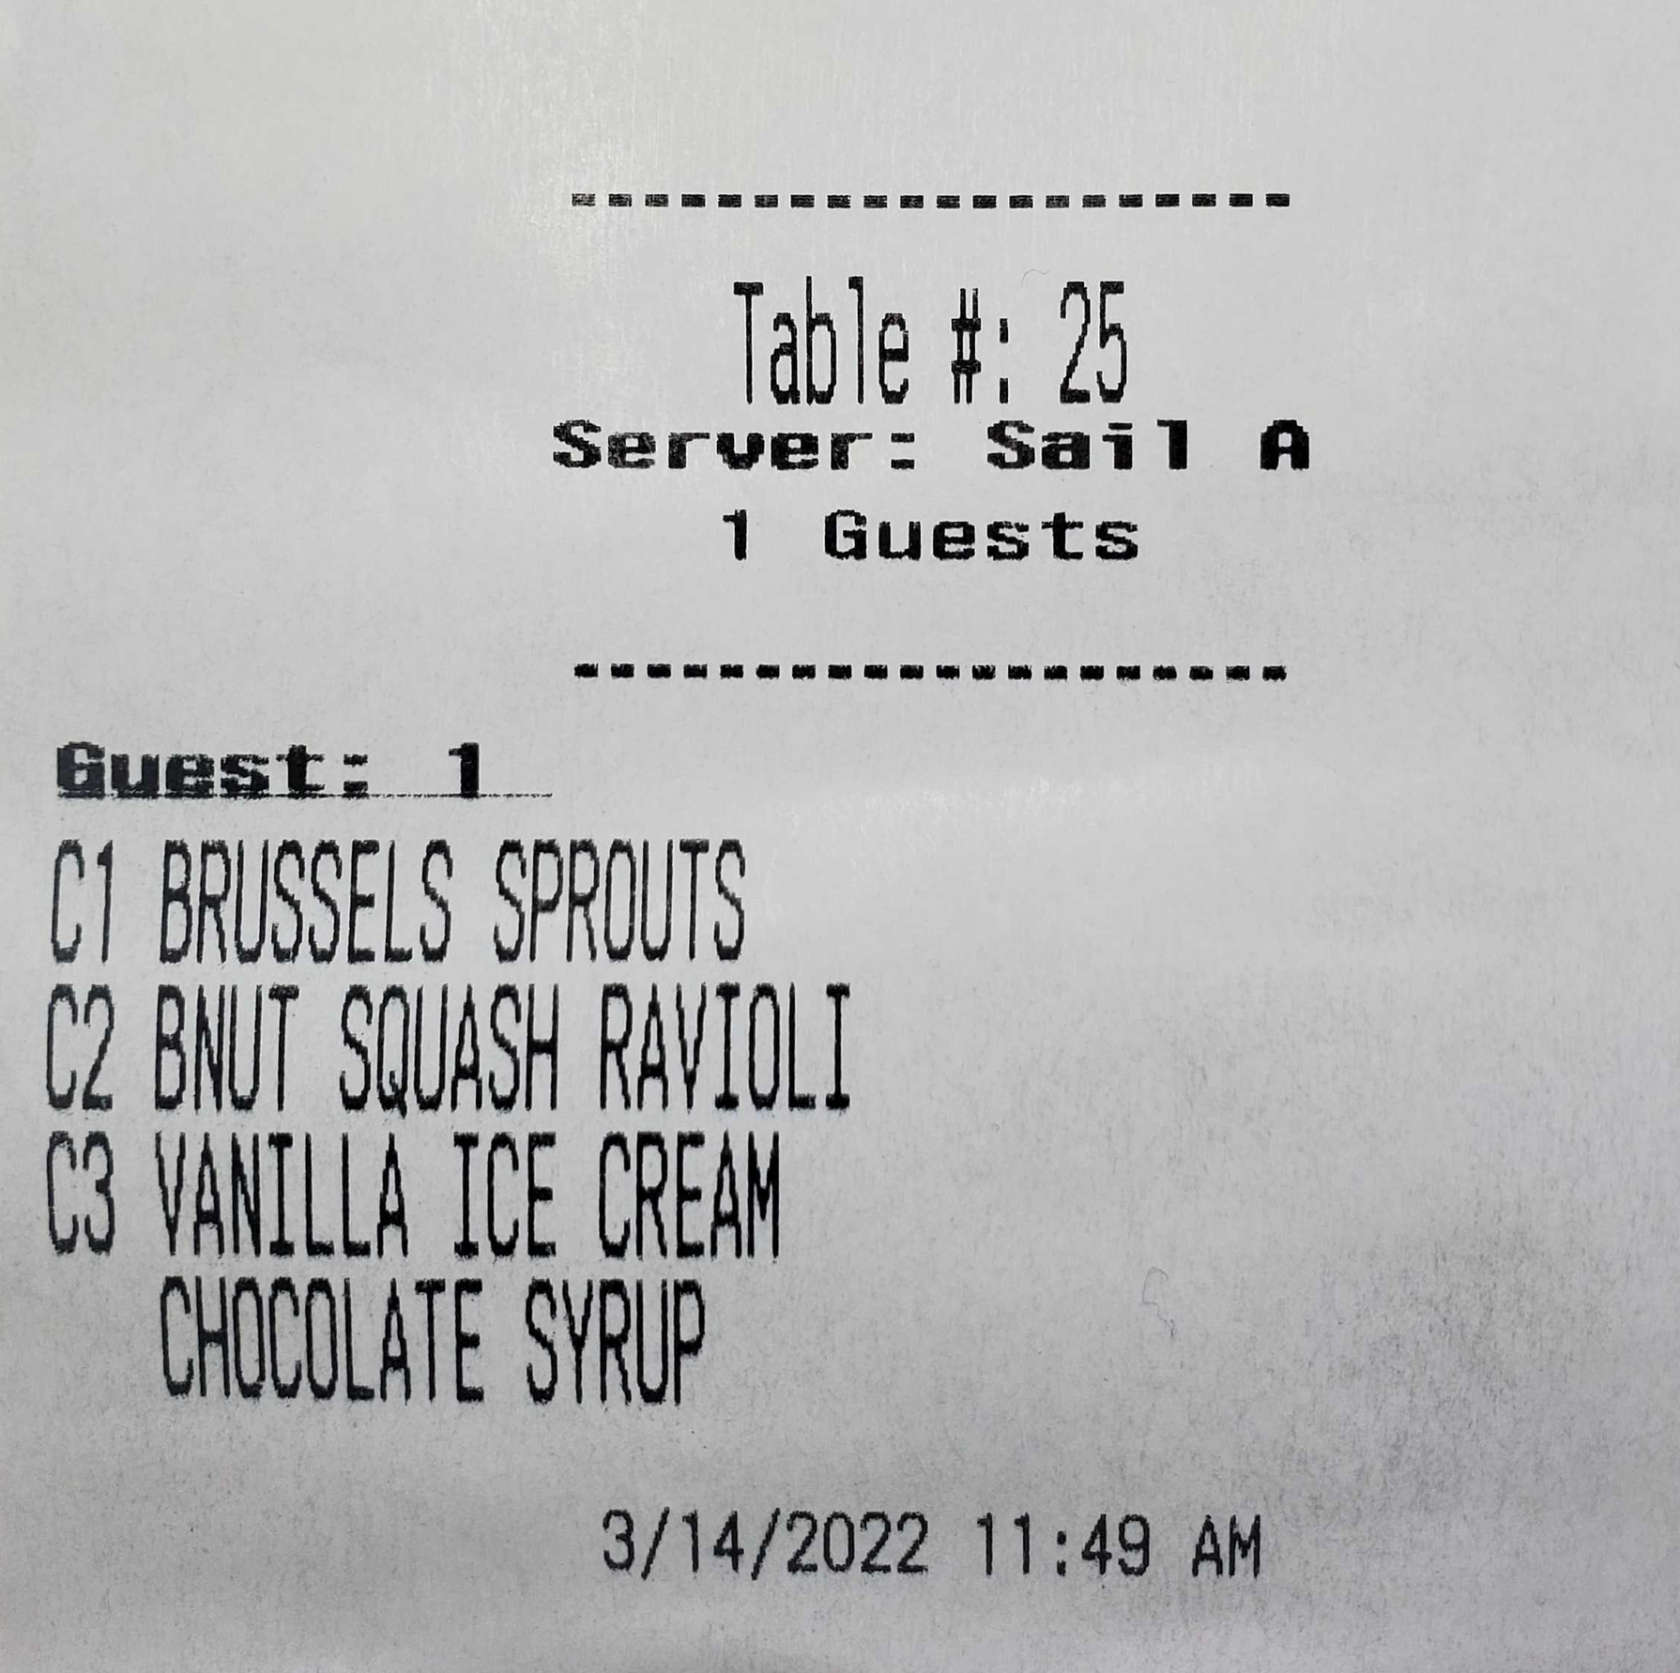
Hold:Placing a hold on something will hold it until YOU press the fire button. This way you can put in an order for an item you don’t want to go to the kitchen right away and then you will need to go back in and fire it when you are ready for it to go to the kitchen.Hold with timer:When Placing a hold on something you can set a timer to have the item automatically send to the kitchen in a number of minutes. You may either select the plus and minus signs to adjust the timer or select the manual input button to be prompted for a number of minutes.*Once placed on hold an Item may be fired early at the servers discretion by selecting the item and pressing the fire button from the edit page as shown in the next step. Or will be automatically fired after the desired amount of time expires.Fire:When an item is on hold press the fire button to send it to the kitchen immediately. When something is placed on hold you must hit this button to get it to fire or it wont send, however, if something was placed on hold with a timer you may use the fire button to send it early but it will send when time runs out either way.Coursing:Coursing is frequently used in banquet situations and with party’s. To create a course add the item you want in a course then select it. Press the number that matches the course you would like the item to be a part of.Kitchen video does not currently support coursing.When the courses are sent in it will print a kitchen ticket or send to a kitchen KVS showing the full order with course numbers in front of each item.
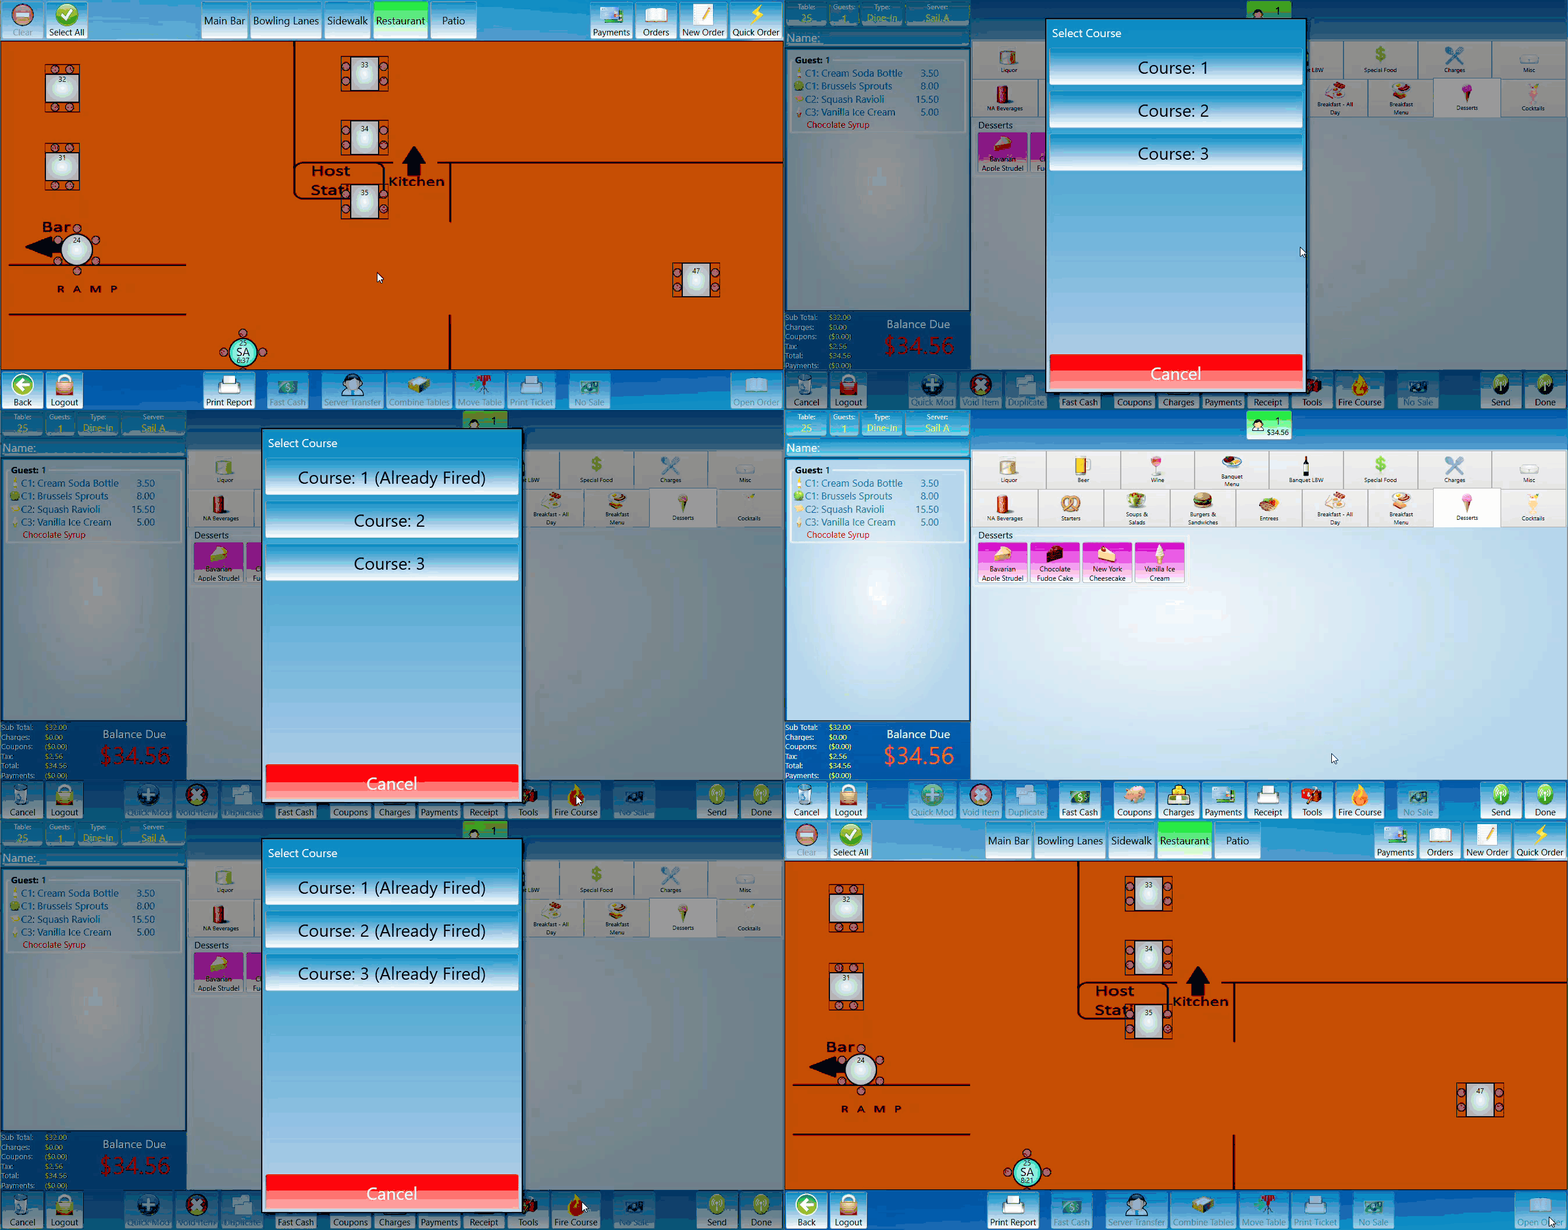
Fire Course:Fire a course by pressing the fire course button. A prompt will appear asking which course you would like to fire. Once the course is selected the prompt will disappear.On kitchen video the item will not populate until it is fired.When firing a course it will print a ticket in the kitchen says fire course x where the x is the course number that needs to be prepared.
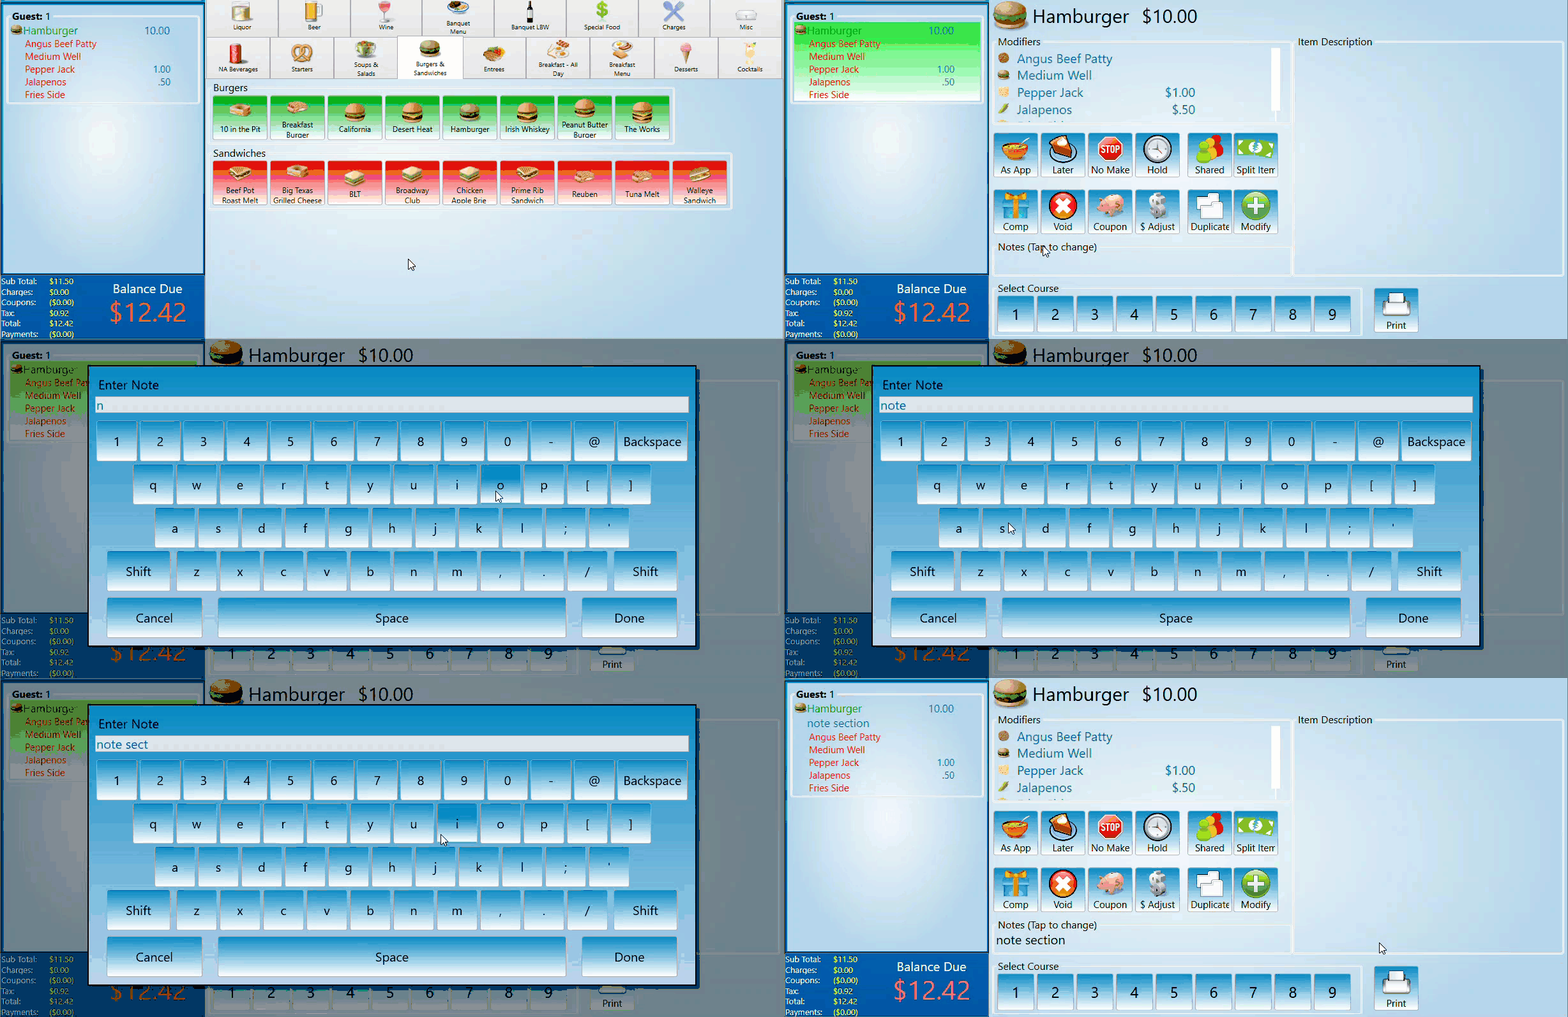
8. Notes Section:The notes section is where you can add a note to item in an order. The note will appear directly below the selected item.
Voids/Comps
Situations where you would use a void differs from when you would use a comp. A void is for an item that was never made and no longer needs to be made. This would be a situation like a customer changed their mind and does not want the item, or a server mistakenly entered the item. A comp removes the need for the customer to pay for the order. This would be a situation where a customer had an issue and the cost of the meal was covered. The main difference is that a void says this was not made so the system does not need to reflect it, whereas a comp is saying the meal was made and needs to be accounted for but the cost of the meal was paid by the store.
-
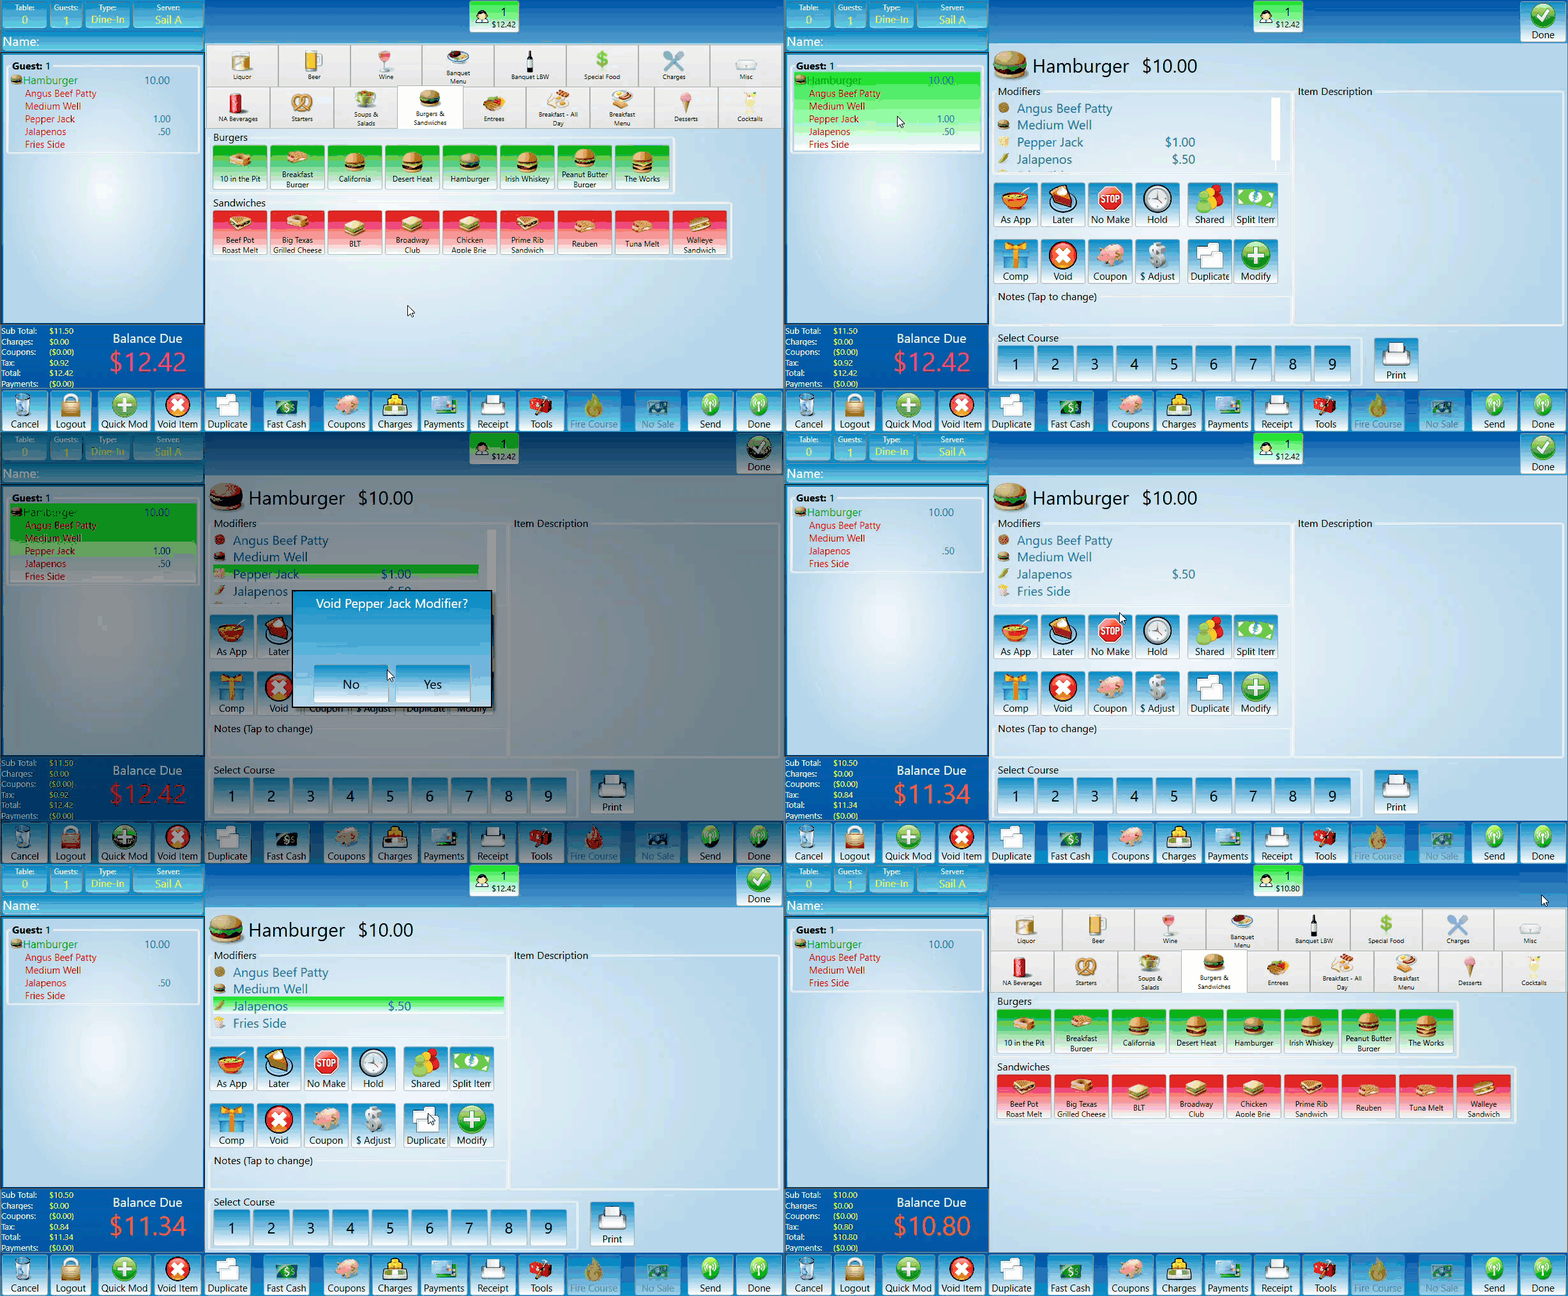
Void a Modifier:
To void a modifier on an item you first select the item then find the modifier in the sub-list to the right and click on it. This will open a prompt asking if you are certain you would like to void. Select yes and the item will be deleted. -
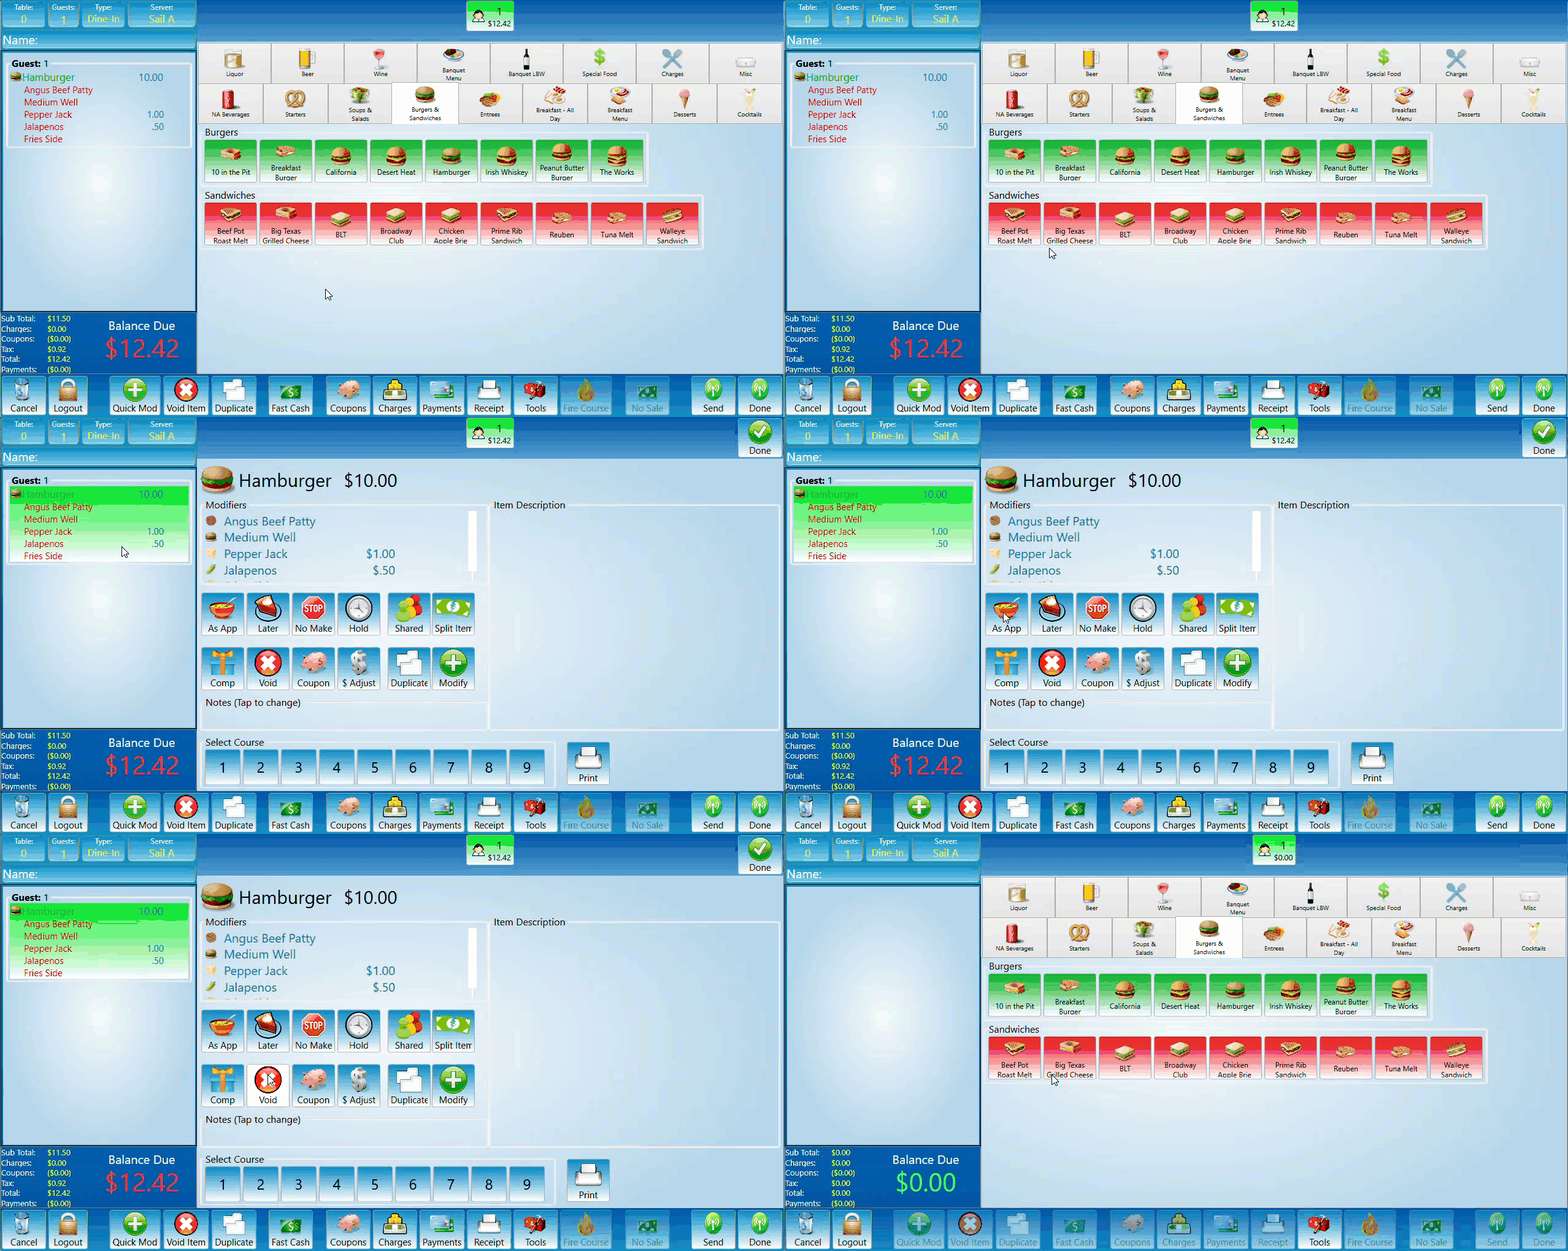
Void before sending:
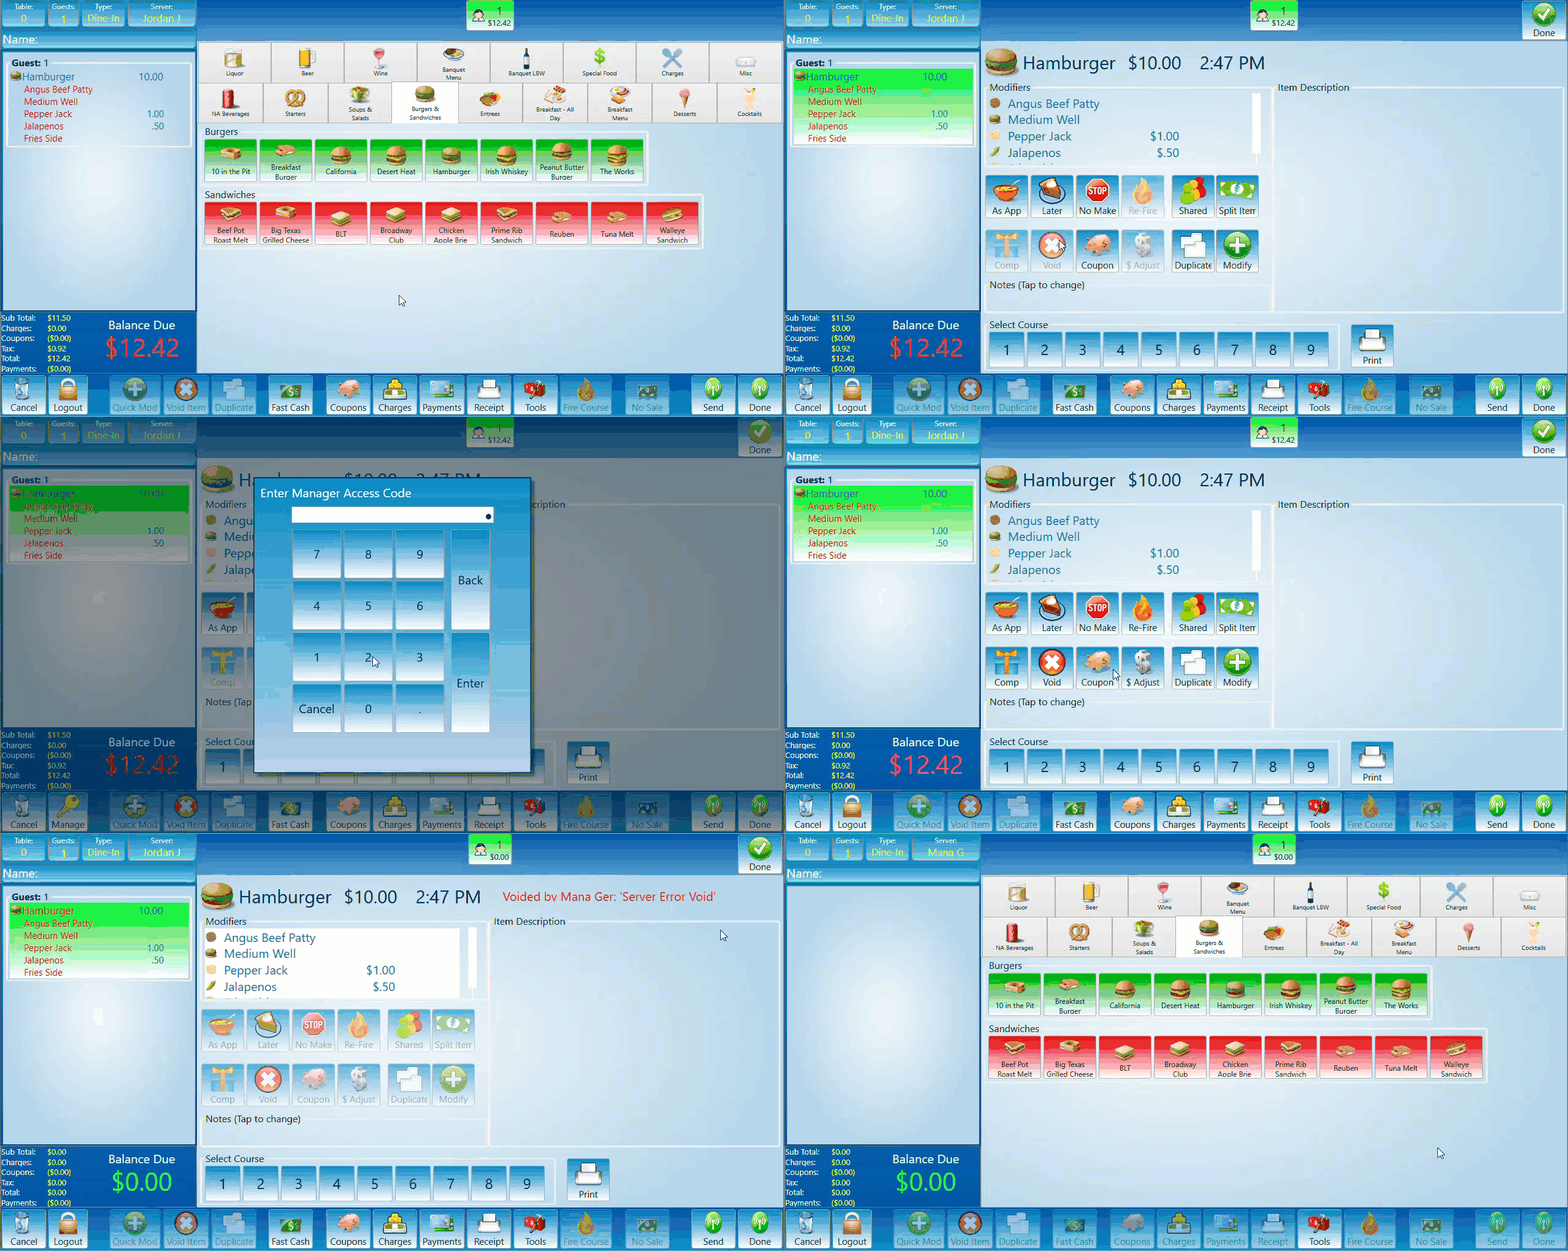
To void a main item select it then select the Void option. If you have done this before the item has been sent it will just be deleted. This does not need manager access rights. -
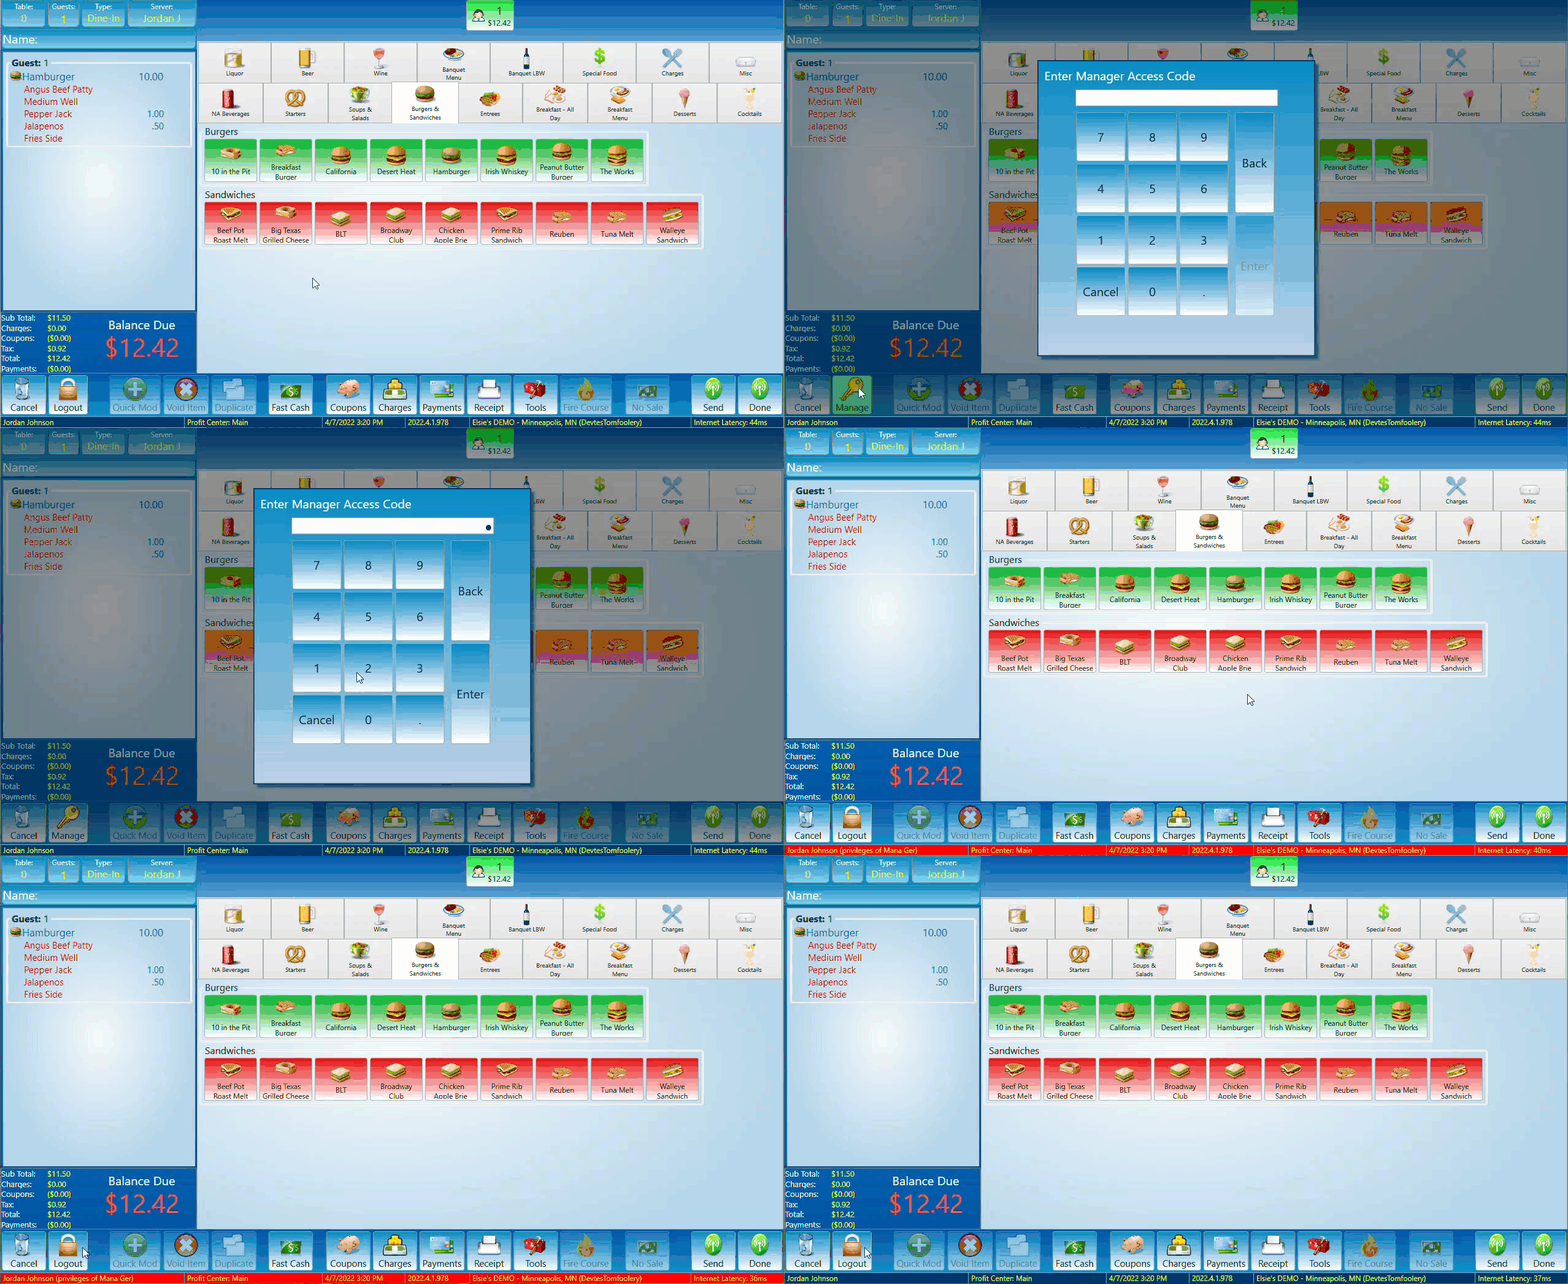
Manager Approval:
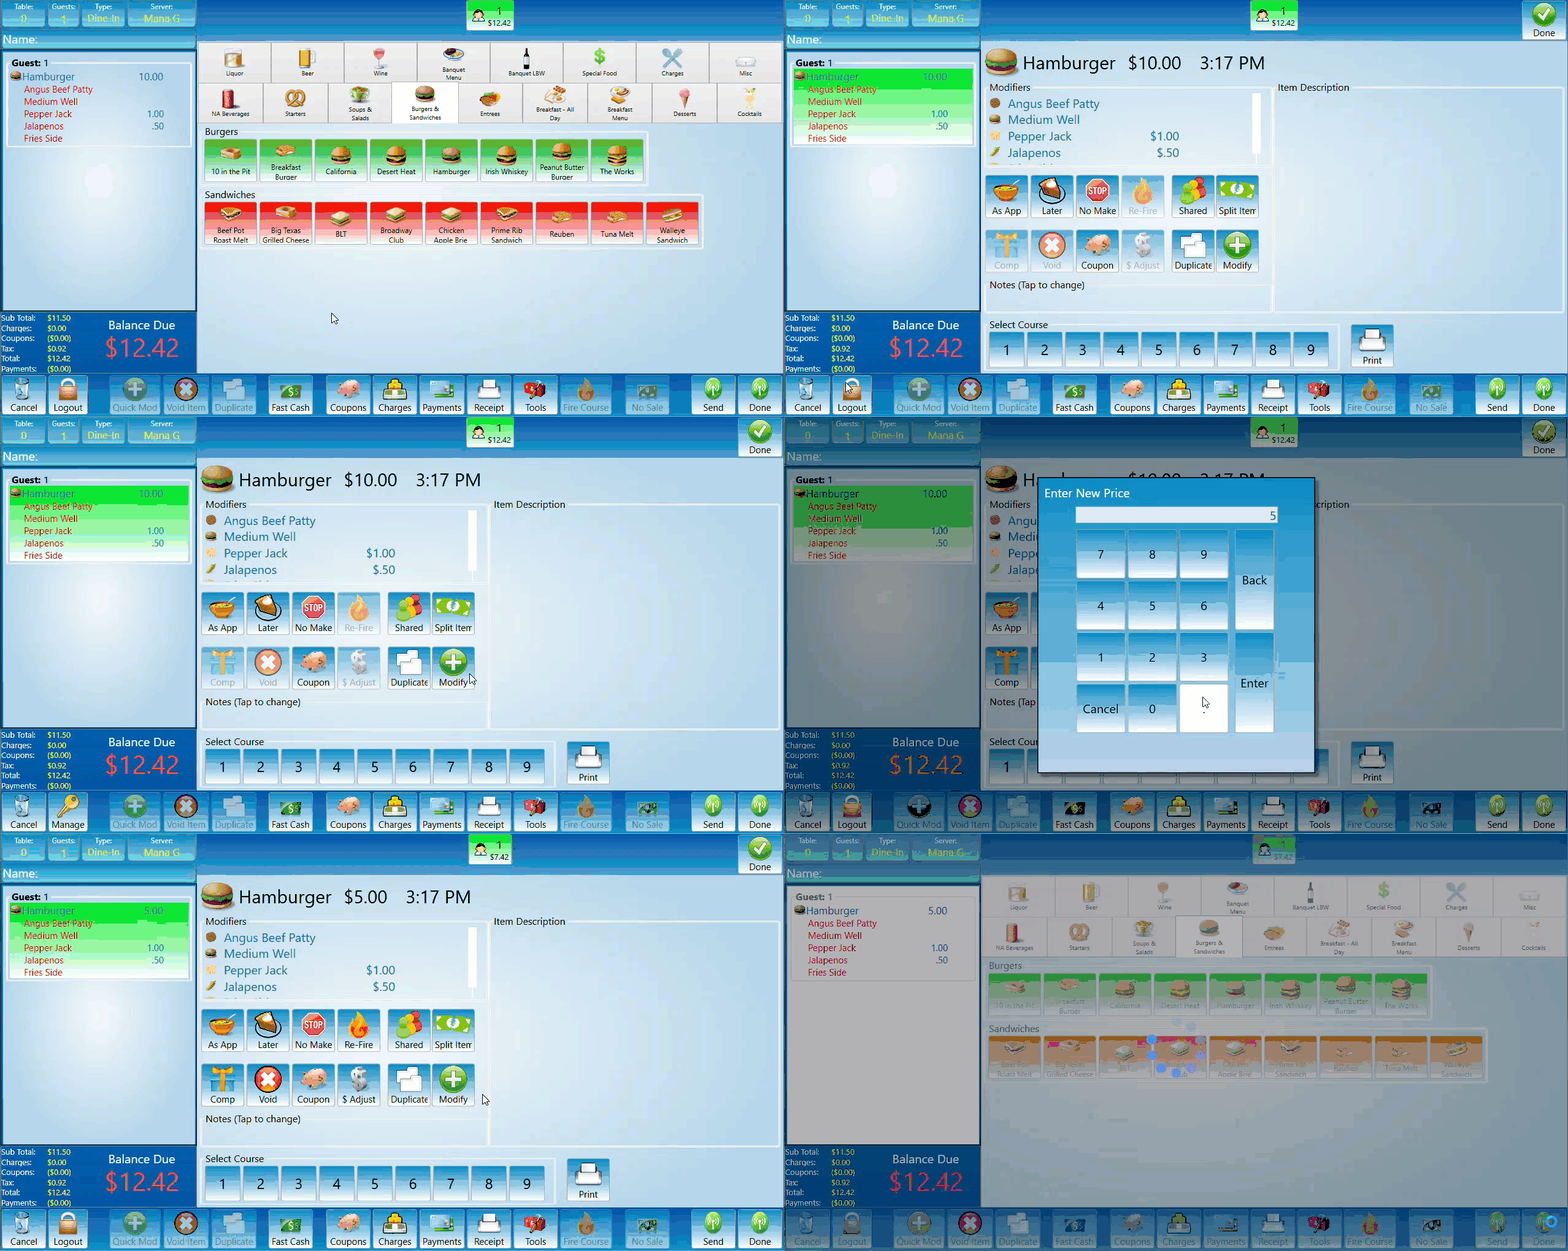
There are several features in the system that may require manager access. You will need to have a manager access the terminal either by pressing and holding the log out button or by swiping a manager access card. Once manager access has been granted the terminal information bar at the bottom of the screen will turn red and the profile name will add the manager who granted access rights. Once you are done with access rights press the log out button and the profile will return to the server who was logged in originally. You do not need to activate manager access rights in if you are logged into a profile that has manager access rights. In the following section you can see manager access being obtained before adjusting a price and before comping or voiding an item that has been sent. -
Void after sending:
To void an item after it has been sent, first select it then select void. Since it has been sent into the system it will prompt a list of reasons for the void. Select the best match from the list. Many locations have this feature require manager access rights. -
Comp:
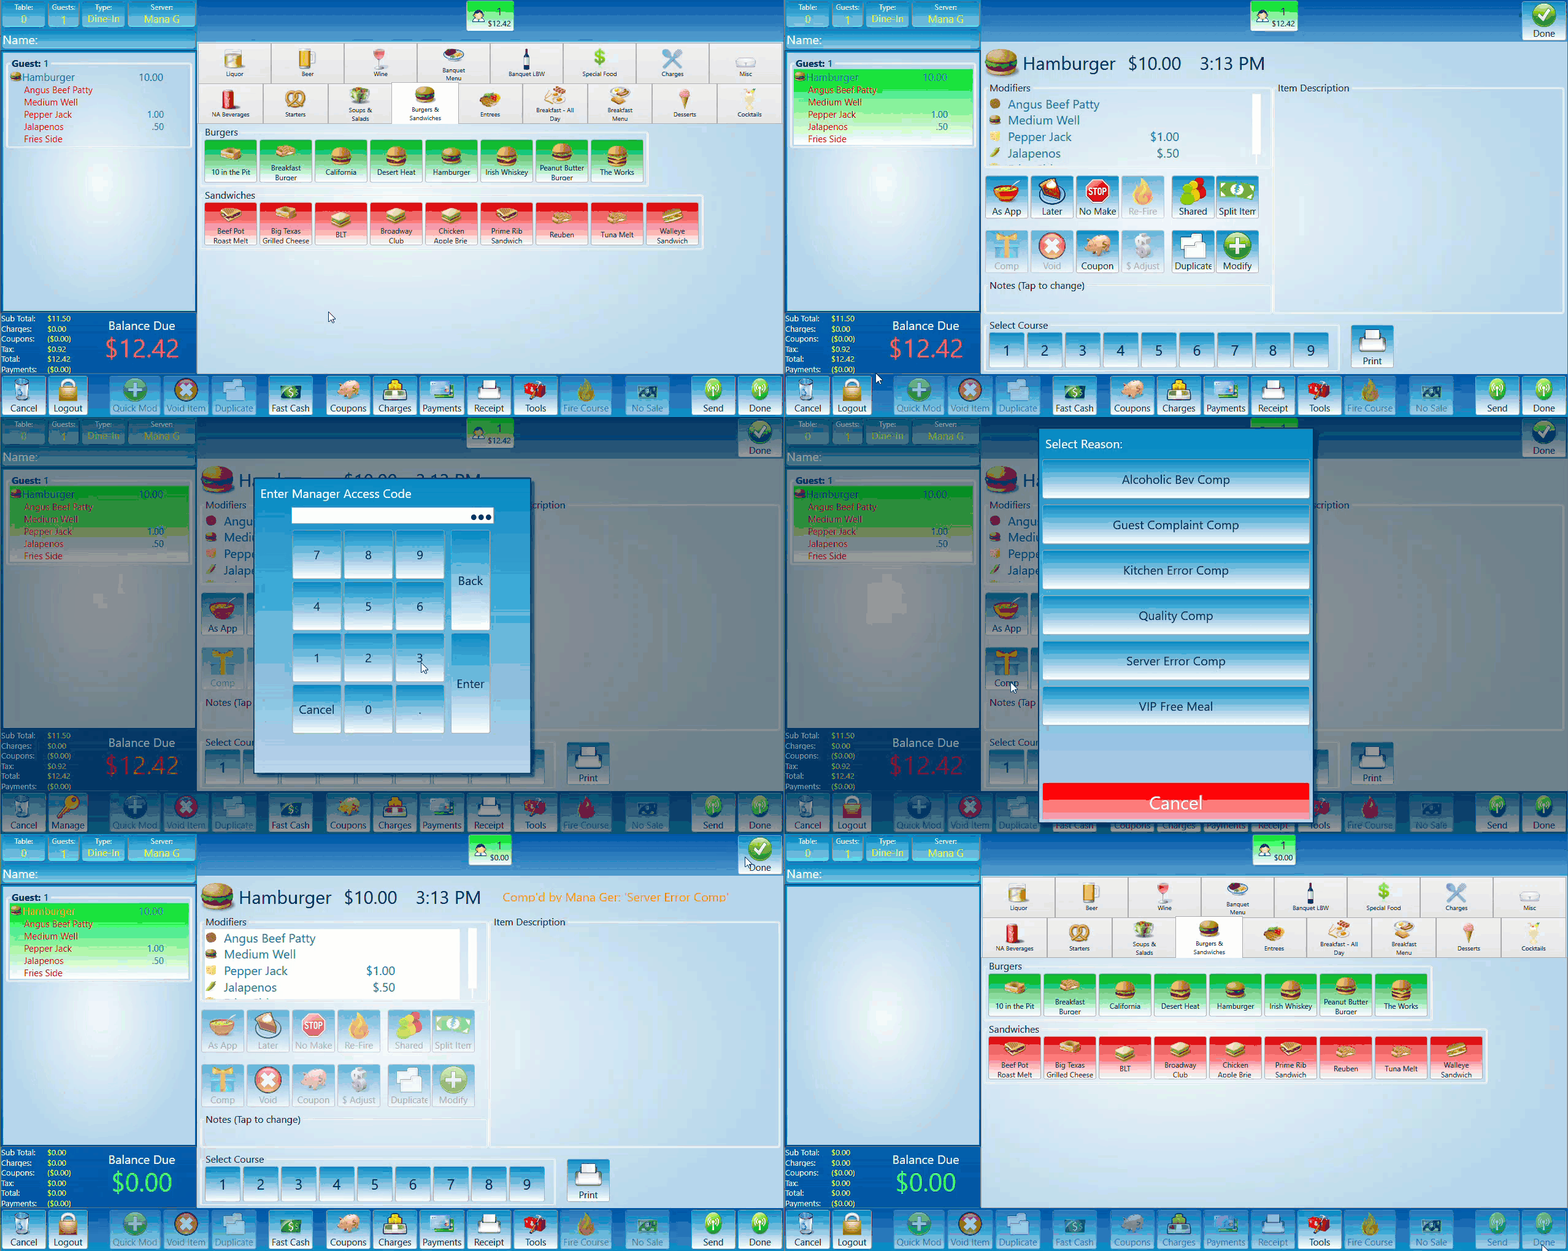
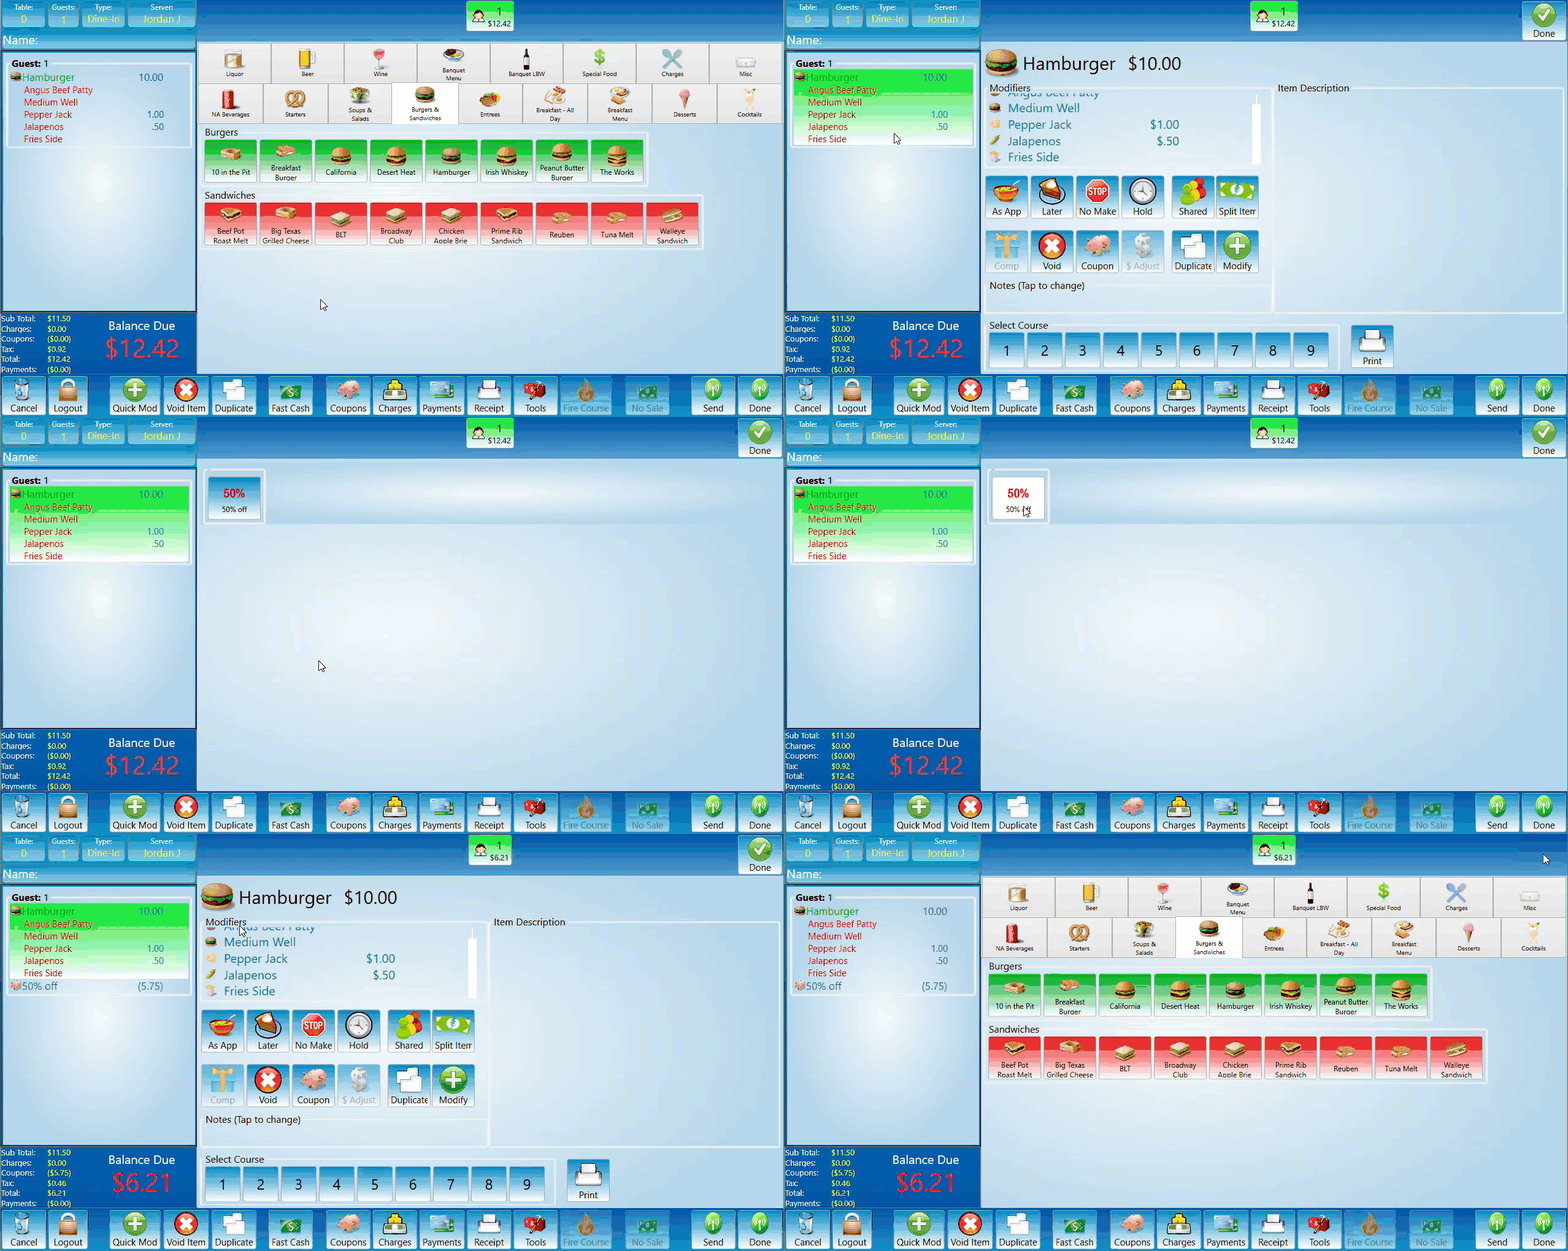
To comp an item select it then press the comp button. The button will prompt a list of comp reasons that vary based on your location. Select a reason and the comp is complete. Many locations have this feature require manager access rights. Coupon:The coupon lets you add a coupon to an individual item (instead of the whole table) from the modification screen. This will have all the options from your coupon tab.Price adjustment:This would be used as a temporary solution if the price of an item had not been updated in back office and the item needs to be changed manually until the updated price can be pushed to the system. The price for an individual item can be adjusted by selecting the item then selecting the adjust price button. A Prompt will appear asking for the new price of the item. Add the new price and hit enter. Many locations have this feature require manager access rights.
Move/Add/Change
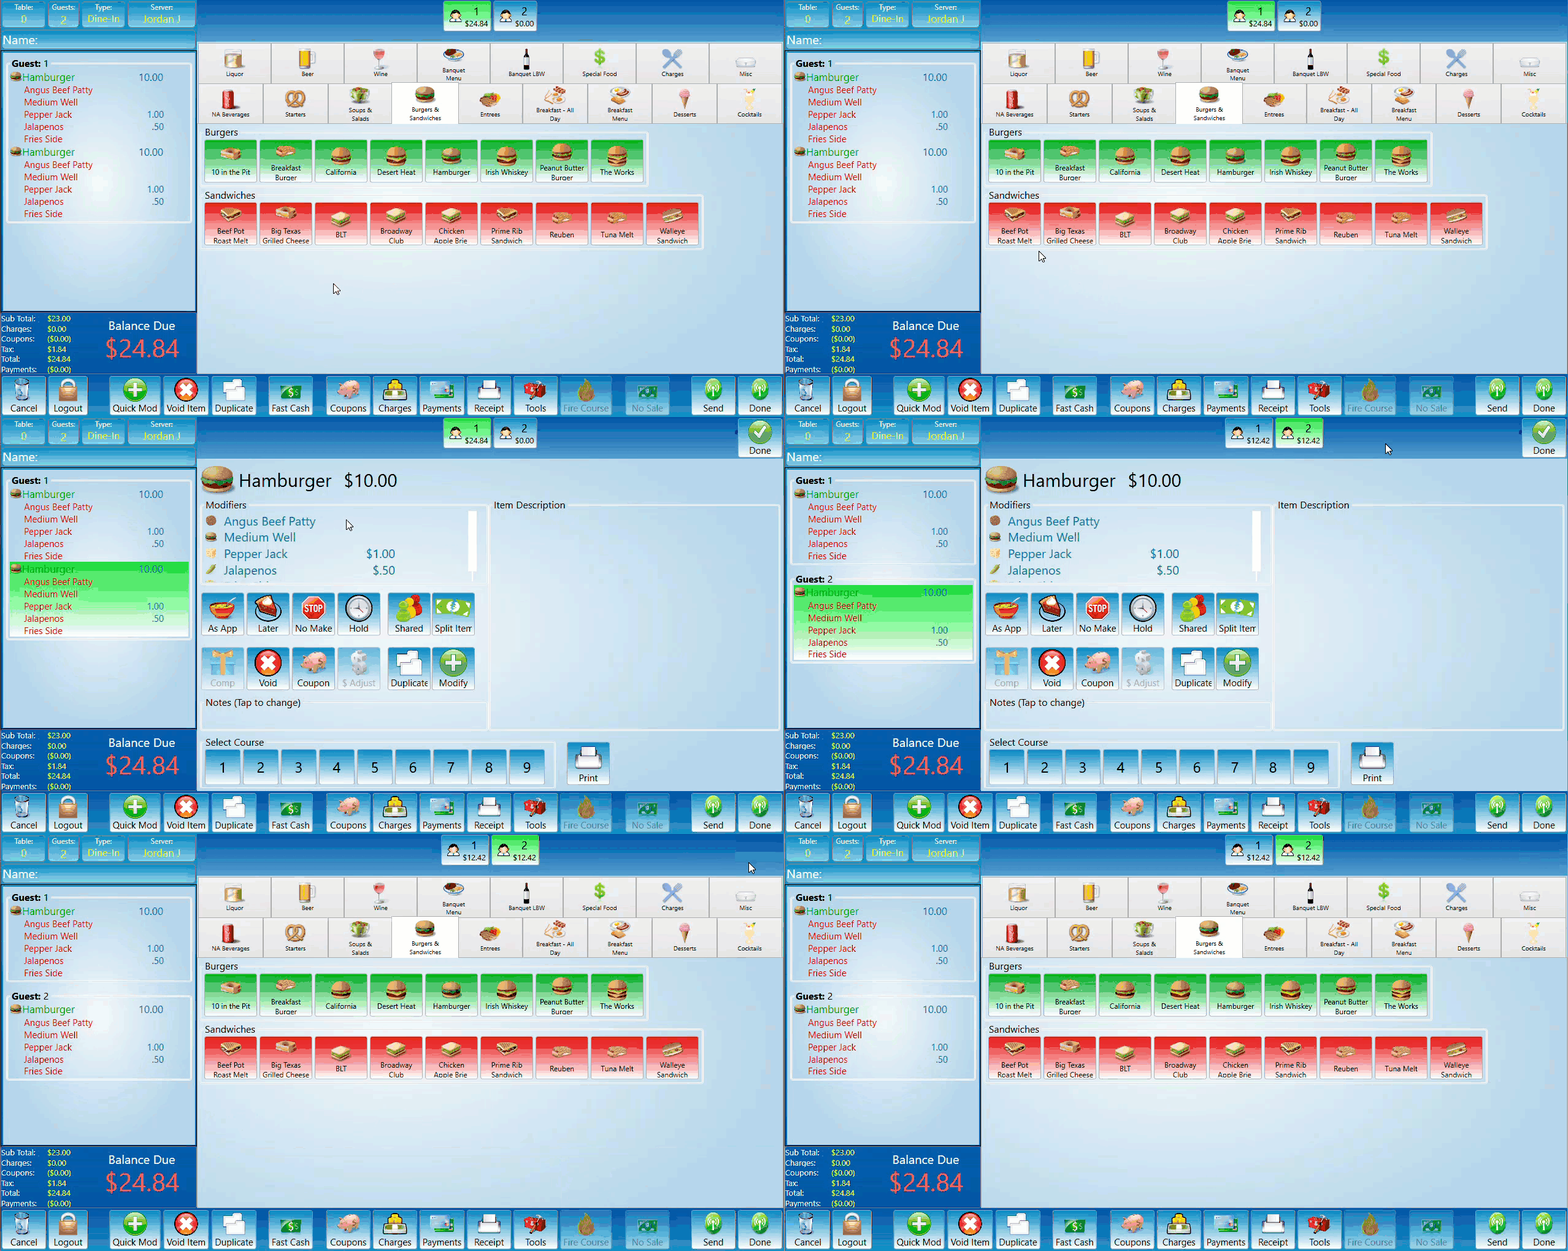
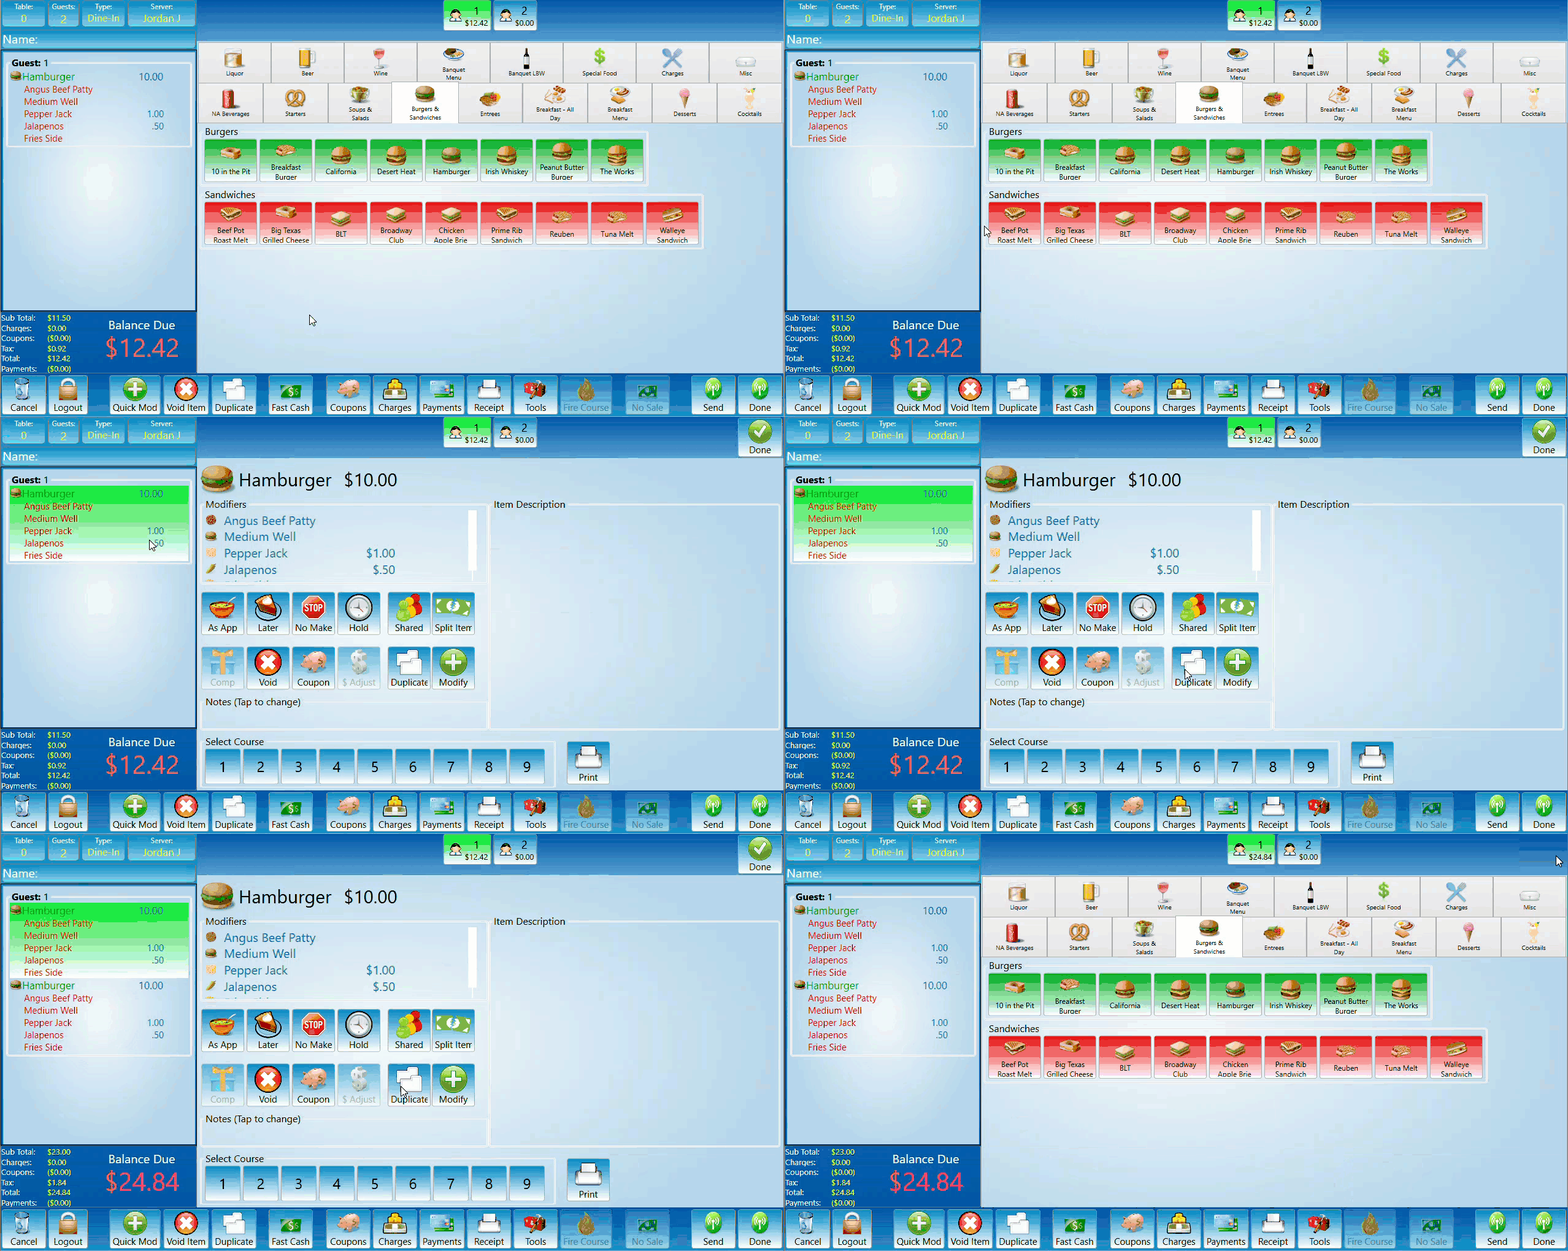
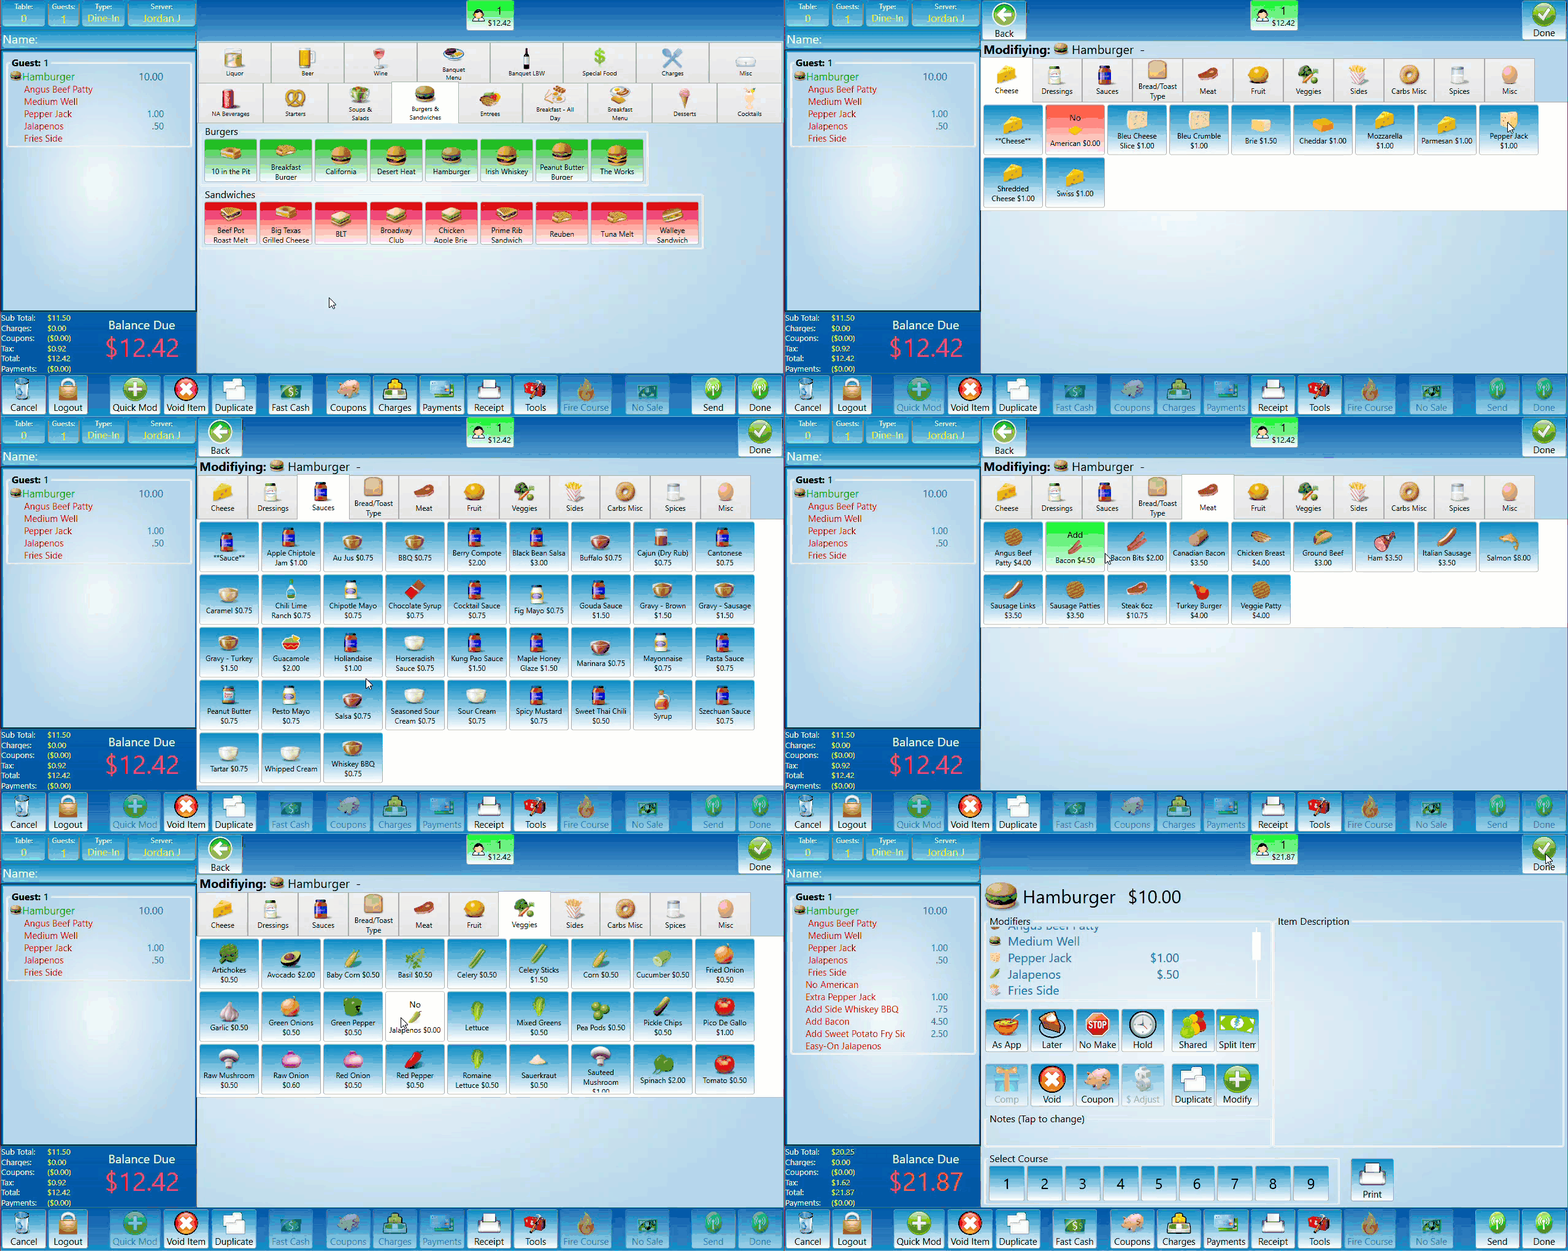
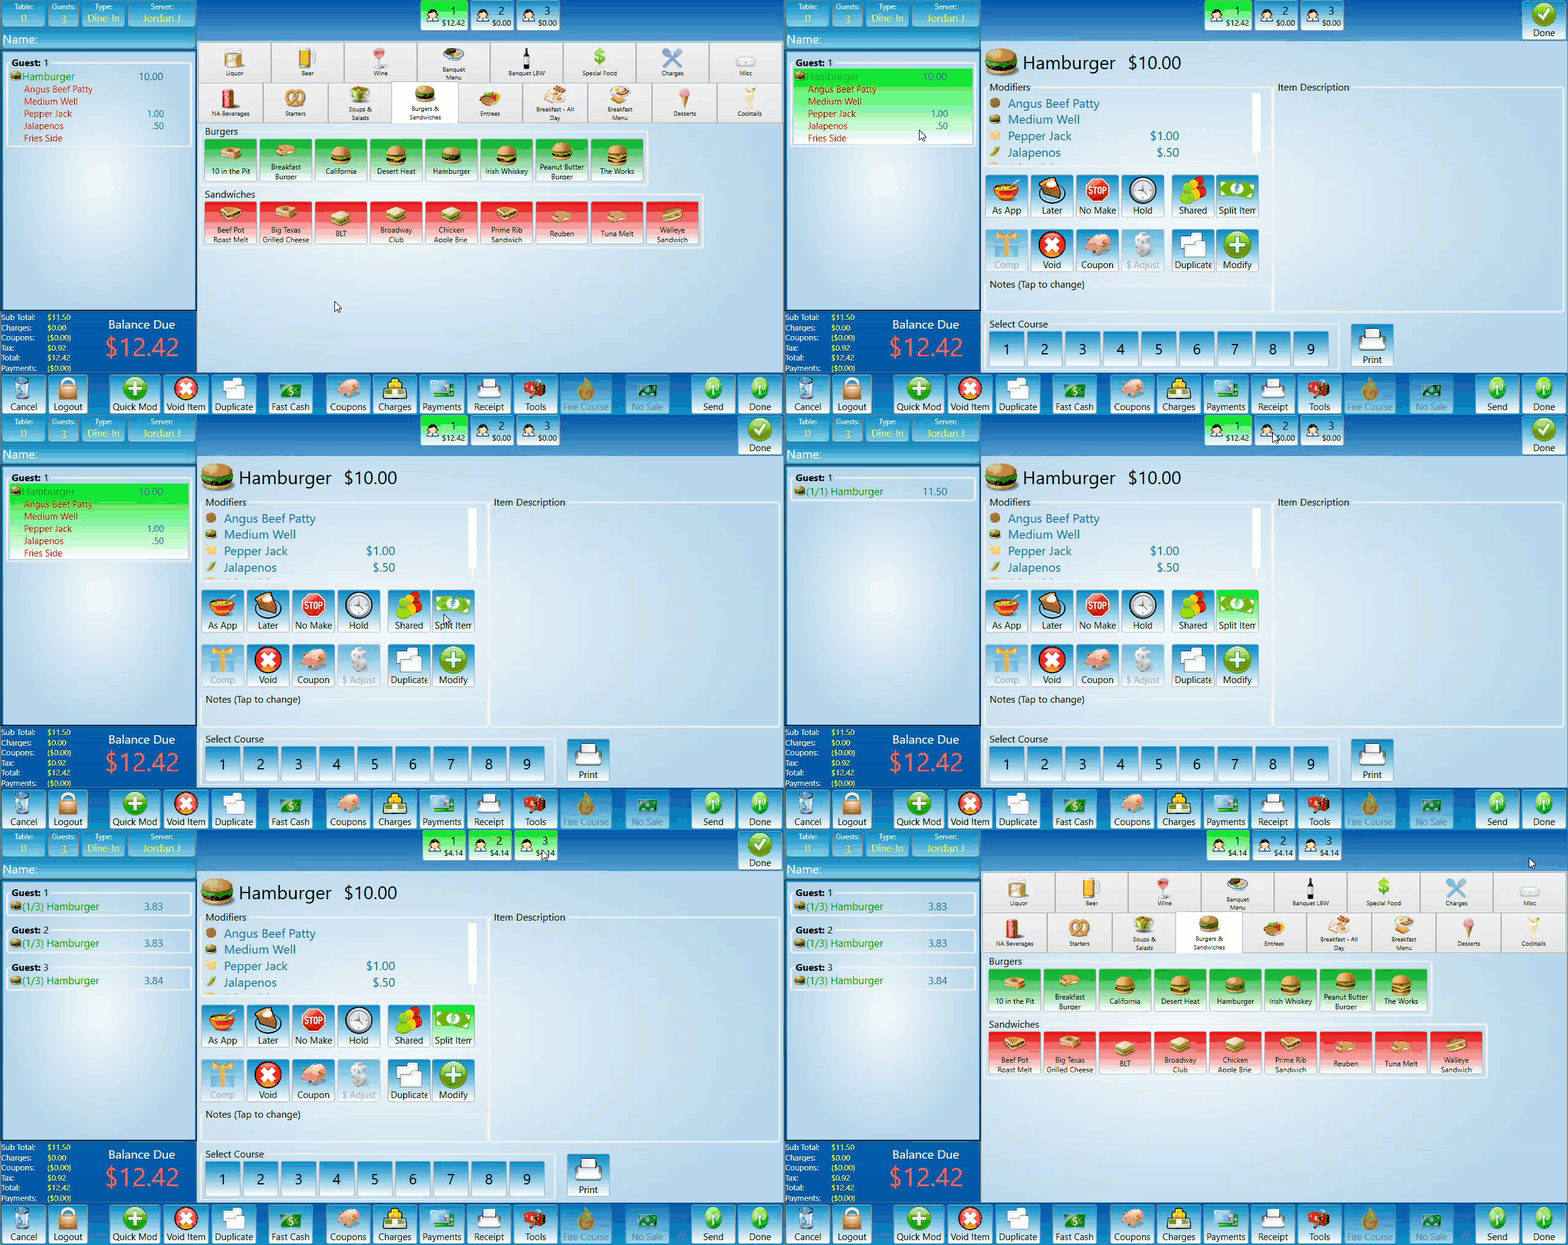
Transfer:To transfer an item, select it, then select the guest you would like to transfer the item too. The item will now appear under the guest it was transferred too and that guests total will reflect the change.Duplicate:To duplicate an item first select it then select the Duplicate button.Modify Item:To Modify an item, select it, then select the Modify button. Once selected you will be given options for just about any situation you will run into. The buttons in this section will not behave in a toggle as they do with most modifiers. Each button will have options to cycle through. They can be cycled through by pressing the button until the desired option appears. Options include Add, No, Add side, Move to Side, Extra, and Easy on. These options can be customized.Split item:Each item can be split between guests. This can be accomplished by selecting the item, selecting split, then selecting the guest you would like the item to be split with.

