How to configure Delivery Zones
Delivery Zones can be defined in the system and optionally linked to a Charge. When an order that is dispatchable is created either using Online Ordering, or on the terminal, it will verify which zone (if any) the customer's address is in. If the Zone is linked to a charge, the charge will automatically be applied to an order.
Note: Delivery Zones are set up for one location. If you have more than one location, pick the location at the top of the page, next to Delivery Zones, and set up the zones for each location.
How to configure a Delivery Zone
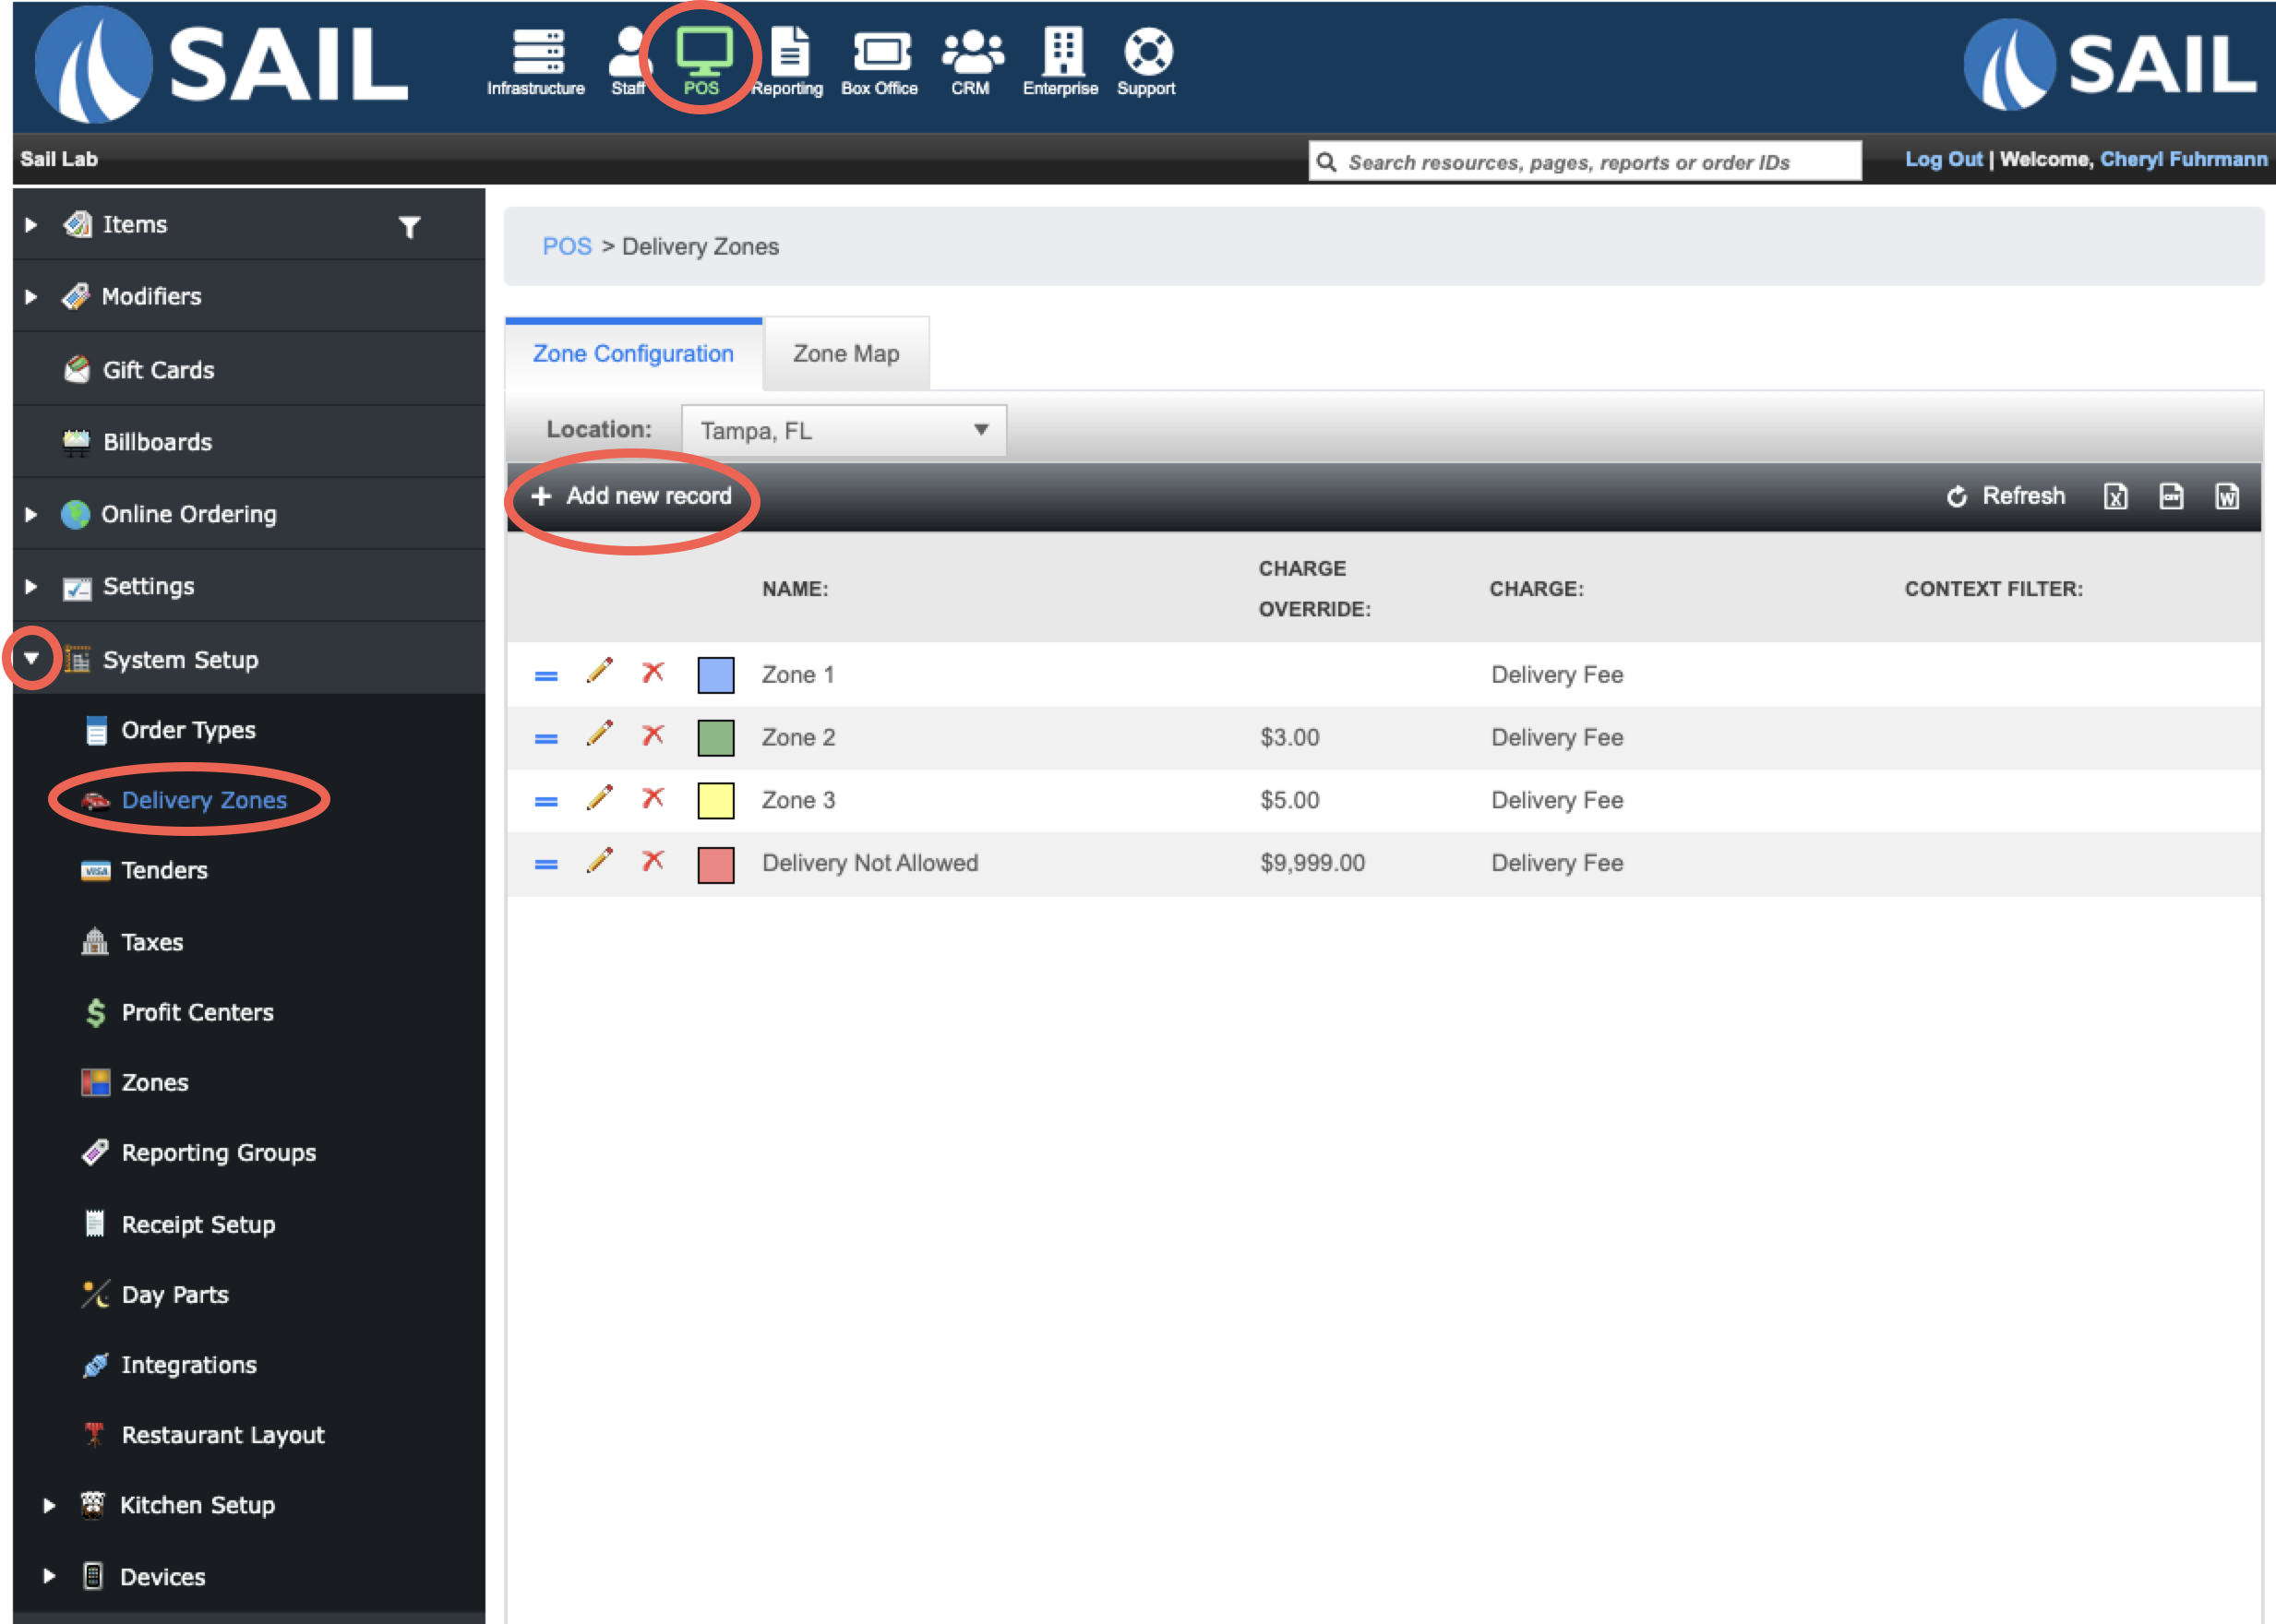
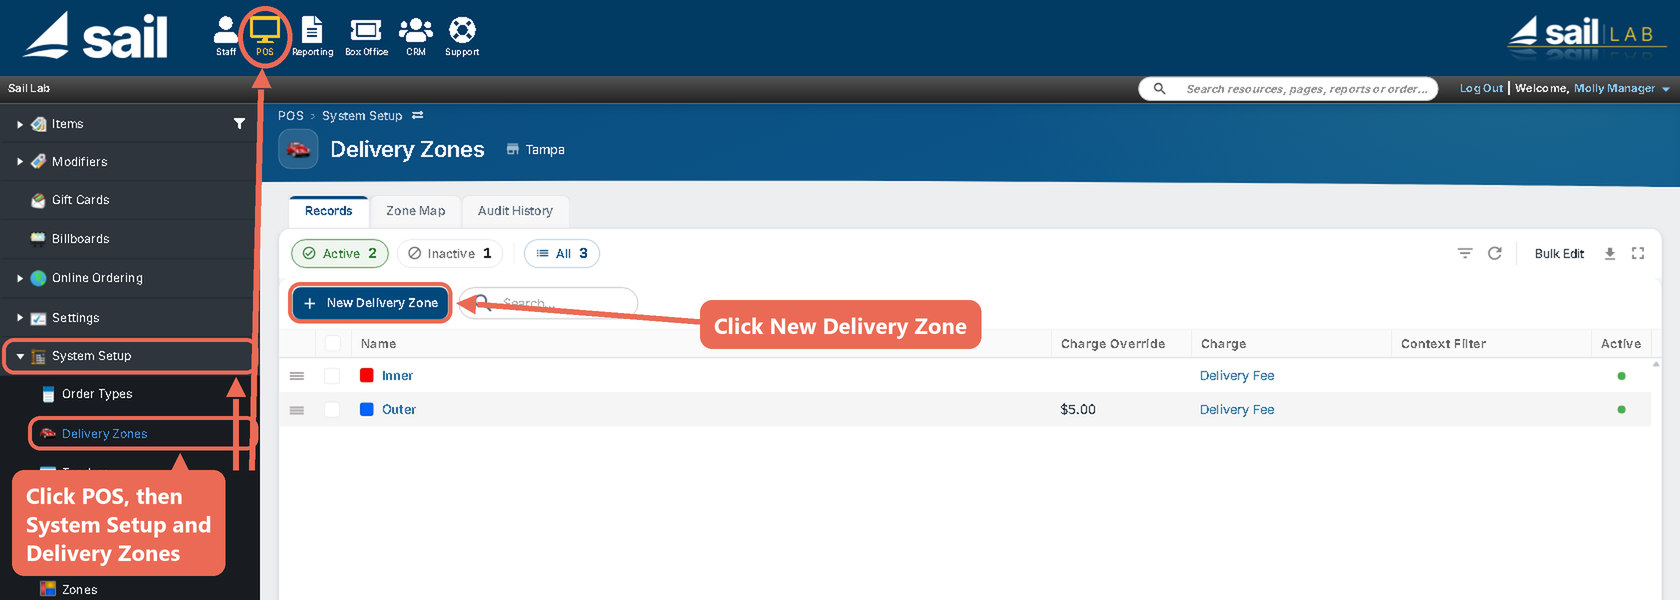
Log into Backoffice --> POS --> System Setup --> Delivery Zones --> AddNew newDelivery record
Zone
Zone Configuration
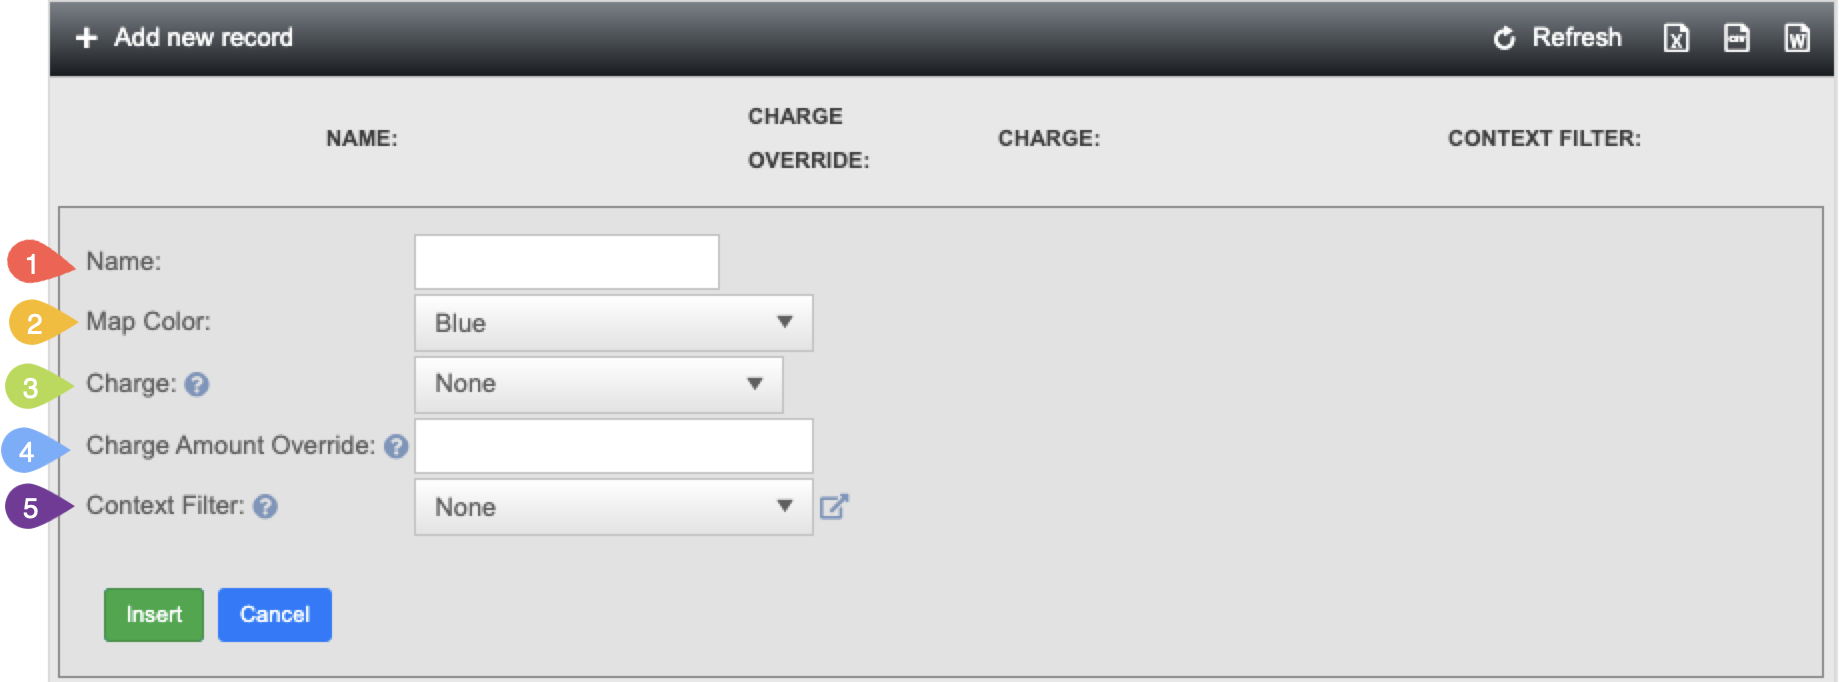
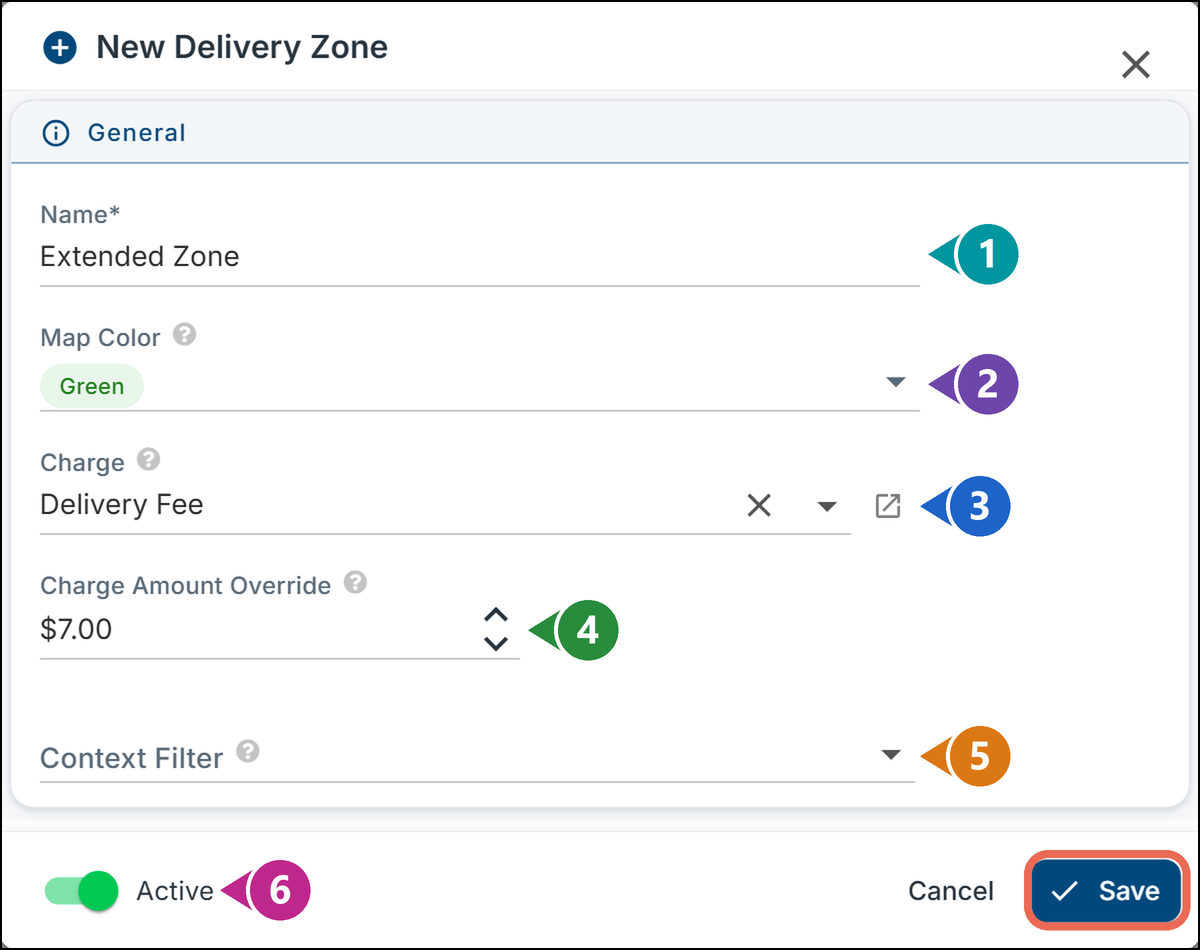
When you click AddNew newDelivery record,Zone, you’you'll be able to name and configure the settings for a specific delivery zone.
You can have as many zones as you'd like
-
Examples:Examples:-
Zone 1 & Zone 2
-
$1 Zone & $2 Zone
-
Within 5 Miles & Beyond 5 Miles
- Primary Zone & Extended Zone
-
-
- Map Color: Choose a color to visually represent this zone on the map.
- Color
Options
Options:
Blue, Red, Green, Yellow, Orange, Purple, Cyan, Pink, Brown and Gray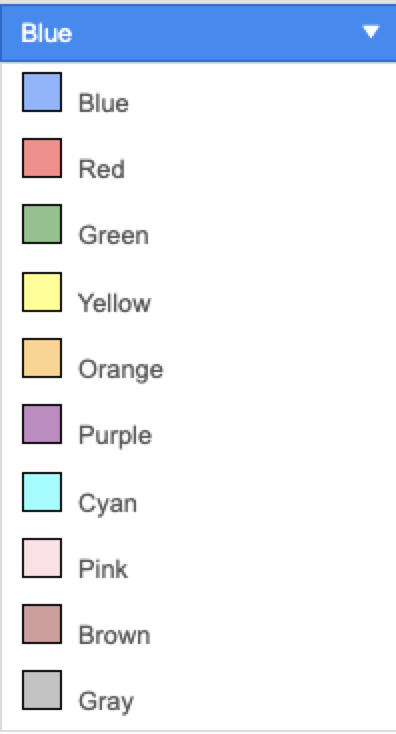
- Color
- Charge (Optional)
-
Select a delivery charge from the dropdown menu. This list includes all existing charges in the system.
-
If no charge is selected:
-
The zone will not apply a delivery fee.
-
It will simply be used to determine whether a customer is within the delivery area.
-
-
If a charge is selected:
-
Customers in this zone will be charged the selected delivery fee.
-
Each zone can have a different charge if needed.
-
-
- Charge Amount Override: (Optional)
-
Enter an amount here to override the original charge amount for this specific zone. Leave it blank to use the charge's own amount.
-
This allows you to use the same charge (e.g., "Delivery Fee") across multiple zones for reporting purposes, while applying different fee amounts.
-
Example:
-
Zone 1 uses the "Delivery Fee" charge, originally set at $1.
-
Zone 2 also uses the "Delivery Fee" charge, but you apply a Charge Amount Override to make it $3 instead
-
-
-
- Context Filter: (Optional)
- Apply a context filter to this zone if needed.
- Apply a context filter to this zone if needed.
- Active: On for a new zone. Turn it off to stop offering a zone without deleting it.
Then click Save. The zone is added to the list on the Records tab.
Note: If two zones overlap, an address goes into the zone that is higher in the list. To change the order, drag a zone by the handle (≡) at the start of its row.
Zone Map
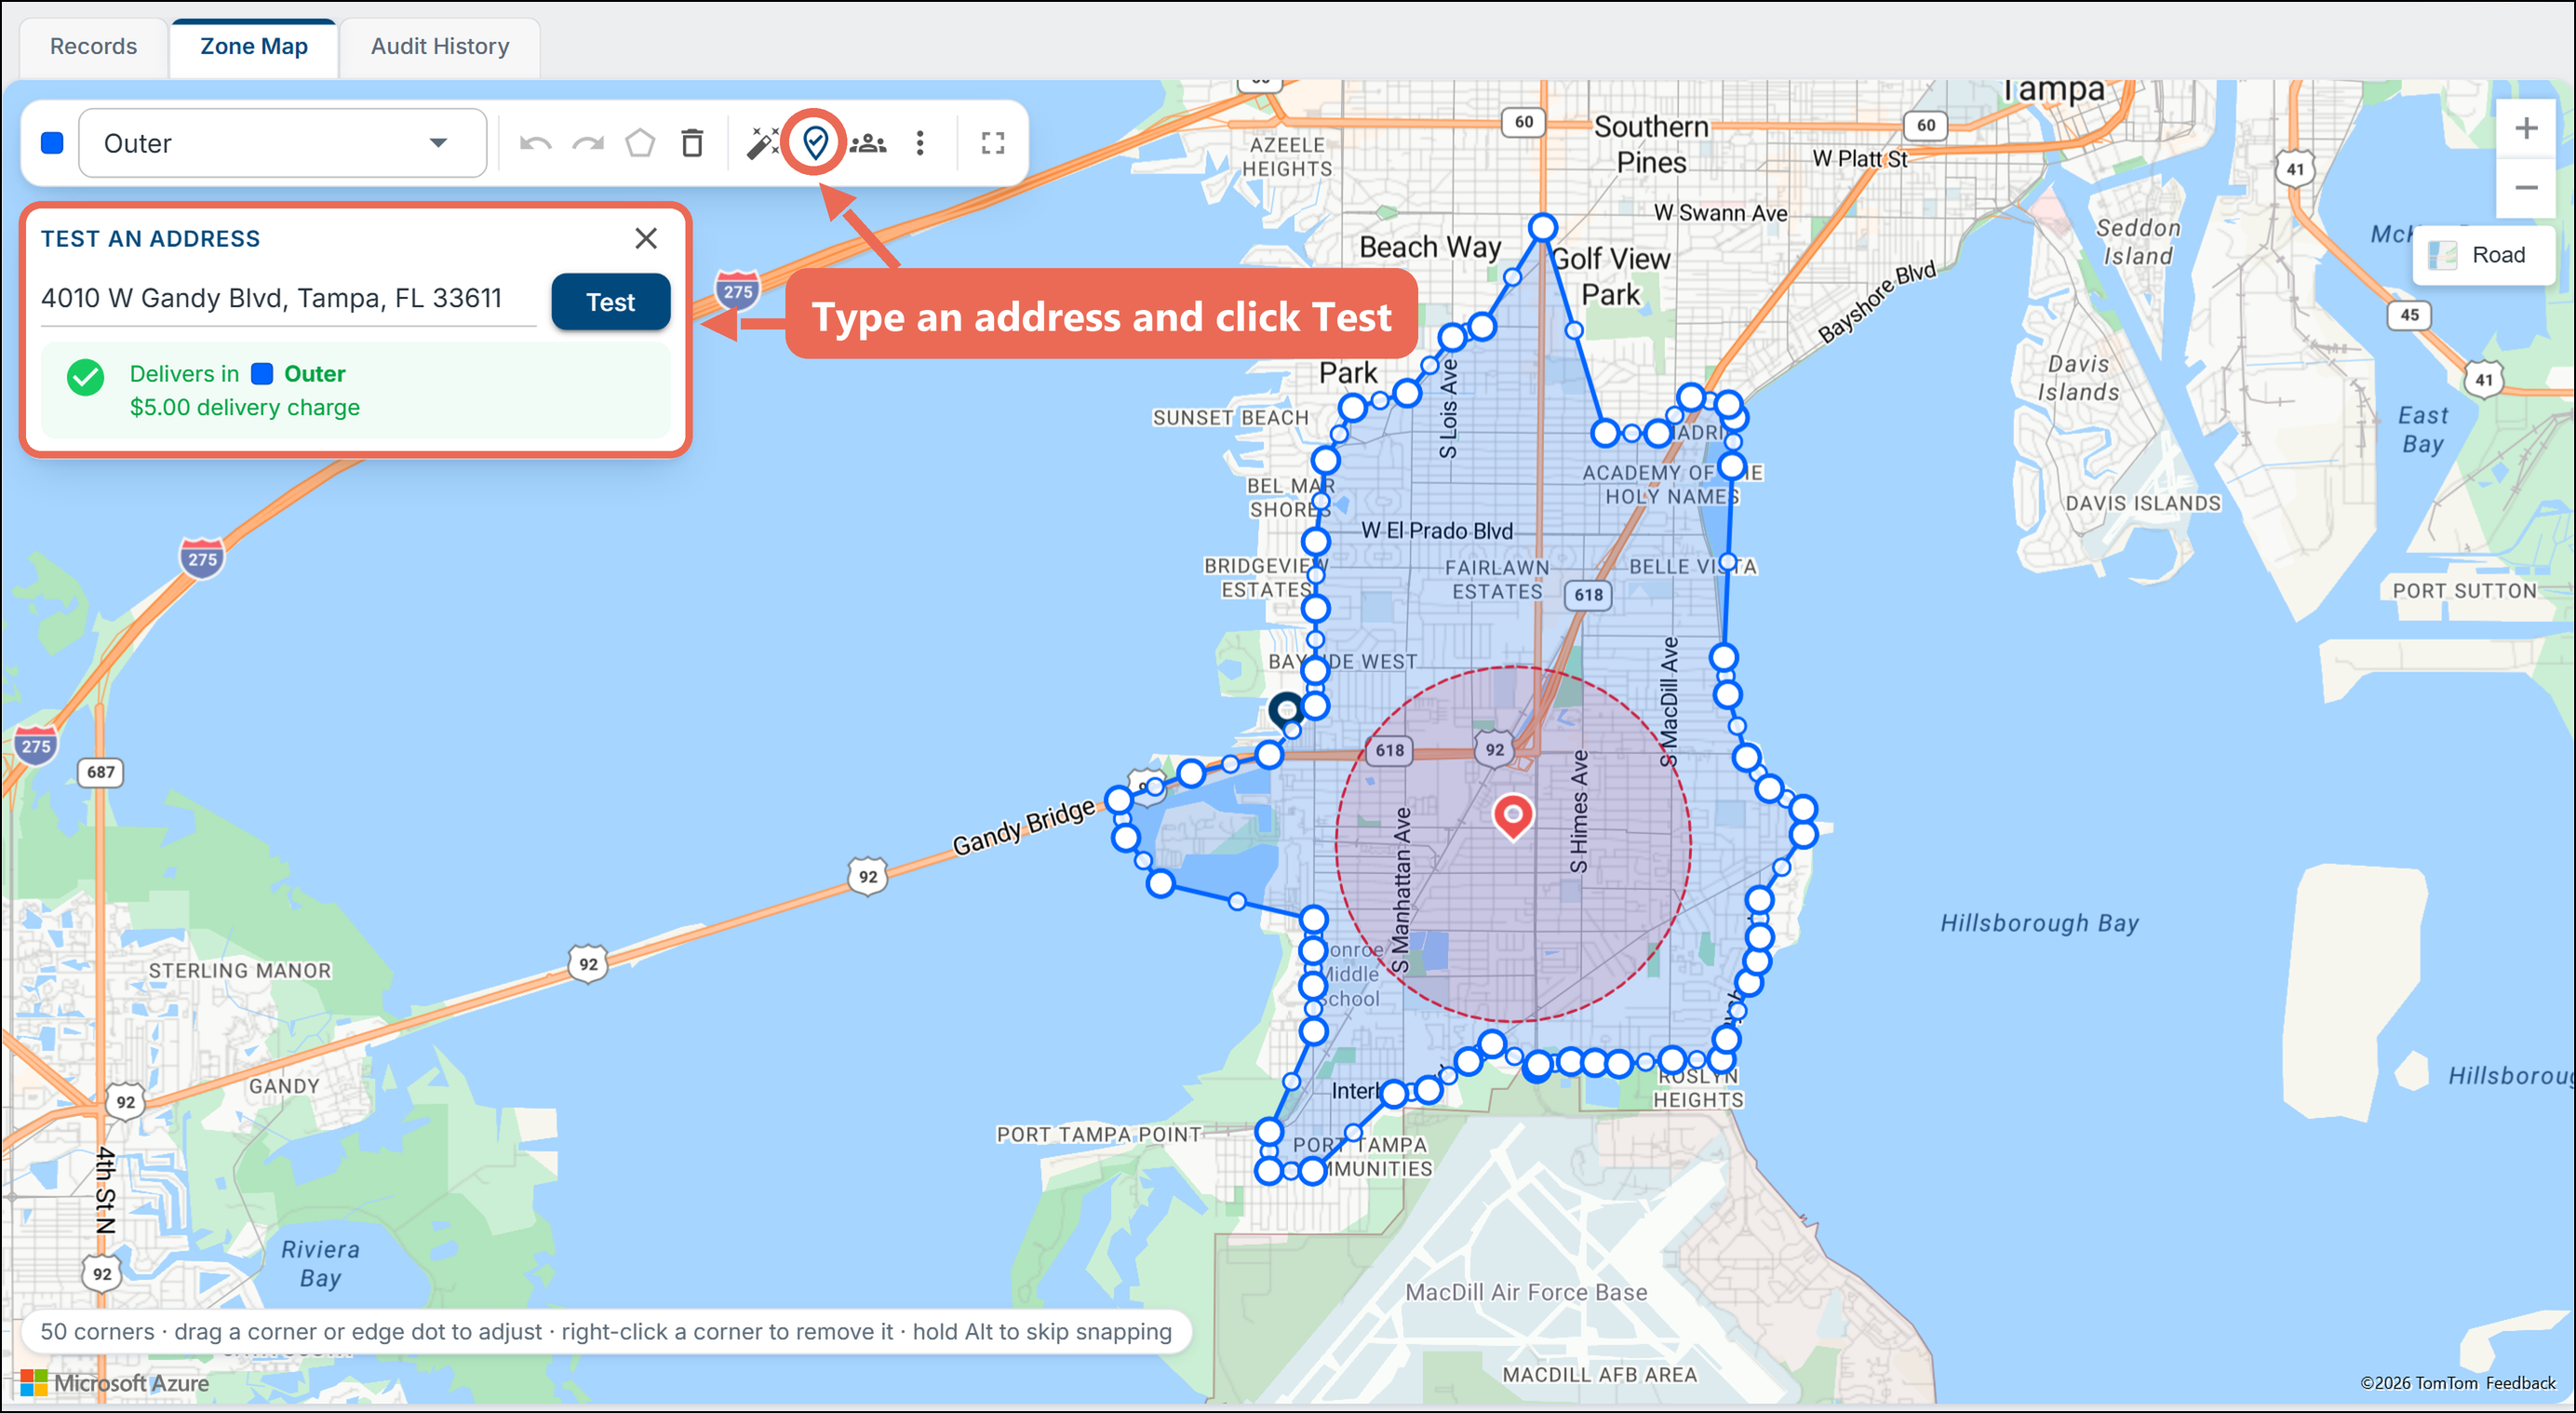
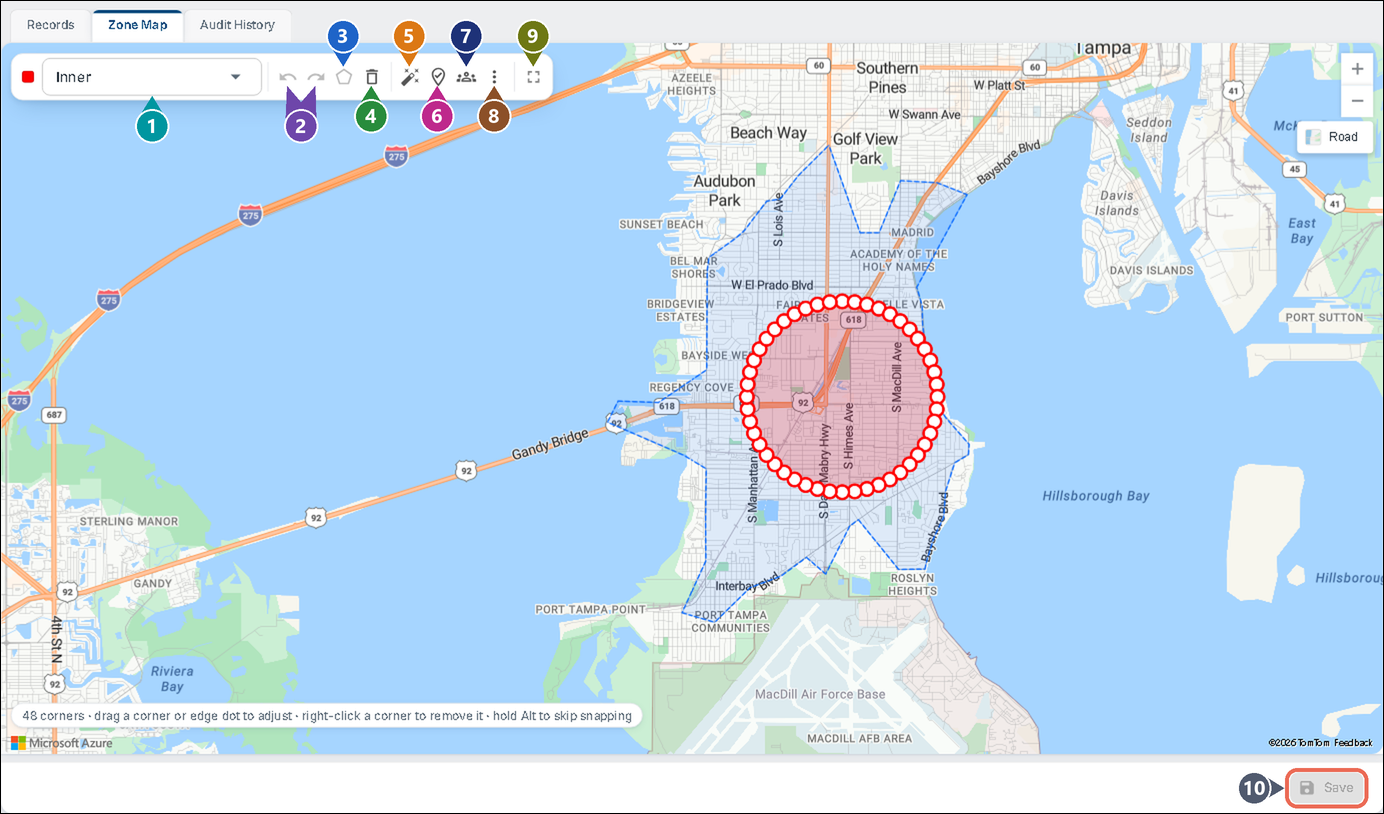
Go to the Zone Map tab to create the zones. The zone you're working on shows with its corners; your other zones show as dotted outlines.
- Zone:
- Use the Zone
Dropdrop down to move between the different zones you've created - Undo and Redo: undo or redo your last change to the boundary
- Close shape: completes the shape once it has at least 3 corners
- Clear boundary: start over
- Generate a boundary: draws the zone for you, by distance or drive time from your store (see below)
- Test an address: shows which zone an address is in (see below)
- Delivery customers: shows where your delivery customers are on the map, as dots or as a heat map, to help you decide where your zones should go
- More: import a boundary from a GeoJSON or KML file (for example from Google My Maps or Google Earth), or export your zones
- Full screen: makes the map fill the screen
- Save: saves the zone's boundary
- Use the Zone
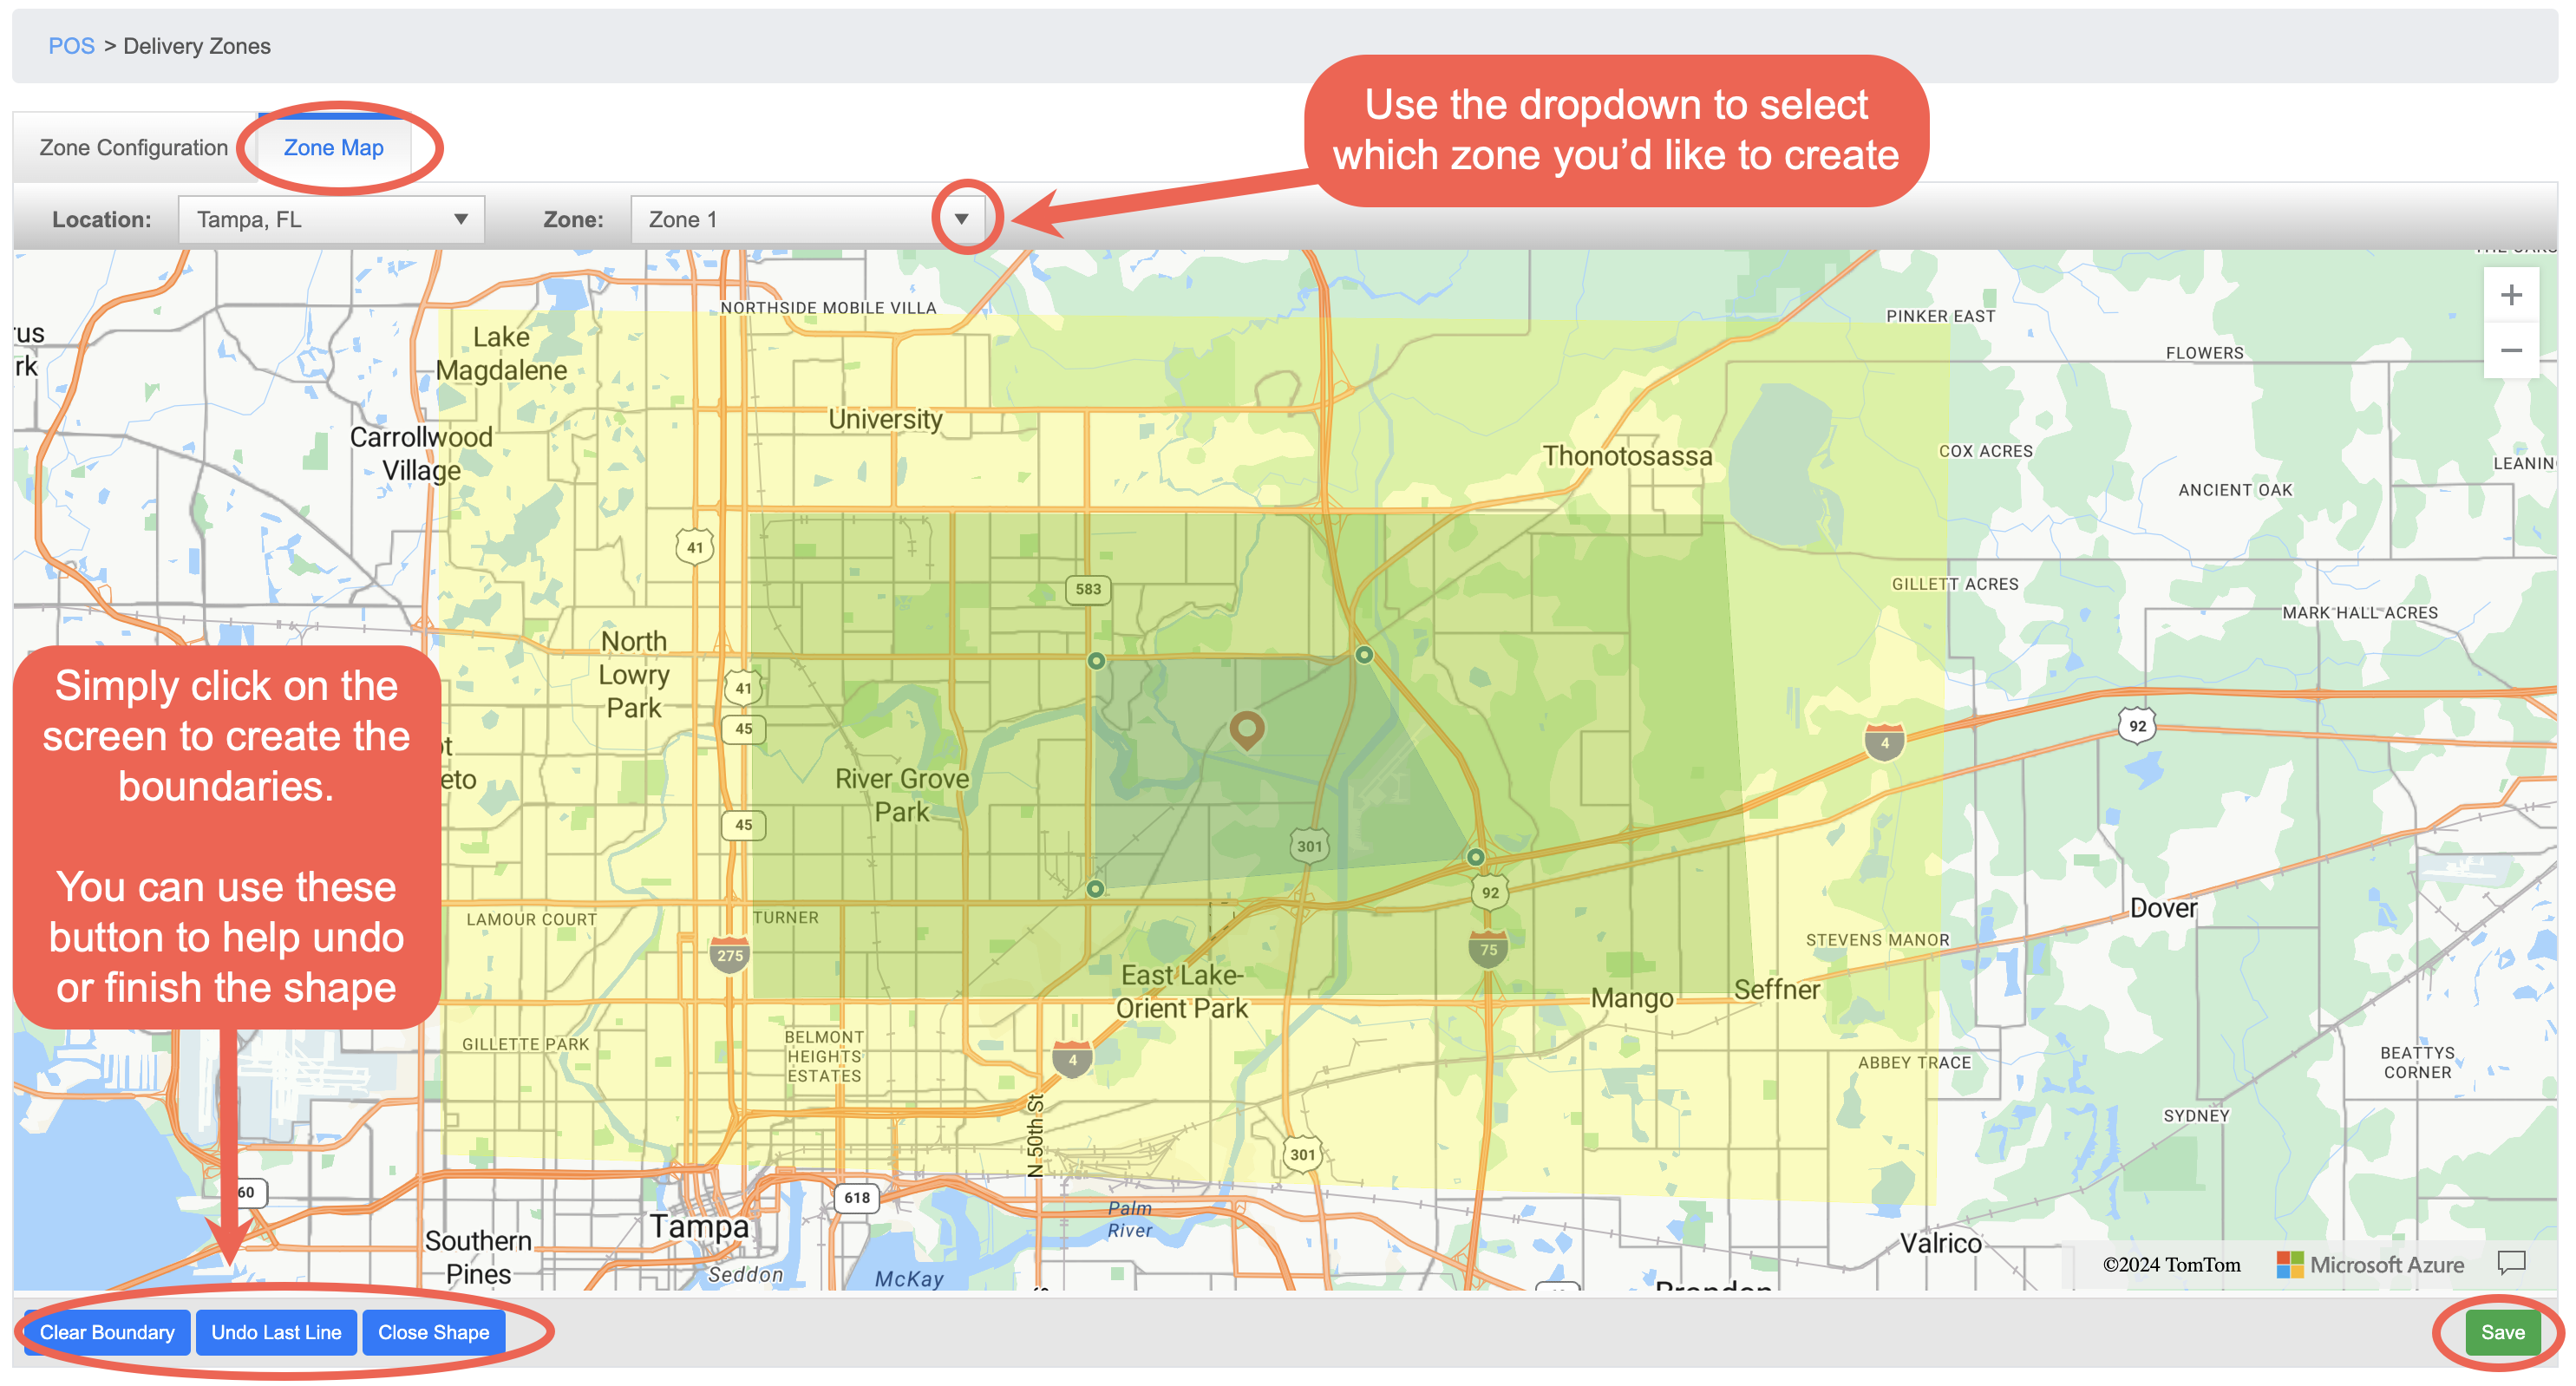
- Pick the zone in the Zone drop down
- Simply click on the map (in a circle or square rotation) to create the boundaries of your zone
The buttons onClick thebottomfirstleftcornercan help you undo a line, Start over,again, or click Close shape, to complete the shape- To adjust it, drag a corner, or drag the small dot in the middle of an edge to add a corner there. Right-click a corner to remove it.
- Then save it
- Measure from the store:
- Distance: a circle, the number of miles you enter around the store.
- Drive time: everywhere a driver can reach in the number of minutes you enter.
- Drive distance: everywhere a driver can reach by driving the number of miles you enter.
Drawing a zone
Generating a zone
Instead of drawing a zone by hand, click Generate a boundary and Sail draws it for you, measured from your store's address.
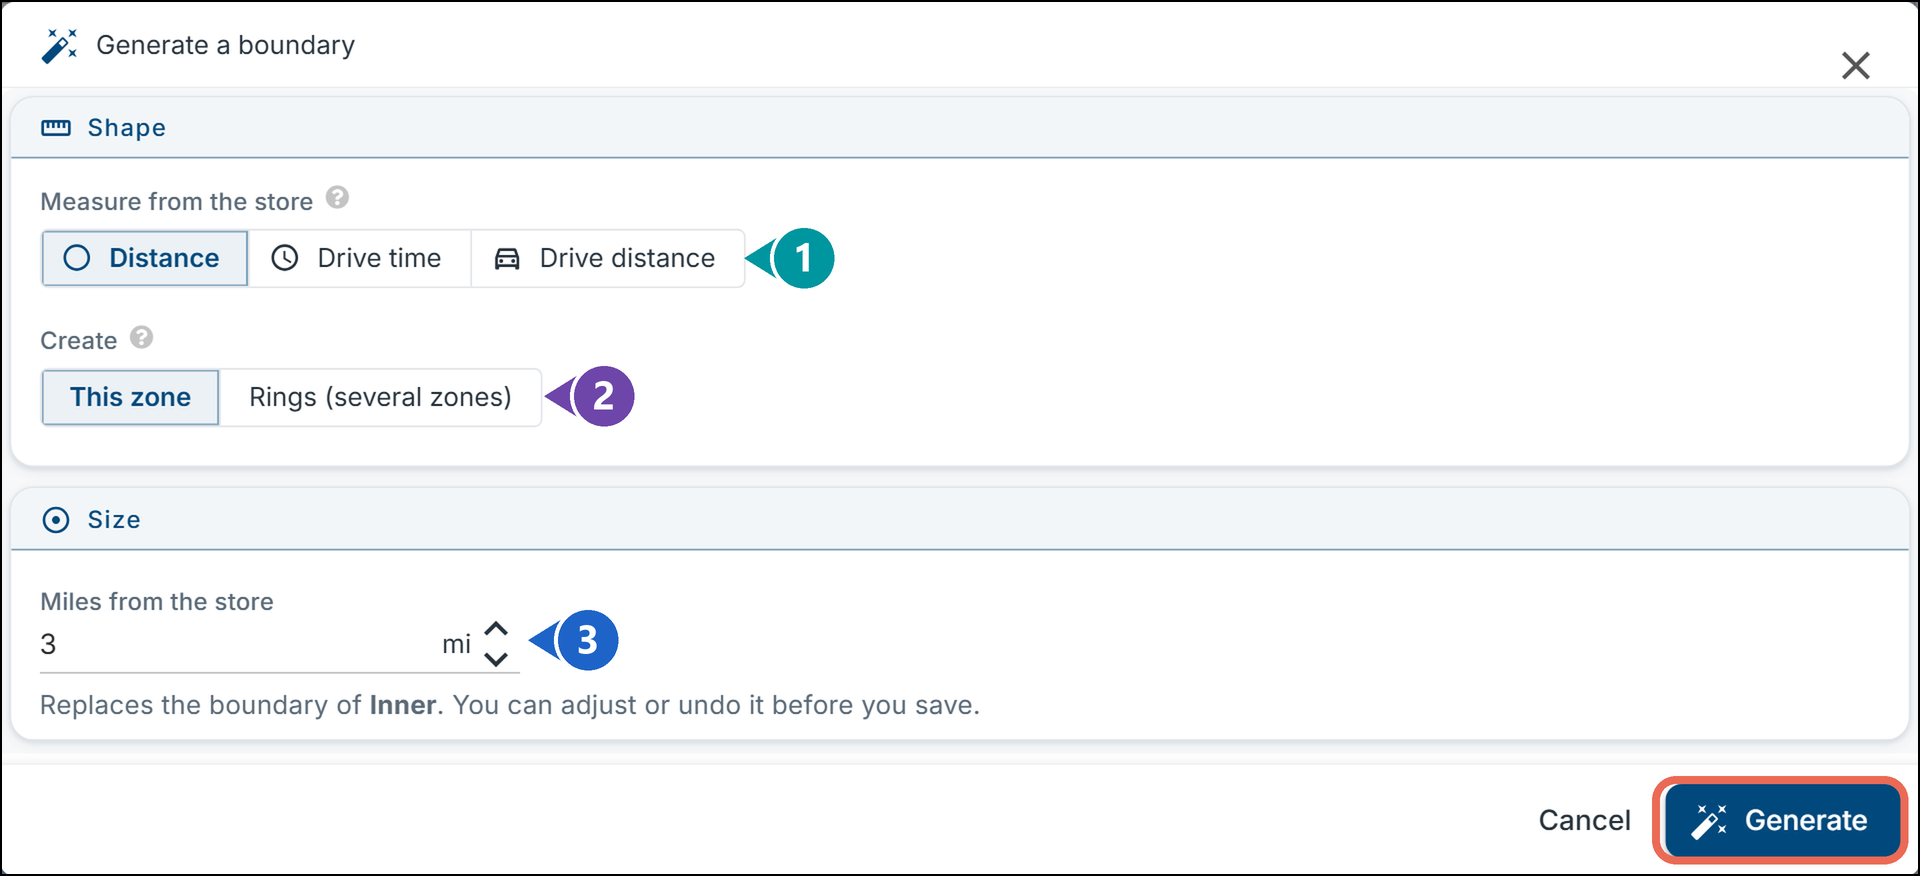
Click HereGenerate. isThe annew exampleshape ofreplaces buildingthe zoneszone's boundary on the zonemap; mapadjust it if you like, then click Save.
Generating several zones at once (rings)
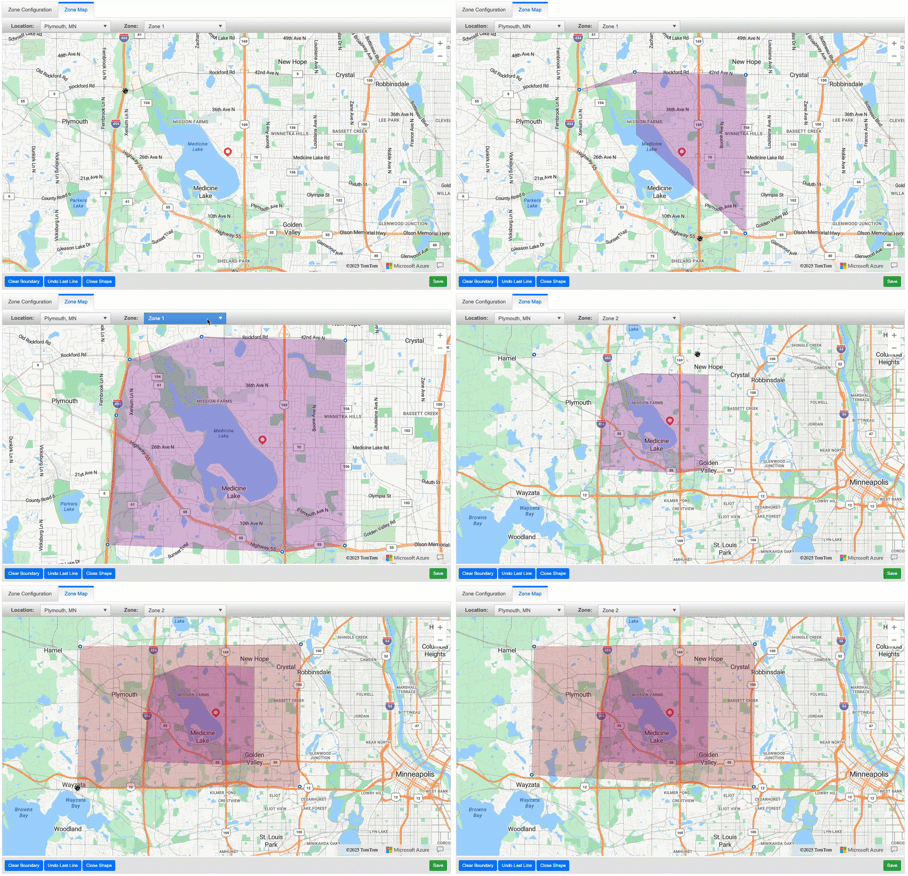
Rings create several zones around the store at once - for example a lower fee close by and a higher fee further out.
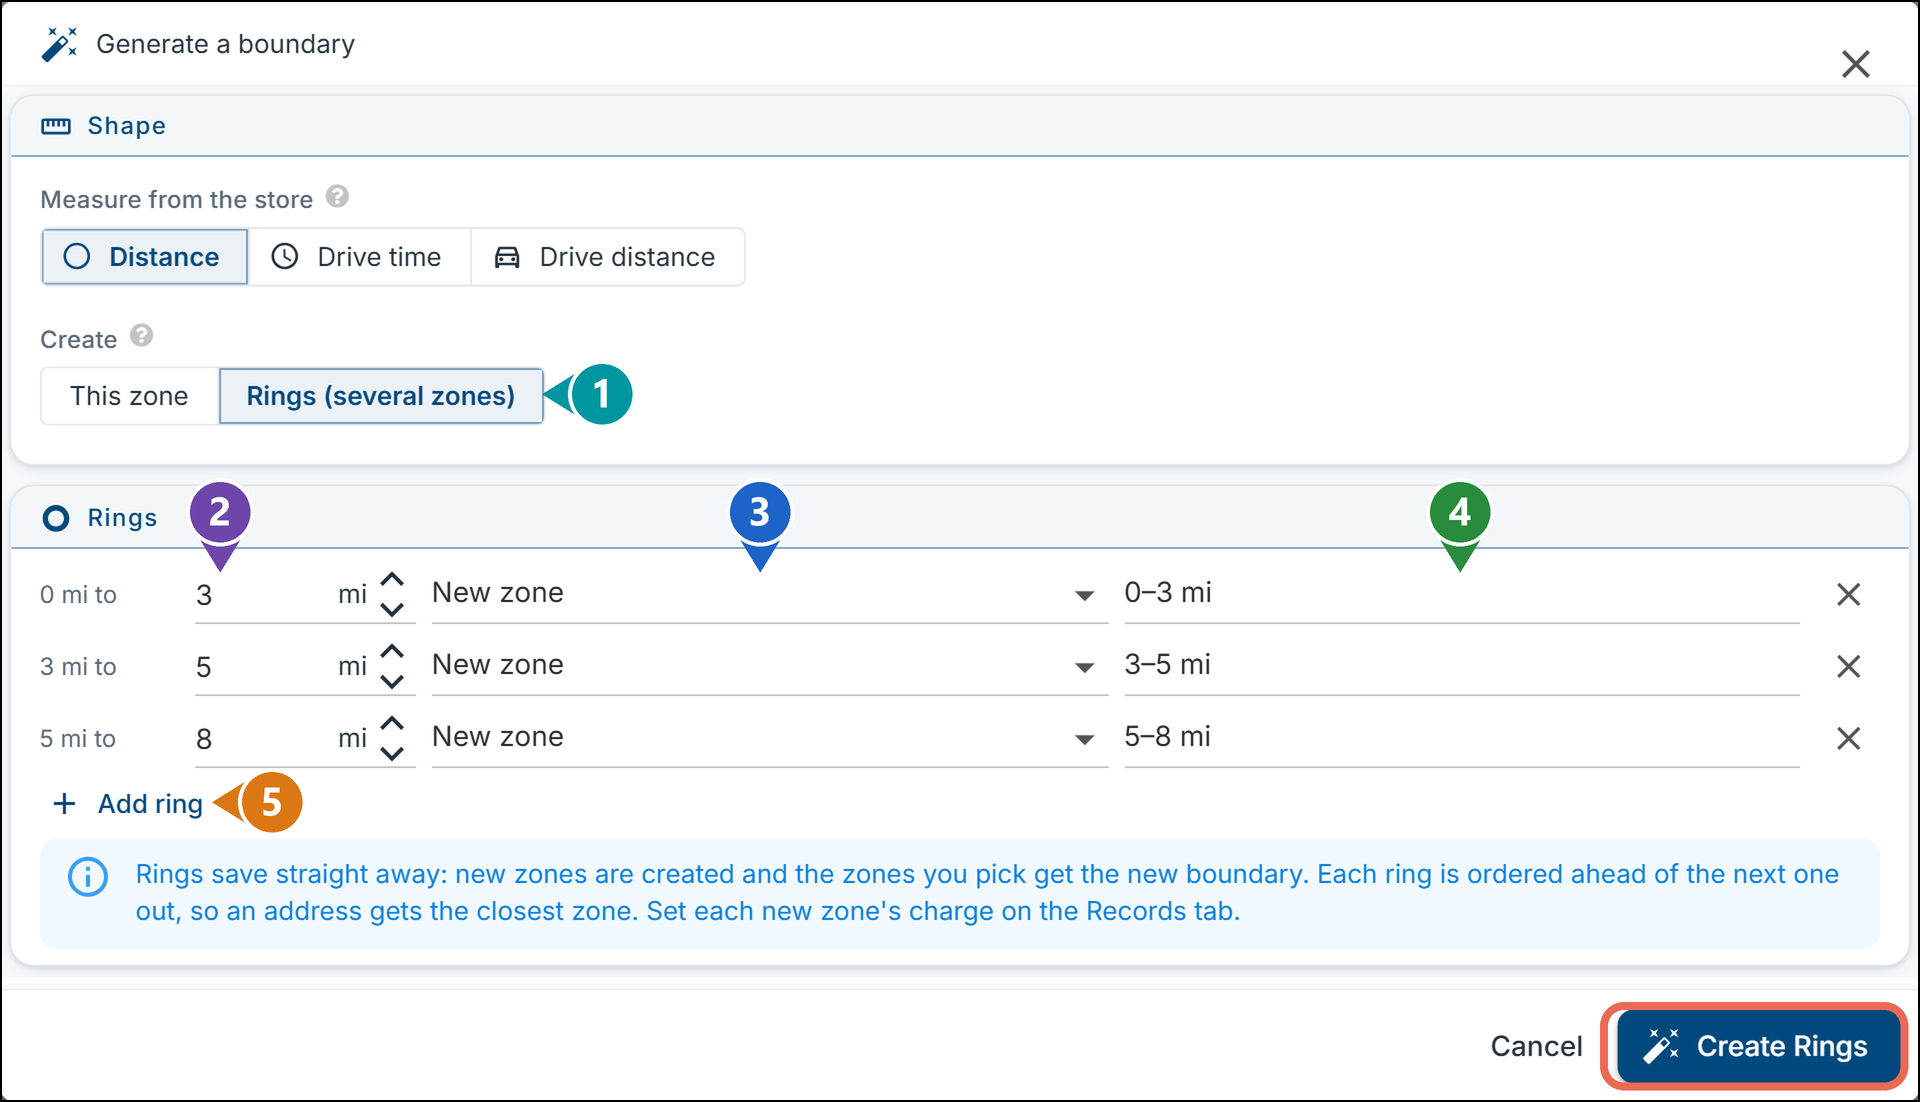
- Click Rings (several zones)
- For each ring, enter how far out it goes
- Pick New zone, or one of your zones to give it this ring
- For a new zone, type its name
- Click Add ring for another ring (up to 6), or the X at the end of a row to remove one
Click Create Rings.
Note: Rings are saved straight away - the new zones are created and the zones you picked get their new boundary. Each ring is put ahead of the next one out in the list, so an address gets the closest zone. Set each new zone's charge on the Records tab.
Testing an address
Click Test an address, type a street address with the city and ZIP, and click Test. The address is marked on the map, and you'll see which zone it's in and its delivery charge - or that it's outside every active zone, so delivery won't be offered there. It uses the boundaries as they are on the map, so you can check a change before you save it.