How to configure Delivery Zones
Delivery Zones can be defined in the system and optionally linked to a Charge. When an order that is dispatchable is created either using Online Ordering, or on the terminal, it will verify which zone (if any) the customer's address is in. If the Zone is linked to a charge, the charge will automatically be applied to an order.
You can create as many delivery zones as you'd likeThey will work on the terminals as well as onlineDelivery fees are optional
1. How to configure a Delivery Zone
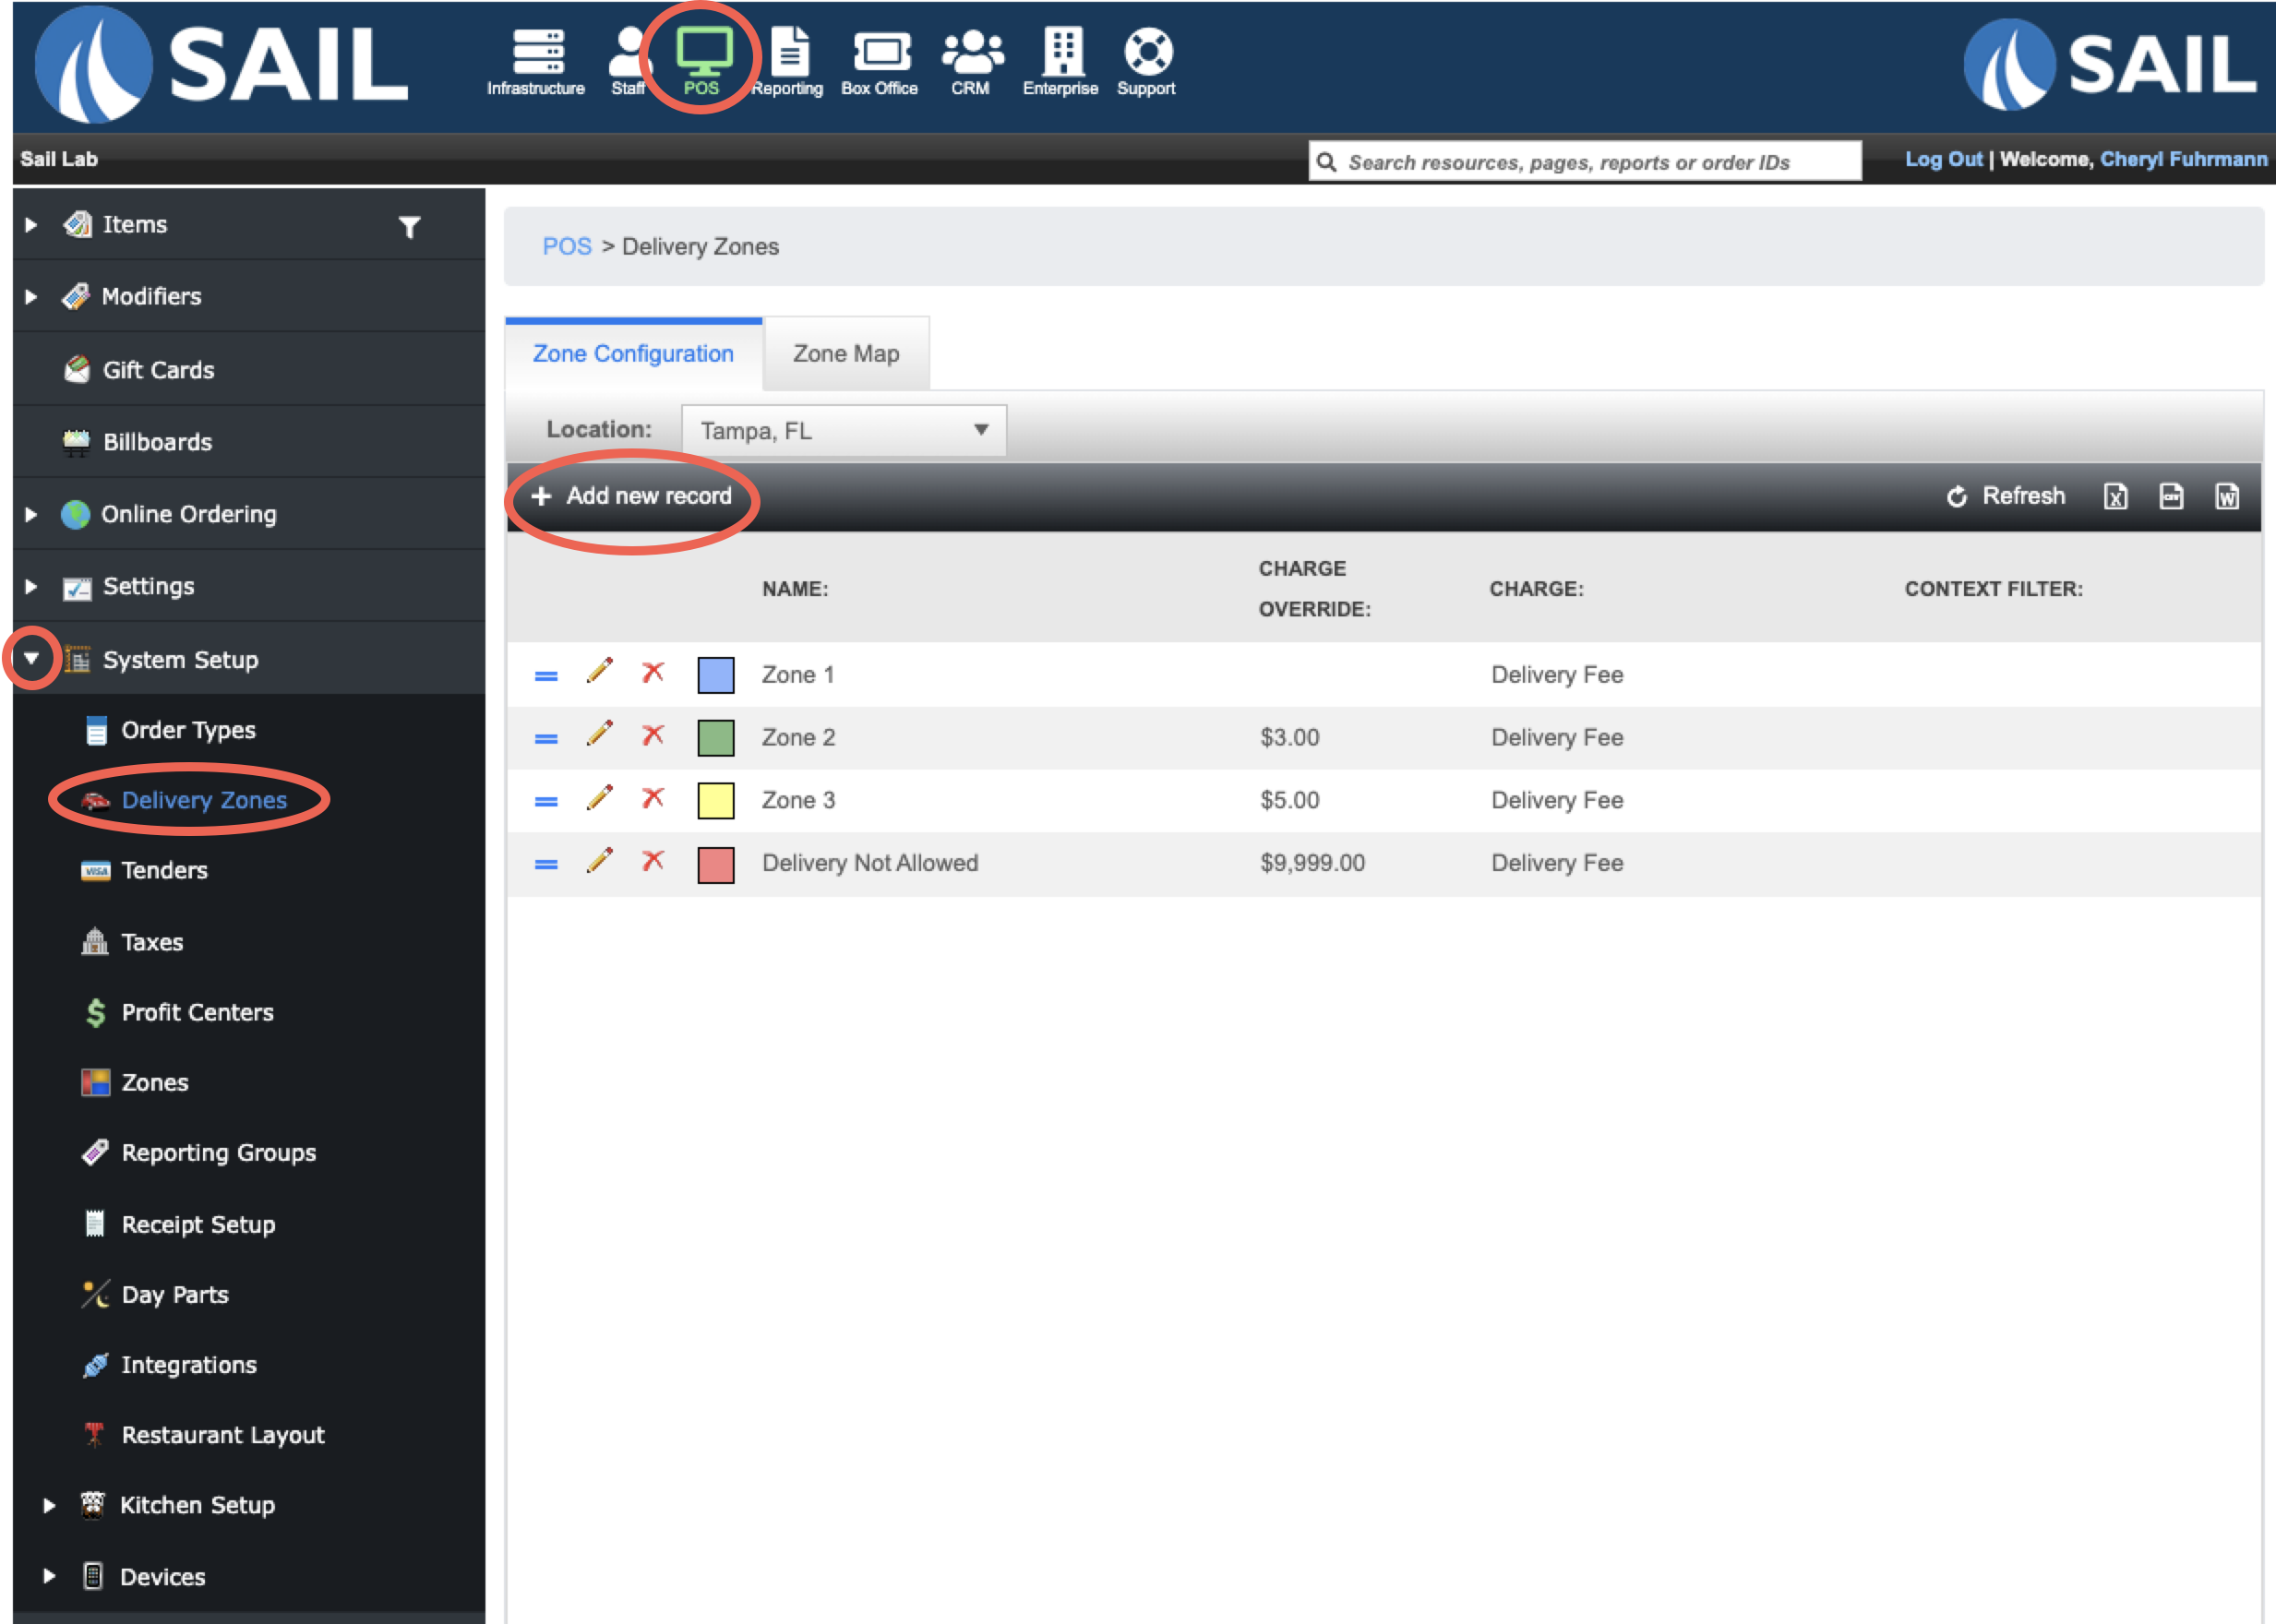
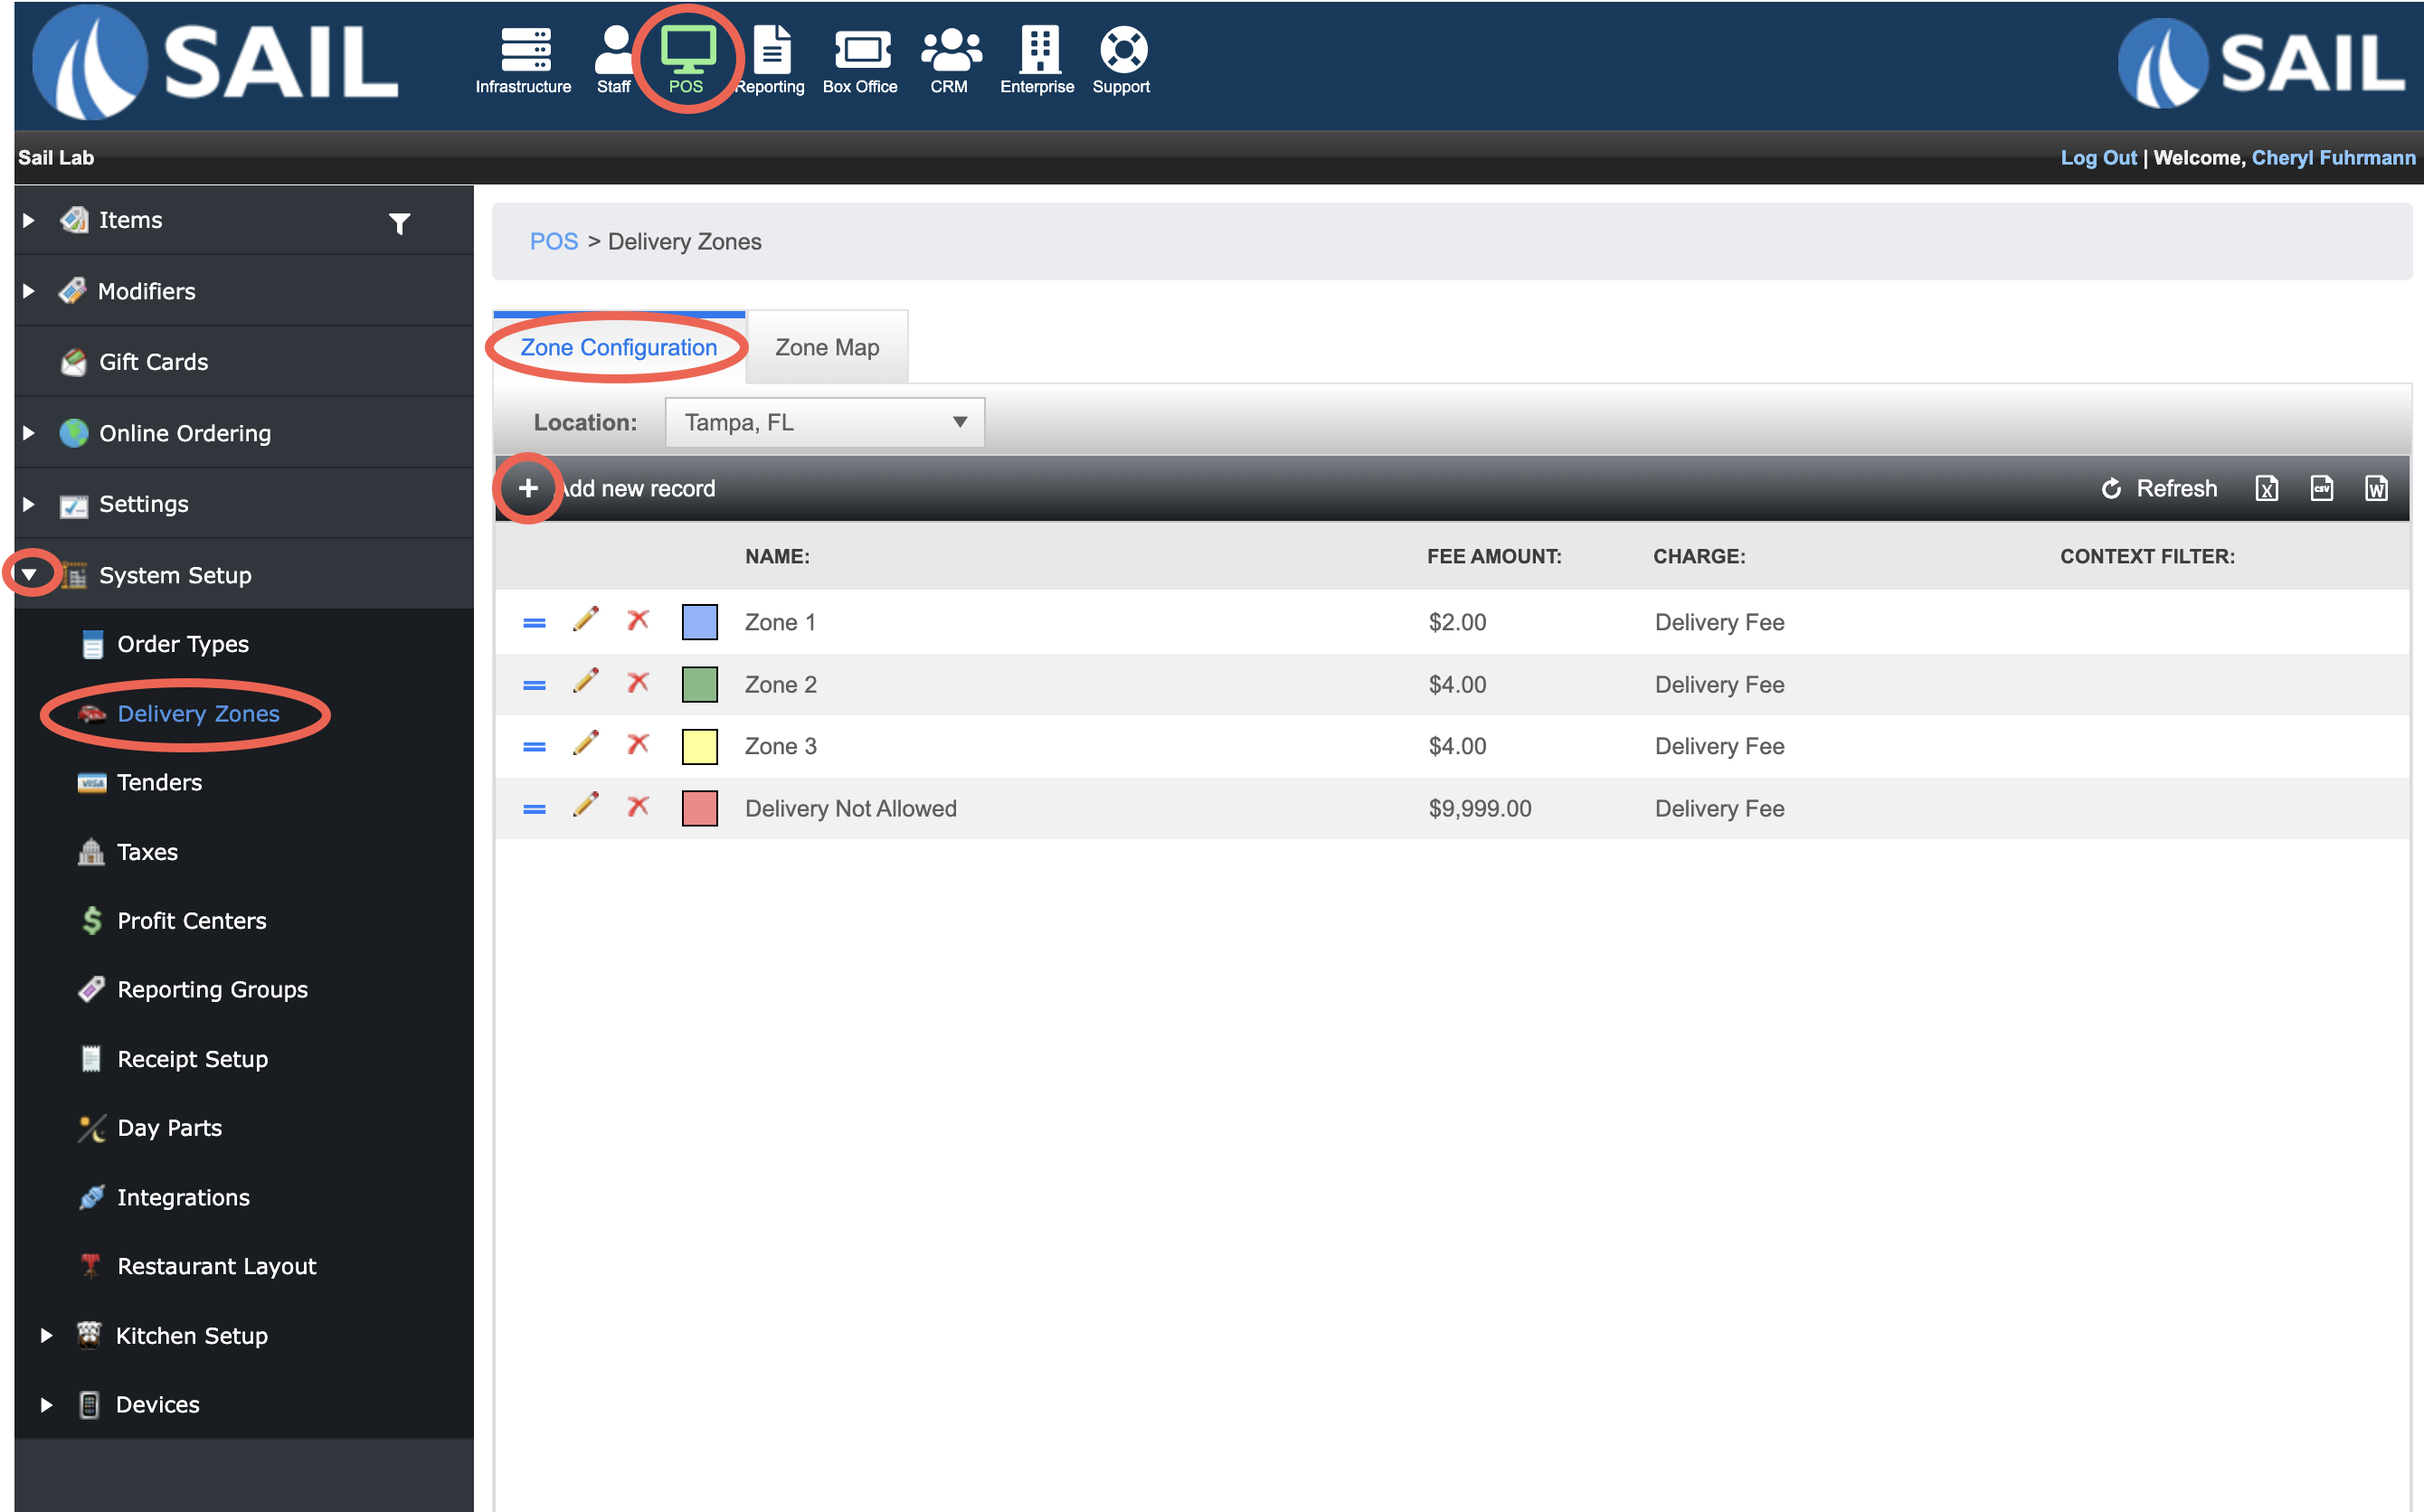
To set one up logLog into Backoffice --> POS --> System Setup --> Delivery Zones --> Add new record
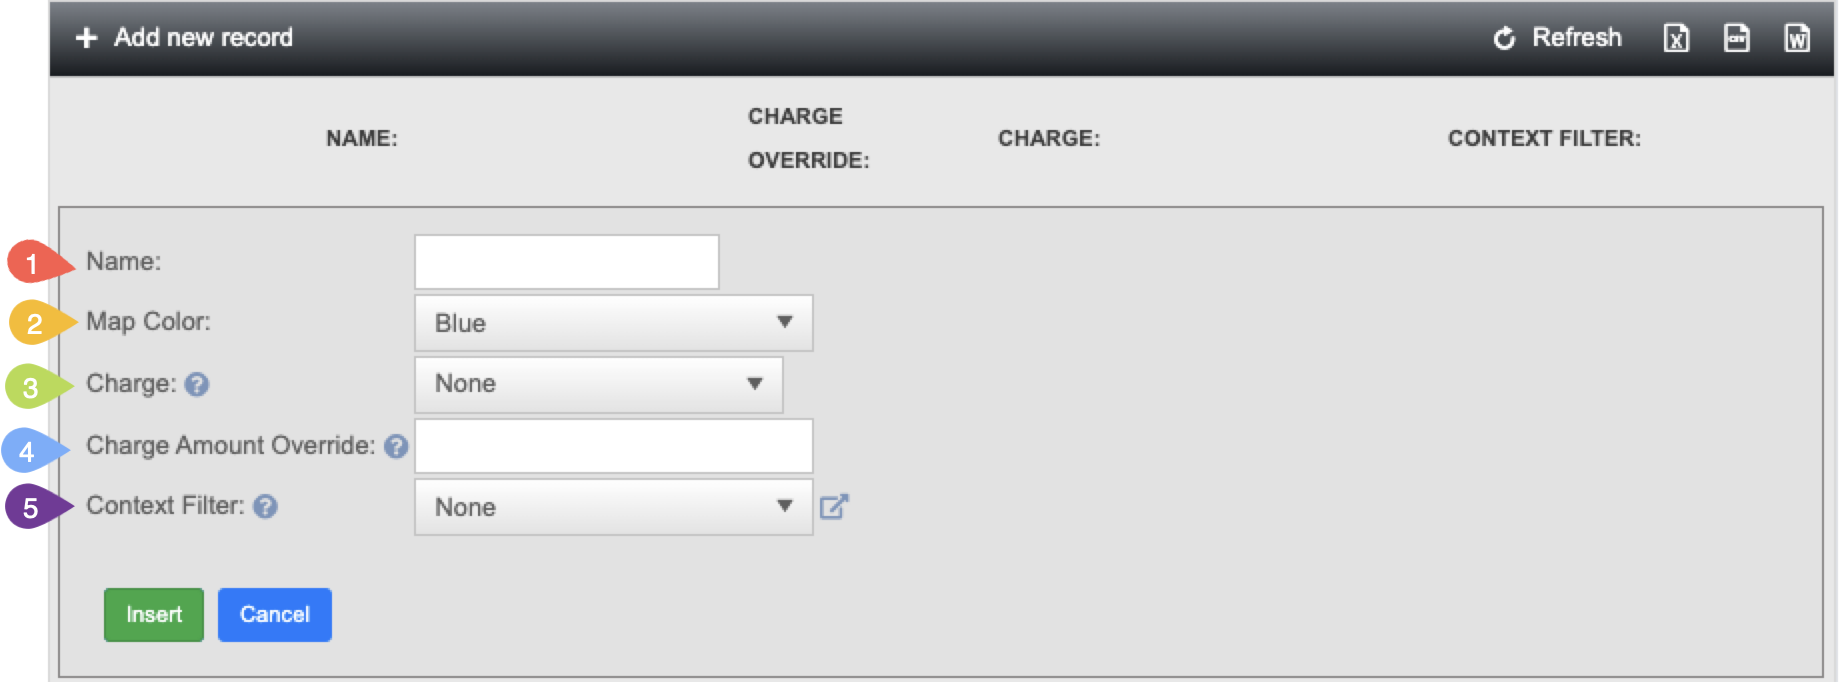
- Name: Give the zone a clear, descriptive name that reflects its purpose or geographic area.
-

-

Zone ConfigurationWhen you click Add new record, you’ll be able to name and configure the settings for a specific delivery zone.
You can have as many zones as you'd like
- Name: Give the zone a clear, descriptive name that reflects its purpose or geographic area.
-
Zone 1 & Zone 2
-
$1 Zone & $2 Zone
-
Within 5 Miles & Beyond 5 Miles
- Primary Zone & Extended Zone
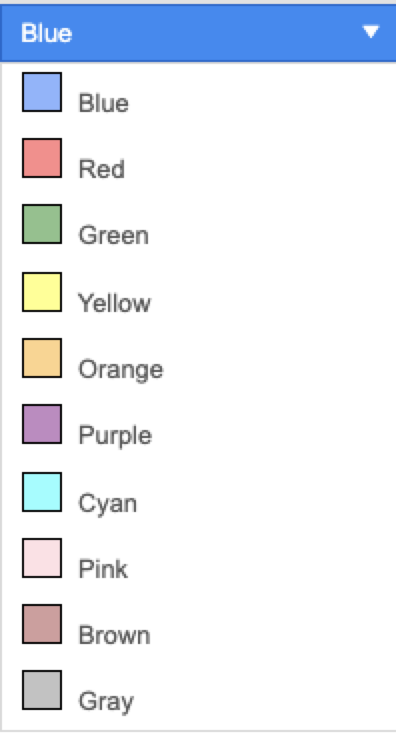
- Map Color: Choose a color to visually represent this zone on the map.
- Color Options

- Color Options
- Charge (Optional)
-
Select a delivery charge from the dropdown menu. This list includes all existing charges in the system.
-
If no charge is selected:
-
The zone will not apply a delivery fee.
-
It will simply be used to determine whether a customer is within the delivery area.
-
-
If a charge is selected:
-
Customers in this zone will be charged the selected delivery fee.
-
Each zone can have a different charge if needed.
-
-
- Charge Amount Override: (Optional)
-
Enter an amount here to override the original charge amount for this specific zone.
-
This allows you to use the same charge (e.g., "Delivery Fee") across multiple zones for reporting purposes, while applying different fee amounts.
-
Example:
-
Zone 1 uses the "Delivery Fee" charge, originally set at $1.
-
Zone 2 also uses the "Delivery Fee" charge, but you apply a Charge Amount Override to make it $3 instead
-
-
-
- Context Filter: (Optional)
- Apply a context filter to this zone if needed.
- Apply a context filter to this zone if needed.
-
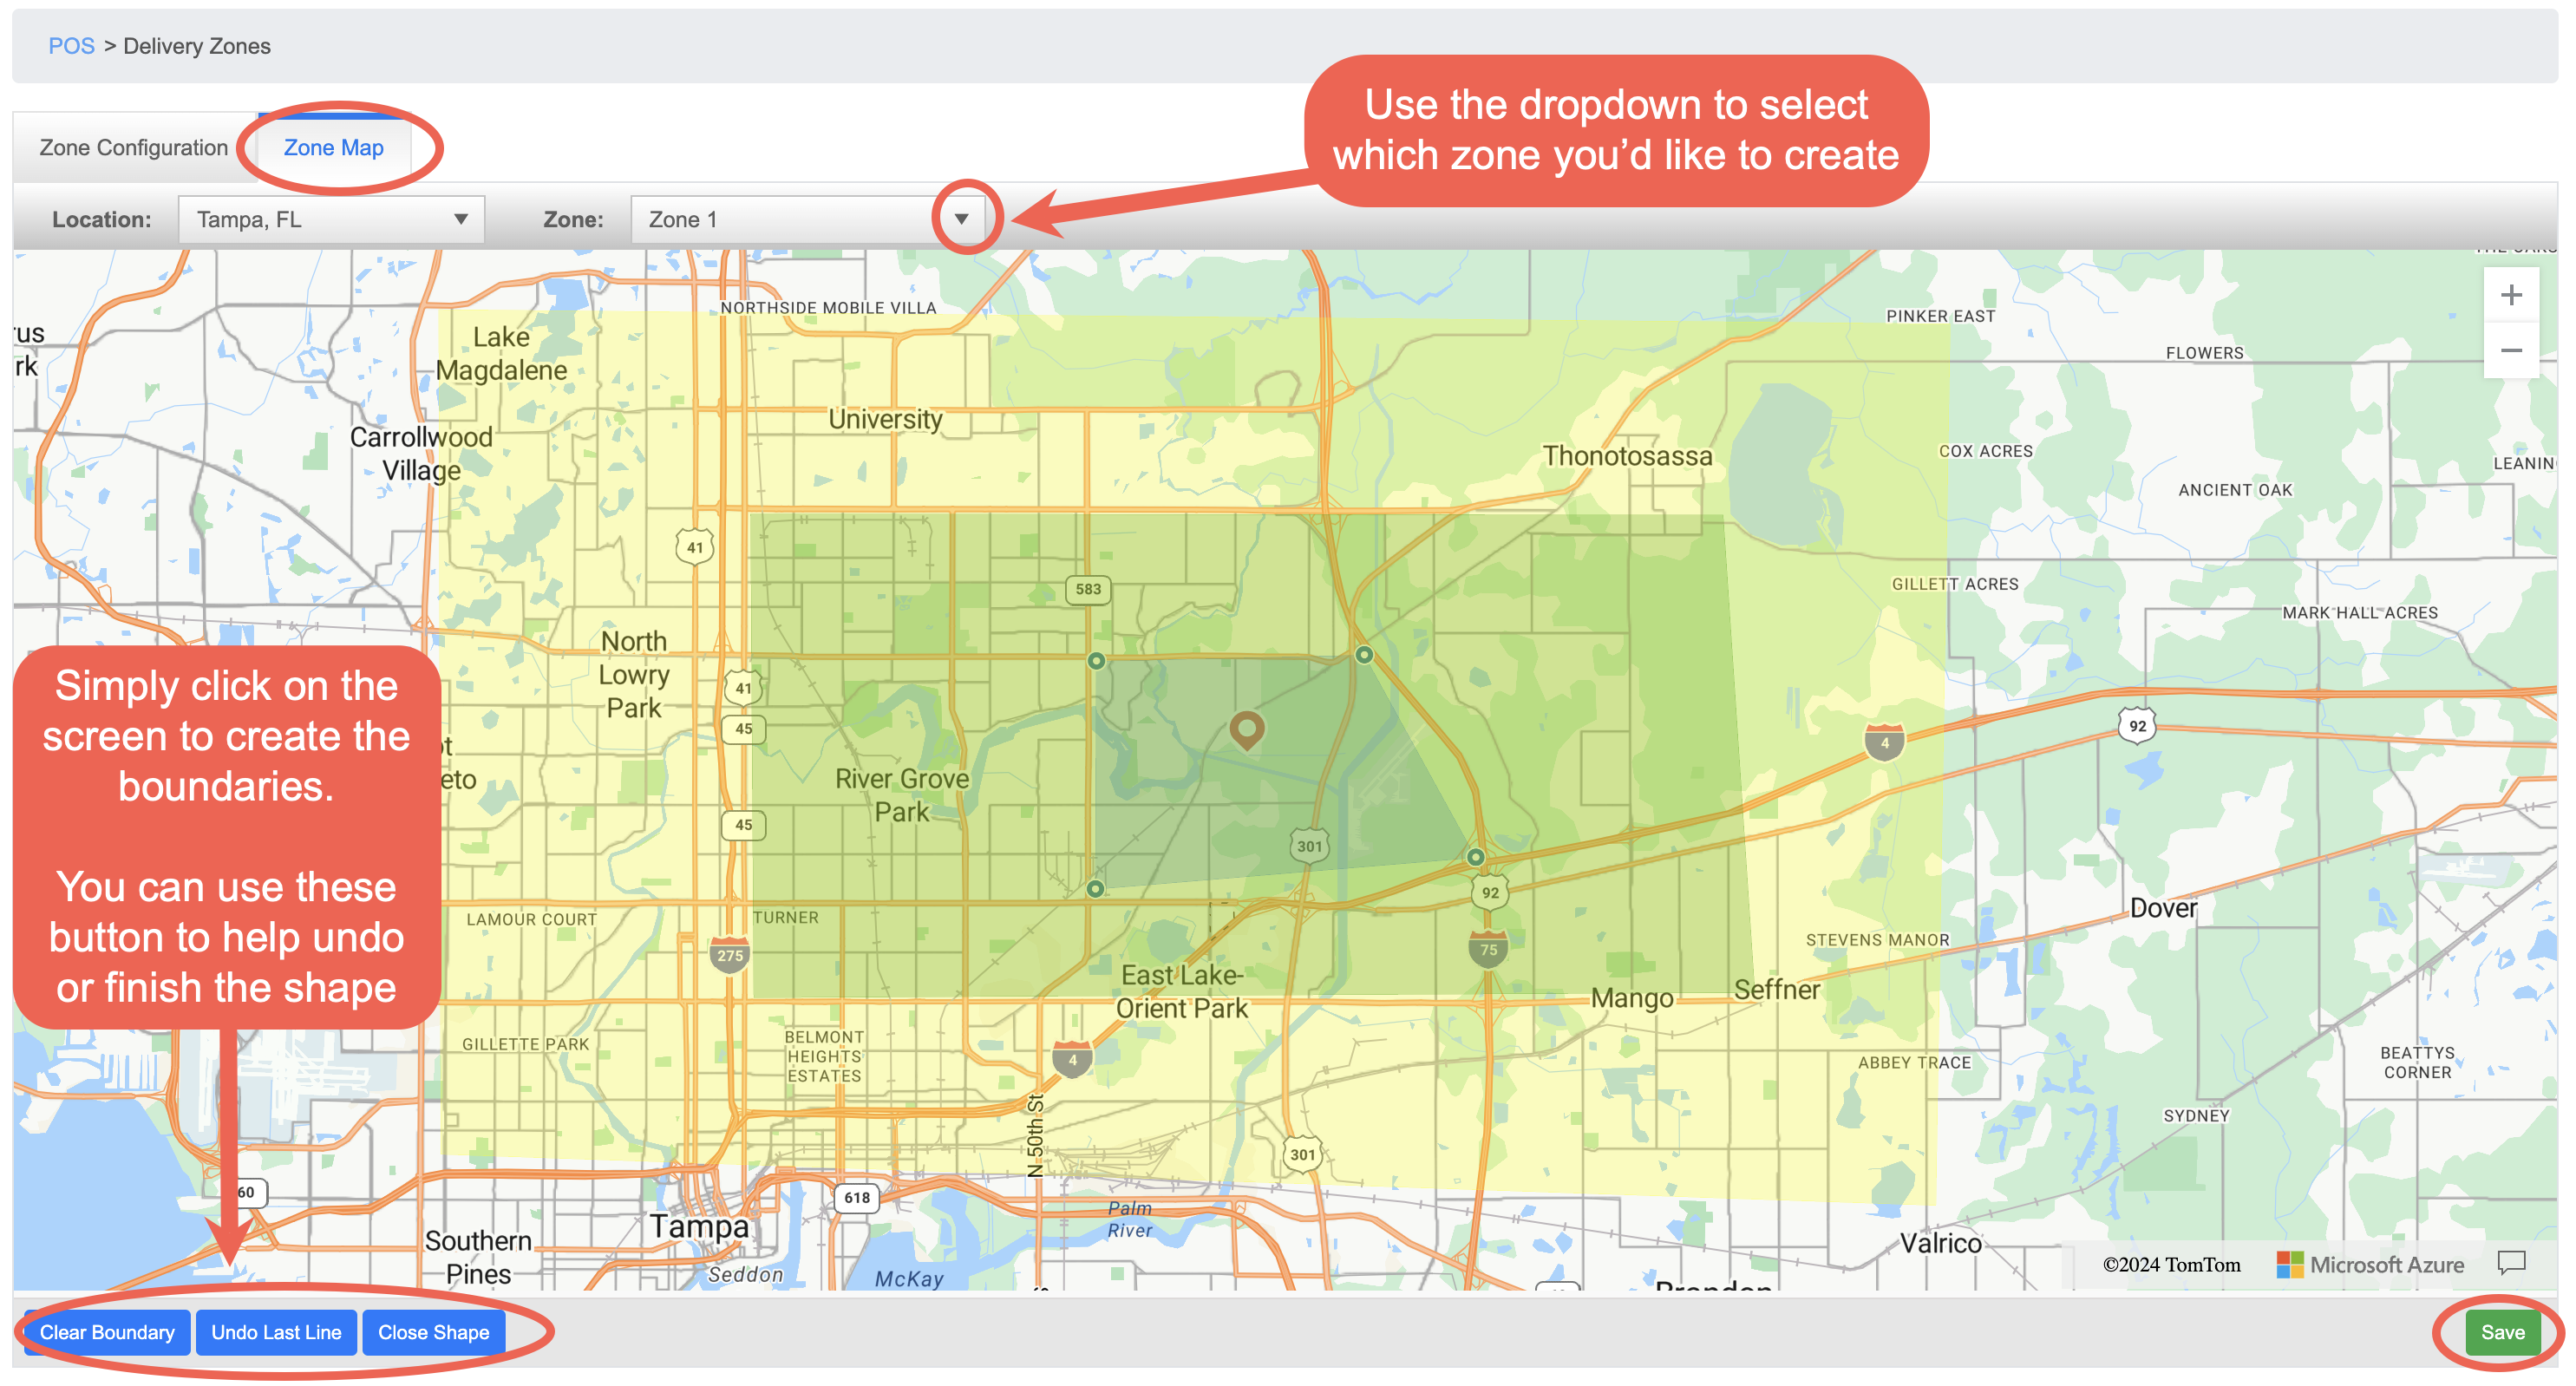
- Use the Zone Drop down to move between the different zones you've created
- Simply click on the map (in a circle or square rotation) to create the boundaries of your zone
- The buttons on the bottom left can help you undo a line, Start over, or complete the shape
- Then save it

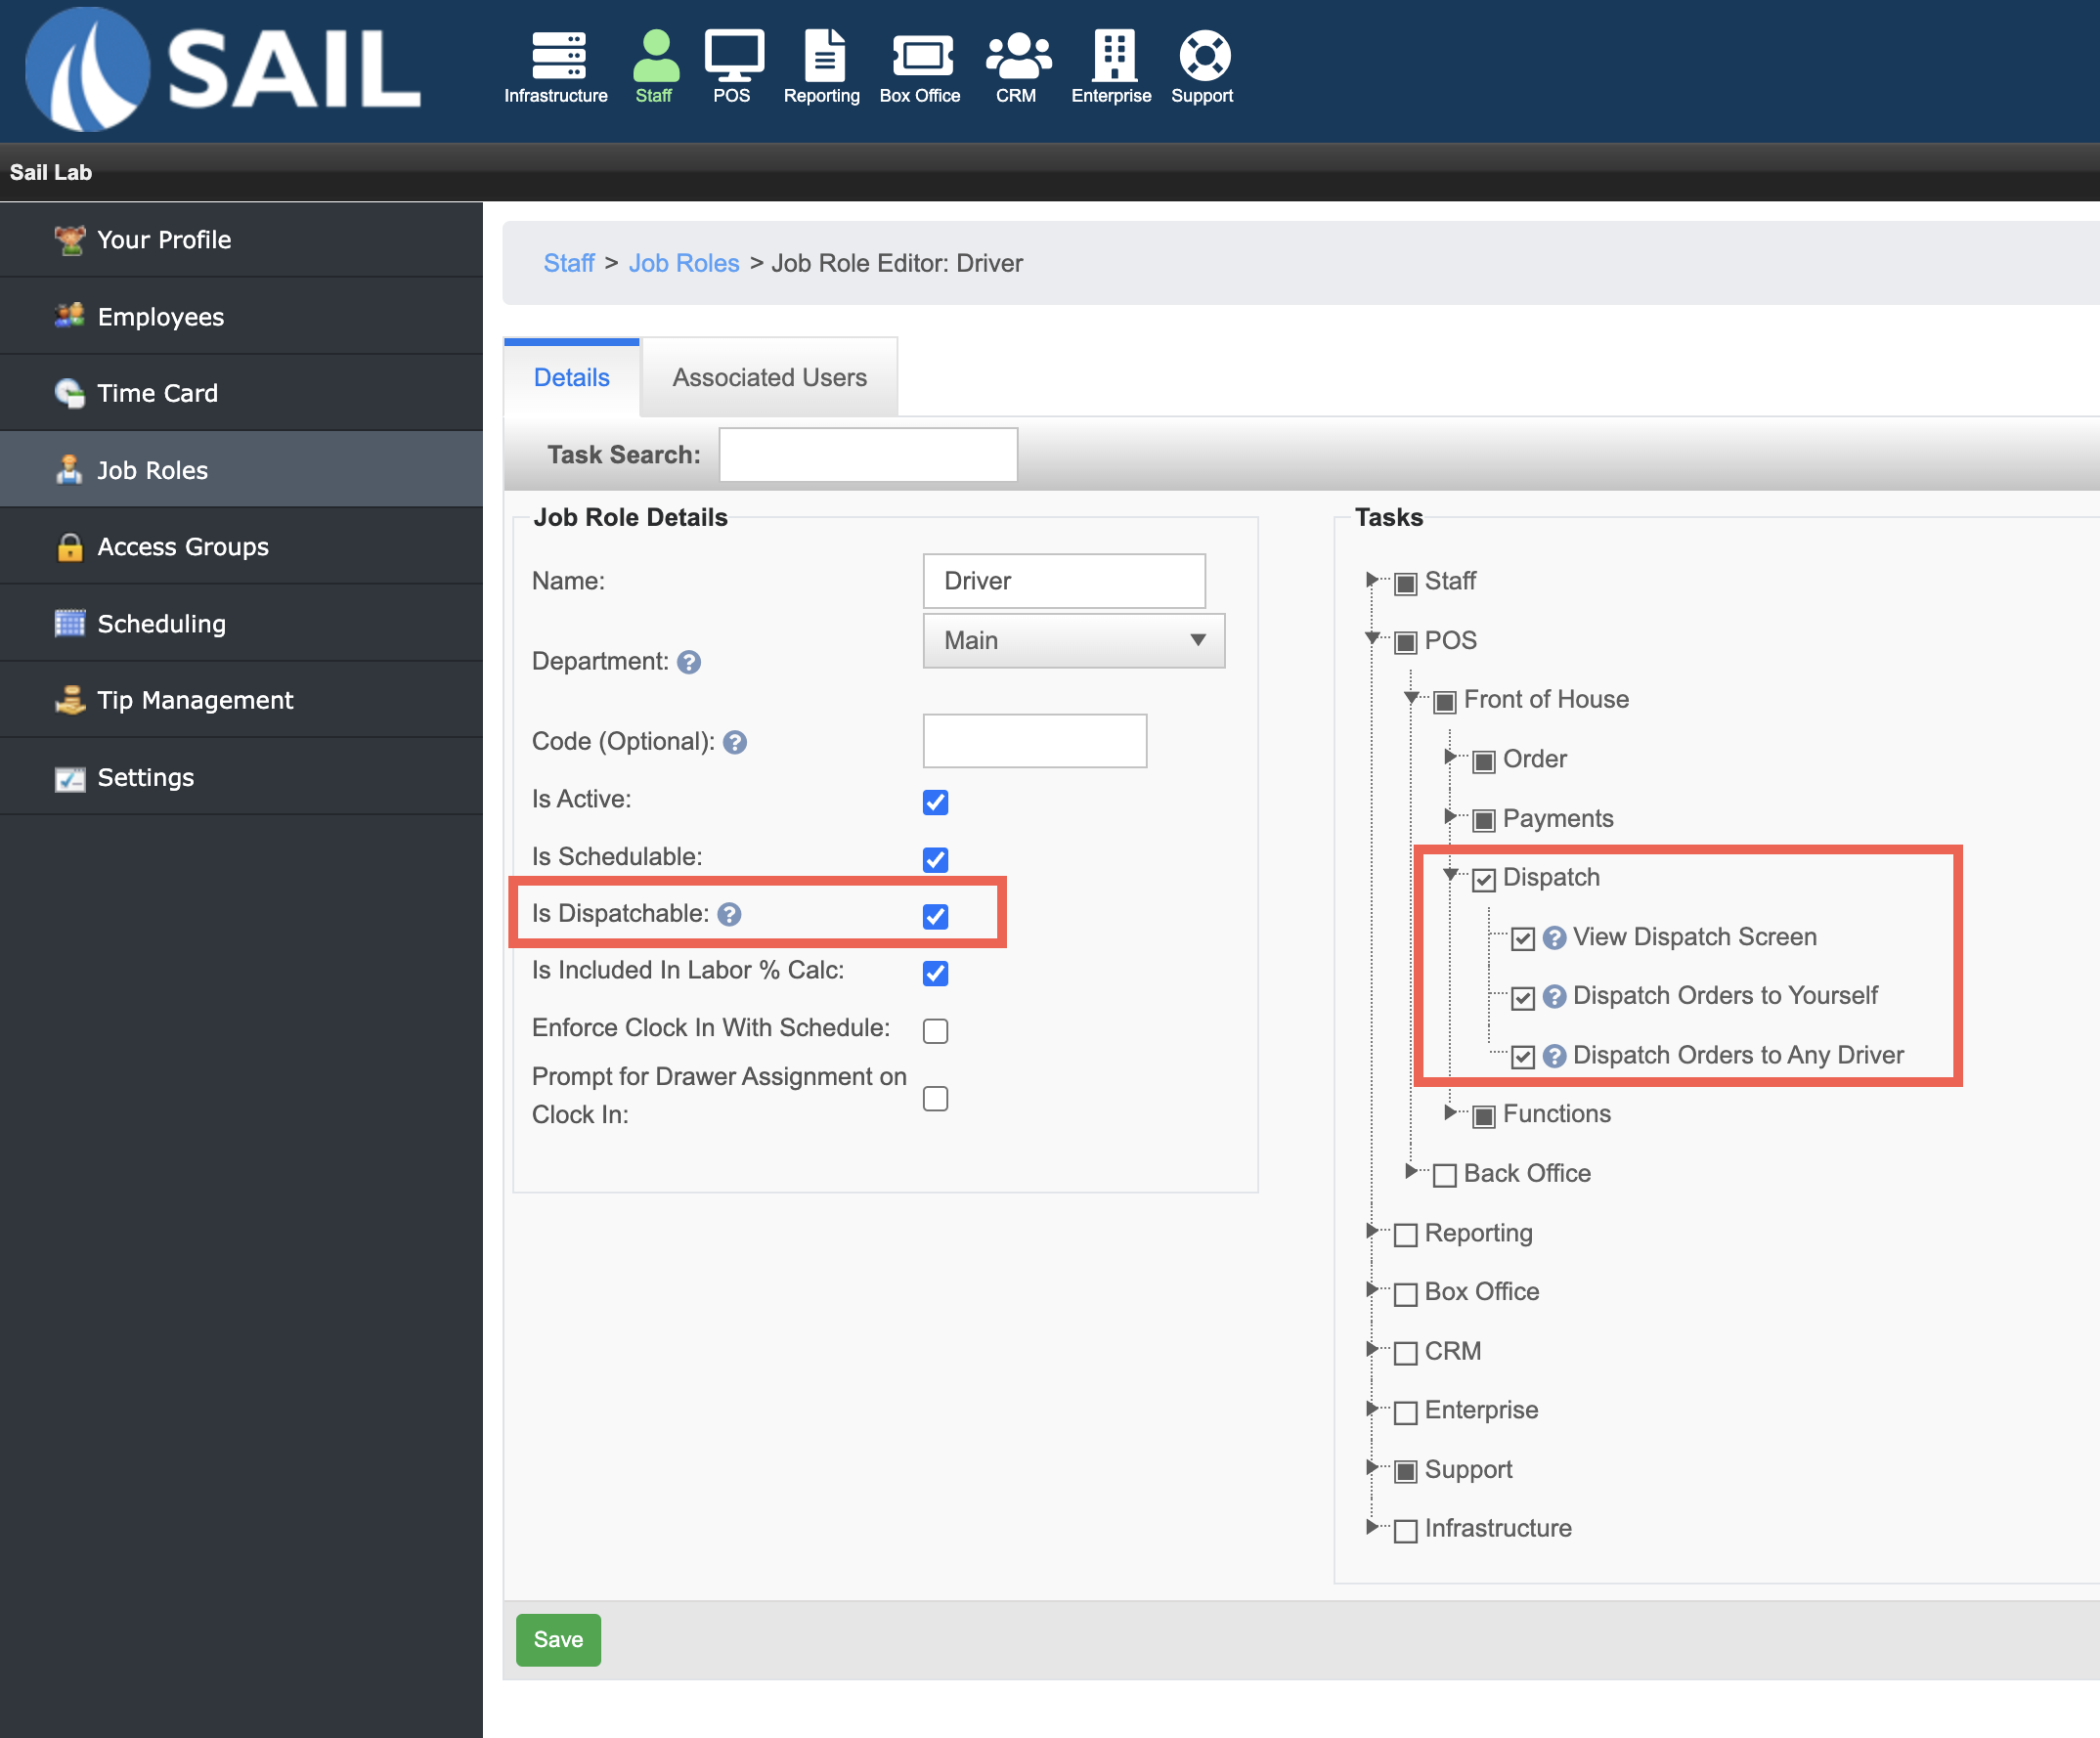
Dispatchable Job RoleThere is a checkbox to make a job role dispatchable, which allows the employee assigned to this job role to dispatched orders.There are job role tasks that allow users to be able to see the dispatch screen or assign orders to drivers.
Dispatchable Order TypeCheck the "Is dispatchable"checkbox if you'd like orders from this order type to be added to the dispatch screenYou can also link this order type to a customer for easy phone number or name lookup. This will keep the customers information and order history in Backoffice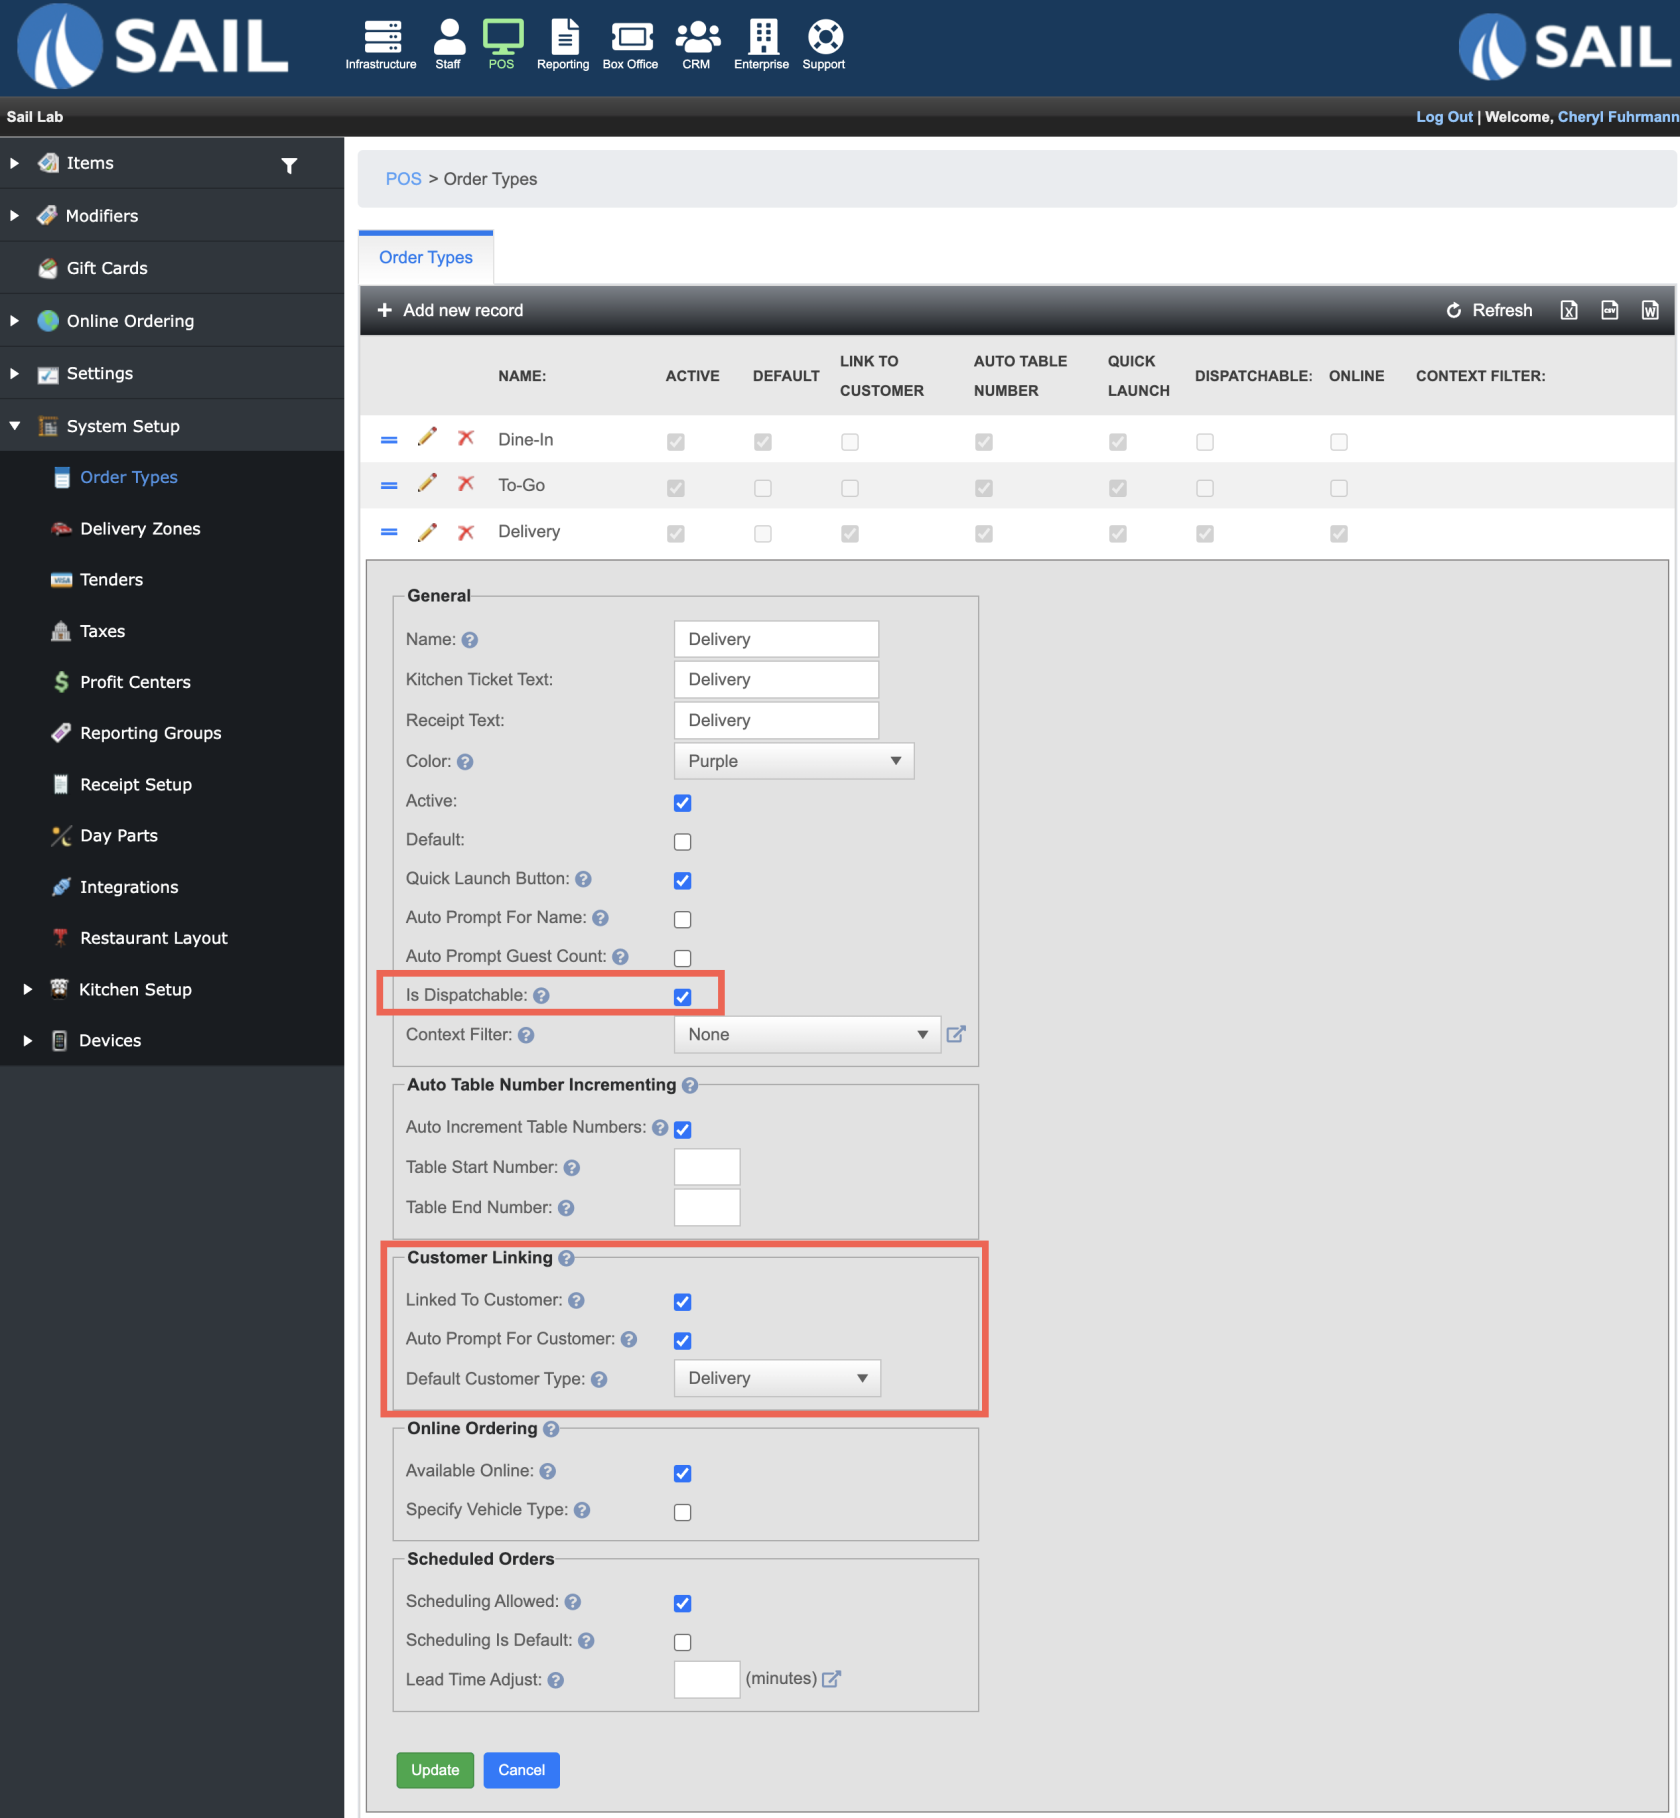
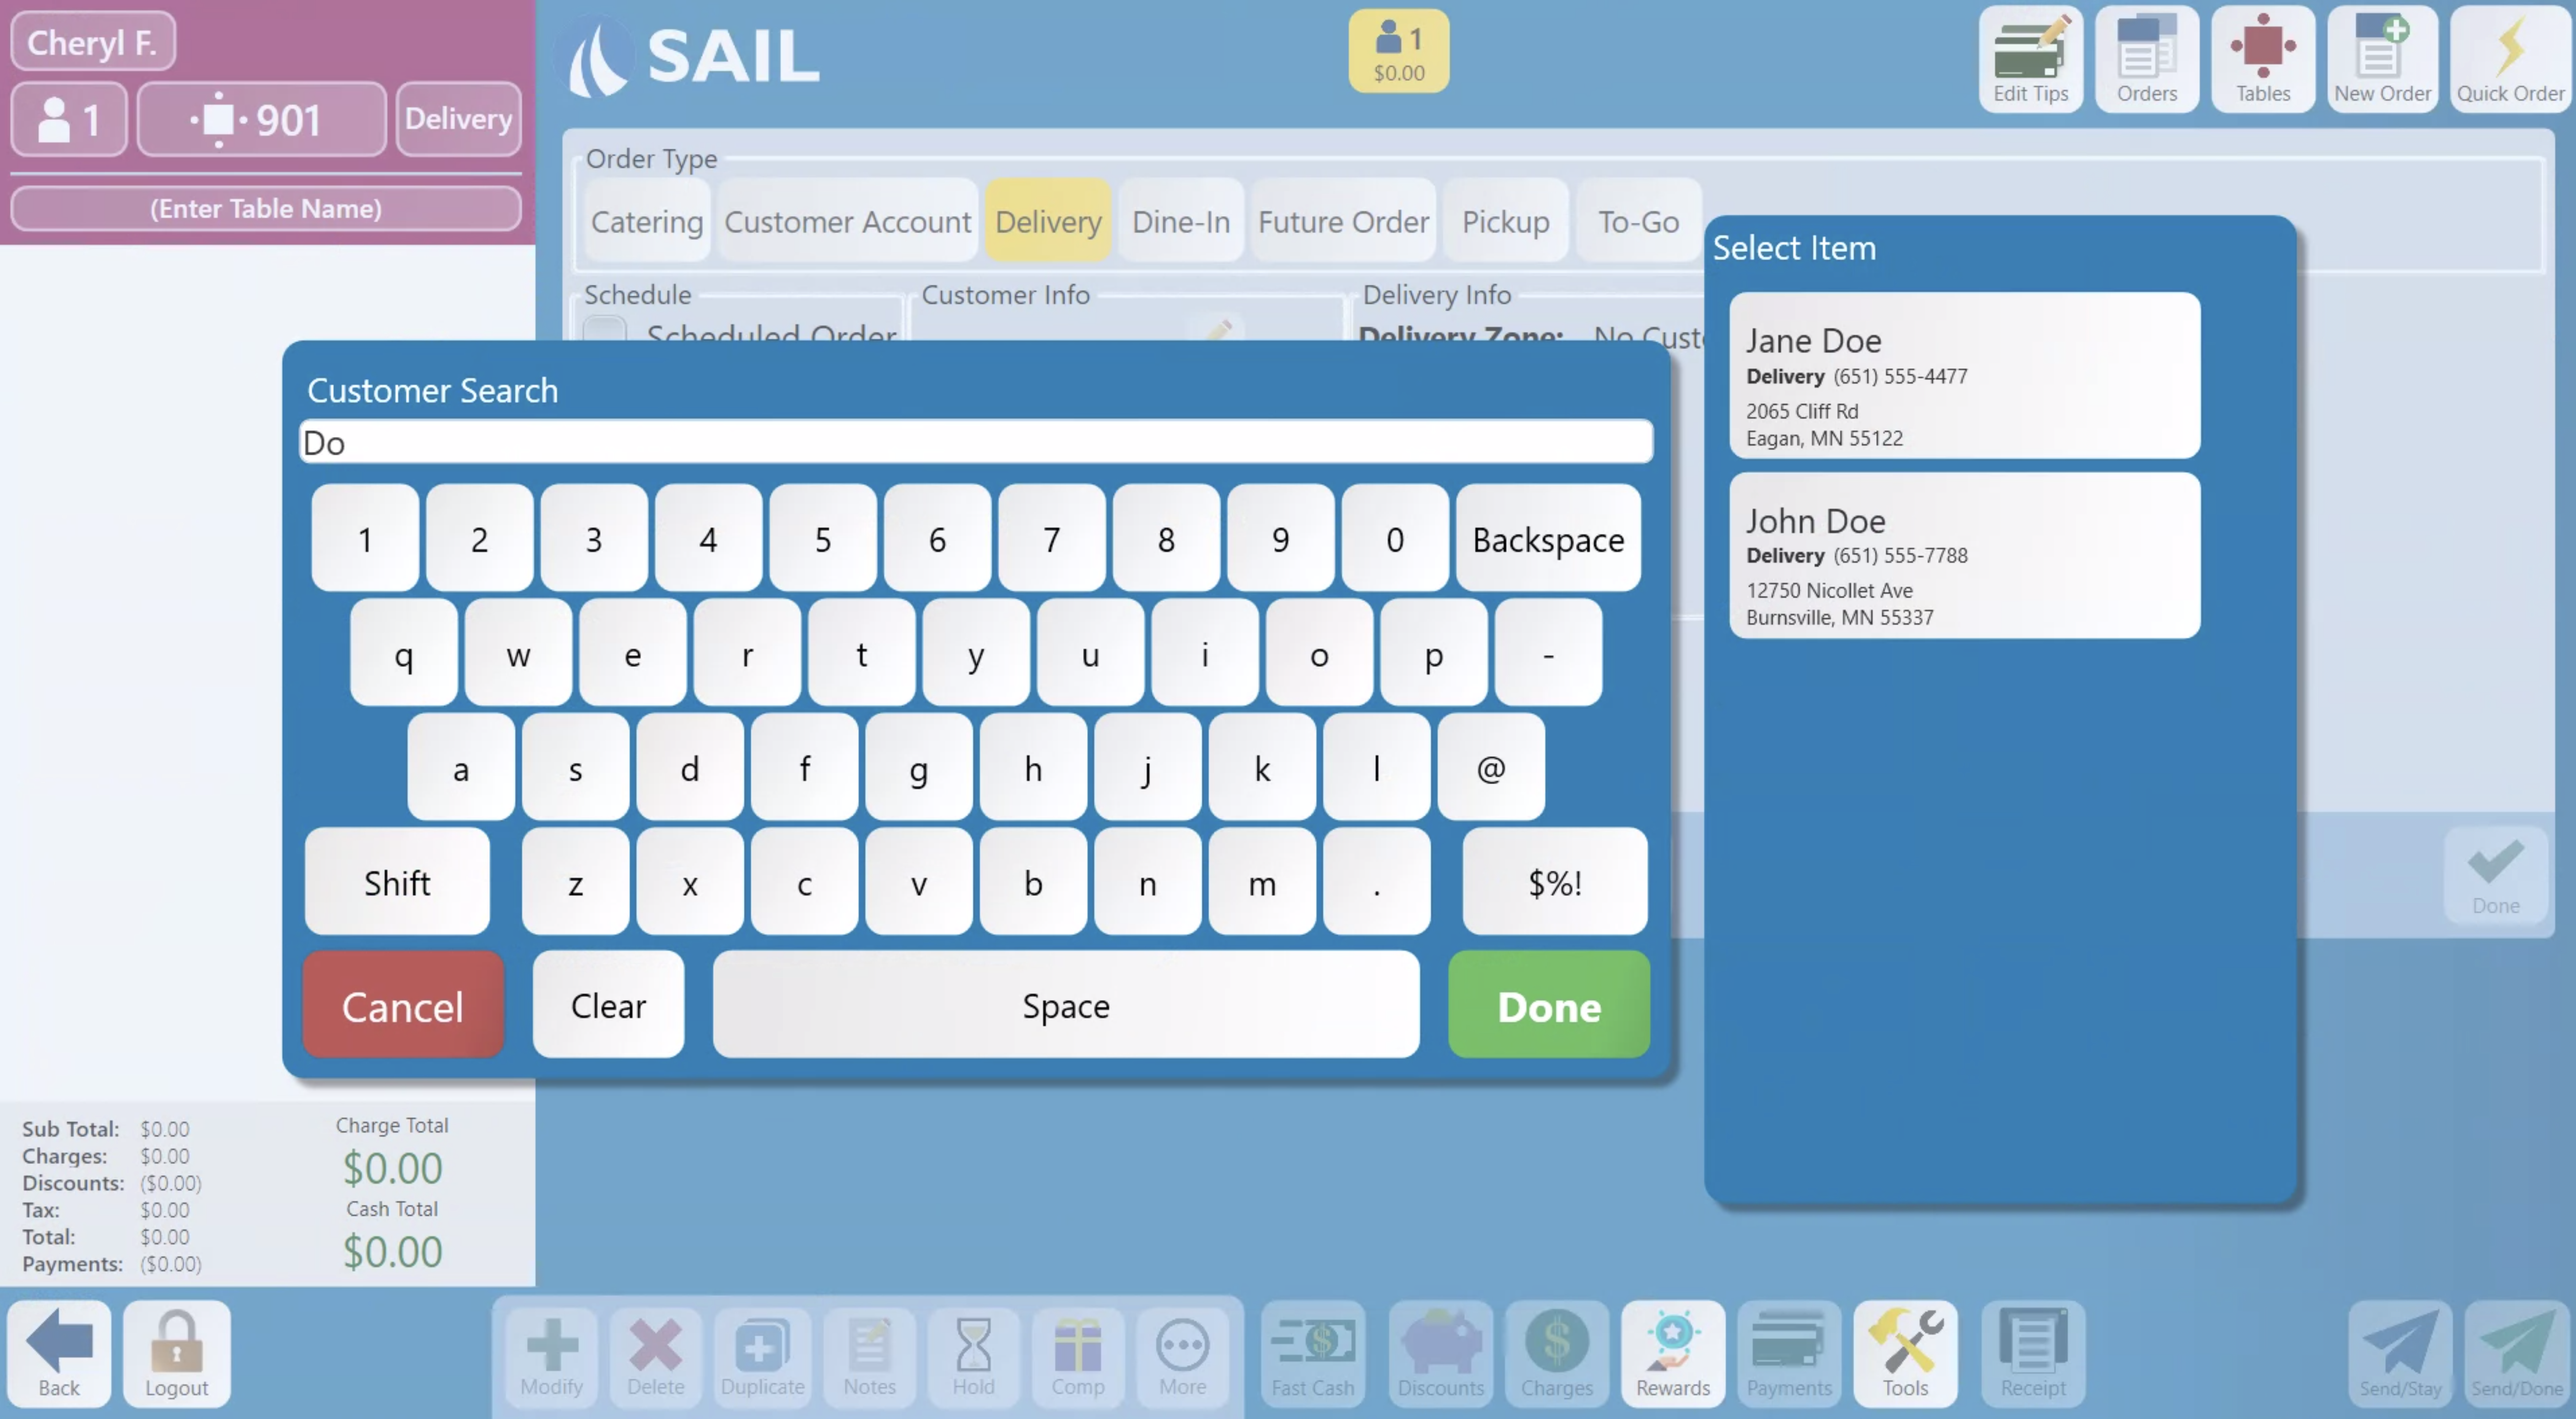
When you click on the delivery order type that is configured to prompt for a customer (suggested on a delivery order type) you will be prompted to enter the customers information, you can type in their name or phone numberThe right side will filter customer as you type in the informationThe customers information will be listed so you can verify you're selecting the correct customer
Once the customer is selected it will bring you to the customer's information page.Here you can edit the customer's informationEnter in a quoted delivery time or add delivery notesThe delivery zone, distance and drive time will all be calculated automatically based off the store's address and the delivery zones you've created in Backoffice.Note: If the distance and drive time are not calculated you may have the wrong addressIf they are outside of the delivery zone it will show "Not in delivery zone". You can manually assign the to a zone if you wish.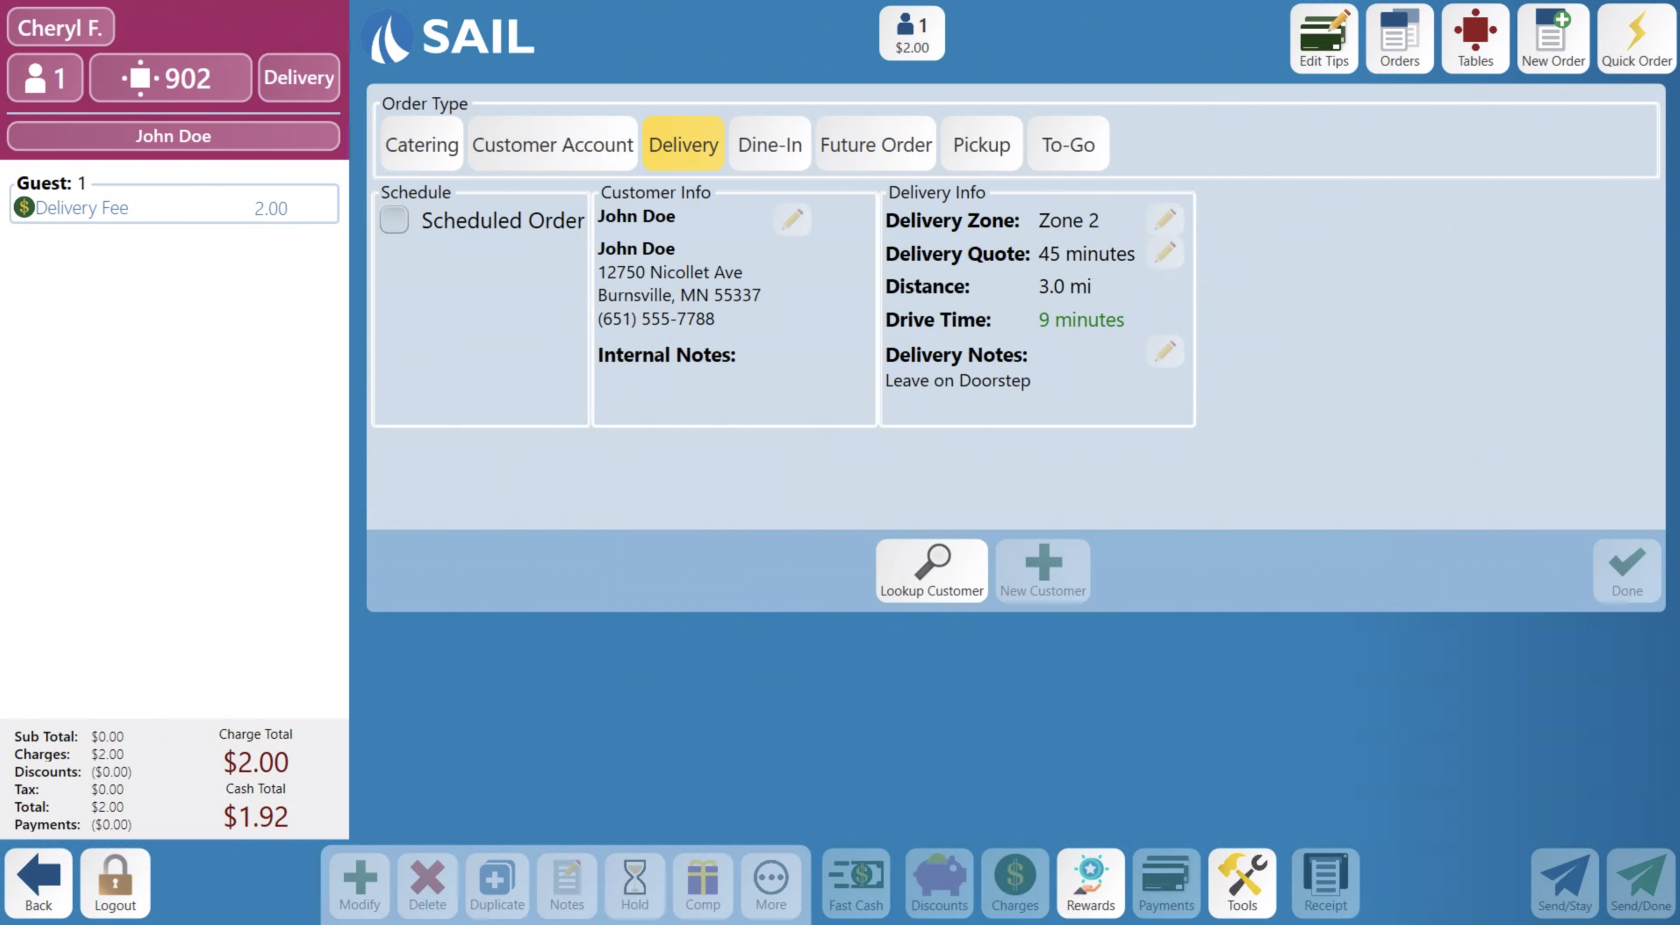
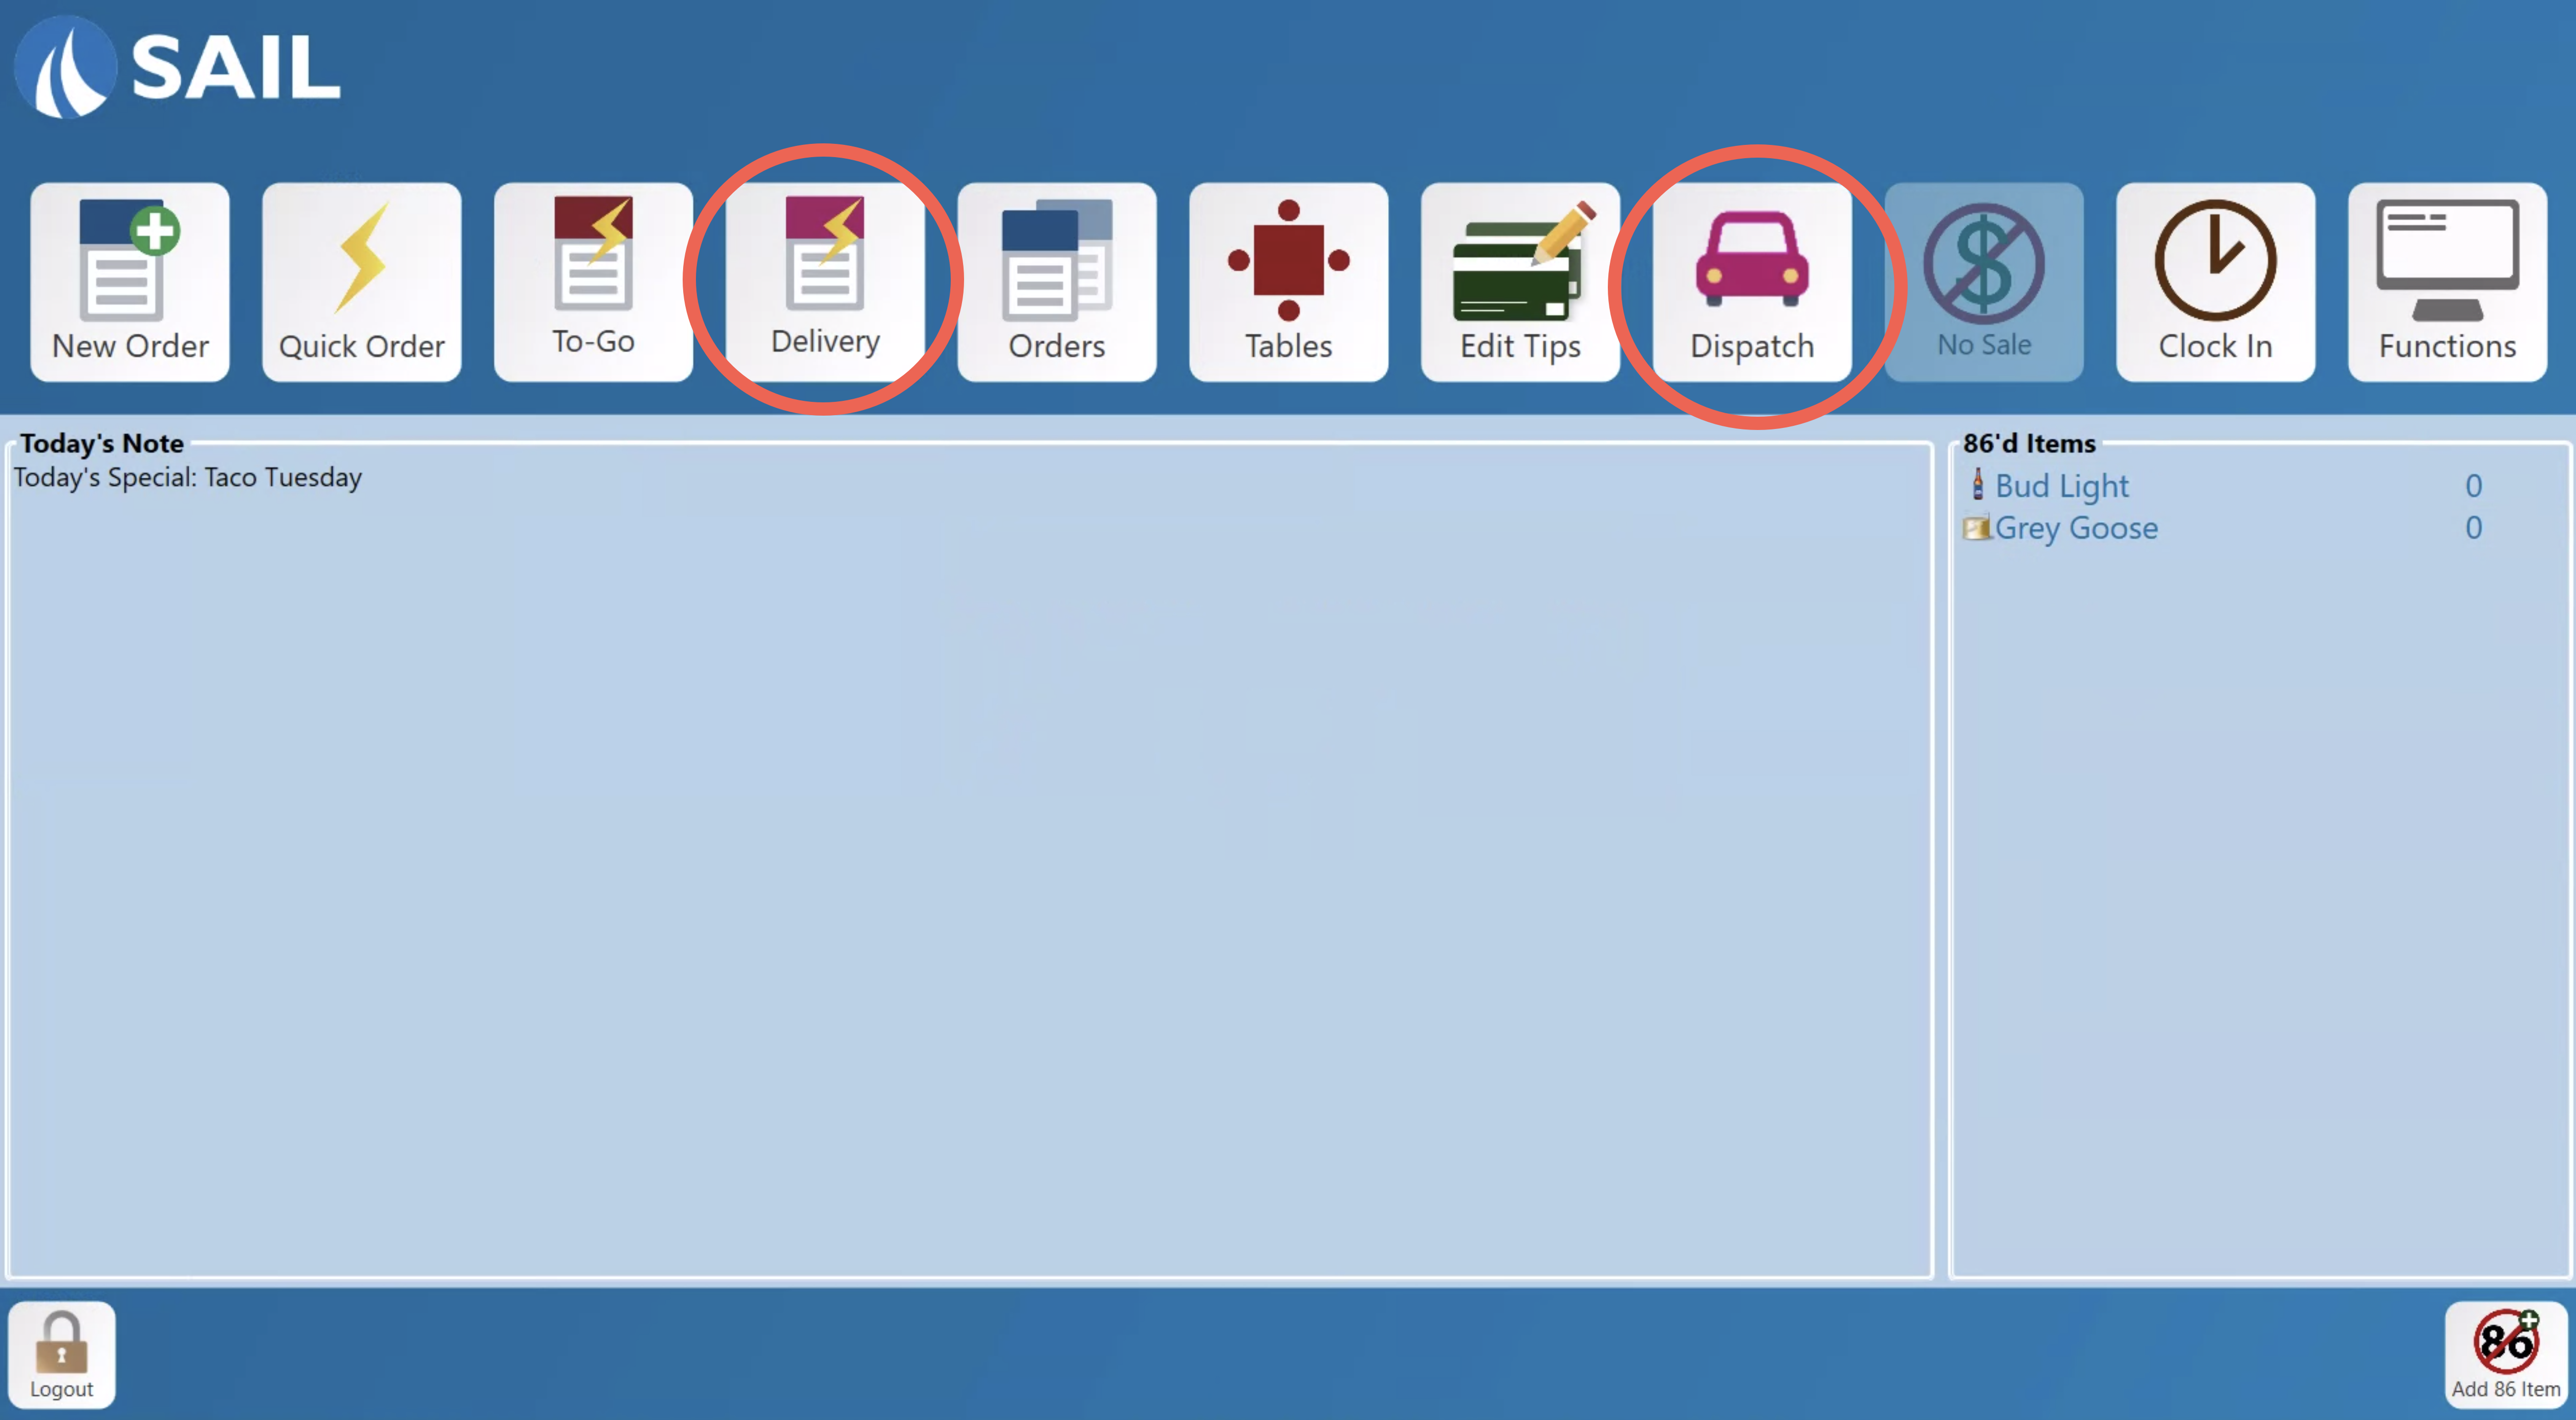
Once an order type is entered that is Dispatchable, it will end up on the Dispatch Screen. There is now a Dispatch button on the launch screen that will bring you to a screen to view and dispatch the orders
- Here is an example of
thebuildingdispatchzonesscreen.You can selecton theorderszoneand assign them to driversWhen an order is assigned, the order is also transferred to them.If the order is unassigned, it will return back to the original user.
You can select the top button to change what orders you're looking at to find orders that are en route or delivered.Drivers can mark their orders as delivered once they return
map
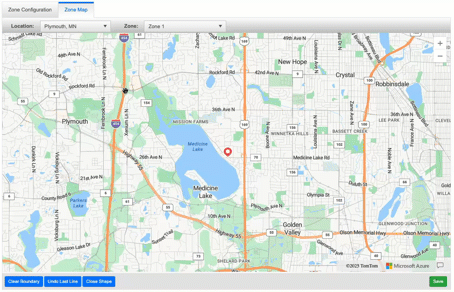
Zone Map
Go to the Zone Map tab to create the zones
2. Setting up dispatch in Backoffice
You can now mark both Order Types and Job Roles as dispatchable. When an Order Type is dispatchable, it will validate delivery zones (if any) and those orders will show up in the dispatch system as talked about in the next section. Employees that are clocked in as a Job Role that is marked dispatchable will be able to be assigned as a driver in the dispatch system.

3. Delivery on the terminals