How to create a pay out button
This document will detail how to make a payout button
-
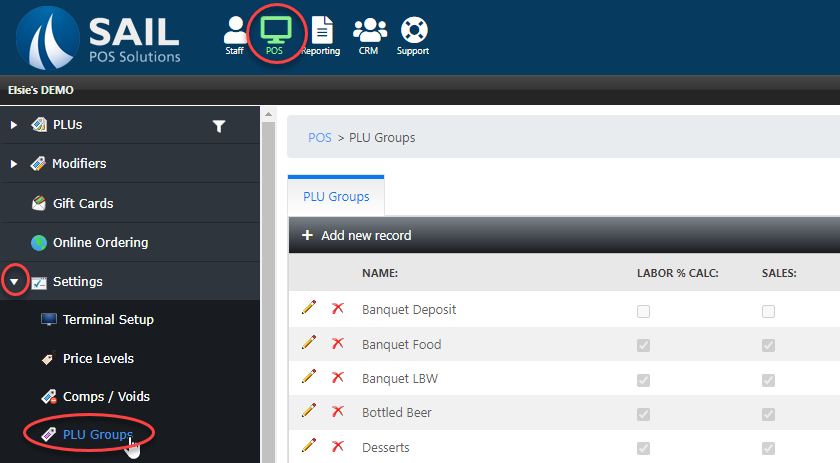
You will need to make a new PLU but first you will need to make a new PLU group to add to it. Navigate to the PLU Groups section under settings on the POS Tab.
-
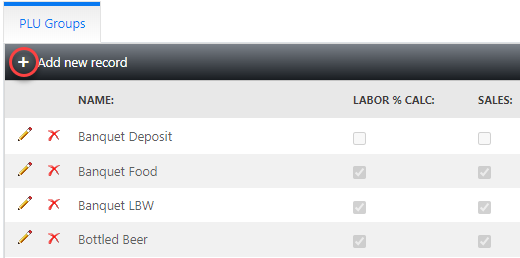
Select the plus sign in the upper left corner of the screen to create a new group.
-
Name the new group Payouts and save.
-
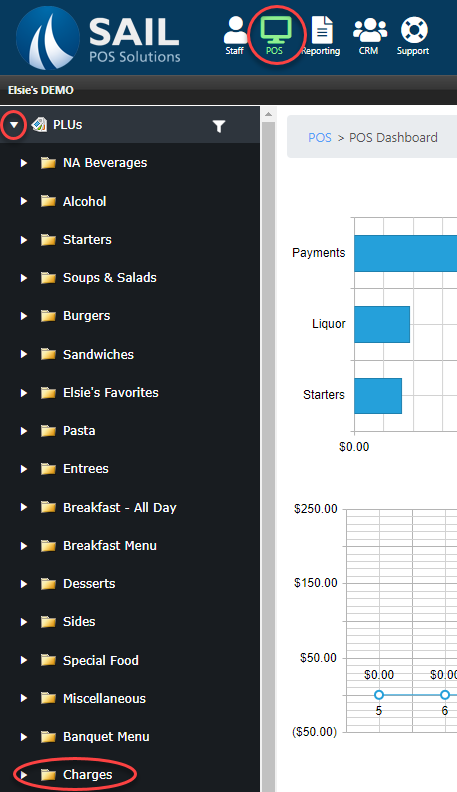
Navigate to the POS section and find the folder that would make the most sense to contain a payout button.
-
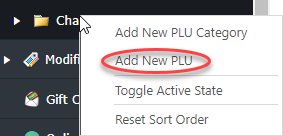
Right click on the folder. Then select “Add New PLU.”
-
A new PLU will open.
-
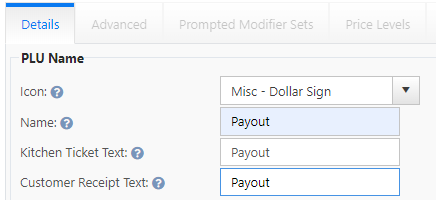
Fill in the PLU name section. For payouts we will use Misc - Dollar sign for the icon and payout for the name.
-
Fill out the Pricing/Availability section.
-
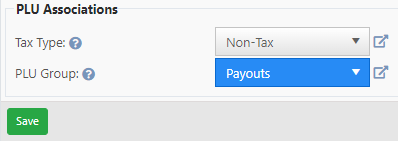
Set the tax type to non tax and PLU group to Payouts then save.
-
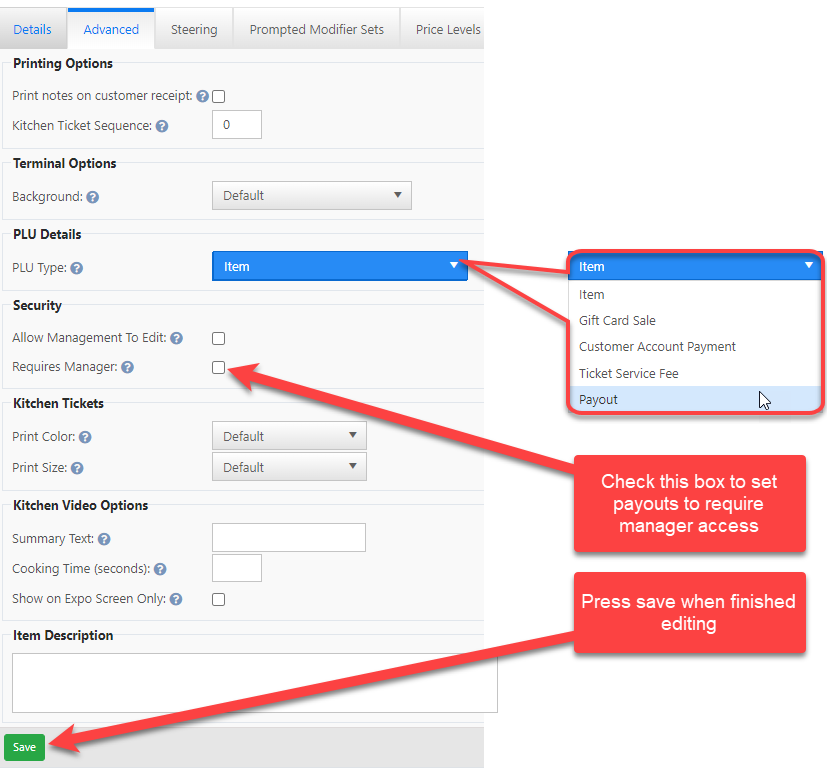
Next go to the advanced tab and set the PLU Type to payments.
-
Requires Manager Checkbox is OPTIONAL depending on your needs
-
-
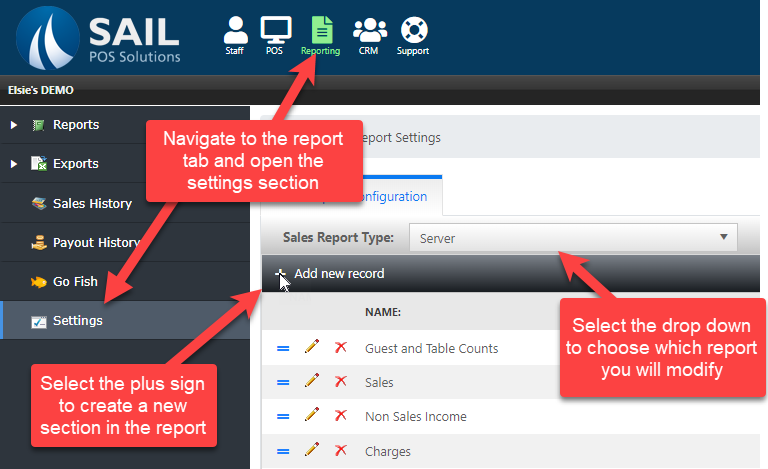
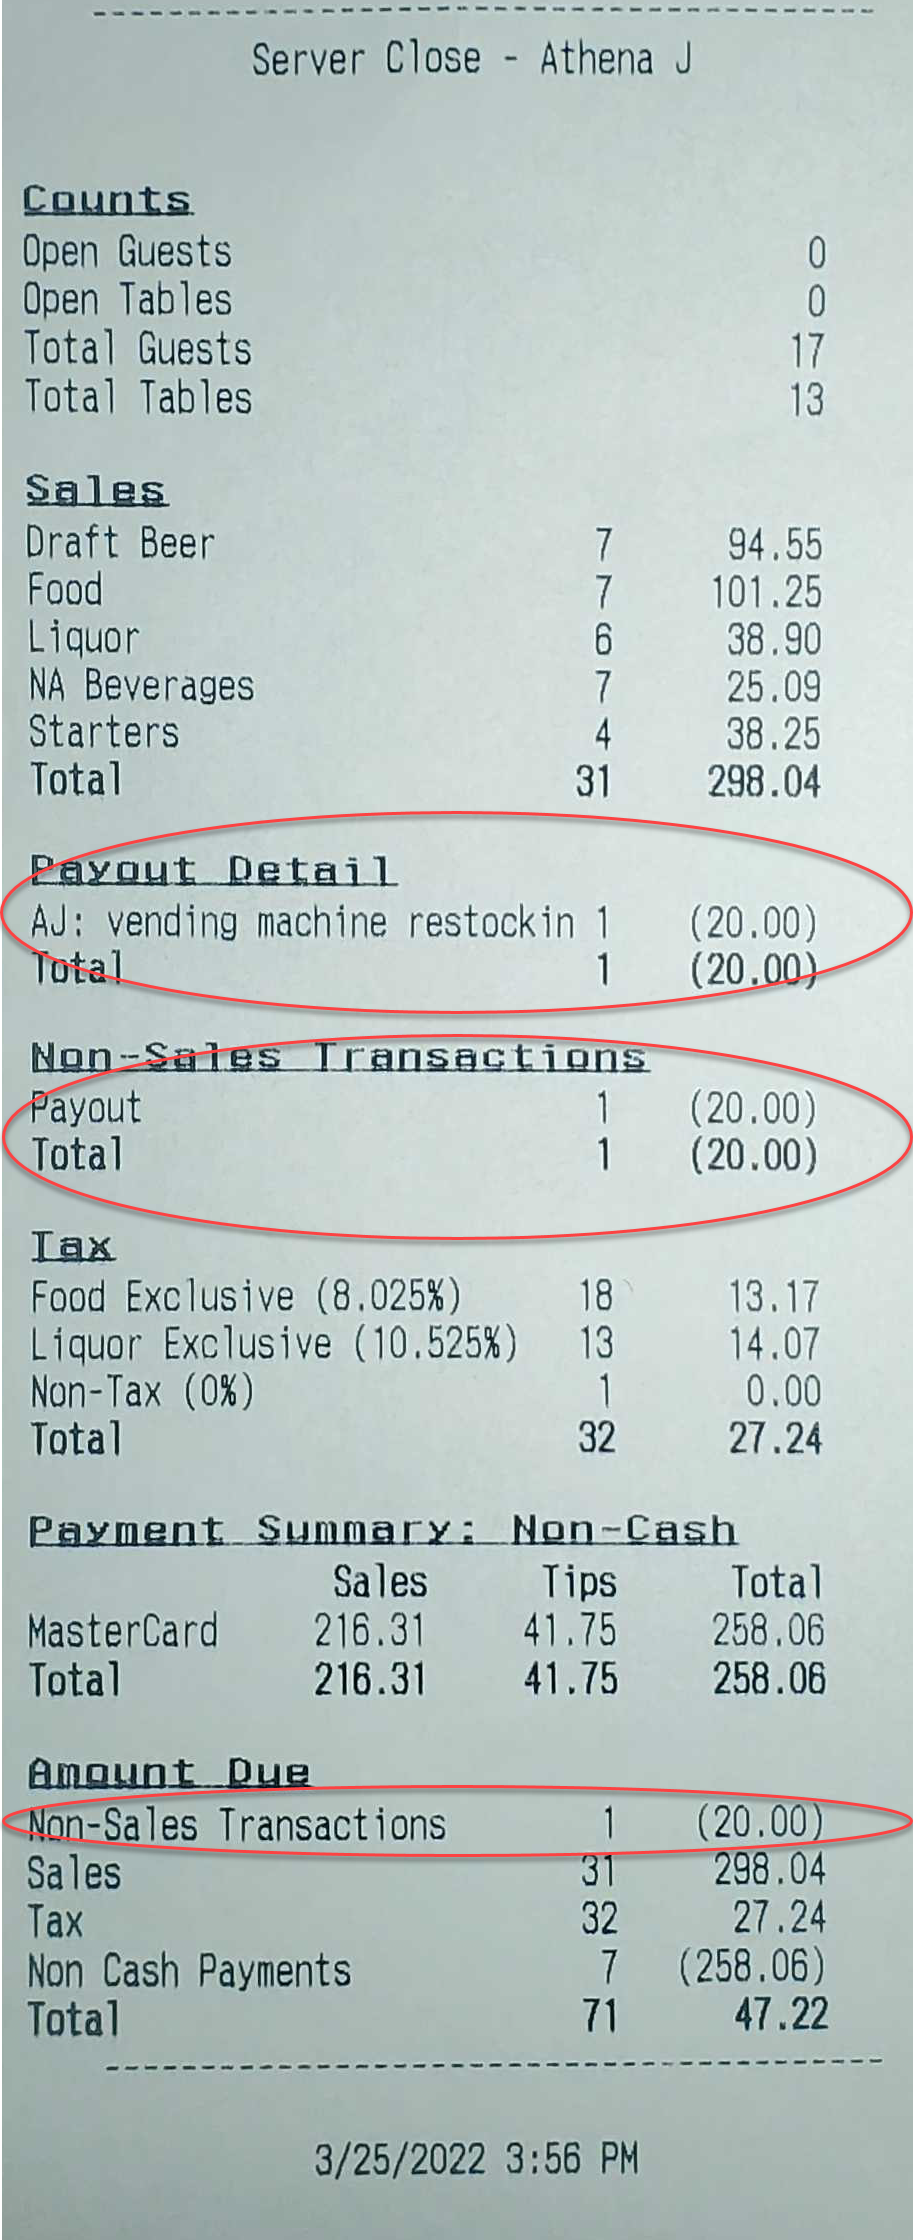
If you would like payout details to show on a report next you will want to navigate to the reports screen.
-
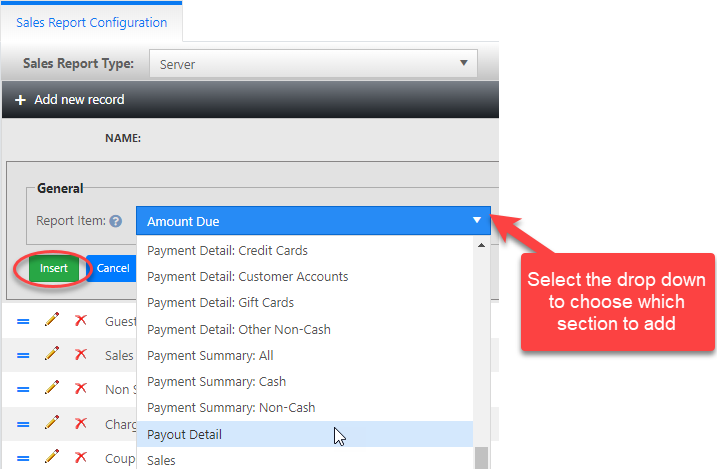
We are adding the Payout Detail section to the server report. Click insert to add it to the Report.
-
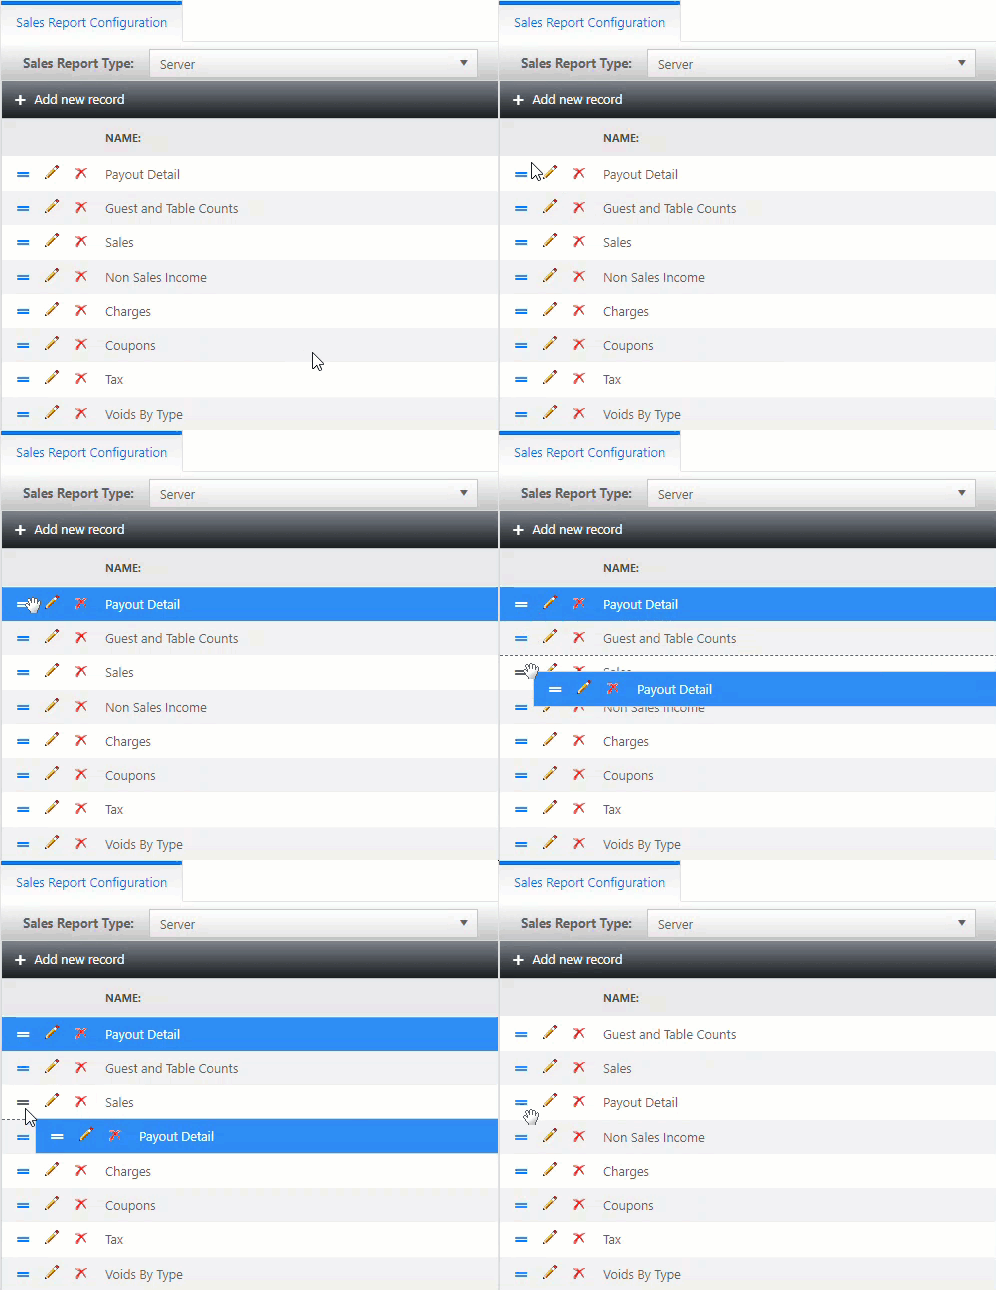
Select the hamburger icon to drag the new section to where you want it in the report.
-
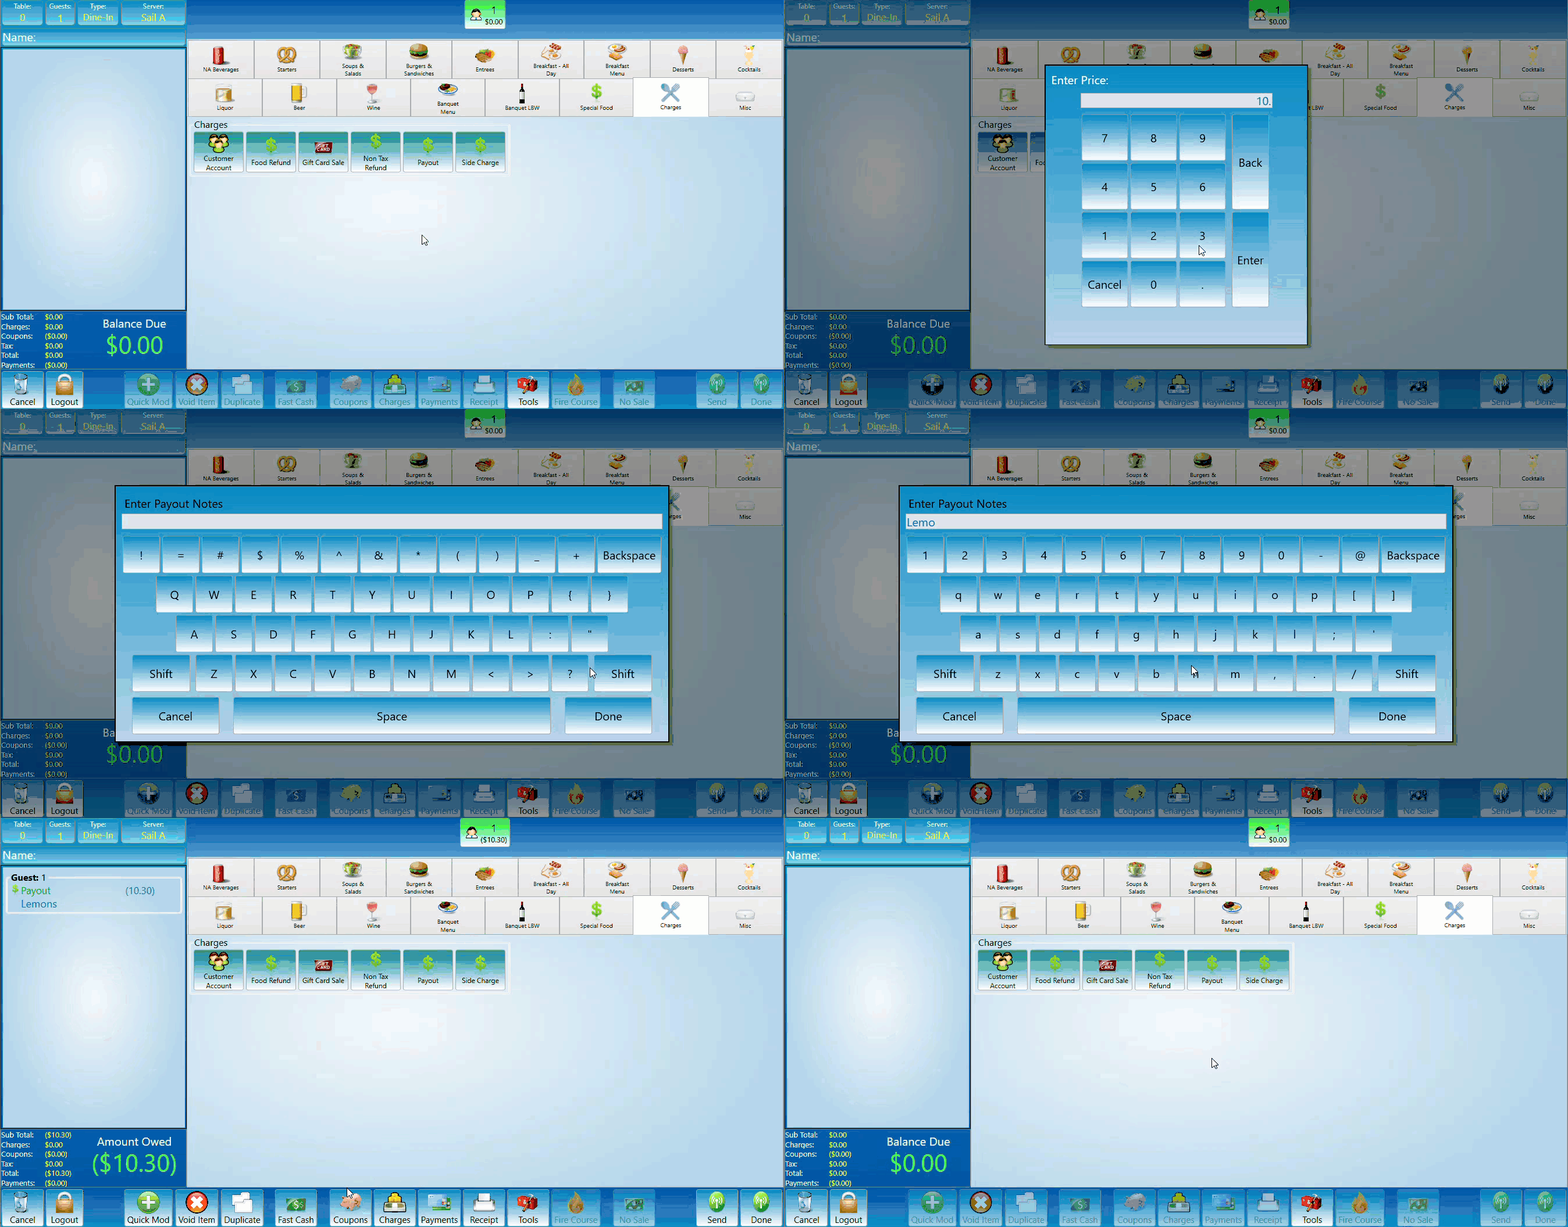
The button will be added to the system in the section that matches the folder you selected to place it in.
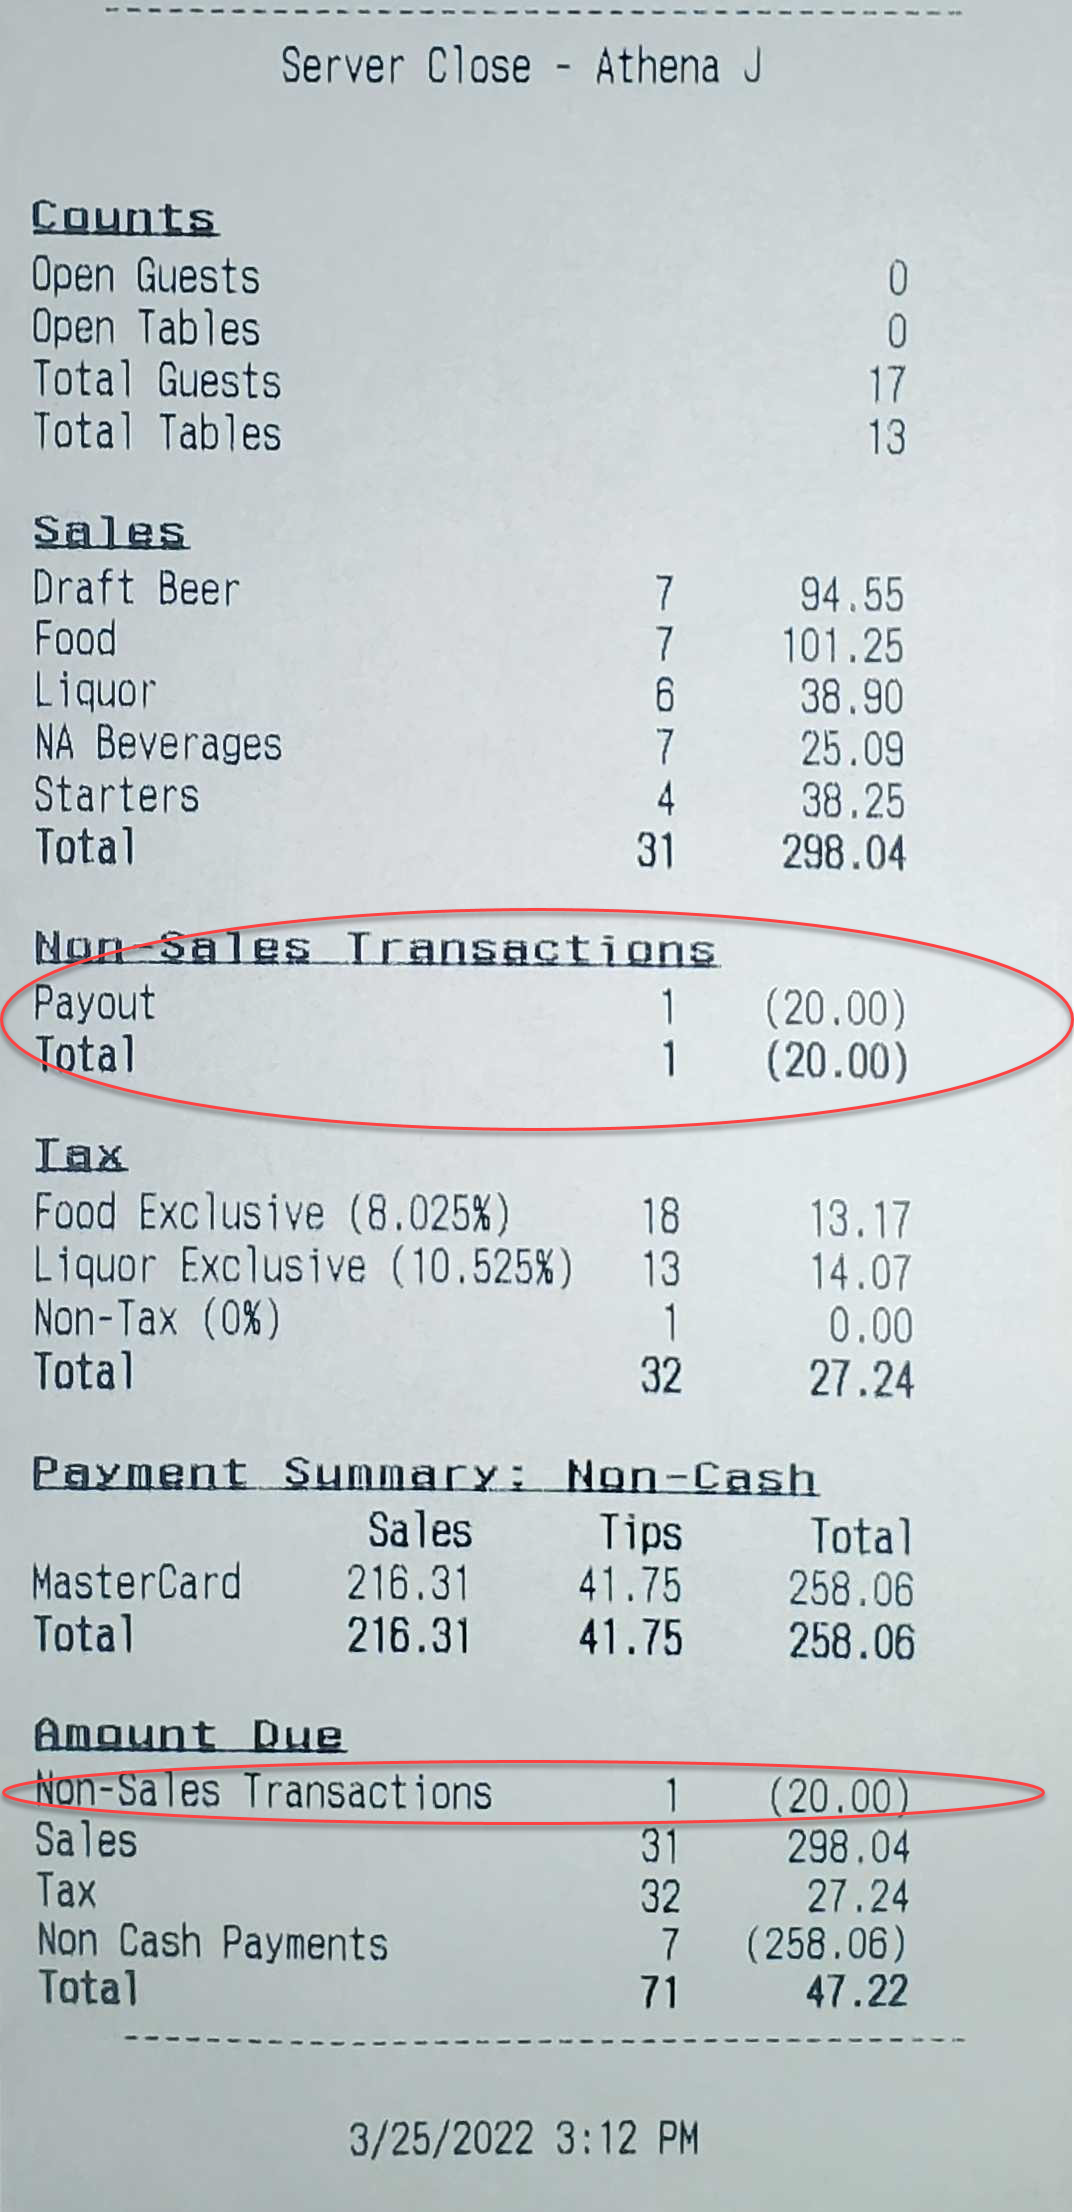
9. This is what a Payout will look like on a server close report.
This is without the details section This is with the details section added


