
How to create a Shortcut
This document will show you how to create a Shortcut
- A shortcut is a set of actions that can occur with 1 button click
How to create a new Shortcut
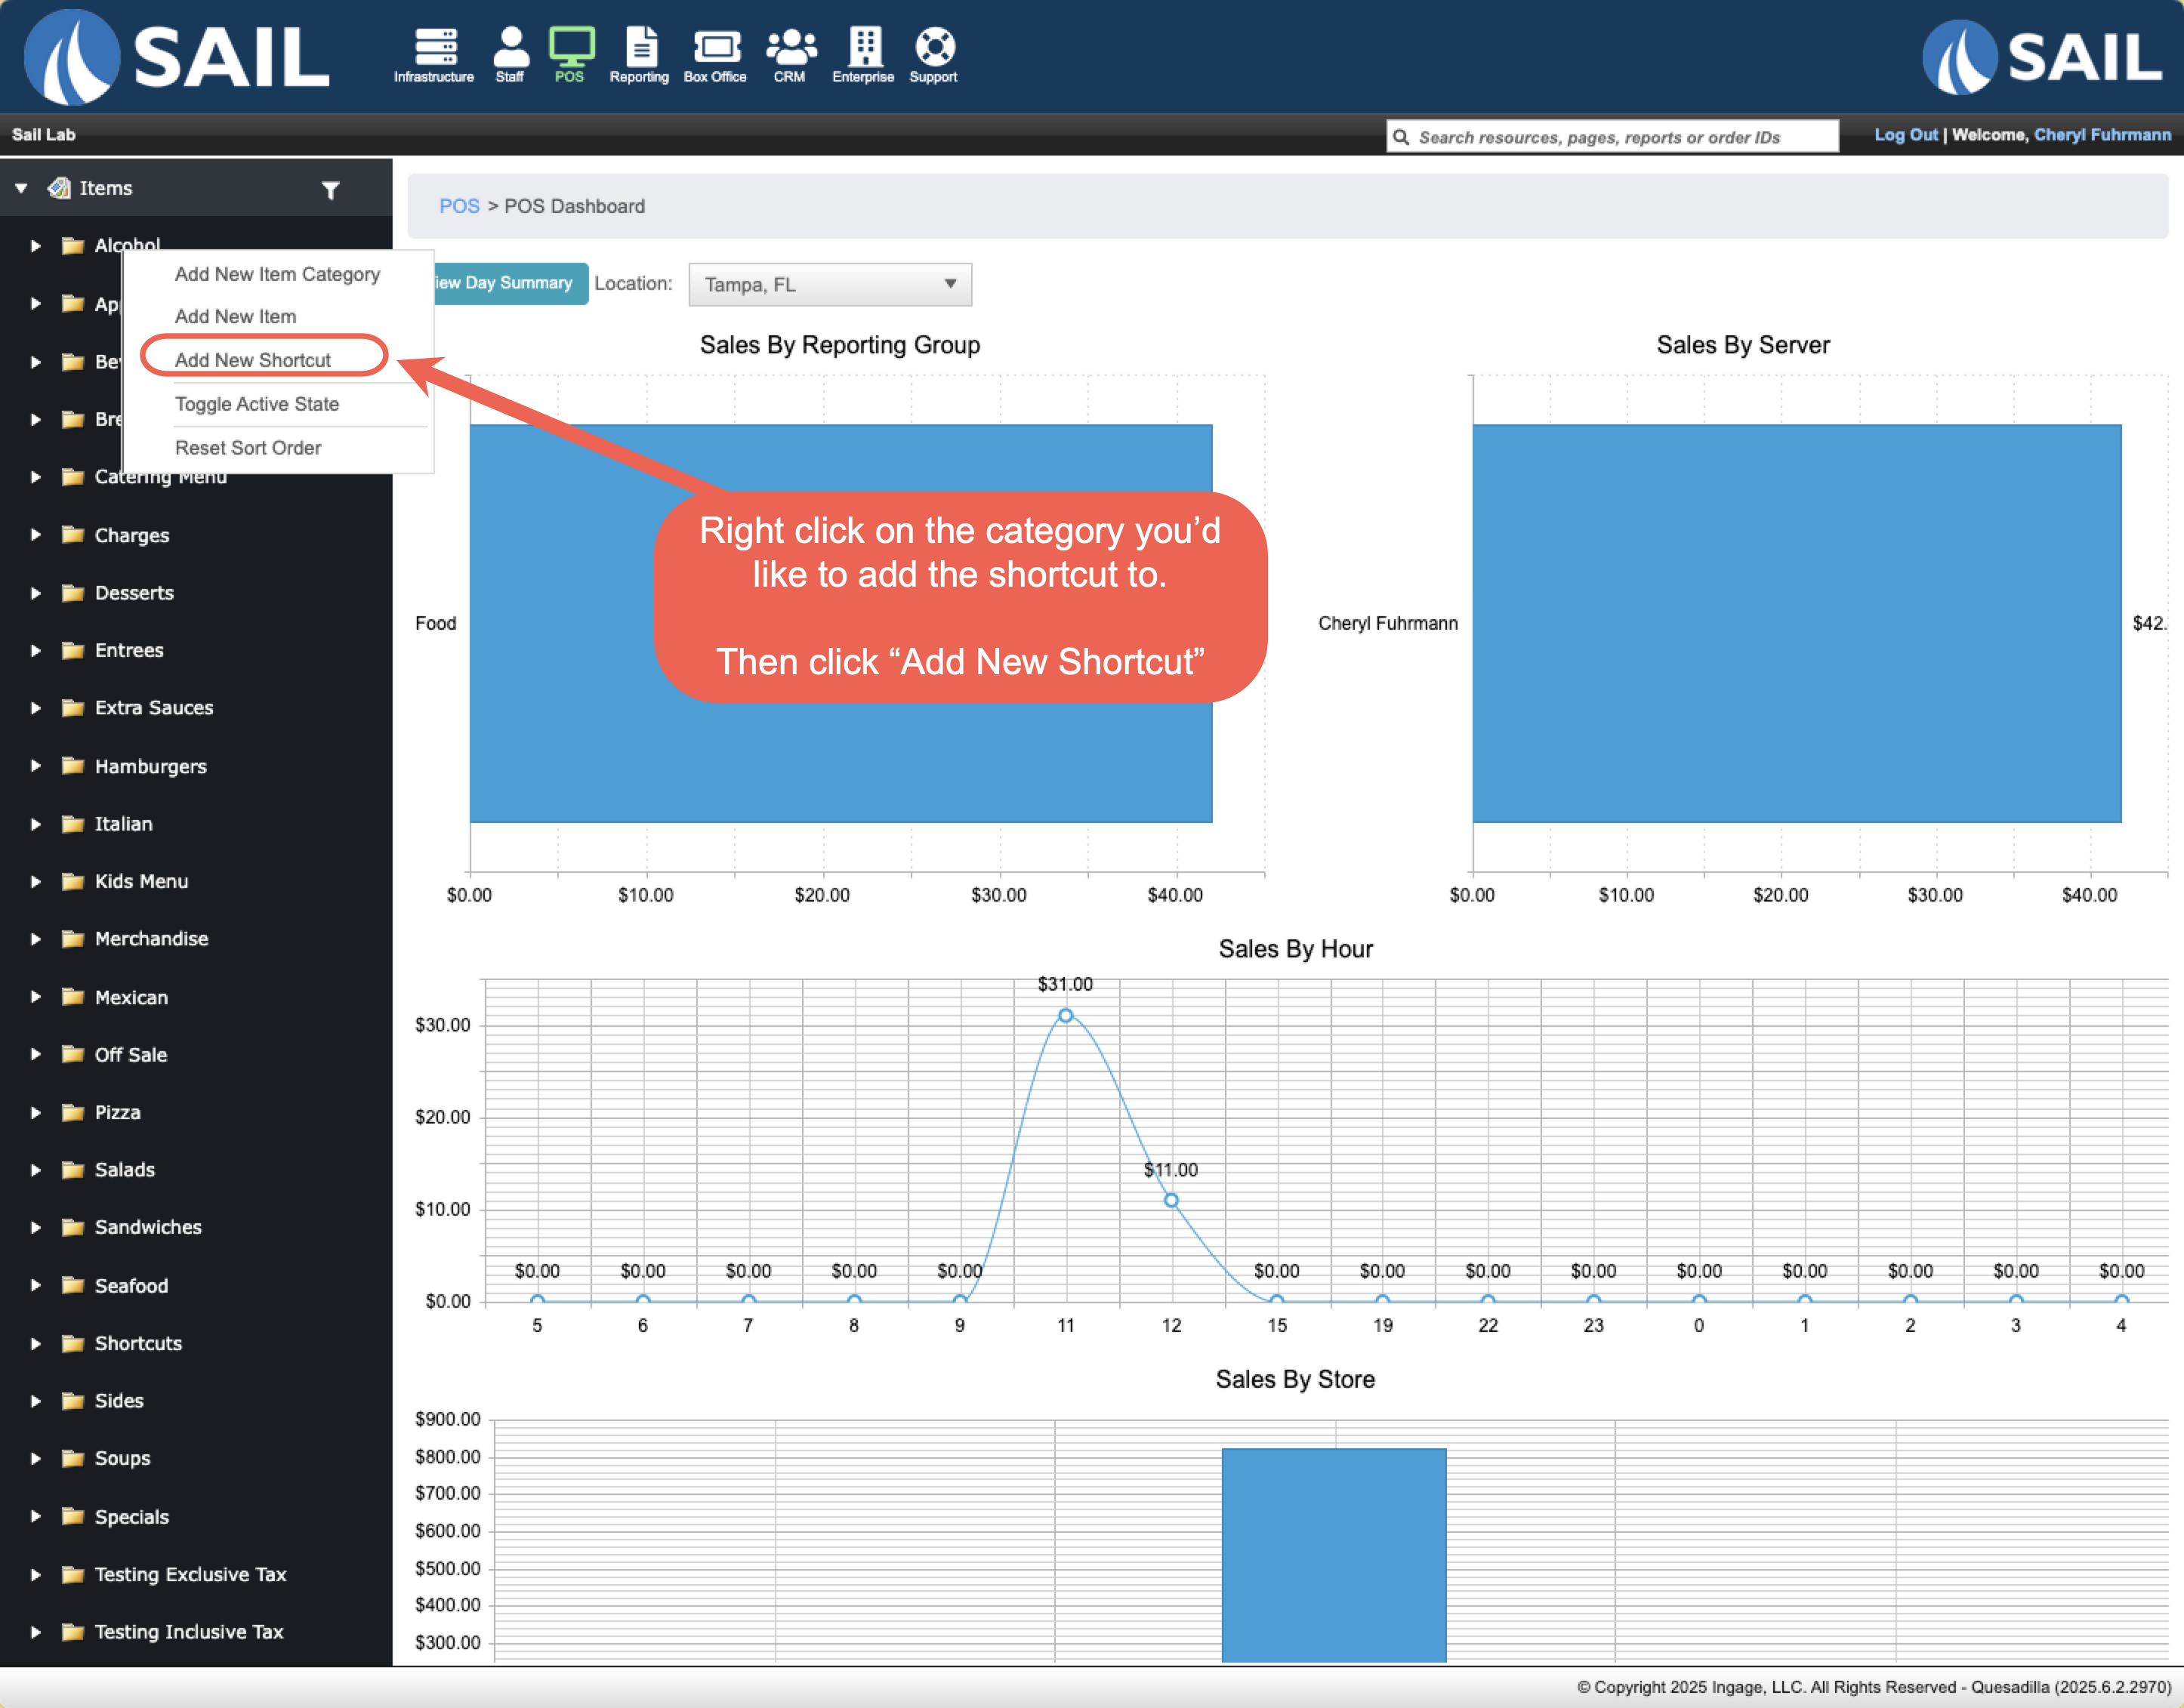
- Backoffice --> POS
- Right Click on the category you'd like to add the shortcut to
- Shortcuts can ONLY go in categories
- Then click "Add New Shortcut"
Give your shortcut a name:
- Icon: The shortcut will appear like any other item on the screen, so you can give it an icon
- Name: This name will only appear on the terminal and handheld.
- It will not appear on reports, receipts, or kitchen tickets
- Description: You can optionally enter a description to better describe it for future references
- the Optional Settings section will apply to the whole shortcut and not the individual actions
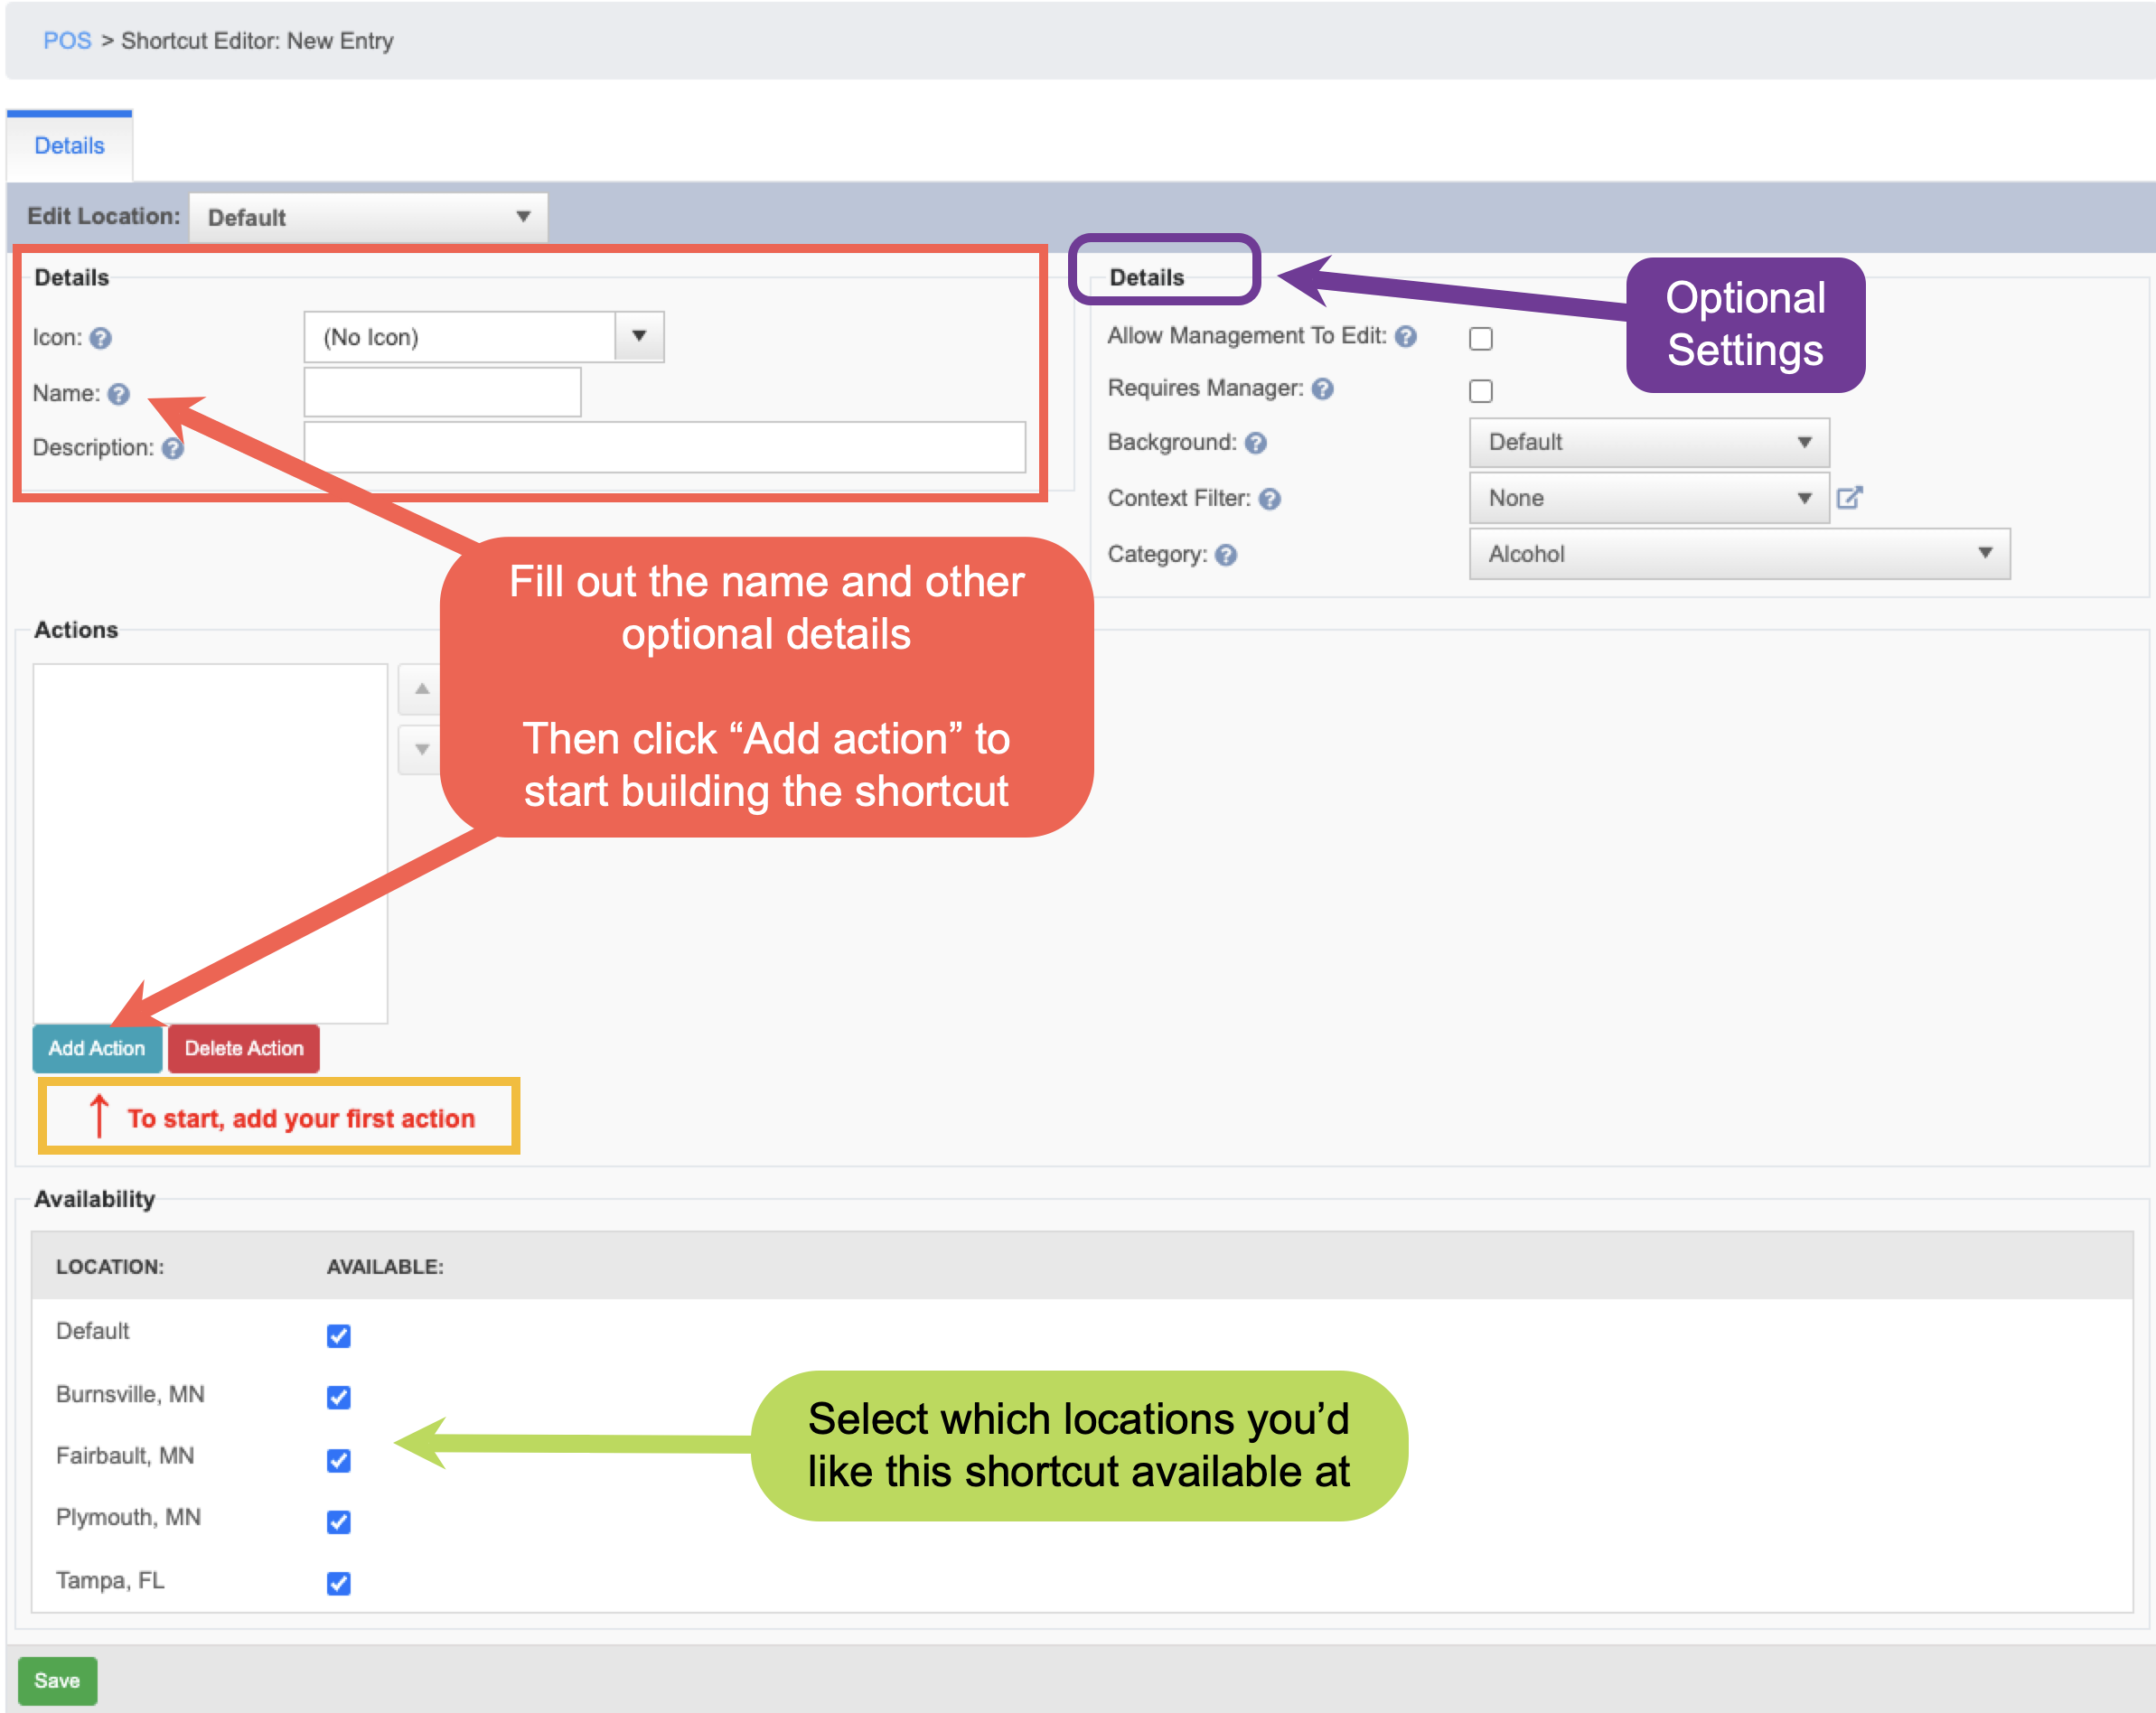
Add Actions
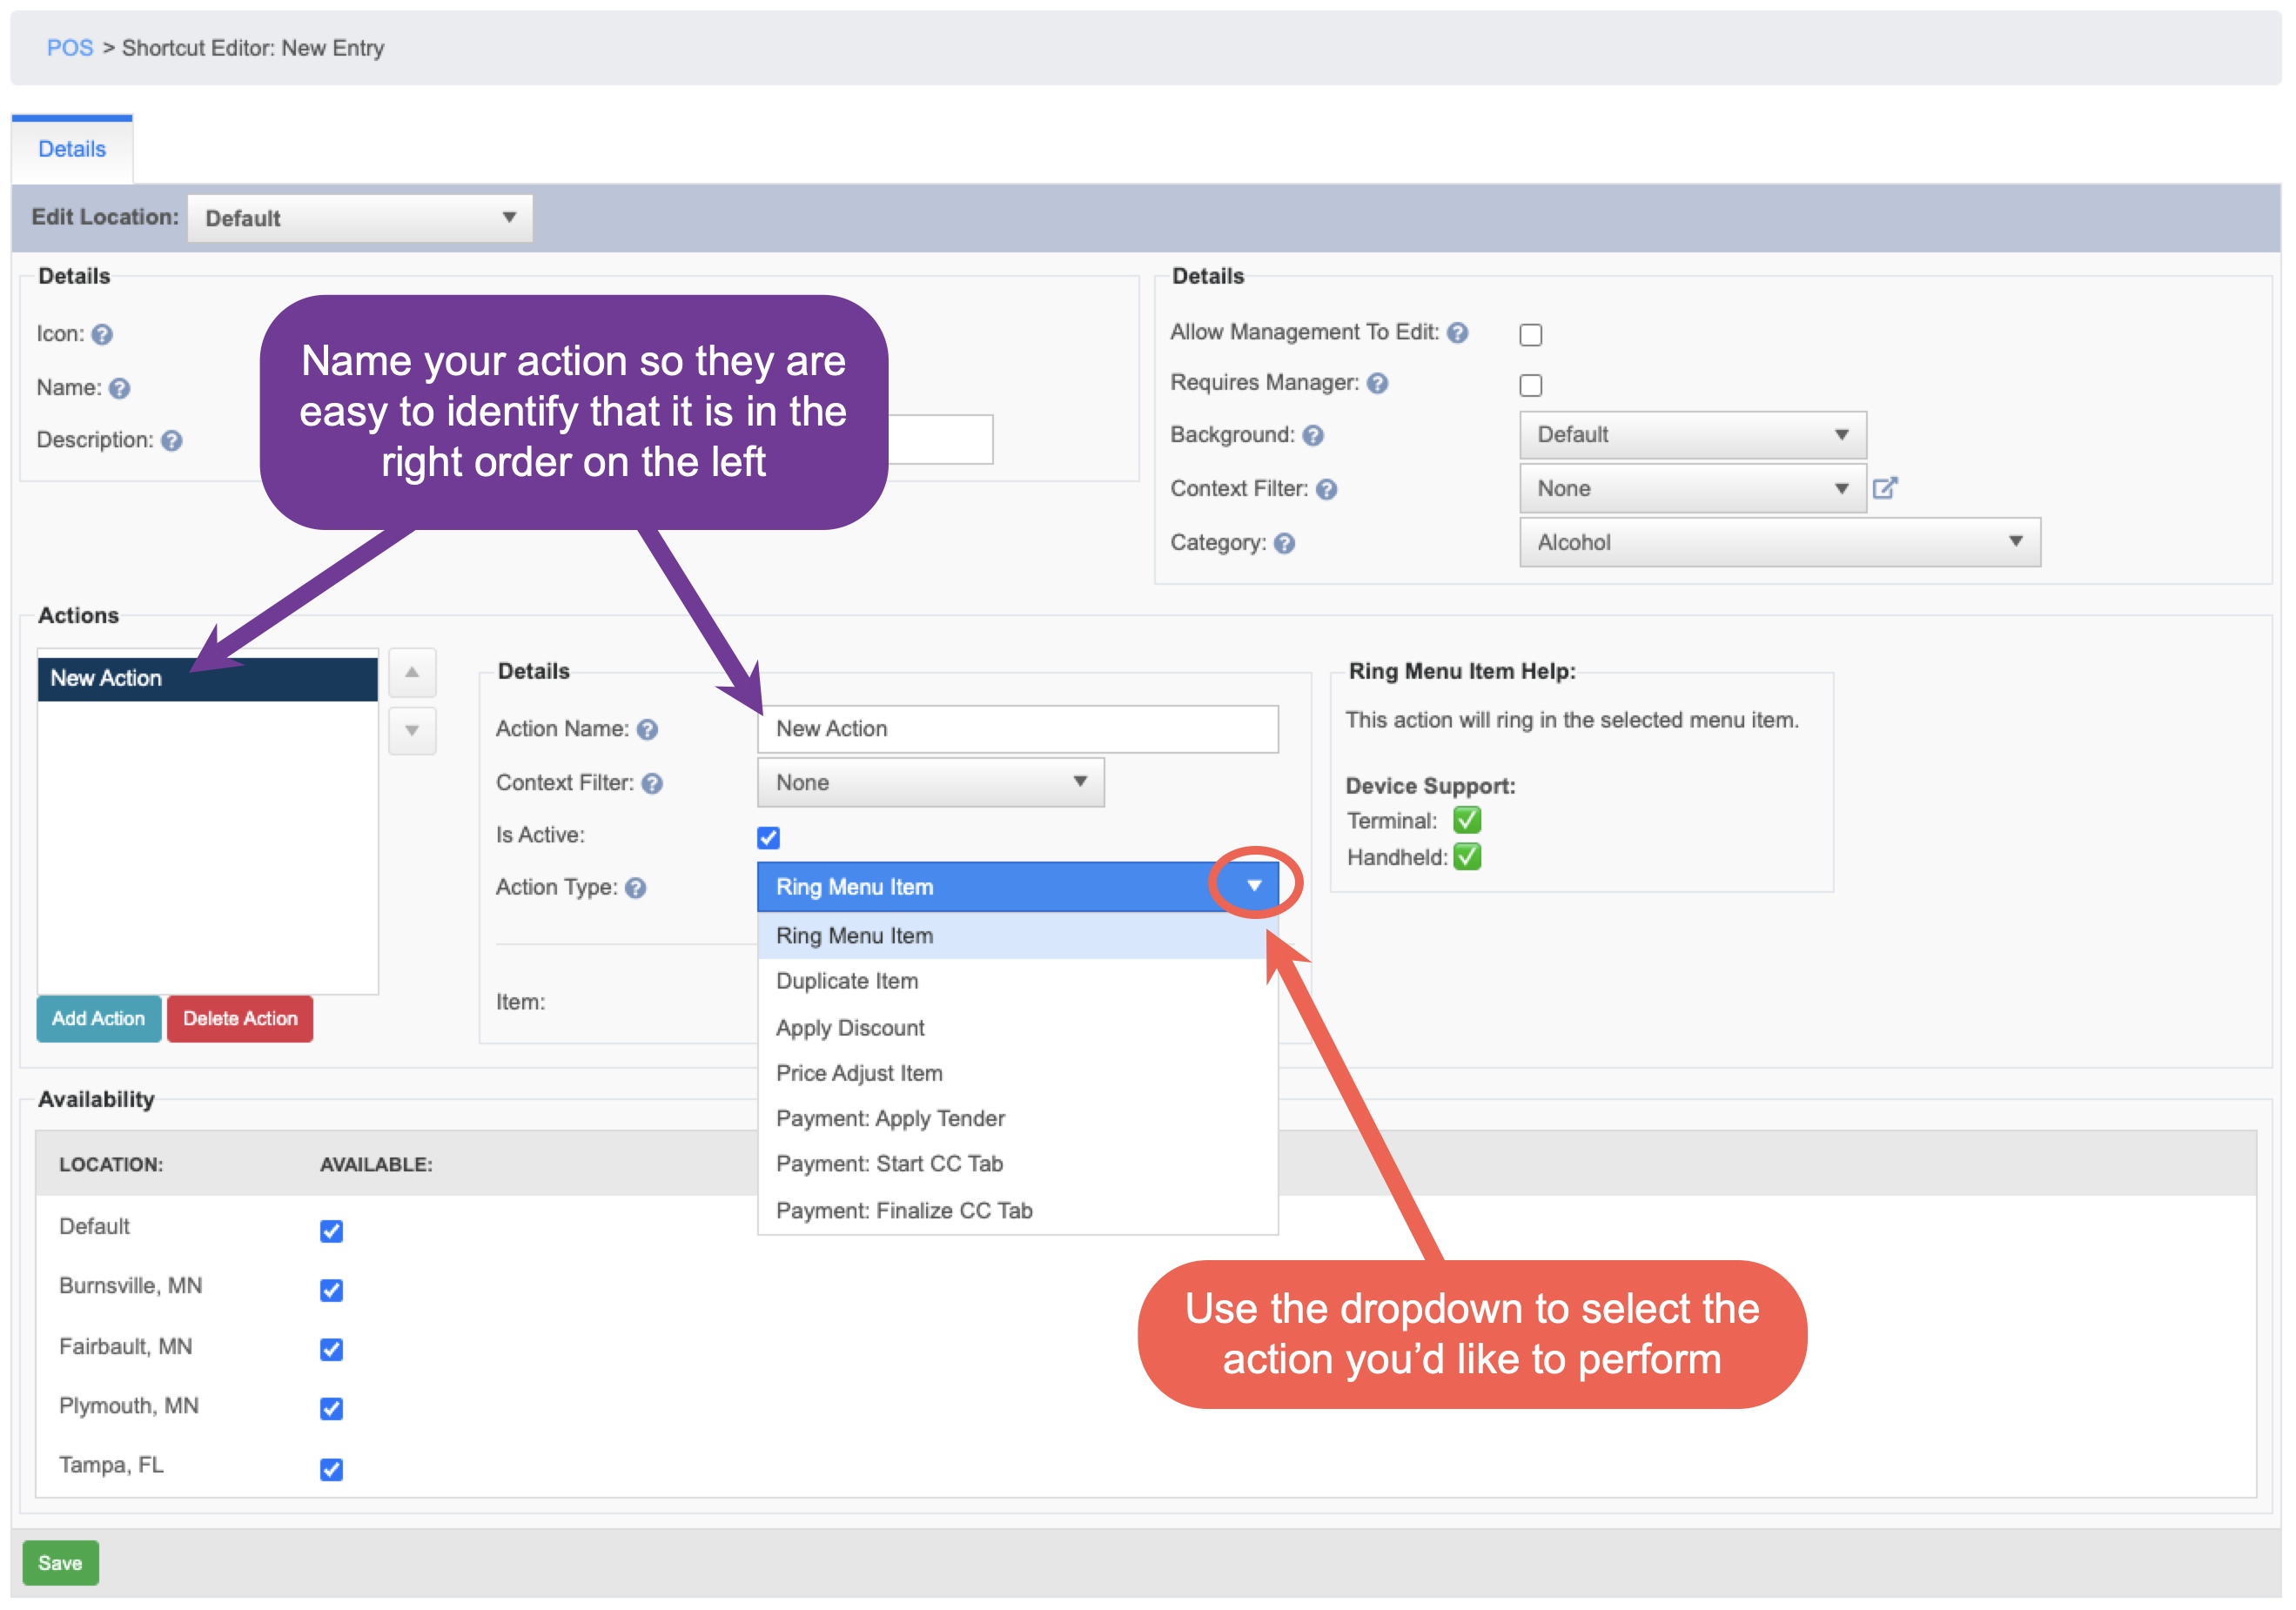
- Name each action you add so that you or someone else can identify the action and that it's in the right order
- You can add context filters to the individual actions in this section
- Use the "Action Type" dropdown to select which action you'd like to perform
- After you select the action type there will be a "help" section on the right to describe what the action will do and which devices support it
- Some of the actions will have additional steps (See below)
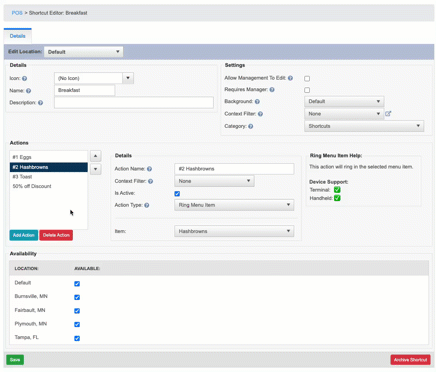
How to rearrange actions
- Use the arrows next to the action window to move them up and down and get them in the right order
Description of each action type
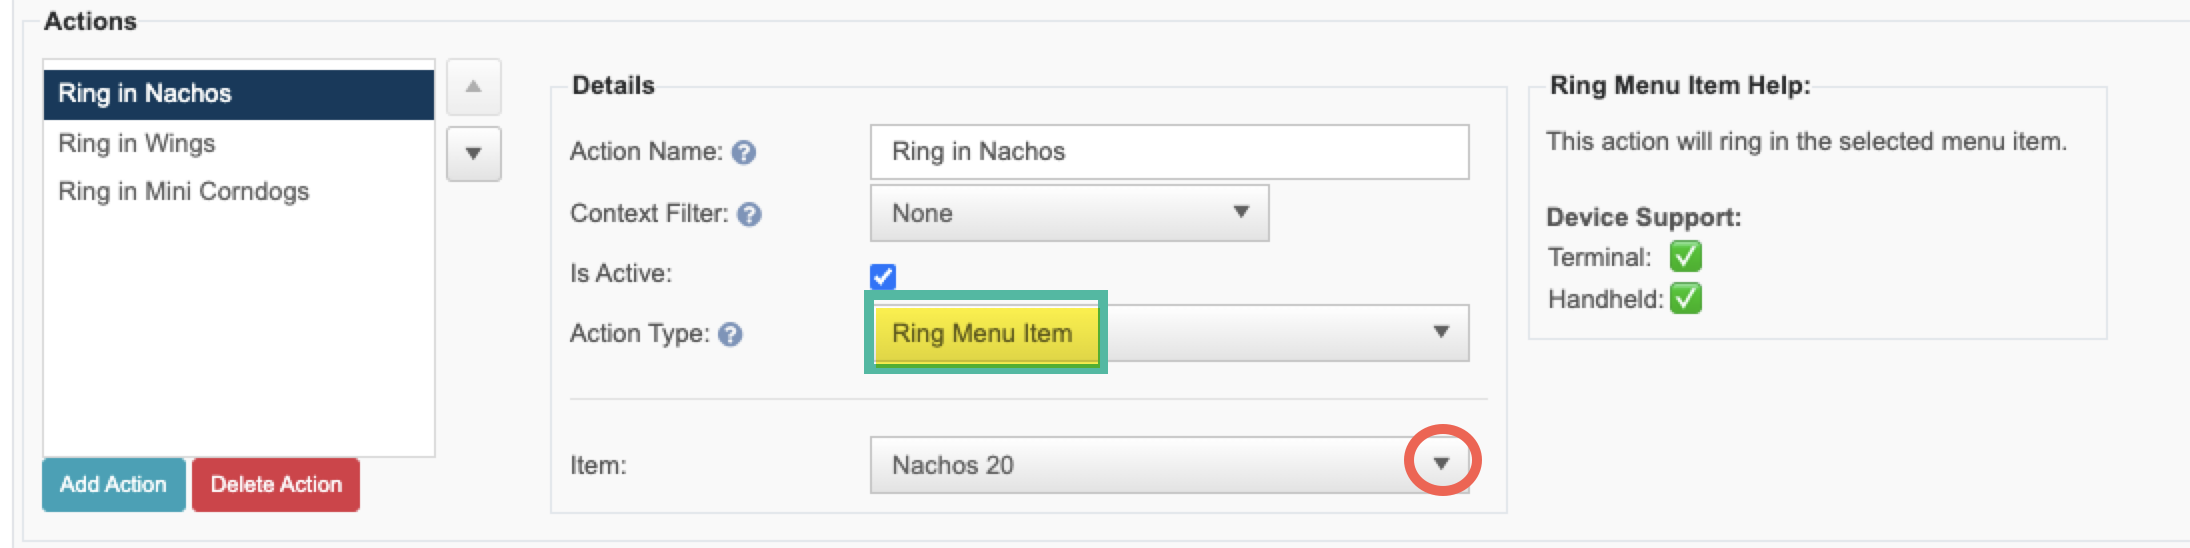
Ring in a menu item
- This action will ring in the selected menu item
- Use the "Item" dropdown to select which item you want rang in
- It will follow all the settings and prompts on that specific item
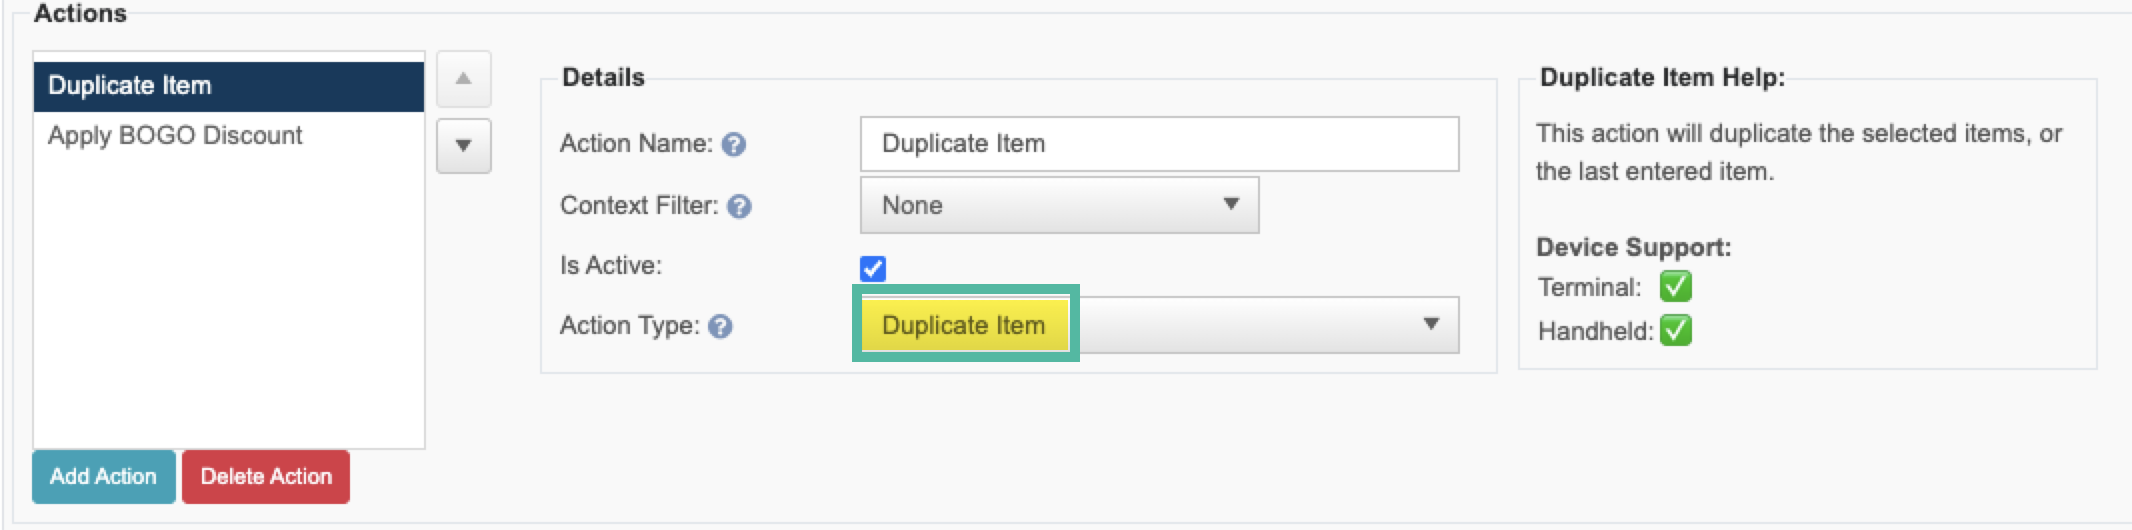
Duplicate Item
- On the terminal it will duplicate the selected item(s), or the last entered unsent item
- On the handheld it will ONLY duplicate the last entered unsent item
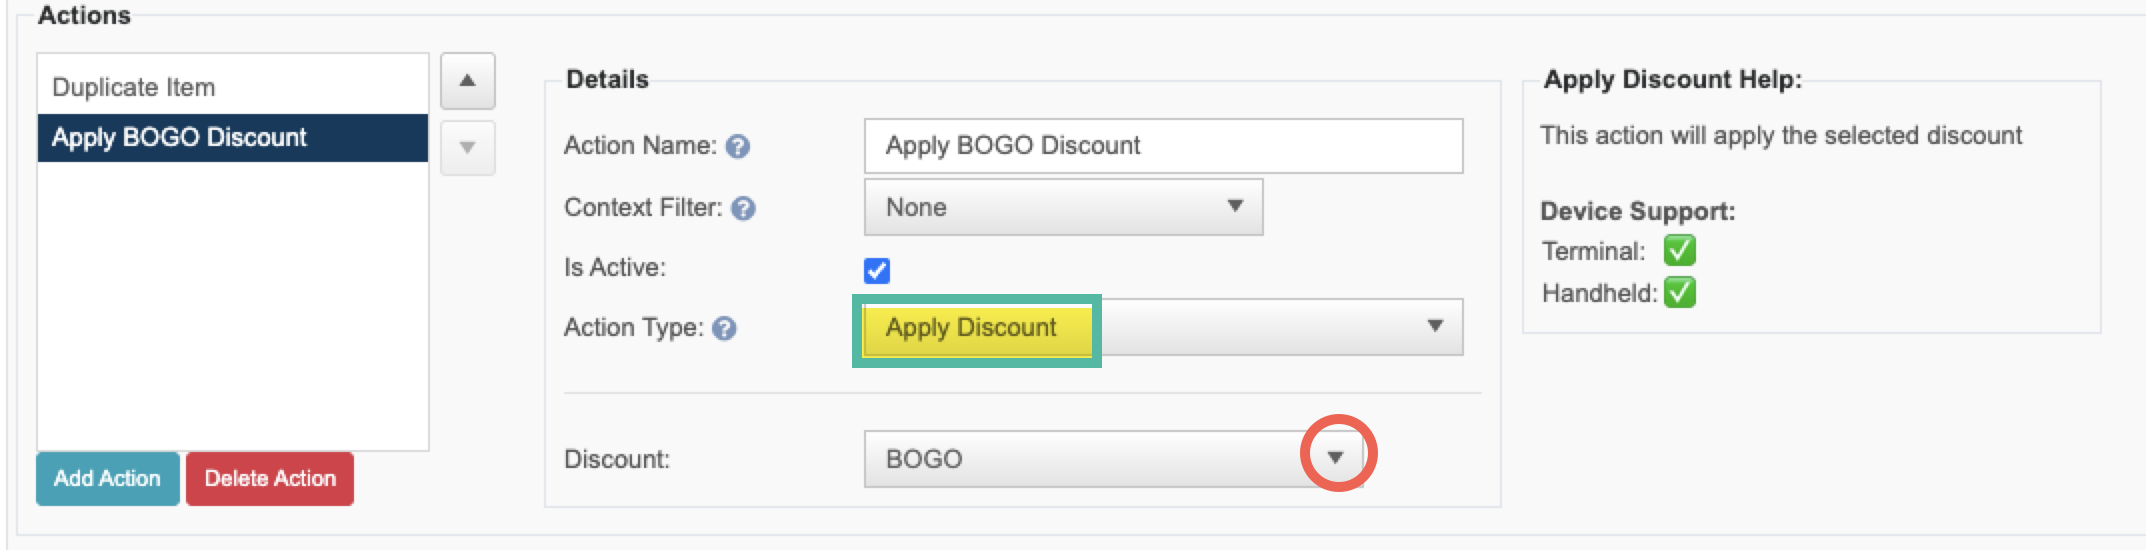
Apply a Discount
- On the terminal it will apply item level discounts to the selected item(s), or the last entered unsent item,
- It will apply check level discounts to the selected seat
- On the handheld it will ONLY apply item level discounts. It will not apply a check level discount
- It will only apply the discount to an unsent item that is still green. It will not add it to a previously sent item
- Use the "Discount" dropdown to select which discount you'd like to apply to the item/seat
- The discount will follow all the rules and settings applied when building the discount
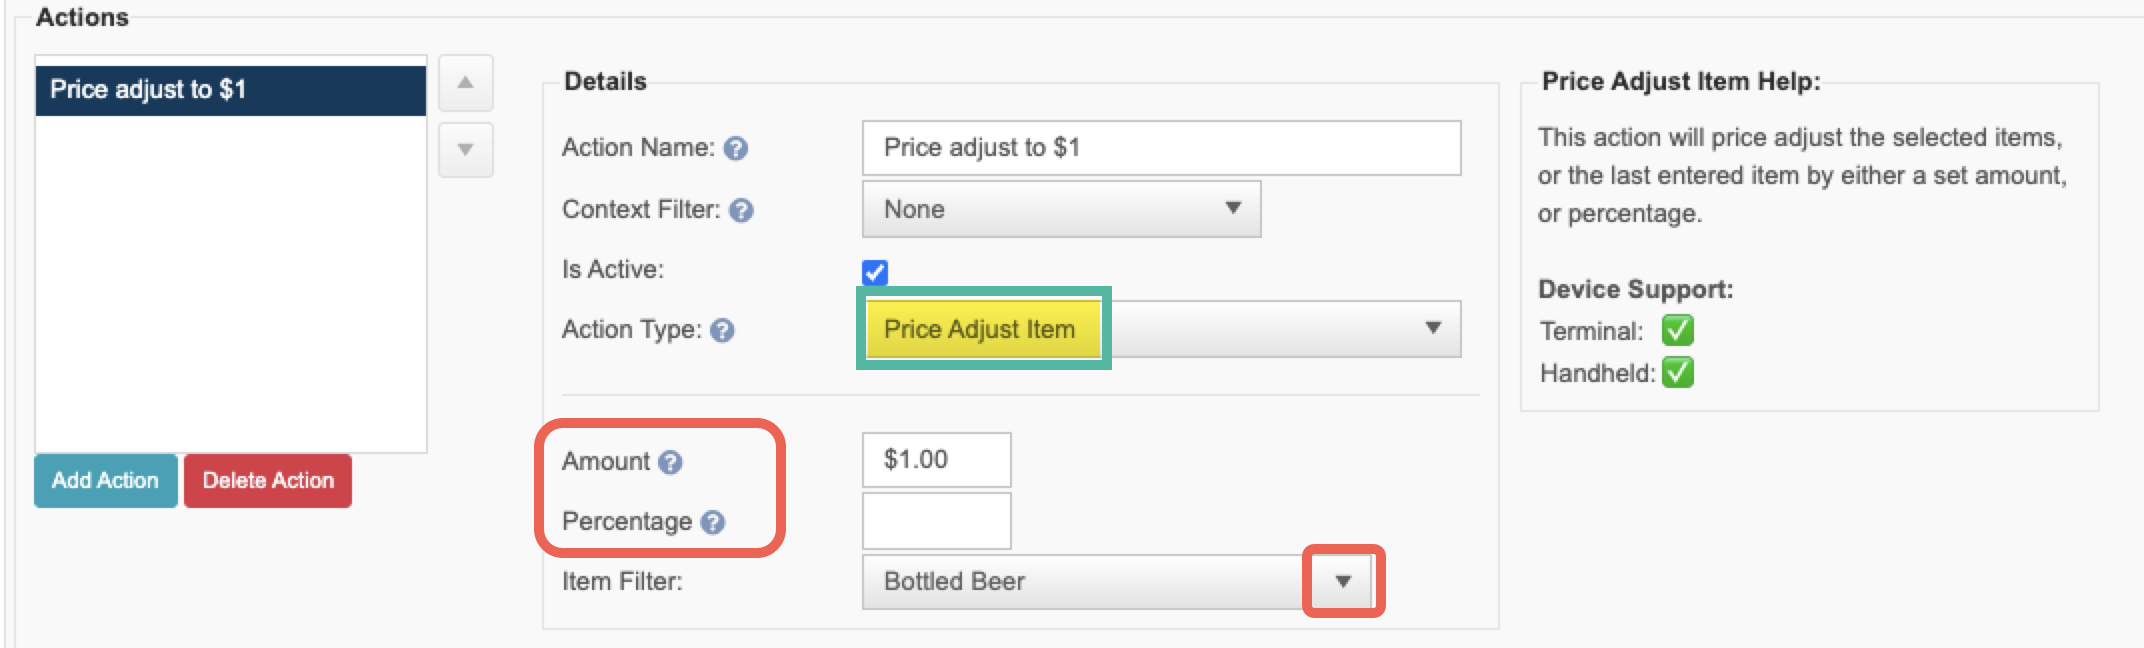
Price Adjust Item
- On the terminal it will adjust the price on the selected item(s), or the last entered unsent item
- On the handheld it will ONLY price adjust the last entered item, that is still unsent (Green)
- You will need to set if you're changing the price to a specific amount or a percentage of the original price
- Optionally you can select an "Item Filter" so that the price adjust only applies to the items you'd like it to apply to
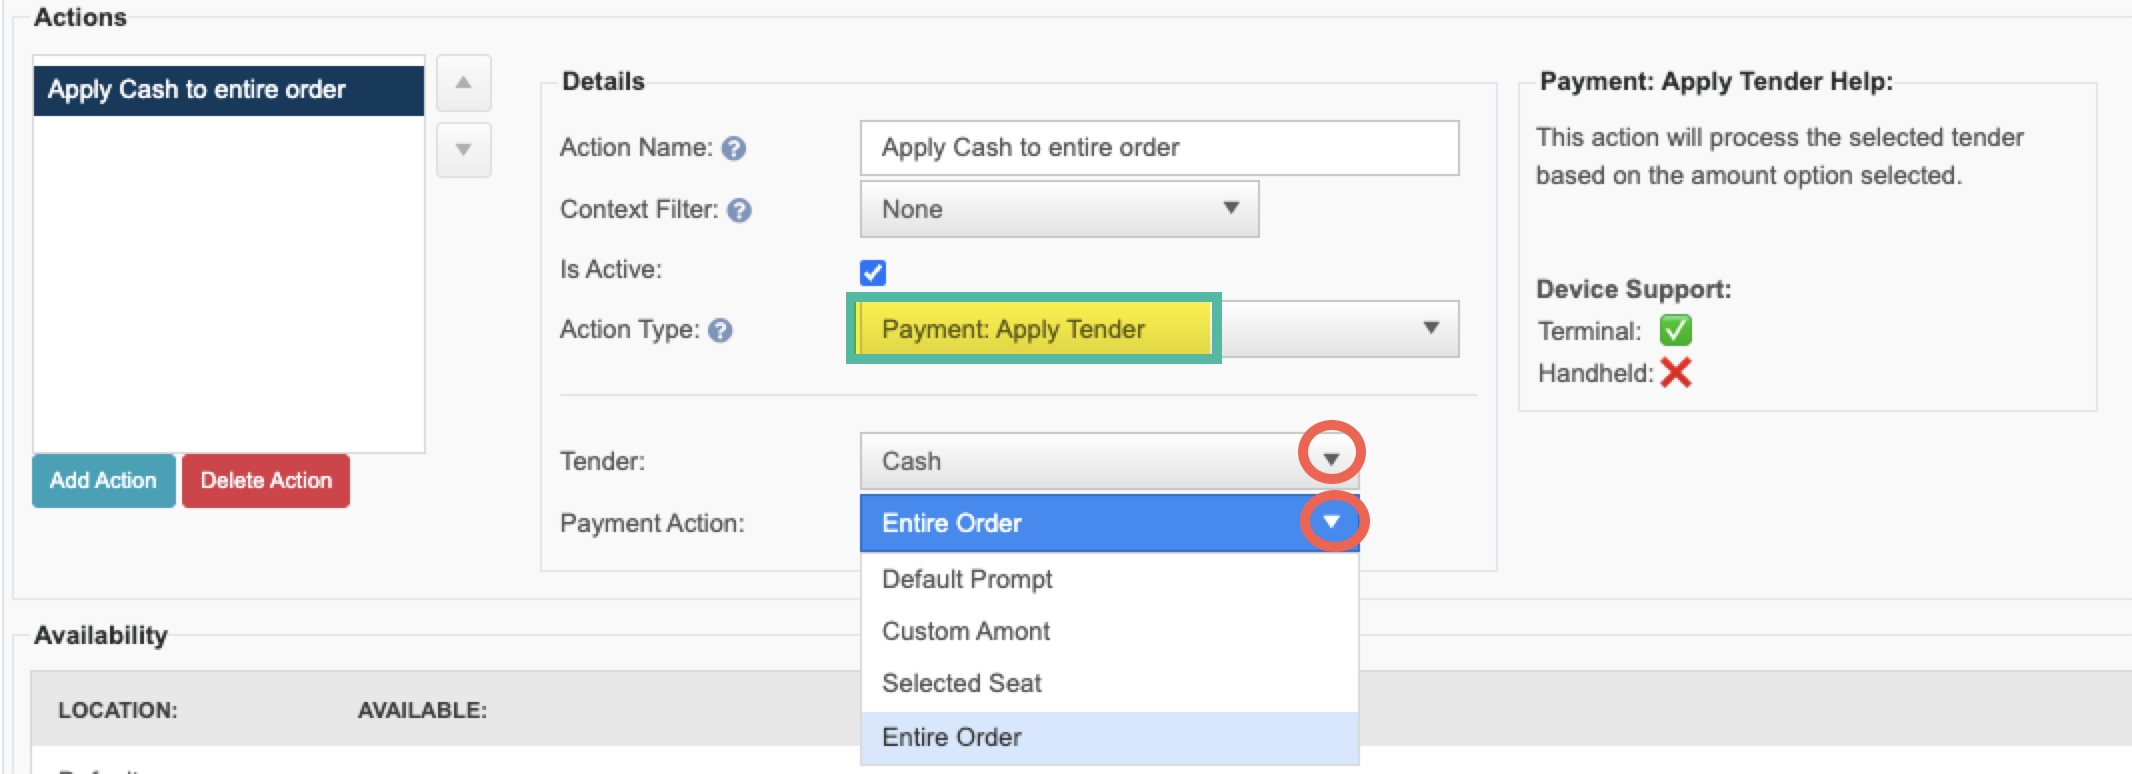
Payment: Apply Tender
- This action is only supported on the terminal
- This action is most often used directly on the speed rail instead of in a shortcut
- Use the "Tender" dropdown to select the tender type that you'd like to apply
- Use the "Payment Action" dropdown to select how they'd like the payment to be applied
- Default Prompt - is the prompt that would normally appear if you were using this tender on the payment screen. Note this will only apply to the seat selected at the top
- Custom Amount - Will prompt a keypad to type in a custom amount. Note this will only apply to the seat selected at the top
- Selected Seat - Will automatically apply the tender to the seat selected at the top without any prompts
- Entire Order - Will automatically apply the tender to the entire order without any prompts
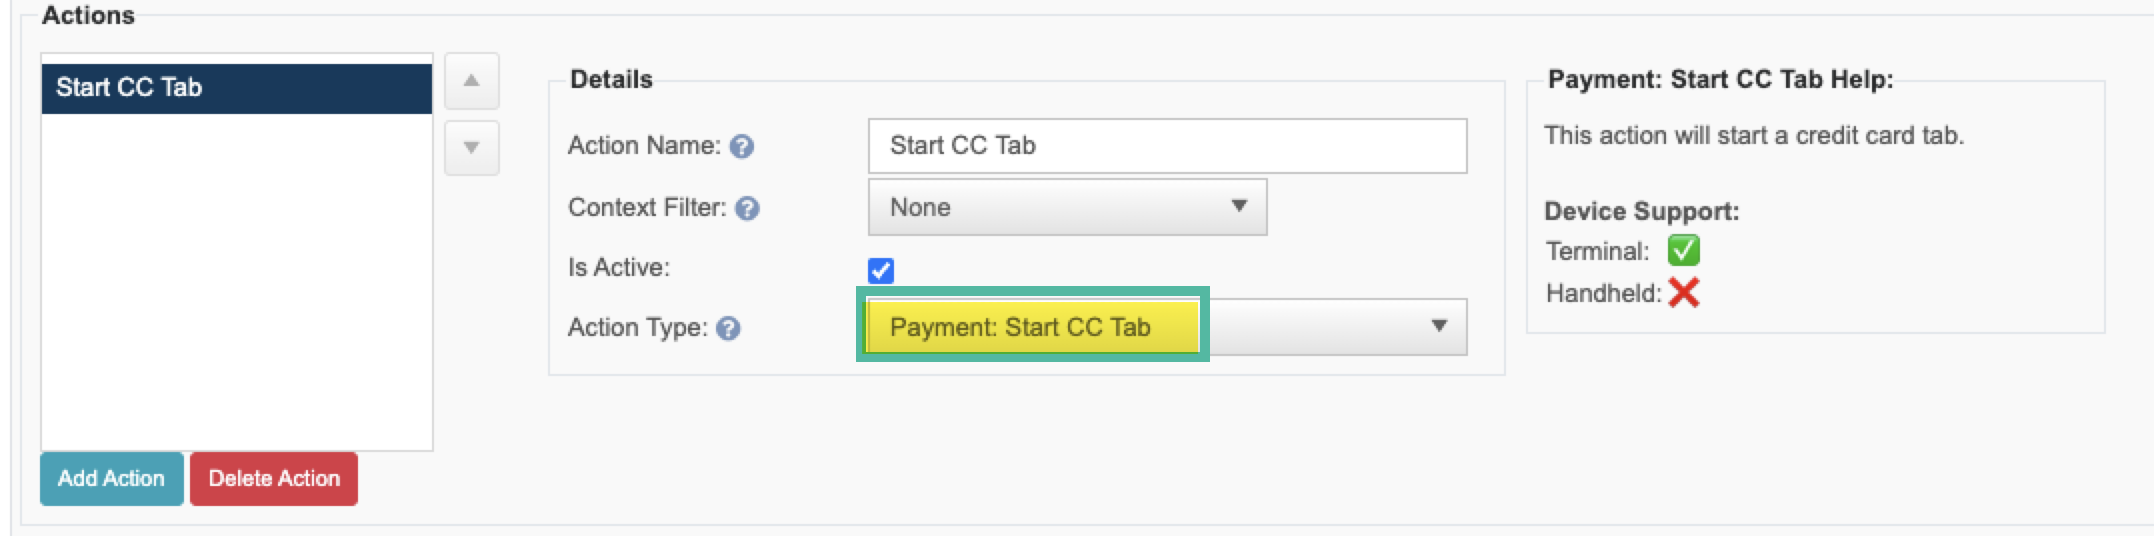
Payment: Start Credit Card Tab
- This action is only supported on the terminal
- This action is most often used directly on the speed rail instead of in a shortcut
- This action will automatically light up the payment device attached to the terminal
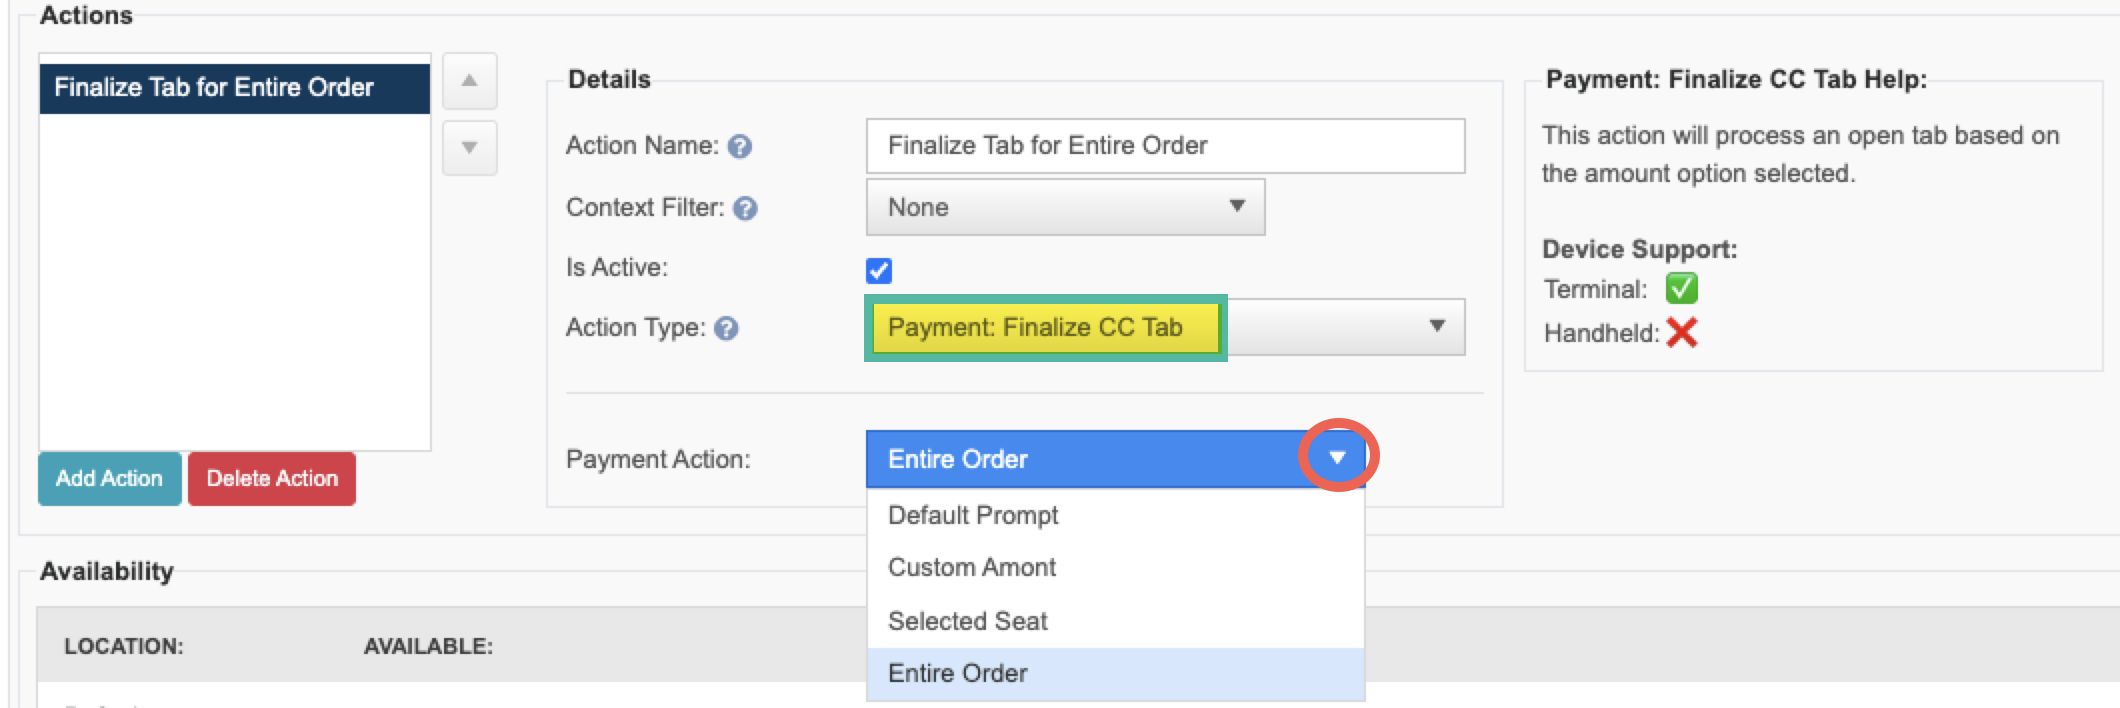
Payment: Finalize Credit Card Tab
- This action is only supported on the terminal
- This action is most often used directly on the speed rail instead of in a shortcut
- Use the "Payment Action" dropdown to select how they'd like the payment to be applied
- Default Prompt - is the prompt that would normally appear if you were using this tender on the payment screen. Note this will only apply to the seat selected at the top
- Custom Amount - Will prompt a keypad to type in a custom amount. Note this will only apply to the seat selected at the top
- Selected Seat - Will automatically apply the tender to the seat selected at the top without any prompts
- Entire Order - Will automatically apply the tender to the entire order without any prompts
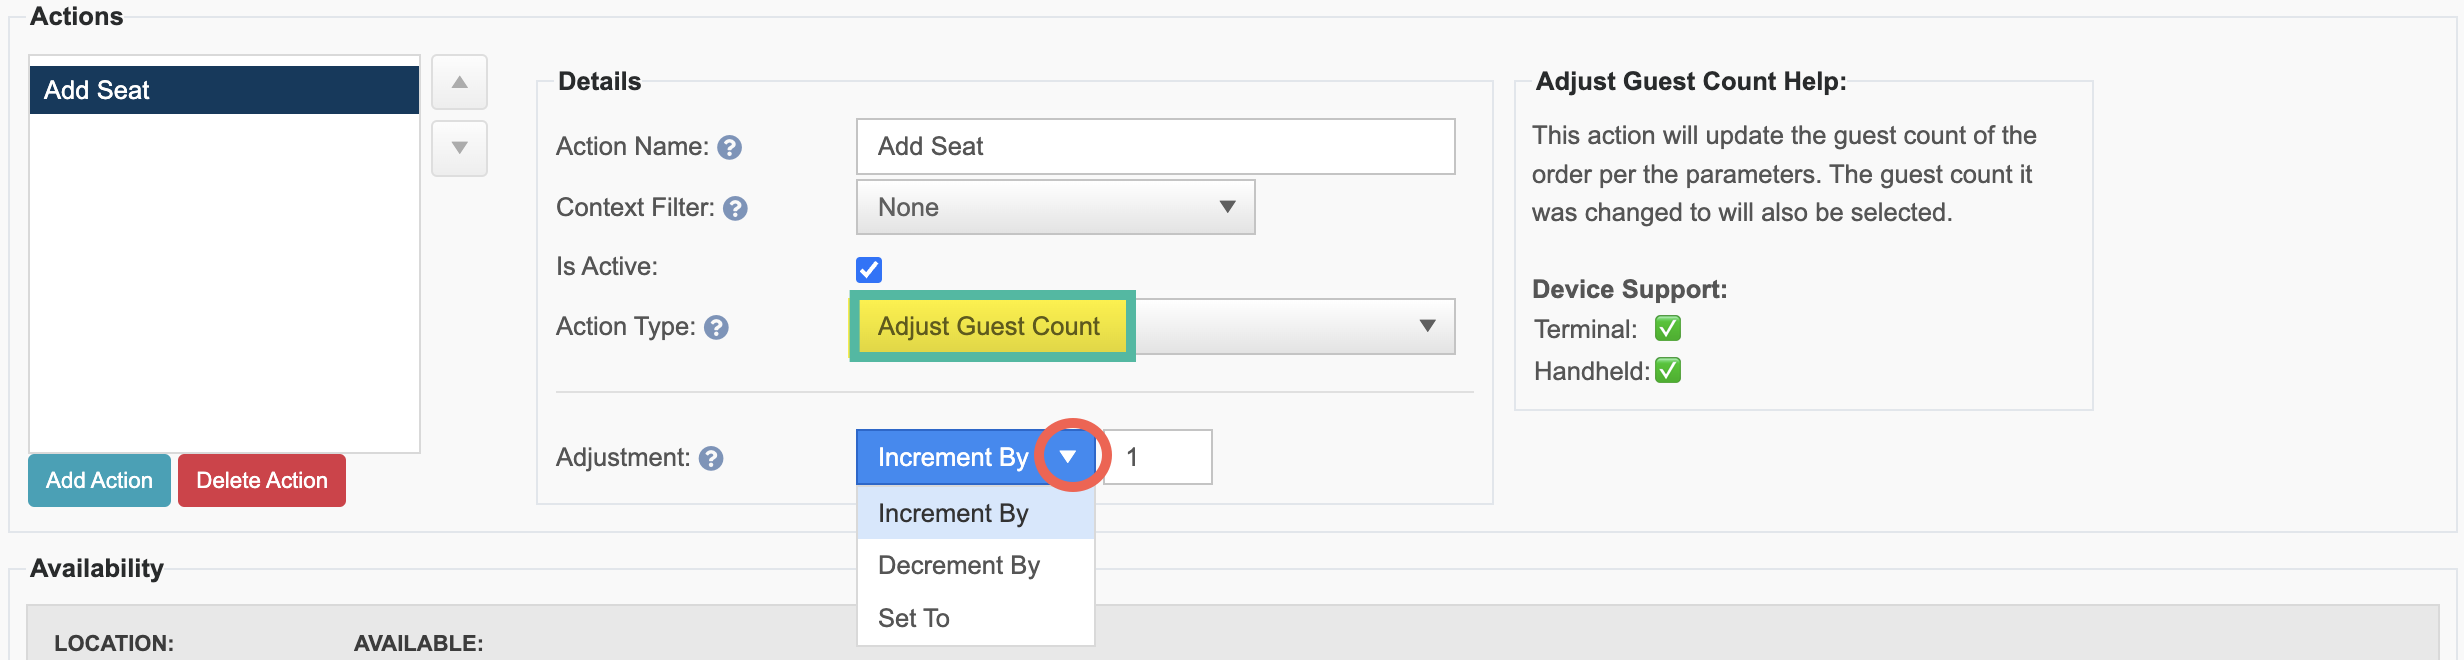
Adjust Seat Count
- This action will update the guest count of the order per the parameters you set.
- The guest count it was changed to will be the selected guest
- Increment by: This will add seats to the order based on the amount you set.
- Most commonly used to add 1 seat to the table with this quick push of a button
- Decrement by: This will remove seats from the order based on the amount you set.
- It will not let you decrease if there is only 1 guest left on the table
- Set to: This will automatically set the guest count to the number to set
- If there are less guests than the set number, it add the correct number of guests to get to the set number
- If there are more than the set number, it will remove the correct number of guests to get to the set number. If there are items on those seats they will be moved to the last seat
- Increment by: This will add seats to the order based on the amount you set.
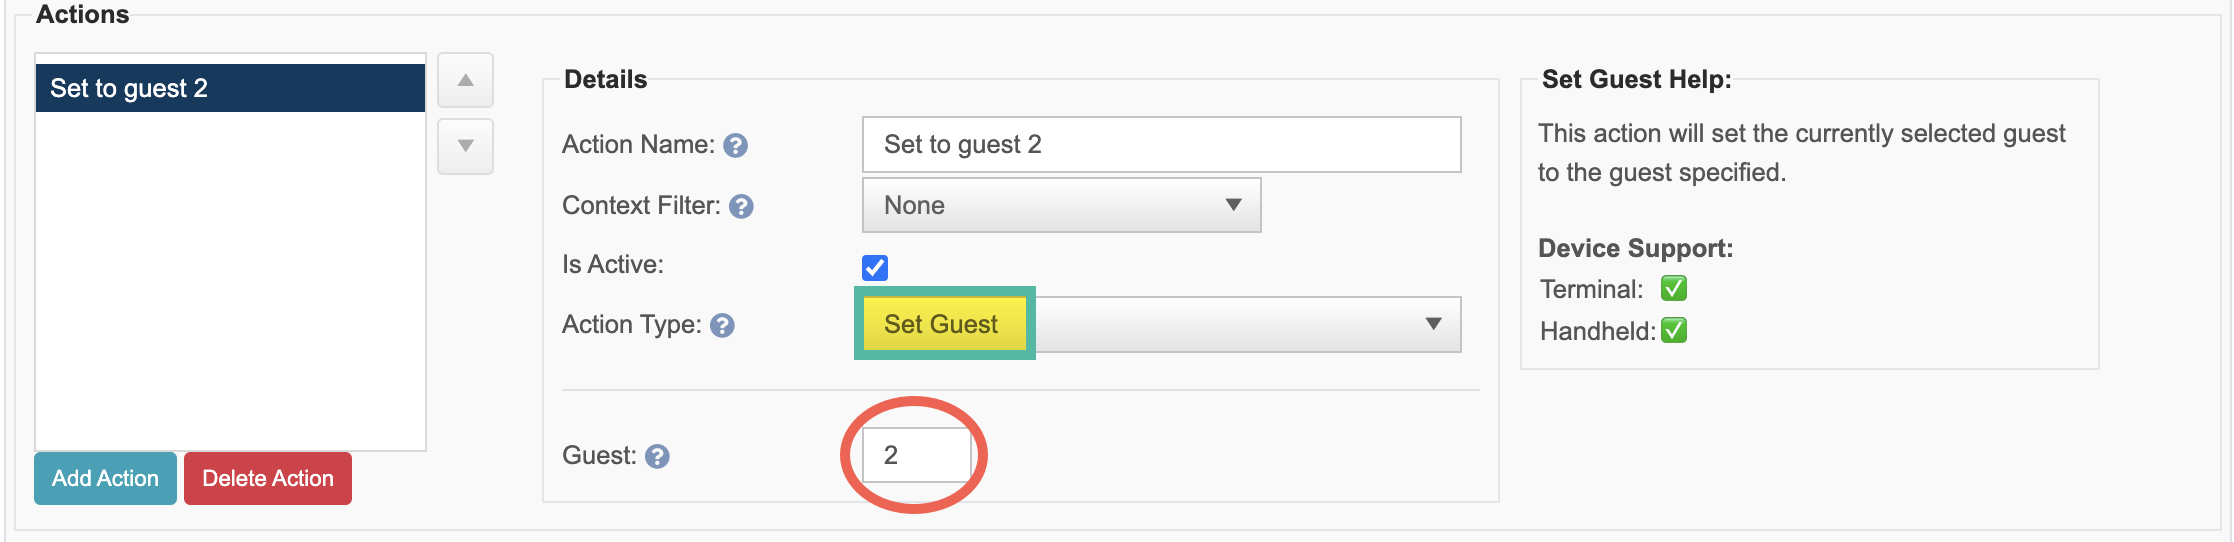
Set Guest
- This action will set the current selected guest to the guest specified
Examples
Use the Links below to see example Shortcuts set up
- 2 for 1 or BOGO - Buy one drink get a second for free
- Double up for a Buck - Buy one bottled beer and get the second one for $1
- Food Special - Buy two pizzas and get a free cheese bread