Quick Station Screen
This document will detail the Quick Station Screen
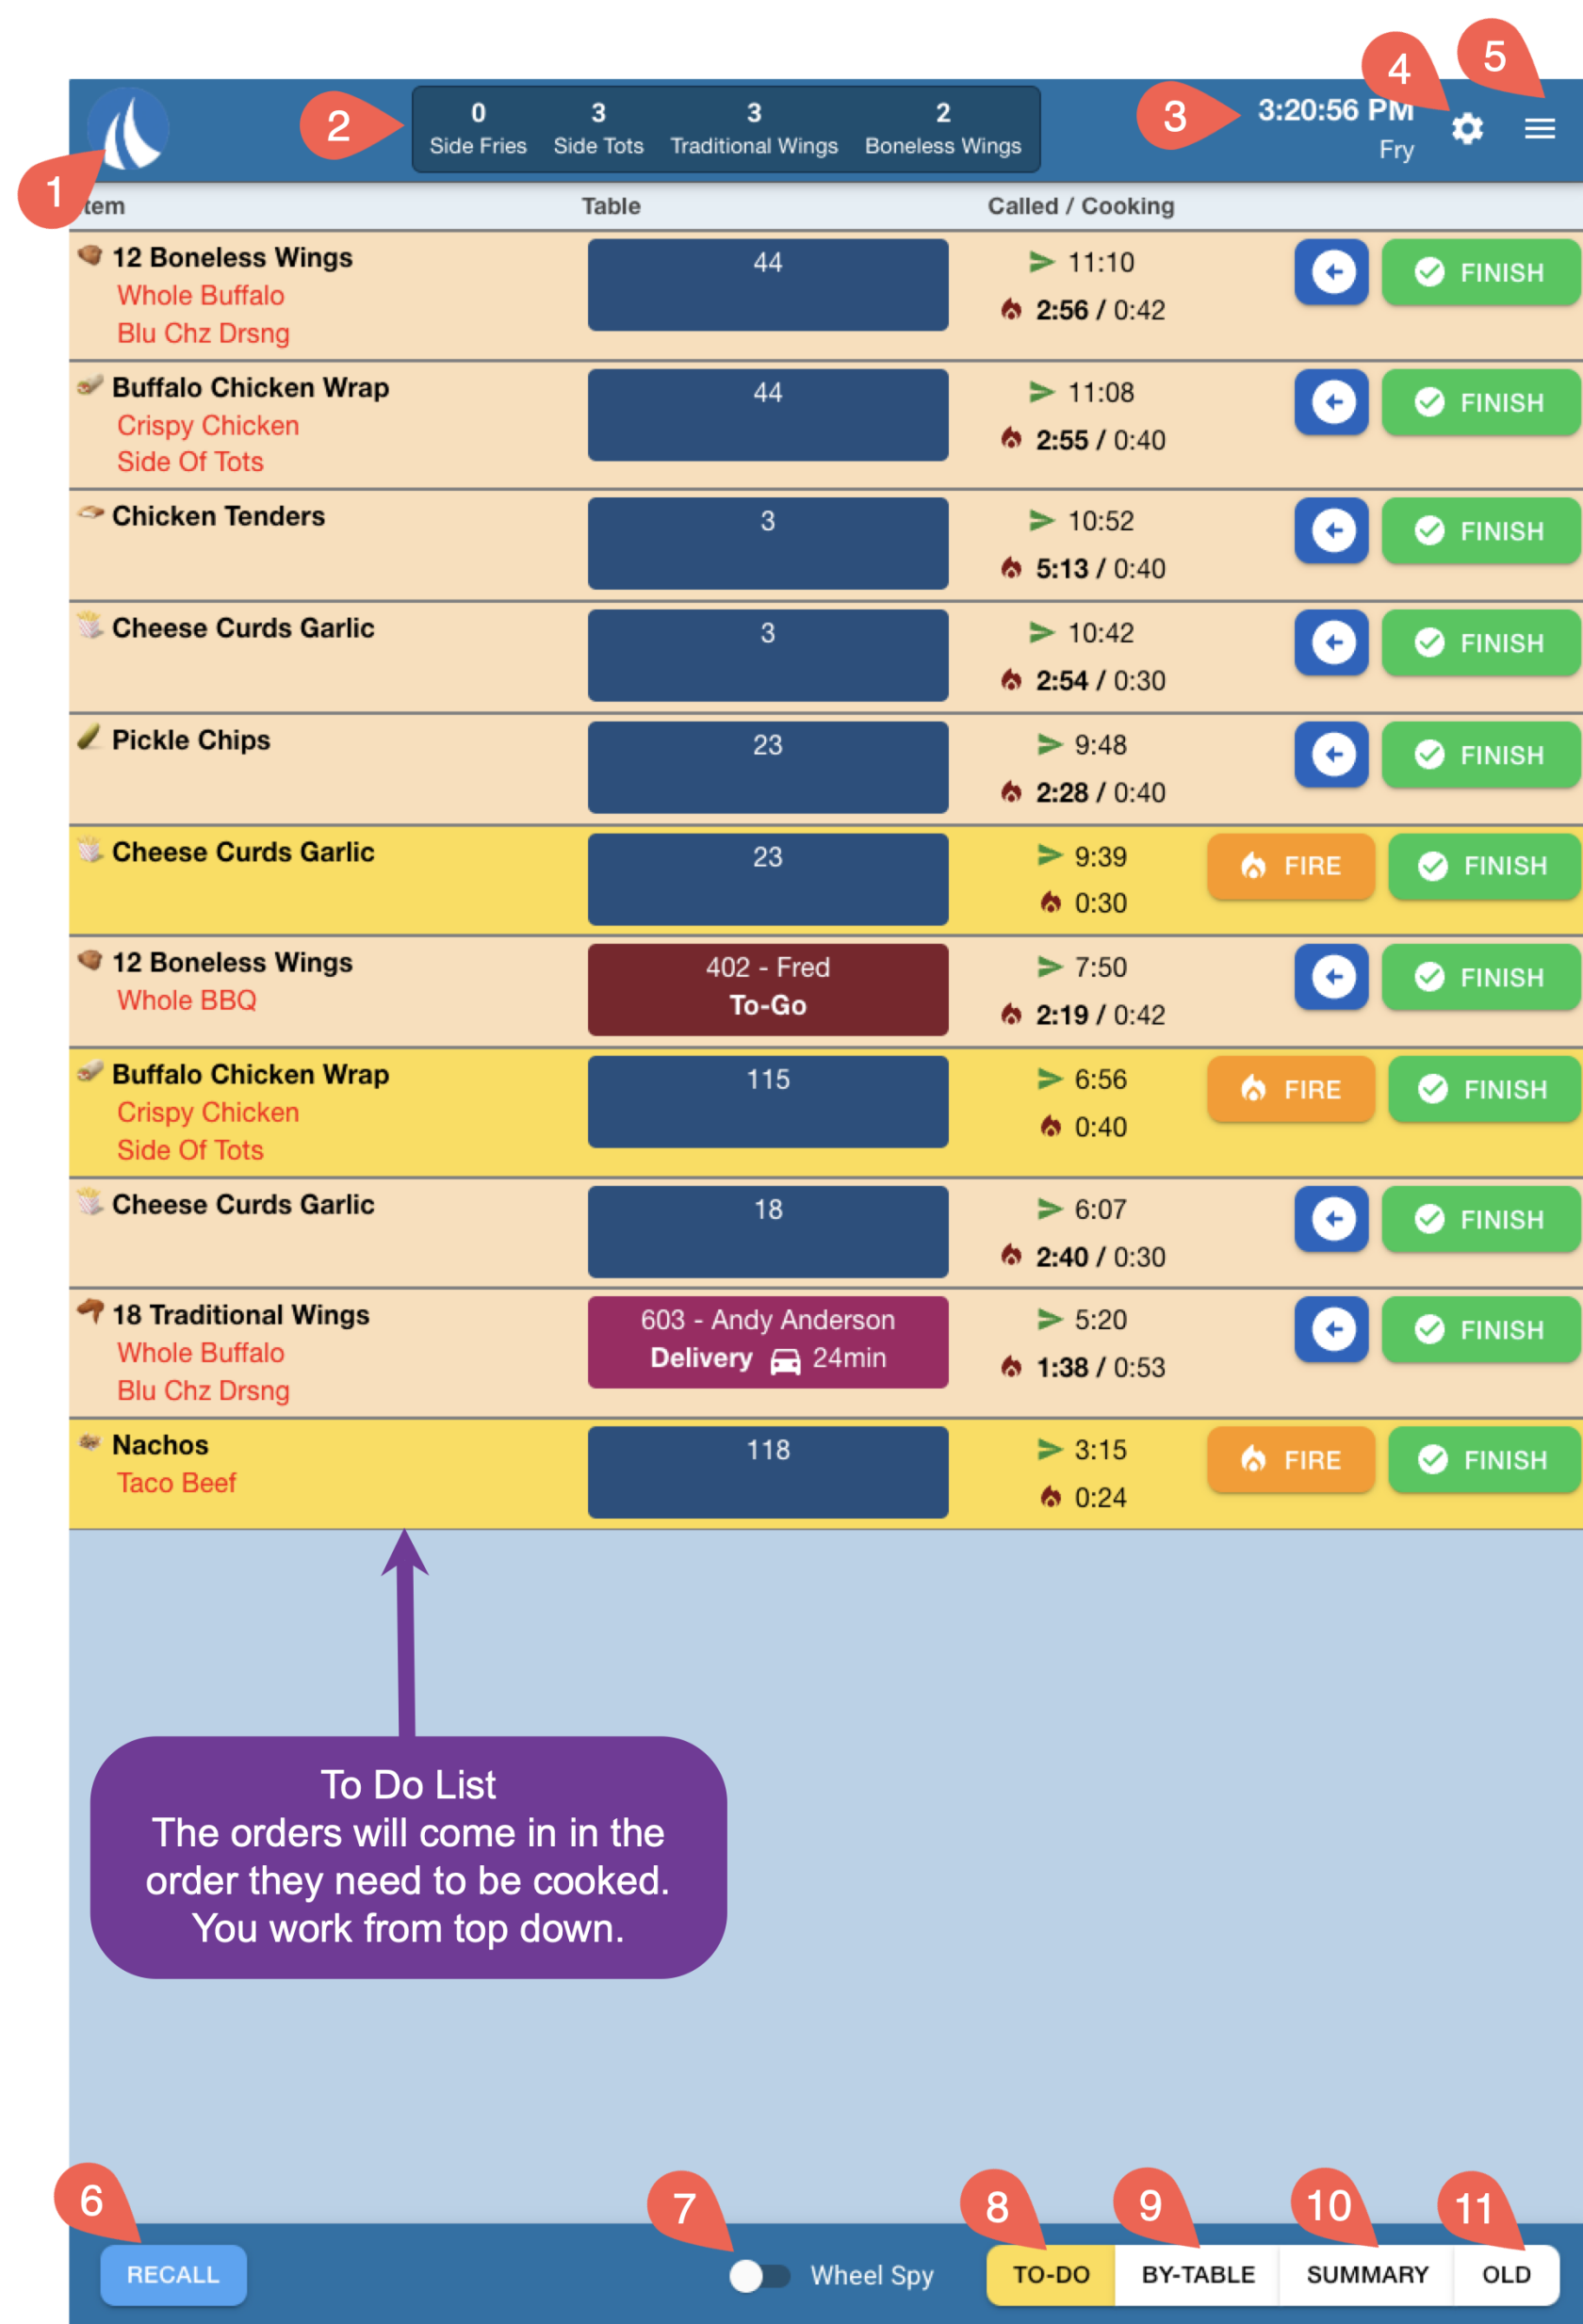
1. Sail Logo - Click the Sail logo in the top left corner of the screen to manually refresh. This will reload the screen and pull in any updates or changes that have occurred since the last automatic refresh.
2. All Day Counts - Located in the top center of the screen, All Day Counts show the total number of specific items that need to be prepared. These counts can be configured in Backoffice. Use this link to find out more about how to set up All Day Counts
3. Time and Station name - In the top right corner, you’ll see the current time and the name of the station you’re logged into. This helps staff confirm they're working at the correct KVS station and stay aware of the current time.
4. Station Settings - Click the Station Settings icon to access configuration options specific to this station.
Each station type (e.g., expo, wheel, quick) has its own set of settings that control how it behaves. Click the link to learn more about each of the station settings.
5. Quick Settings - Click the Quick Settings icon for a faster way to access commonly used settings.
These are a shortcut to some of the same options found in Station Settings, but designed for quicker adjustments during service. Click the link to learn more about the quick settings.
6. Recall - This button brings back the most recently bumped order from the Old Orders screen. Orders are recalled in the same order they were bumped off the Quick station screen. When an order is recalled, it will reappear on the quick station screen and display a recall symbol in the order header to indicate it has been brought back into view.
7. Wheel Spy - Turning on Wheel Spy allows this station to view the entire Wheel screen, giving them visibility into all active tickets, not just the ones assigned to their station. This is useful for monitoring overall kitchen flow or assisting with coordination across stations. (Click here to learn more about the wheel screen)
8. To Do - When To Do is selected, you are viewing a list of all new or active items that need to be prepared at this station. Items appear in the order they were sent, with the oldest at the top and the newest at the bottom. This helps cooks work from top to bottom, focusing first on the items that have been waiting the longest. As each item is completed, it is removed from the list, and the next item moves up in priority. (Shown in the image above)
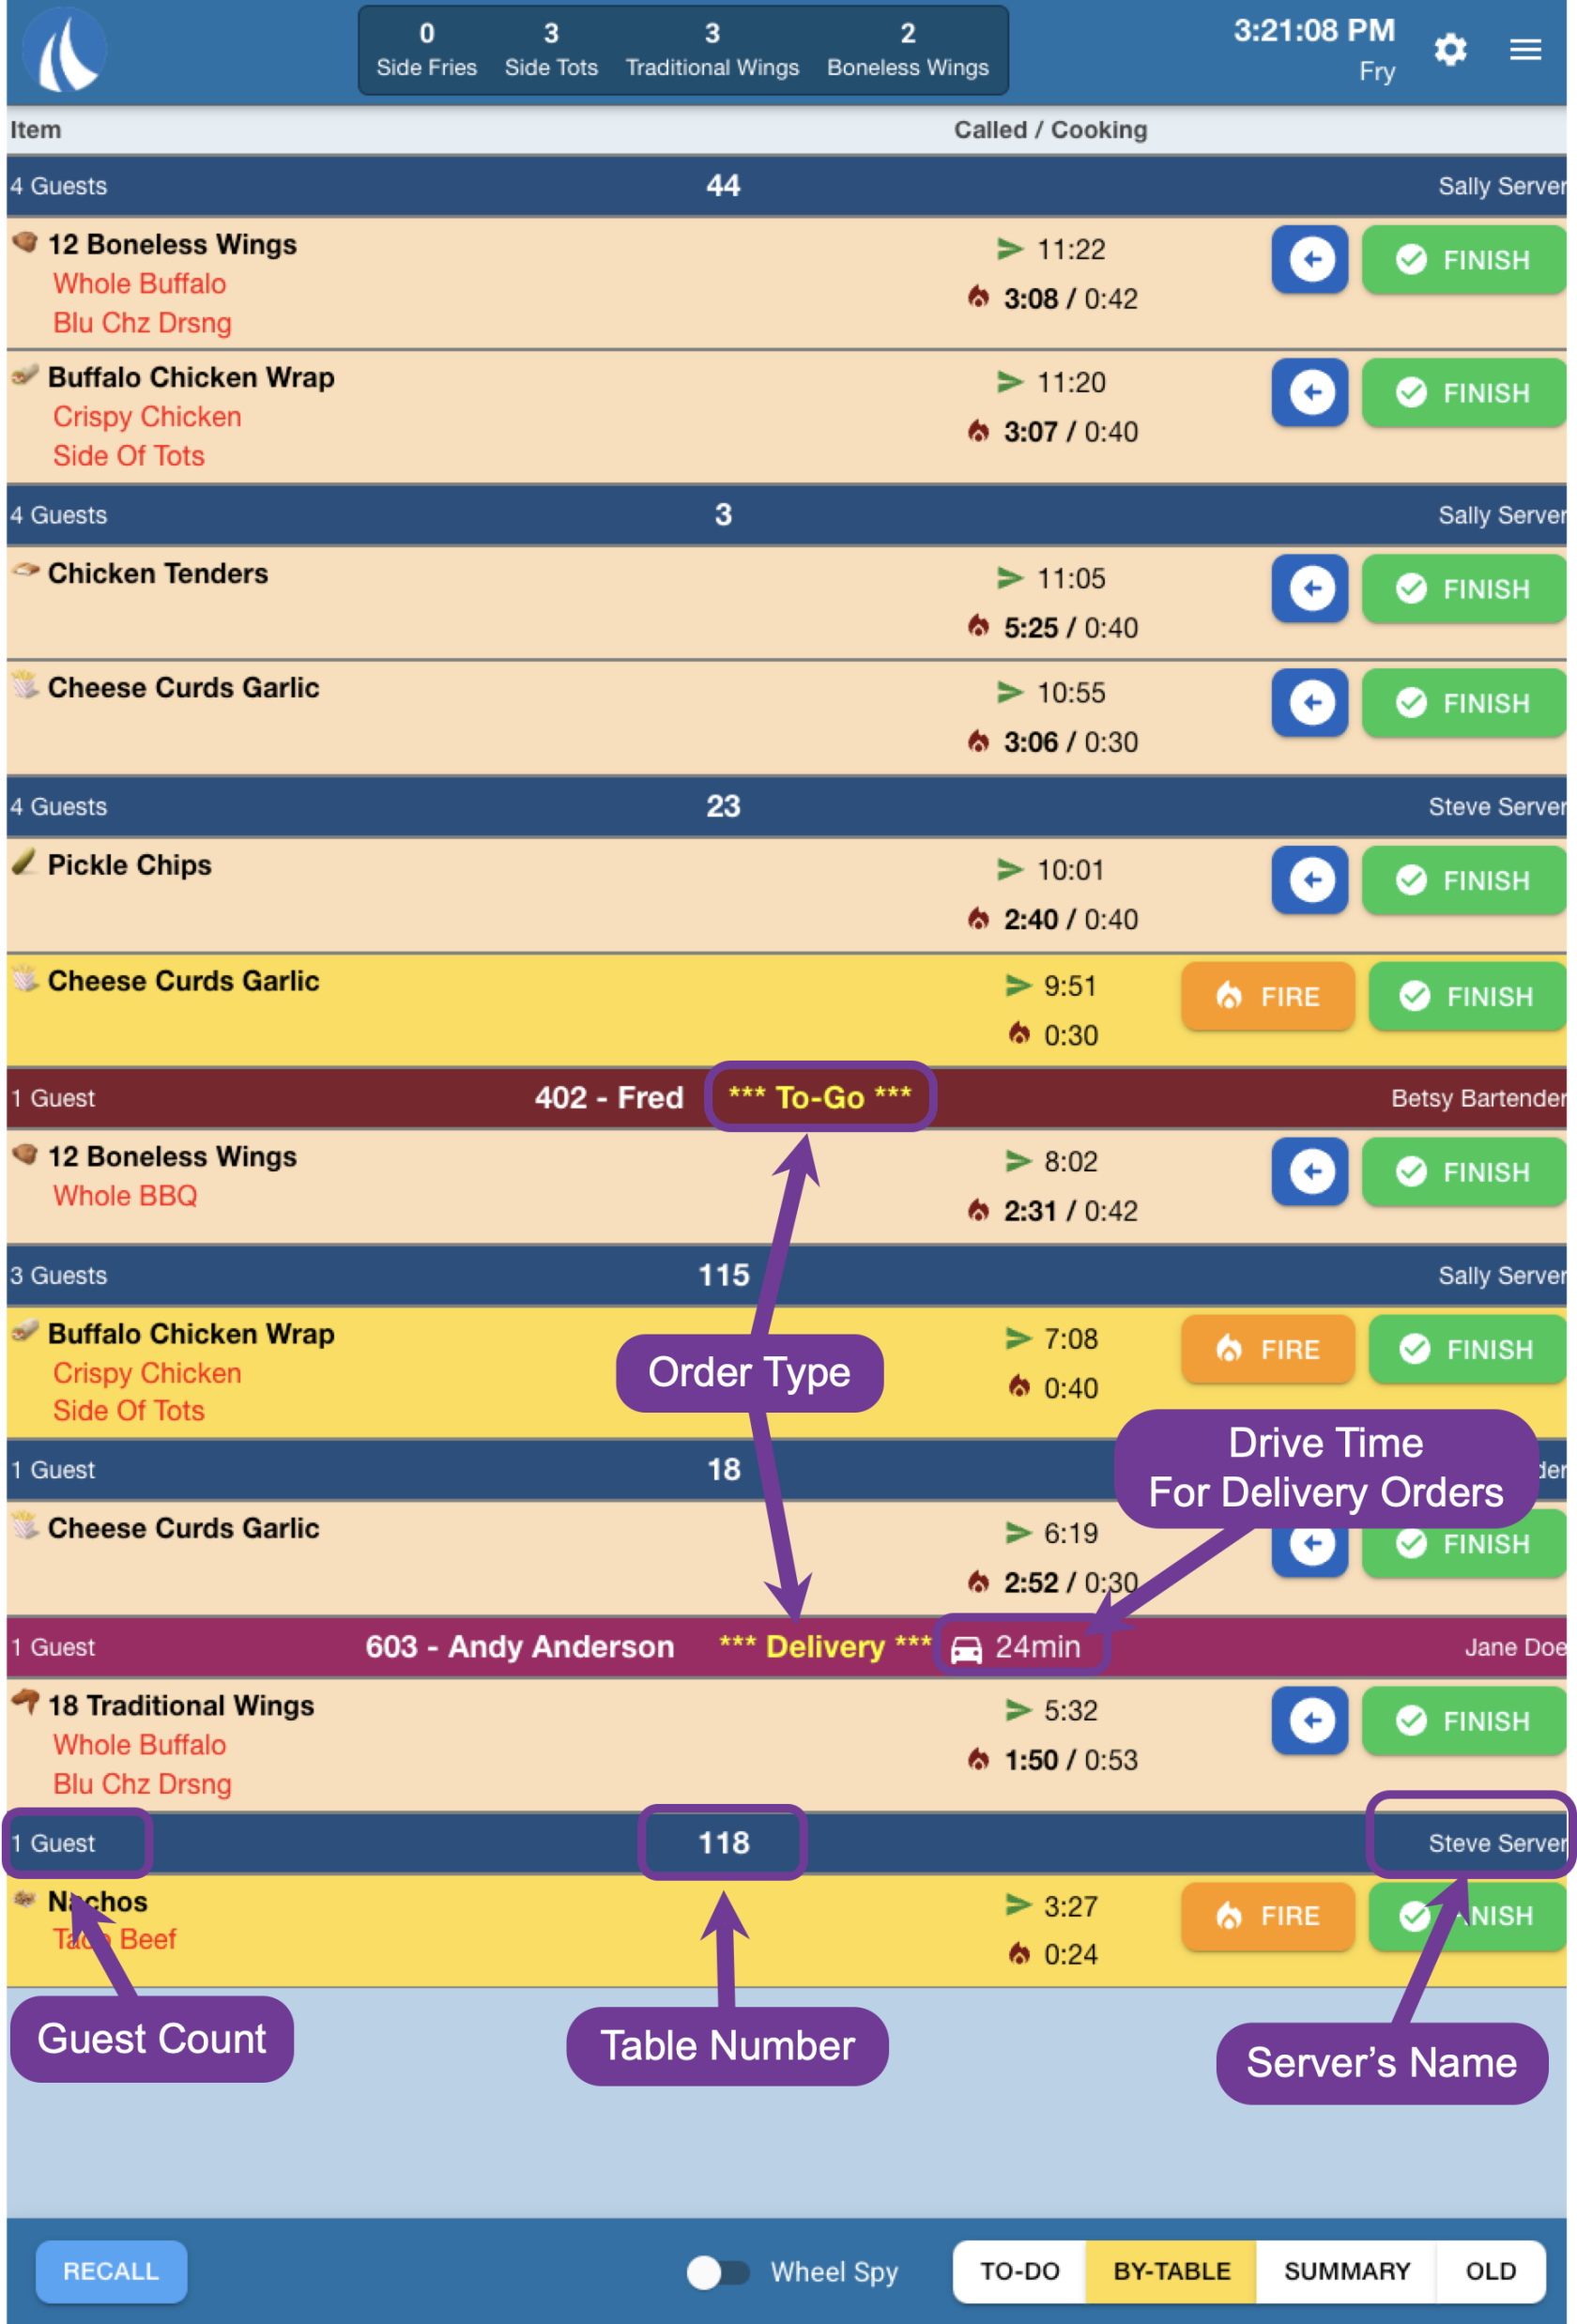
9. By Table - When By Table is selected, you are viewing all new or active items that need to be prepared at this station, grouped by table number. This view helps cooks easily see which items belong together for the same table. Tables are sorted by longest waiting time first, but items within each table are not listed in cooking priority, so the cook must manage the timing of each item to ensure everything is ready at the right moment.
Here is what the By-Table view looks like:
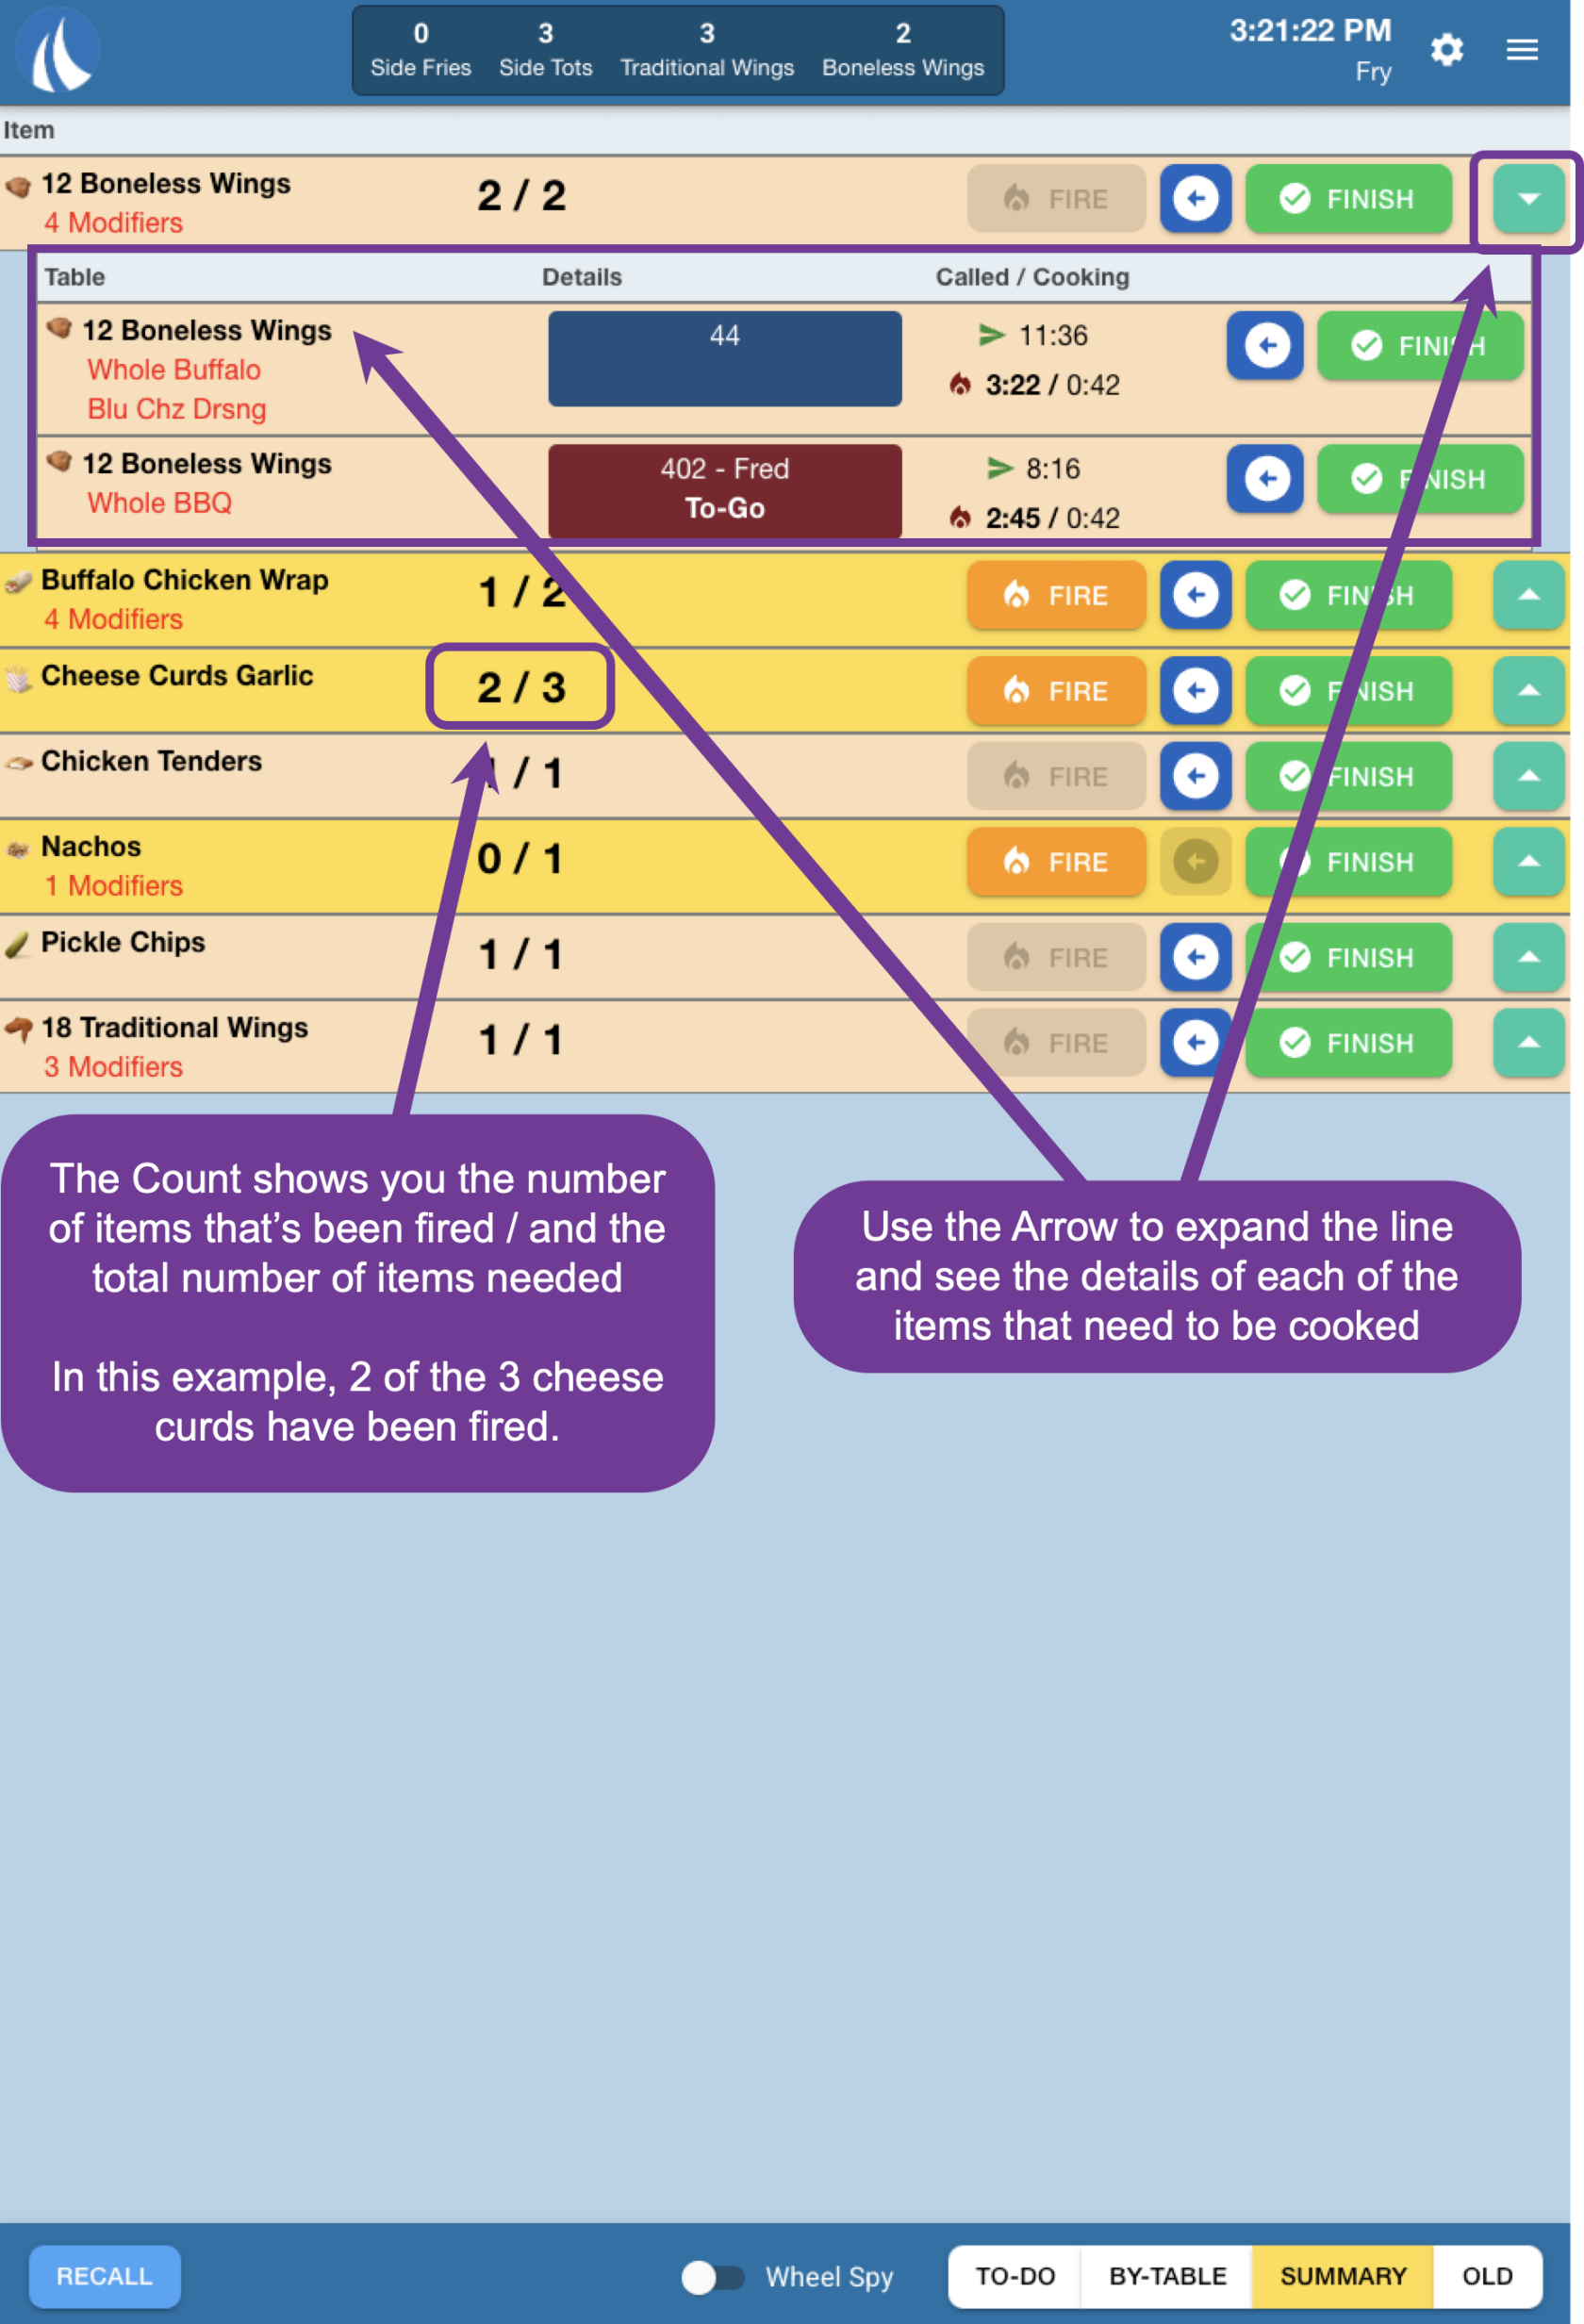
10. Summary - When Summary is selected, you are viewing all new or active items at this station, grouped by like items. This view makes it easy to spot items that can be cooked together for efficiency—for example, if three cheese curds are ordered, they can all go into the fryer at once. Items are organized alphabetically, not by order priority, so the cook must manage timing manually to ensure everything is ready together. When you click Fire on a summary line, it fires the oldest item in that group. Each subsequent click fires the next one. The same applies to Finish. The summary line will remain yellow if even one item in the group is not fired; once all are fired, the line changes color.
To view item details (like sauces or modifications), click the teal arrow on the right-hand side to expand the group.
Here is what the Summary view looks like:
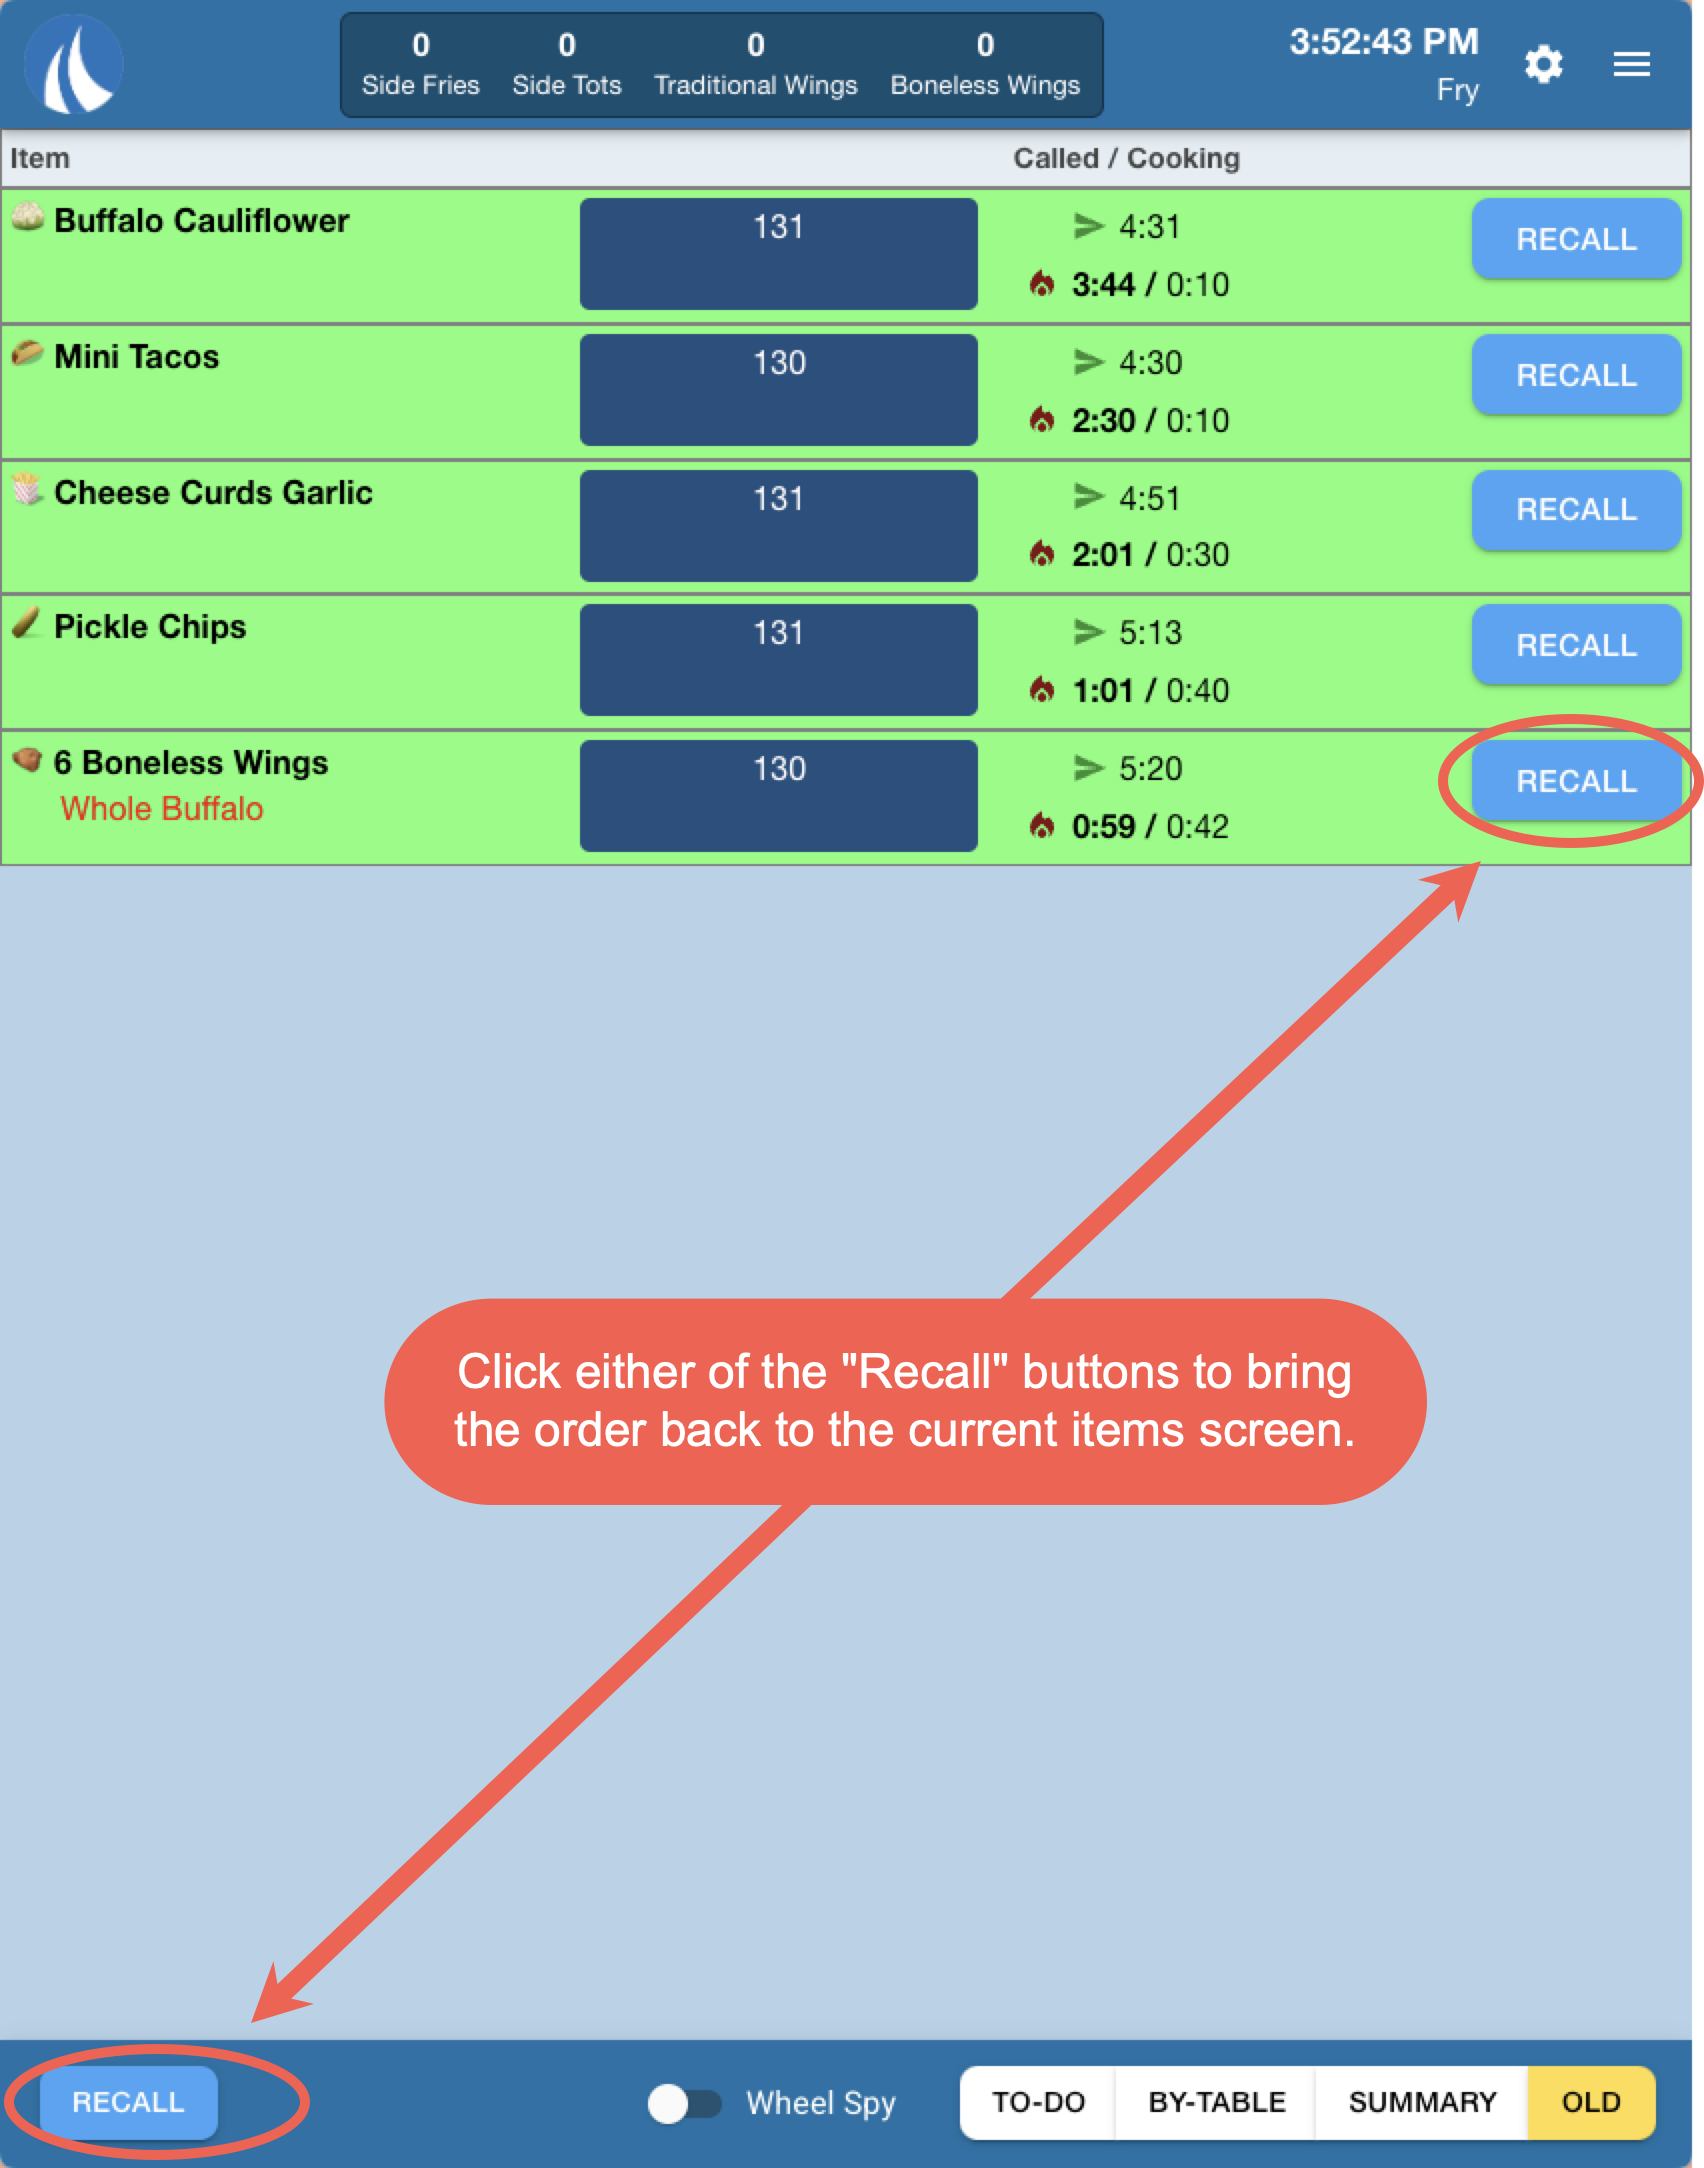
11. Old - When Old is selected, you are viewing items that have already been finished and bumped. These items are stored for reference in case they need to be recalled or reviewed.
Here is what the OLD view looks like:
To move the item back to the current tickets screen, click either the recall button on the item, or select the order and click the recall button on the bottom left







No Comments