How to print a receipt
This document will show how to print a receipt from a terminal. There are many way
- From Order Entry Screen
- From Tools Screen
- From Table View Screen
- From Order View Screen
Order Entry
-
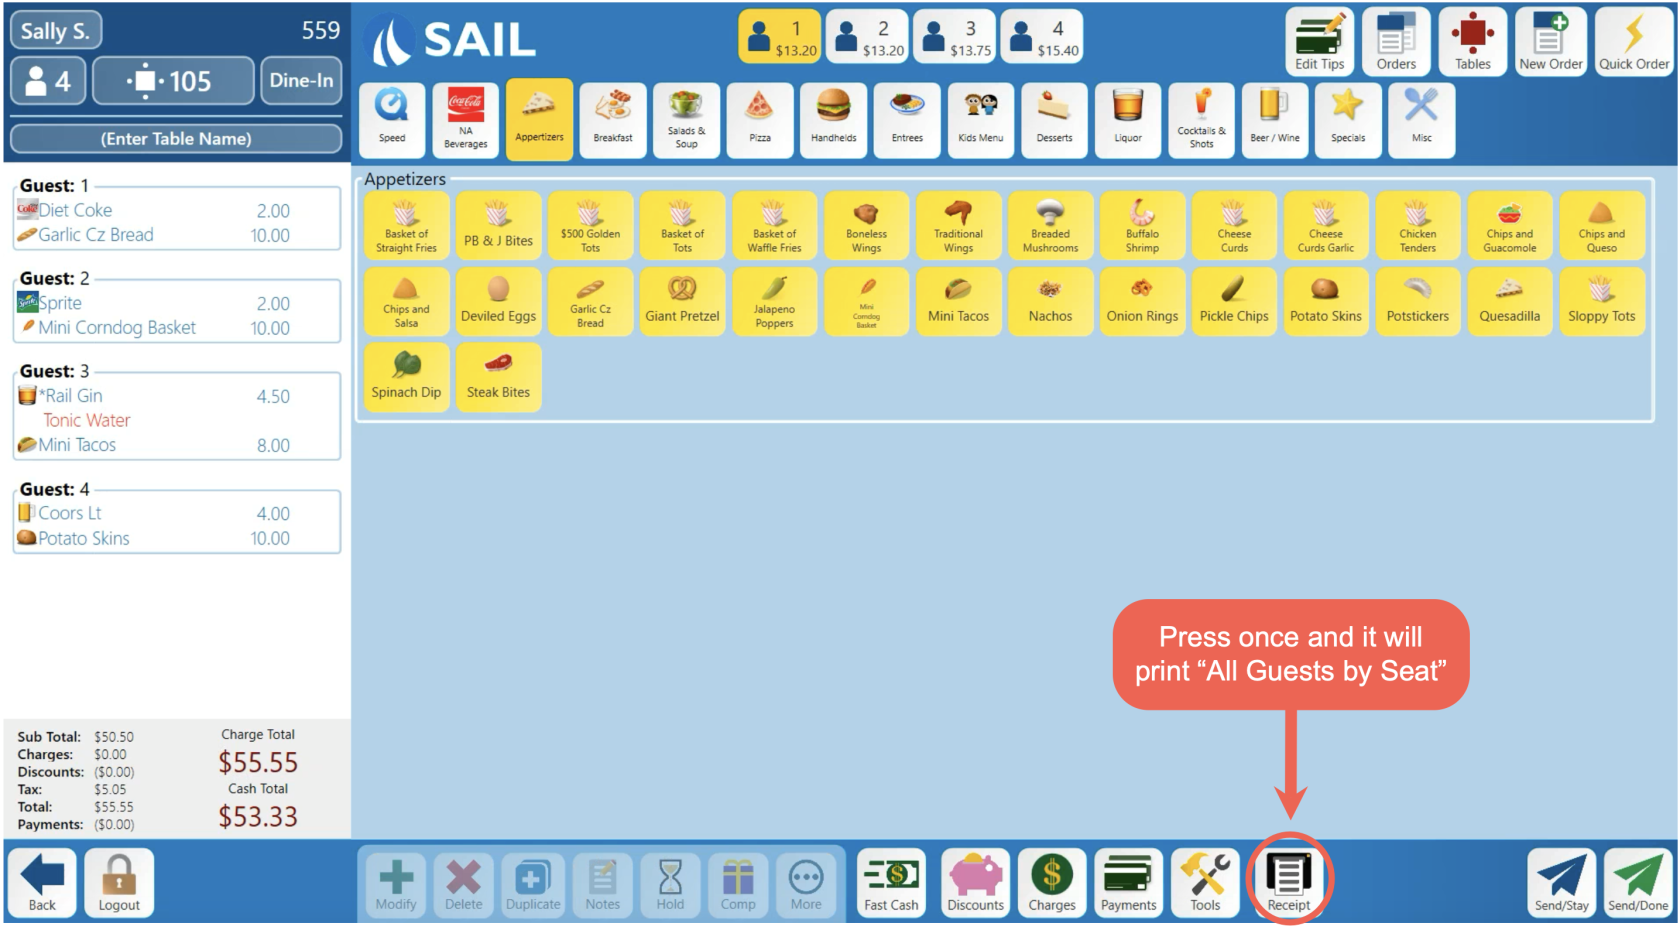
Inside the order you can press the Receipt button on the bottom toolbar.
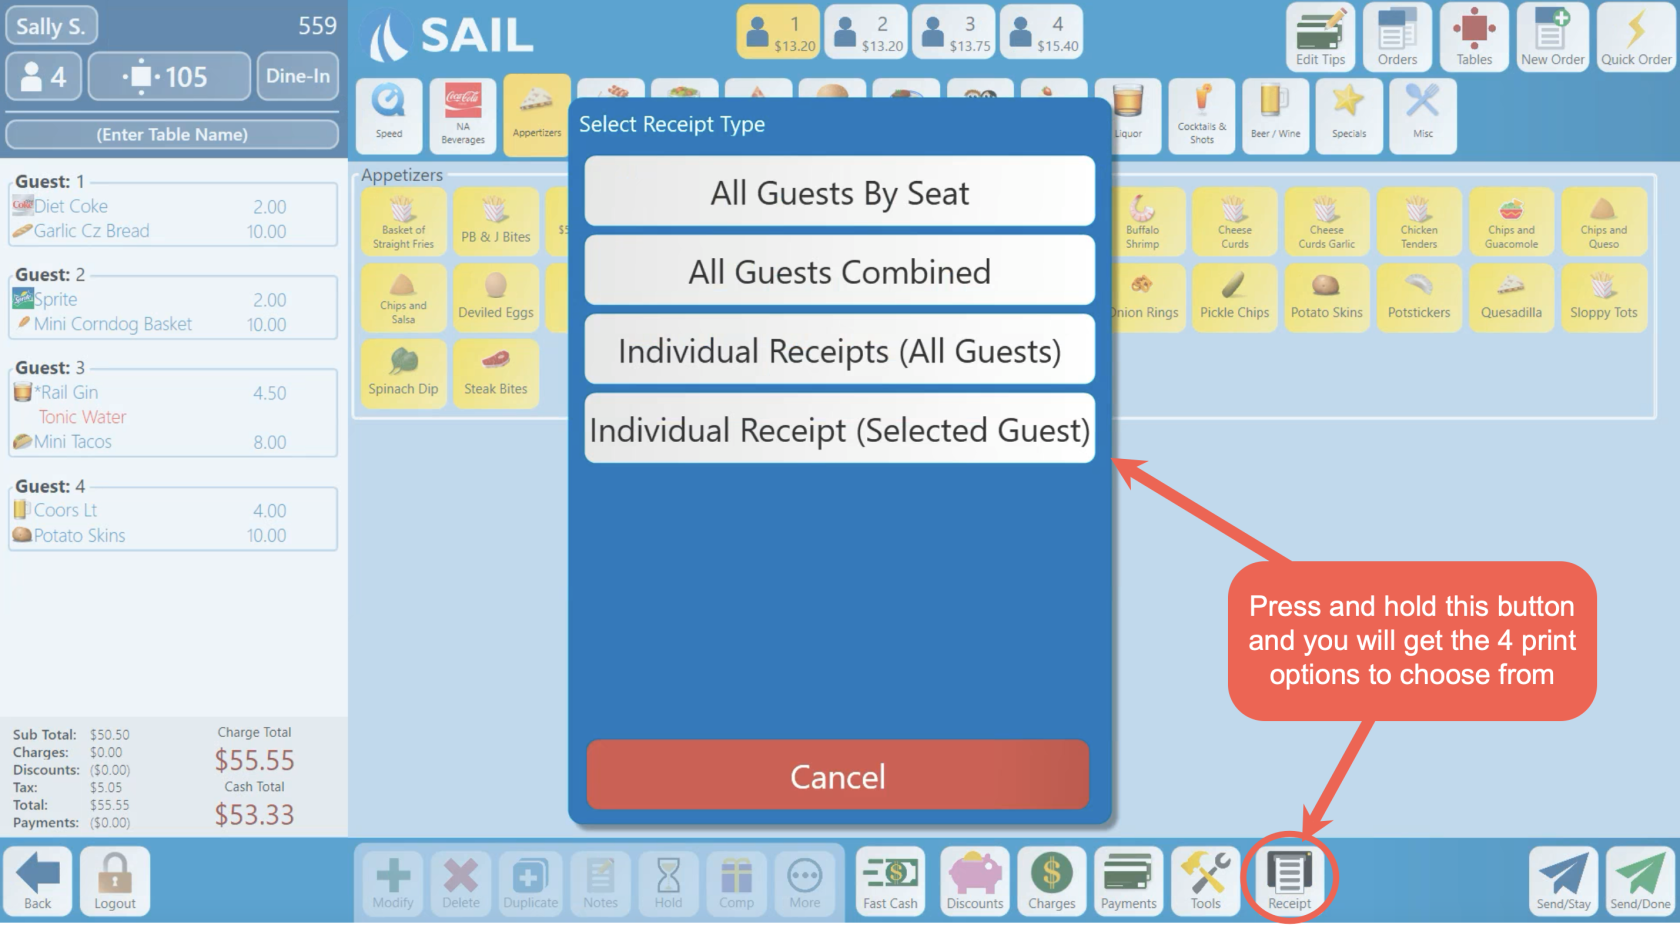
- To see other printing options, press and hold the receipt button and you will get a pop up with the 4 different printing options on it. (See below for explanations of the 4 printing options)
Tools screen
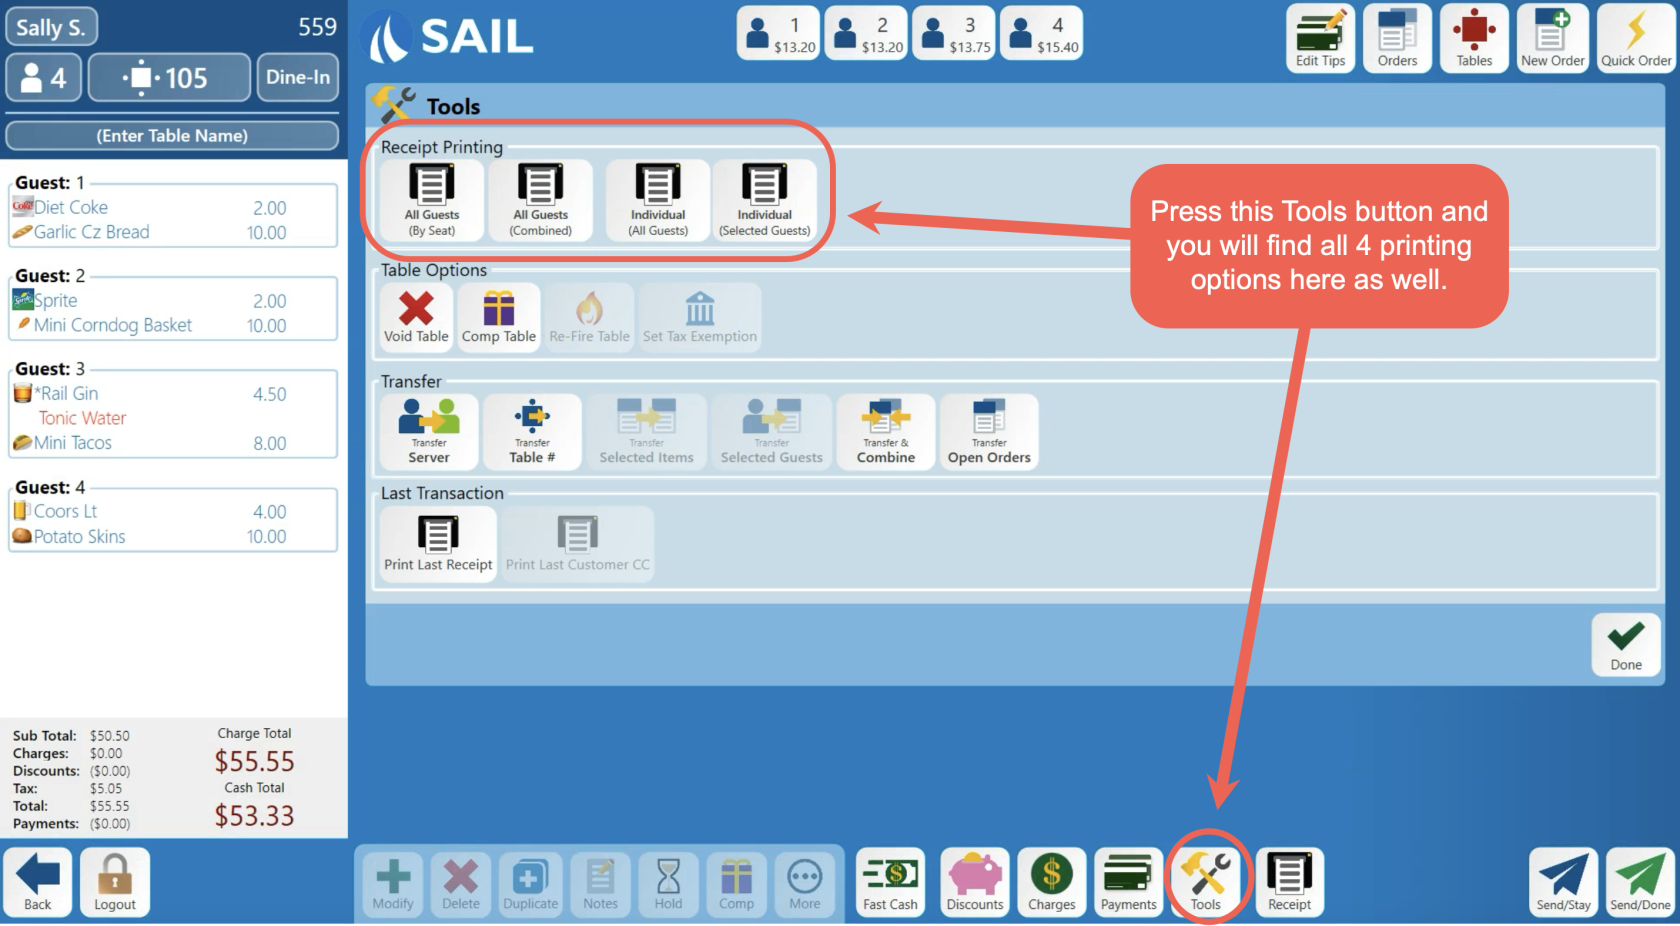
1. Another place to find the printing options (incase you forget the press and hold) is in the Tools screen. Press the Tools button on the bottom toolbar and it will have the 4 printing options at the top.
Here is an explanation of what the 4 different printing options are:
-
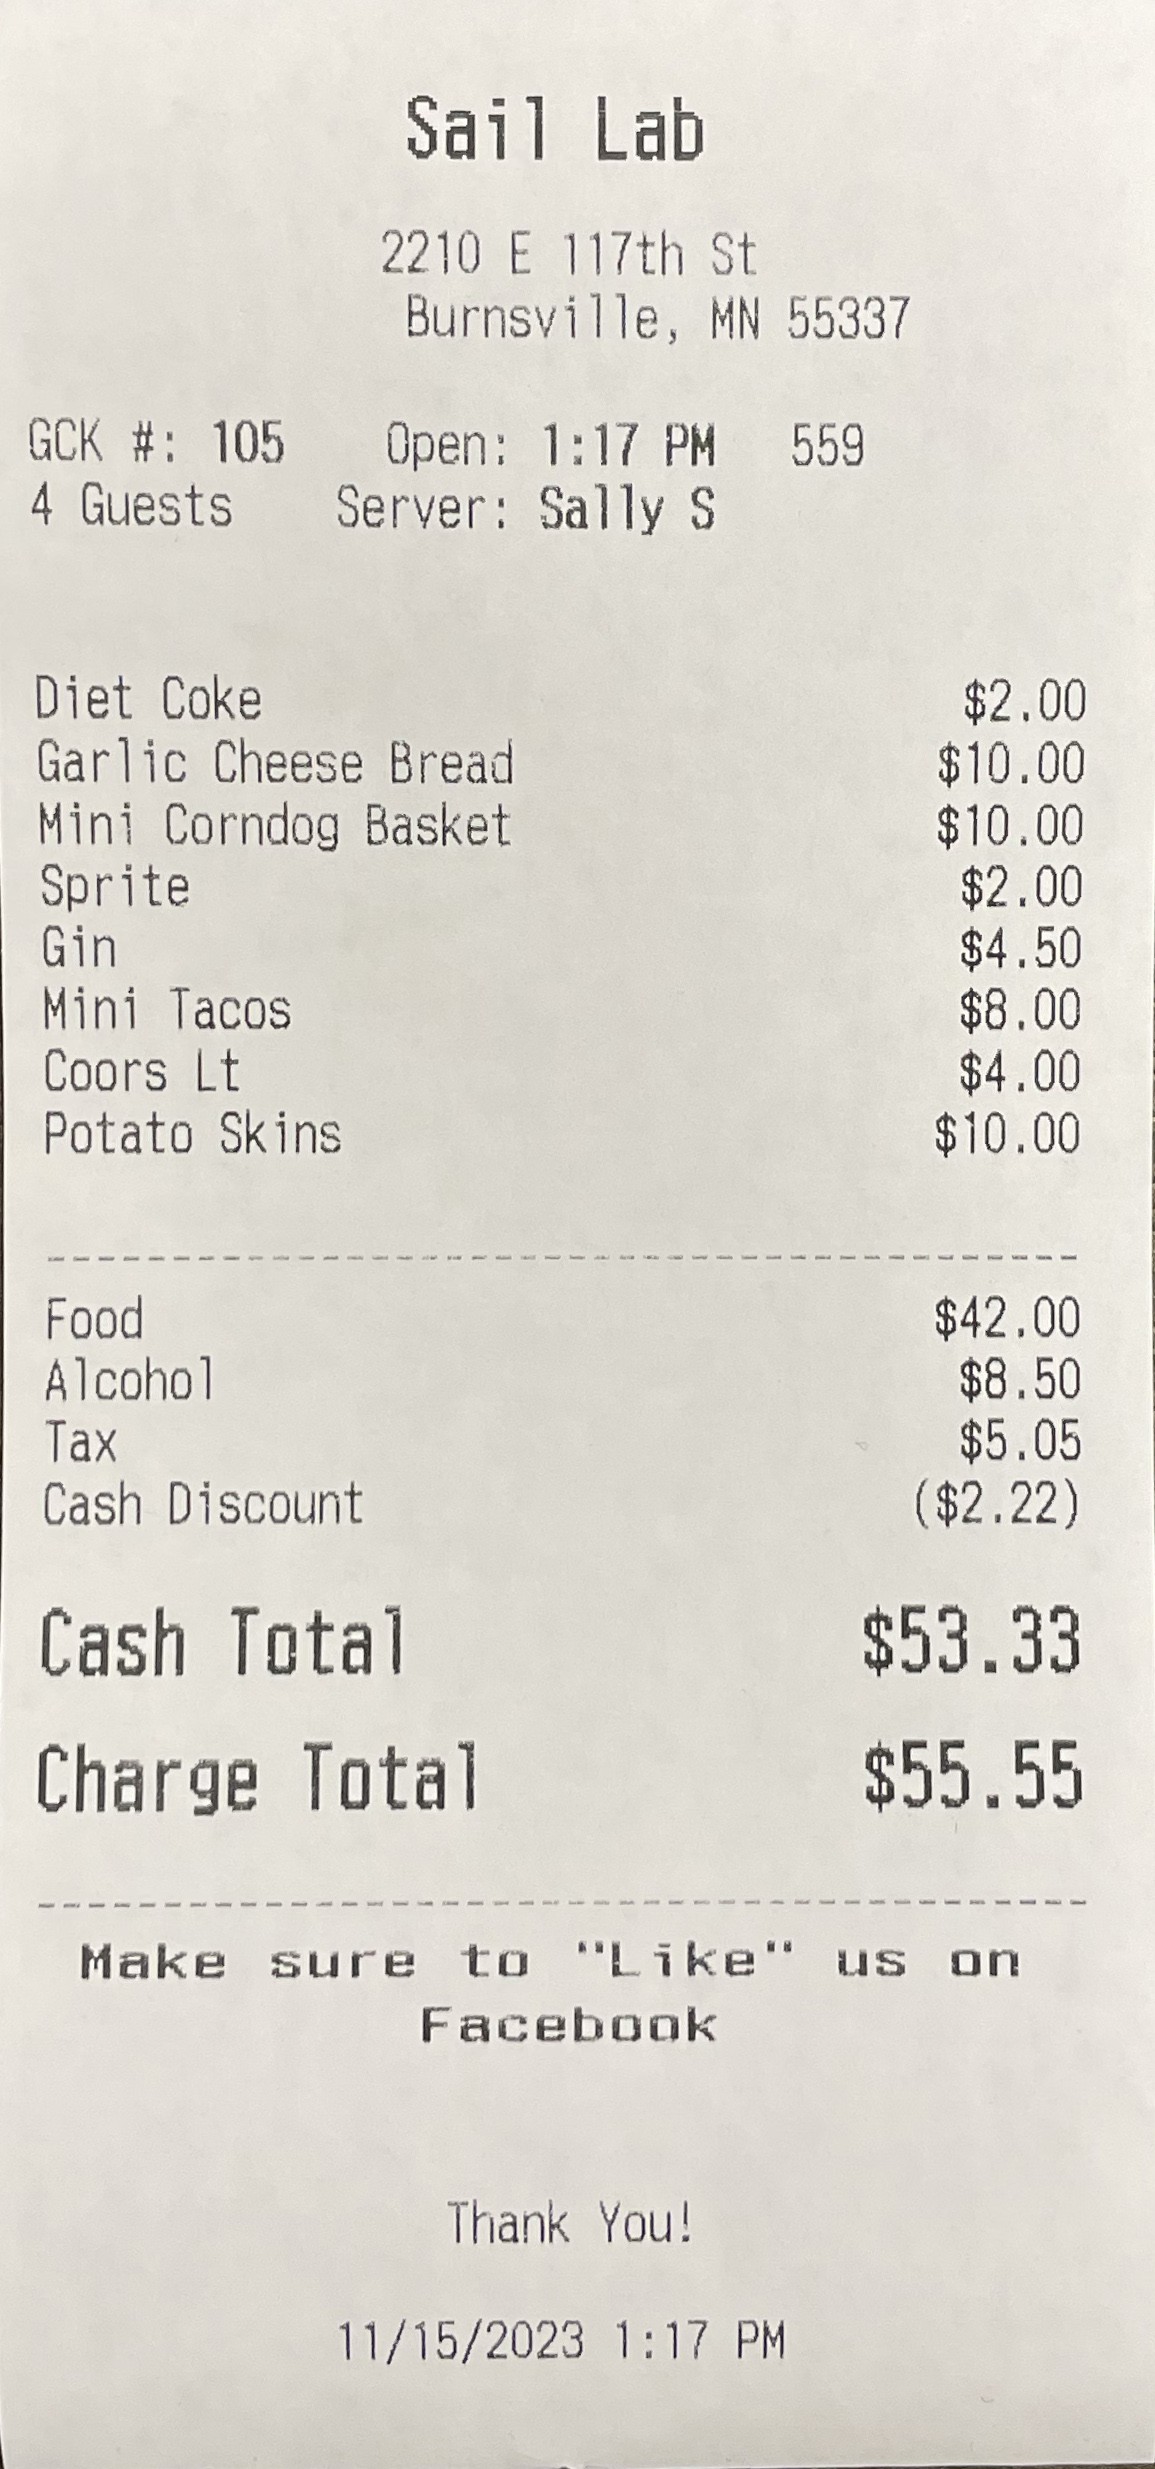
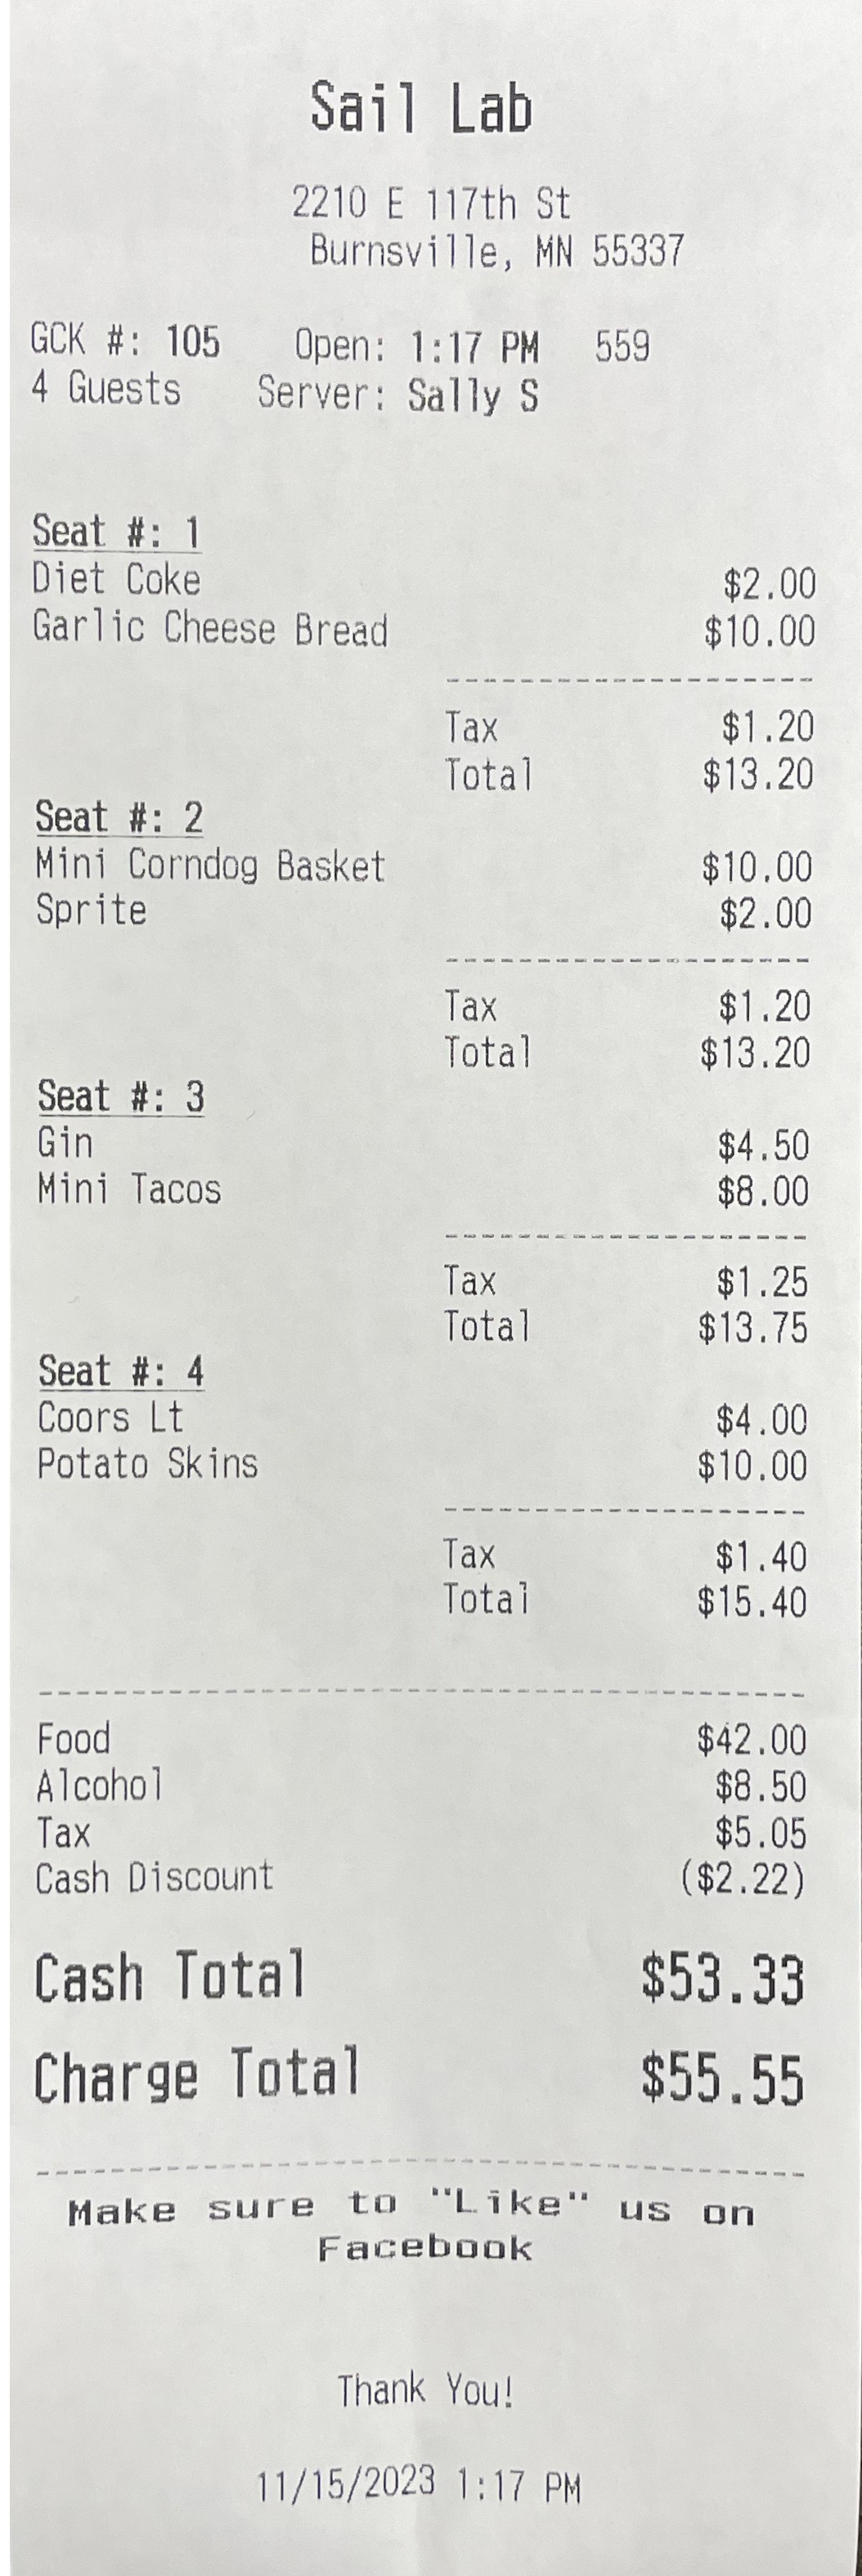
All Guests By Seat (example on left below)
-
This will print a single receipt with every guest at the table on it.
-
The guests will be separated by each guests order.
-
-
All Guests Combined (example on right below)
-
This will print a single receipt with all items from the table with no separation.
-
-
Individual Receipts (All Guests)
-
This will print a separate receipt for each guest at the table.
-
-
Individual Receipt (Selected Guest)
-
This will print one receipt for the guest selected on the top.
-
Table View
-
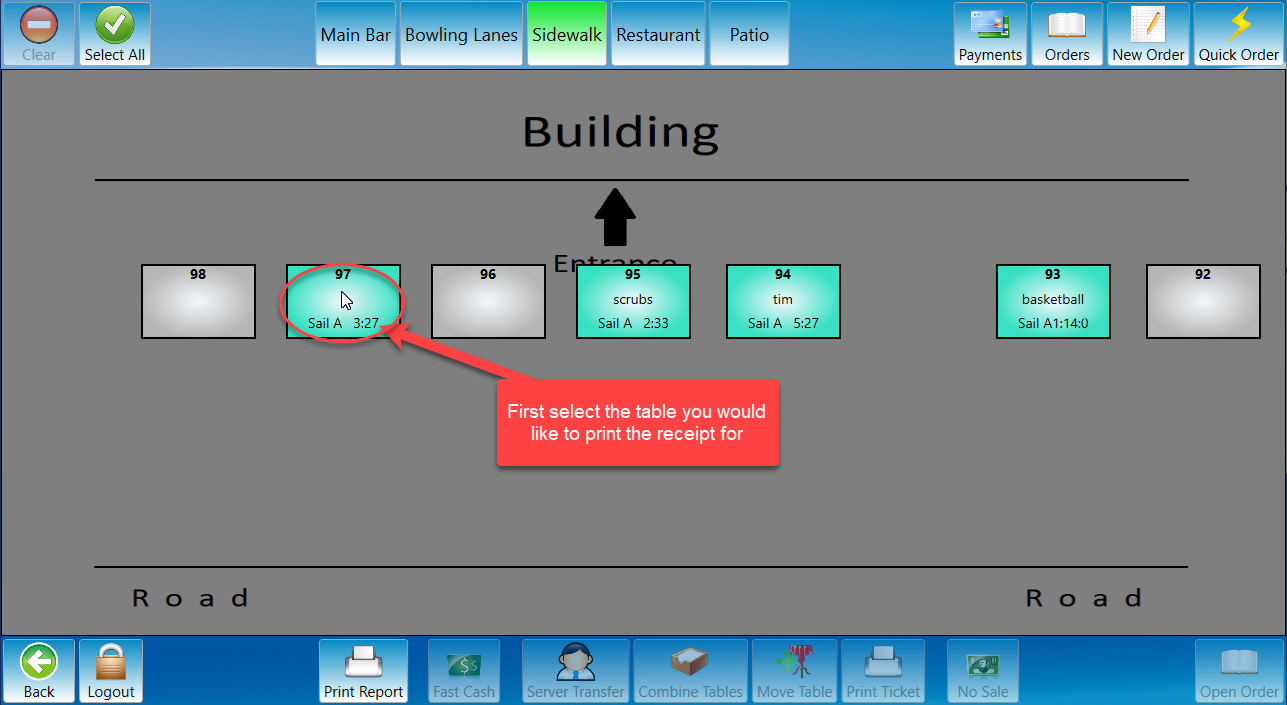
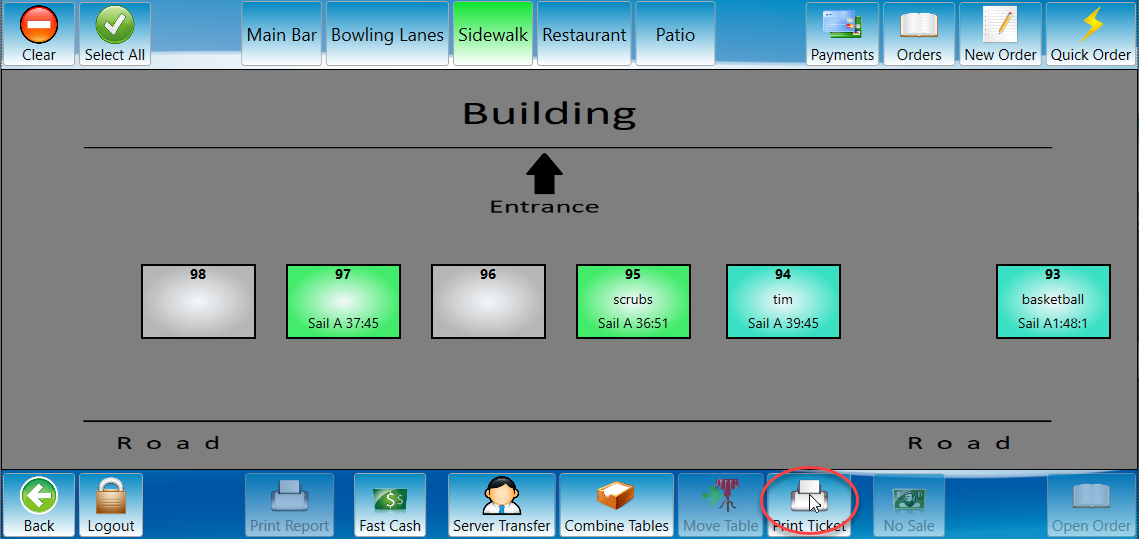
Open the Table View screen.
-
This is the table view screen if you would like more information on it see Table View Screen.
-
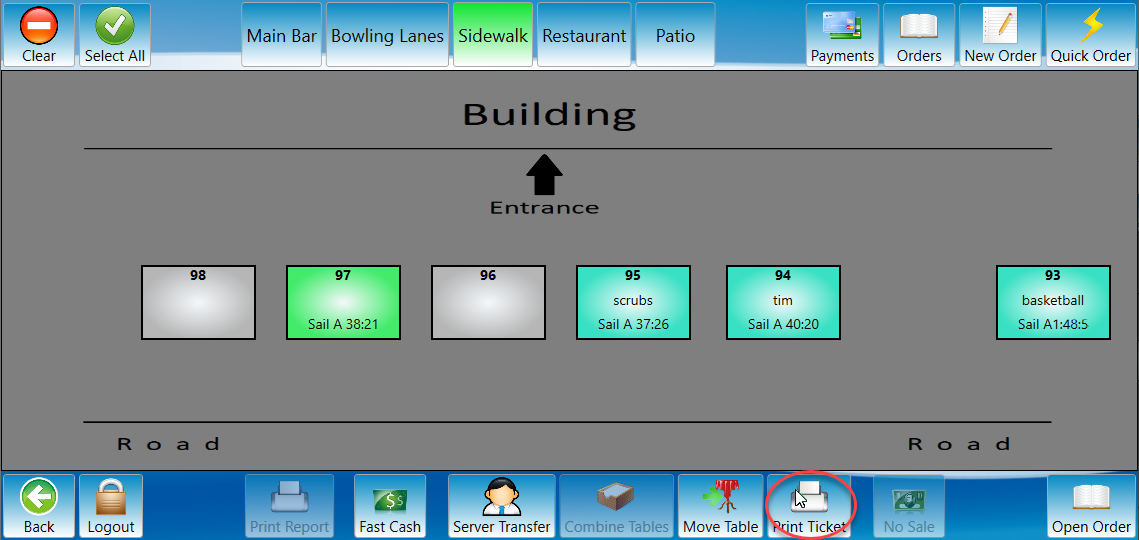
Select the table by clicking it once. It will highlights in green when selected. Select print ticket to print the selected tables receipt.
-
To print multiple tables receipts at the same time select each table you would like the receipt for and press print ticket.
Orders Screen
-
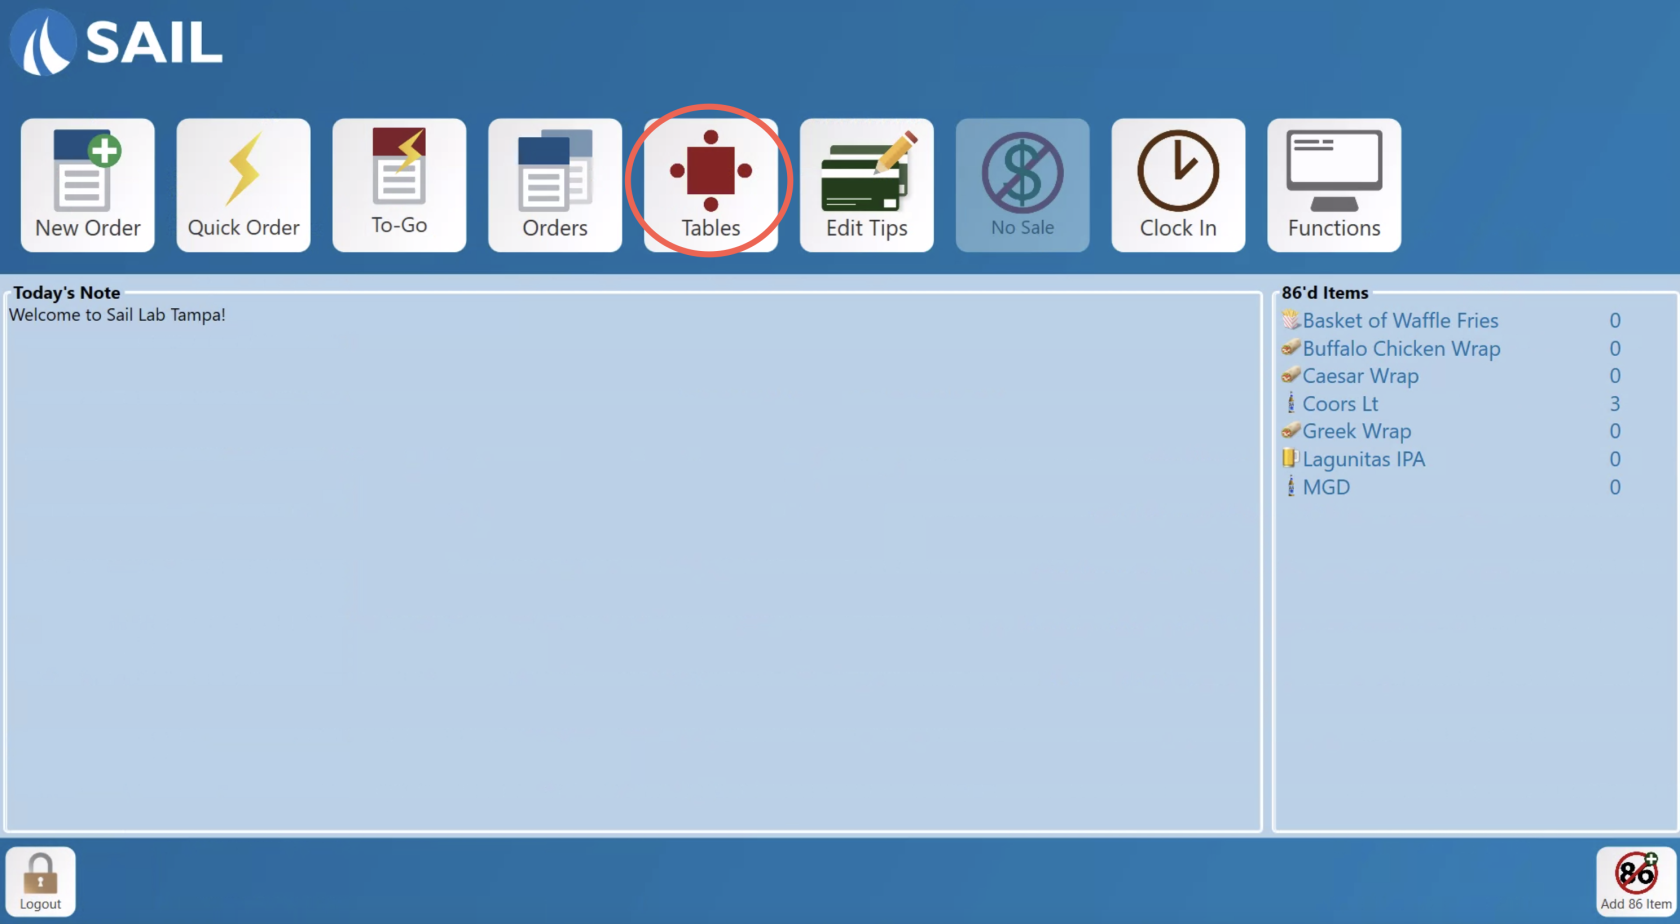
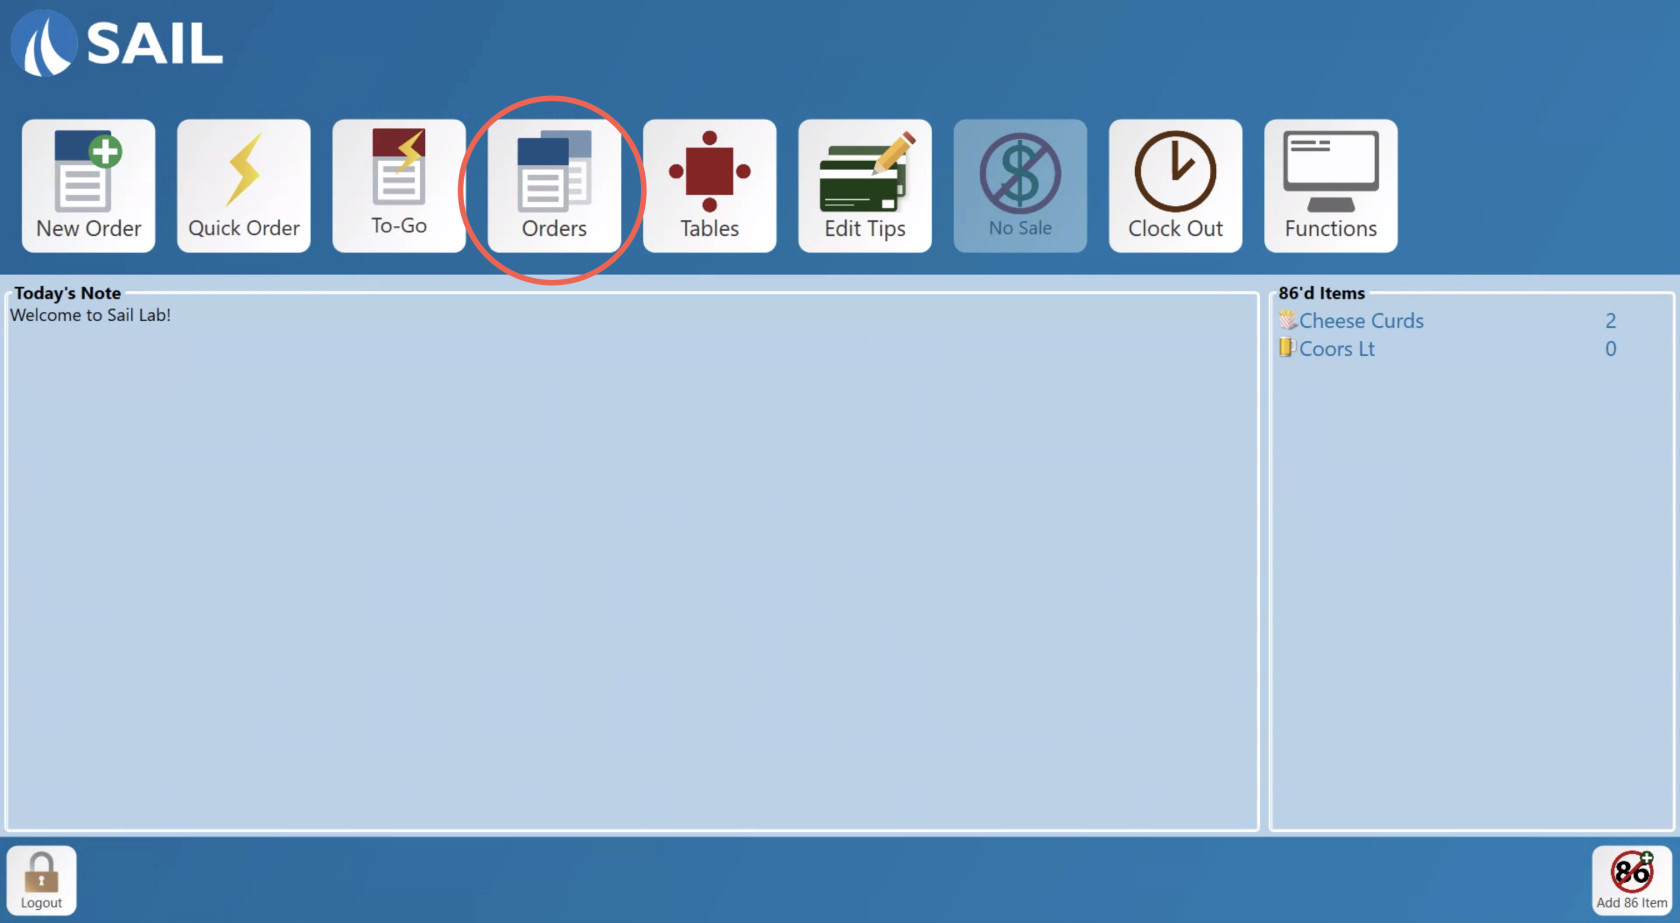
First open the orders screen by pressing the order screen button on the launch page.
-
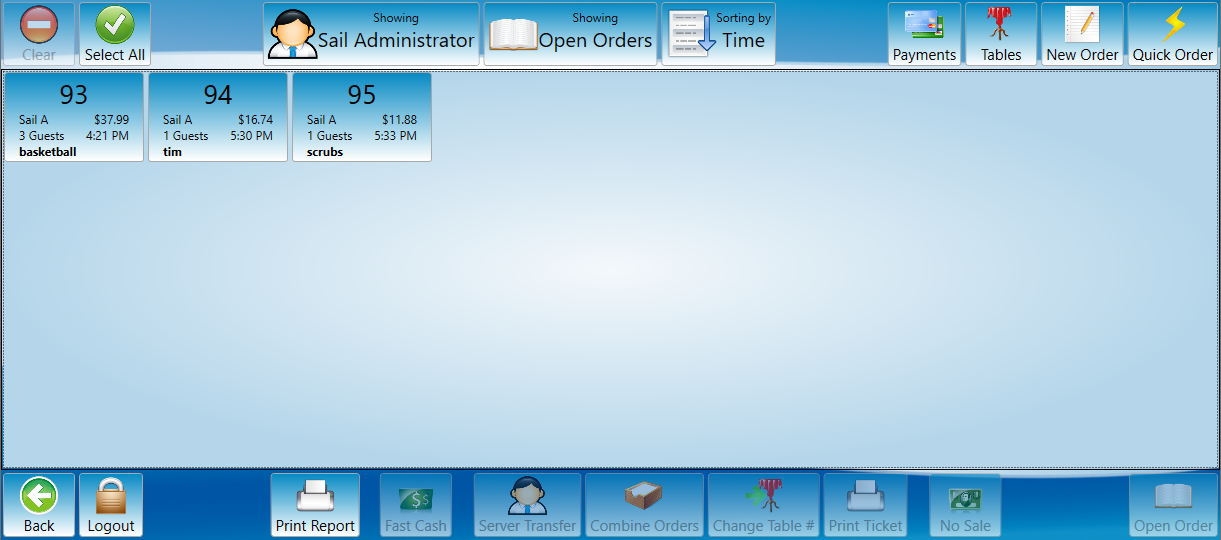
This is the order screen on it you will find options to select and manage all of your orders. See the Orders Screen document for more details on this page.
-
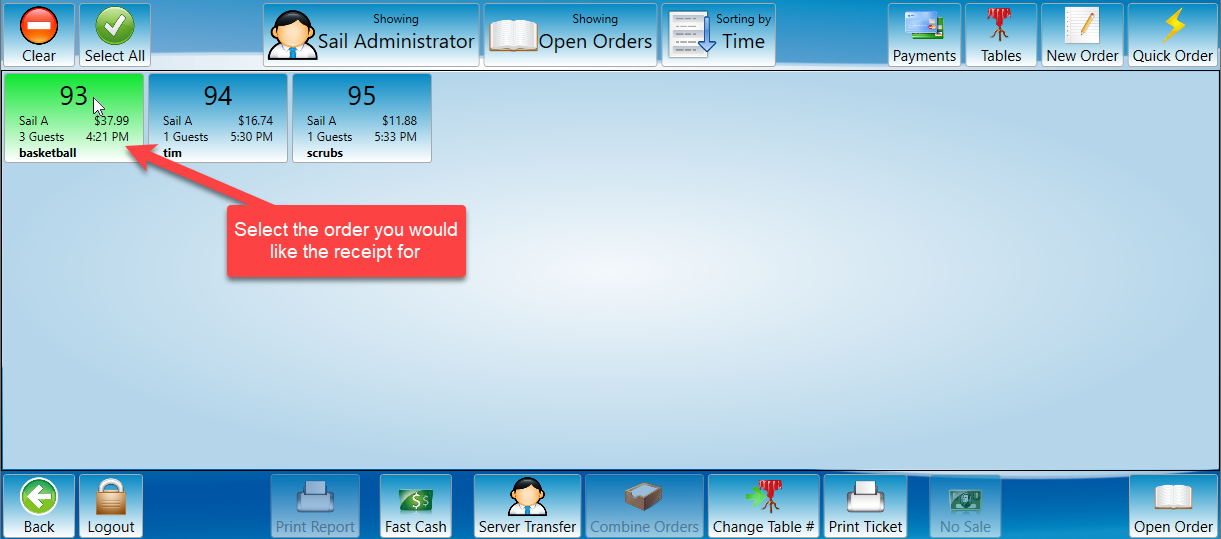
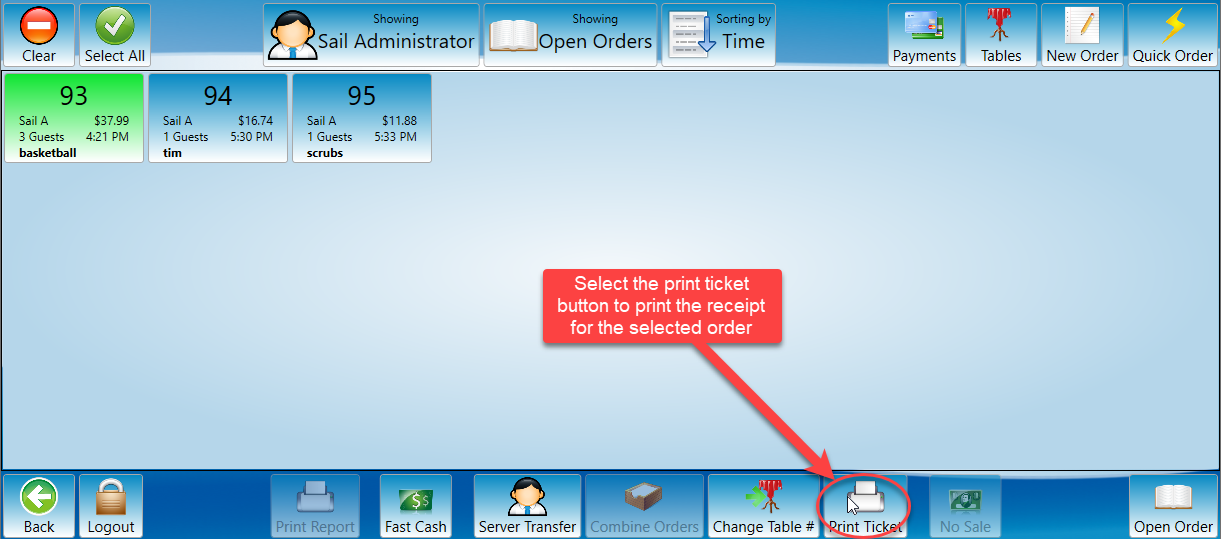
Select the order you would like to print a receipt for.
-
To print the receipt for the selected order click print ticket.
-
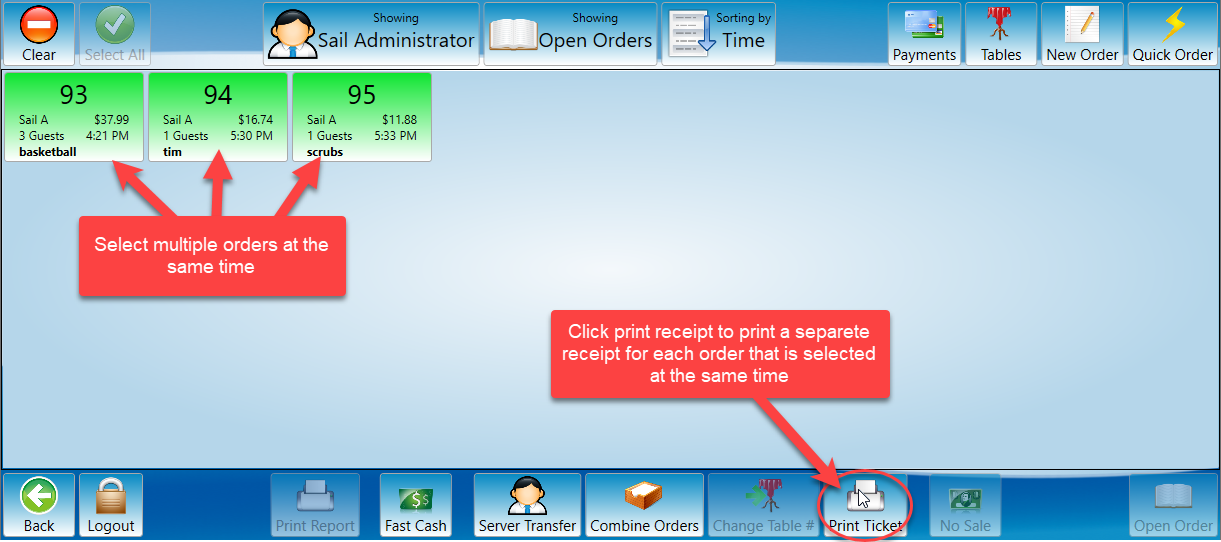
Multiple tickets can be printed at once by selecting each order you would like to print a receipt for before pressing the print ticket button.
-
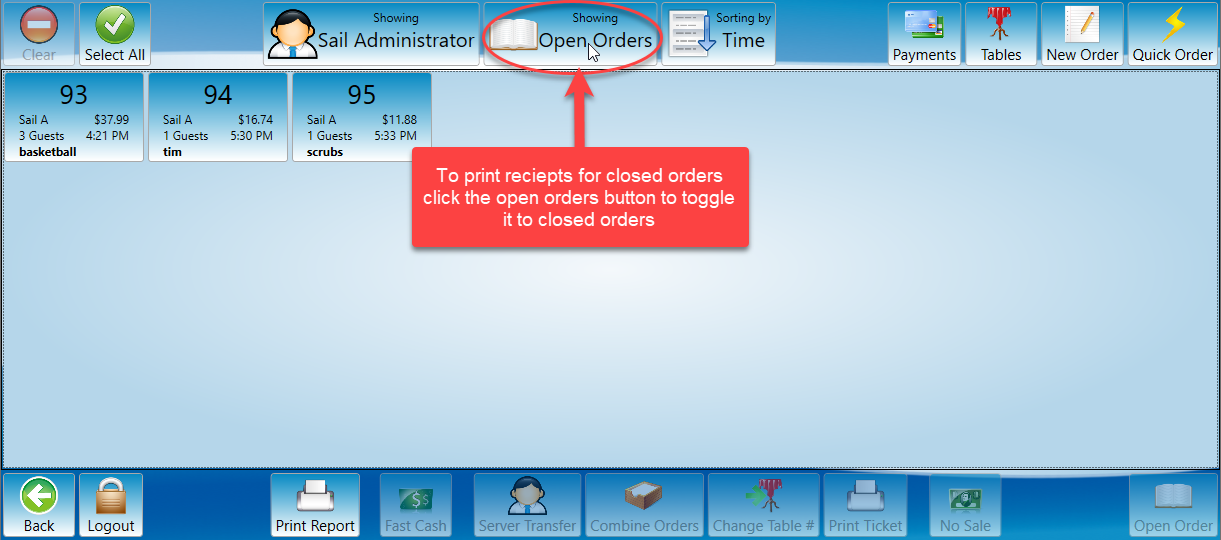
The orders page defaults to open orders. If you would like to print a receipt for a closed order, select the open orders button and it will toggle to closed orders.
-
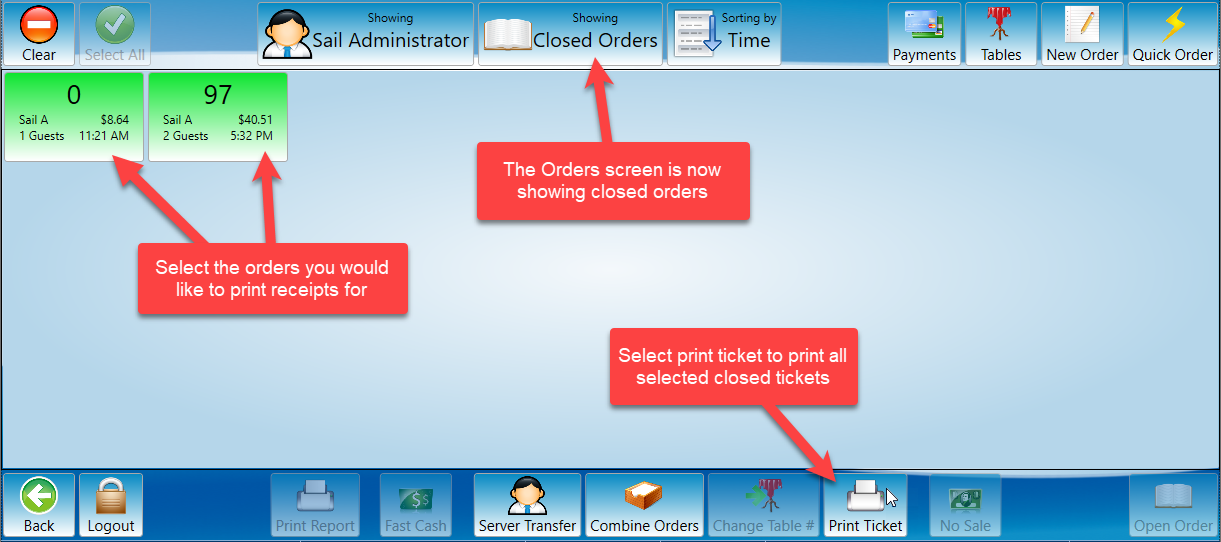
The closed orders will populate in the same way the open orders did and receipts can be printed the same way as described above. The button in the top center of the screen will either show “Closed Orders” or “Open Orders” to indicate which is showing.
-

 .
. 