
Set up in Ingage Scheduling
This guide walks you through the key items that should be set up in Ingage Scheduling before you begin building your first schedule.
Update Location Settings
There are a few important settings that are managed directly in Scheduling (not in Sail Backoffice). These control how your schedule displays and behaves.
How to Access Location Settings
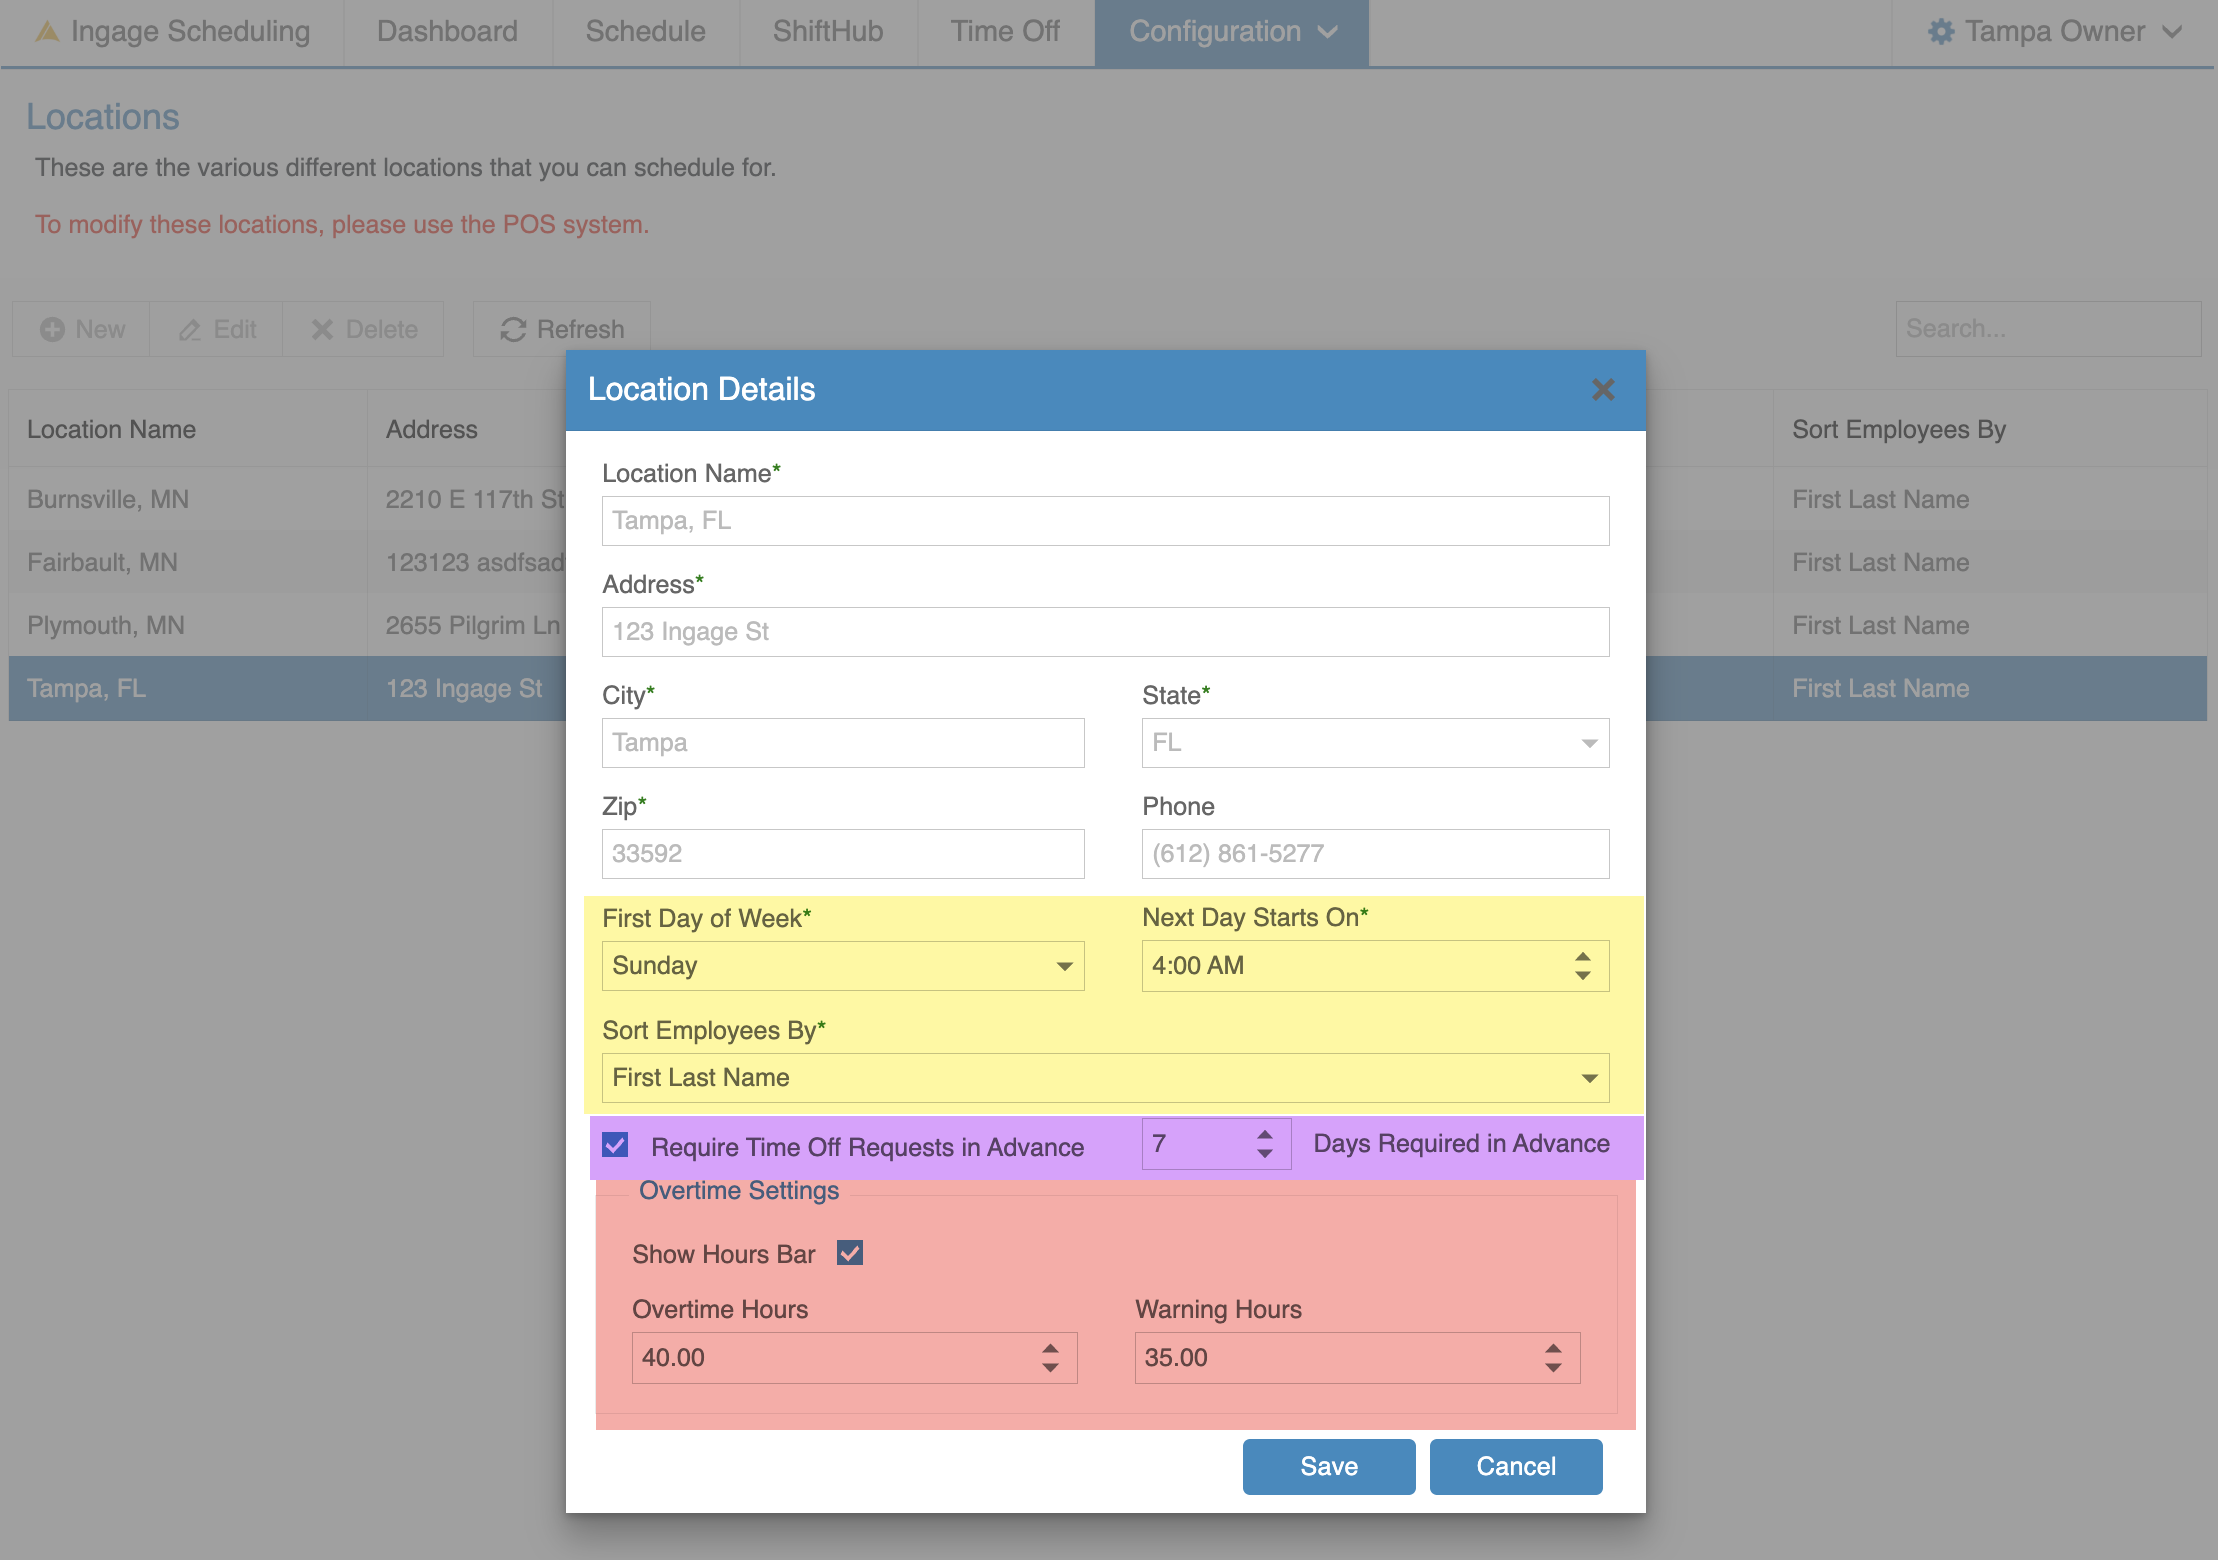
Log into Scheduling → Configuration → Locations
Double-click the location you’d like to edit (or select it and click Edit).
Location Settings (Highlighted in Yellow) to Review
-
First Day of Week
Choose which day you want your schedule to start on. -
Next Day Starts On
Select the time that defines when the next day begins in Day View. -
Sort Employees By
Choose how employees are ordered within each job role on the schedule:-
First Last Name (Sally Server)
-
Last, First Name (Server, Sally)
-
Required Time Off Setting (Highlighted in Purple)
-
Enable this setting if employees must submit time off requests a certain number of days before the requested date.
- This setting is enabled by default and requires requests to be submitted 7 days in advance. You can adjust the number of days to fit your business needs.
Overtime Settings (Highlighted in Red)
- When disabled, each employee's weekly scheduled hours are displayed as a number beneath their name and job role.
- When enabled, the weekly scheduled hours are displayed as a color-coded bar, making it easier to identify employees who are approaching or exceeding overtime.
-
Warning Hours: Enter the number of hours at which the Hours Bar should change to orange.
-
Overtime Hours: Enter the number of hours at which the Hours Bar should change to red.
-
Hours Bar Colors:
| Color | Hours | In example above |
|---|---|---|
| Gray | 0 hours | 0 |
| Green | 1 hour up to 1 hour less than the Warning Hours setting | 1-34 |
| Orange | Warning Hours through Overtime Hours | 35-40 |
| Red | Any hours above the Overtime Hours setting | 40.01+ |
Update Job Role colors
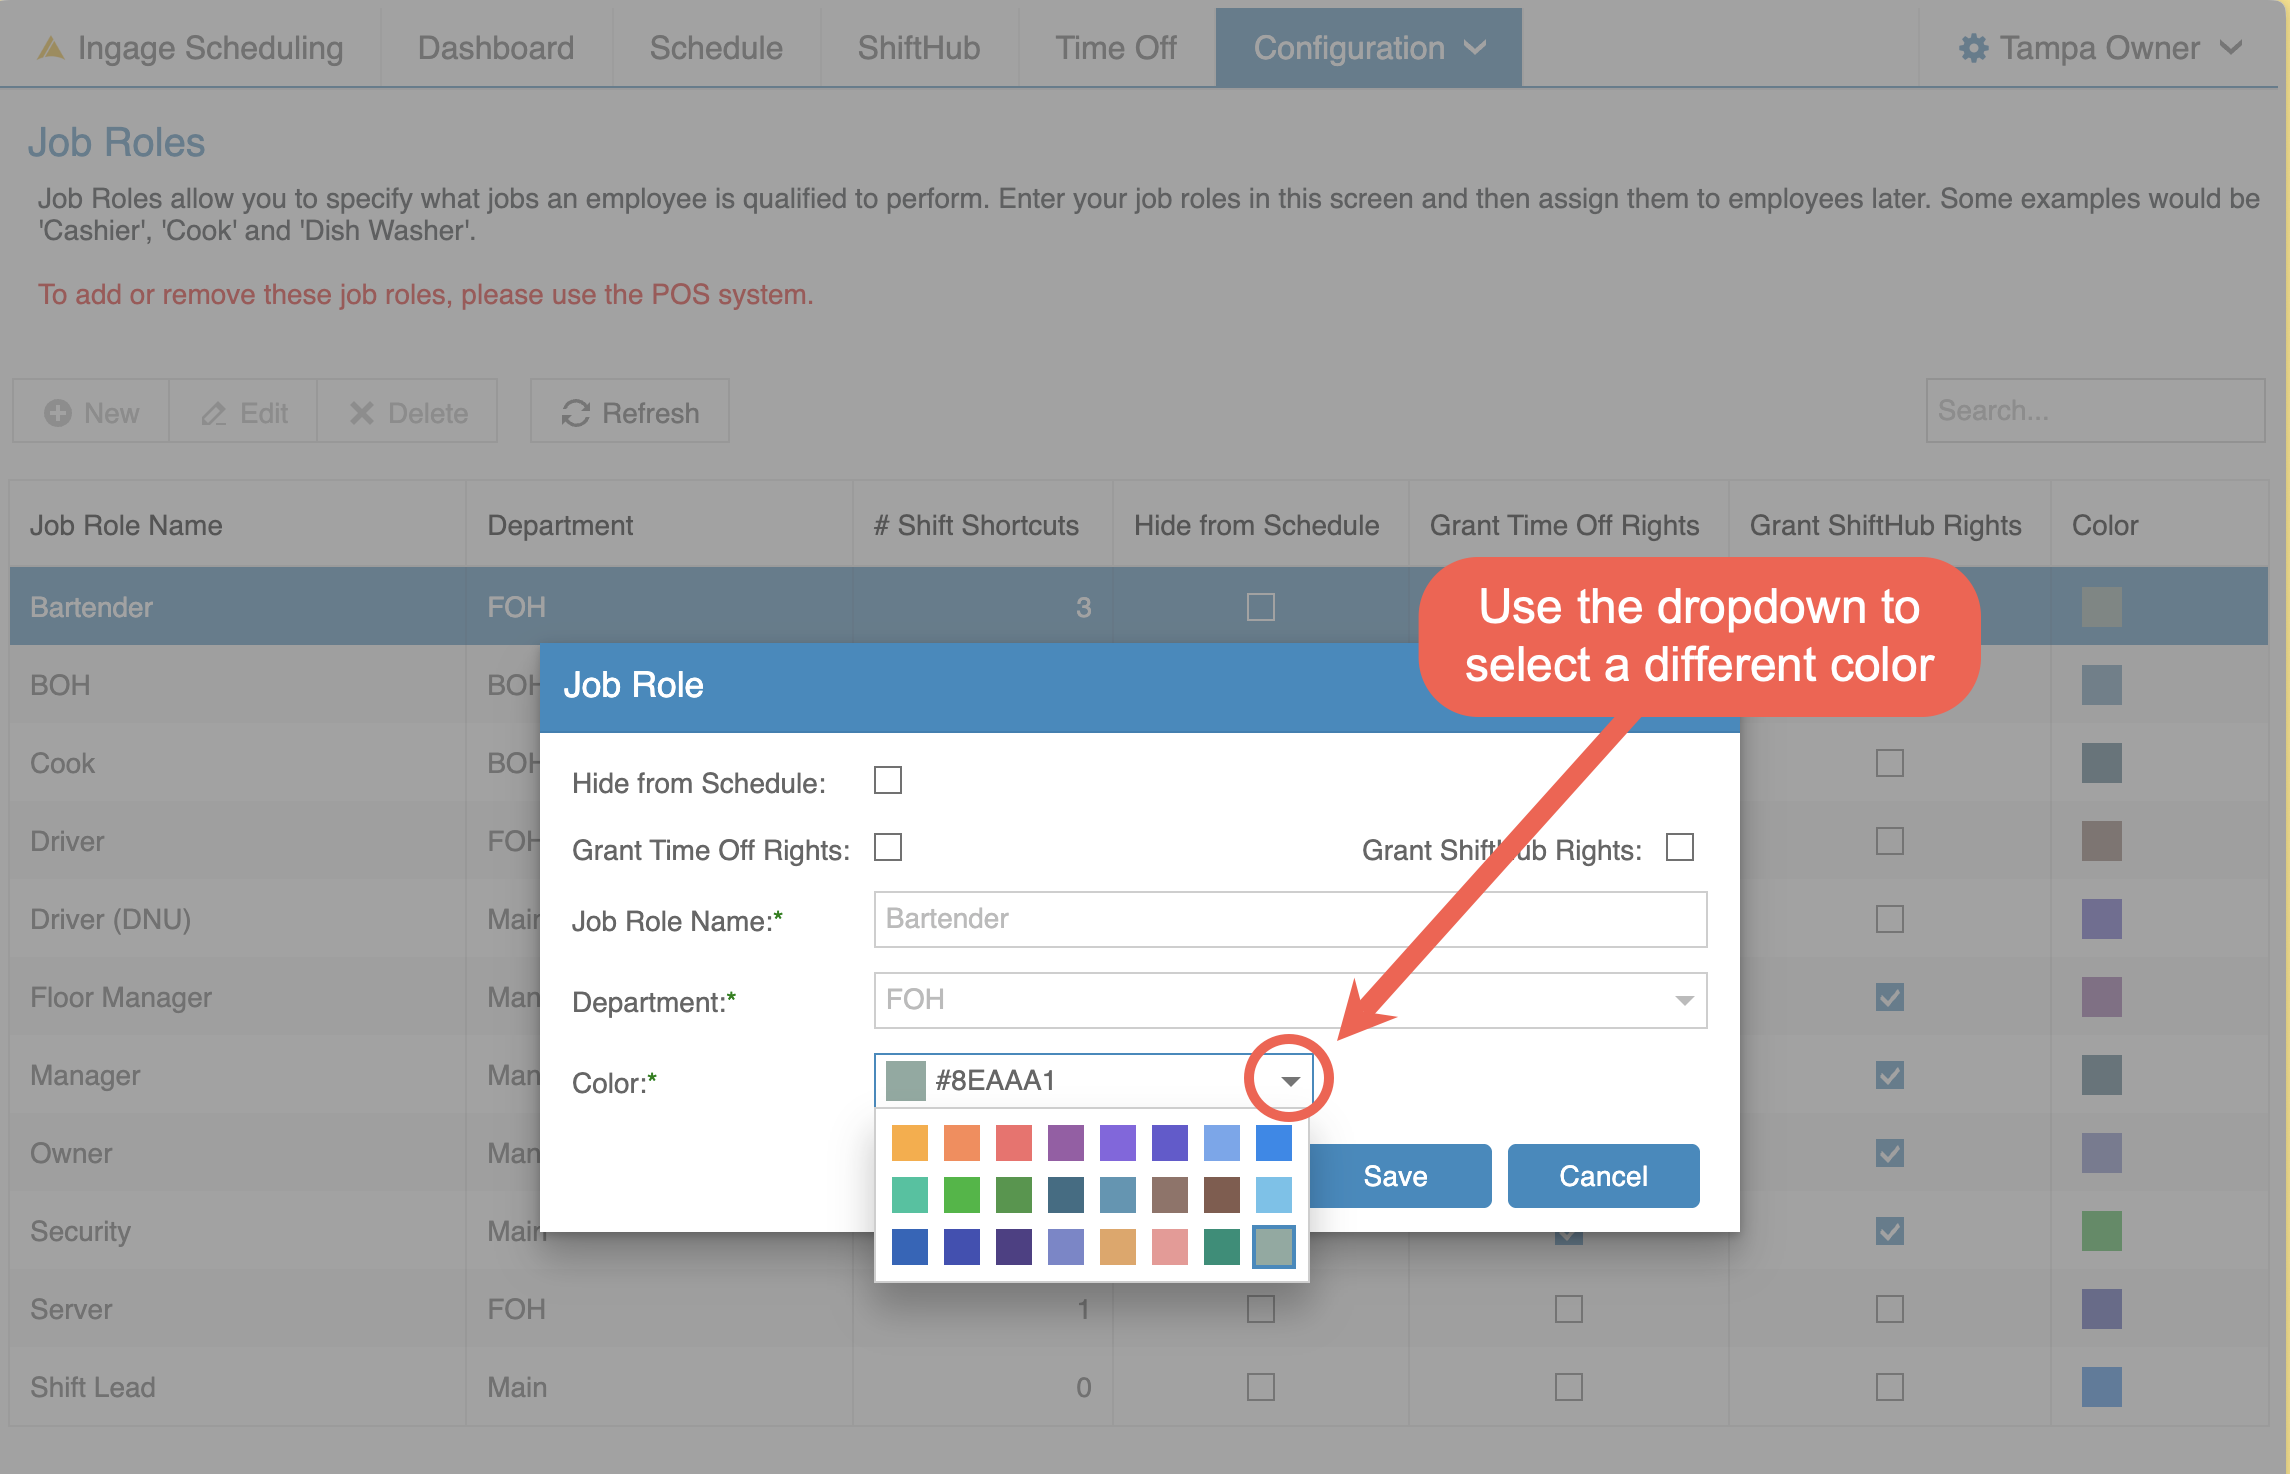
When the initial sync occurs, each job role is automatically assigned a color. You can change these colors at any time.
-
Job role colors appear:
-
On the schedule view
-
In the employee app next to their assigned role
-
How to Edit Job Role Colors
Log into Scheduling → Configuration → Job Roles
Double-click the job role you want to edit (or select it and click Edit).
-
Use the Color dropdown to select your preferred color.
-
Click Save.
*Reminder: All other job role settings (permissions, schedulable roles, etc.) are managed in Sail Backoffice.
Update Employee's Availability
Currently, only managers and administrators can edit employee availability. Employees cannot update their own availability.
This helps ensure availability changes are reviewed and approved before affecting the schedule.
How to Edit Employee Availability
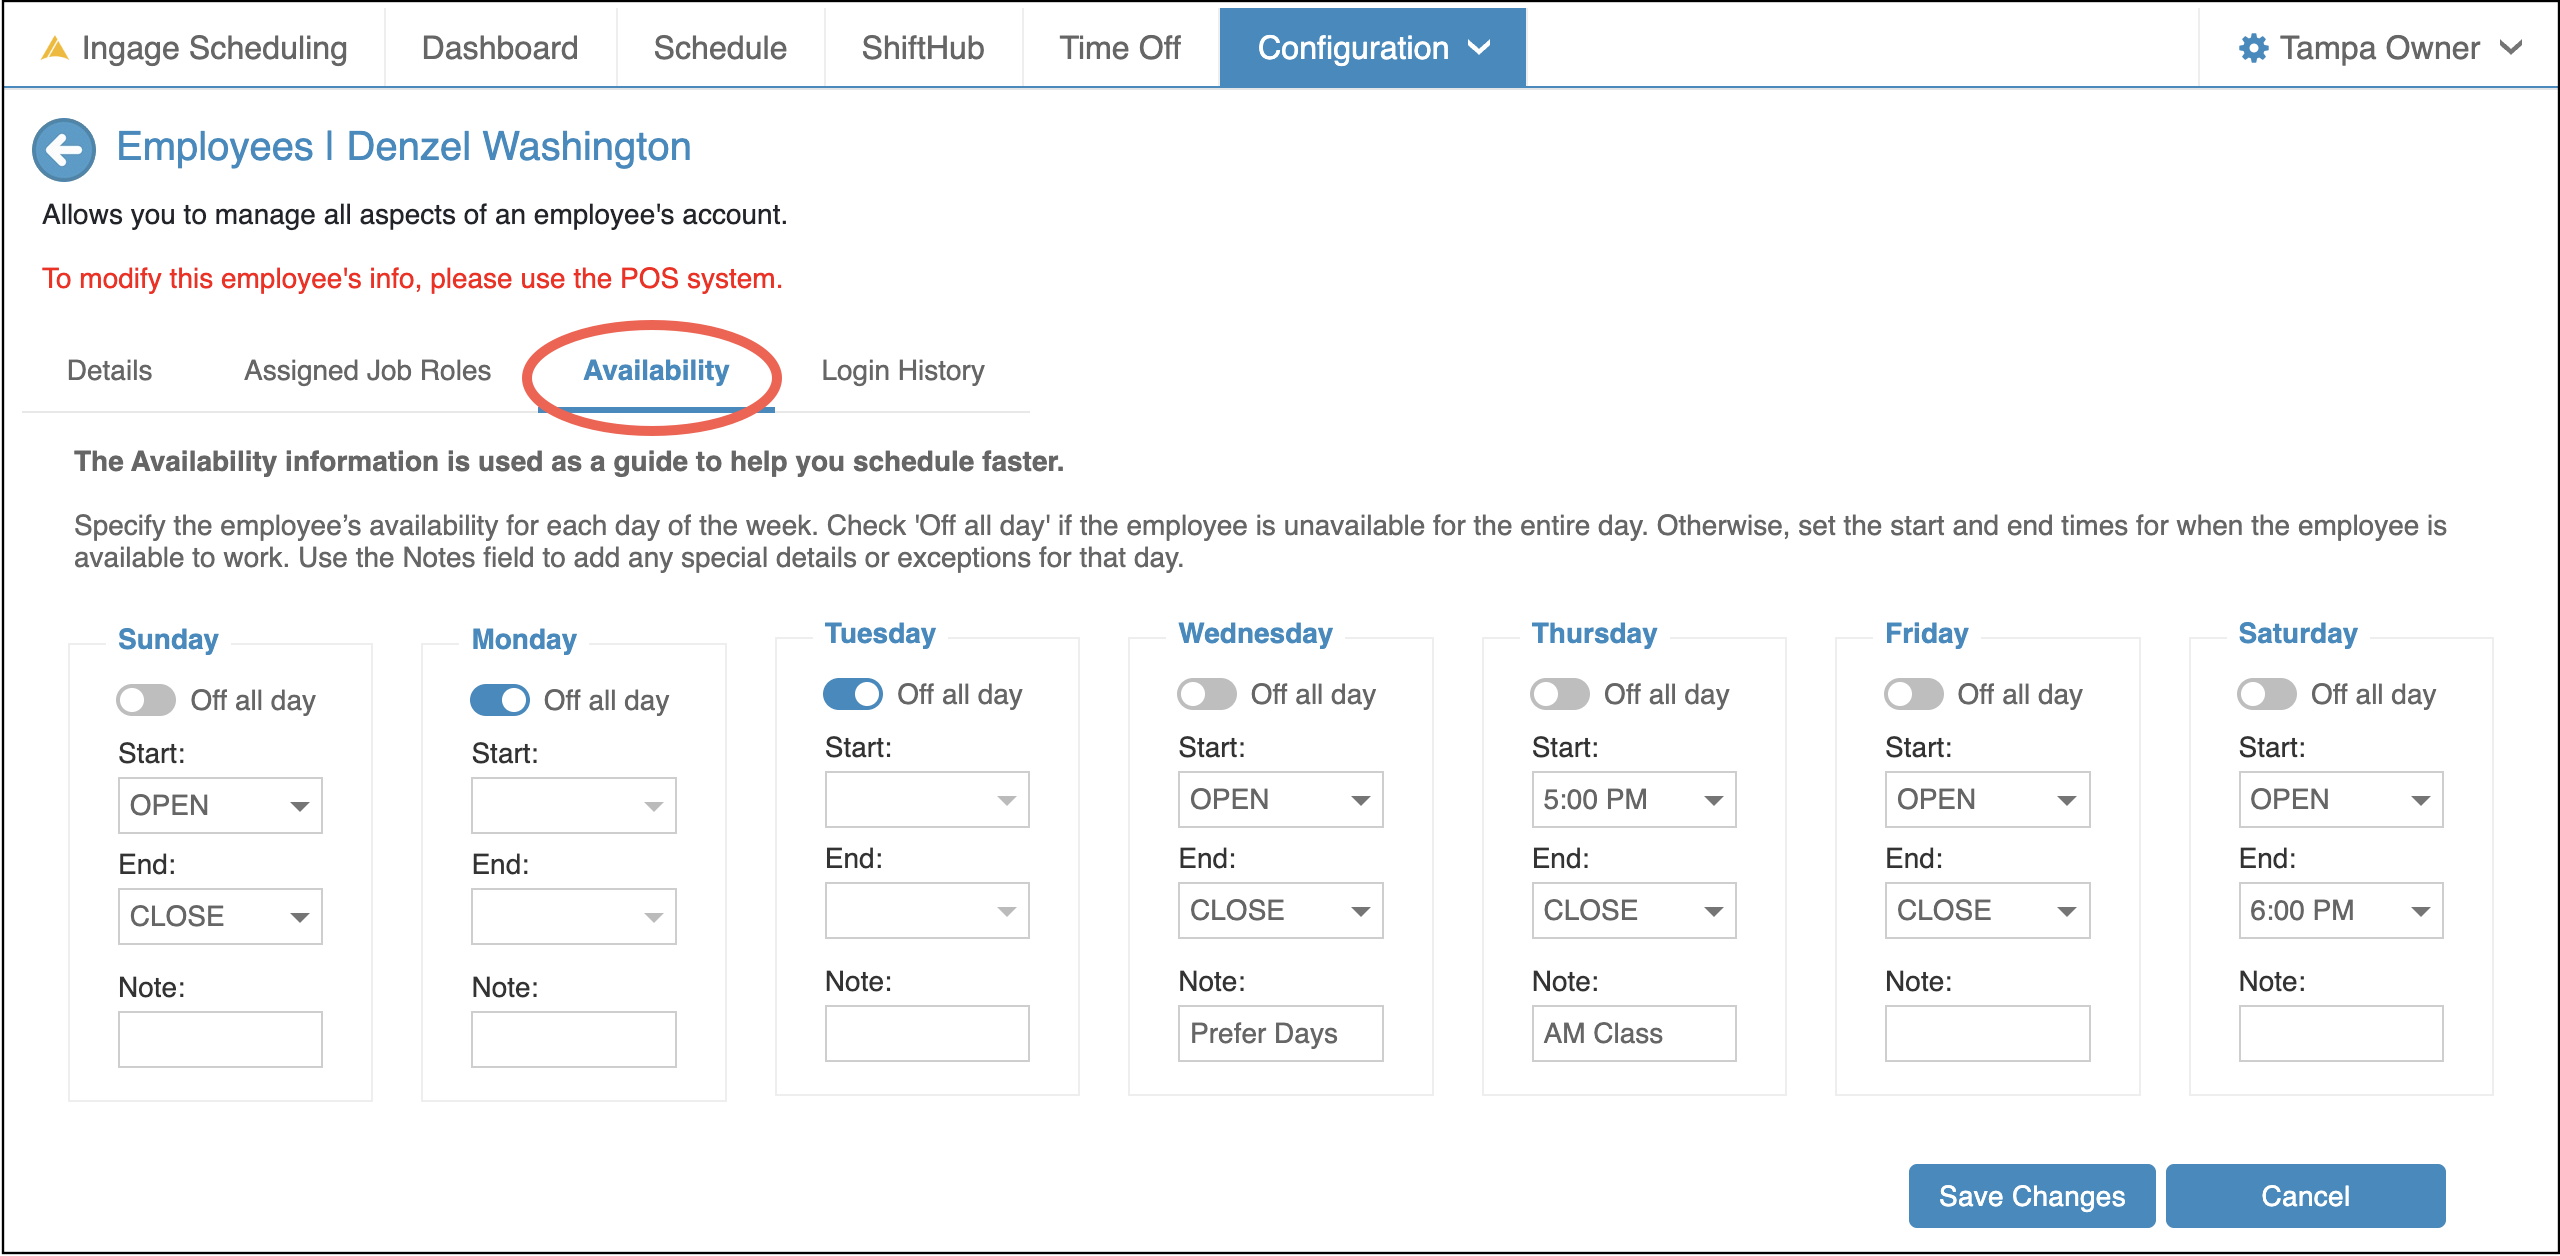
Log into Scheduling → Configuration → Employees
Double-click the employee you’d like to edit (or select them and click View) and go to the Availability tab.
Setting Availability
-
By default, employees are available from open to close.
-
Check Off all day if the employee is unavailable for the entire day.
-
Otherwise, set start and/or end times for when the employee is available.
-
Use the Notes field to add special requests or details.
In the Example Above, Denzel is available:
-
Sunday: Available all day
-
Monday & Tuesday: Off all day
-
Wednesday: Available all day, prefers mornings
-
Thursday: Available after 5:00 PM (class during the day)
-
Friday: Available all day
-
Saturday: Available during the day, needs to be done by 6:00 PM
Create Shift Shortcuts
Shift Shortcuts make scheduling faster and more consistent—especially if your shifts follow the same patterns each week.
-
Shift Shortcuts define standard start and end times for specific job roles.
-
Creating shortcuts for each job role can save significant time when building schedules.
If your team regularly works the same shifts, setting these up ahead of time is strongly recommended.
Click here to learn more about how to create shift shortcuts.
No Comments