
Order Entry Screen
This will detail the page for putting in guests orders.

There are a few ways to get to this page and depending on how the table is opened it will be set up differently.
Quick Order - The table number will be set to 0, the guest count to 1, and it will open directly to this page.
New Order - A prompt to enter what the guest count and table number will appear before opening this screen.
Table view, double tap or hold - This will open the table that was double tapped or held(long button press) and automatically set the guest count to the number of seats available at the table.
A. The top of the page is where the table information and editing options are found.

![]()
1. Table number - This is the number of the table that is currently open. It can be selected to edit table number effectively moving the table.

2. Guest count - This is the number of guests seated at the table. Select this to edit guest count.
3. Type - This is the type of order that is being entered. Select this to edit the type of order. Options usually include dine in and take out, but may vary depending on your location.

4. Server - The server who is assigned to the order will appear here. Select this to transfer the table to a different server. Depending on your locations settings, a manager's authorization or confirmation from the recipient server may be required.
![]()
5. Name - The name of the table may be changed here. This is optional and will show on the table in the order view screen. This does not appear on the customers receipt.

6. Guest list - This is the list of guests at a table. This is where guests are selected to add or edit their orders. This defaults to numbering the guests. Each guest can be named individually. To name a guest, click and hold until the keyboard comes up. Individual guest names will appear on the customer receipt.
B. The middle of the page is where ordering and editing the order takes place.
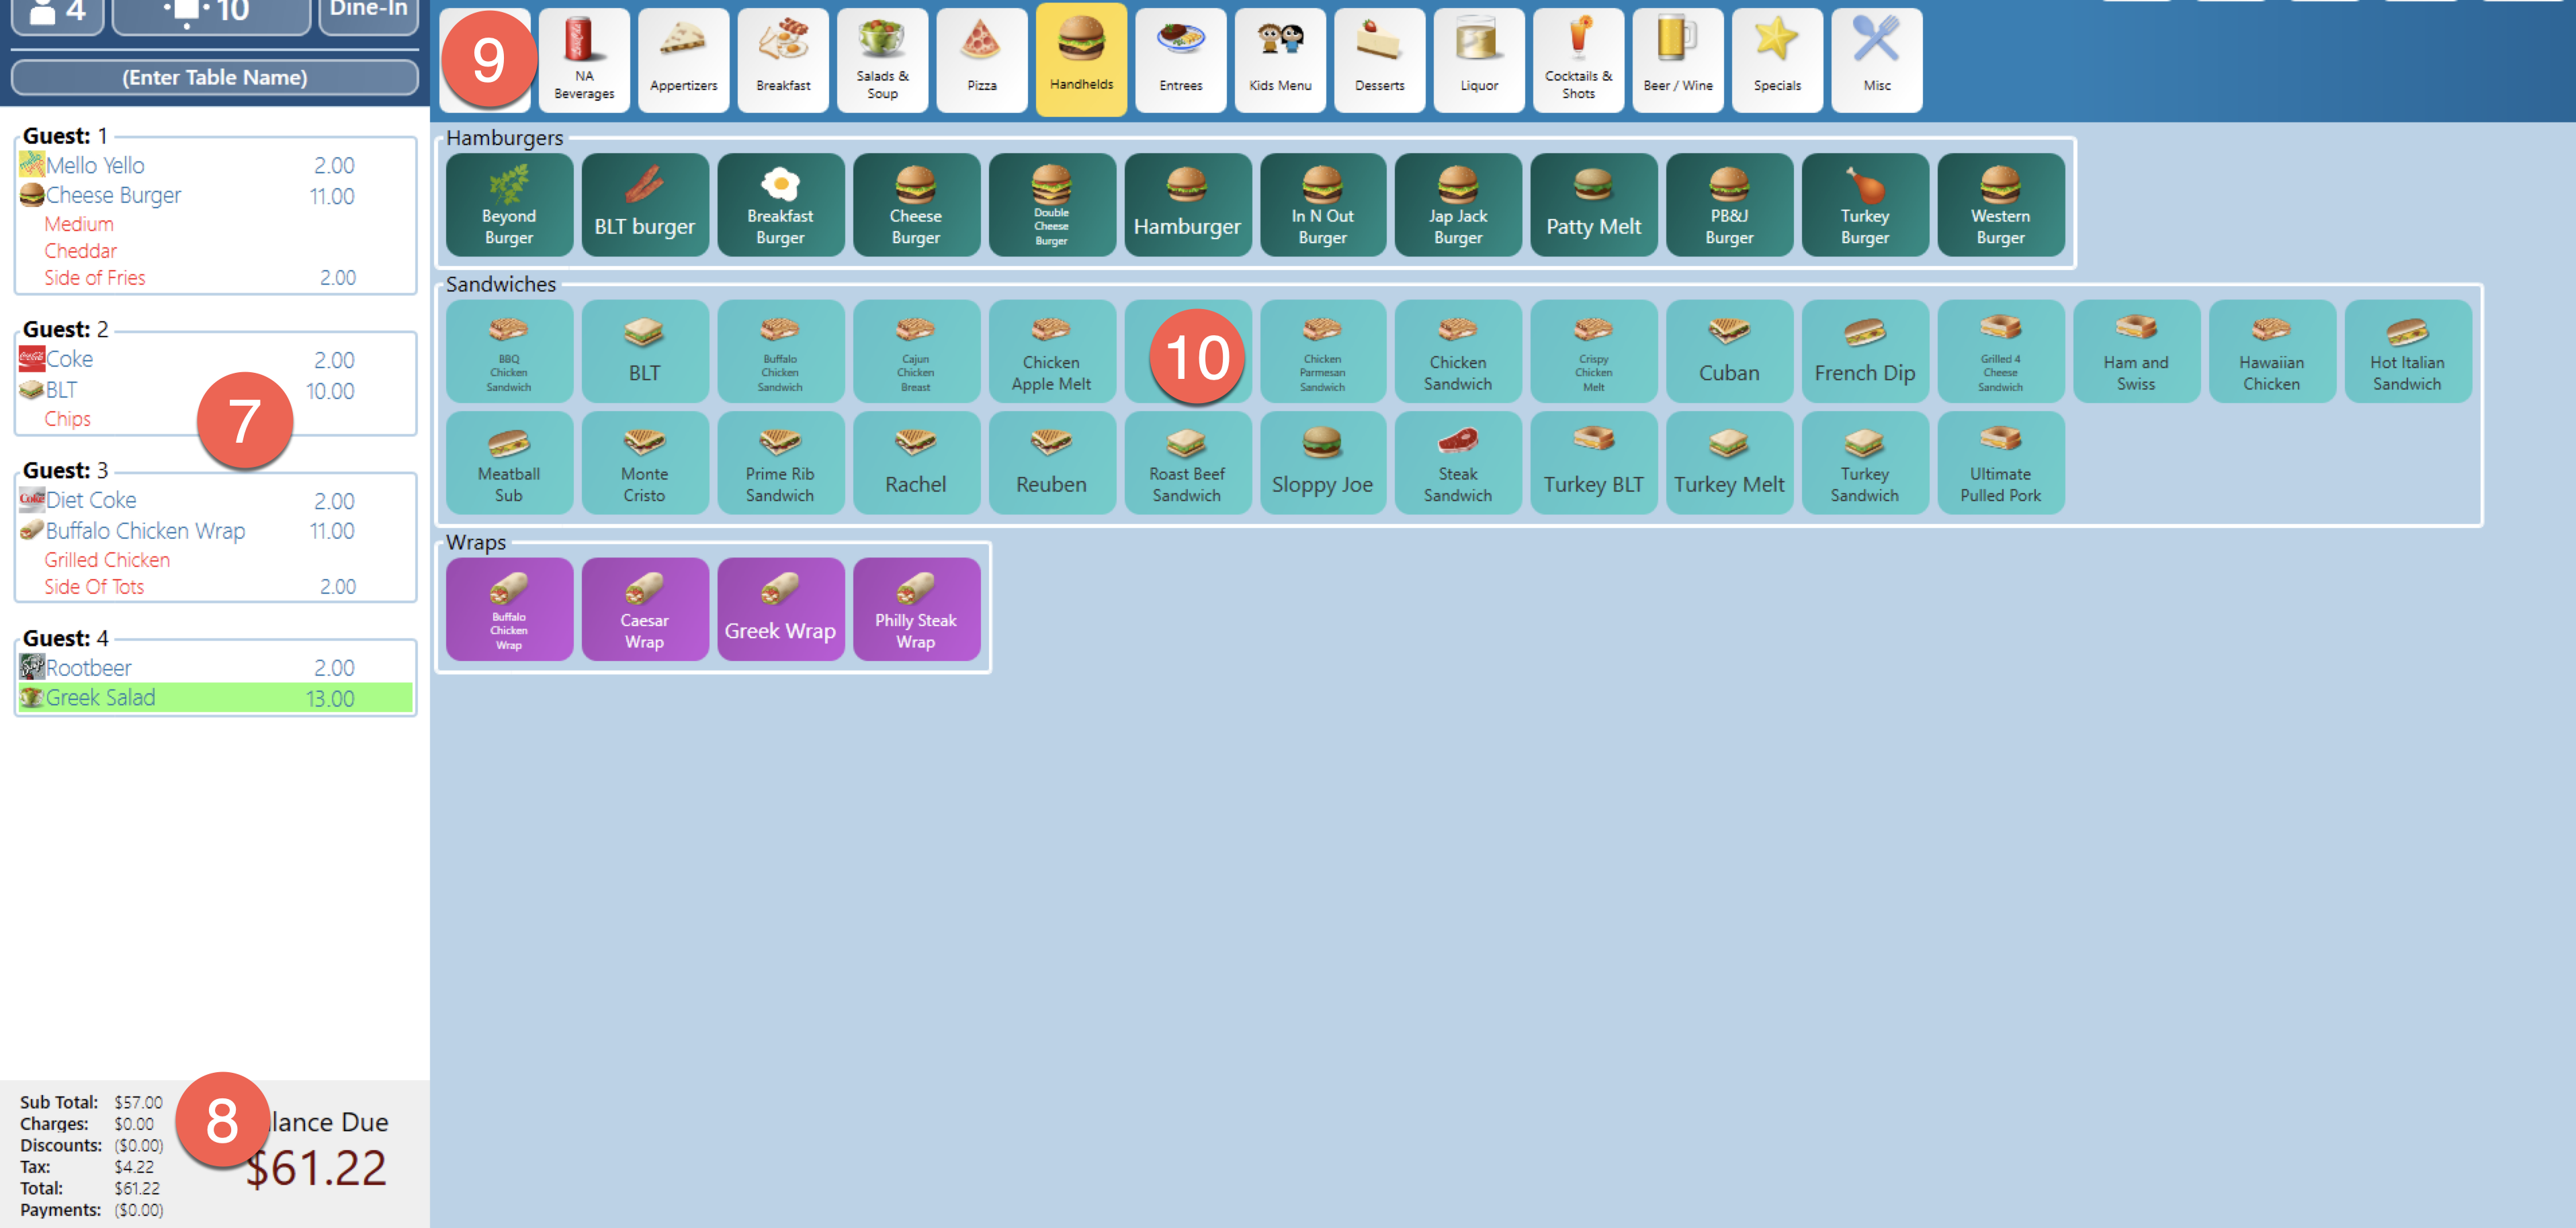

7. Order area - This is where the orders will appear once they are entered in.
Icon explanation:
a. To edit an item select it from this list and use one of the button on the bottom toolbar.
b. To move an item select the item you wish to move then the guest (from the guest list at the top of the page) that you wish to move it to.
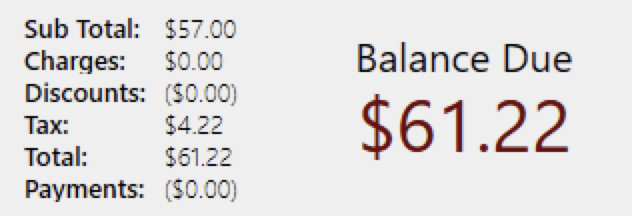
8. Balance Due - This area shows the cost of the order broken down into categories. The balance due will show red when there is an outstanding balance and green zeros when nothing is due.

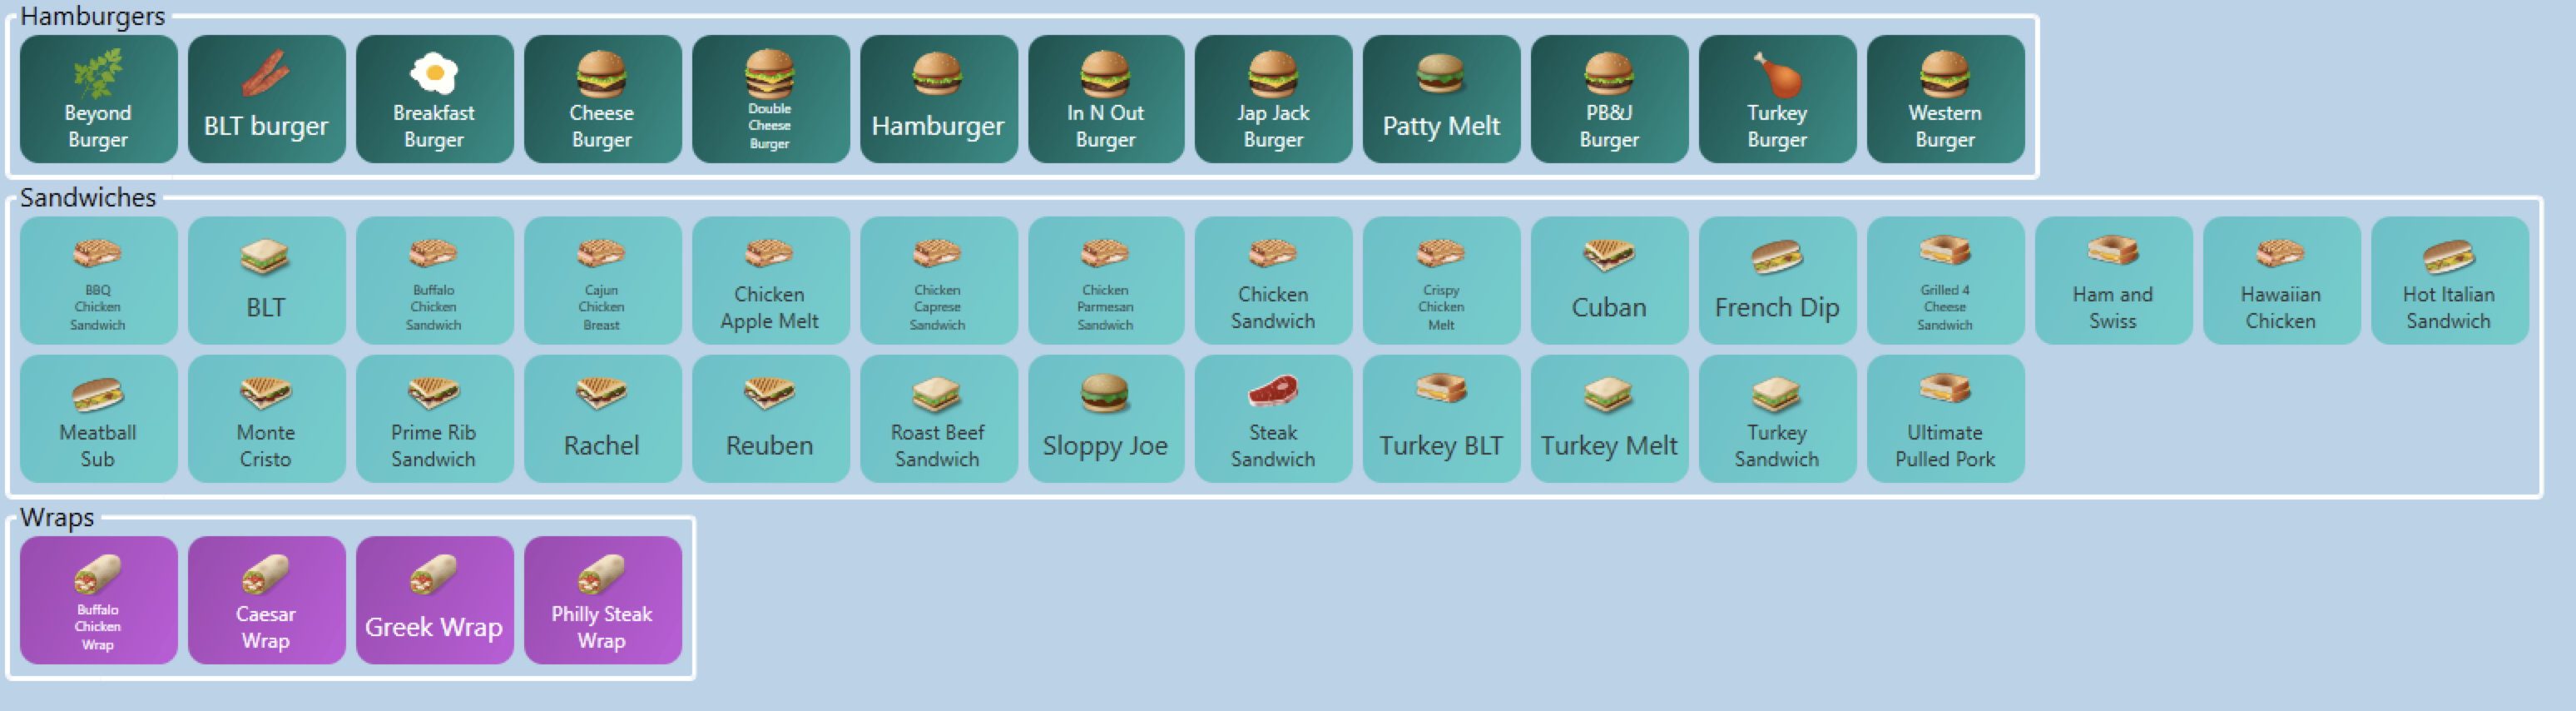
9. Tabs - This is a set of general categories that hold similar groups of menu offerings. Selecting a tab changes the menu buttons available to select from.
C. The bottom of the page has all of the utility options for the order. It includes options to cancel, send, payout, and modify orders.


11. Cancel - Close order without saving or sending any of the changes.

12. Logout - Logs out of the terminal.

13. Modify - This button can only be used with 1 selected item. This will open the modifier page for the most recent item you have rang in or the selected it. The modifier page holds options for adding, removing, or changing just about everything on a selected item.

14. “Void/Delete” – Can be used with 1 or multiple selected items
- If an item has not been sent, this button will say “Delete.”
- Once it has been sent, it will change to “Void,” and you will need to select the void reason from the list. The same reason will be applied to all. If you need to use a different reason, you will need to void them individually.
- If you do not have rights to void an item, it will prompt you for a manager number.
- If you select 1 item that has been sent and 1 item that has not been sent, this button will say “Delete/void” which means it will prompt you for a reason to void the item, but will only record it as a void for the item that has already been sent, and will just delete the item that has not been sent.

15. Duplicate - Select as many items as you’d like, click Duplicate, and it will duplicate all of the selected items and keep it on the correct guest. (This works great for duplicating another round for a group of customers.)

16. Notes - Select 1 or as many items as you’d like to apply the same message to.

17. Hold, Fire, Re-Fire - Select 1 or multiple items that you’d like to Hold/Fire.
-
If an item has not been sent, this button will say “Hold.”
-
If there are items on hold, once you select them it will say “Fire.”
-
If items have been sent to the kitchen, when you select items it will say “Re-fire.”
-
You can not select 1 item to hold and 1 item to fire at the same time.

18. Comp - Select 1 or multiple items to apply the same comp reason to. If you need to use a different reason, you will need to comp them individually. If you don’t have rights to comp an item, it will prompt you for a manager number.

19. More - Can only be used with 1 selected item. This will bring you into the Item Details screen where you can perform more options with this item, such as, splitting, price adjusting or marking it as an app or no make.

20. Fast Cash - Closes an entire order by cashing it out for exact change. This will not calculate change it only prompts to collect the amount due and closes the entire order. A prompt will appear asking if you are sure you want to use this button. To skip the prompt you can hold the button until the fast cash function goes through. Warning: Do not use the fast cash button if you need to cash people out individually. As it will automatically cash out the whole table all at once.

21. Coupons - This is where you will find buttons for coupons and discounts.

22. Charges - This is where you will find non food and beverage charges that can be added to a guests bill.

23. Payments - This is where you would go to have the guest pays their bill.

24. Tools - The tools area offers options to print receipts, comp items, void items, or move individual guests to different tables.

25. No Sale - This will open the drawer without a sale.

Sometimes takes the place of No Sale: Fire Course - One of the options for editing an item is to set a course number for it. It appears as a series of numbers to indicate which course the item will be part of. This button will prompt a list of the available courses for the user to fire when selected.

26. Receipt - Prints the receipt for the whole table. If you click and hold a pop-up will come up with other printing options.

27. Send - This button sends the order through without closing the order so that you may continue to add to it. This is good for sending a drink order through while the guest is still ordering their entrée.

28. Done - This button sends the order through while closing the order.
No Comments