
How to edit an Item: More Screen
This document will show you how to edit items on the order in the "More" screen
Select and item on the check and press the “More” button on the bottom toolbar of the order entry screen.
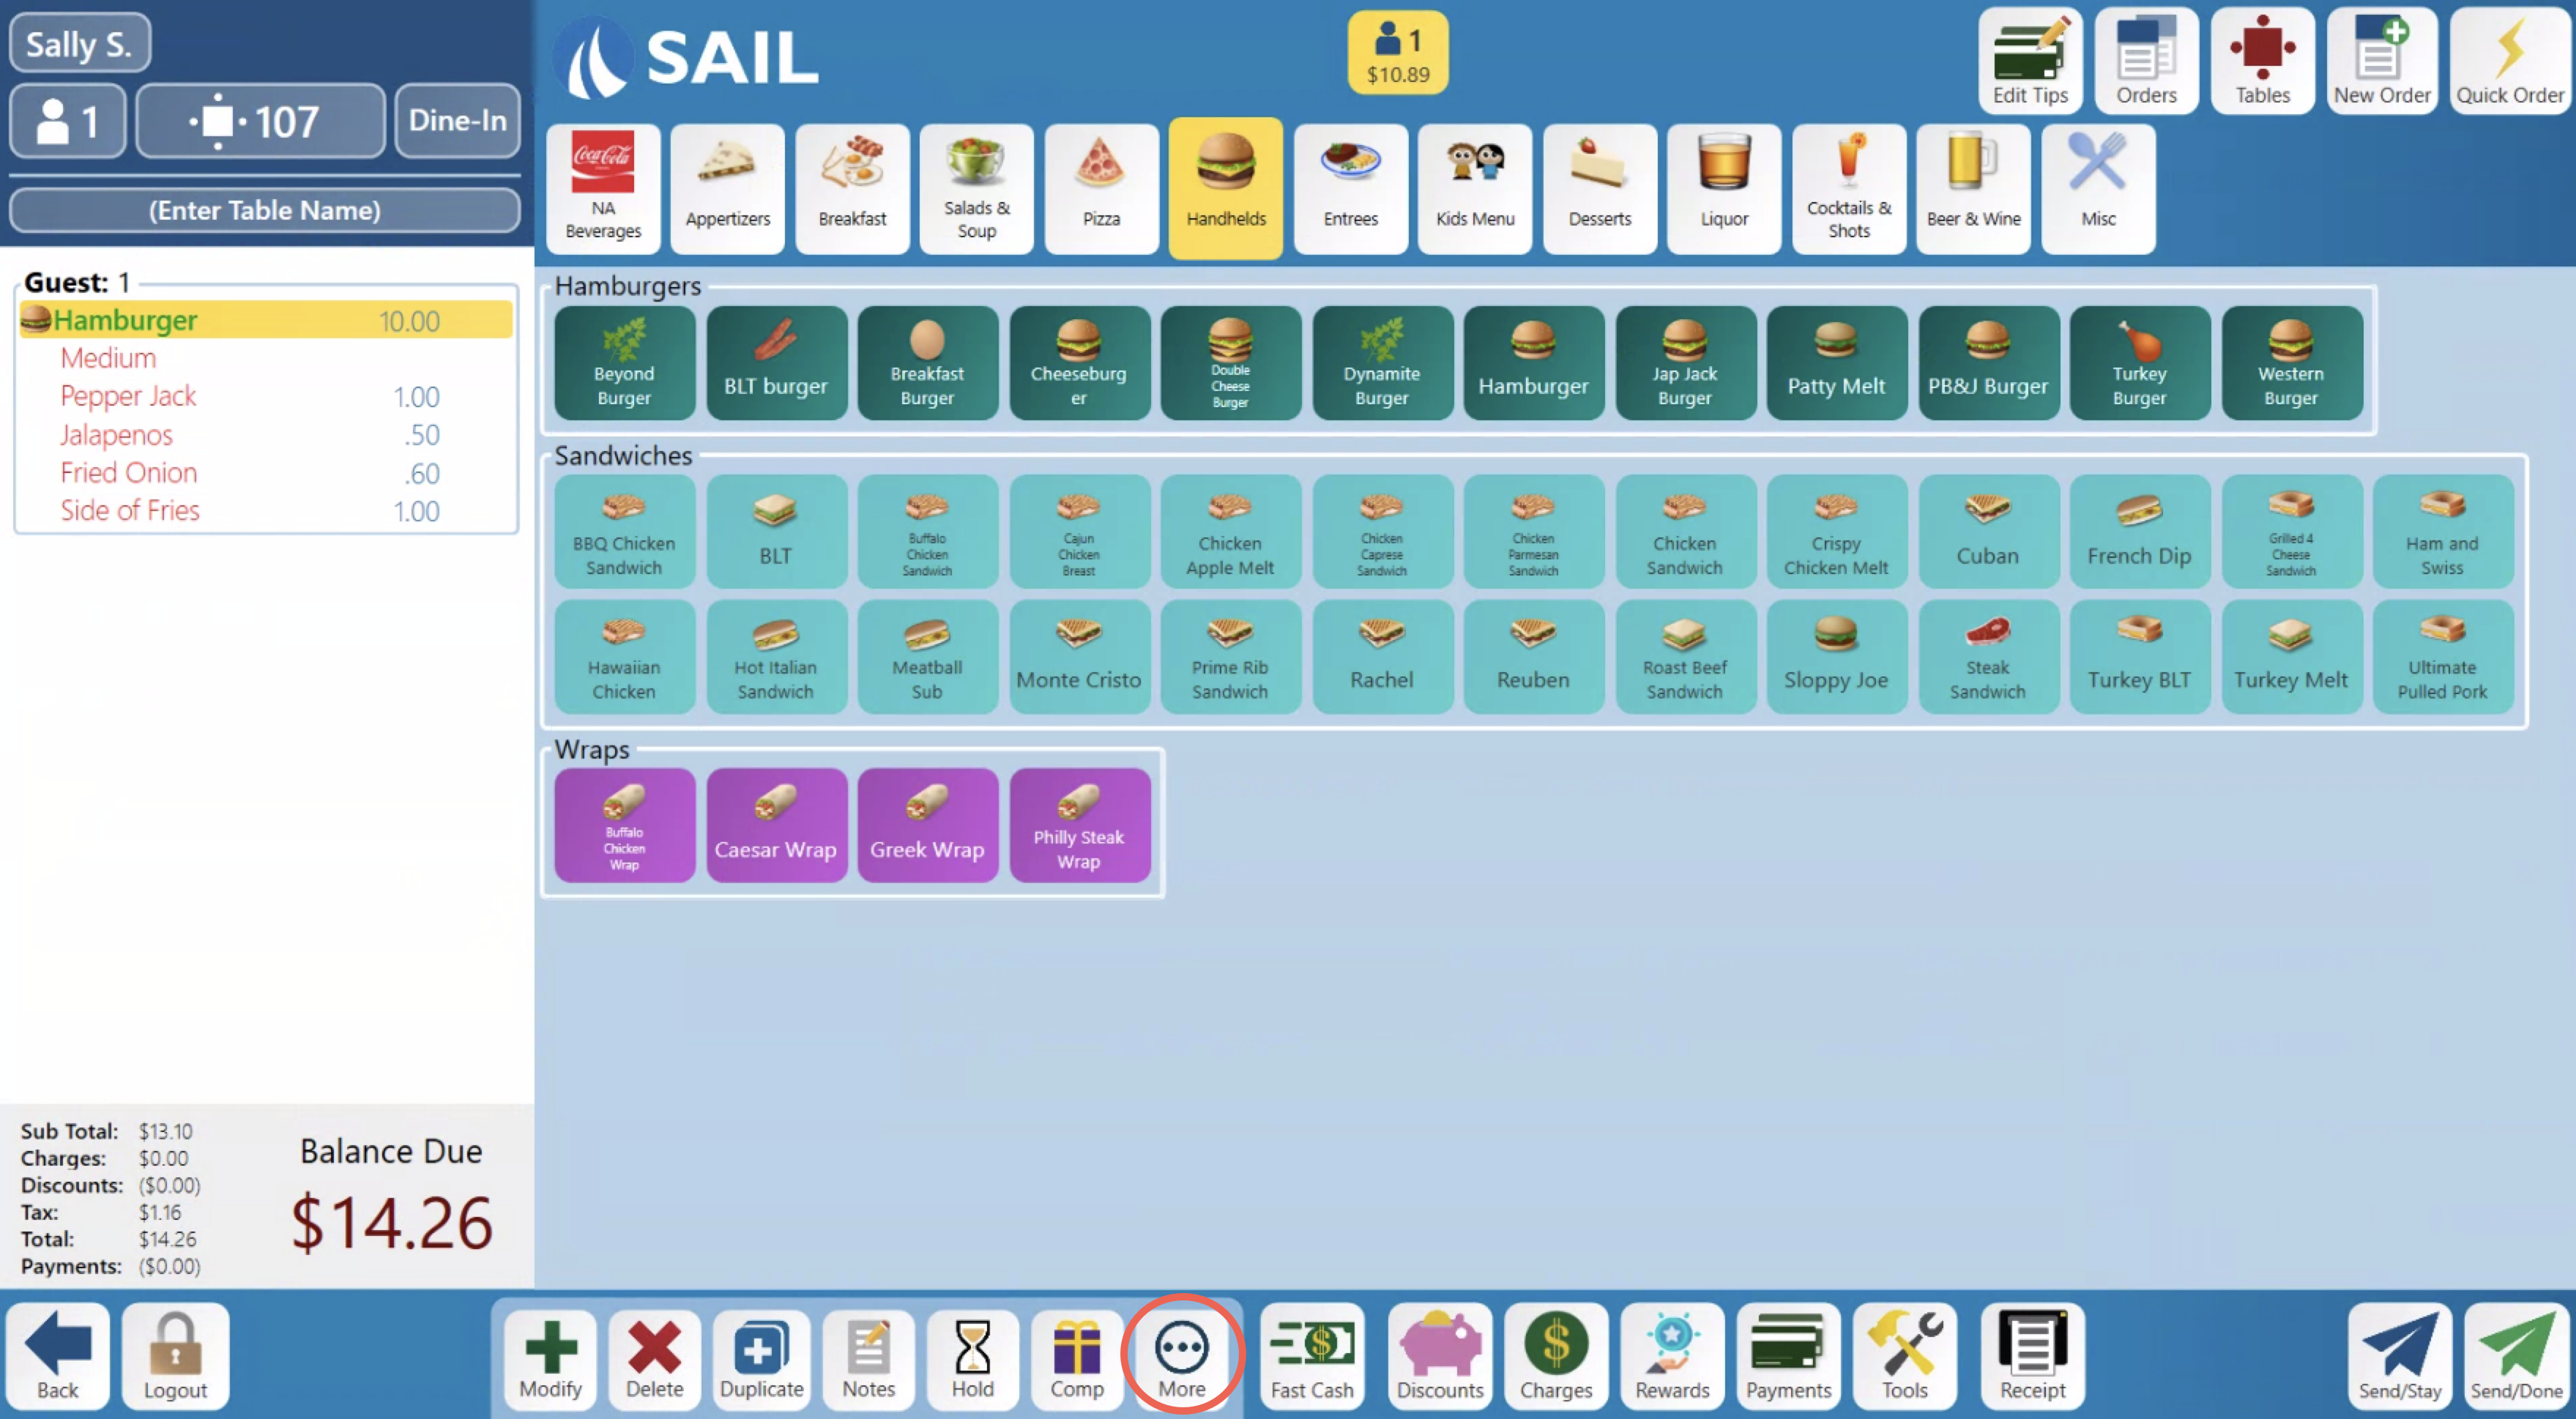
Once selected you will see this screen
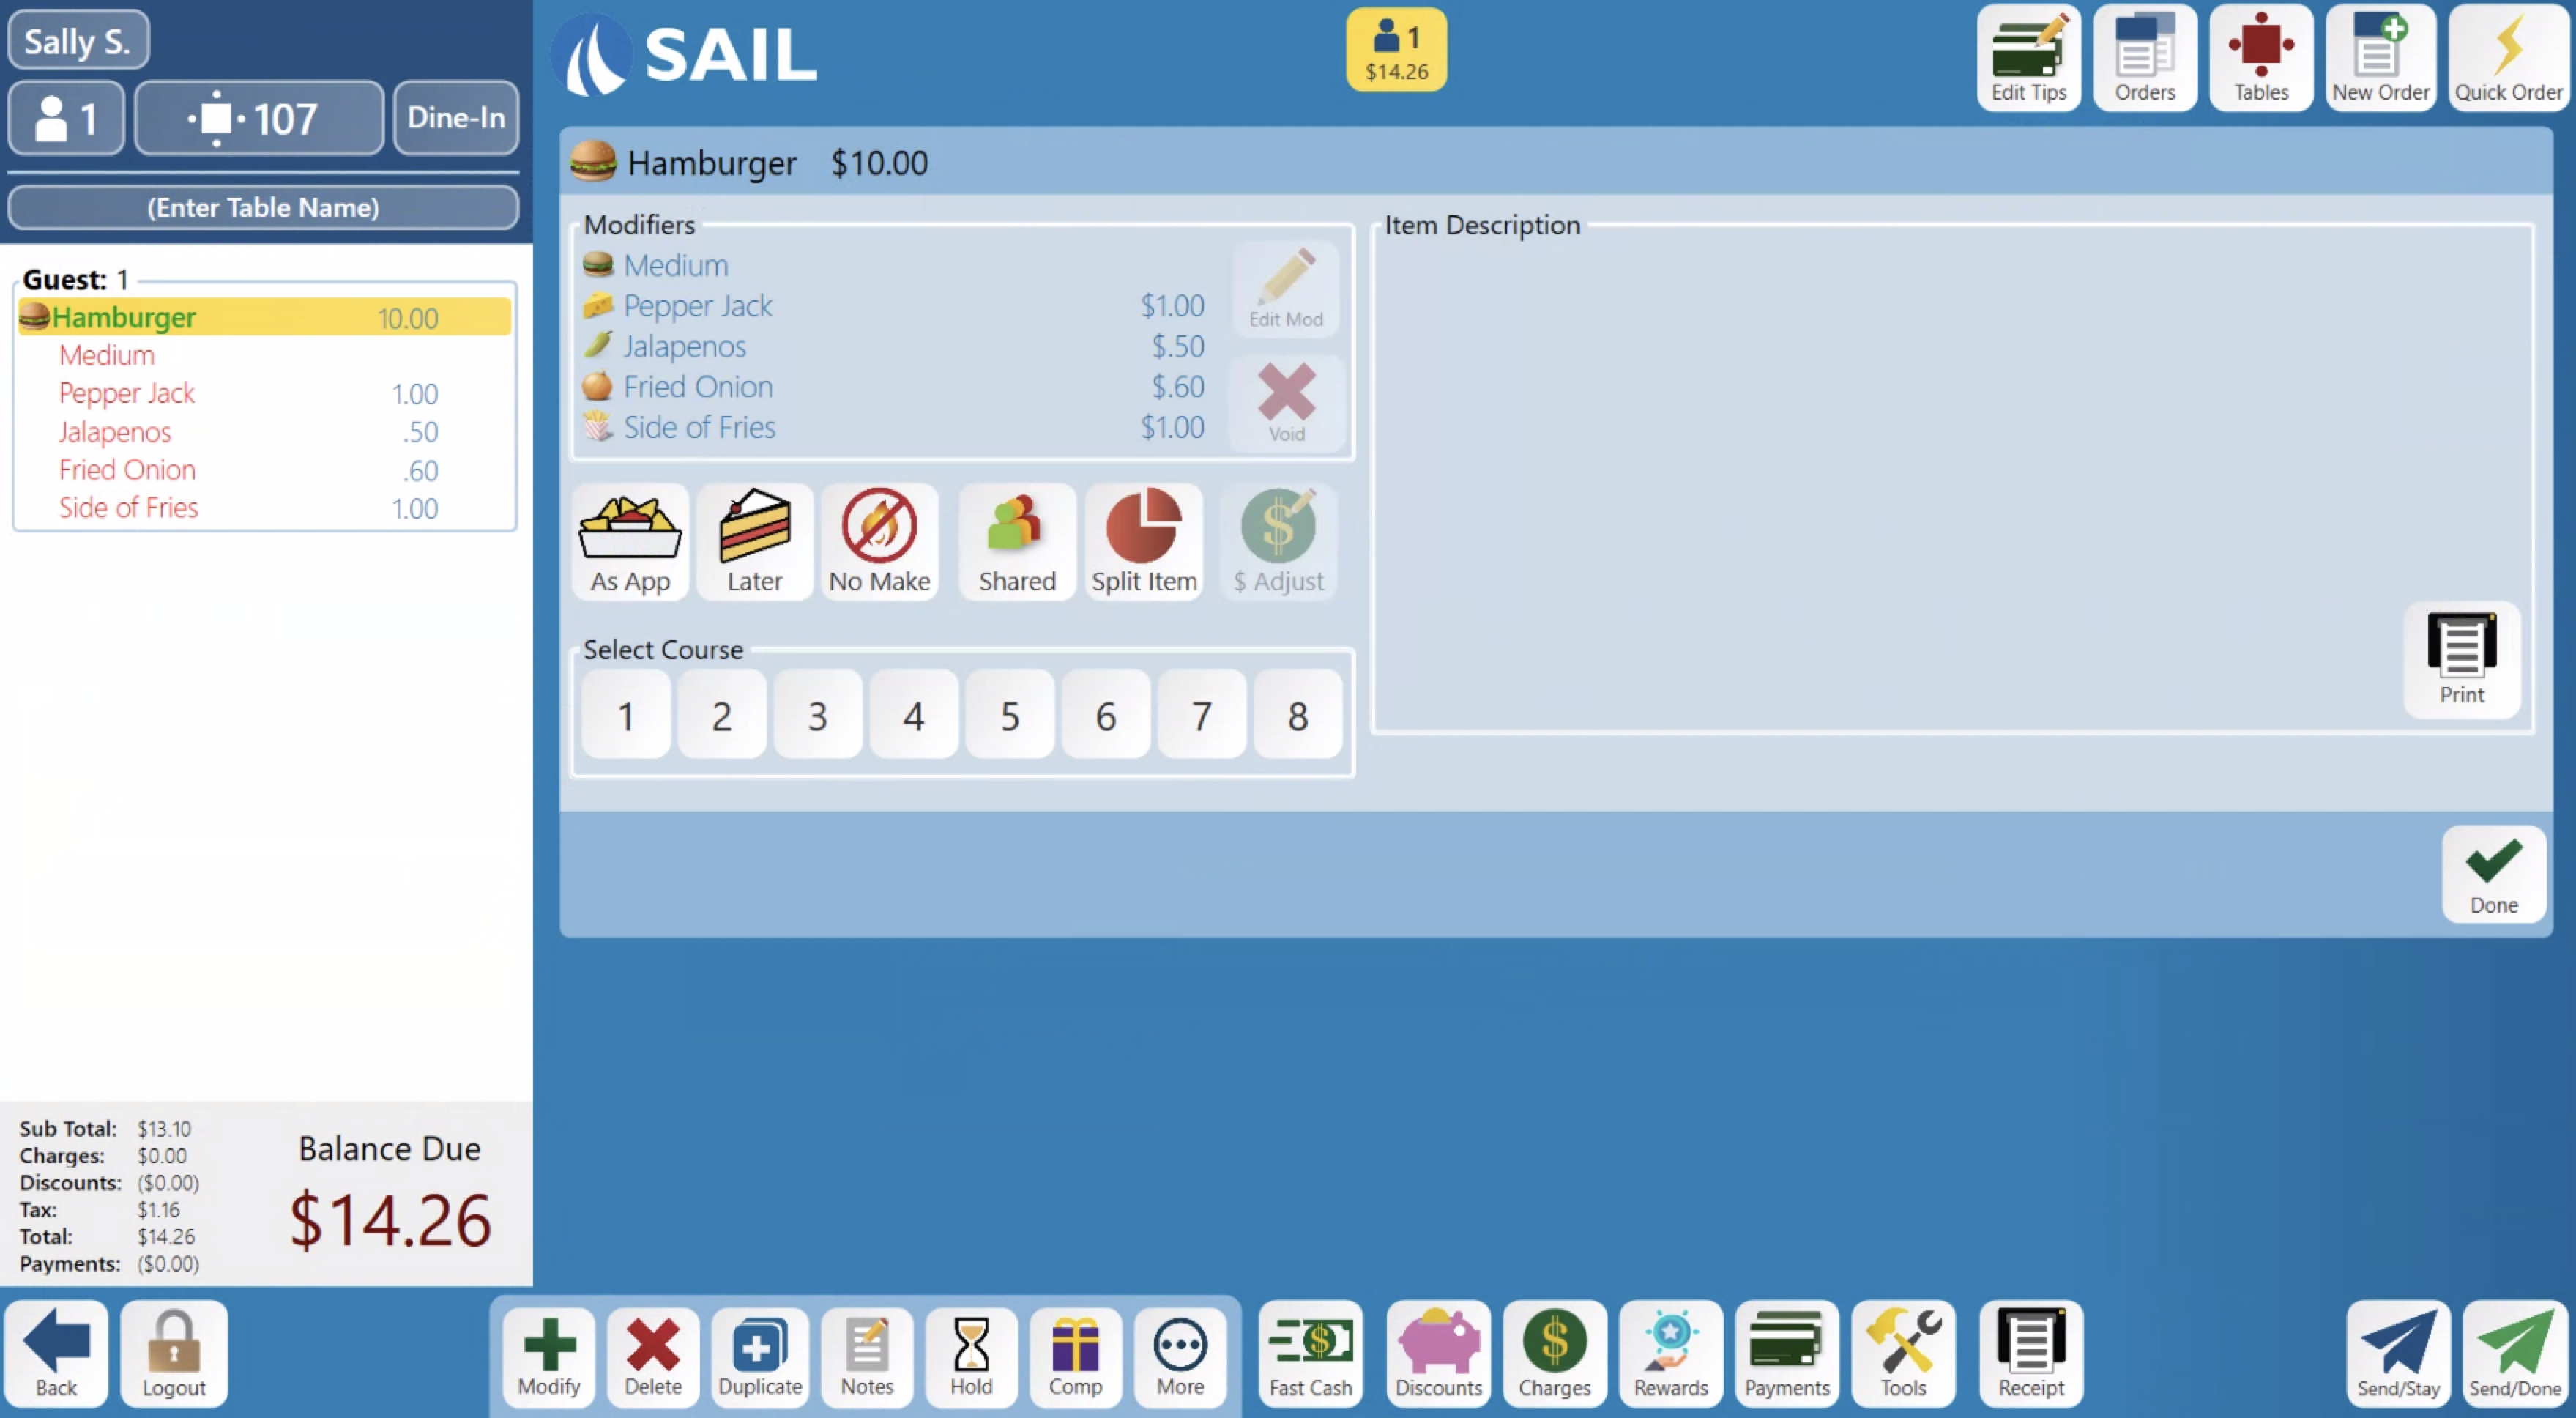

A. Editing/deleting modifiers
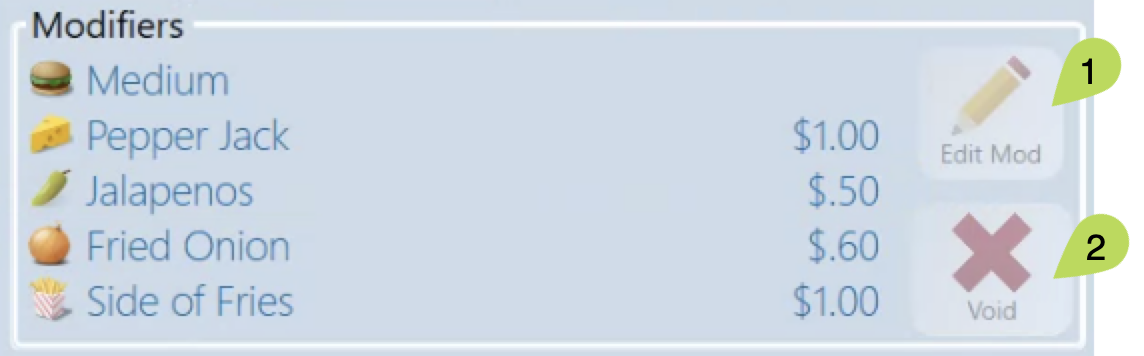
When a modifier is selected the buttons on the right side will light up.
- Edit Mod: (can only be used before the item is sent to the kitchen) Will bring you back to that prompted modifier screen to allow you to reselect something else on that prompt
- Void: (before the item is sent to the kitchen) Will allow you to delete the modifier and bring you back to the prompt to change your selection. (After the item is sent to the kitchen) Will void the price off the item
B. Timing & editing buttons
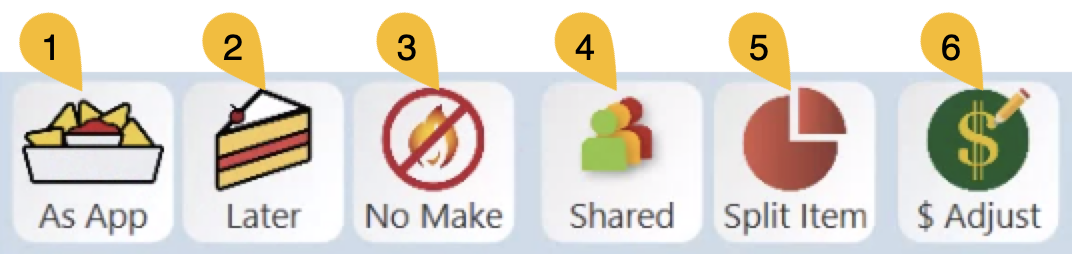
- As App: This indicates to the kitchen that the item should come out before the main course as an appetizer. It will print on a separate ticket for the kitchen and say ***As App*** on the top
- Later: This indicates to the kitchen that the item should come out after the main course like a dessert. It will print on a separate ticket for the kitchen and say ***Later*** on the top
- No Make: This indicates that the item does not need to be made. This would be used in a situation where the customer already received an item but it needs to be put on the bill without making the item. This item can be configured to print to the kitchen or not.
- Shared: This indicates that the item will be shared and should come out with any necessary items to let the guests share the item. ie extra utensils and/or dishes.
- Split Item: Each item can be split between guests. This can be accomplished by selecting the item, selecting split, then selecting the guest you would like the item to be split with. (click the link for more detail)
- $ Adjust: This would be used as a temporary solution if the price of an item had not been updated in back office and the item needs to be changed manually until the updated price can be pushed to the system. The price for an individual item can be adjusted by selecting the item then selecting the adjust price button. A Prompt will appear asking for the new price of the item. Add the new price and hit enter. Many locations have this feature require manager access rights.
C. Coursing buttons
Coursing is frequently used in banquet situations and with party’s. To create a course add the item you want in a course then select it. Press the number that matches the course you would like the item to be a part of
-
-
Kitchen video does not currently support coursing.
-
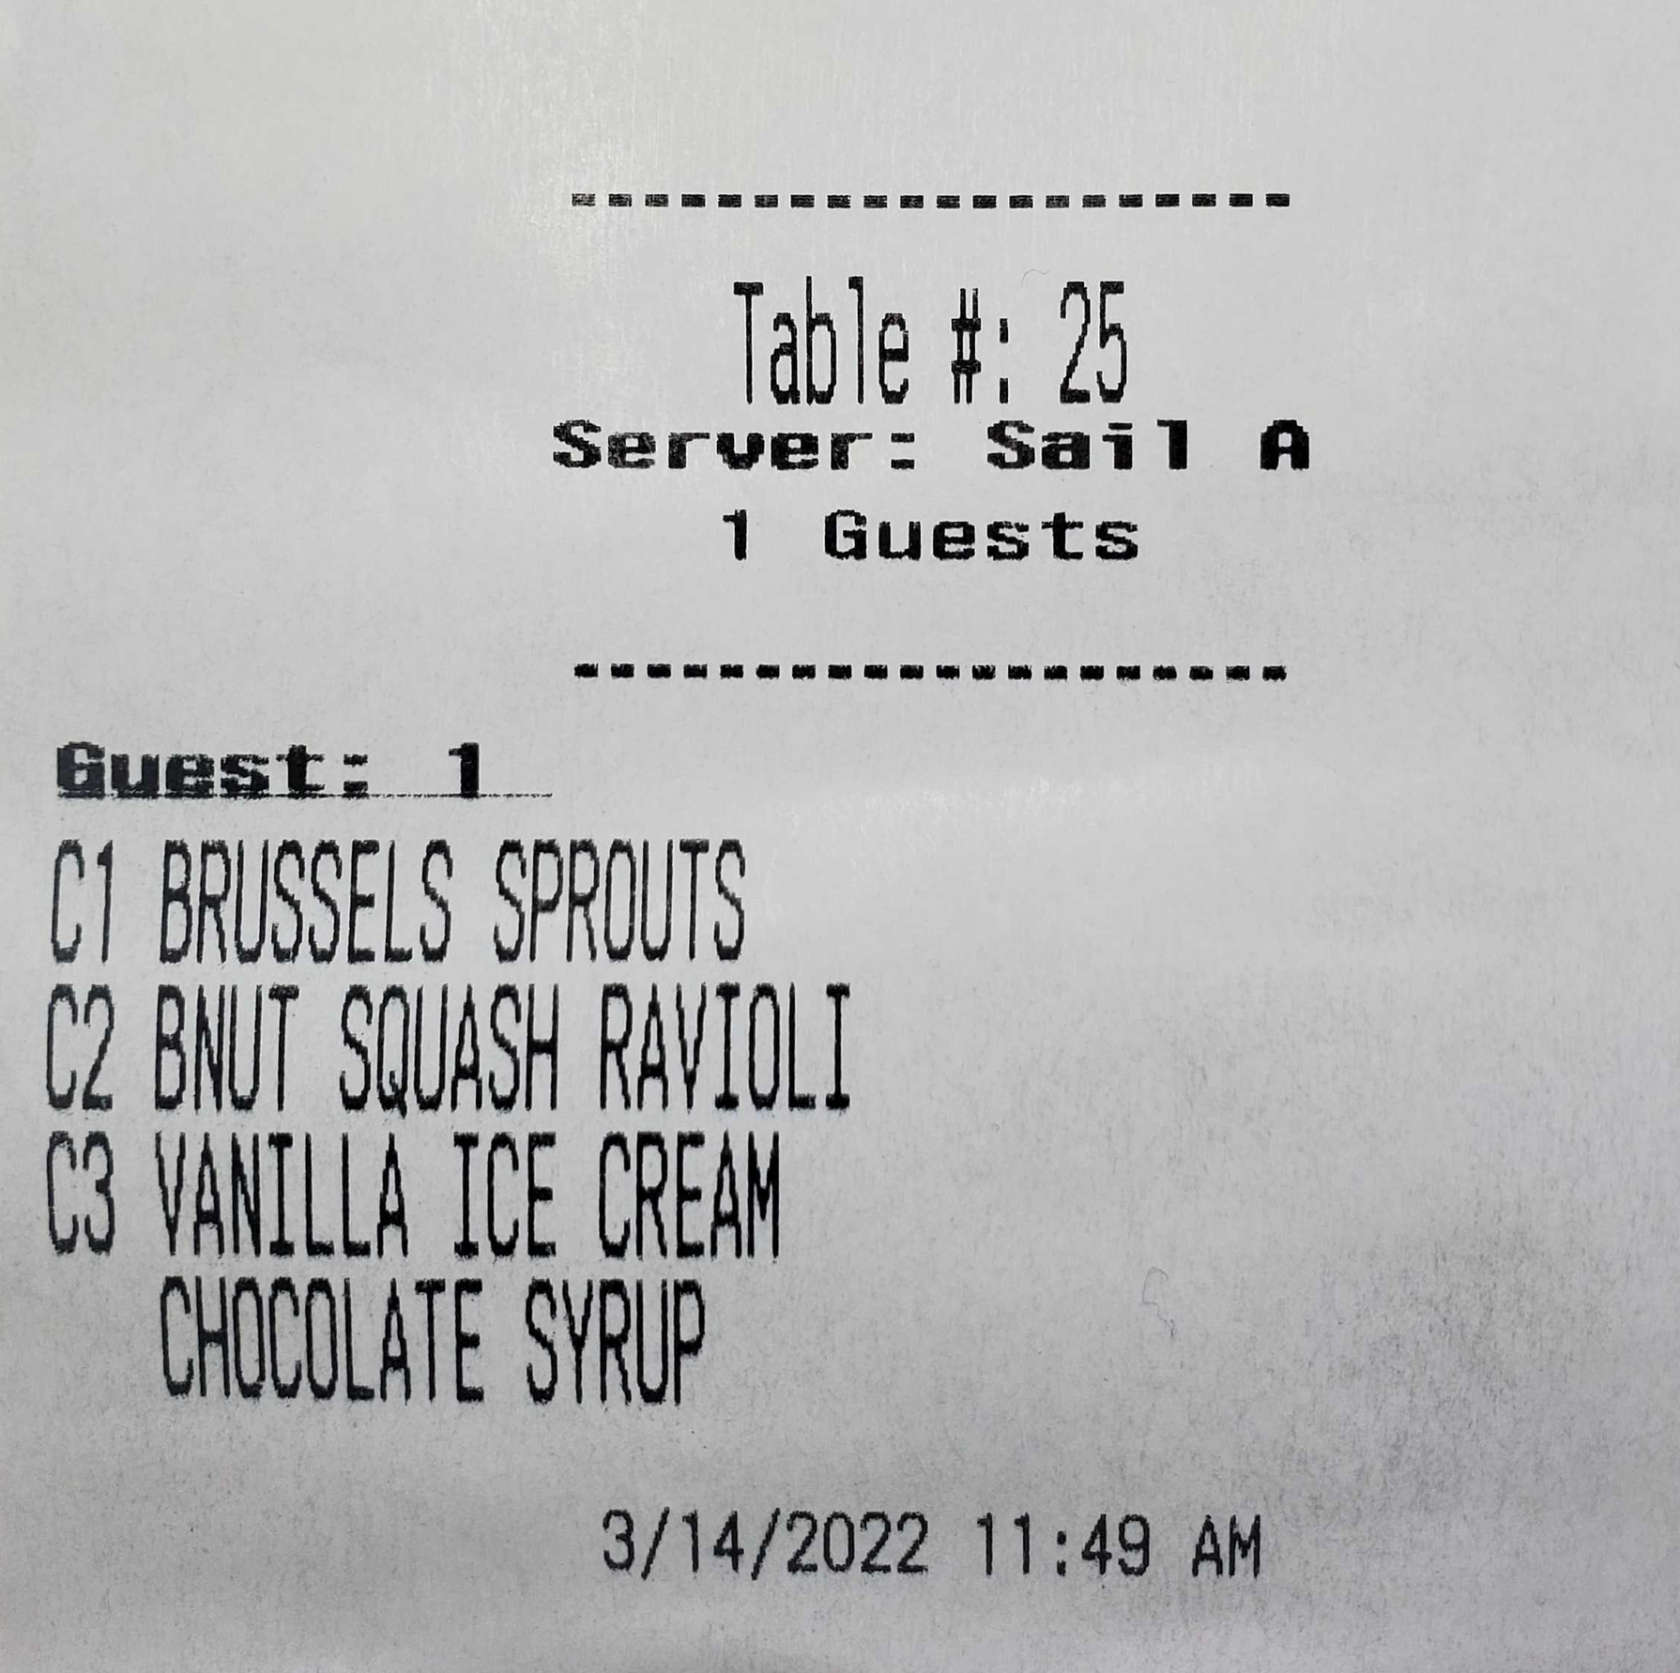
When the courses are sent in it will print a kitchen ticket showing the full order with course numbers in front of each item.
-
-
Fire Course:
Fire a course by pressing the fire course button. A prompt will appear asking which course you would like to fire. Once the course is selected the prompt will disappear.
-
On kitchen video the item will not populate until it is fired.
-
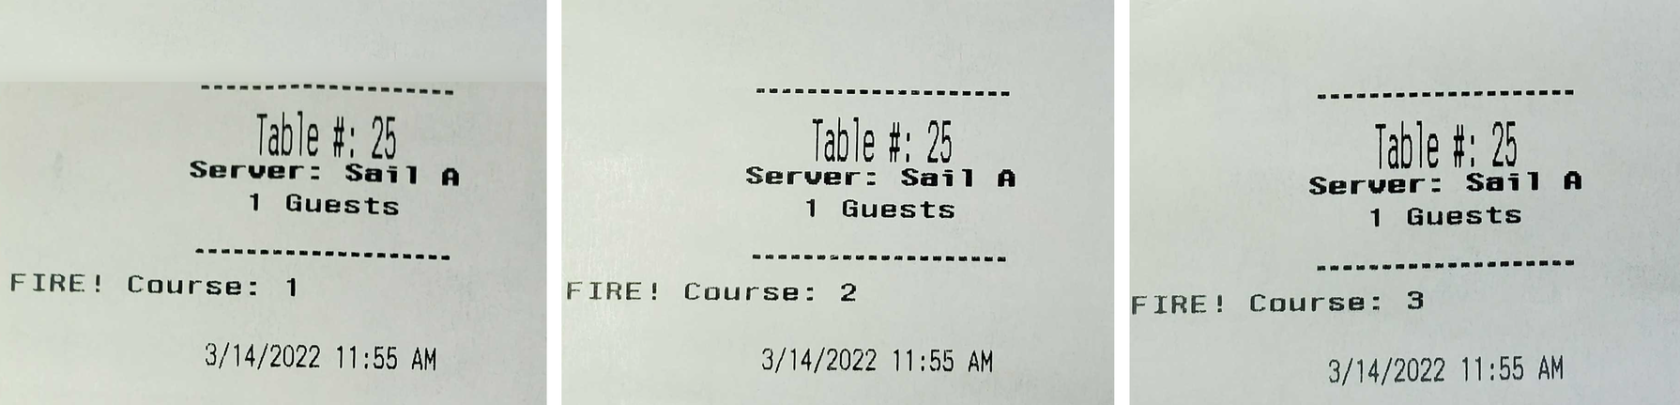
When firing a course it will print a ticket in the kitchen says fire course x where the x is the course number that needs to be prepared.
-


No Comments