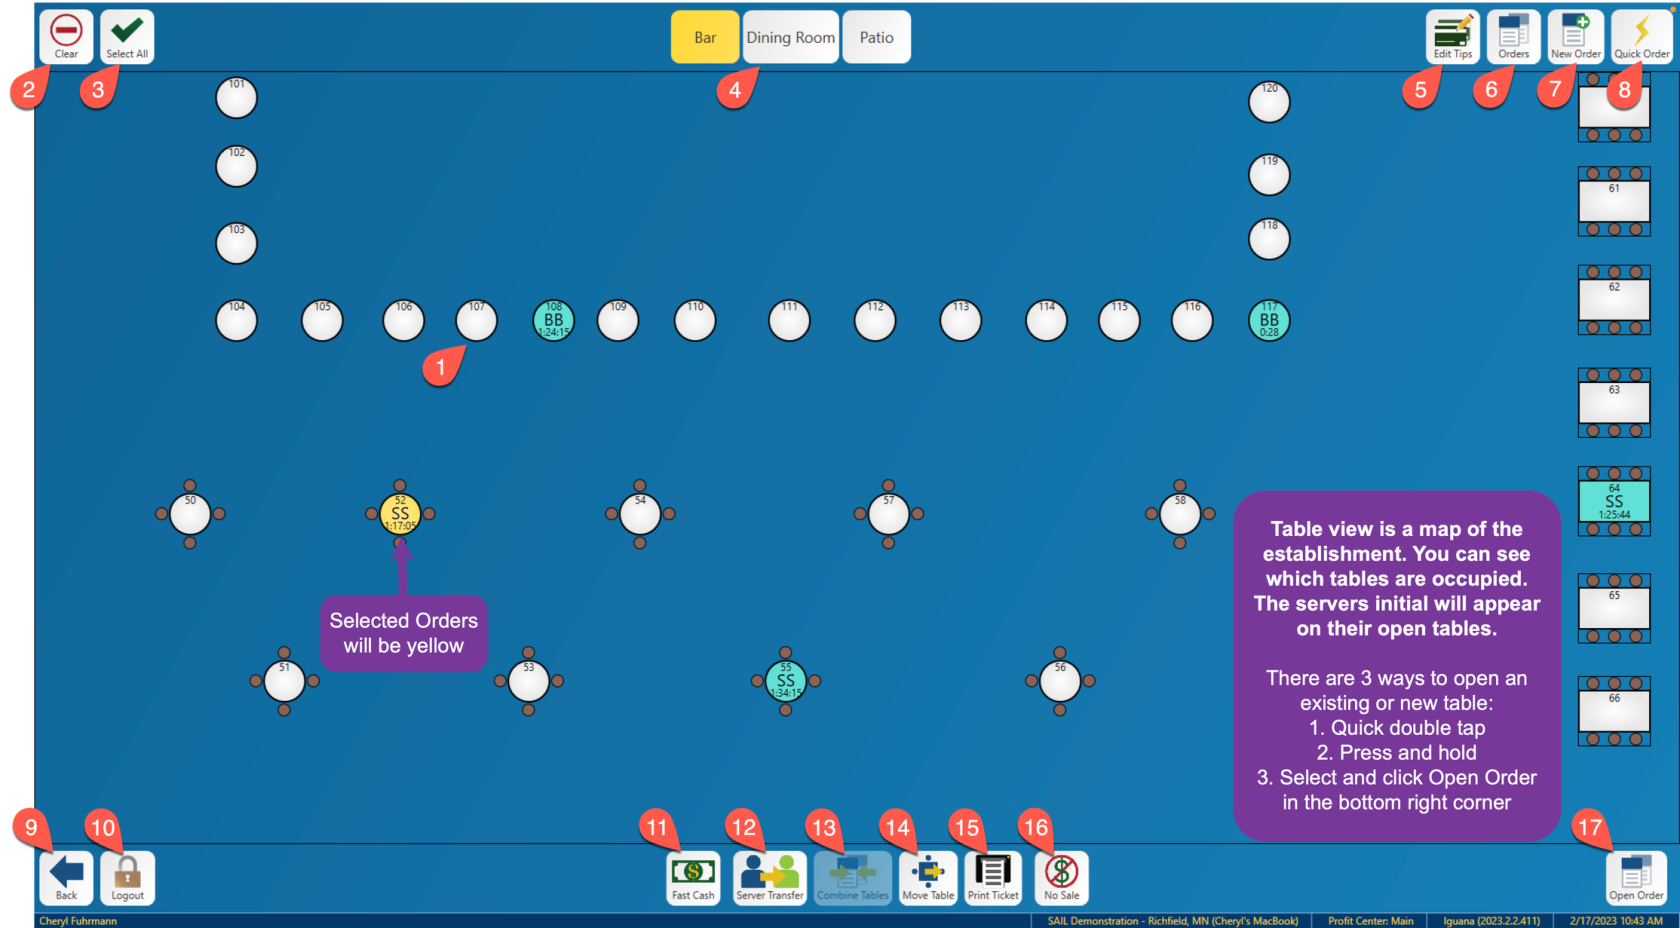
Table View Screen
This page will detail the Table View screen.
1. The tables - Each table or bar stool on the screen is a button. When selected you can open new tables or edit existing tables. When opening a new table, it will automatically enter in the table number and guest count based on the table you selected.
2. Clear - Clear will unselect everything selected on the table view screen.
3. Select All - This will select all the open tables on the table view screen.
4. The top center of the screen - Each button in this location has a dining area. Each button is its own room or section of the establishment. The room/section you are on will be highlighted in yellow.
5. Edit Tips - This will bring you to the Edit Tips screen.
6. Orders - This will bring you to the orders view screen.
7. New Order - This will open a new table and prompt enter a table number and guest count.
8. Quick Order - This will open a new order with one guest and a table number of zero.
9. Back - This will return you to the launch screen.
10. Log Out - This will log you out of the system and return to the login screen.
11. Fast Cash - This will cash out the current selected table(s).
12. Server Transfer - This will open the server list and reassign the currently selected table or tables to the server you select. Depending on your access permissions it may prompt you that the transfer is pending at which point the server it was transferred to would need to accept the transfer.
13. Combine Tables - This will combine all the tables you have selected into one table.
14. Move Table - This will move a table you have selected to an empty table that you have selected. If you only have the currently assigned table selected it will prompt you to enter a new table number to move the table.
15. Print Ticket - This will print the customer receipt for any tables you have selected.
16. No Sale - This will open the cash drawer.
17. Open Order - This will open the selected table.


No Comments