
Release 2023.1.2 "Flamingo"
Notes: This release mainly focuses on improving existing functions
New Feature:
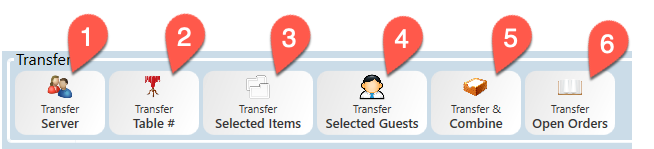
Terminal: Transfer buttons have been added to the Tools screen.
-
You can still transfer things the way you used to, we just wanted to also have all of the transfer options in a single spot so they’re easy to find; plus, we added the ability to “Transfer Selected Items”

-
Transfer Server - This will transfer the current order to the new server/bartender that you select.
-
The same 1 or 2 step transfer rules will apply.
-
-
Transfer Table # - This will change the table number to the new number you enter.
-
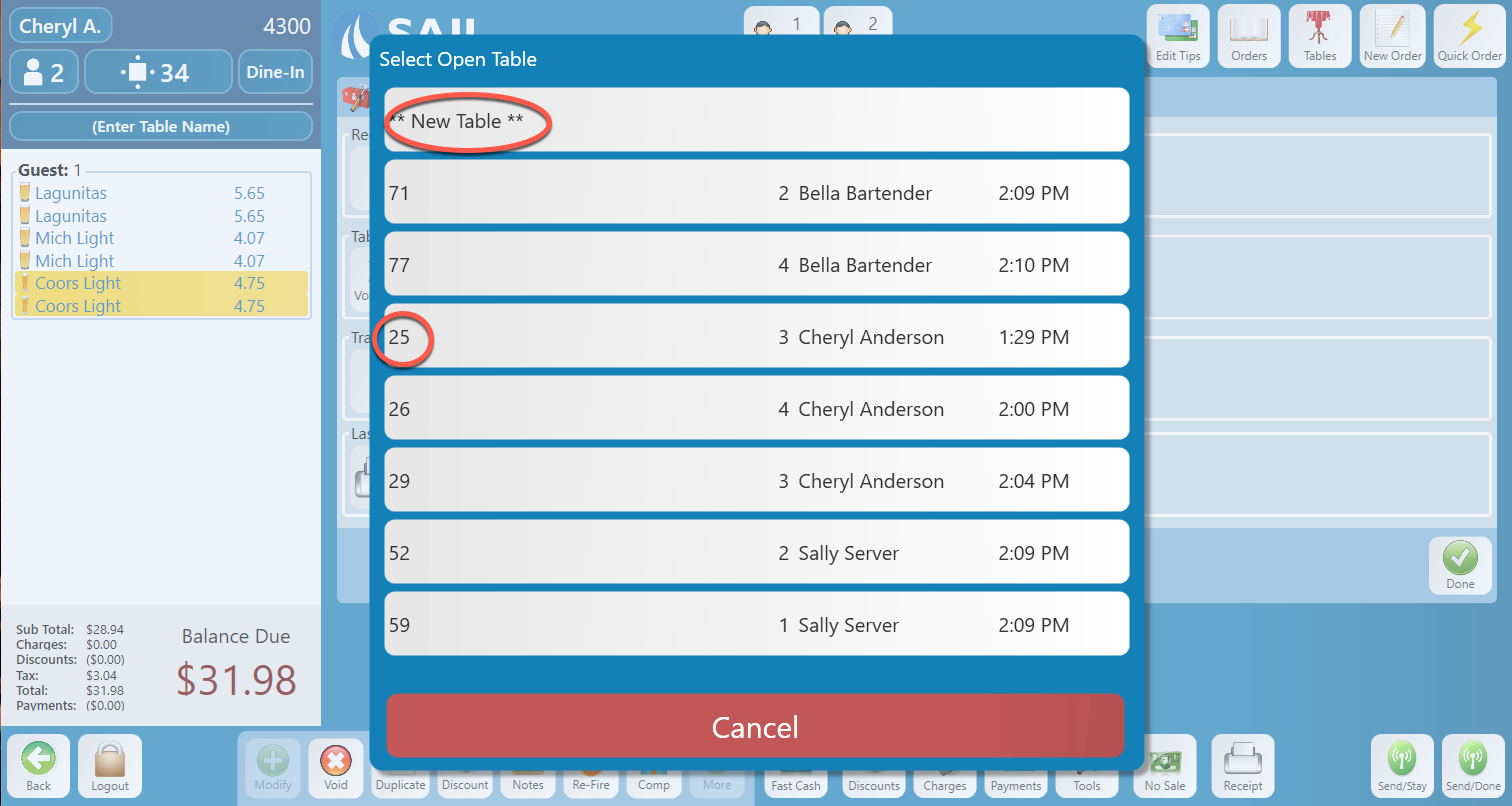
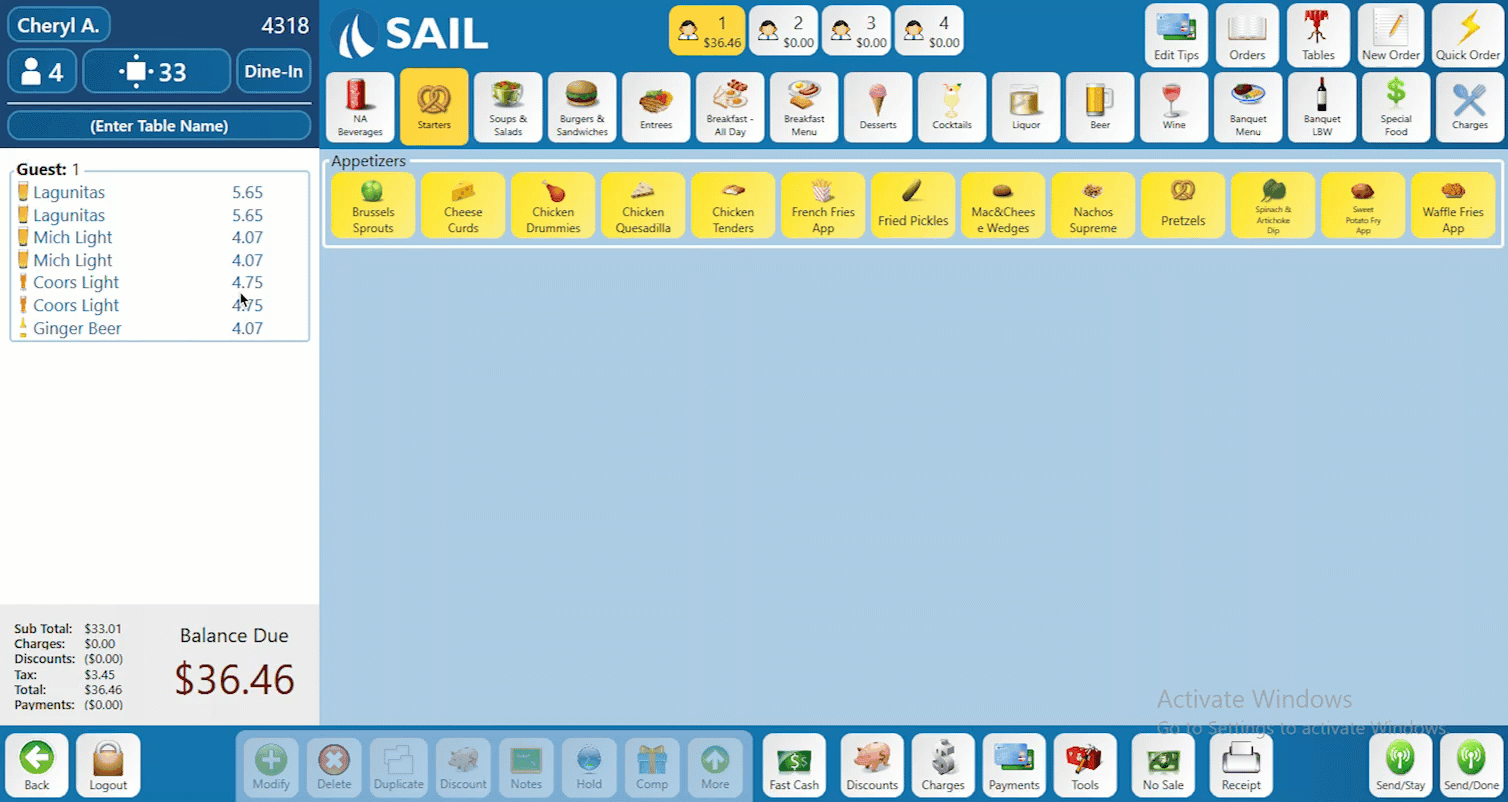
 Transfer Selected Items - This will transfer the item or items that you have selected (in yellow) to a new or existing table.
-
If the items are split by guests, they will stay split by guests when transferred.
-
In the example below, the two Coors Lights that are selected, can be…
-
Transferred to a new table. (You will then be asked to enter in a new table number.)
-
Transferred to an existing table. (The items will be added as a new guest.)
-
Transferred to another teammates existing table. (If you have the rights to “View all orders”)
-
-
-
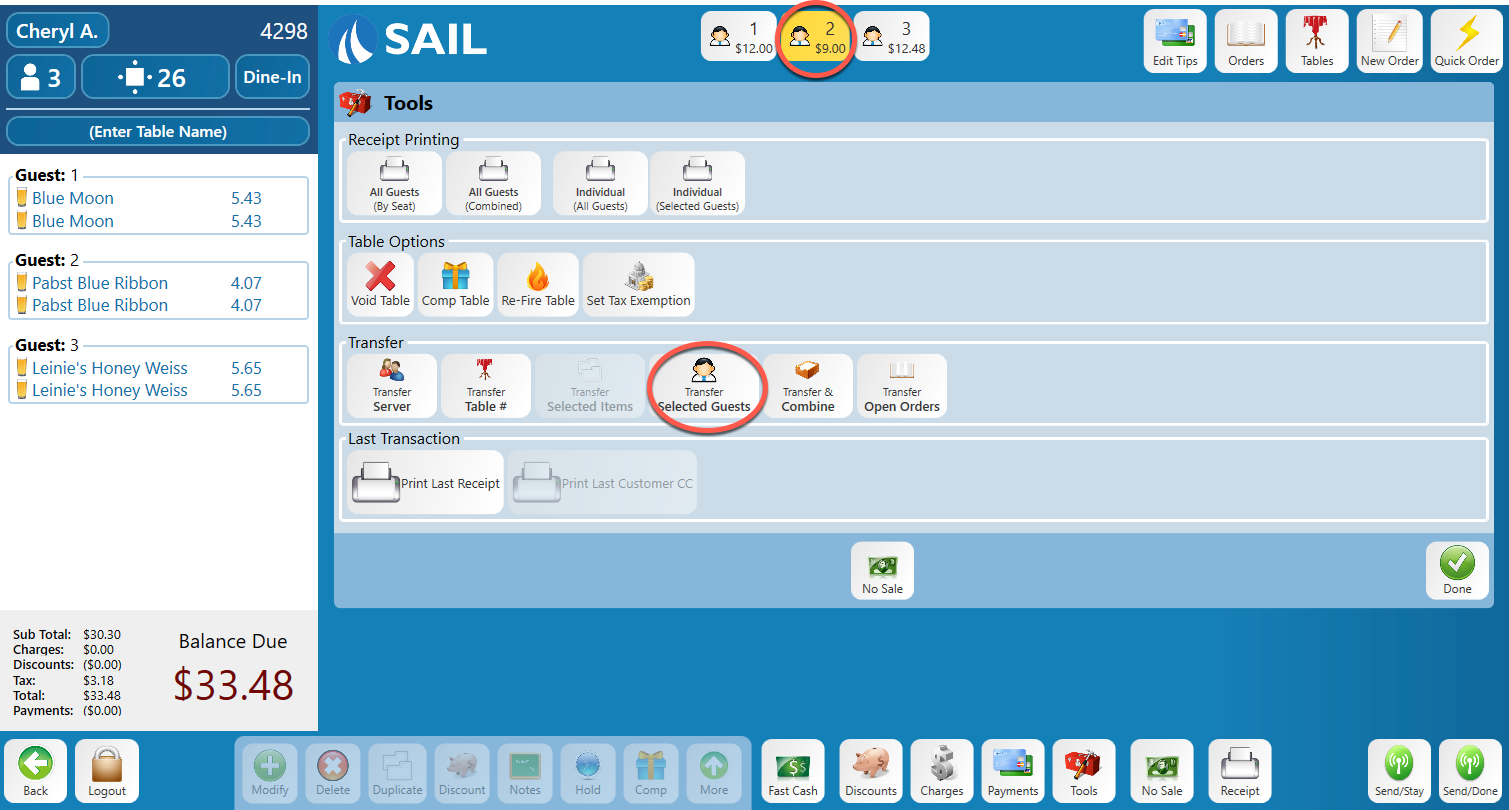
Transfer Selected Guest - This will allow you to transfer an entire guest(s) to a new or existing table.
-
When you go into the tools screen, Transfer Selected Guest will not be lit up until you select at least one of the guests at the top.
-
In the example below, guest 2 was selected and can now be transferred to a new or existing table just like in the selected items screen above.
-
-
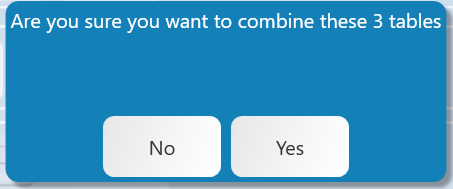
Transfer & Combine - This will allow you to combine the current table with an existing table
-
Once selected a list of tables will come up and you can select one or more tables to combine together.
-
All selected tables will combine on the current table you are on.
-
Once you select the table(s) you will get a confirmation page
-
-
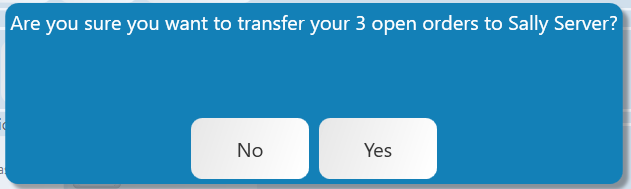
Transfer Open orders - This will transfer ALL of your OPEN orders to another teammate.
-
This will not transfer any of your closed orders.
-
You will get the below confirmation page before the transfer is completed:

-


Improvements:
Terminal: Reworked buttons on the Edit Tips screen to follow the new look on the Orders screen
-
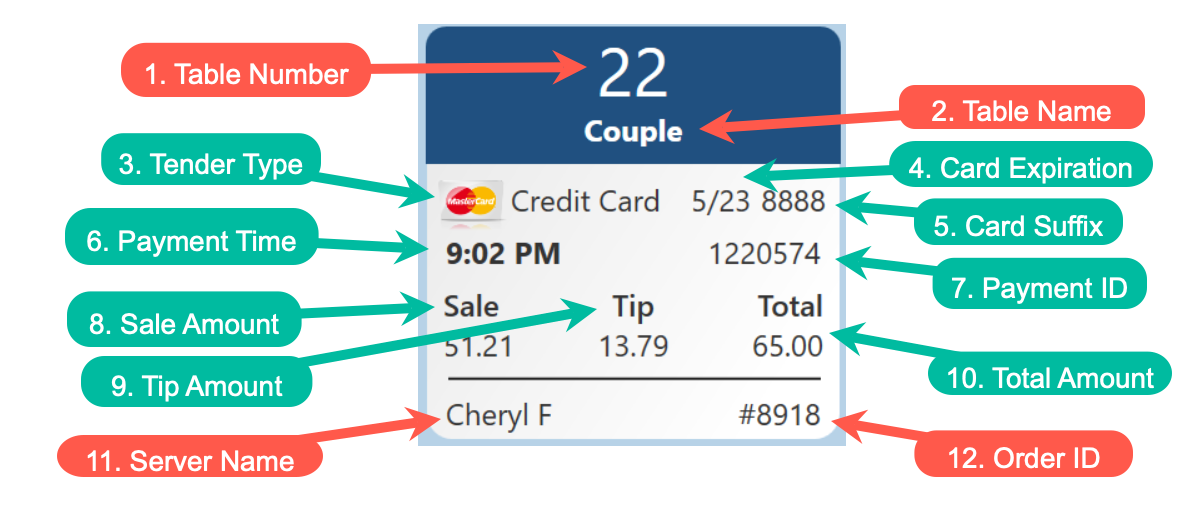
The items in red are the same as the Orders View screen.
-
The items in teal are unique to the Edit Tips screen.

-
Table Number - This is the table number.
-
Table Name - This will appear if you put a Name on your order.
-
Tender Types - This will list the tender type the payment was made with.
-
Examples: Credit, Cash, Gift cards, 3rd party (UberEats, Doordash, Ect), or Customer Accounts
-
-
Card Expiration - This is the credit card's expiration date.
-
If the tender type is not a credit card, this area will remain blank.
-
-
Card Suffix - This is the last 4 digits of the credit card or gift card.
-
If the tender type is not credit or gift card, this area will be blank.
-
-
Payment Time - This is the time the payment was completed.
-
Payment ID - This is the payment ID that will also be at the bottom of the credit card receipt.
-
Sales Amount - This is the amount the sale was ran for.
-
Tip Amount - This is the tip amount put in by the server/bartender.
-
If no tip has been entered, this section will be blank and the payment will be in a pending state.
-
-
Total Amount - This is the total amount of the sale
-
If a tip is entered, the total will be the sale amount + the tip amount.
-
If there is no tip entered, the total will be the same as the sales amount.
-
-
Server’s Name - This is the name of the server/bartender that this order is assigned to.
-
Order ID Number - This is the last 4 digits of the Transaction ID number.
Terminal: You can now edit tips by the tip amount or the total amount
-
When you click on the order to enter the tip, you will now see a keypad with 2 options.
-
When the “Tip” is highlighted in yellow you can enter the tip amount. The total amount will reflect the correct total as the tip is entered.
-
When the “Total” is highlighted in yellow you can enter the total amount. The tip amount will update based on the total amount.
-
If you have a total amount that is less than the sale amount, the tip button will say “Invalid”
-
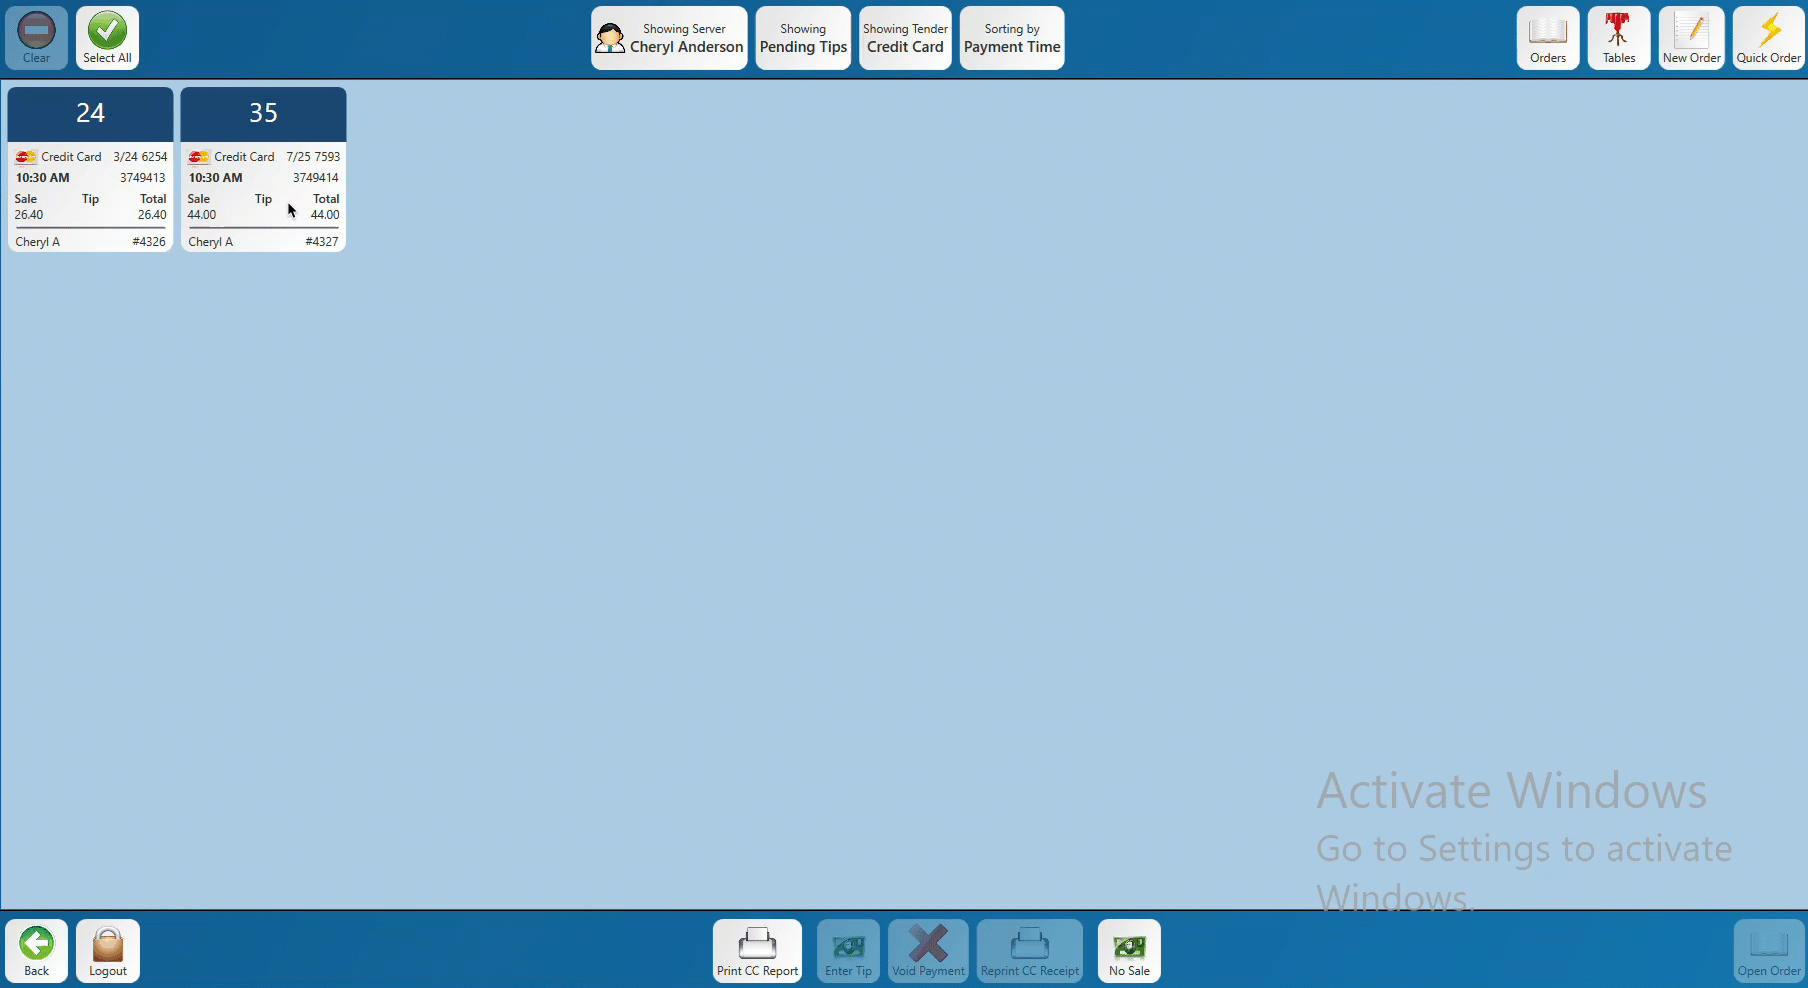
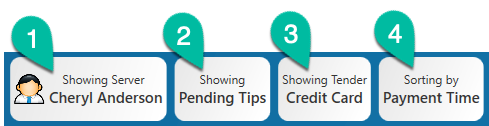
Terminal: In the Edit Tips screen you can now sort by more options!
-
Showing Server - This will show you the current user who is signed into the terminal.
-
If you have access level “View All Payments” you will be able to select that button and choose the server/bartenders payments.
-
-
Showing - This new button will allow you to toggle between “Pending Tips” and “All” payments
-
Pending Tips - still need a tip entered.
-
All - Shows both pending and entered tips.
-
-
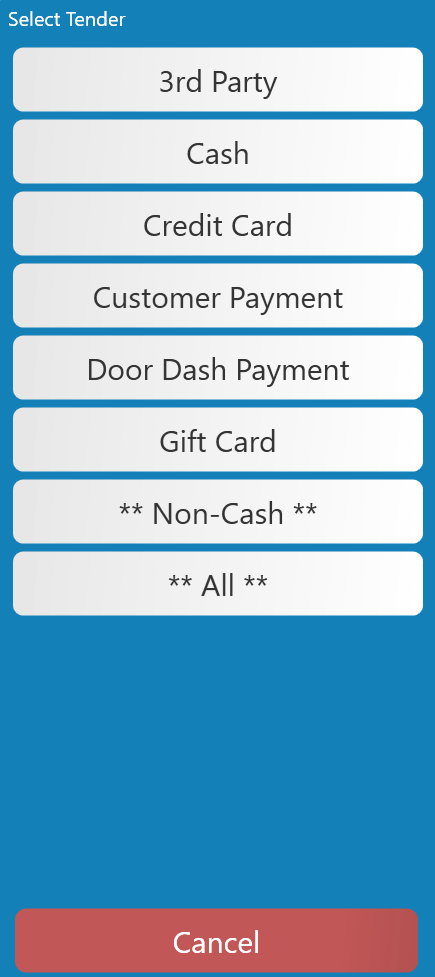
Showing Tender - This will allow you to easily select which tender type you are viewing. When you select this button a list of all your tender types will appear.
-
**Non-Cash** will show you every tender type except for cash. This allows you to easily see all of the payments that you can enter tips on.
-
**All** Will show you all payments with cash included.

-
-
Sorting by - Now that we have added this new information to the button, we also have the ability to sort the orders by any of those fields!
-
Whichever option you choose to sort the orders by, that information will be bolded so that it's easier to find.
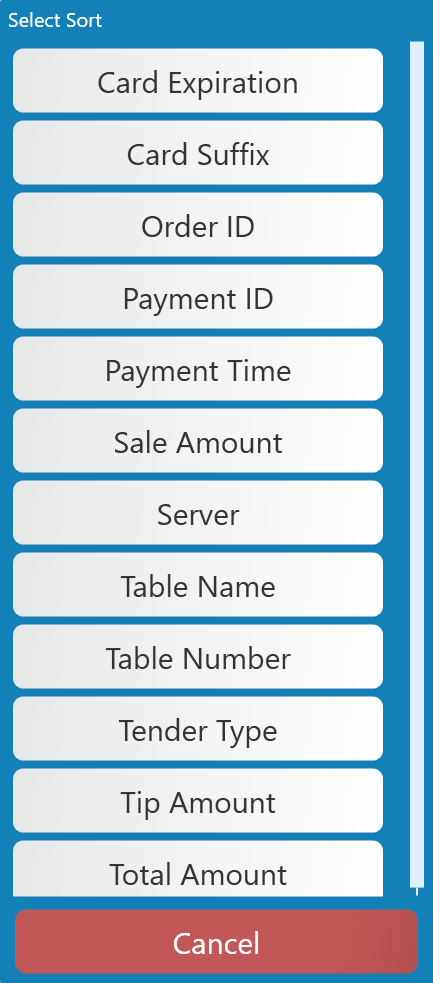
-

 Here is an example of showing “All” pending and entered tips, with “All Tender” types. Which is sorted by the bolded “Payment Time.”
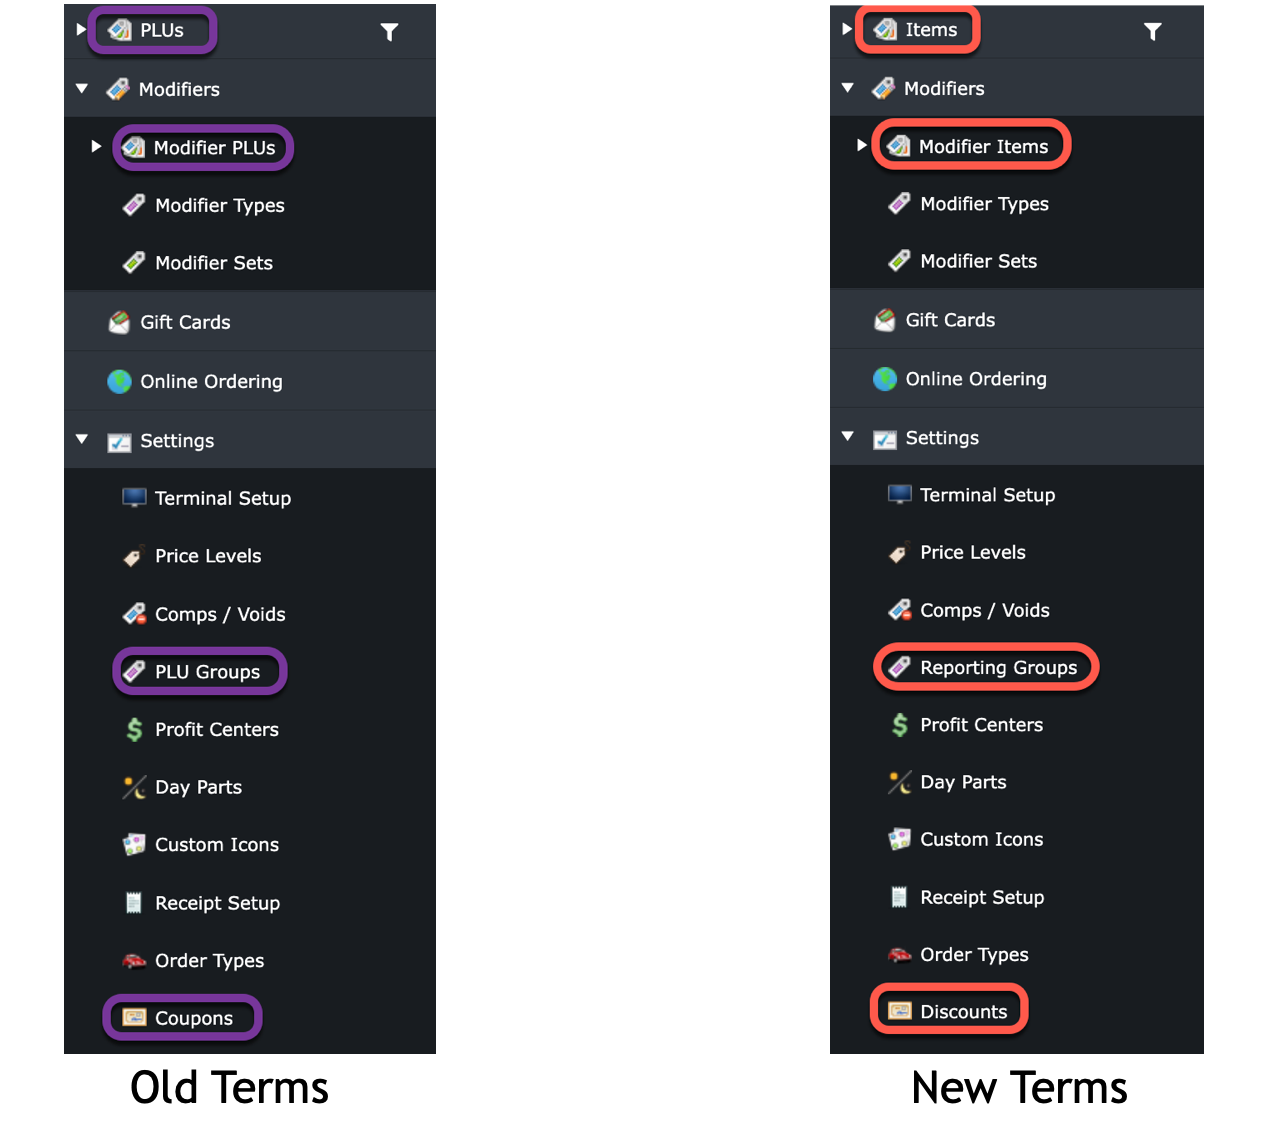
General: Renaming things…
-
We have renamed a couple key terms system wide.
-
PLUs are now called “Items”
-
PLU Groups are now called “Reporting Groups”
-
Coupons are now called “Discounts”

-
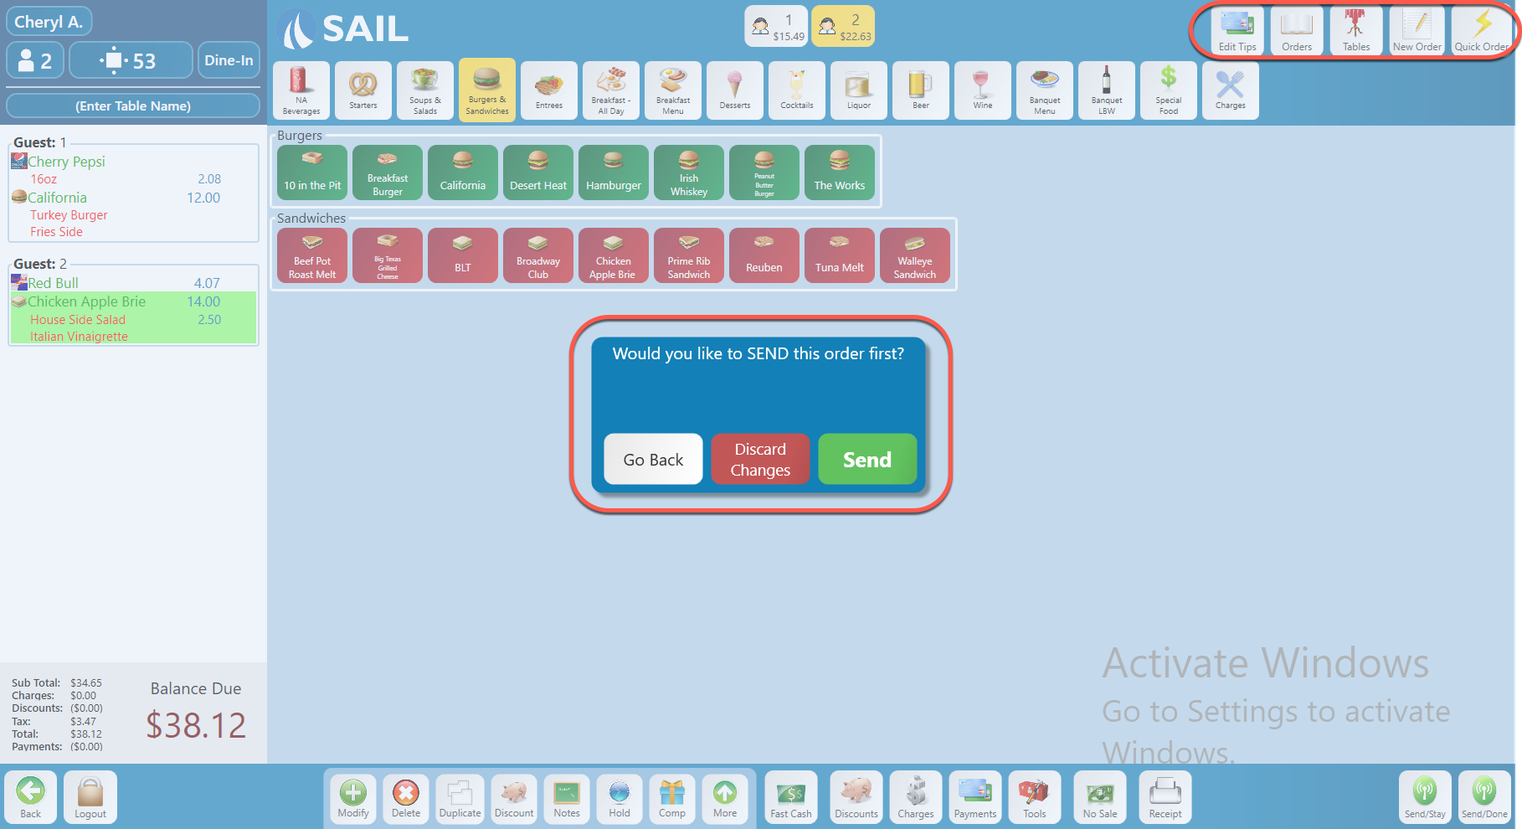
Terminal: Switched the prompt to ask if you want to send before moving on
-
Previously if you rang in an order and then tried to use one of the navigation buttons on the top right, it would let you know that you hadn’t sent the order. So you’d have to select “No,” then go back and send the order, and then finally you could use one of the navigation buttons to go to a different screen.
-
Now, if you ring in an order and select one of the navigation buttons, it will ask you if you want to send it first.
-
“Send” will send the order and bring you to the new page.
-
“Discard Changes” will cancel the order and bring you to the new page.
-
“Go Back” will bring you back to the order in case you needed to make any changes before you send.
-
-
This will make navigating to other screens or starting new orders faster! Hooray for less clicks!

Terminal: Selected items are de-selected after you have performed a function
-
Previously if you performed one of the toolbar functions, the selected items would stay selected.
-
We have changed it now so that if you perform a toolbar function or move items to another guest, they will unselect when complete.
-
Note: newly ordered green items do not unselect after an action.
 Bug Fixes:
Backoffice: Printing a receipt in Backoffice with Go Fish was giving an error message and wouldn’t let you print. That is now fixed!
No Comments