
Release 2023.1.3 "Gazelle"
Reminder, starting Monday January 30th, your handheld devices will need to be on the current app store version (2023.1.3) in order to work.
Notes: This release is all about Access levels!
Improvements:
There are two ways to give access to an employee
-
Assigning an access group to an employee (old school way)
-
Using this method there are 2 downsides
-
The employee does not need to be clocked in in order to have access to the system, they have those access rights at all times.
-
They always have the highest level of access that's given. As an example, if you have an employee who is a bartender and is a manage every once in a while, if you give this bartender manager rights they will have manager rights ALL THE TIME.
-
-
This method is good for Owners because they can just have Full Access all the time and do not need to be clocked in

-
-
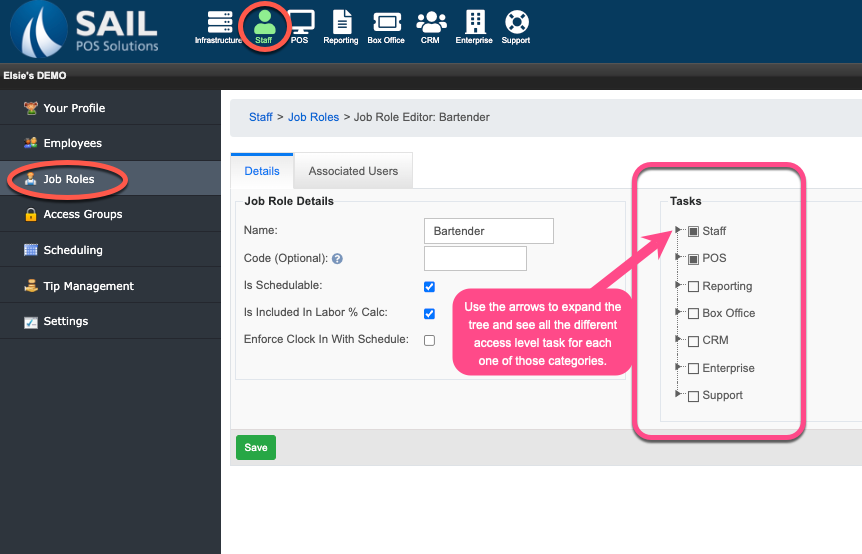
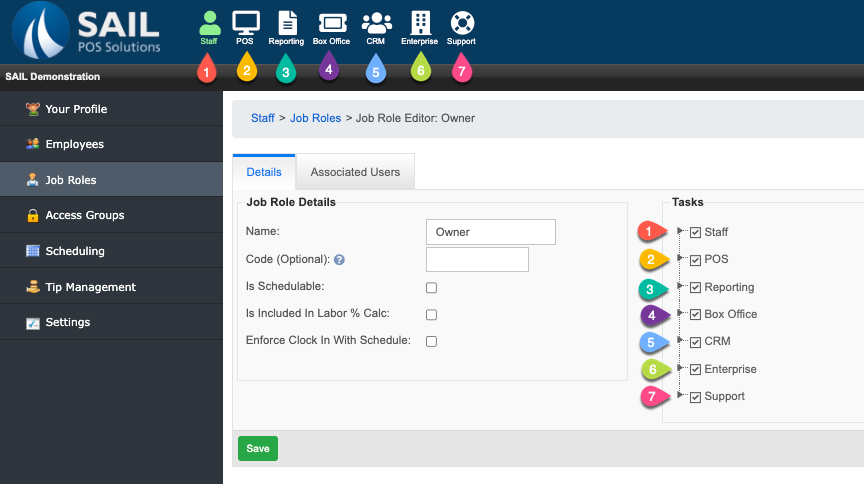
Assigning access levels to the job roles (New improved way!)
-
 Now when you go into Job Roles you will see a “Tasks” tree.
 -
You can expand all of those categories and attach the Access level tasks to the Job role.
-
That means when a person is clocked in as a bartender, they will only have that access.
-
-
The great thing about using this method is when an employee is not clocked in, they will not have access to do anything in the system.
-
Another plus to this is because the employee needs to be clocked in to have access to the system, less people will “forget to clock in”
-
-
Also, if you have an employee with multiple job roles, they will only have those specific access levels when they are clocked in as that specific job role.
-


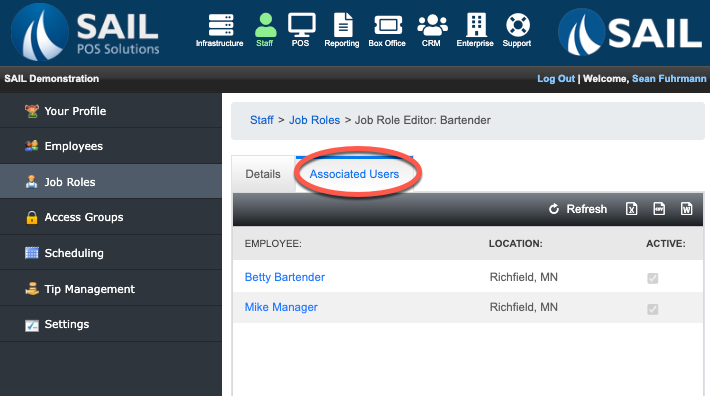
The 2nd tab will allow you to see the “Associated Users” that have that job role assigned to them.
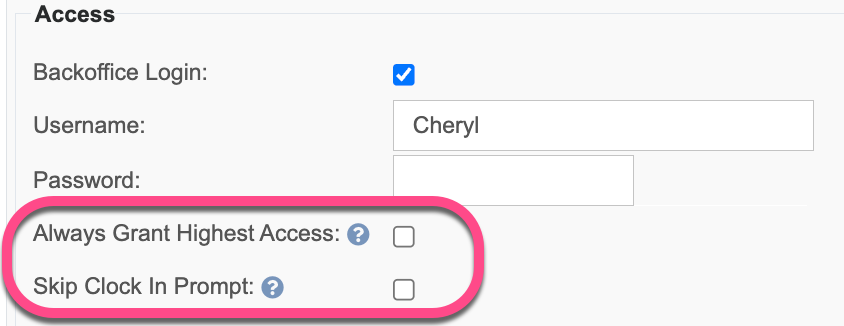
We have added 3 new checkboxes at the employee level to give more flexibility when using Job Roles
-
Always Grant Highest access: When checked, the user will be granted access of all the job roles assigned, regardless of which role they are clocked in as
-
This is used when you have an employee who bartends, cooks, serves, and manages and you want them to have manager access rights all the time.
-
-
Skip clock in prompt: When checked, the system will not prompt them to clock in upon login
-
This would be used for a “dummy bartender” role who does not need to clock in
-
Or used for Owners who do not want to clock in to use the system

-
-
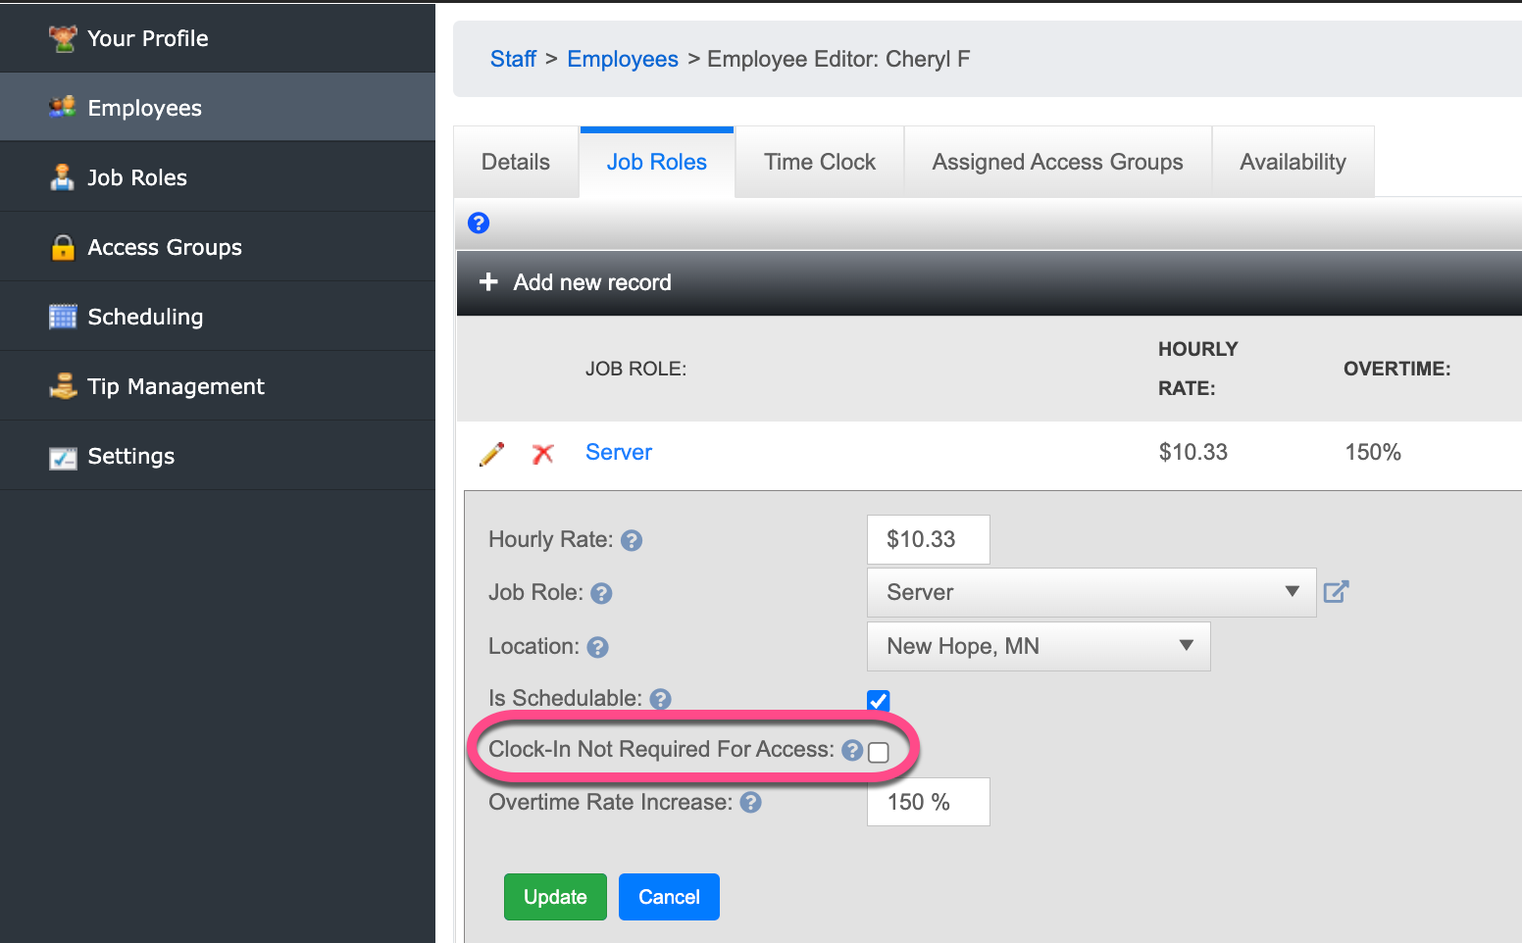
Clock-in not required for access: When checked, the user will be granted access within their assigned job roles, even if they are not clocked in.
-
This is used if you want an employee to have access to the system even when they are not on the clock. For example, a manager who can still access the system when they aren’t working.

-
Note: User’s are allowed access to Backoffice all the time (based on their job role rights), regardless if they are clocked in or not.
Reorganization and Descriptions!
-
To make the list of tasks easier to navigate, we have rearranged them to put them in the same order that you see them in back office or on the terminal.
 The main categories follow the “sections” along the top

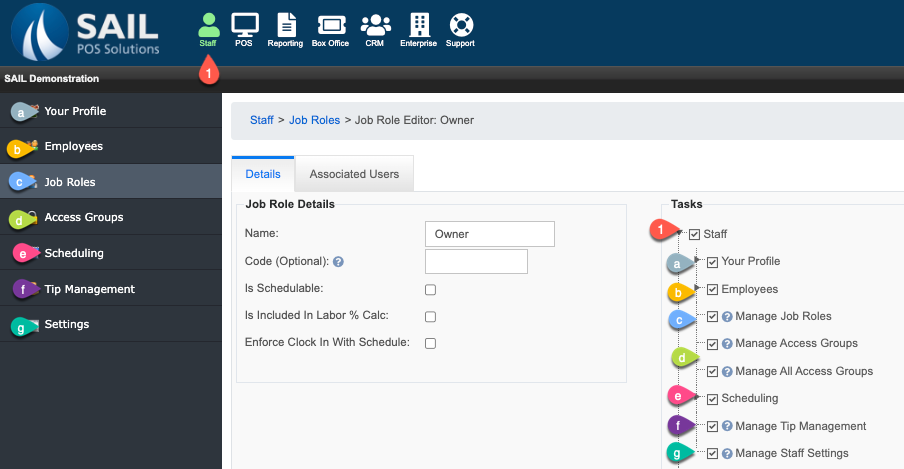 Once you open the category, the sub categories and tasks will follow the tree on the left side.
-
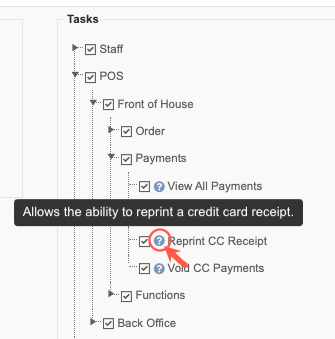
We have also added descriptions to every task. If you hover your mouse on the ? question mark, the description will show up above it.

New Access Level Tasks
-
We have added new access level tasks to give additional control in your ability to grant access to areas of the system. Some of these tasks are things that existed before, but were combined with another task, splitting them out gives you better granularity on assigning rights.
-
Edit Own User Details: Allows users to edit their name, contact information, and Backoffice login.
-
Edit Own Access Code: Allows users to edit their own system access code.
-
Require Notes on Manual Time Clock Entries: This requires a note to be added when manually entering or editing a time clock entry.
-
Manage All Access Groups: Allows the ability to add or edit access groups at any access level.
-
Add Time-Off Requests For All Employees: Allows the ability to add a time off request for all of the employees.
-
Manage Staff Settings: Allows the ability to edit various staff related settings.
-
View All Payments: Allows the ability to view and edit teammates payments.
-
Refresh Cache: Allows the ability to refresh the cache, which will resync the system with changes made in back office.
-
Server Report - All Users: Allows the ability to run a server report for all users.
-
Submit Tip Out: Allows the ability for a user to submit a tip out to another user (for payroll reporting purposes only).
-
Server Close – Own: Allows the ability to close out sales for the day for yourself.
-
Reverse Server Close: Allows the ability to reverse a close out on a specific server.
-
Check Gift Card Balance: Allows the ability to check the balance on a gift card.
-
Manage Modifier Types: Allows the ability to add and edit modifier types.
-
Manage Modifier Sets: Allows the ability to add and edit modifier sets.
-
Manage Gift Card Types: Allows the ability to create new gift card types.
-
Import Gift Cards: Allows the ability to export the gift card list.
-
Export Gift Cards: Allows the ability to import the gift card list.
-
Manage Terminal Screens: Allows the ability to manage the screens on the terminals. Add new tabs and buttons, change colors and move locations.
-
Manage Closing Configuration: Allows you the ability to configure your closing settings and enable an auto close.
-
Manage Event Spaces: Allows the ability to add and edit event types and ticket pricing.
-
Manage Event Types: Allows the ability to add and edit the event space names and capacity.
-
Receipt Coupons: Allows the ability configure and manage coupons at the bottom of customer receipts.
-
Help Center: Gives you access to the Sail POS help center. Giving access to our knowledge base of help articles and the ability submit a support ticket.
-
Here are the steps you need to take to change from using Access Groups to assigning access via Job Roles
-
Go into each one of your Job Roles and give it the access level tasks you want that role to have.
-
Assign a job role to any users that did not have a job role before. (Note if this user does not typically clock in, check the “clock-in not required for access” on the job role. Also on their employee record you can check “Skip clock in prompt”)
-
Go into each one of your employees and remove all accesses under the “Assigned Access Groups” tab
-
Use the 3 new checkboxes for the employee that you want to grant highest access no matter their job role, not clock in, or have access when they are not clocked in.
-
Test it! Check to make sure it works on both the terminals and handhelds
If you have any questions or need help, please call support at 1-855-SAIL-POS (724-5767)
 Bug Fixes:
Terminal: When entering Tips on the terminal with the new tip vs total keypad, we had the decimal point and back button flipped. We have switched it back.
KVS: The “sort” function on the summary, should allow you to sort the summary by name or by count, it was not working and has been fixed.
No Comments