
Release: 2022.3.1
Note: Items indicated with a ** have been in the system for a few months and are not new as of this release, they just were not documented in previous release notes.
New Features:
Reporting: Add new sections to reports
A few new sections are available to add to the sales reports.
(For more information on how to add fields to reports see How to edit a report)
-
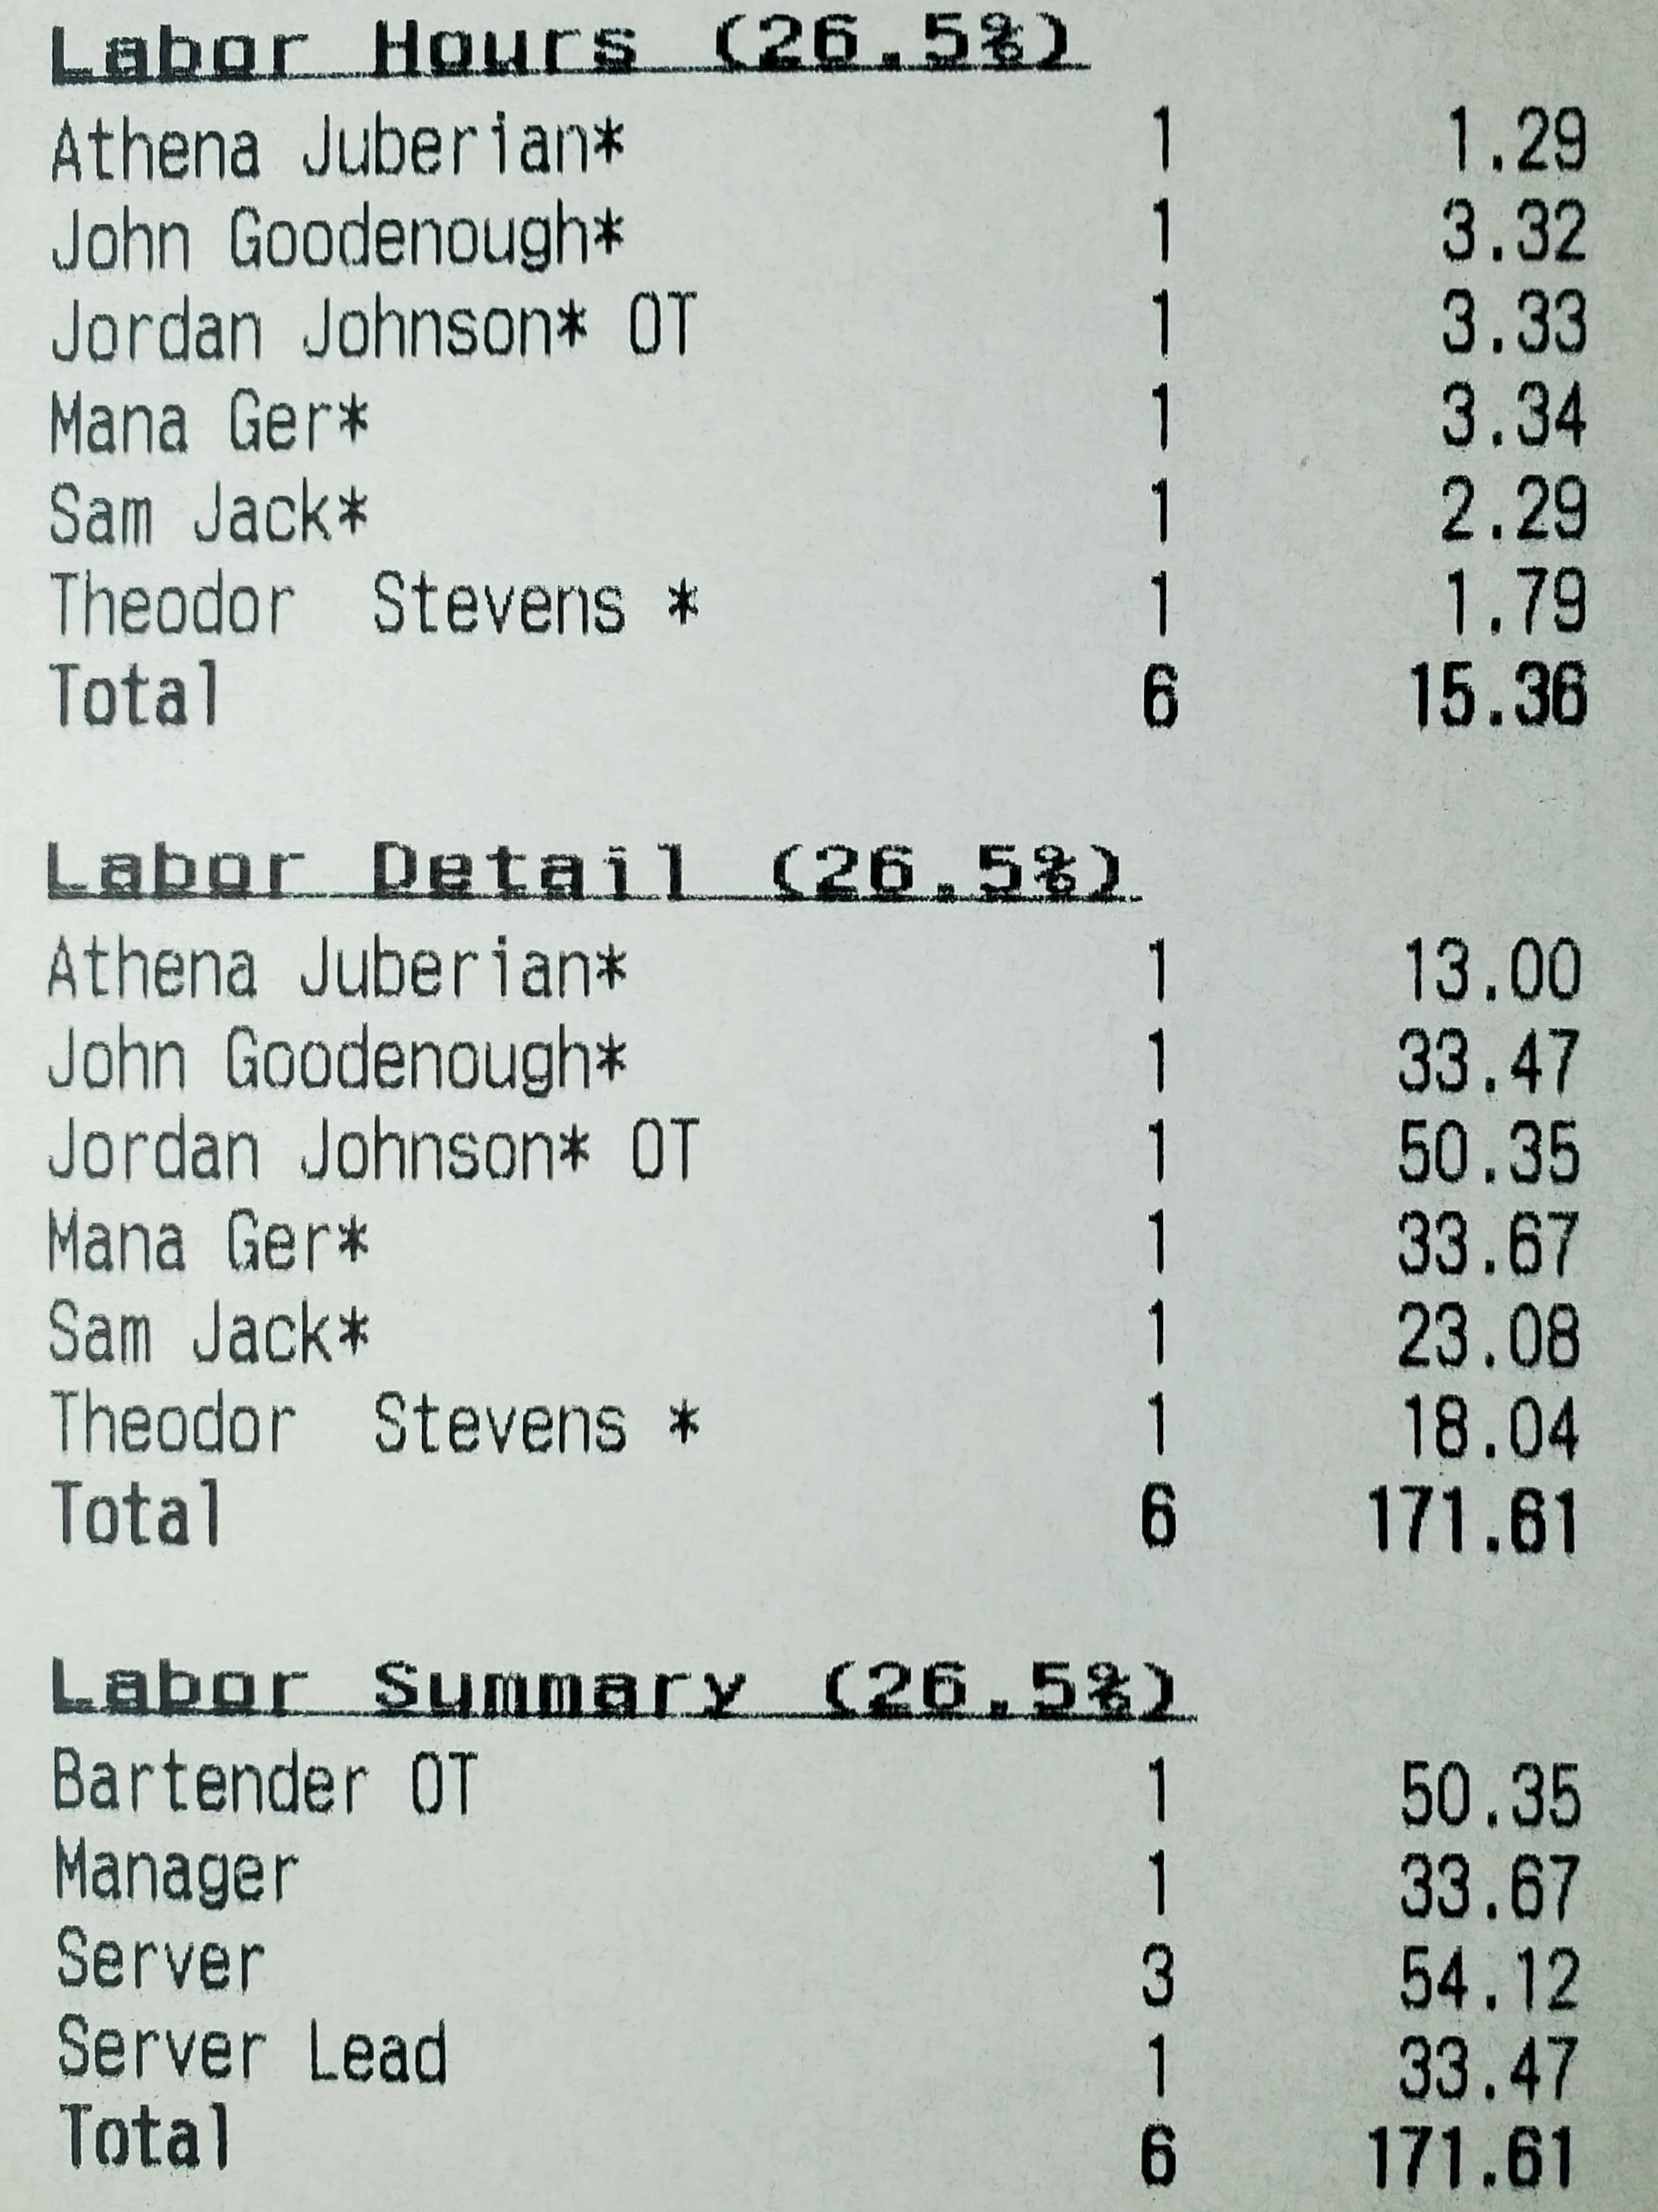
Labor Information can be added to daily\sales period reports
-
Labor Detail Hours: This will show hours worked by employees, separated by employee.
-
Labor Detail Pay: This will show the total cost of labor, separated by employee.
-
Labor Summary: This shows total cost of labor, separated by job role.
-
The asterisk(*) next to the name shows that they are currently clocked in when the report is ran.
-
The “OT” next to their name means they are on overtime
-
The labor percentage is in parenthesis next to the heading

-
-
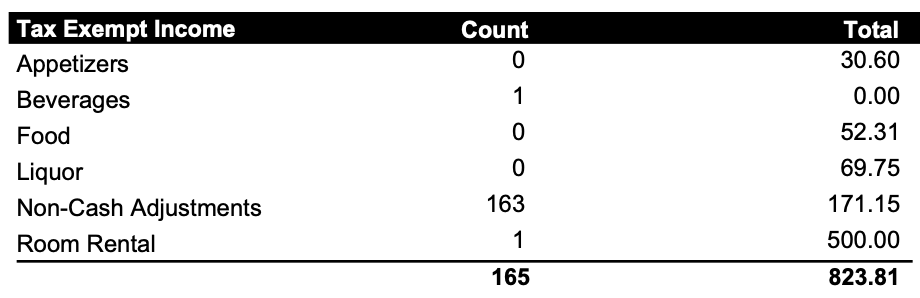
Tax Exempt Summary
-
This will show a listing of all items, charges, etc that is income that tax has not been collected for
-
-
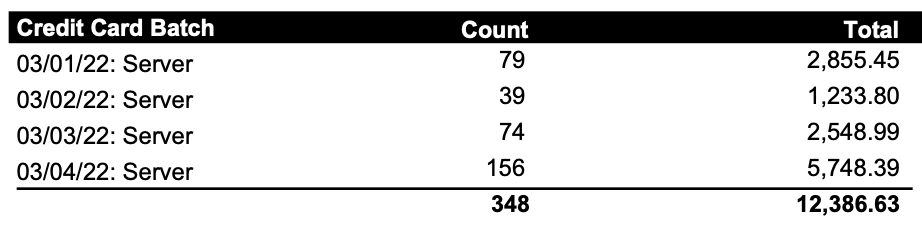
Credit Card Batch Summary
-
This will simply show your CC Batch details, typically added to your Daily report
-
If running a sales period report for multiple days it will show the date of each batch.

-

Backoffice: A few items have moved to the “Reporting” section
-
-
“History” and “Go Fish” which used to be under the POS section have now moved to the Reporting section
-
Note “History“ has been renamed to “Sales History” to not confuse it with the new “Payout History“
-
General: New Time Clock Features:
-
You can now schedule an “Auto Clock Out”
-
This feature will have the system automatically clock out any employee still on the clock at a specified time.
-
Anytime a user is “auto clocked out” an asterisk(*) will appear next to their clock out time on the Payroll Report.
(For more information on how to set up an Auto Clock Out see How to setup auto clock out)
-
-
Another option is to auto clock-out employees when the daily close happens.
-
This setting will automatically clock out any employees that have not been clocked out when the daily close happens. See the POS → Settings → Closing section in back office for this setting.
-
This is the preferred method to auto-clock out employees if you are already using an Auto-Close
-
-
Time clock can be edited from terminal
-
There is now a way to edit a time clock from a terminal for the current day
-
You will be able to edit clock in, clock outs, job role, and clock in/out an employee
(For more detailed instructions on how to edit time clock see How to edit time clock)
-
-
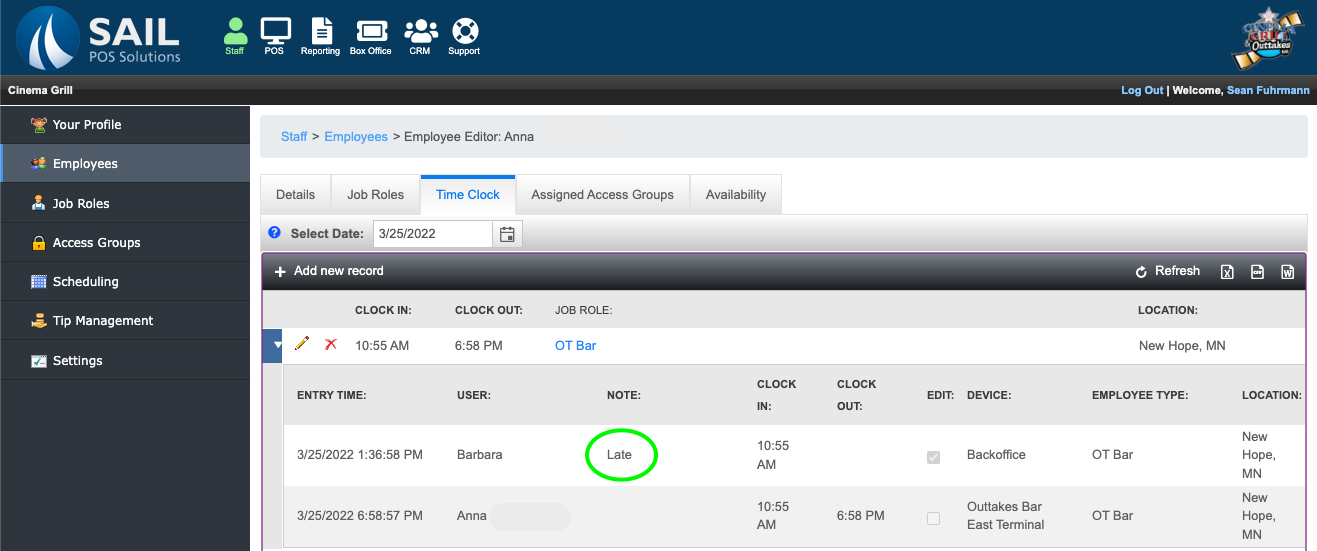
Manual Time Clock History Audit Notes
-
When manually adjusting time clock records, that audit history now captures a note along with the edit.
-
By default this is optional, you can make it mandatory in Back Office → Staff → Settings and update the “Require Notes On Manual Time Clock Entry” checkbox

-
General: Auto Close **
-
You can now configure the system to automatically run the daily close at a specified time.
(For more details on how to set it up, see Auto Close)
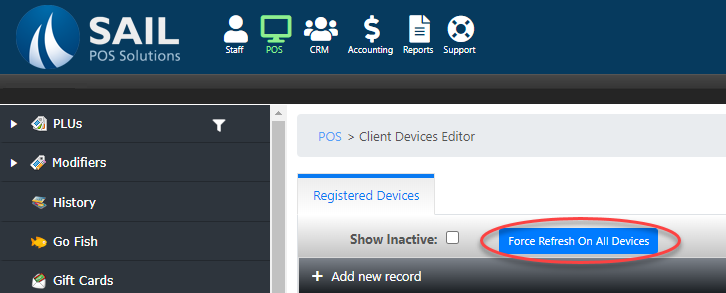
General: Refresh Cache On All Devices
-
You can now force a “Refresh Cache” to all terminals and pods on next login
-
This will let you update all the terminals without having to go to each one. It will automatically update the next time it is logged into.
-
The terminals will not refresh while a server or bartender is logged into it, so you don't have to worry about staff getting kicked out of a terminal in the middle of a transaction. However, staff will need to log out of a terminal before it will automatically update before the next log in.
To find it:
-
If you have multiple locations, there will be a second buttons to allow you to do the refresh per store, or all stores
-


New Payouts Button:
-
You can now create a button to record payouts in the system.
-
When using this button it will prompt you to put in the amount, type in a name/notes for the payout, and upon paying it out, it will print a receipt.
-
The payouts will be calculated into the amount due on server and daily reports, as well as you can add a section to the reports for the payout detail.
-
Back Office also has a Payout History screen in the Reporting section to view and export payout information
(For more details see How to create a payout button)
-
New Coupon Features:
-
You are now able to coupon individual items
-
A new coupon button has been added to the modification section that can be used to coupon an individual item.
-
All the coupons that are available in your coupons section will be available here as well.

-
-
A coupon is no longer required to be linked to a tax type
-
When you create a new coupon, you can set the tax type to “Any”. When this is the case if you apply a coupon to items of multiple tax types, multiple coupon entries will be created - on for each tax type.
-

Additional Gift Card Options
-
You can create multiple gift cards types assigned to different sale PLUs
-
Have the option to capture a name when purchasing one
-
Have the gift card print the balance report when purchased
(More details on How to create a gift card button)
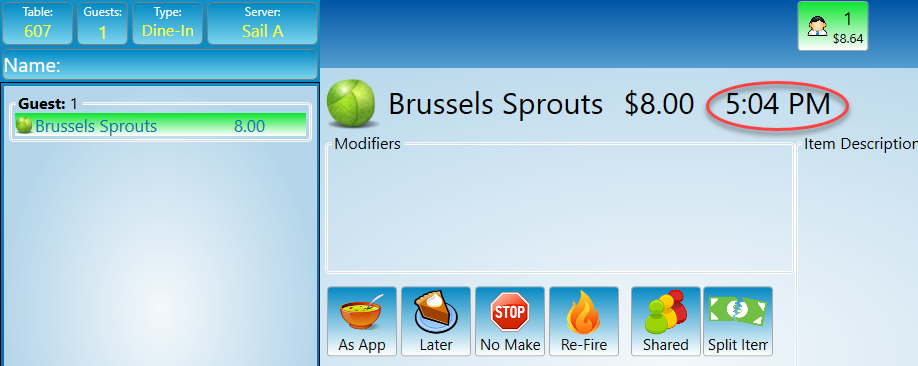
Terminal Changes:
-
Item details view in terminal now shows the time item was added to the ticket.
-
Multi-drawer support **
-
You can now have multiple cash drawers set up on one terminal. When this feature is used, you can have two bartenders assigned to and working out of different drawers on a single terminal.
-
In Tools on the terminal you will see an “Assign Drawer” button. Note: you can also use the assign drawer feature even if you only have one drawer to prevent other staff from opening their drawer
-
Note the accompanying new tasks available in Access Groups
-
\\POS\Payments\Assign Drawer To Anyone
-
\\POS\Payments\Assign Drawer To Self
-
\\POS\Tools\Open Cash Drawer (Assigned To Someone Else)
-
-
-
You can now Fast Cash selected order from the Orders or Tables View screens **
-
You can now press-and-hold in places where you would otherwise double-tap **
-
EG: Press and hold a table in Order or Tables screen instead of double-tapping, or press and hold on a payment to double-click
-
-
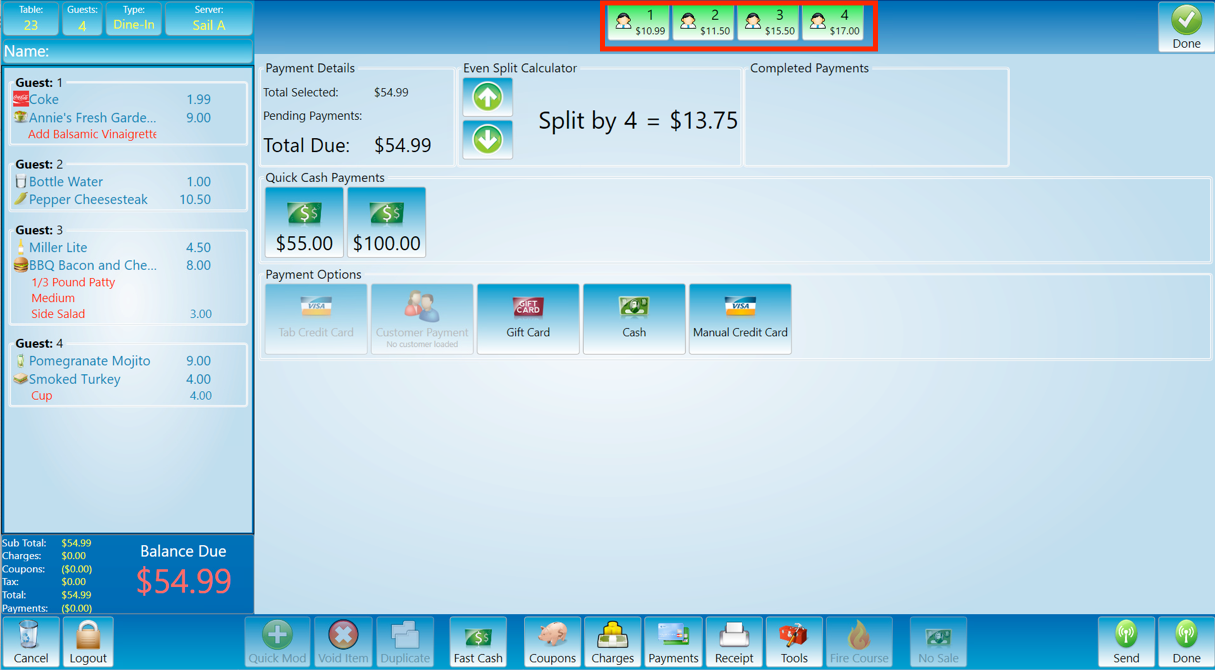
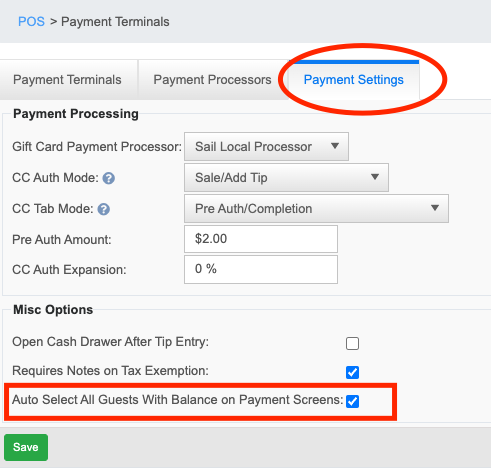
Can now toggle whether payment screen auto selects all guests **
-
Normally when you go into the payment screen, all guests are highlighted at the top
-
Now you can go into back office and turn that off
-
Back Office → POS → Settings → Devices → Payments Terminals → Payment Settings Tab
-
-
If you uncheck that box, when you go into the payment screen, only guest 1 will be selected. You will need to select the guests you’d like to payout.
-
-
You can now re-fire items to the kitchen **
-
After an item has been sent, if you need to re-fire it to the kitchen, you can click on the food item, and “Re-Fire” will now appear where the hold button was in the modifier screen.
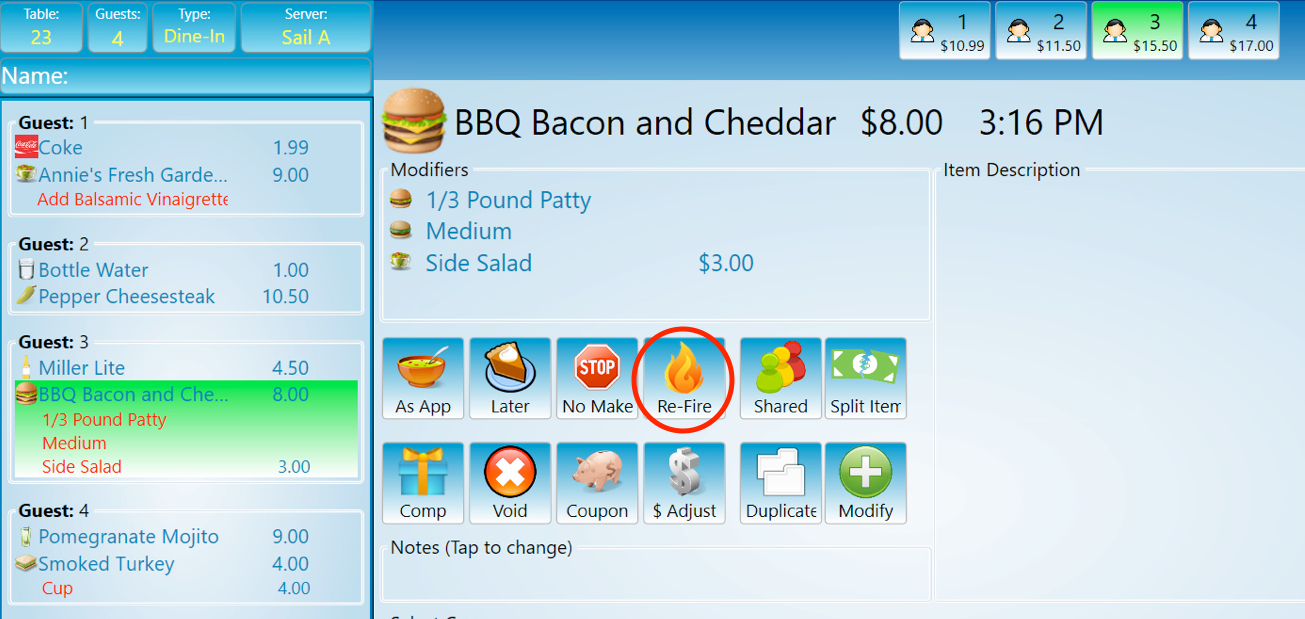
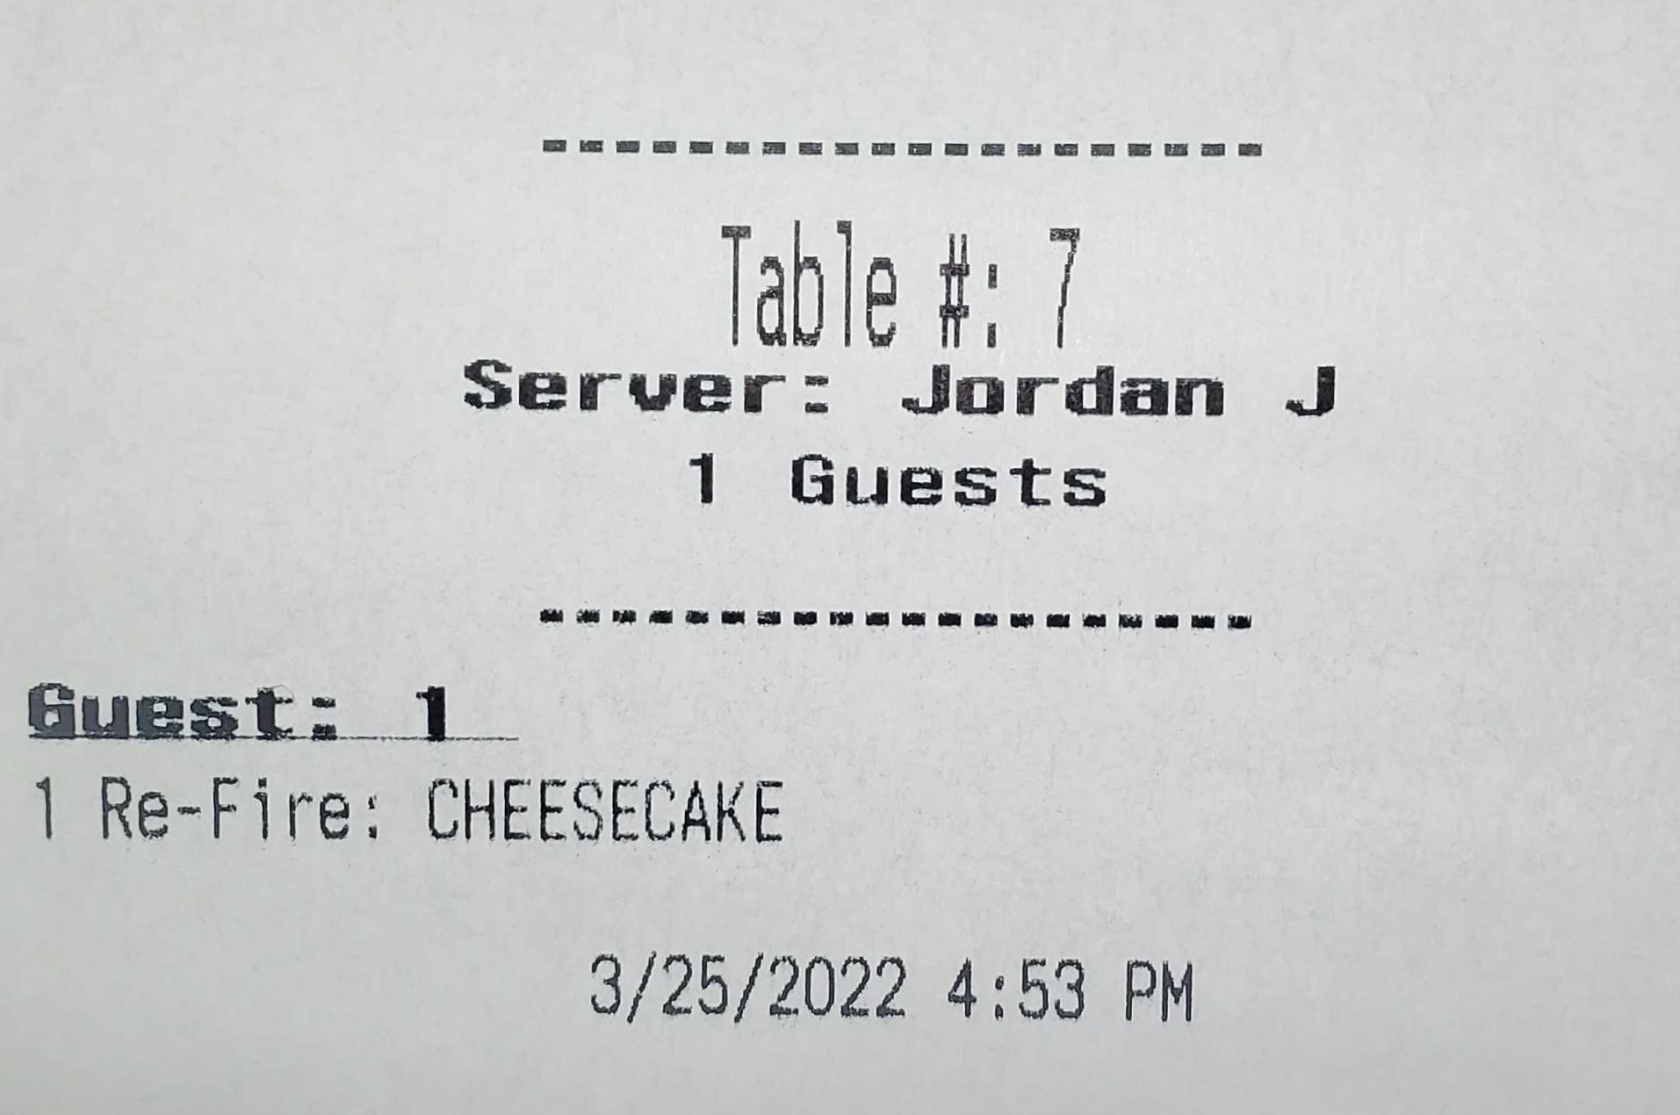
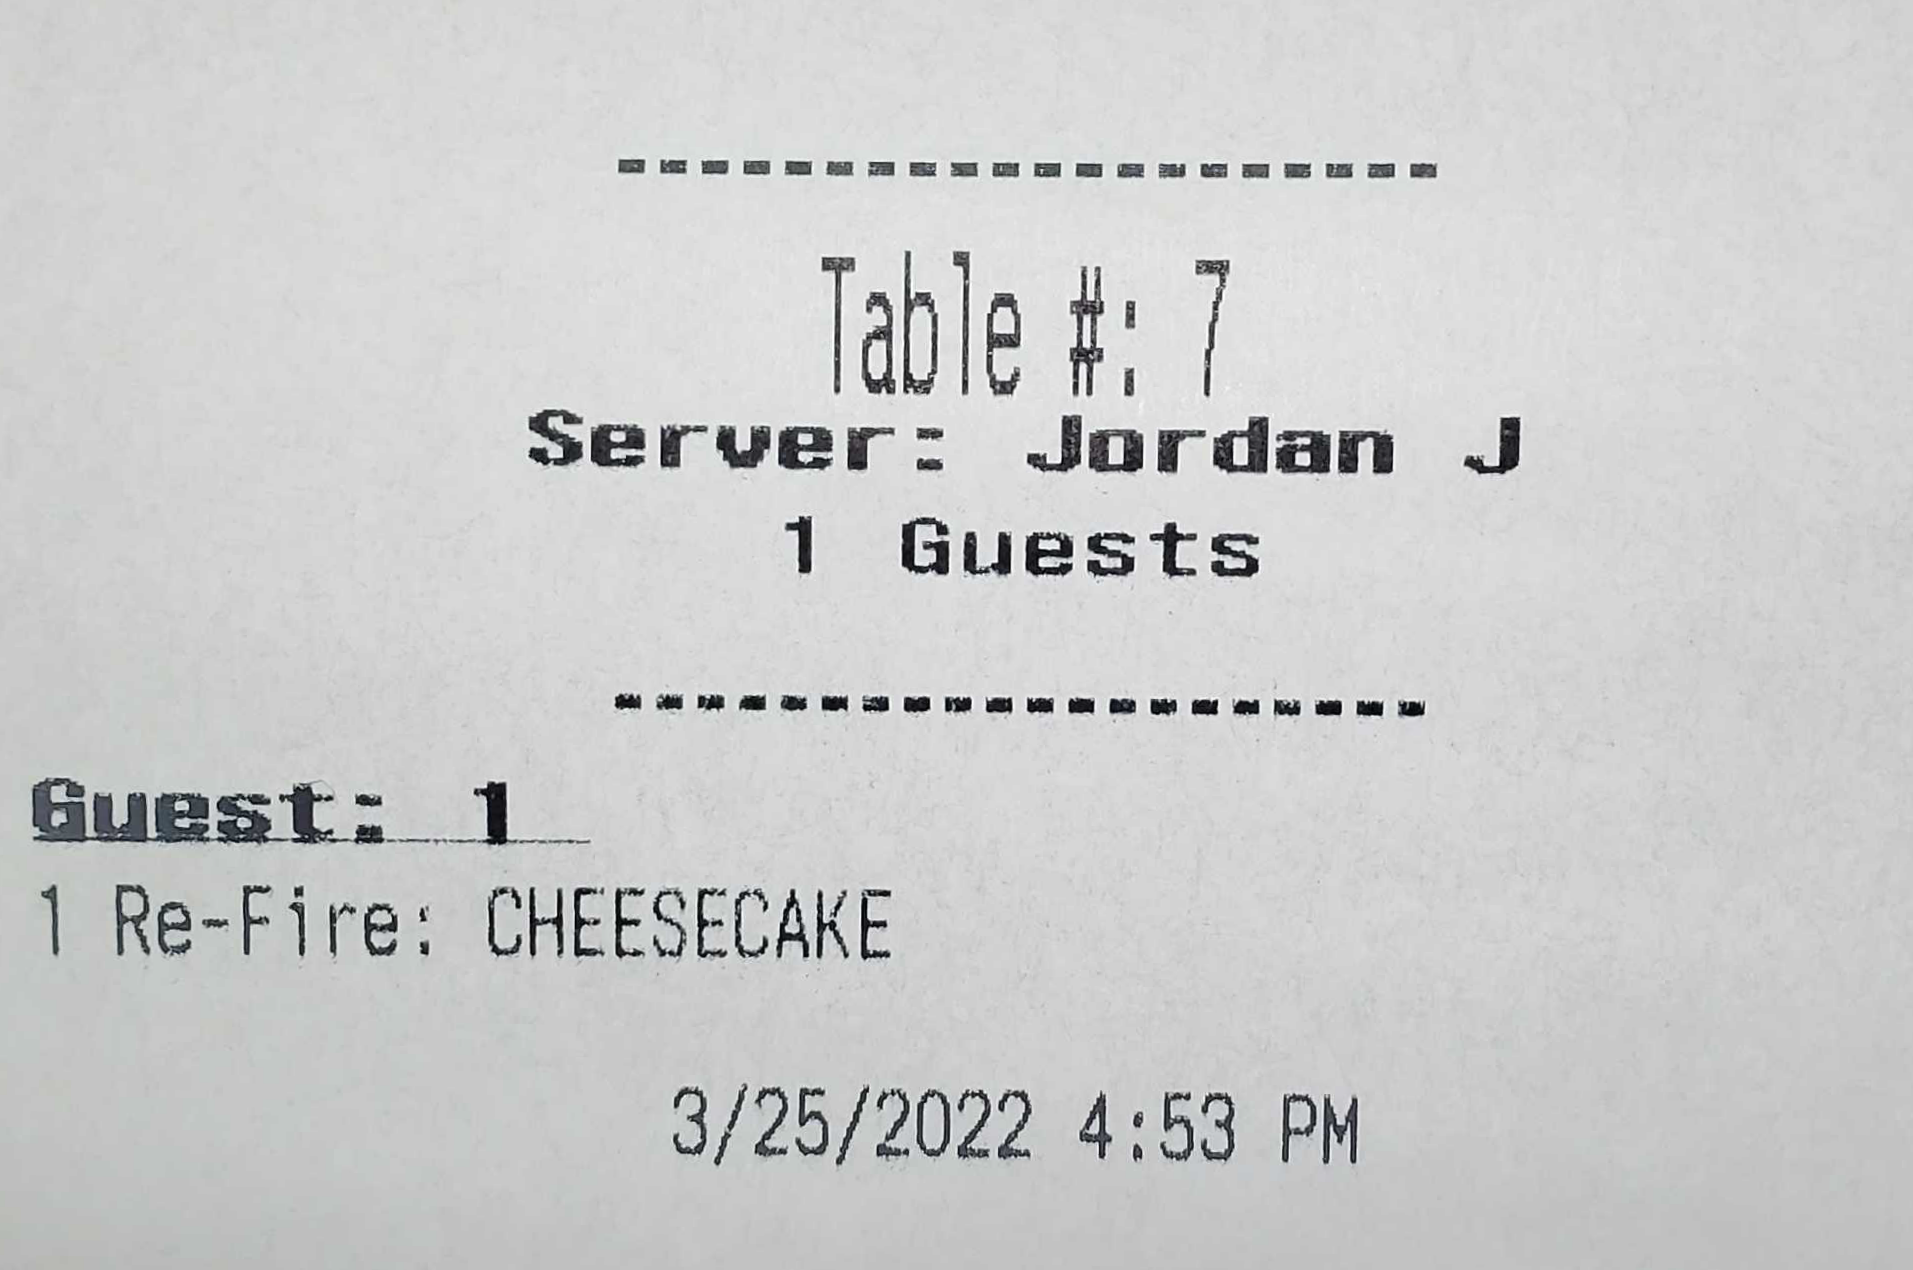
-
Here is what the ticket will look like in the kitchen
-
This feature is also available when selecting multiple items from the Tools menu
-
You can also re-fire items from the handhelds. By selecting the “edit” button in the top right.
-
-
Item Price Adjust **
-
If an item needs to have its price adjusted, you can now do it in the item screen.
-
This will adjust the price to whatever you put in, and it will only effect this one item this one time.
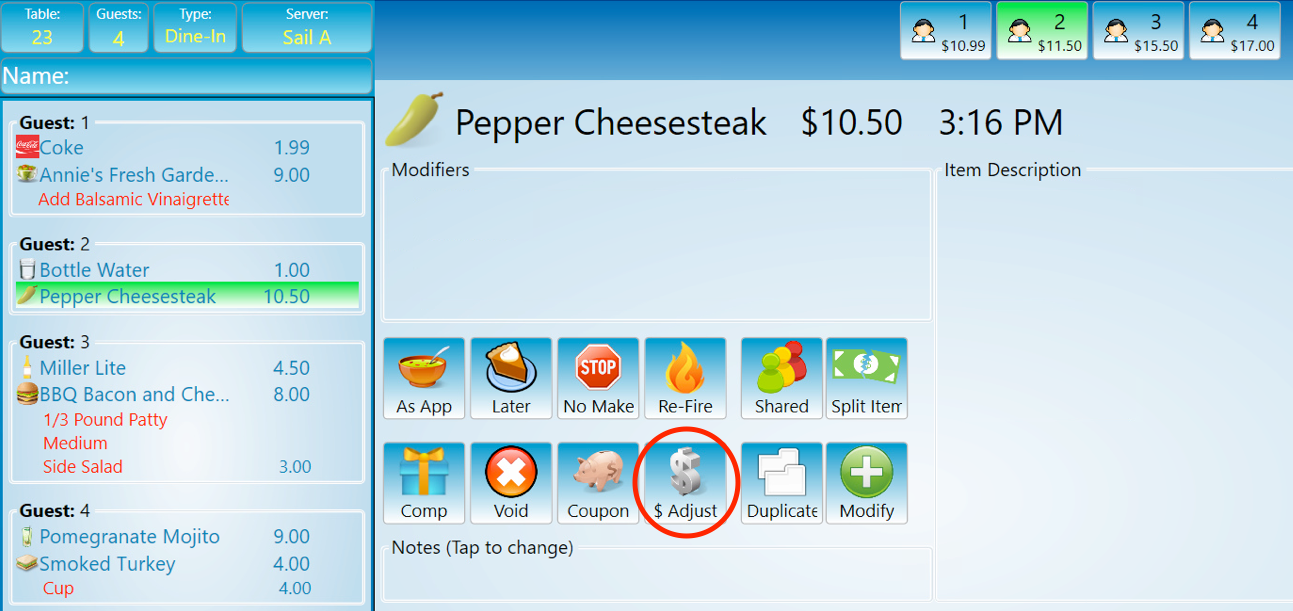
-
To access this feature, the user must have the \\POS\Order\Price Adjust task in their access group
-


Employee Records Changes
-
Supplying an Access Code is now optional
-
When no Access Code is specified you can still assign a user a swipe card to login and prevent them from logging in with a code.
-
-
An employee can now be specified as a “Tippable Employee”
-
This used to be combined with “Show In Server List”.
-
Show In Server List, only affects whether the user shows up in the Server List, where is Tippable Employee is recognized by other areas of the system such as prompting for cash tips on clock out.
-
-
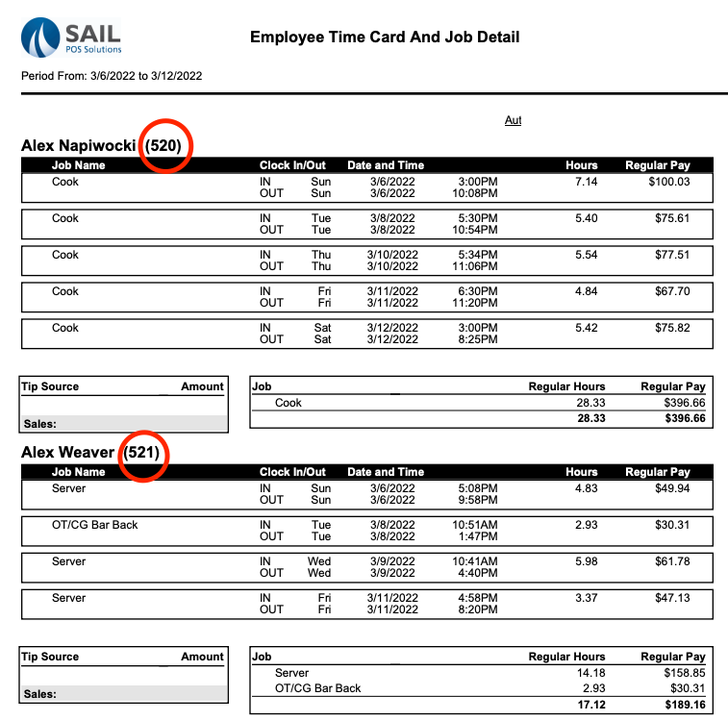
You can now store an “Employee Number” **
-
The employee number on top will appear on payroll reports\exports. The access code at the bottom is still the number the employee will use to sign into the terminal.
-
 .
. 
Misc Changes:
-
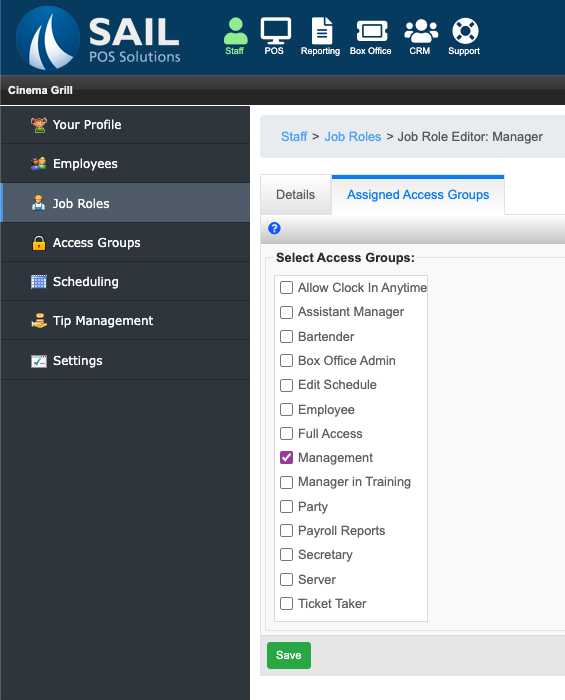
Access Groups can now be assigned to Job Roles instead of directly to an employee **
-
This will make it so that when an employee is clocked in as a manager, they have manager rights. But when they are clocked in as a bartender they will only have bartender rights.
-
This also allows you to not assign any rights directly to an employee making it so the employee will not have any rights in the system until they have clocked in.

-
-
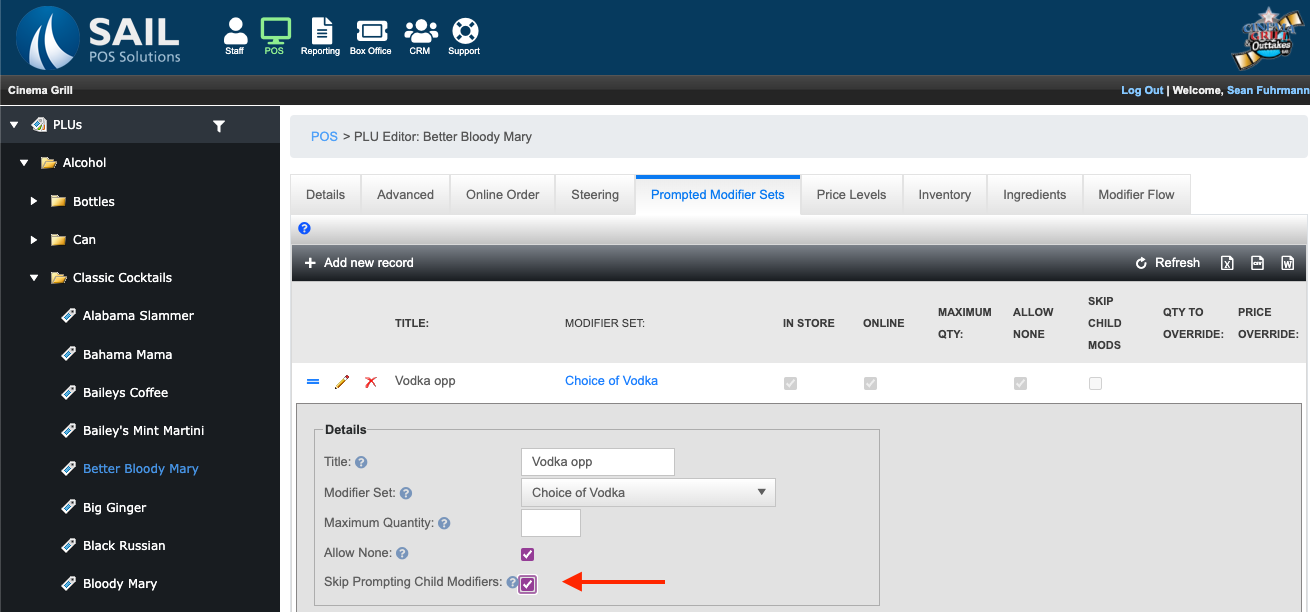
Can now optionally skip child forced modifiers **
-
Anytime you are setting up a prompted modifier you can now optionally tell the system to skip displaying prompted modifiers of subsequent items.

-
-
Tip entry on gift cards **
-
To find gift card sales on the terminal. Go to your Payment screen → click on the middle button → select “Pending: Gift Cards”
-
Once in there, you can adjust tips as normal.
-
Please keep in mind that Gift Card tips do not need to be entered in order to do a server close.

-
-
-
Kitchen items and their modifiers are ensured to print in the order they are rang in **
-
(Kitchen sequence and cooking time can still takes precedence)
-
-
Tip Calculator Customization **
-
New variables have been added to the Receipt Setup to allow you to create a tip calculator using any %'s you want.
-
These can now be added to a Customer Receipt, not just a Credit Card Receipt

-
-
Business Date is now an available variable to be added to reports **
-
You can now force users to have all tables paid out and all tips adjusted before they can clock out **
-
This will insure that the server has completed everything they need to do for their paperwork before they are able to clock out.
-
To do this, go to Back Office → Staff → Settings → Check the box that says “Enforce all tables and payments closed on Clock Out”

-
-
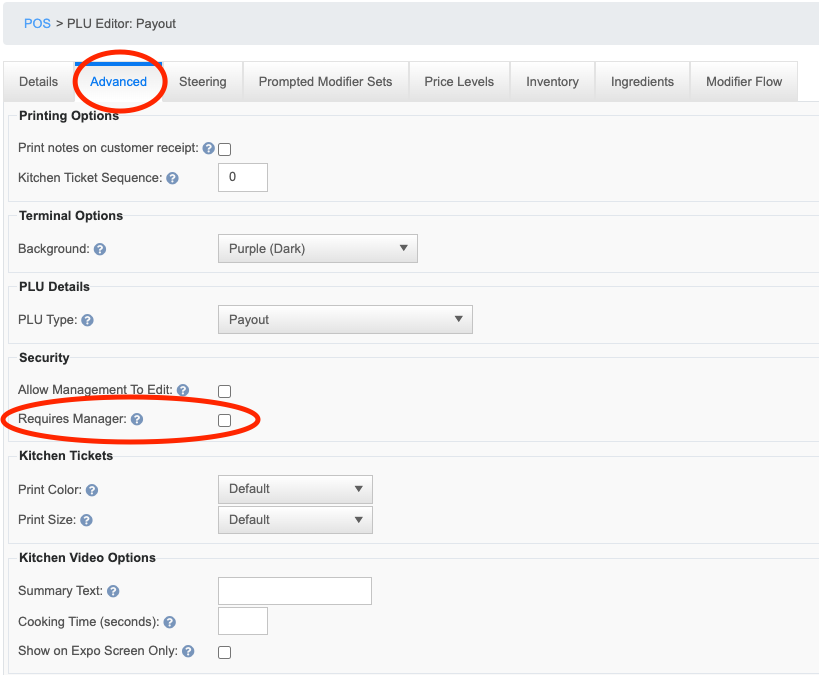
Can now specify PLUs as “Requires Manager” **
-
To enable this feature go to Back Office → POS → Select the PLU you’d like to restrict → go to the Advanced tab → Check the box that says “Required Manager”
-
If someone without access tries to ring it in on a terminal, they will get a message that says “This item Requires a manager”
-
To ring them in, a user must have the \\POS\Order\Enter Manager PLUs added to their access group
-
On a handheld, this button will not be visible
-
-
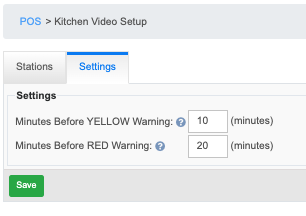
KVS Yellow\Red color times can be adjusted **
-
The default time will turn tickets yellow at 10 minutes, and red at 20 minutes.
-
To adjust those times, go to Back Office → POS → Settings → Kitchen Setup → Kitchen Video → Settings tab → Adjust Times

-


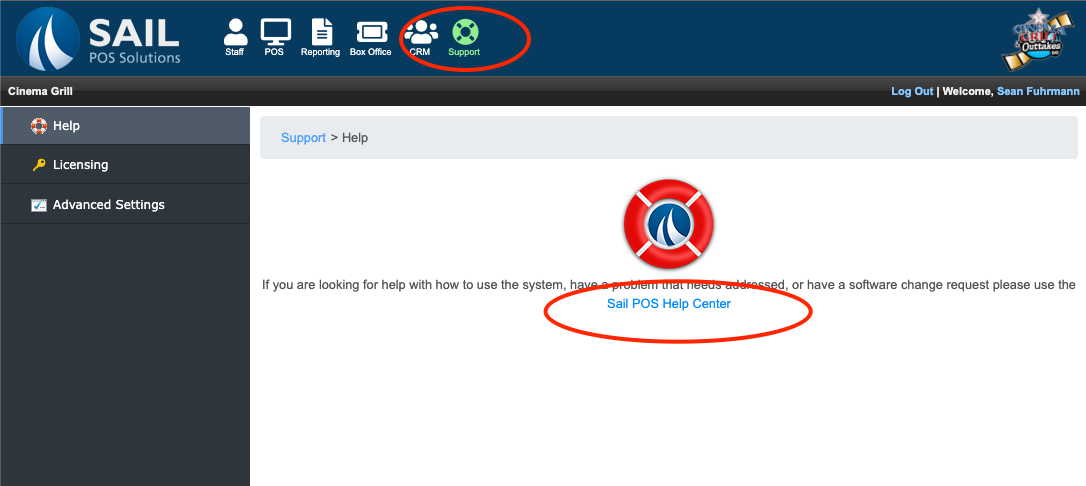
Sail POS Help Center
We are excited to introduce our new POS Help Center. Here you will be able to report issues, make software and hardware change requests, order gift cards, and submit a service request. As well as search our knowledge-base of ever growing documents on how to do various things within the system.
-
You can access this by going to help.sailpos.com
-
This link is also available on the main “Support” tab in Back Office
-
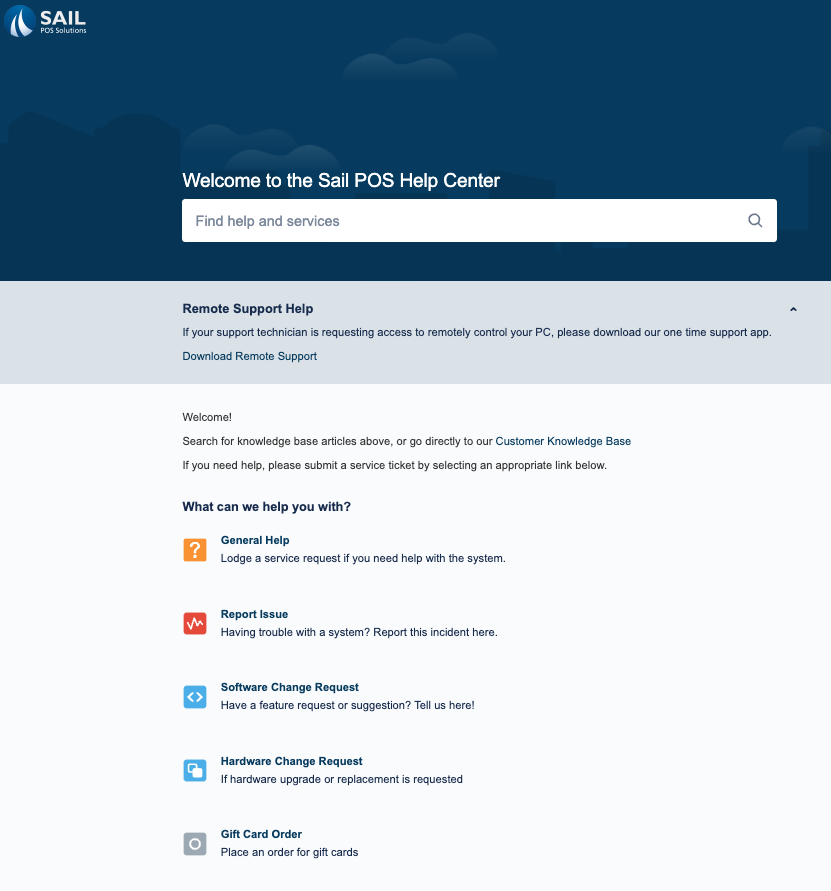
You will also be able to search our “How to…” documents. Just type in any word, like Payroll or Payments, and it will pull up documents explaining how to do specific tasks within the system.
-
Please keep in mind that we do not have everything yet, we are adding more and more documents to it every day.
-
If there's a specific How To document that you really want, please let us know and we will move it to the top of the list.
-
-
You can also find this page by going to help.sailpos.com
-
To see a list of the How To documents we currently have, click on the “Customer Knowledge Base” link and it will bring you to our full list of documents. A list of our documents are on the left, or use the search bar in the upper right.


No Comments