
Release 2024.1.1 "Erbil"
Notes: This release consists of 6 New features and Improvements.
**This release WILL require you to update your handhelds to version 2024.1.2**
If you would like any additional information or help setting up any of these new features, please contact support at:
Support@ingageit.com or call (612) 861-5277
New Features
1. New Timecard section in Backoffice
- You can now use the Timecard section in Backoffice to more easily edit employee's payroll hours in one area.

-
Here are the ways you can filter the list
- It will default to show you the current pay period. (That you set up in Staff Settings)
- You can use the calendar icons to filter by a custom date
- You can use the "Payroll Period" arrows to go back to the previous pay period.
- You can use the Employee filter to filter out a single employee
- You can use the Job Role filter to filter out a single job role
- It defaults to filter by date and clock in time. You can click on the clock out time to filter by date and clock out time.
- You can use the "Auto clock out" filter to bring all the employees who were auto clocked out to the top of the list so it's easier to edit those time clocks.
- You can use the Hours filter to bring the most amount of hours to the top
- It will default to show you the current pay period. (That you set up in Staff Settings)
- You can then access individual time card entries for employees as you are used to on individual employees:
- You can use the pencil to edit the entry
- You can use the red X to clear out the entry (this will change the clock in and clock out time to be 12am)
- You can click on the white arrow in the blue section to see audit history

2. Check Tender Type
- You can now create a check tender type and treat checks a little differently than cash!
- Here is how to set it up:
- Navigate to the POS tab --> System Setup --> Tenders --> Click +Add new record
- Set the icon you'd prefer (we do have a check option)
- Name the tender "Check"
- Then be sure to use the dropdown for payment types and select "Check" (This will bring the option for check that you need)
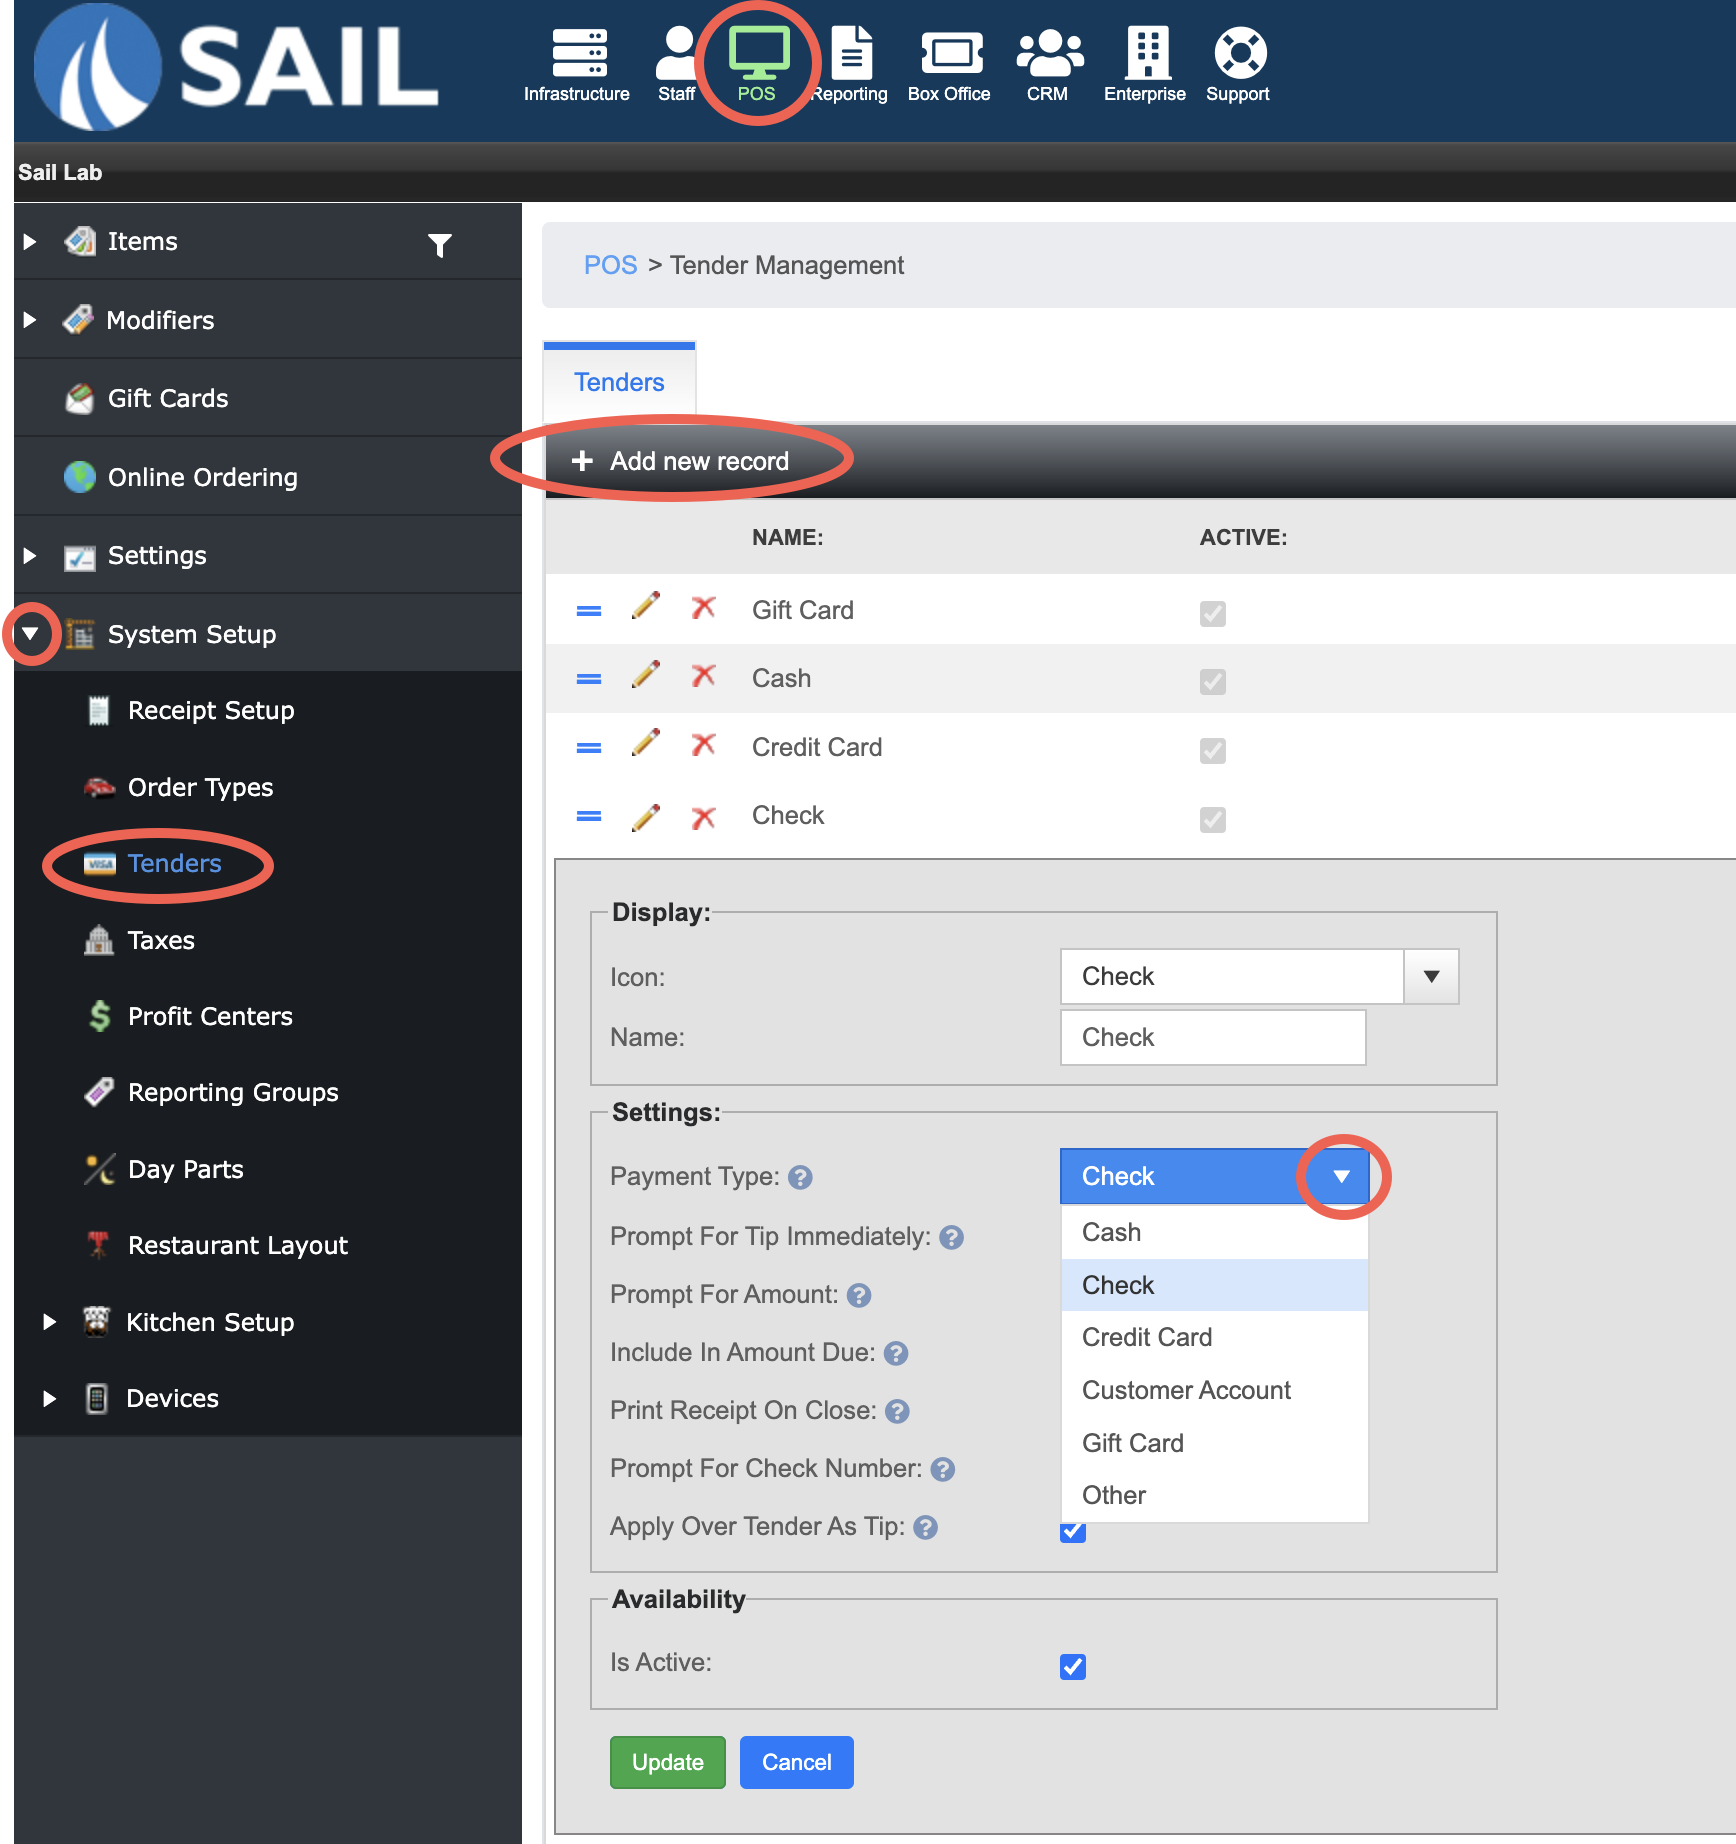
- Select the checkboxes from the settings you'd like. (the two that need to be checked are Active and Prompt for Amount)


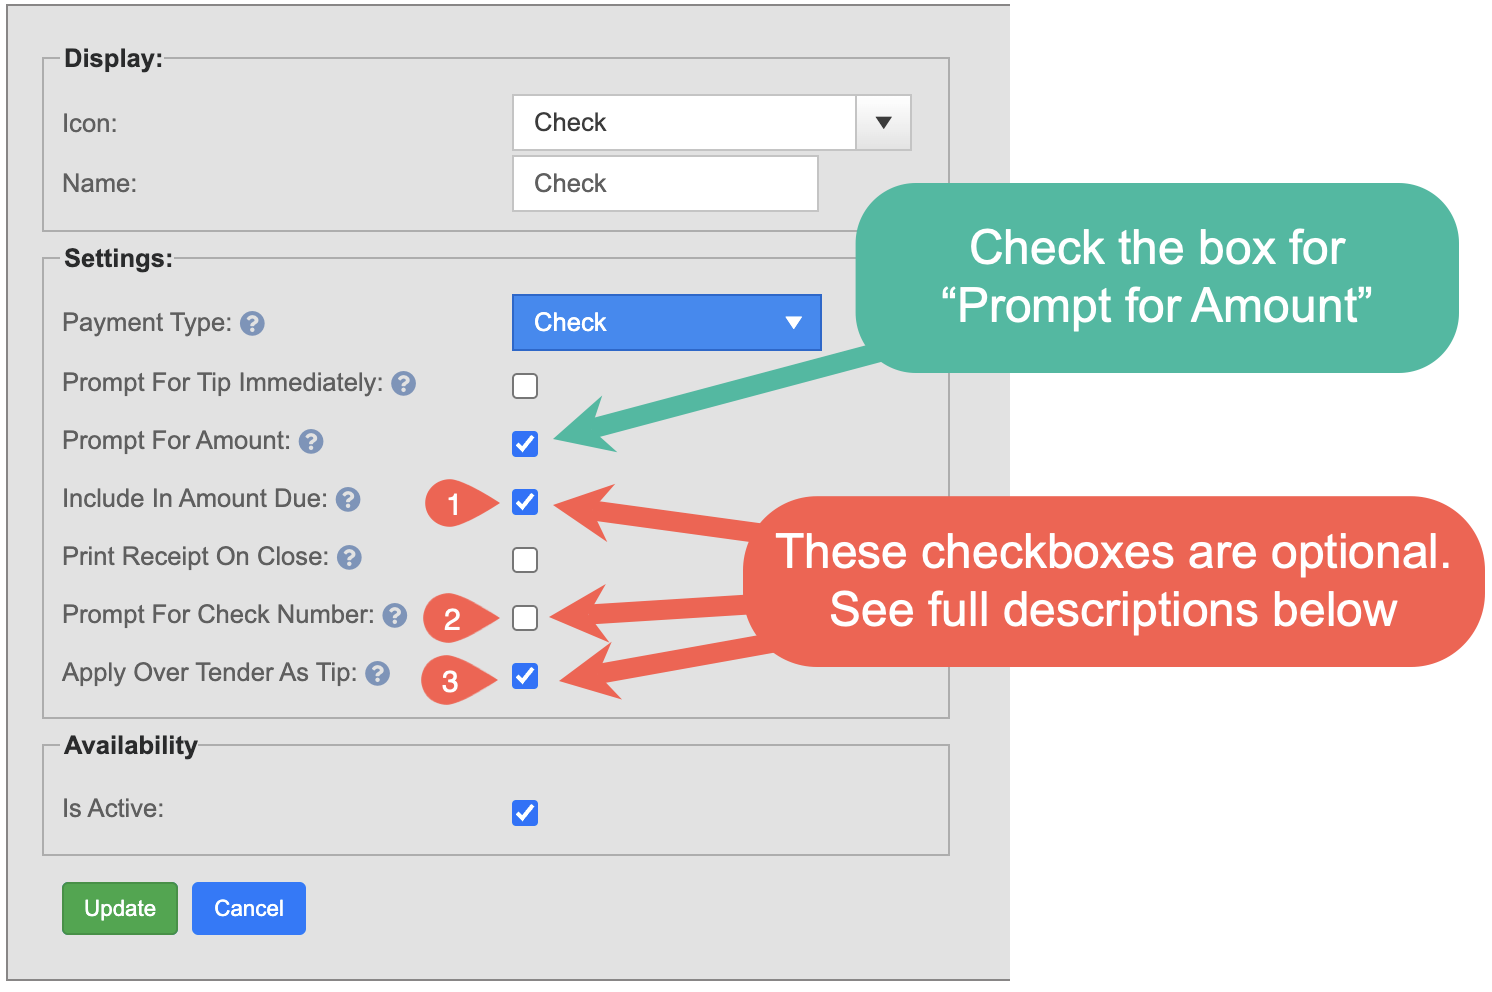
- Include in Amount Due
- If you choose to "Include" the check in the amount due section, then the check will still be counted as Cash. So in the examples below, the Amount due is $254.60 - Which means you'll need to turn in the $45 check plus an additional $211.60 cash. (So Total amount due is your CASH & CHECKS together)
- If you DO NOT include in the amount due, Then the check will be subtracted in the amount due section. and the Total at the bottom is the CASH that is owed only. The server will still need to turn in the check.

- Prompt for Check Number
-
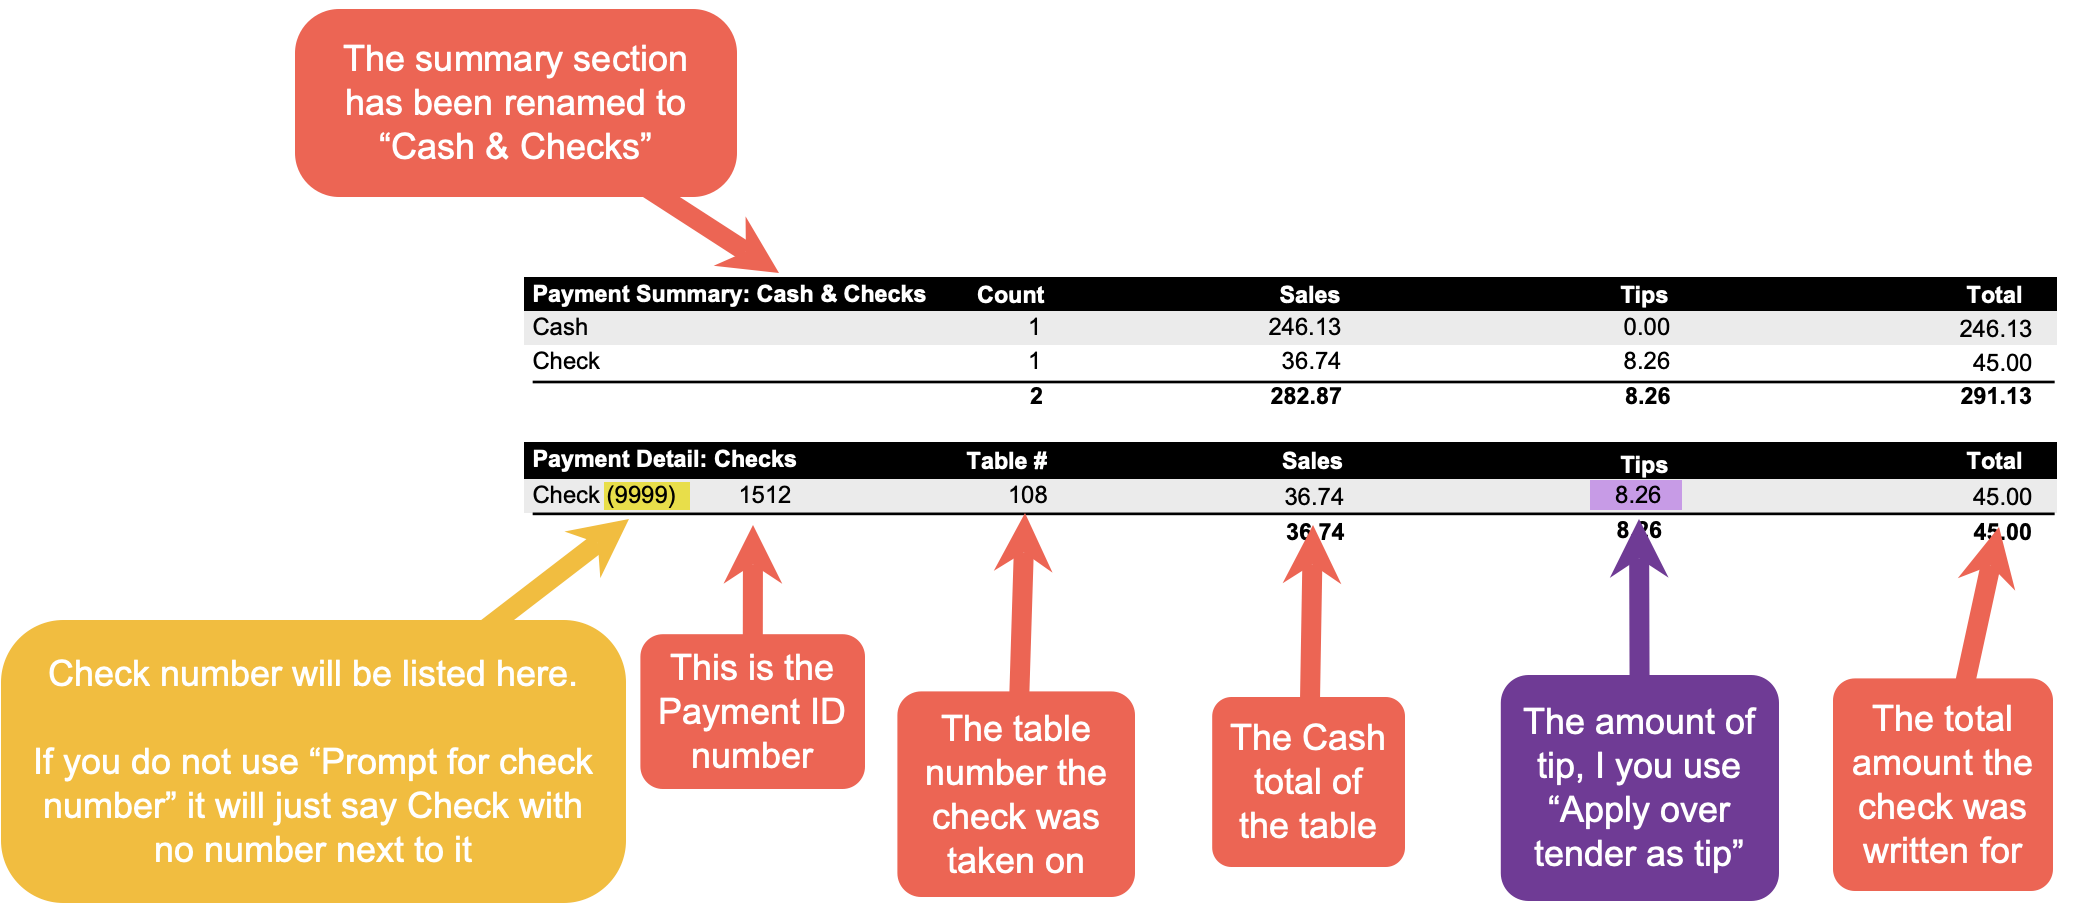
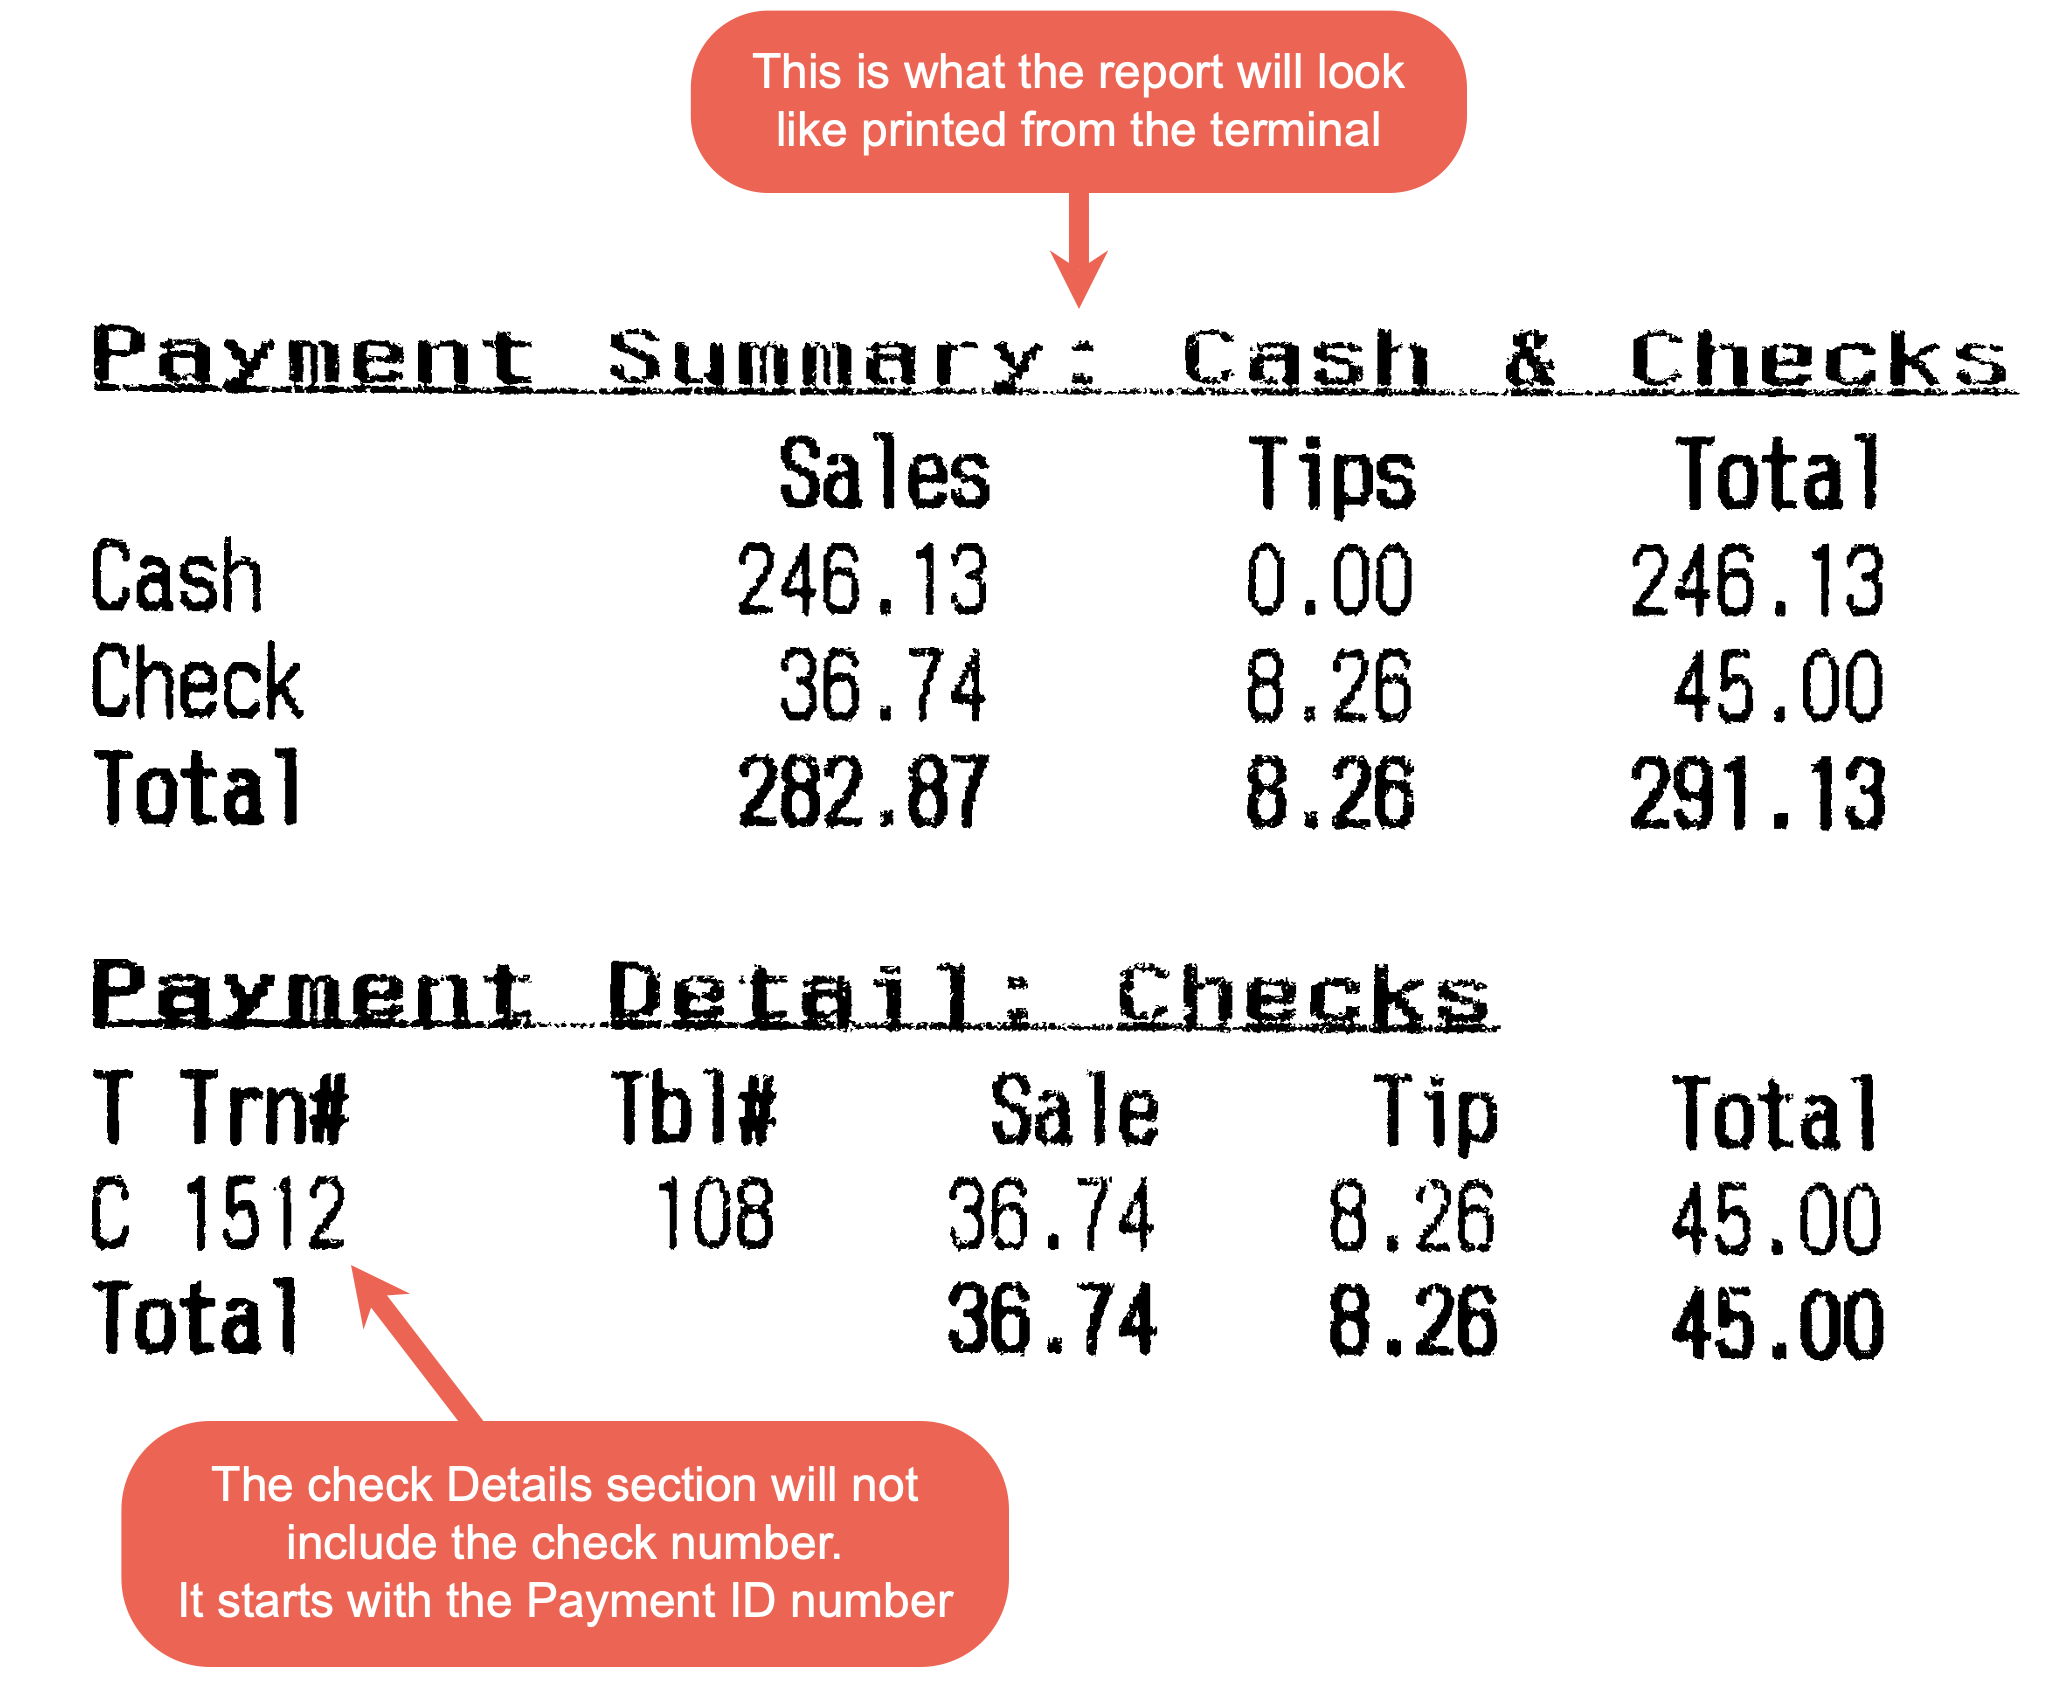
Check numbers will only appear on the Daily Close Report that is emailed when the day is closed, or printed from Backoffice. They will not appear on the Receipt paper reports printed from a terminal.

-
- Apply Over Tender As Tip
- If you check this box, and If the amount you put in for the payment is more than the cash amount due, then the over tender amount will automatically be counted as a tip.
- For example (like above): If the amount is the cash due amount is $36.74, and when it prompts for the amount due, you put in $45 (which is the amount the check is written for), Then the $8.26 will be the tip amount.
- Please note that this tip will automatically be tracked and accounted for on their payroll report in the "CC, Gift Cards, $ HA Tips" Line
- For example (like above): If the amount is the cash due amount is $36.74, and when it prompts for the amount due, you put in $45 (which is the amount the check is written for), Then the $8.26 will be the tip amount.
- If you do not check this box, then even if you put in $45 for the amount, it will still only record the check as the amount of the sale $36.74. (I would recommend, if you're going to use this method, then you also "Include in Amount Due" so the check amount plus cash is the total amount due)
- If you check this box, and If the amount you put in for the payment is more than the cash amount due, then the over tender amount will automatically be counted as a tip.


3. KVS Station Collections
- Now like printer collections with Kitchen printers you can now route your menu items to multiple KVS stations at once.
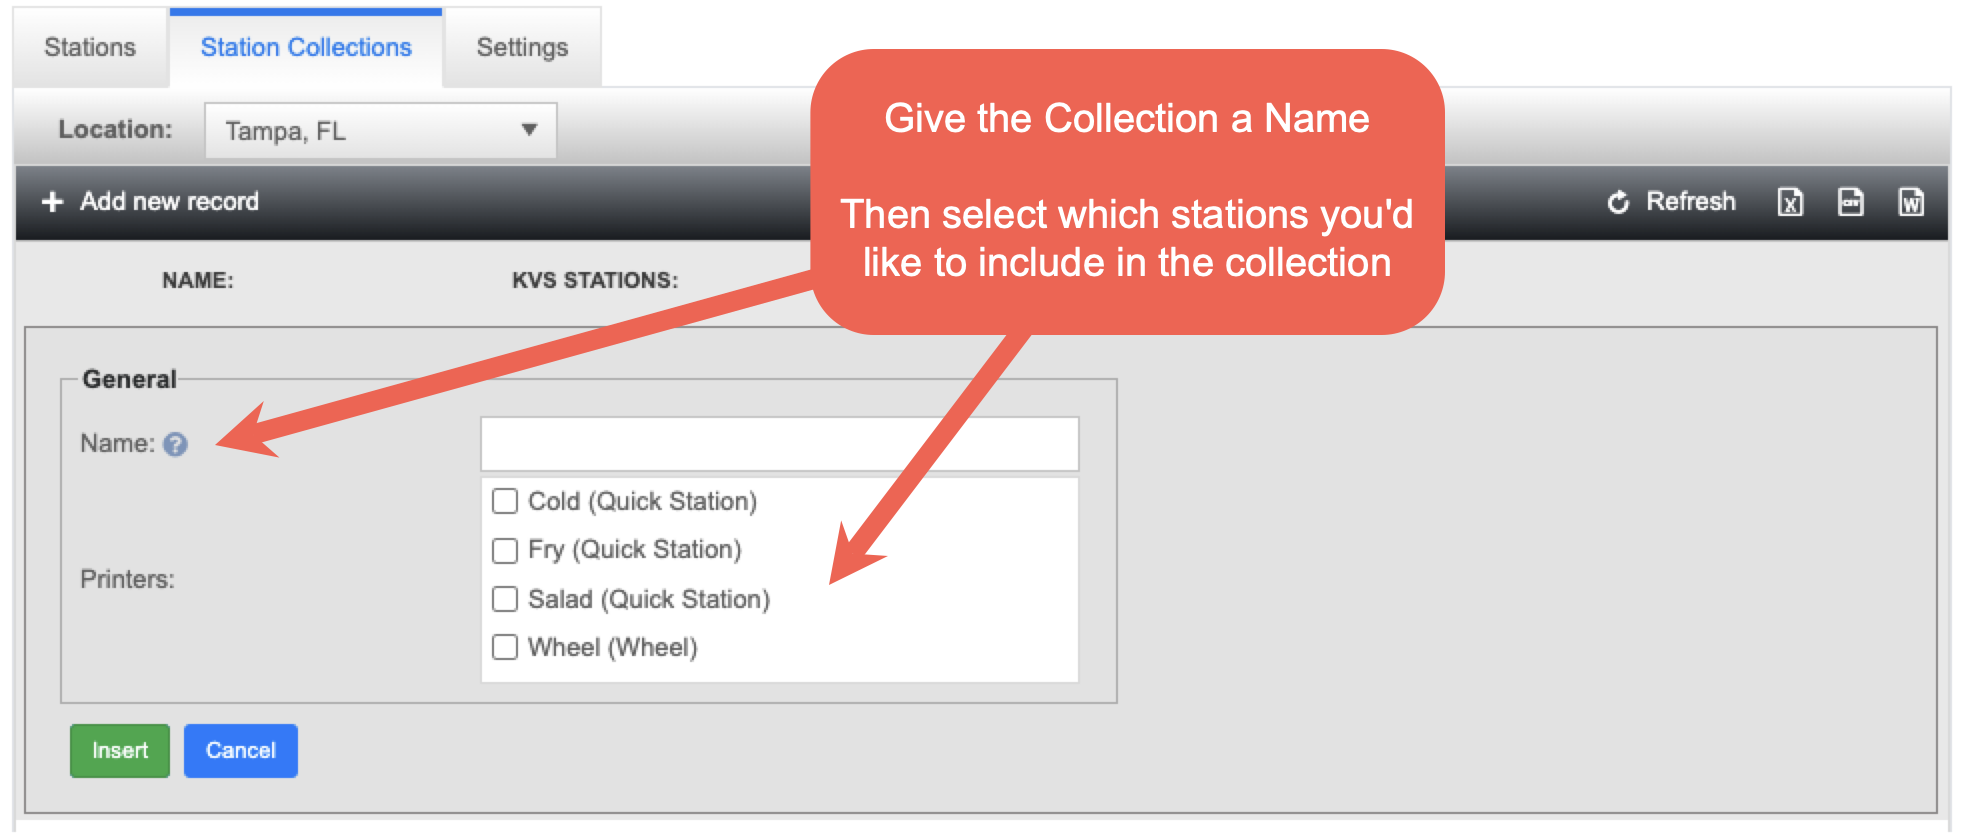
- To set it up, navigate to Station collection:
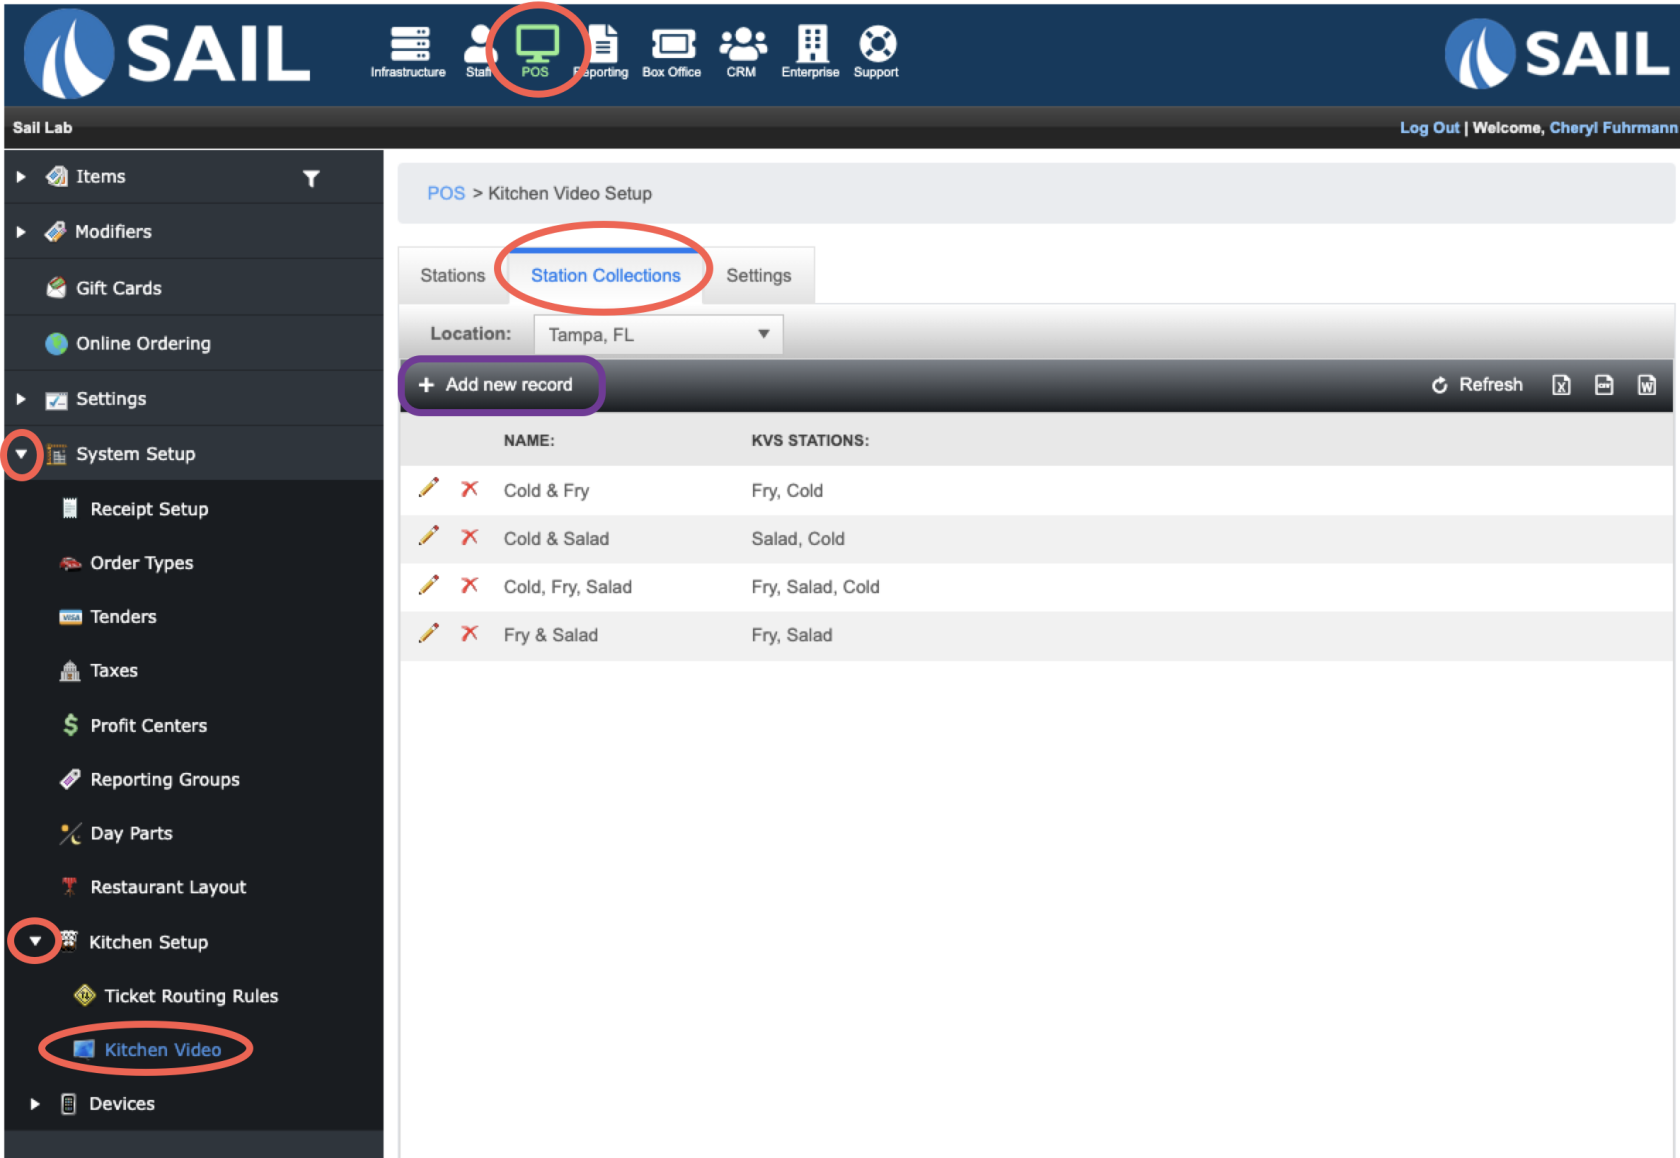
- Click "+ Add new record"

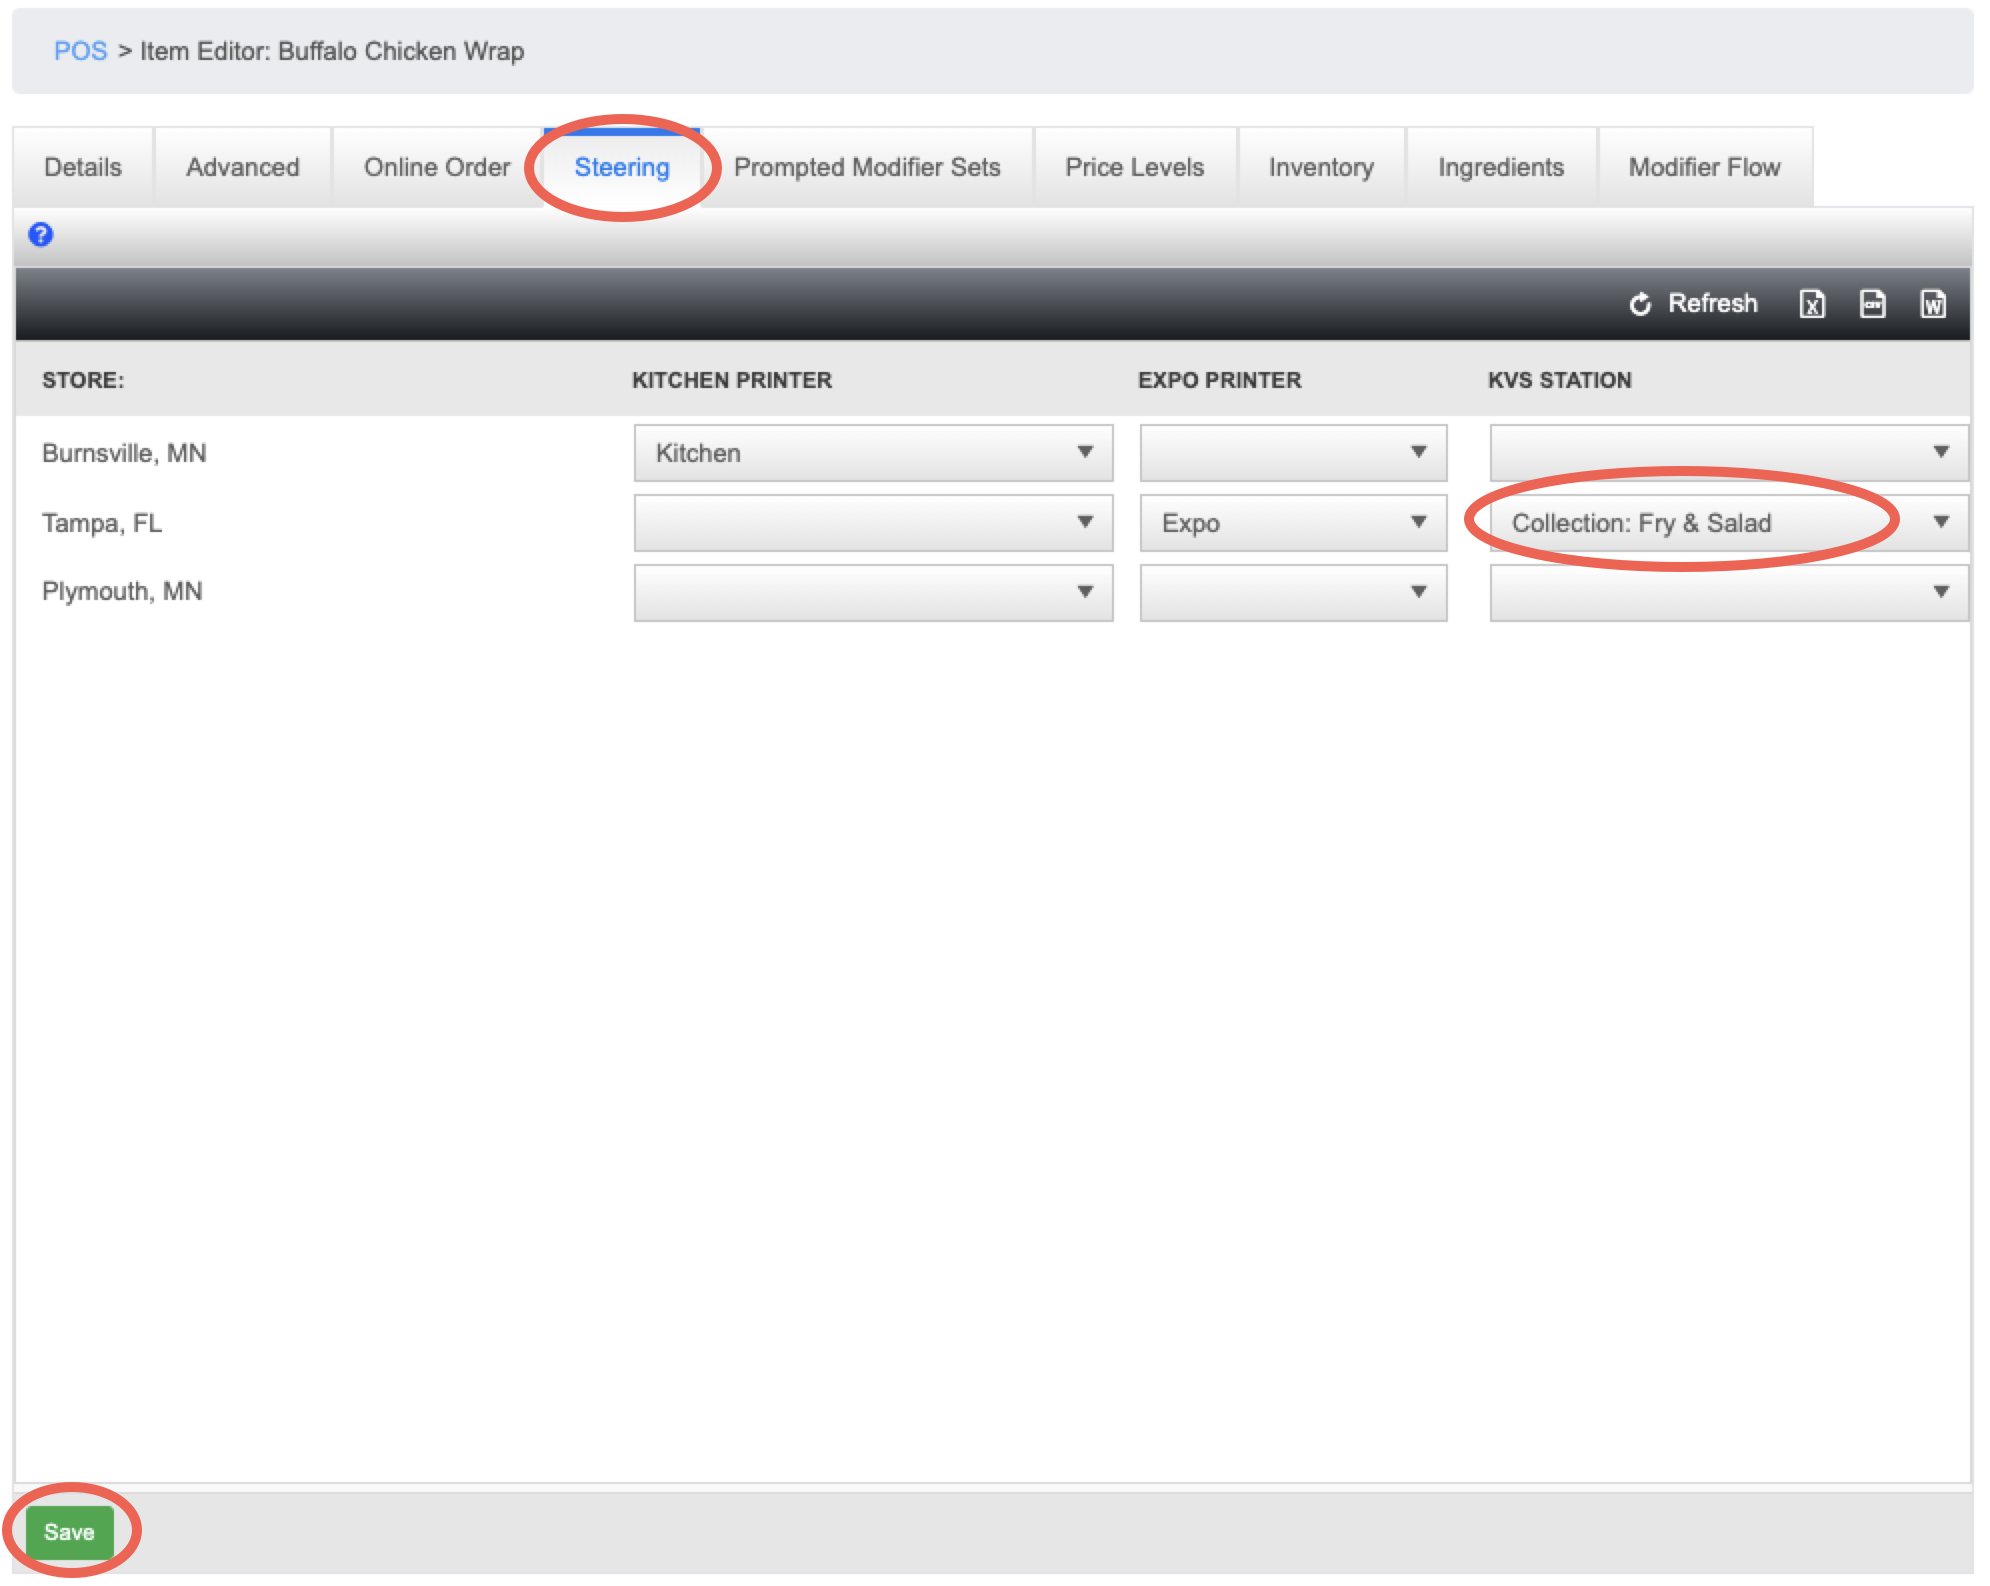
- Next, find the food item you'd like to switch to a collection, navigate to the steering tab and change the station to the collection

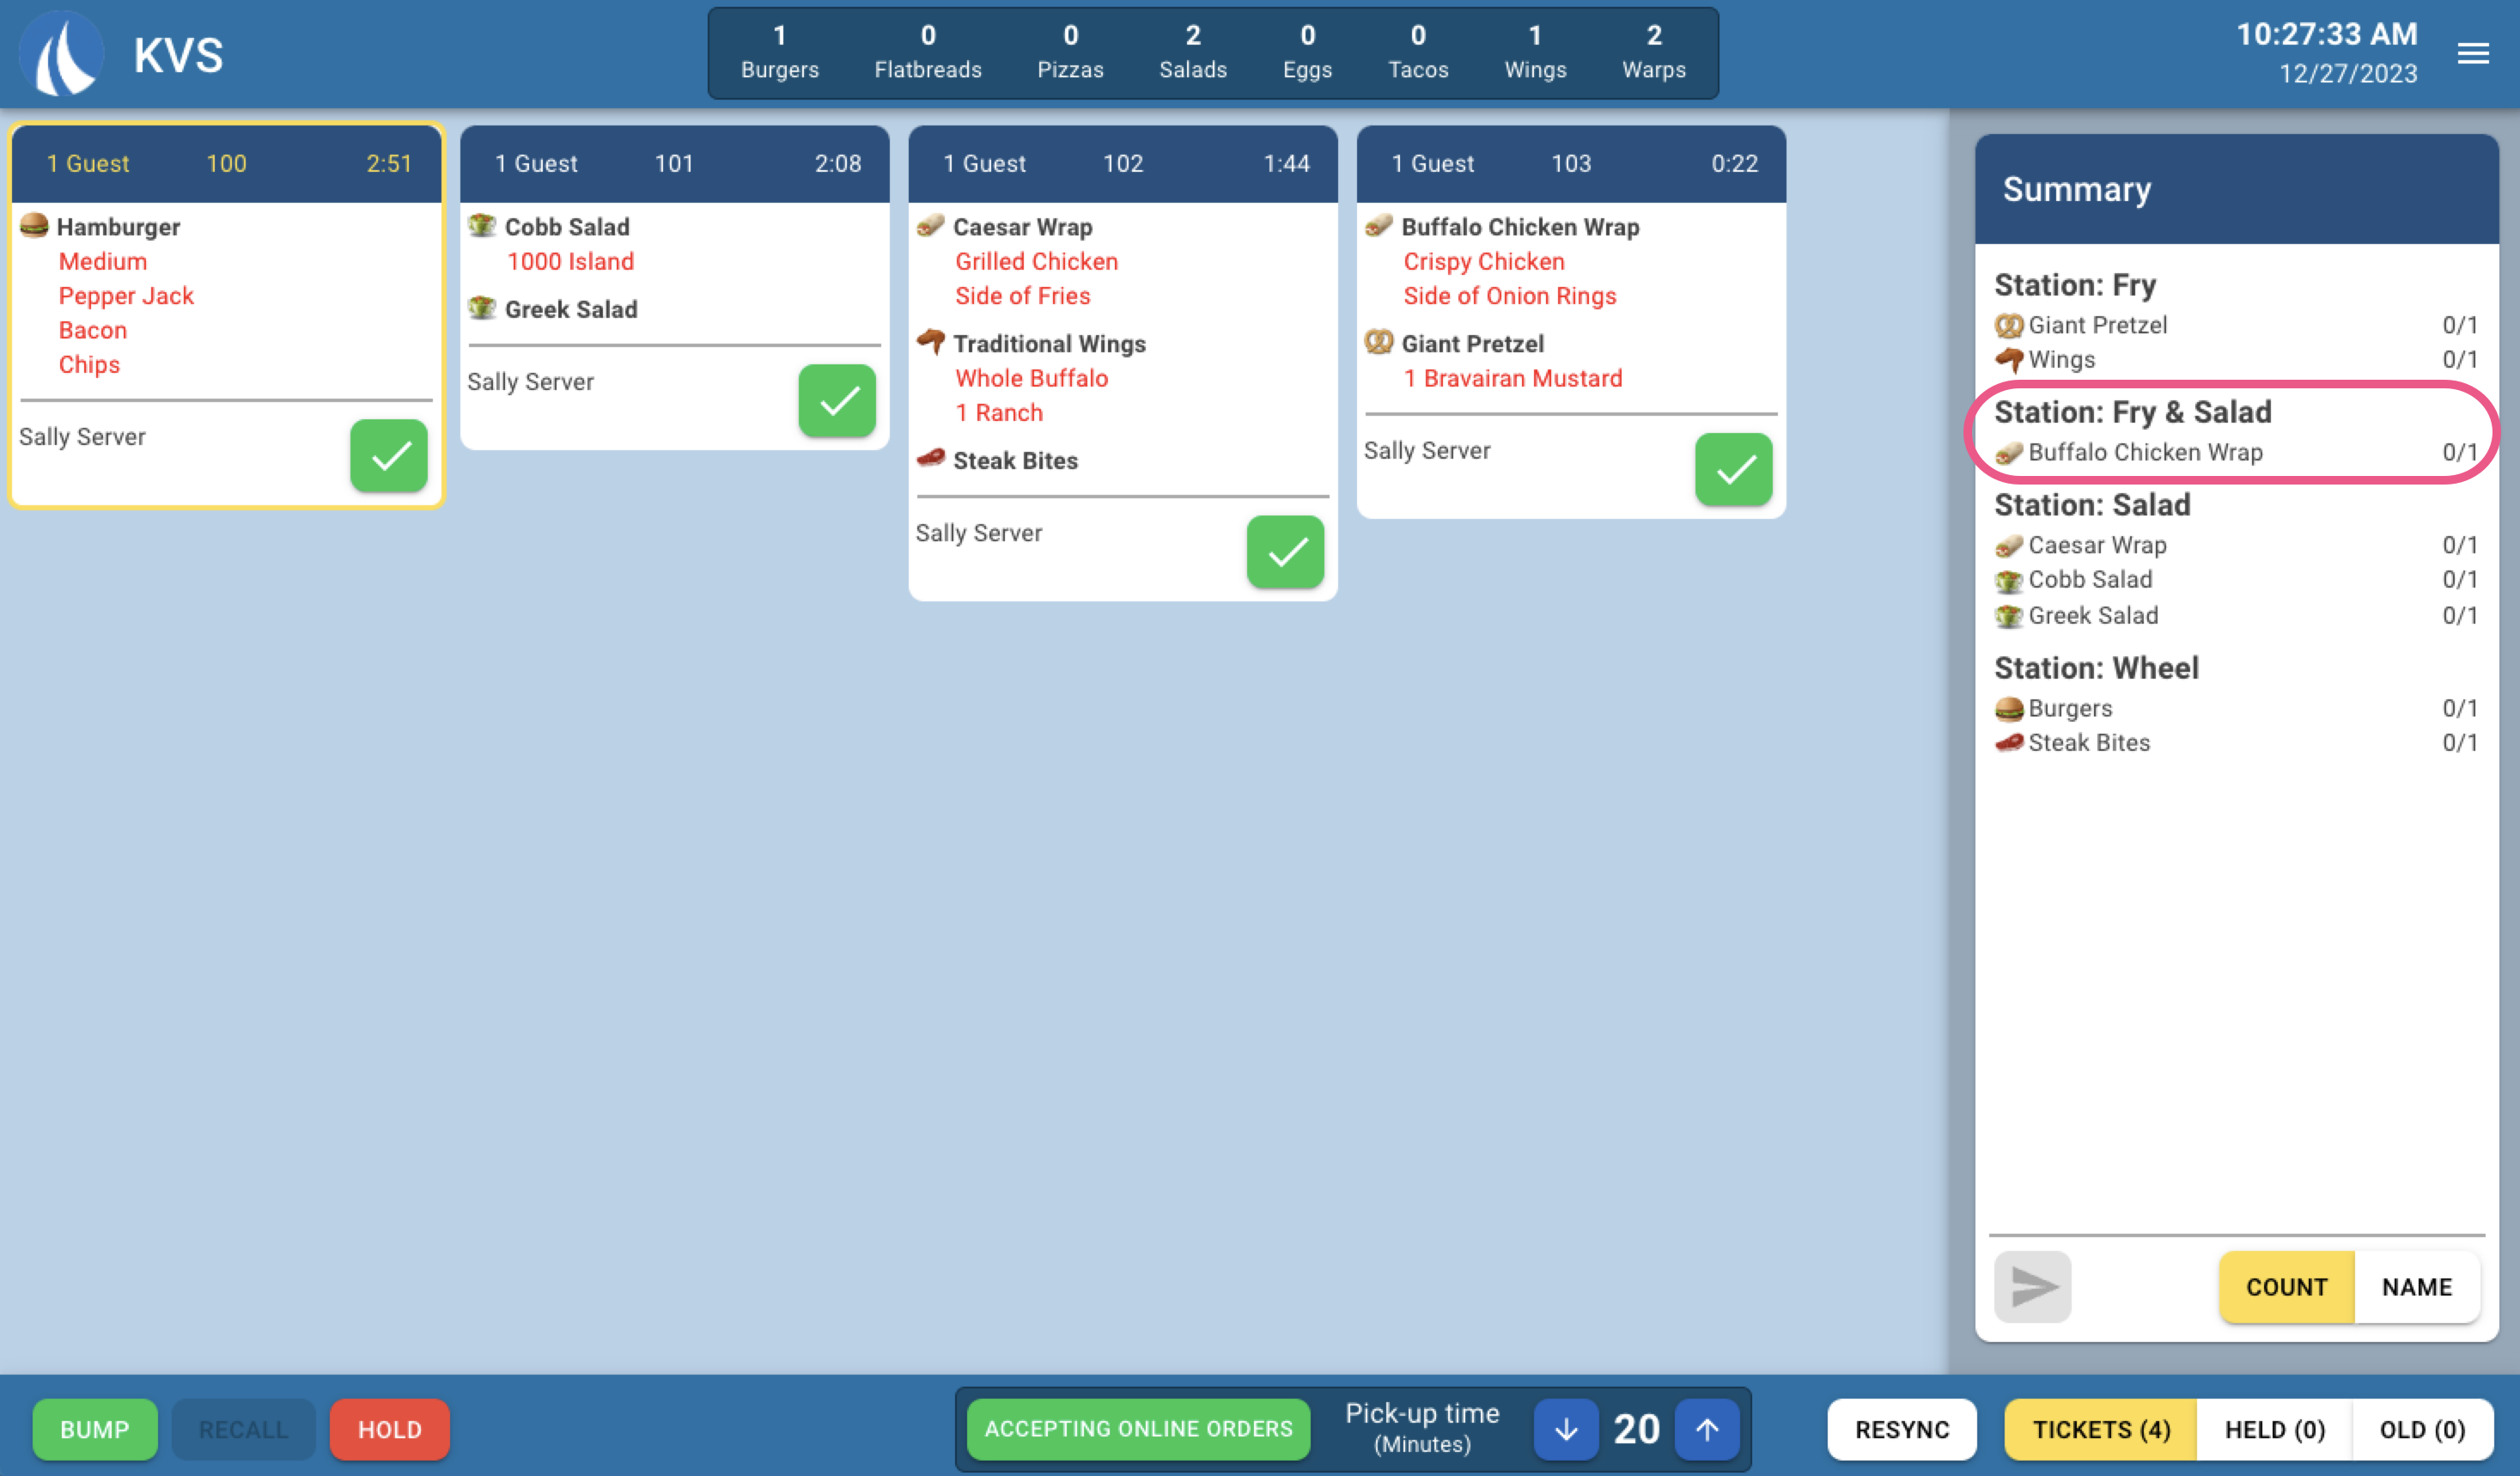
- Here is what it will look like in the KVS Summary
- When "sent" it will go to BOTH stations at the same time. The first station to "fire" the item will start the timer on the wheel screen and the last stations to "Finish" the item is what will turn it to done on the wheel screen.

- When "sent" it will go to BOTH stations at the same time. The first station to "fire" the item will start the timer on the wheel screen and the last stations to "Finish" the item is what will turn it to done on the wheel screen.

4. KVS All Day Counts
- You can now create "All Day Counts" (ADC) on each of the KVS stations to help keep track of the items on your screen.
- You can create an ADC for a single item, like Basket of Fries.
- You can create an ADC for multiple items, like Burgers.
- You can use Multipliers in ADC for things like Wings. (Example: 12 wings is 1 and 6 wings is .5)
- The ADC can include items from all stations or just its own station
- Here is what it looks like on the KVS Fry station


Improvements
5. Kitchen Printers can print modifiers on their own
- You can now have your modifiers print to a different printer than the parent item.
- For example, if a steak and salad is rang in, the steak can go to the grill printer and the salad can go to the salad printer.
- To set this up:
- Navigate to modifier item you'd wish to print on its own.
- Go to the advanced tab
- Click the box for "Independent" steering
- Once saved a Steering tab will appear, then you can add which printer you'd like this item to go to.
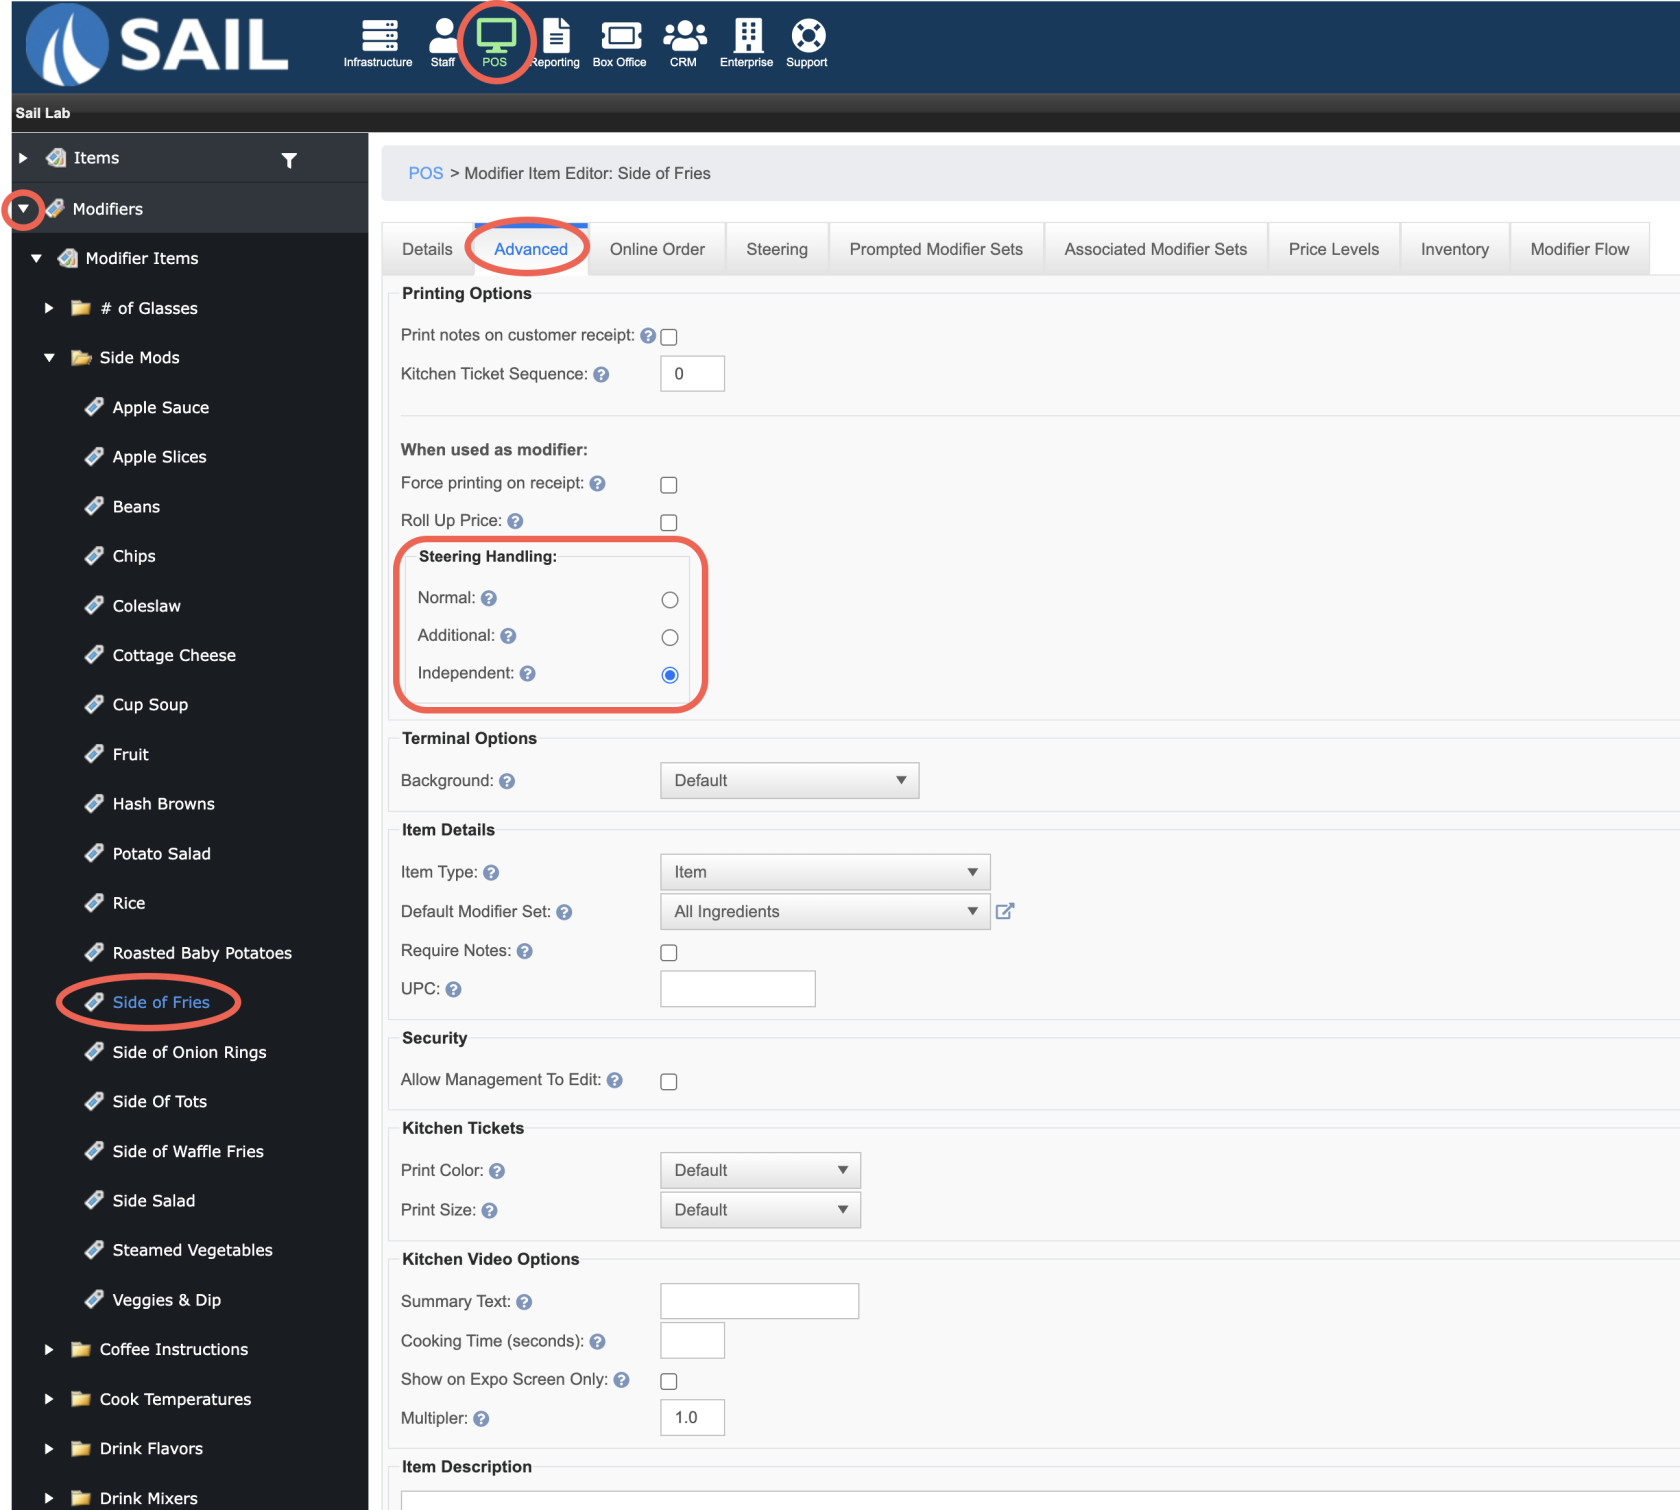
- Other Steering options:
- Normal: Child modifier follows the parent item
- Additional: Child modifier AND parent item will print at both locations
- Independent: Child modifier will print to a different item from the parent item

6. Page number and date added to bottom of most reports
- Page number and the date range have now been added to each of the reports in the footer. So its easier to keep track of multi page reports!
- Note: This has been added to every report EXCEPT: Sales Period Report, Daily Sales Report, and Server Close Report.

Bugs
- When you voided a Gift card it was not removing the balance. This is fixed. The balance on the gift card will now be removed as soon as you void the payment or void the card.
- The labor % on the sales vs labor by hour report was not calculating correctly in the totals section. It was taking the average of all the % in that column. It is not taking the Total Labor $ divided by the Total Sales.
No Comments