
Release 2024.4.1 "Lima"
Notes: Use the page navigation section on the top left of this screen to jump between the features you'd like to read about.
**This release WILL require you to update your handheld to version 2024.4.1**
If you would like any additional information or help setting up any of these new features, please contact support at:
Support@ingageit.com or call (612) 861-5277
New Features
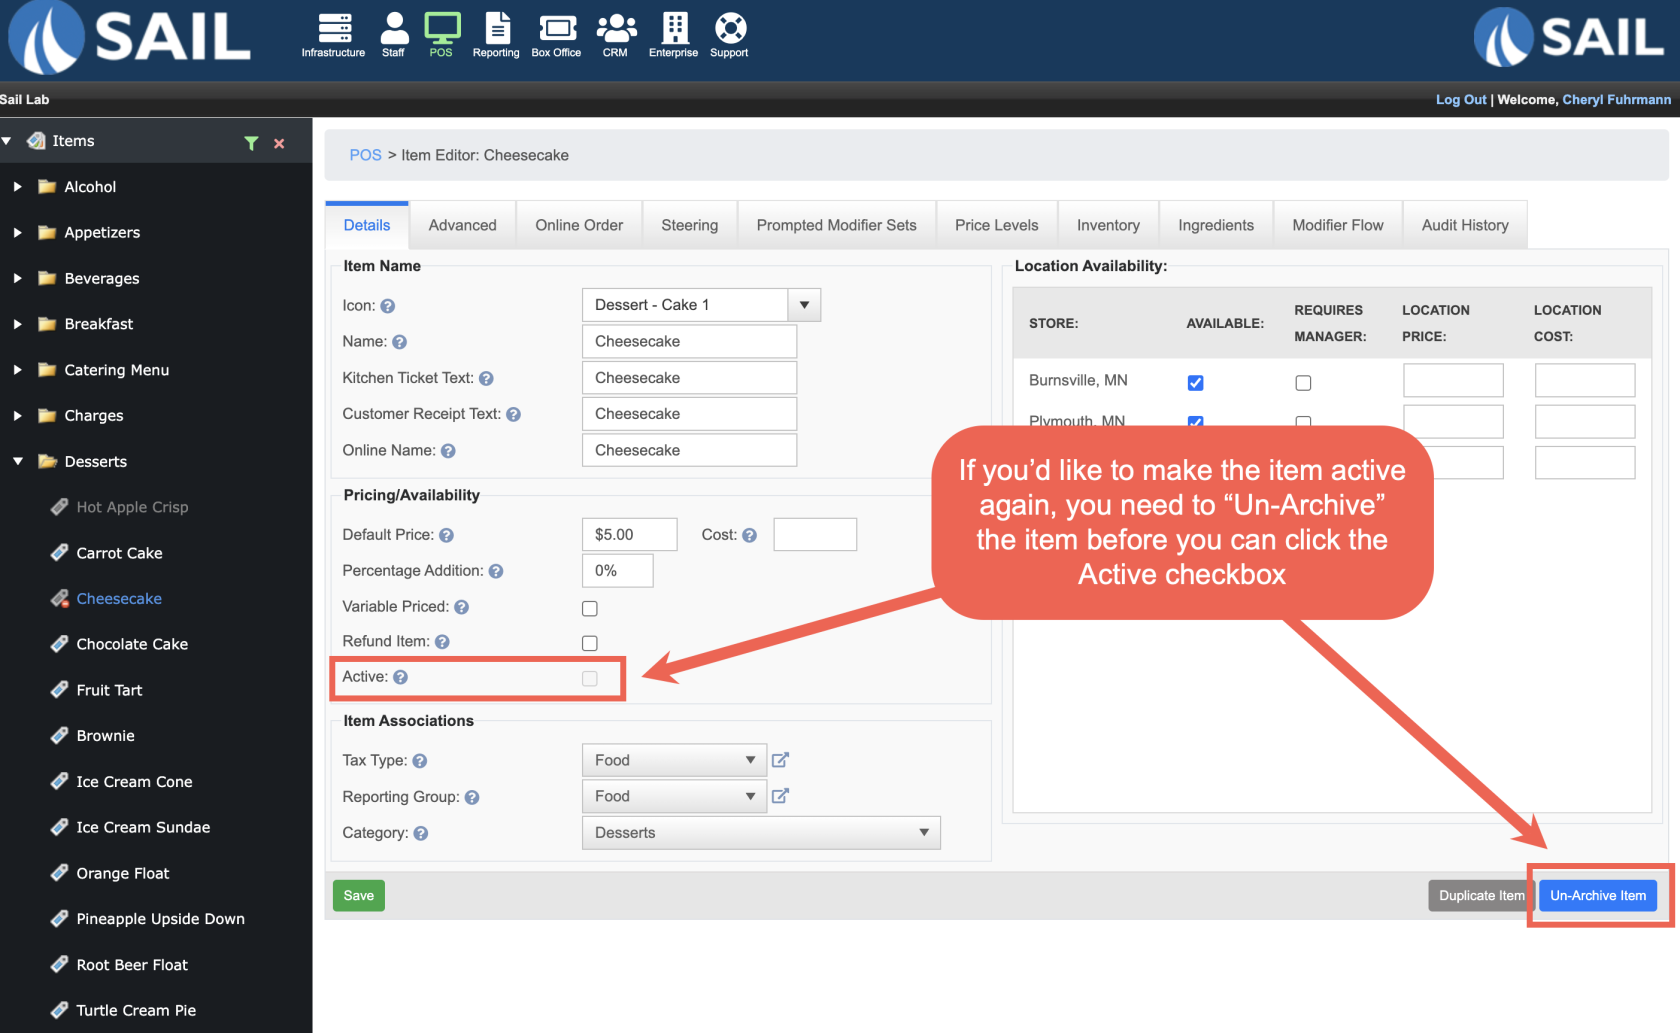
1. Added an "Archive" option on menu items
- We have now added a 2nd layer of inactivating an item. You now have the ability to ARCHIVE the item instead of just inactivating it.
- Archiving an item means that it will not show up on the list when you show inactive items
- This way if you know it's an item that you might bring back in the future, you can just inactive it (for example rotating tap beers). But if its an item that you more than likely won't bring back in the future you can "Archive" it so that it doesn't take up space on your list!
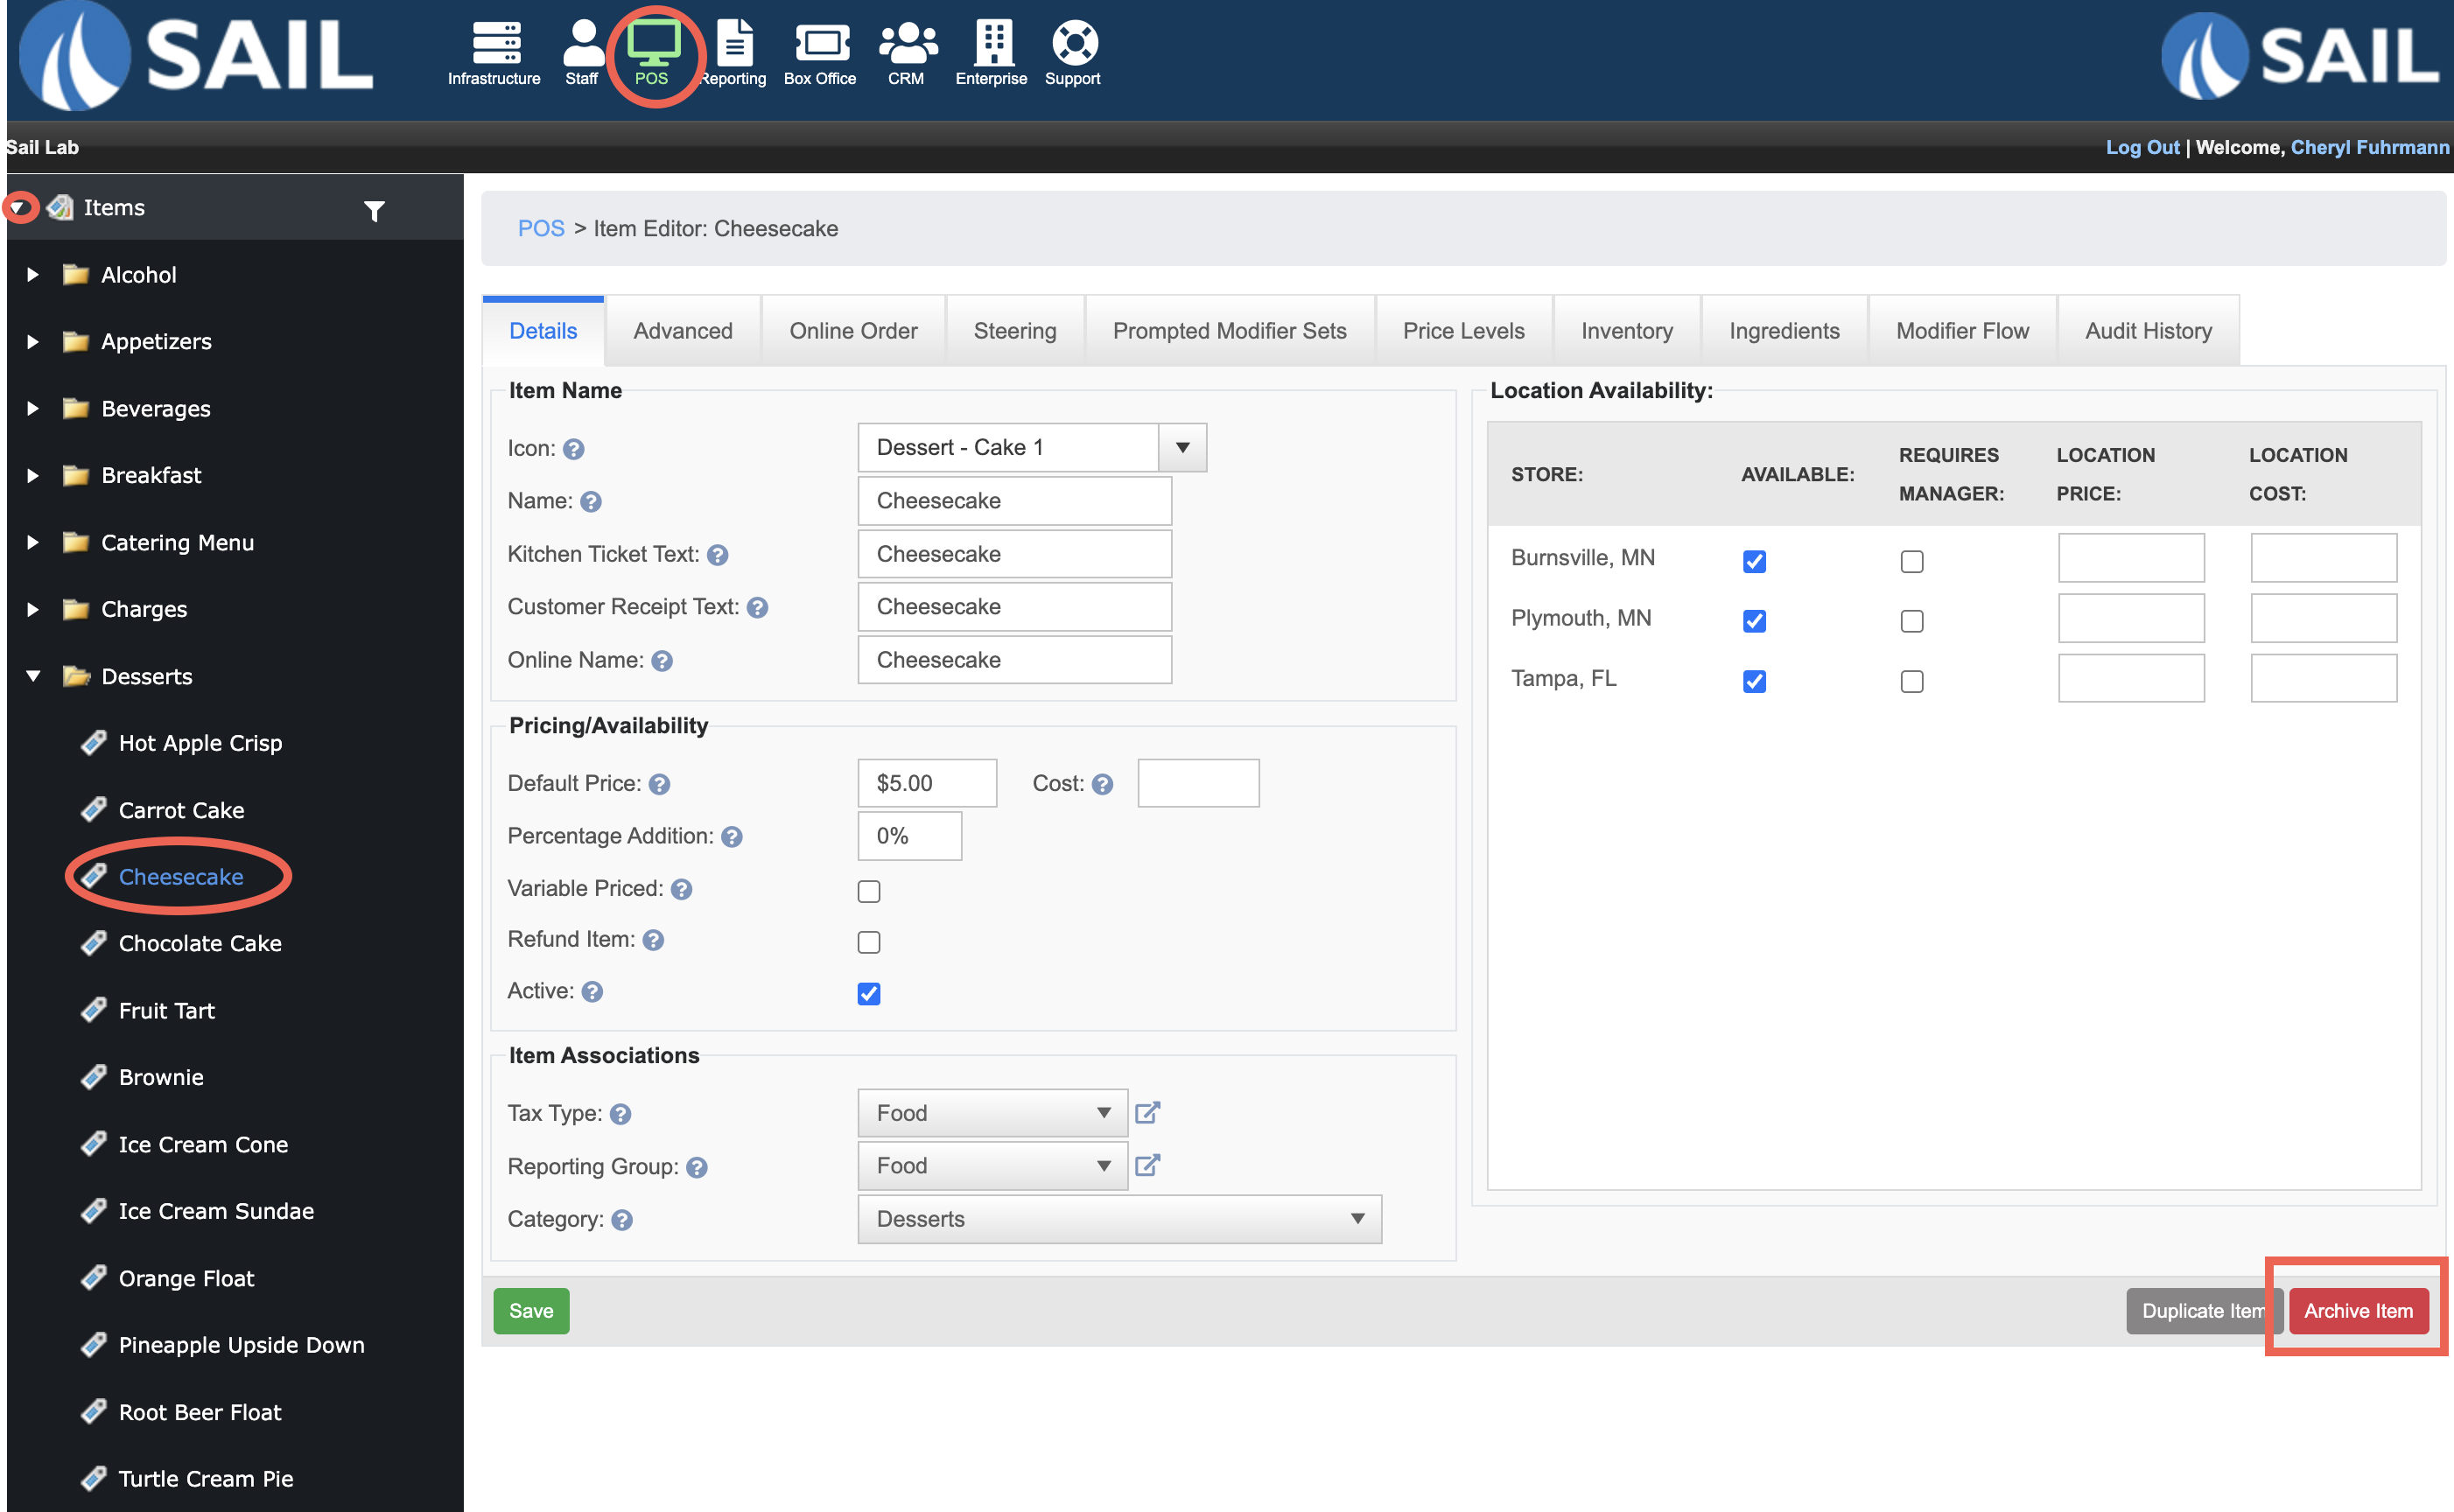
- To do this, log into Backoffice --> POS --> Find the item you'd like to Archive --> Click the red Archive button on the bottom right
- This will automatically make it inactive and move it into the Archive list instead of the inactive list.

- This will automatically make it inactive and move it into the Archive list instead of the inactive list.
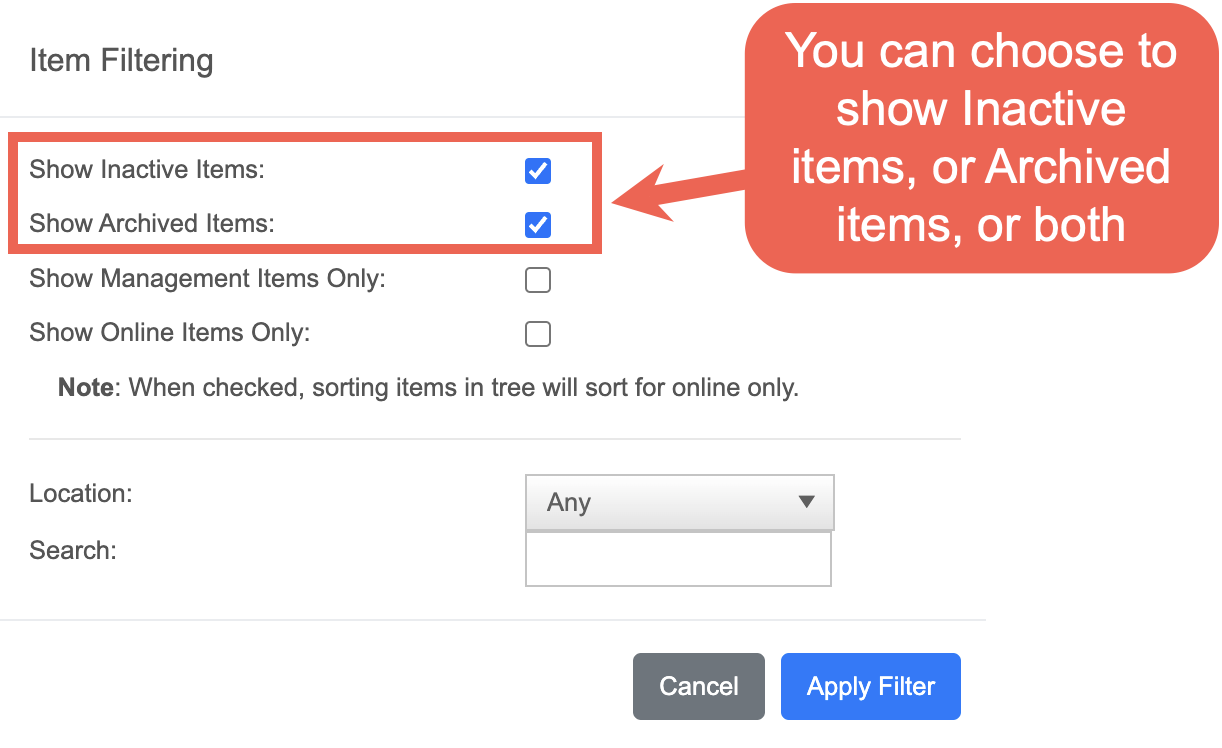
- When you want to see Inactive and/or Archived items, use the Filter icon next to the Items folder, and click 1 or both of the buttons to see which list you're looking for

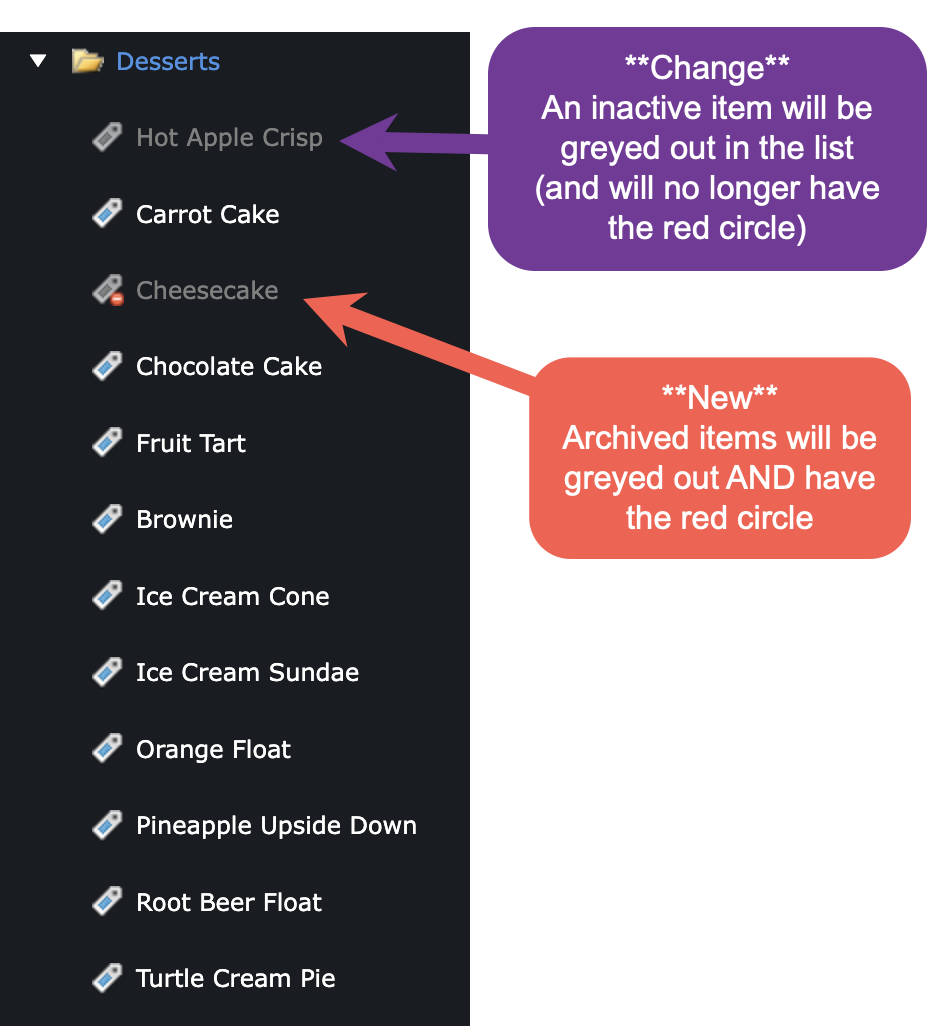
- On the tree below you will see the 3 different state of items.
- 1. Bright white - Active Items
- 2. Greyed out - Inactive items (this is a change from before)
- 3. Greyed out with a red circle - Archived Items

- To reactivate an item just click on the active checkbox and it will show up on the list again.
- To reactivate an Archived item, you must first "Un-Archive" it, and then click the Active button

Improvements
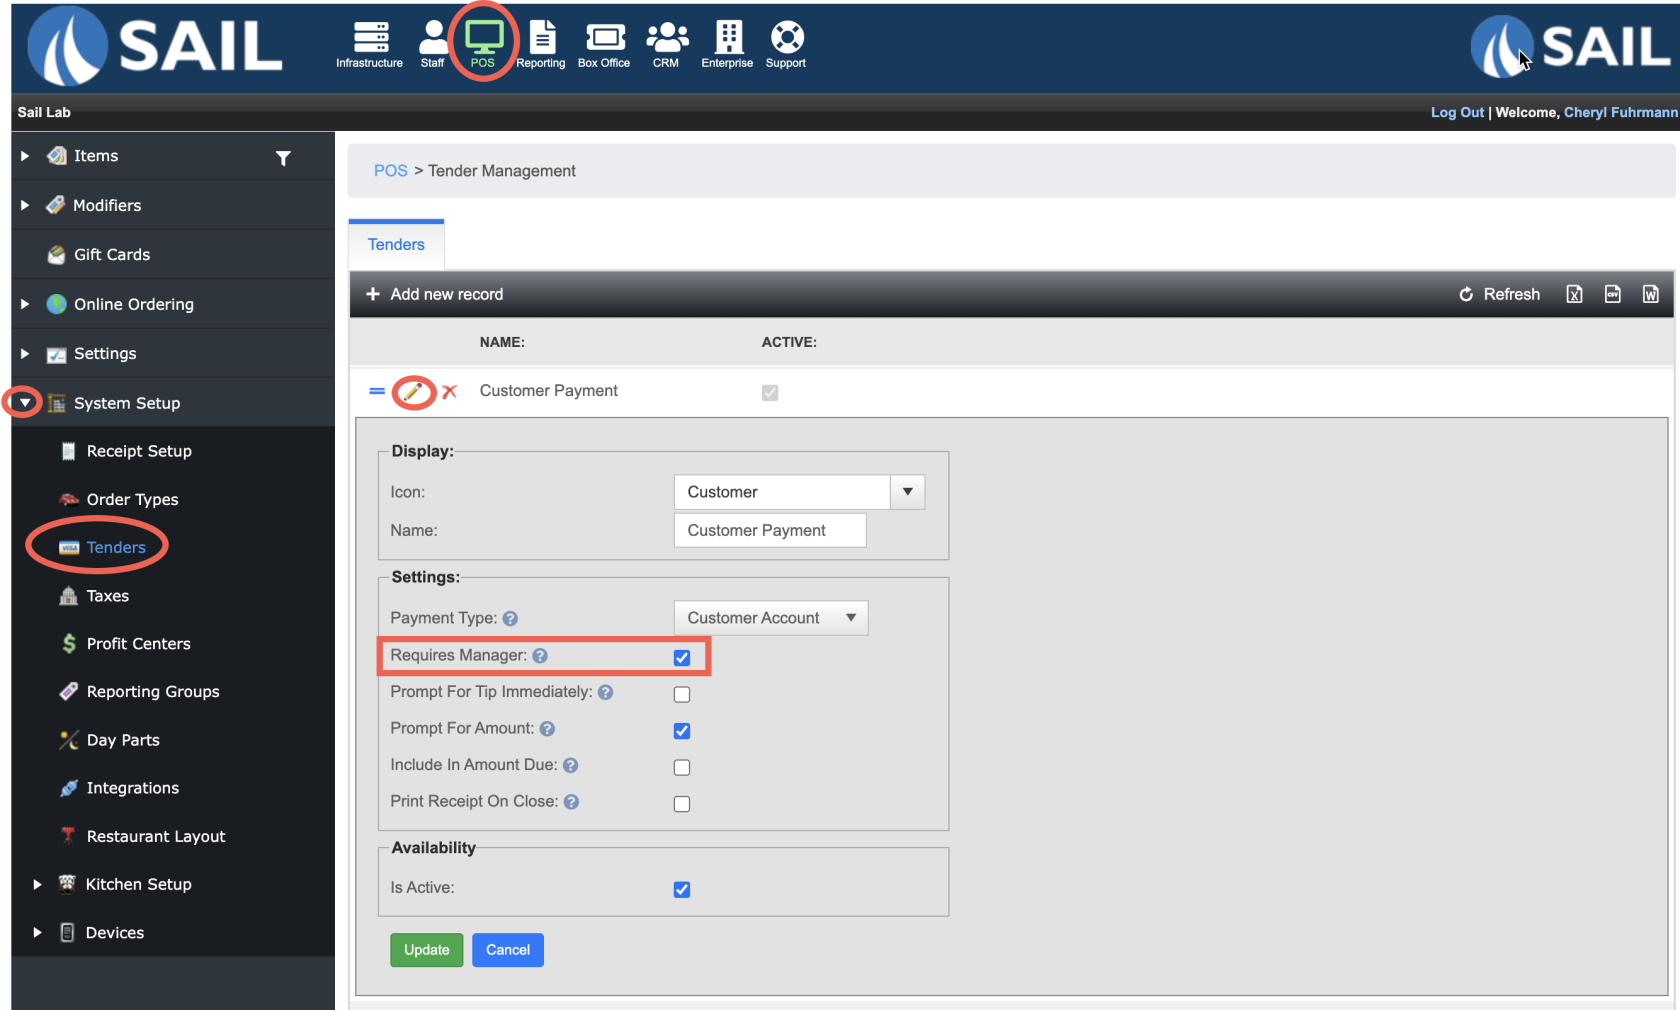
2. Abilty to set Tender Types to be Manager Only
- There is now a checkbox on the tender types to make it require a manager code
- To set it up go to Backoffice --> POS --> System Setup --> Tenders --> Create a new or edit an existing
- Then check the box that says "Require Manager" and click update
- When that payment type is used a keypad will popup to type in a manager number

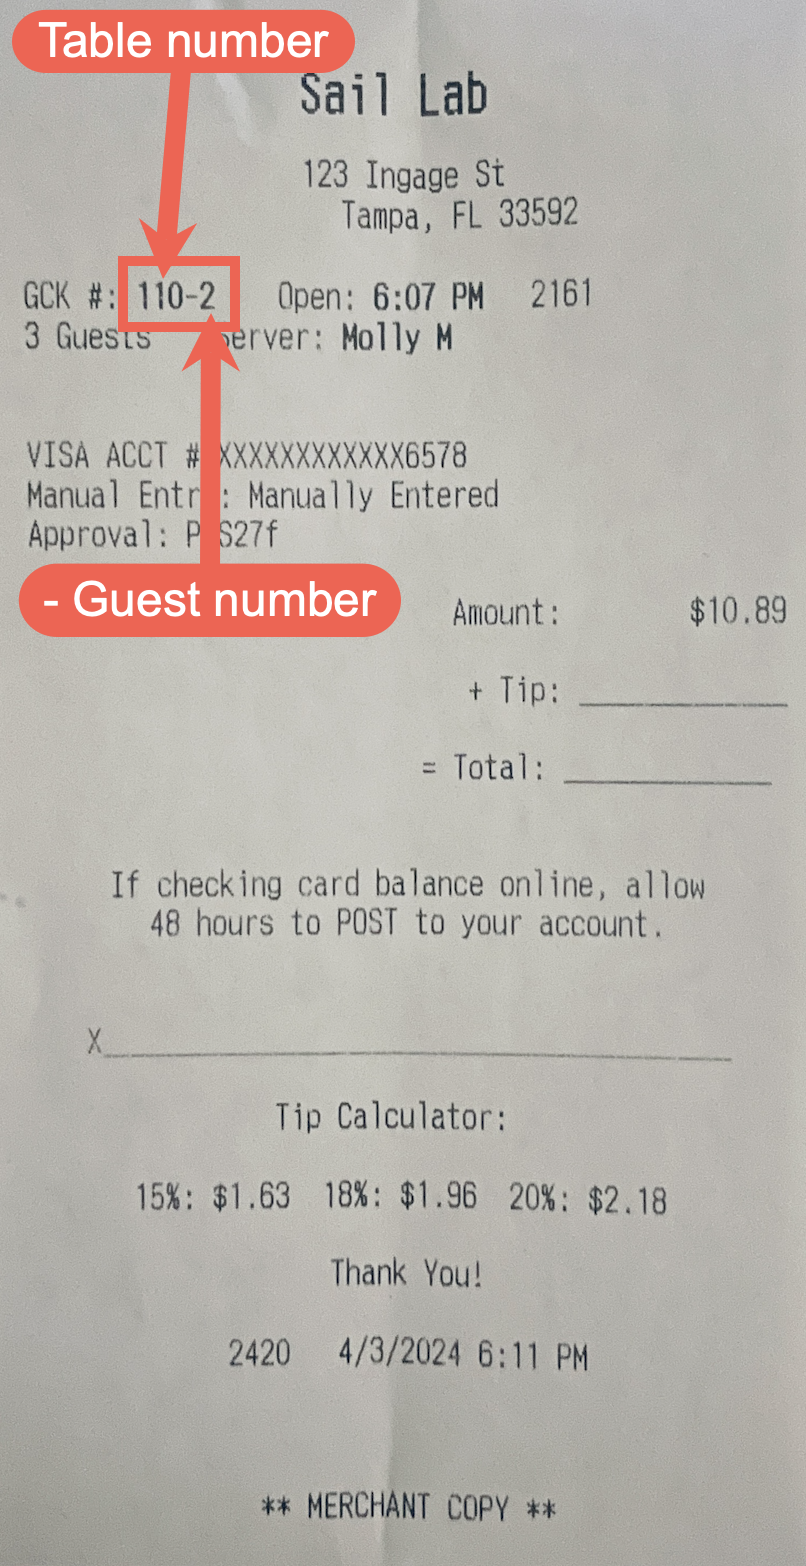
3. Add guest number to the payment screen and receipt
- We have added the guest number to the table number on the Edit Tips screen and the payment receipt
- The guest number will be appended by a -#
For example:- If you have 4 guests who pay individually on table 112 it will look like this: 112-1, 112-2, 112-3, 112-4
- If you have 4 guests but they pay all together it will all combine on guest 1 and will just say 112-1
- If you have 2 guests who are splitting the whole table in two, all items will combine on guest 1 so the payment will report as 112-1 & 112-1
- Here is what it will look like on the Edit Tips screen

- Here is what it will look like on a receipt

- The guest number will be appended by a -#

Fixes
- Multi store locations were not seeing a "sales by store" snapshot on their dashboard in Backoffice. This has been fixed.
- The quantity type modifier was not respecting the maximum amount if you used the hot buttons at the bottom. This has been fixed and will now give you an error message that says you have exceeded the maximum value so you can change the number.
- Fast cash would combine all guests even if there was one already paid. This has been fixed. It will now only combine the guests that are left with a balance. The other payments will remain on their own seat.
- Sometimes on a CC receipt when tap to pay was used the last 4 digits of the card would not appear. This has been fixed now so its easier to identify on the payment screen
No Comments