
Release 2024.10.2 "Zion"
Notes: This release consists of 2 New features and Improvements.
**This release WILL require an update of the handheld to version 2024.10.2**
If you would like any additional information or help setting up any of these new features, please contact support at:
Support@ingageit.com or call (612) 861-5277
New Features
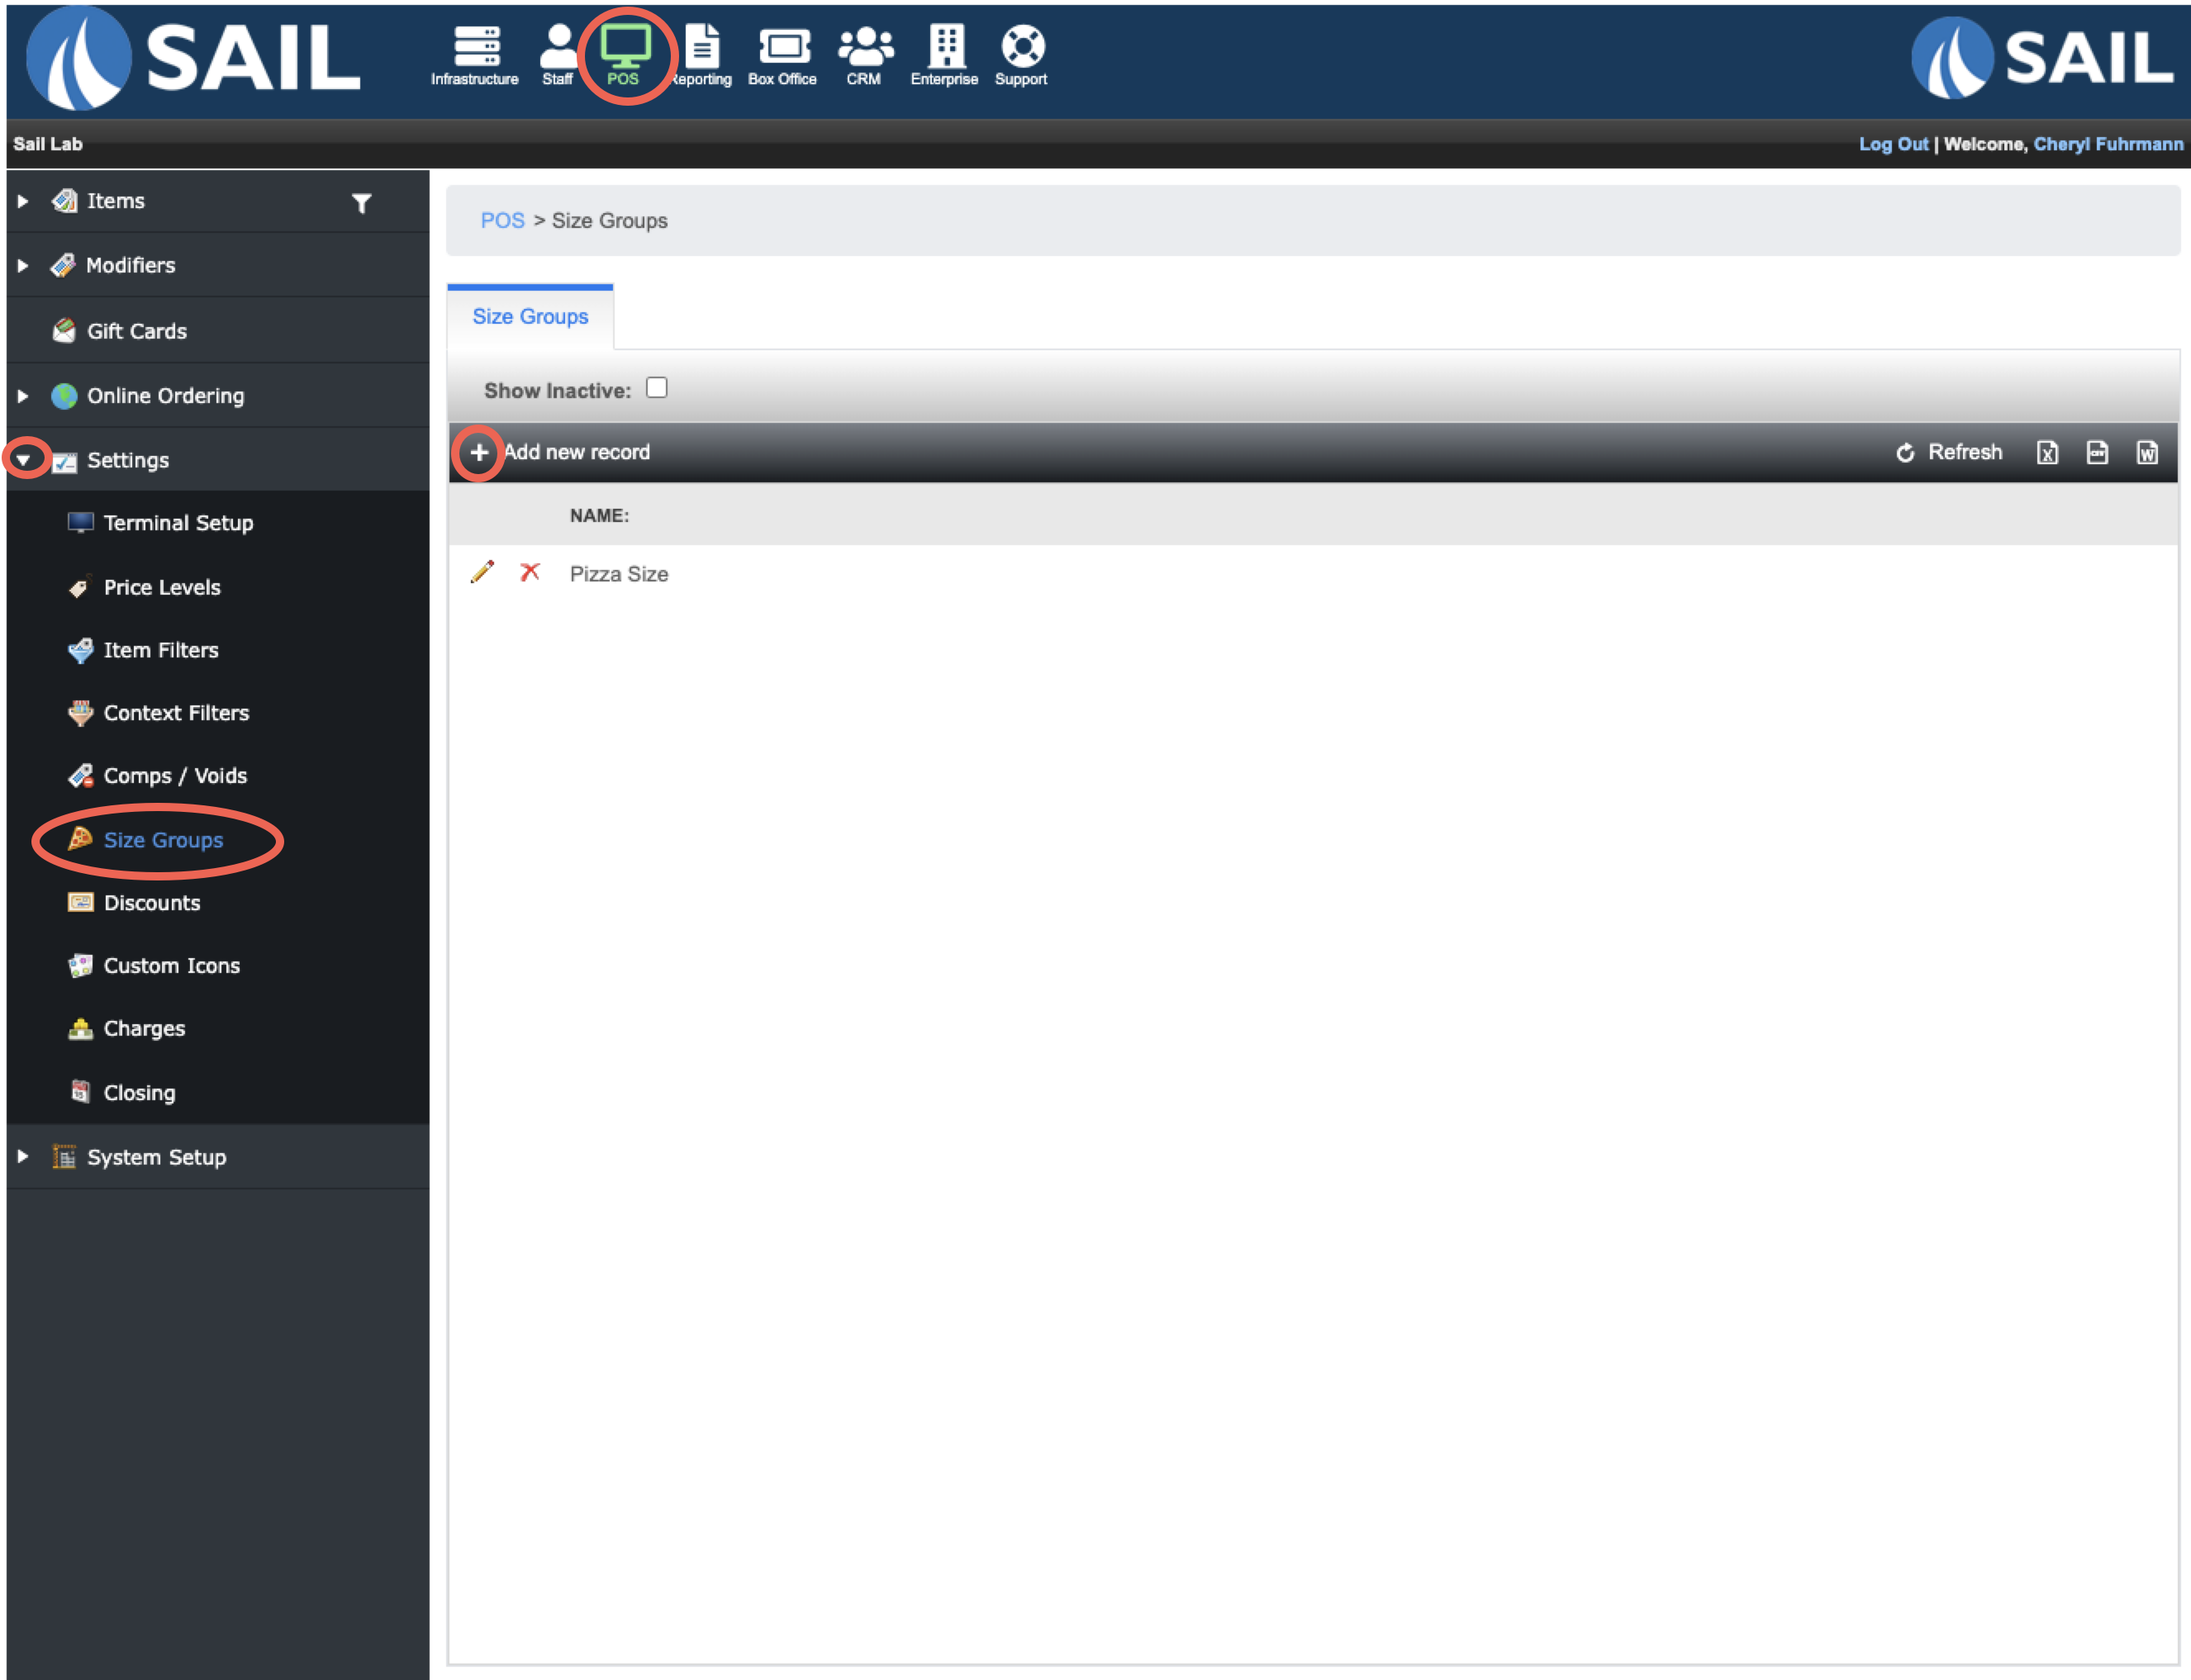
1. Size Groups
- We have now added the concept of Size Groups so ringing in item, and pricing items, that have multiple sizes is easier.
- This function will be helpful for locations that serve pizza.
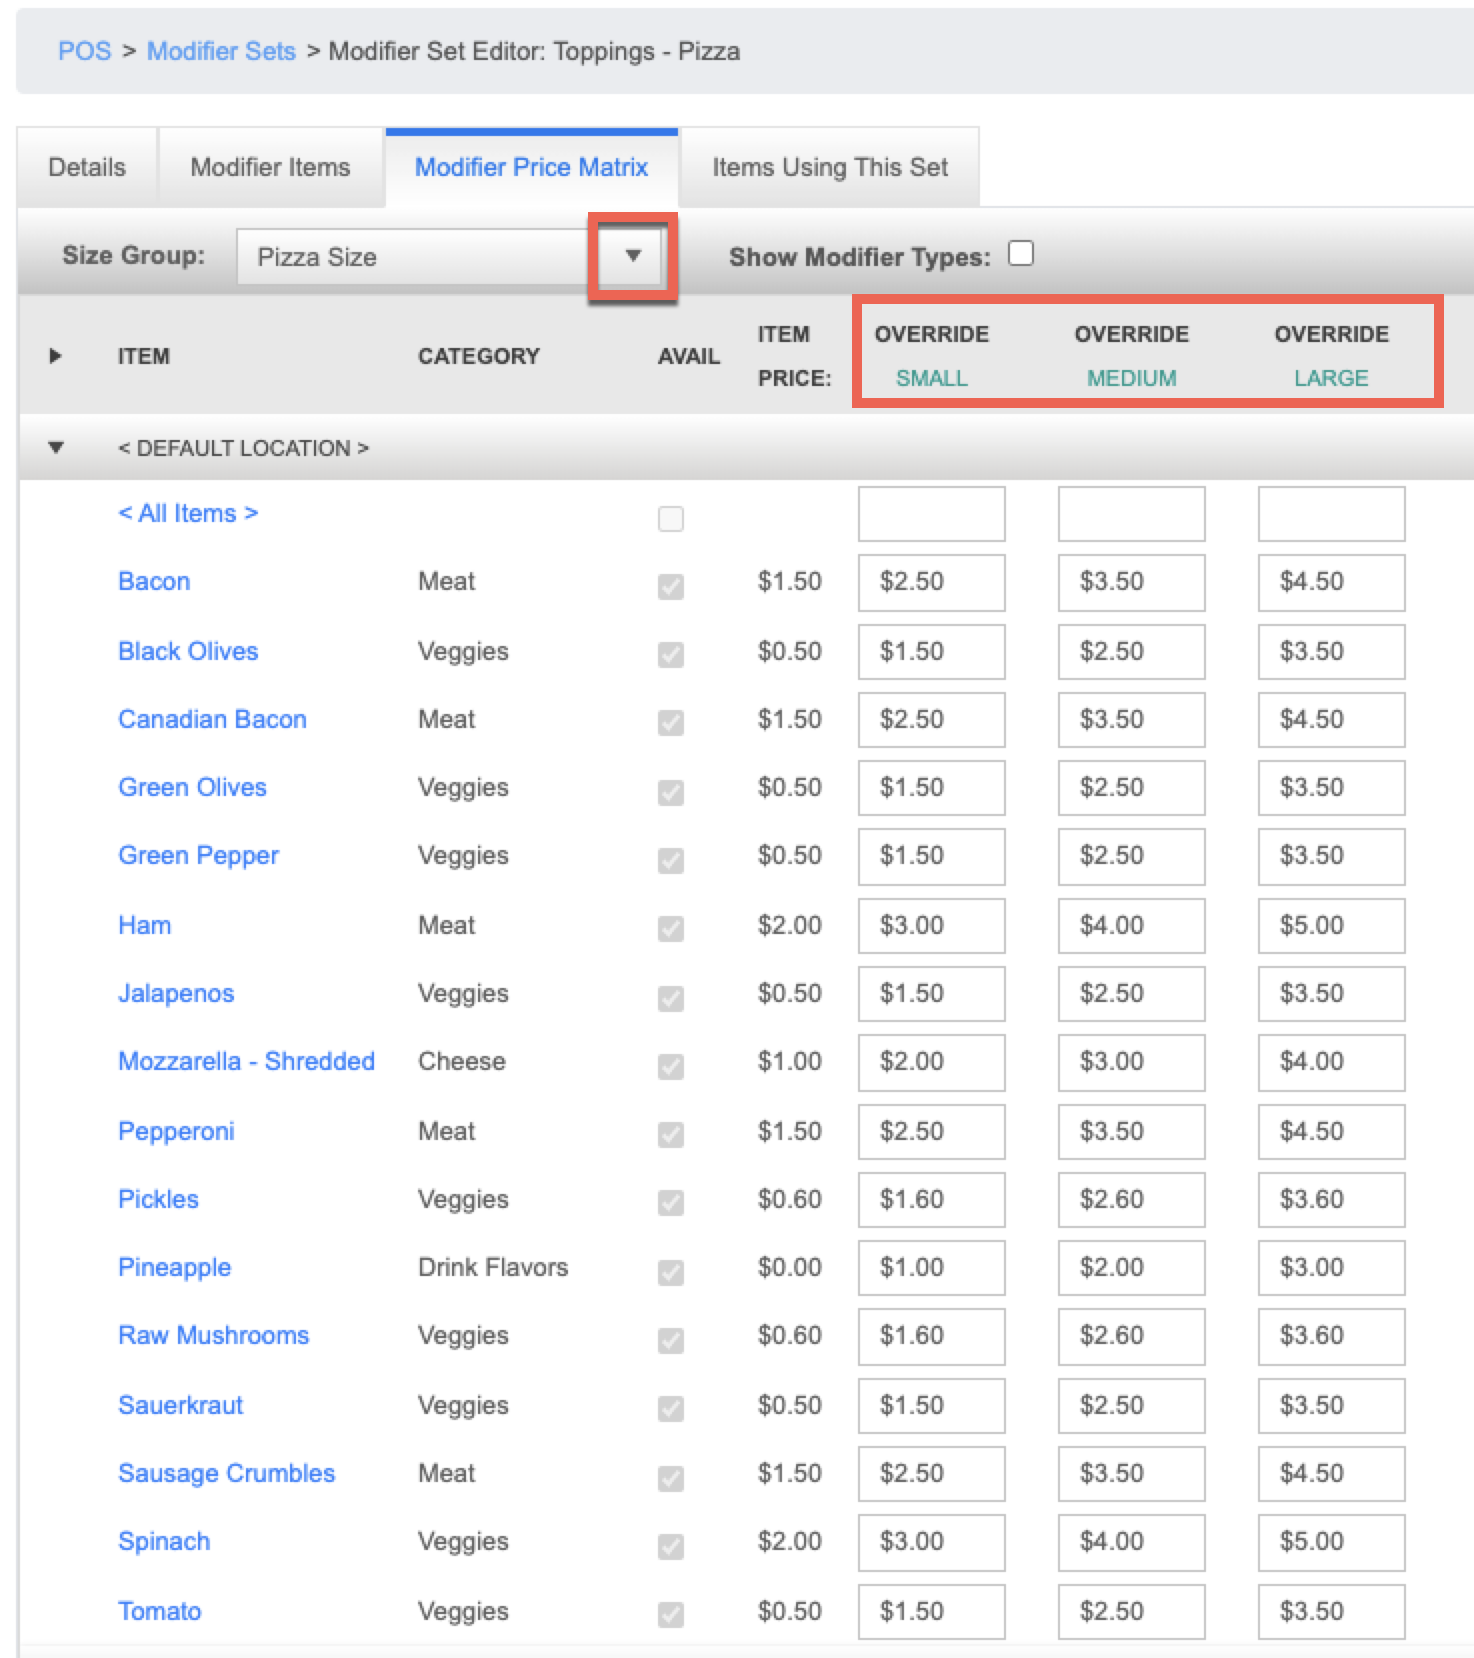
- Due to the impact of size groups on modifier pricing, we've updated the way our modifier sets are structured.
- The "Details" and "Items using this set" tabs have not changed at all
- The "Modifier Items" tab has changed to now ONLY show the items that are in the set. It will no longer show the pricing.
- We have added a "Modifier Price Matrix" tab to deal with all pricing changes
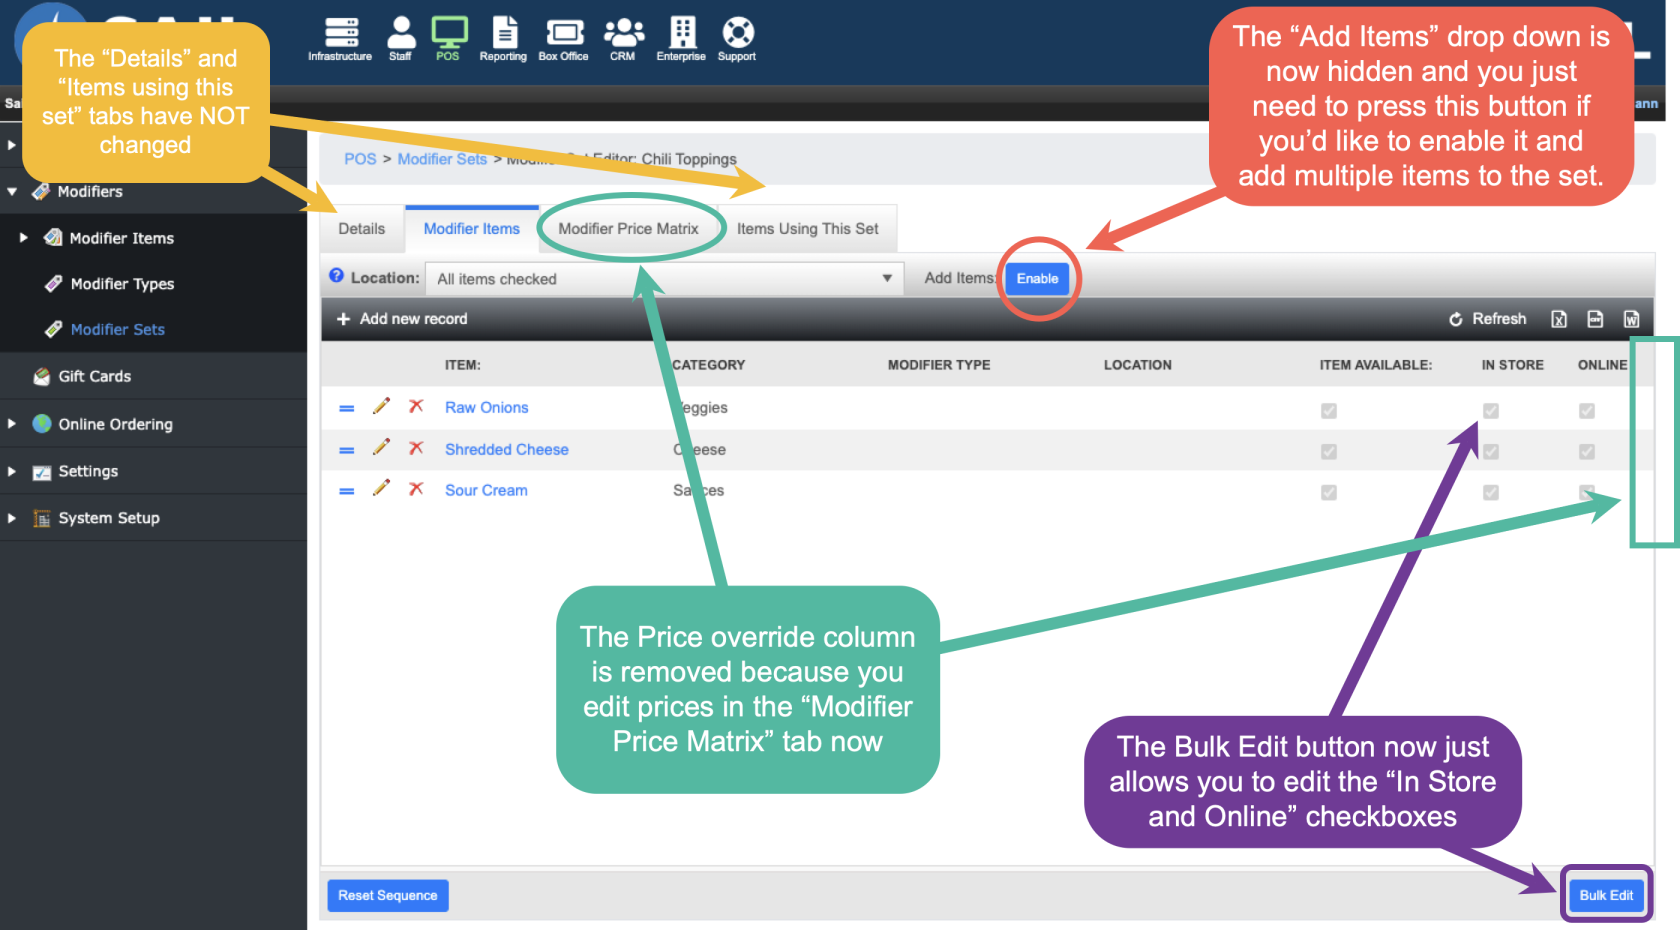
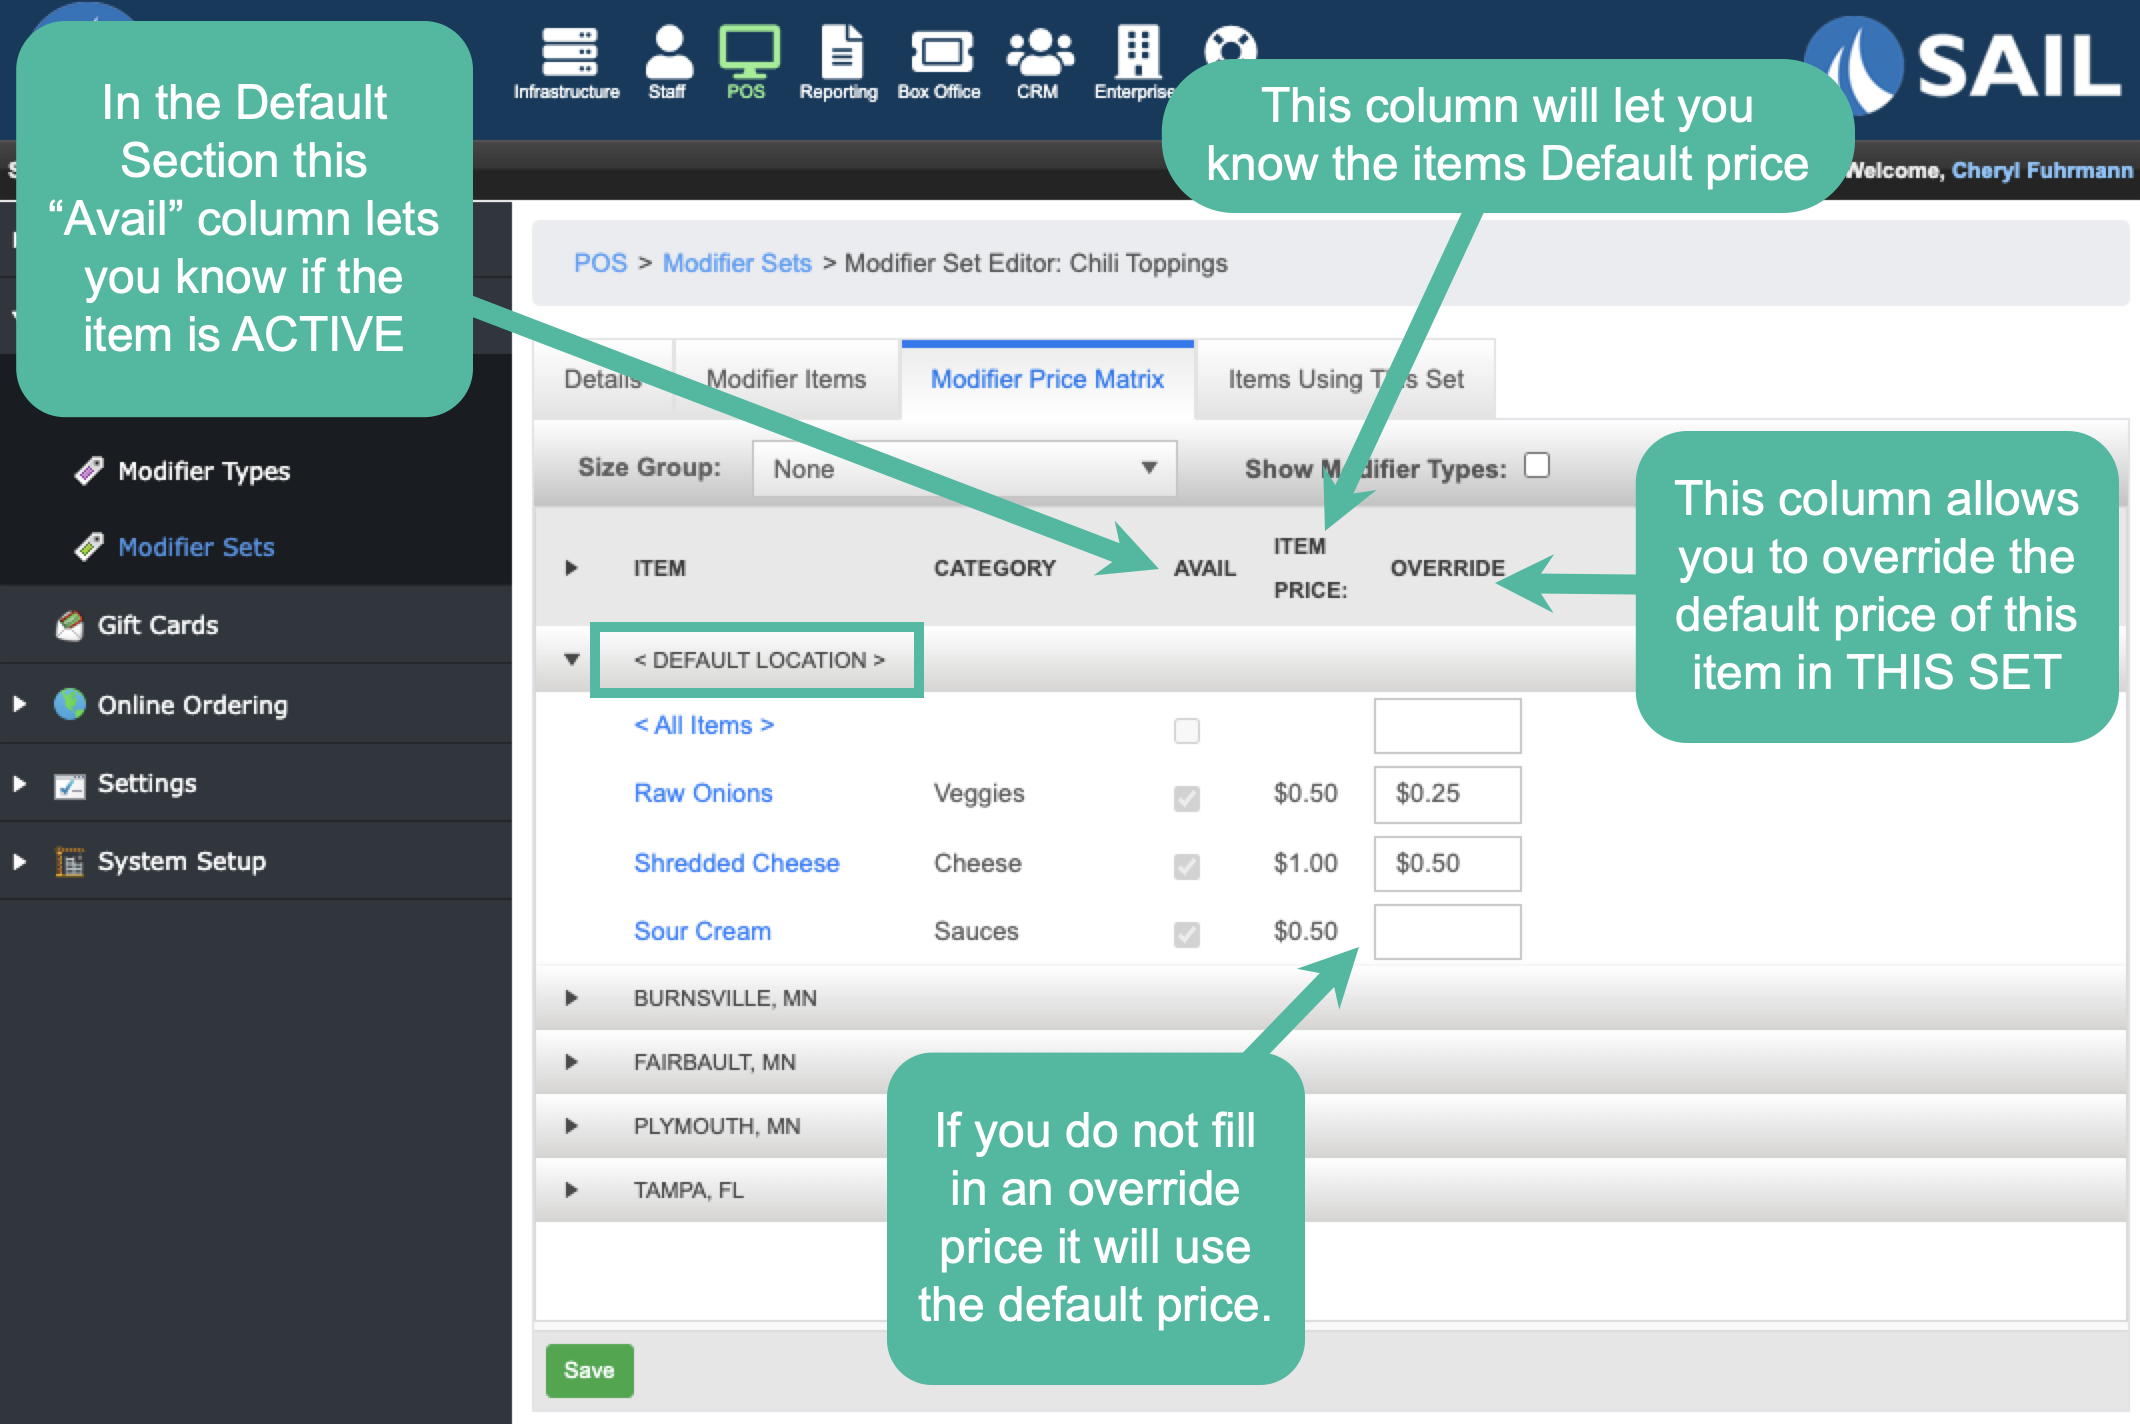
- This is the "Modifier Price Matrix" tab. It will control the price of the items in THIS SET
- If you are a single store location you will only see the top section called the "Default Location"
- Here you will now see if the item is active, What the default price is, and a box to be able to edit the price.
- If you leave the box blank it will use the default price. If you input a number it will now use that price.

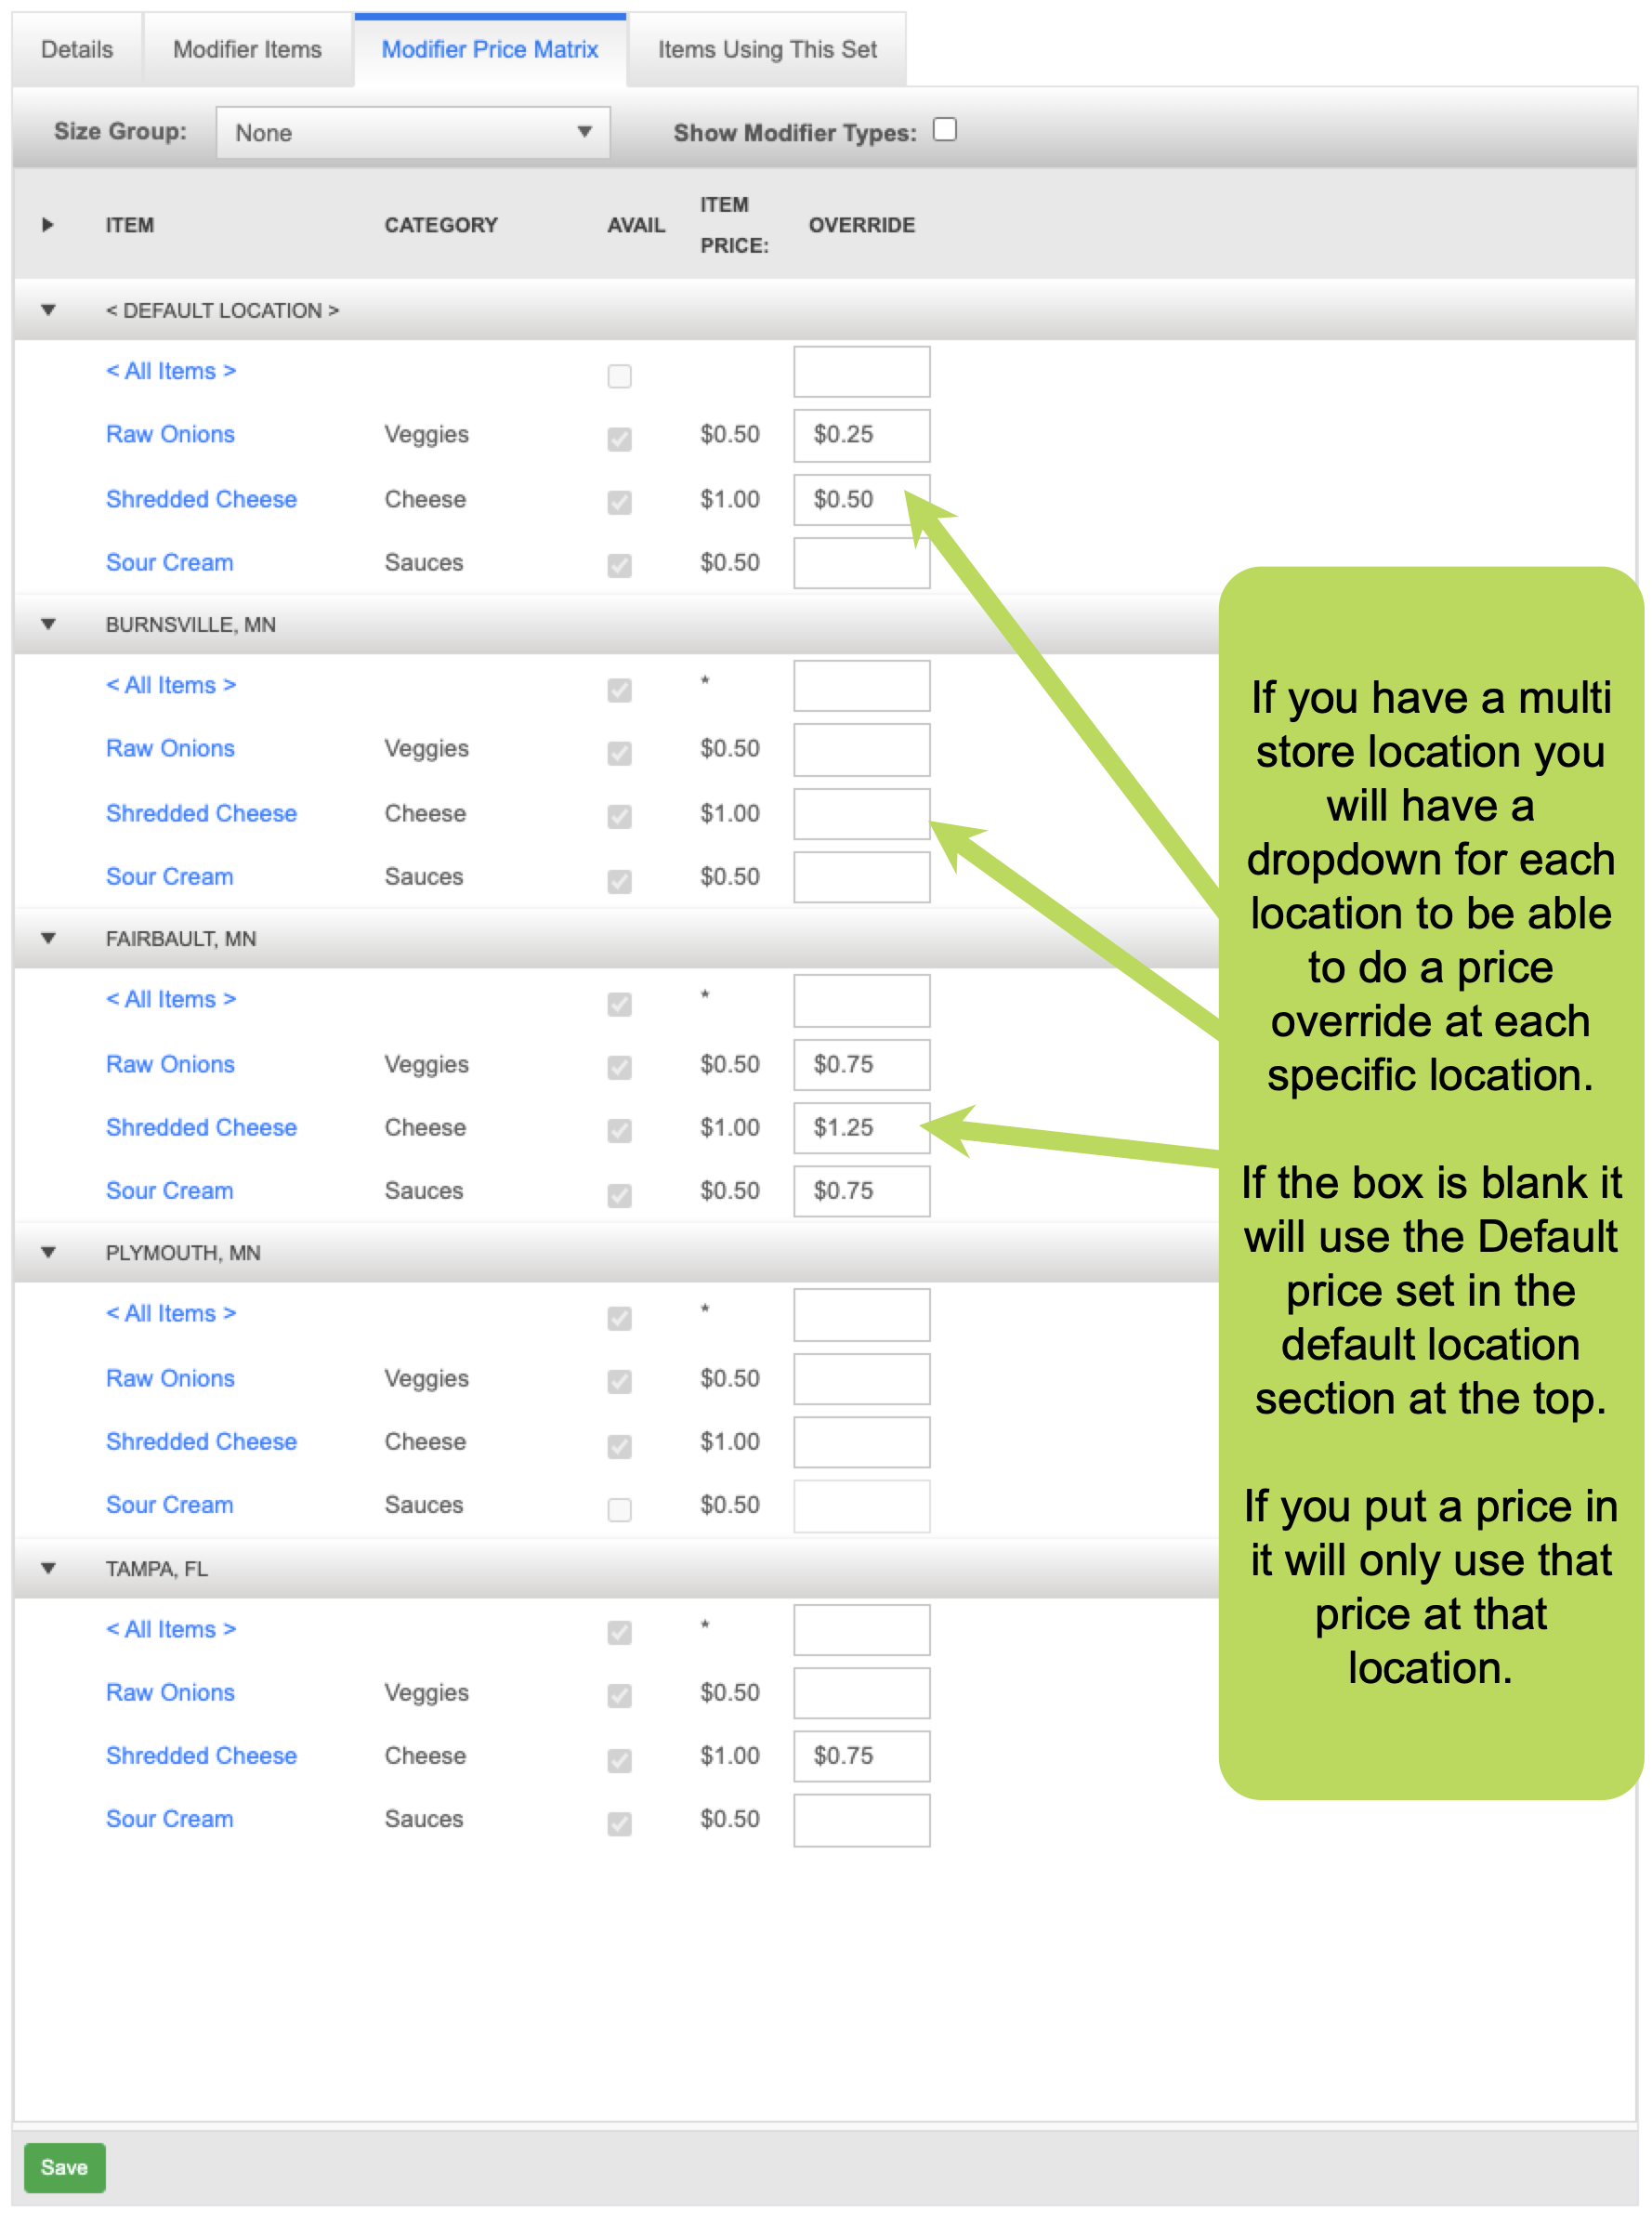
- If you have multiple locations, you will have a dropdown for each of your locations so you can set different prices at each location easily
- For the different locations the "Avail" column will let you know if that item is available at that location
- The Item price column will let you know if the default price is different at that location than the others
- The override column allows you to put in a price that is different than the default item price of the default location


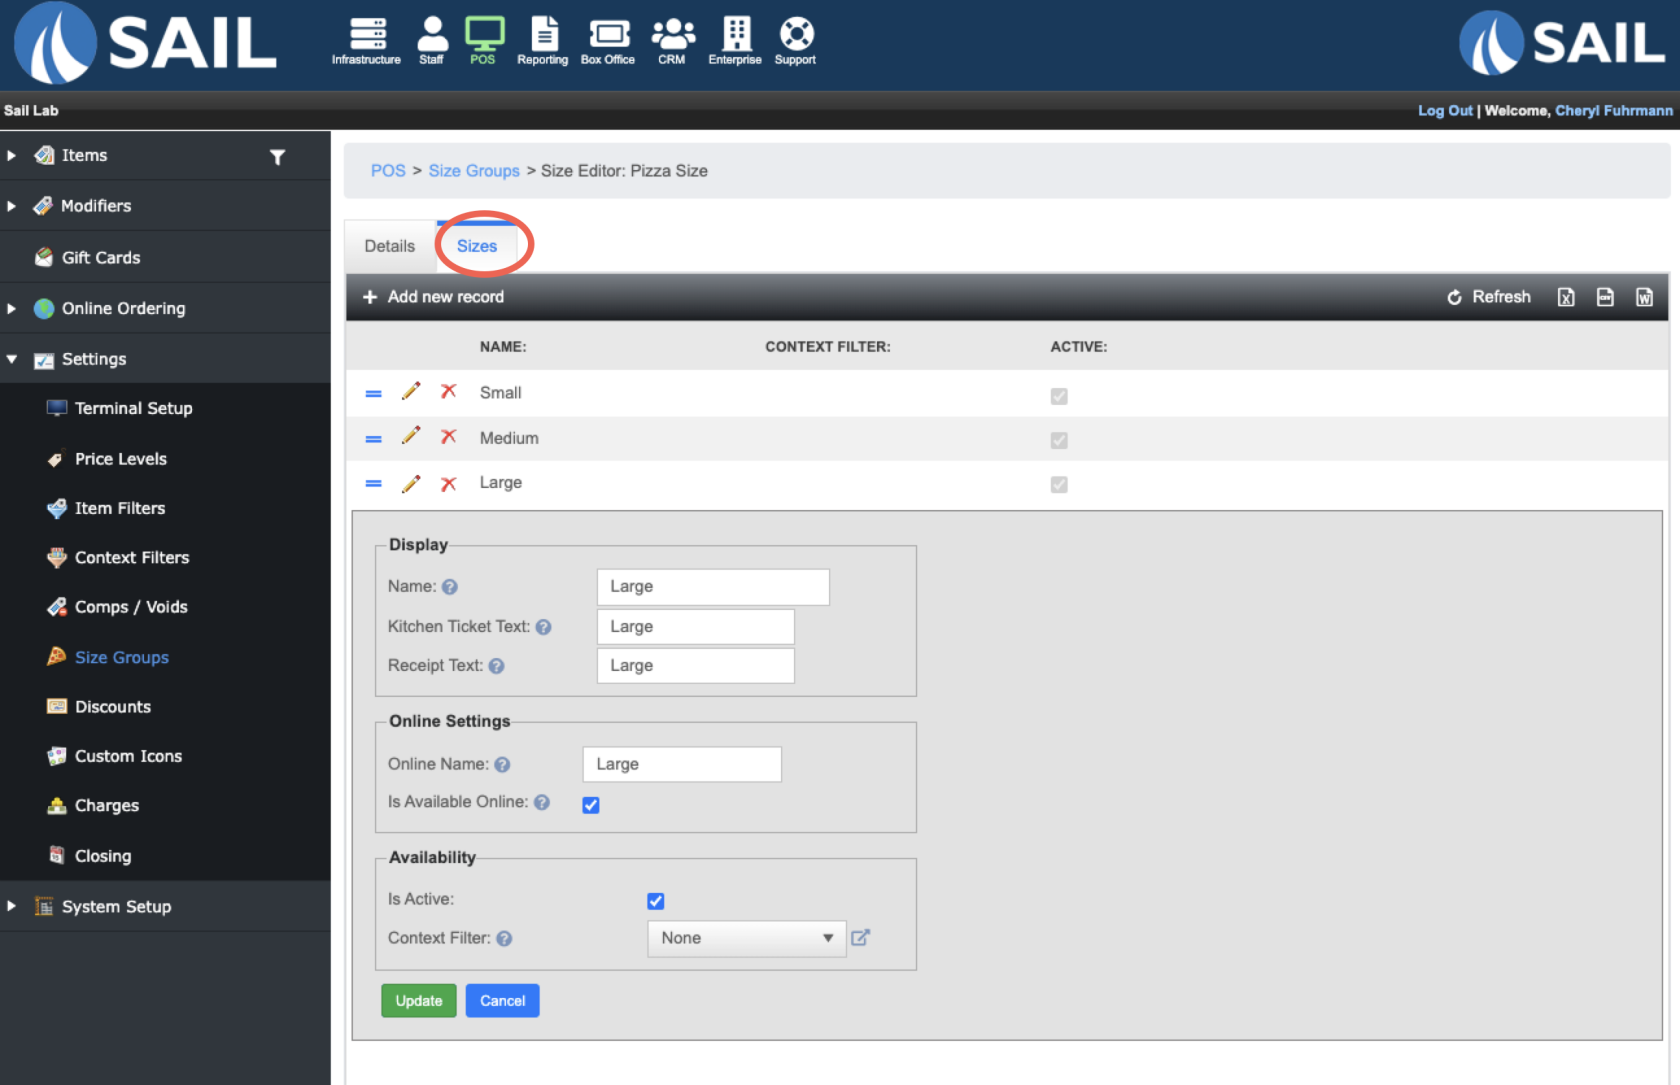
How to create a size group
- To create a size group go to Backoffice --> POS --> Settings --> Size Groups --> Add New Record
- It will first ask you to name it and set it active

- It will first ask you to name it and set it active
- Next go to the "Sizes" tab
- Here you will name all the different sizes you need for this size group
- Keep in mind that the name of the size will go in front of the item its on, so you may need to use abbreviations for the kitchen ticket text.

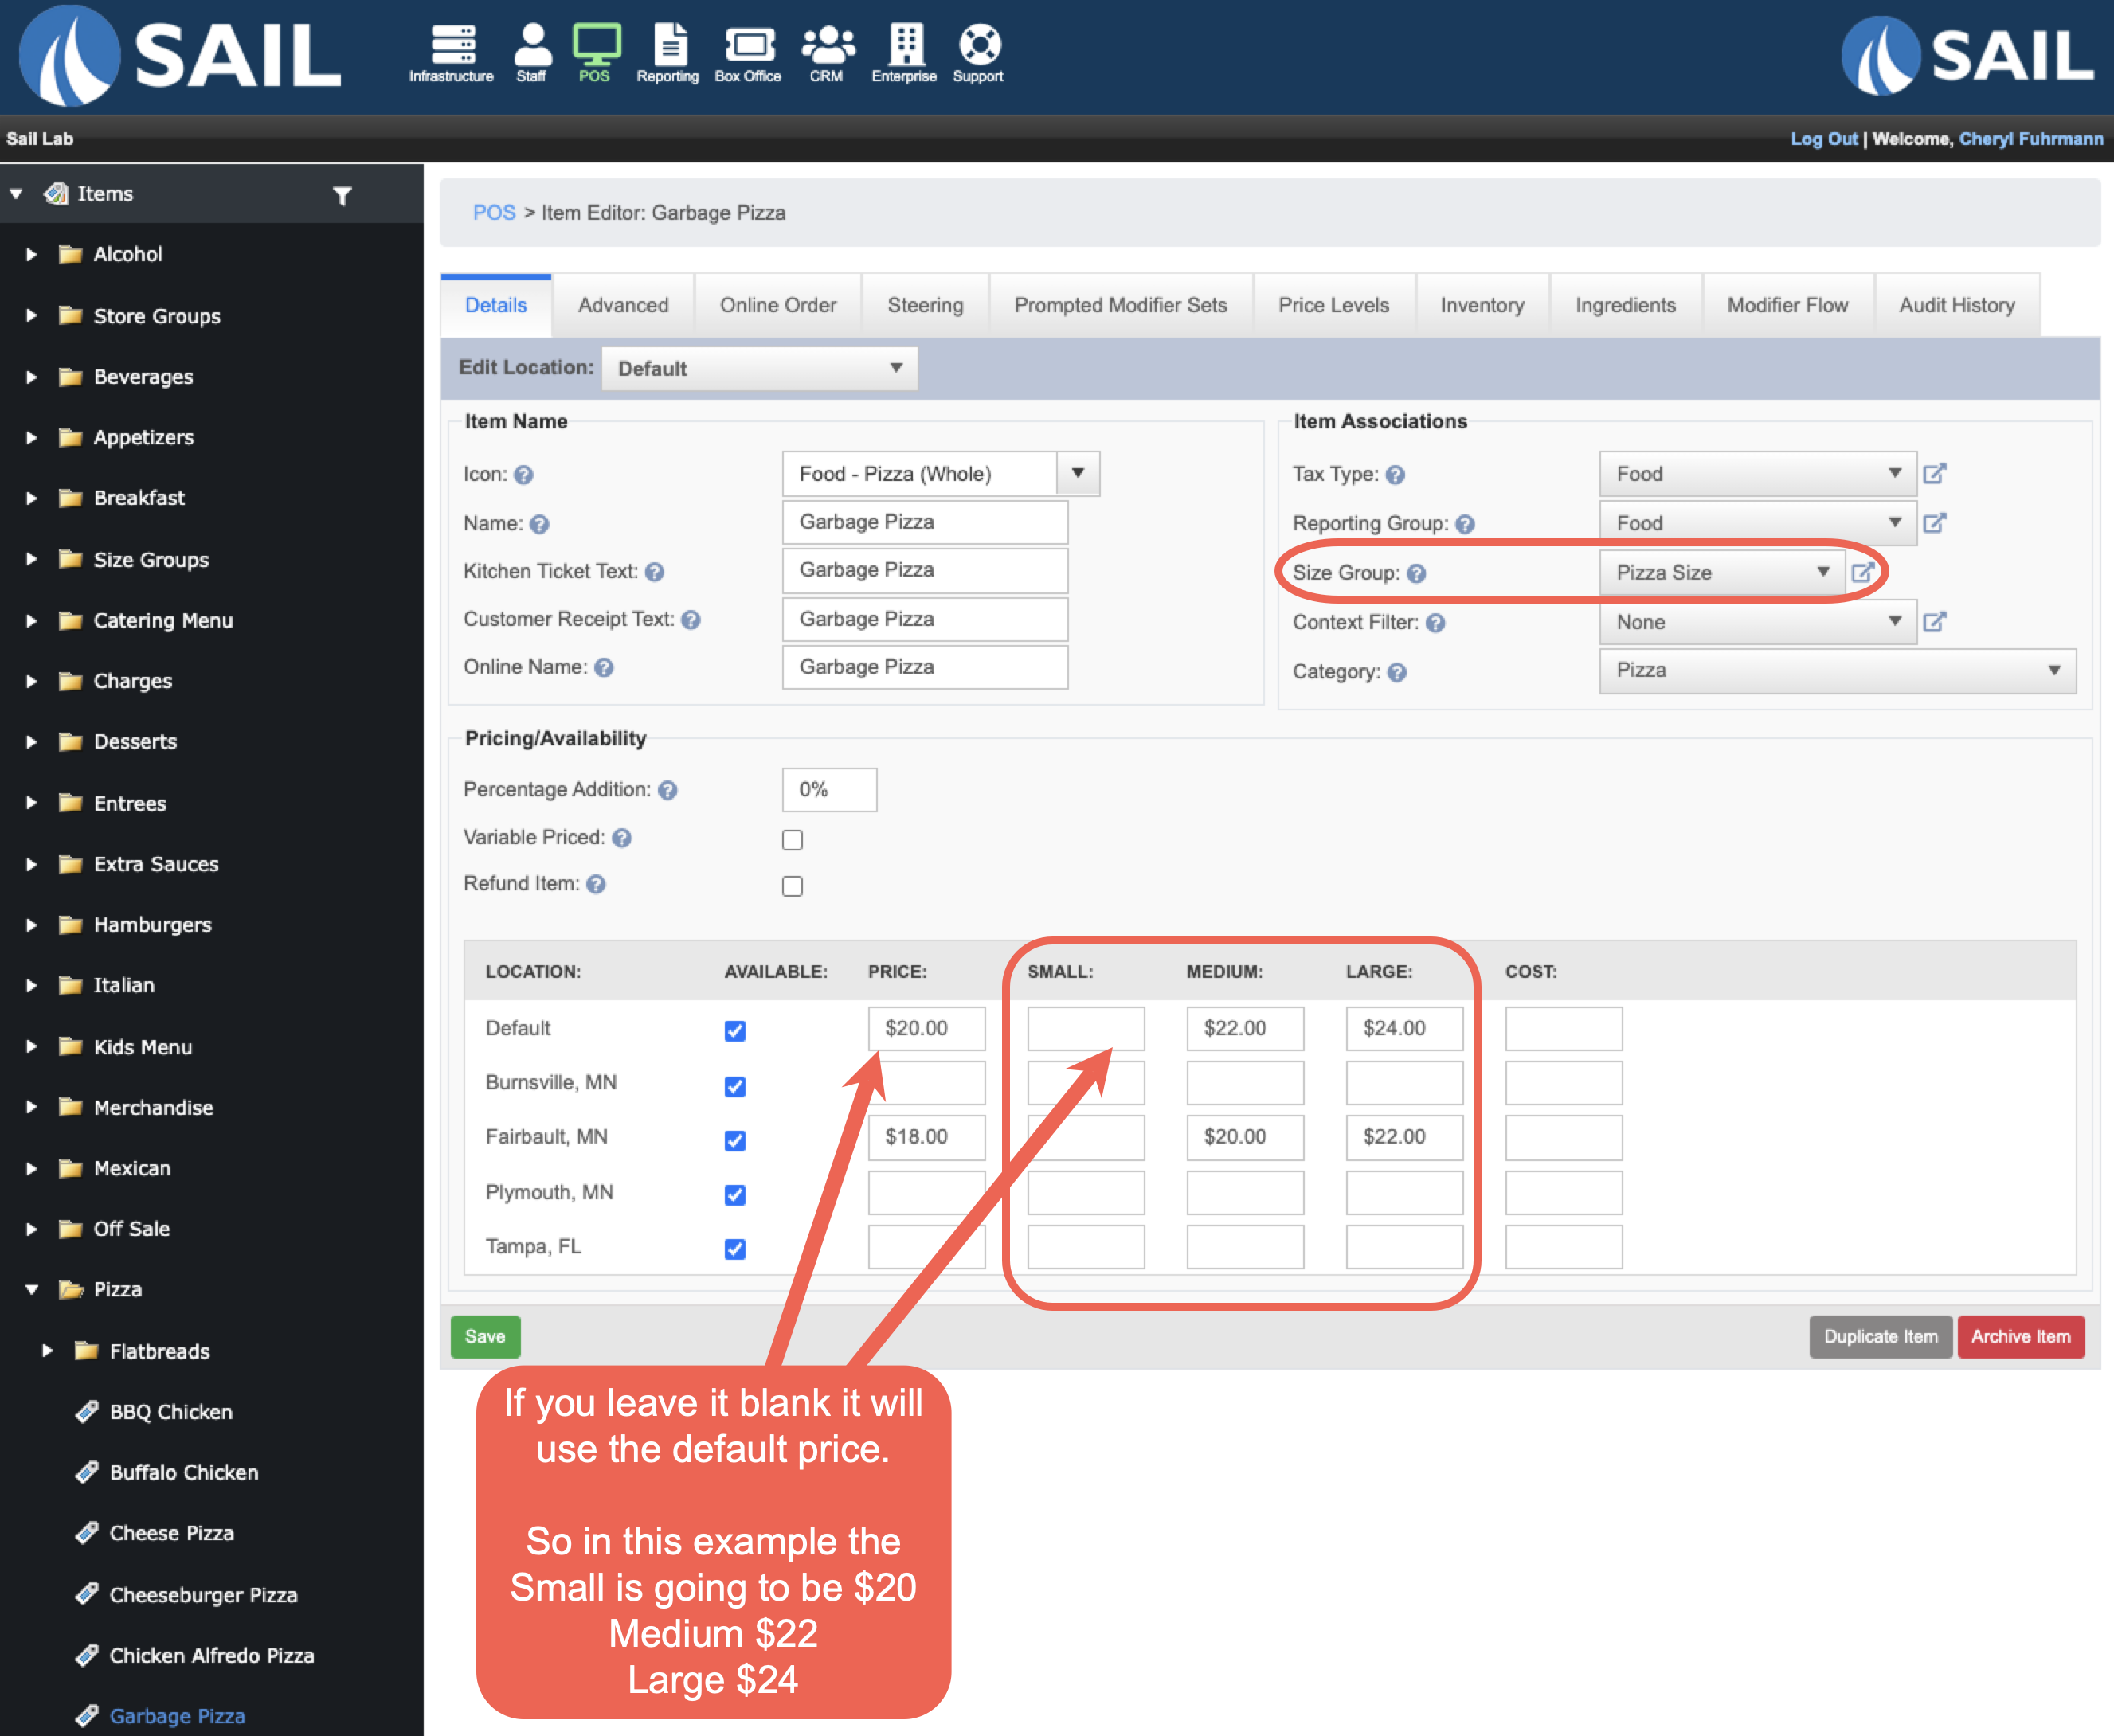
How to attach a size group to an item
- Go to the item
- There is now a drop down on the right side called "Size group" for you to select the size group you'd like to assign to this item. Click save
- Then the different size names you created will appear in the pricing section
- You can now assign different prices to the different sizes
- For Multi Store, if you just put in prices on the top of the default line, all locations will use that price
- If you'd like a location to have different prices you can fill in other prices for each size in the locations line. (In the example below the Fairbault location has different prices than the other locations.)

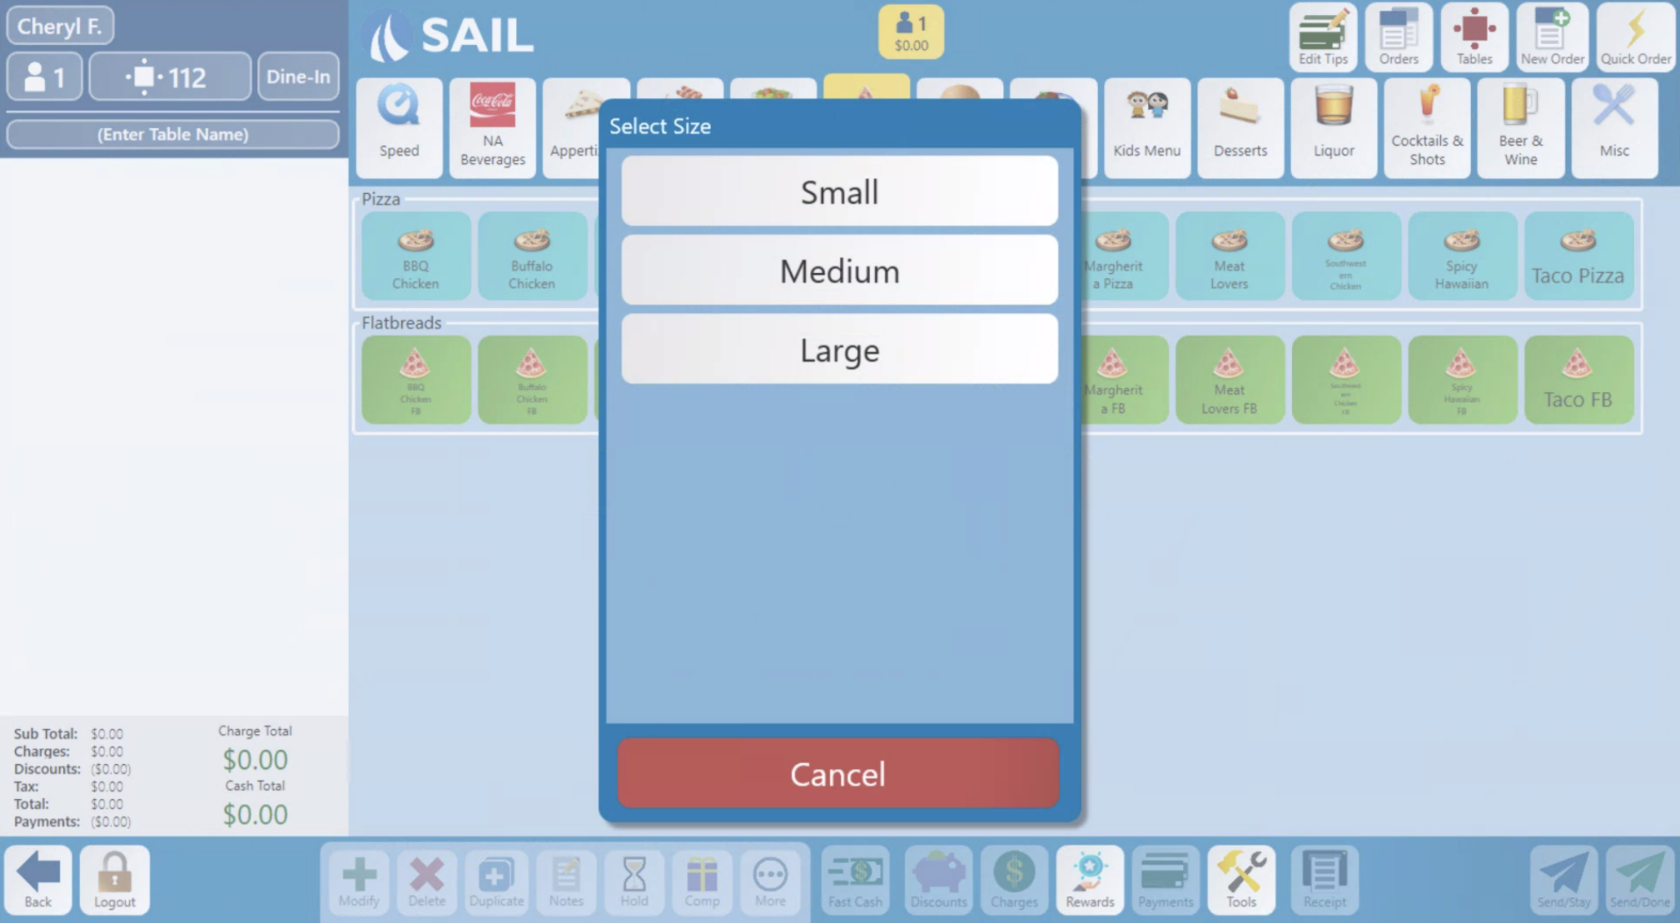
- Here is what it will look like on a terminal when you select this Garbage Pizza
- It will put the word "Medium" in front of the name of the pizza on the check on the left, on the kitchen ticket, and on the customer receipt.

How to use size groups with Modifiers
- Find the modifier set that you'd like to use the size group with
- Go to the Modifier Price Matrix tab
- Use the Size group drop down to select the size group that you'd like to change pricing on
- The size names you create will appear at the top so you can put in different prices for each of the different sizes

Improvements
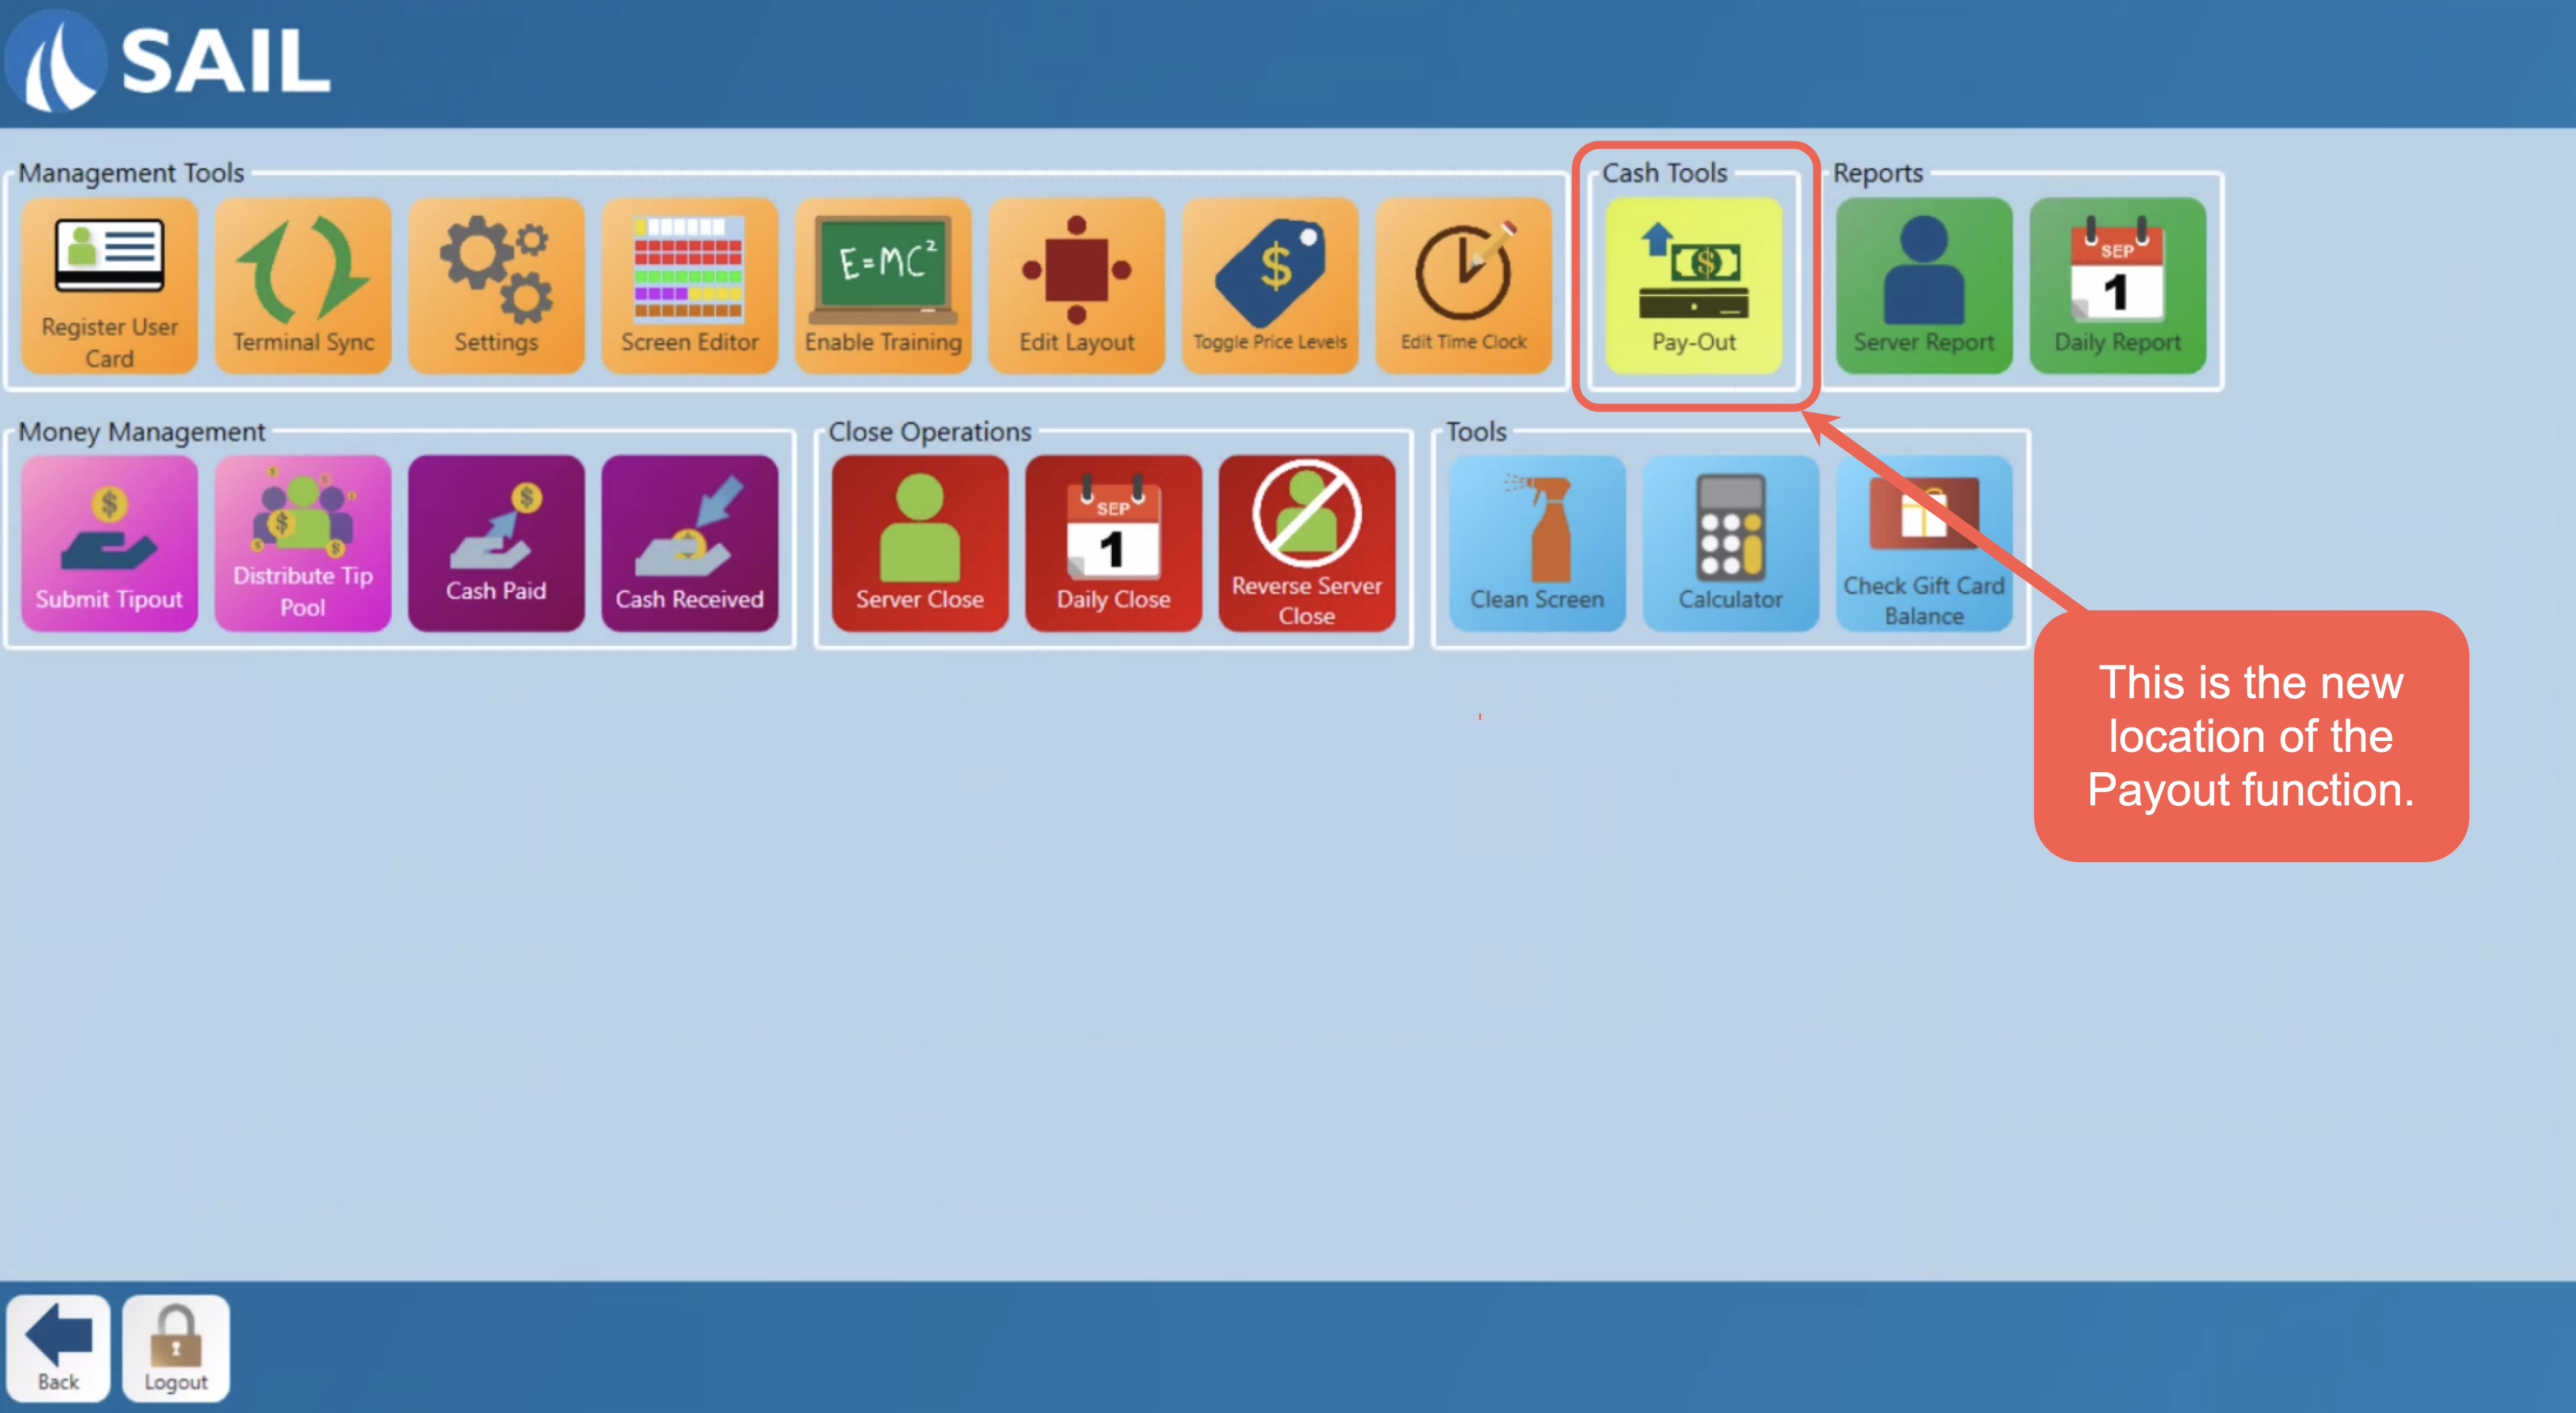
2. The Payout button is moving
- We have now moved the payout button to the Functions screen

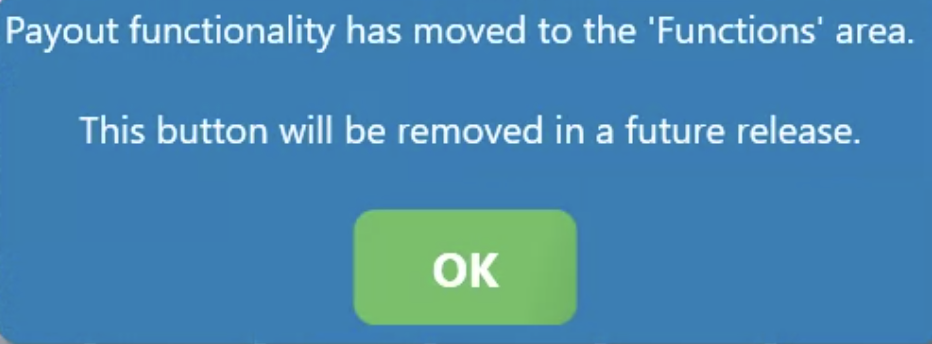
- If you try to use the payout button that is still in the order entry screen you will get this message:
(Note: in a future release we will remove the payout button from the order entry screen)

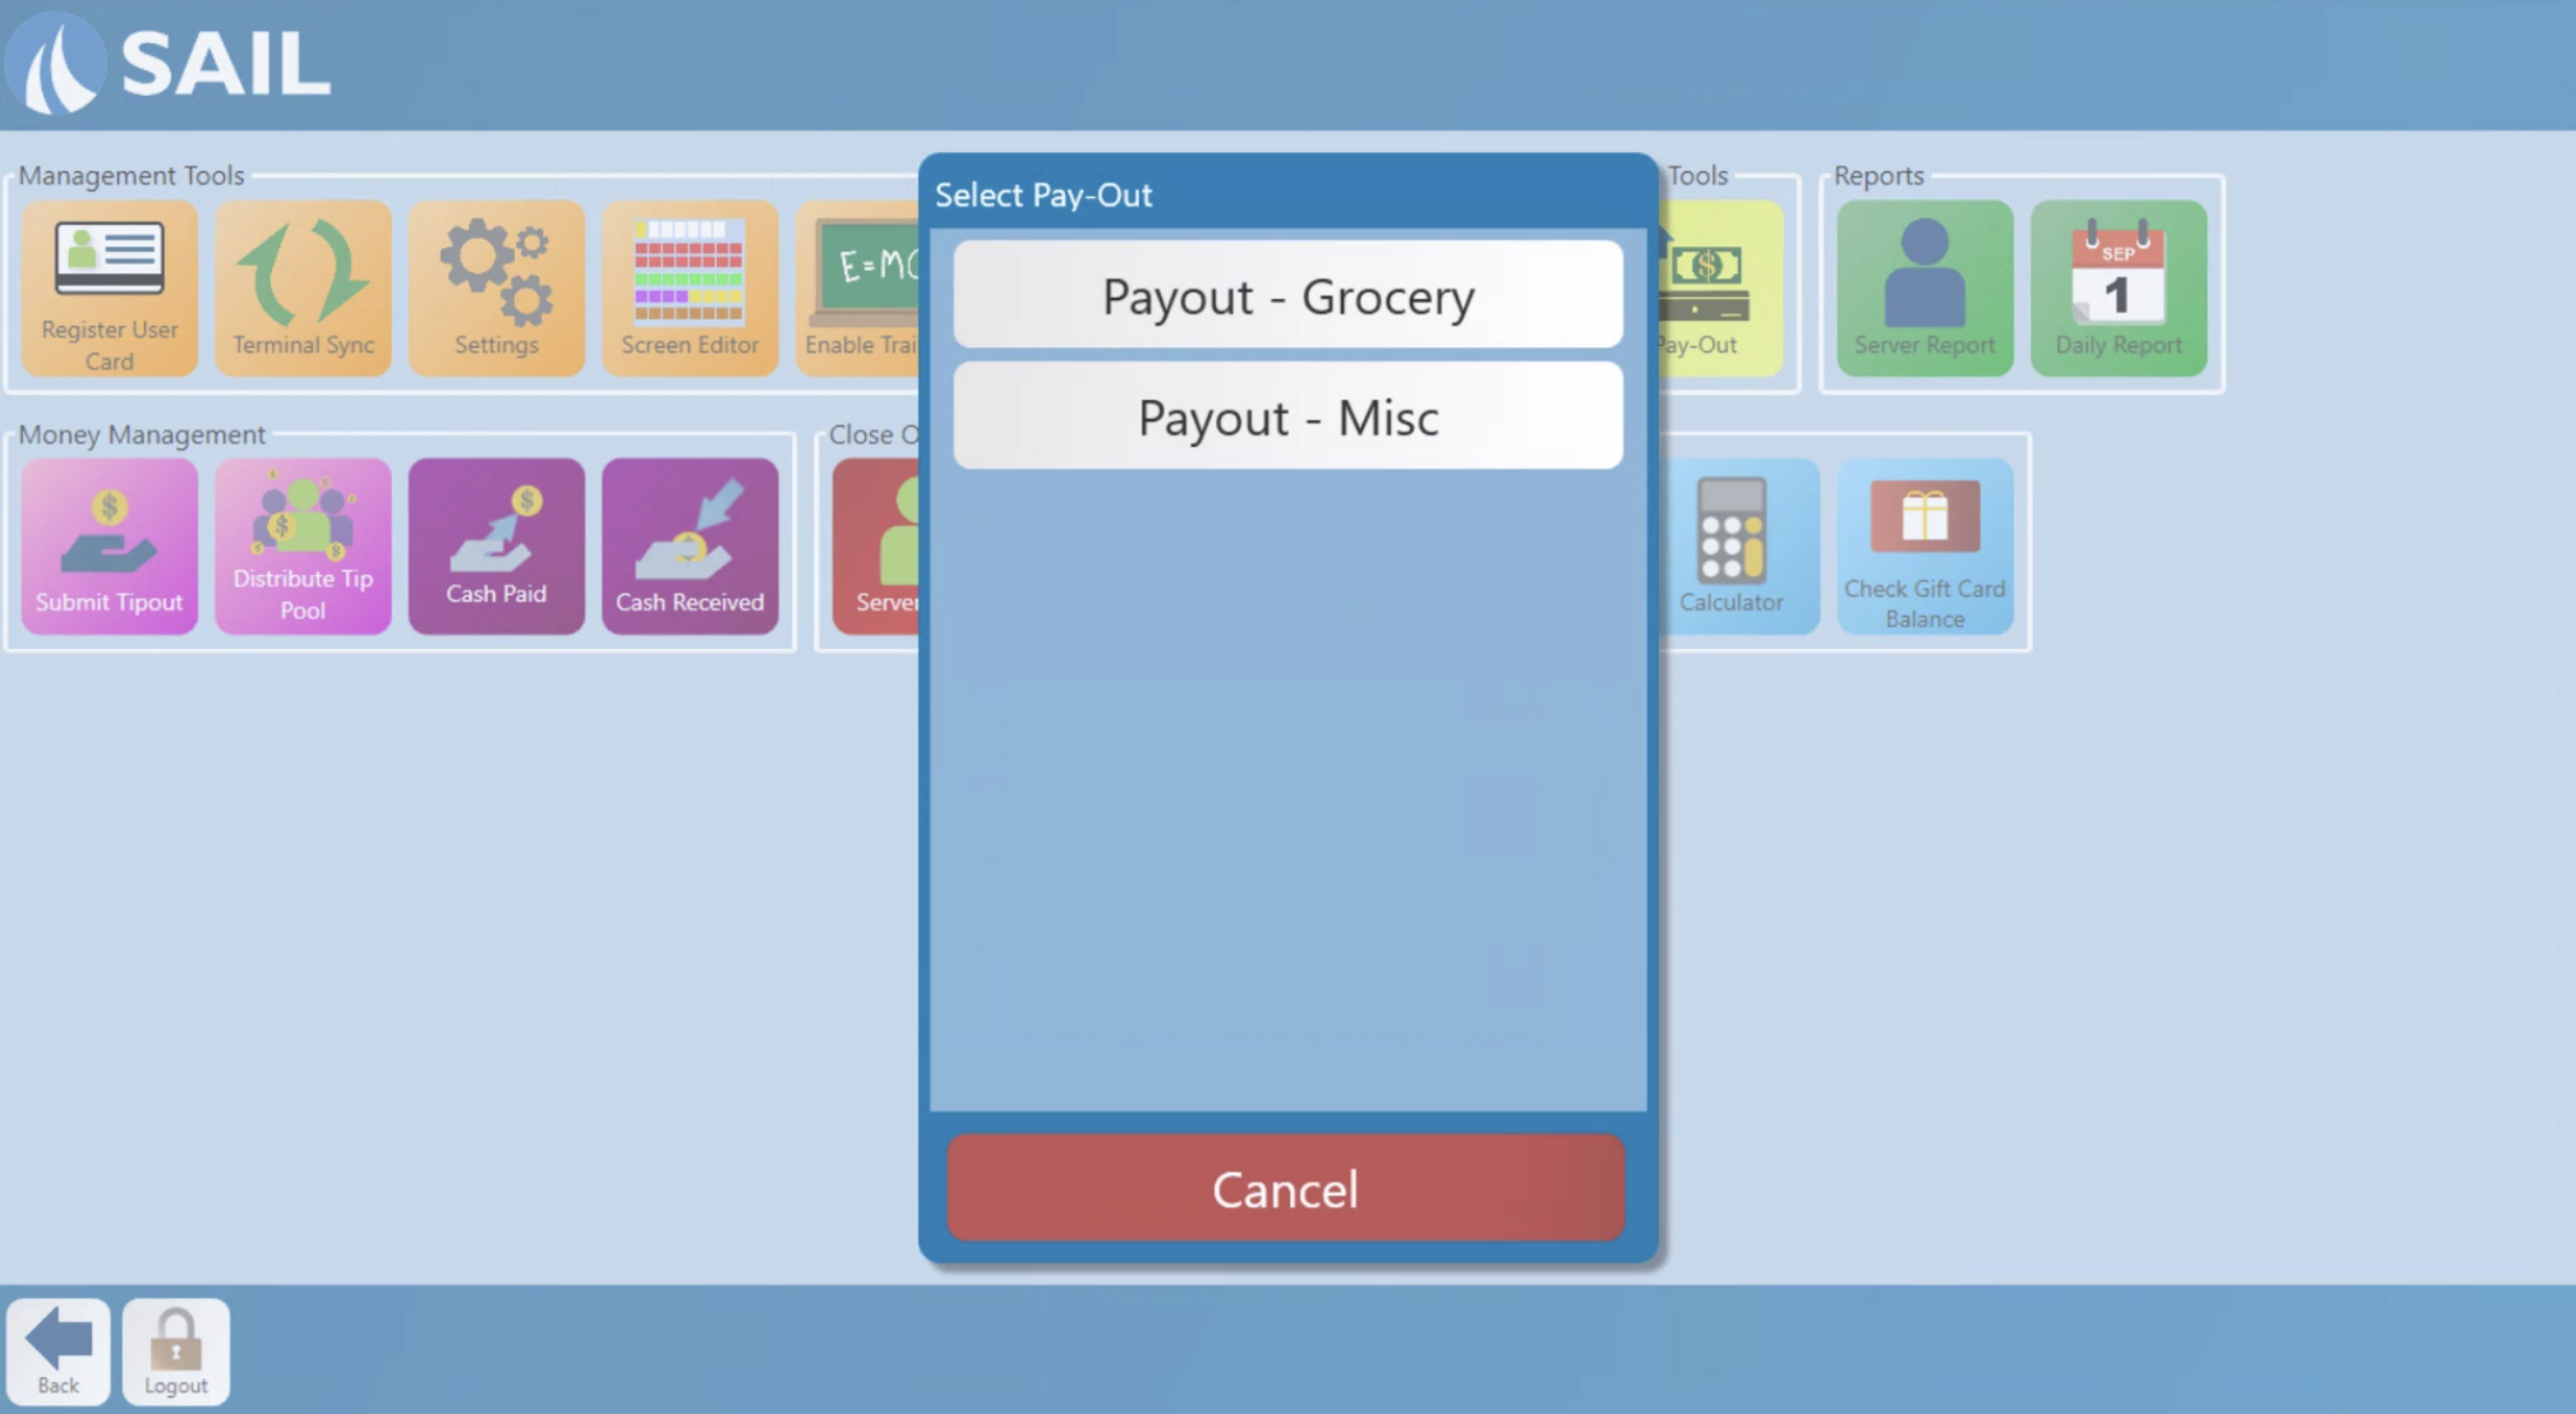
- If you have more than 1 payout button, when you go into Functions and select the Payout button you will get a prompt to select which of the payout buttons you'd like to use.

- Please note that only the location of the payout button has changed
- The Buttons will still prompt for an amount
- It will still prompt for a type note as to the details of the payout
- The drawer will still open for you to take the money out
- A slip will still print the details so you can keep it in the drawer or attach it to a receipt
- In reporting it will still show up in the same location under non sales transactions
No Comments