
How to create Item Filters
This document will show you how to create Item Filters
To Navigate to Items filters
- POS --> Settings --> Item Filters
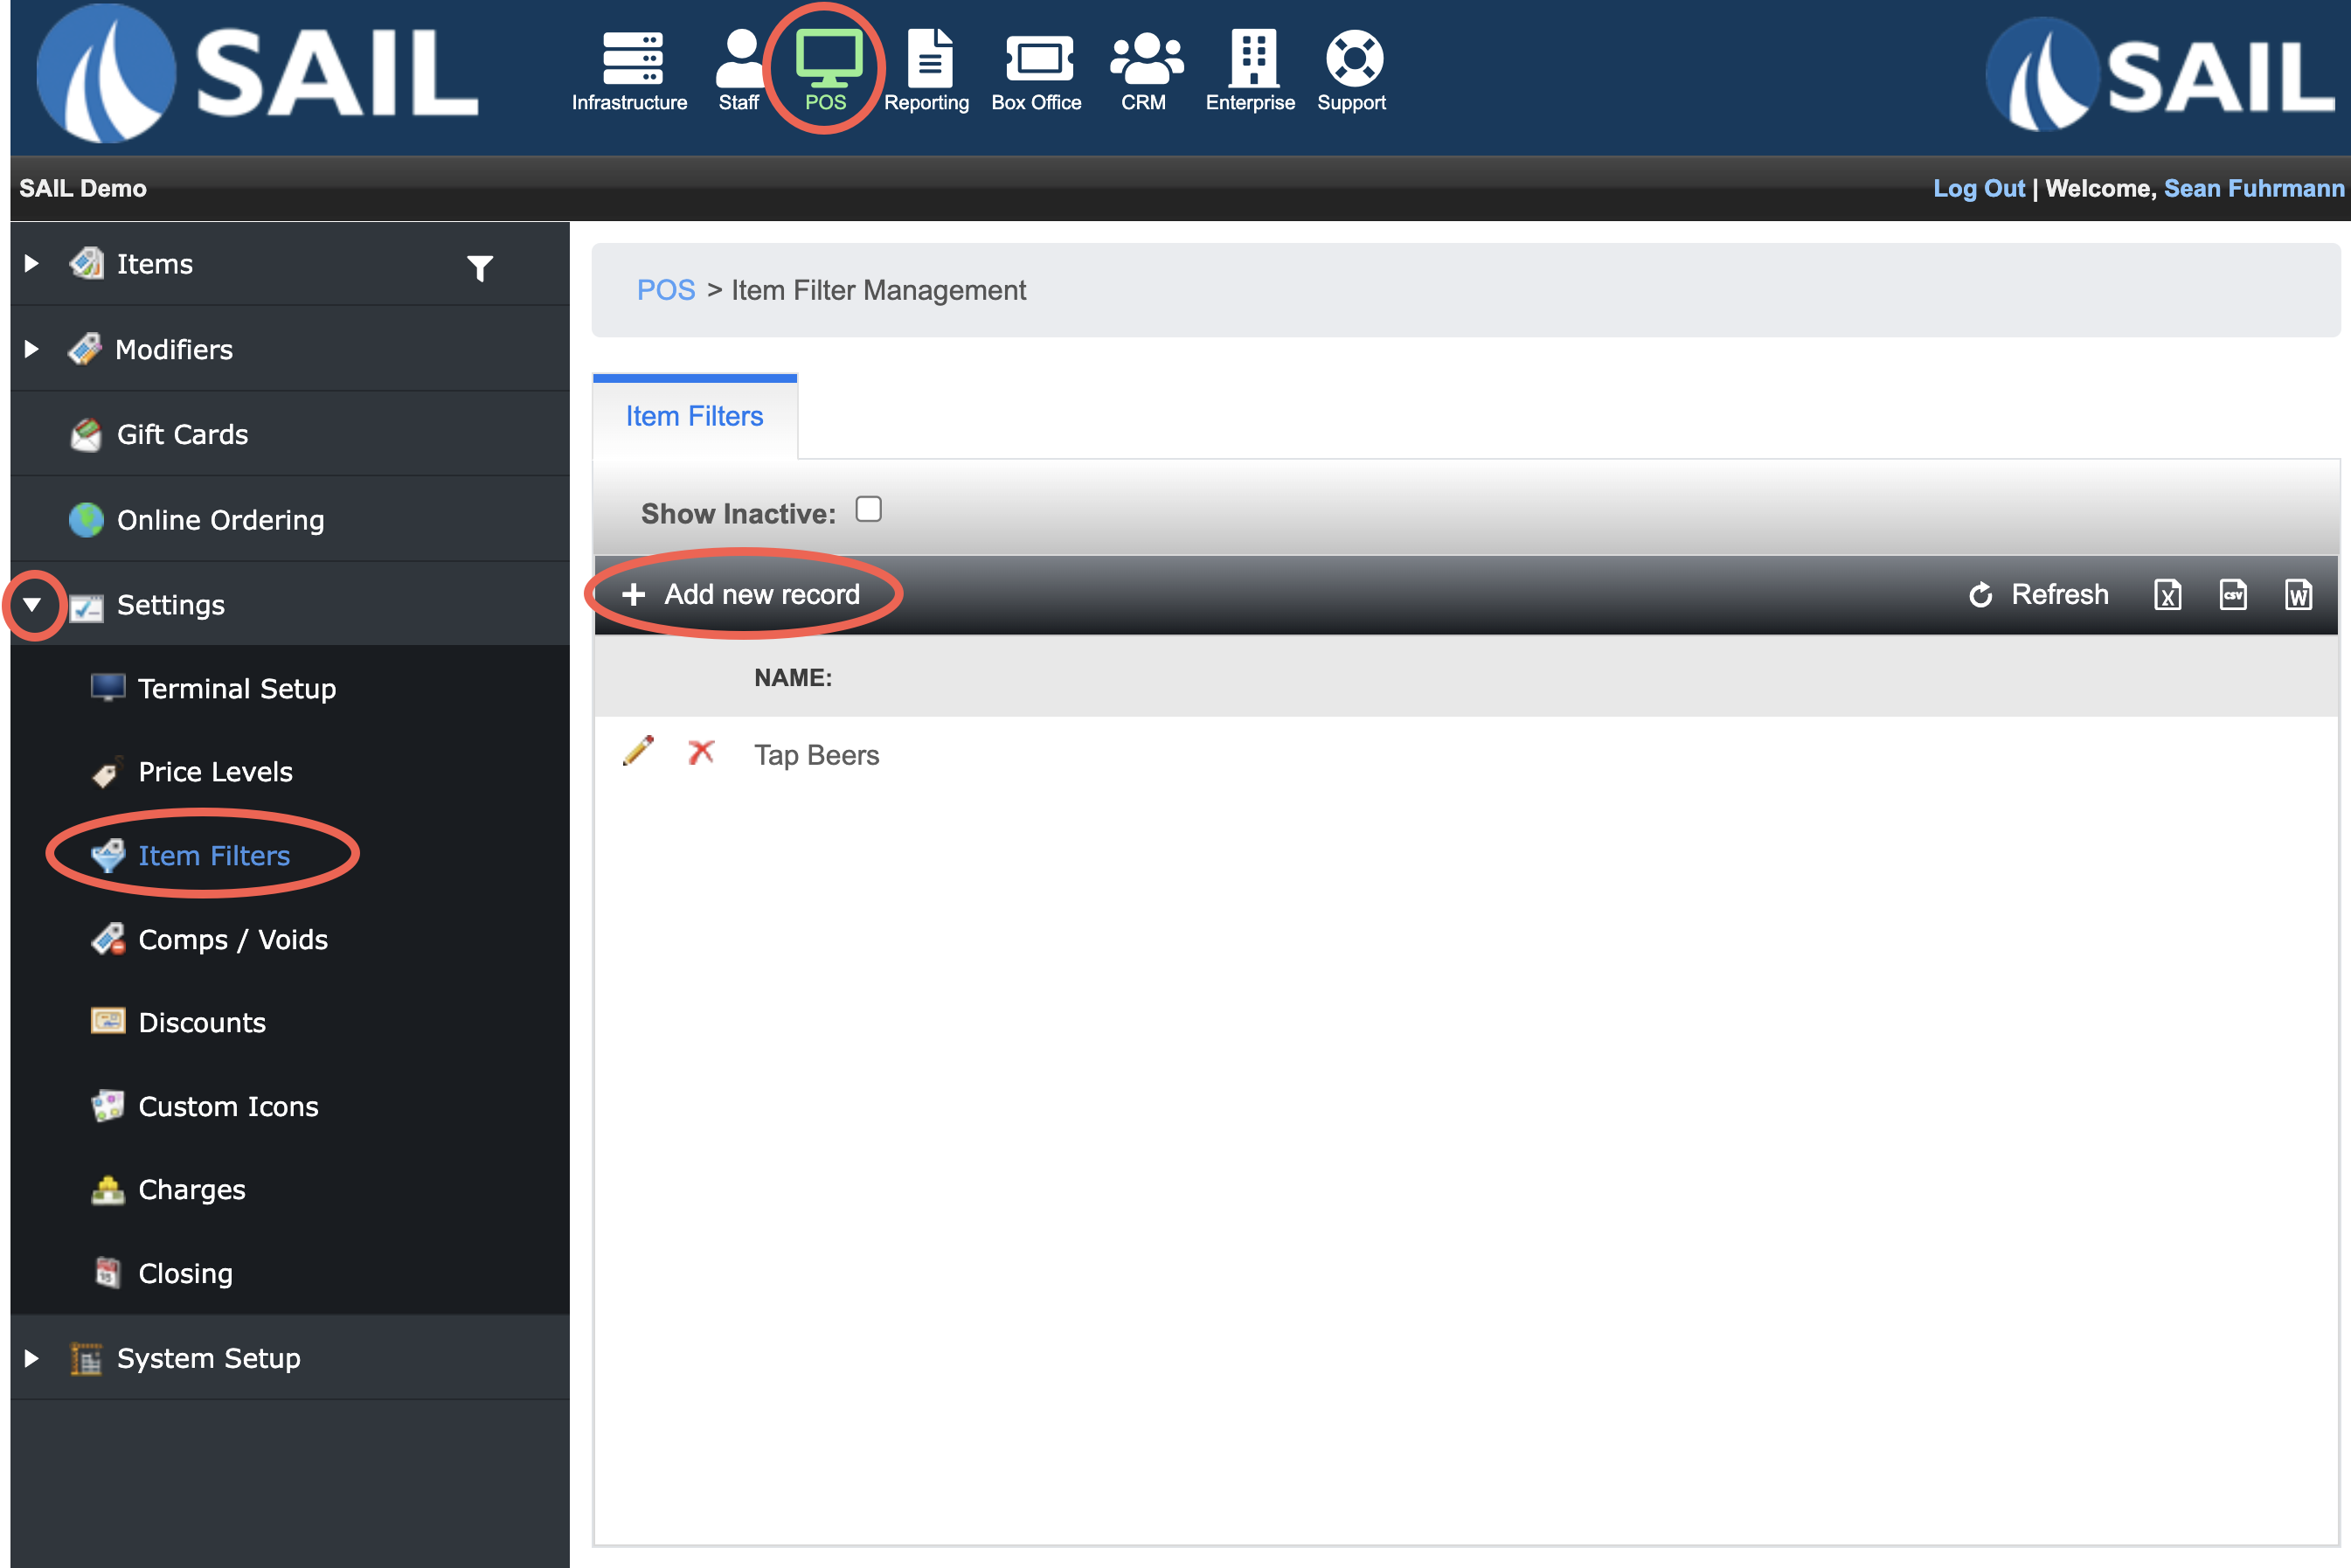
To create a new Item Filter
Click + Add a new record
- Name the filter
- Item filters can be created in many different ways.
- You can filter by any of the 8 settings (Reporting groups, Tax Types, Item Categories, Individual Items, Items that are Available Online, Variable priced items (like open food and open liquor), REfund items, and Management editable items.)
- You can filter by any of the 8 settings (Reporting groups, Tax Types, Item Categories, Individual Items, Items that are Available Online, Variable priced items (like open food and open liquor), REfund items, and Management editable items.)
- For right now you can use items filters for 2 different things. (In the future it will be more)
- Use them to filter items for discounts (Example #1)
- Use them for All Day Count with the KVS system (Example #2)
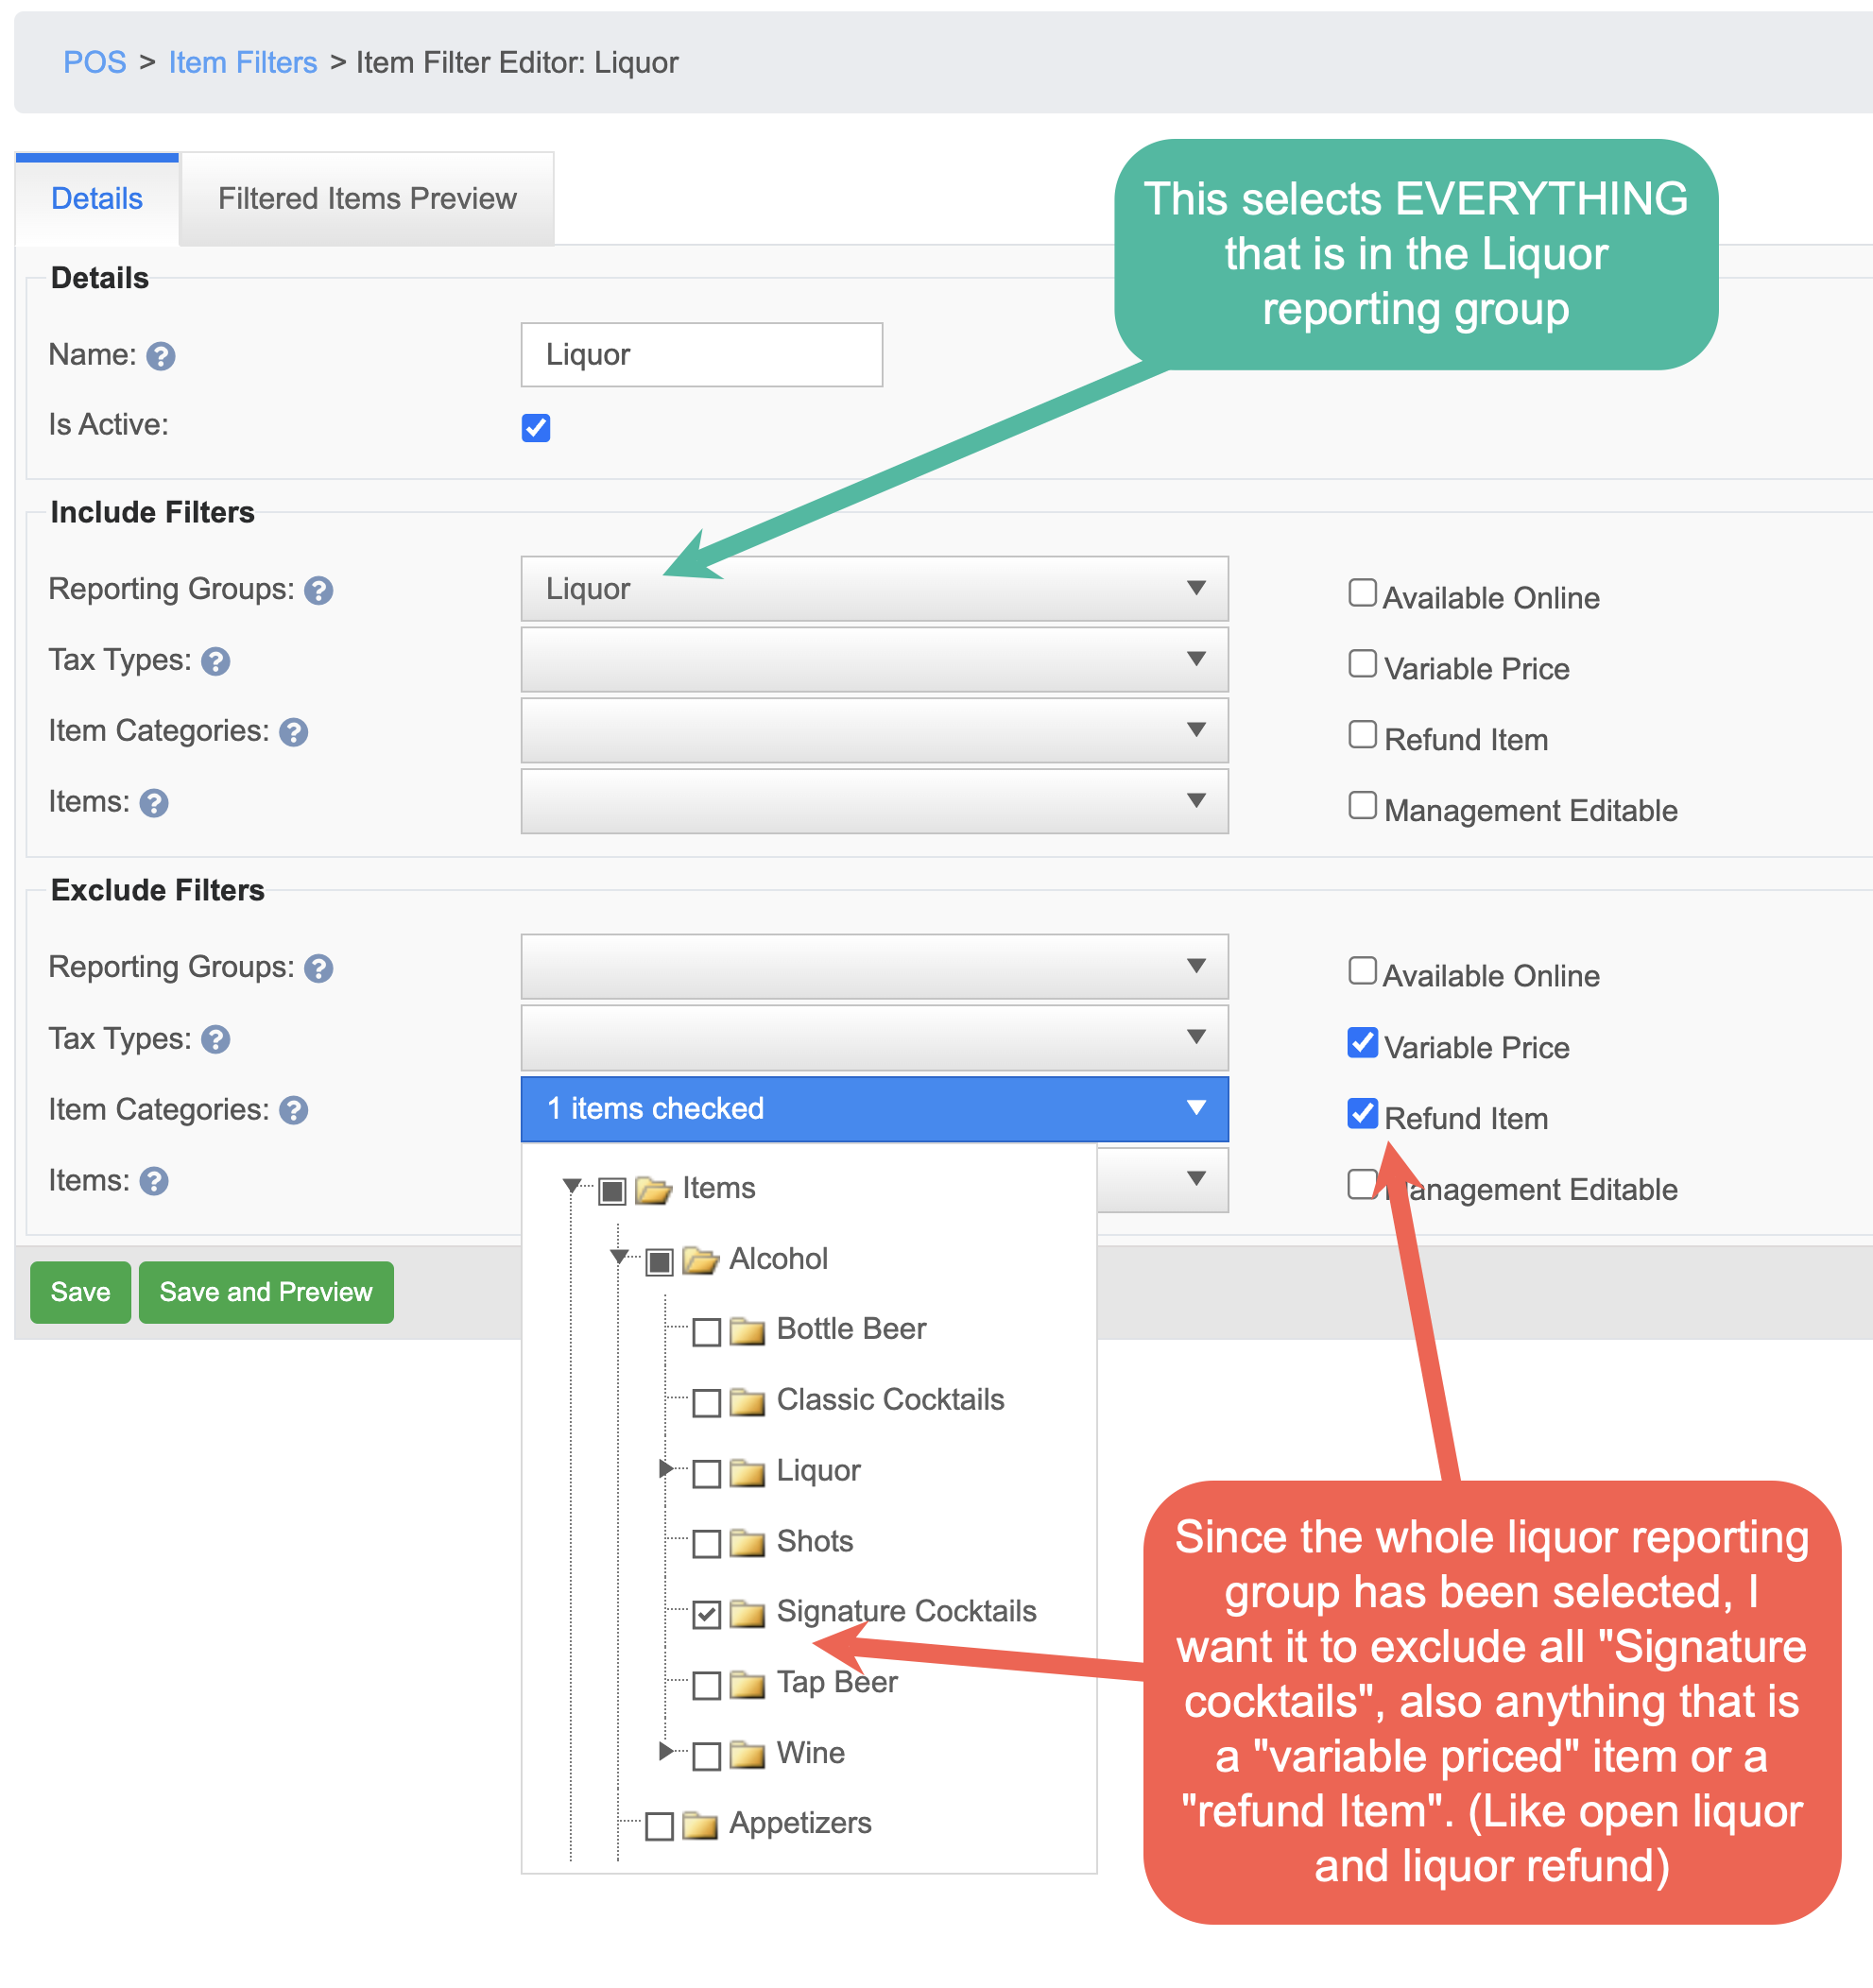
Item Filter Example #1 (Discounts)
- This Item Filter is going to be used to allow a discount on Liquor Items, but they do not want the discount to apply to their signature cocktails!
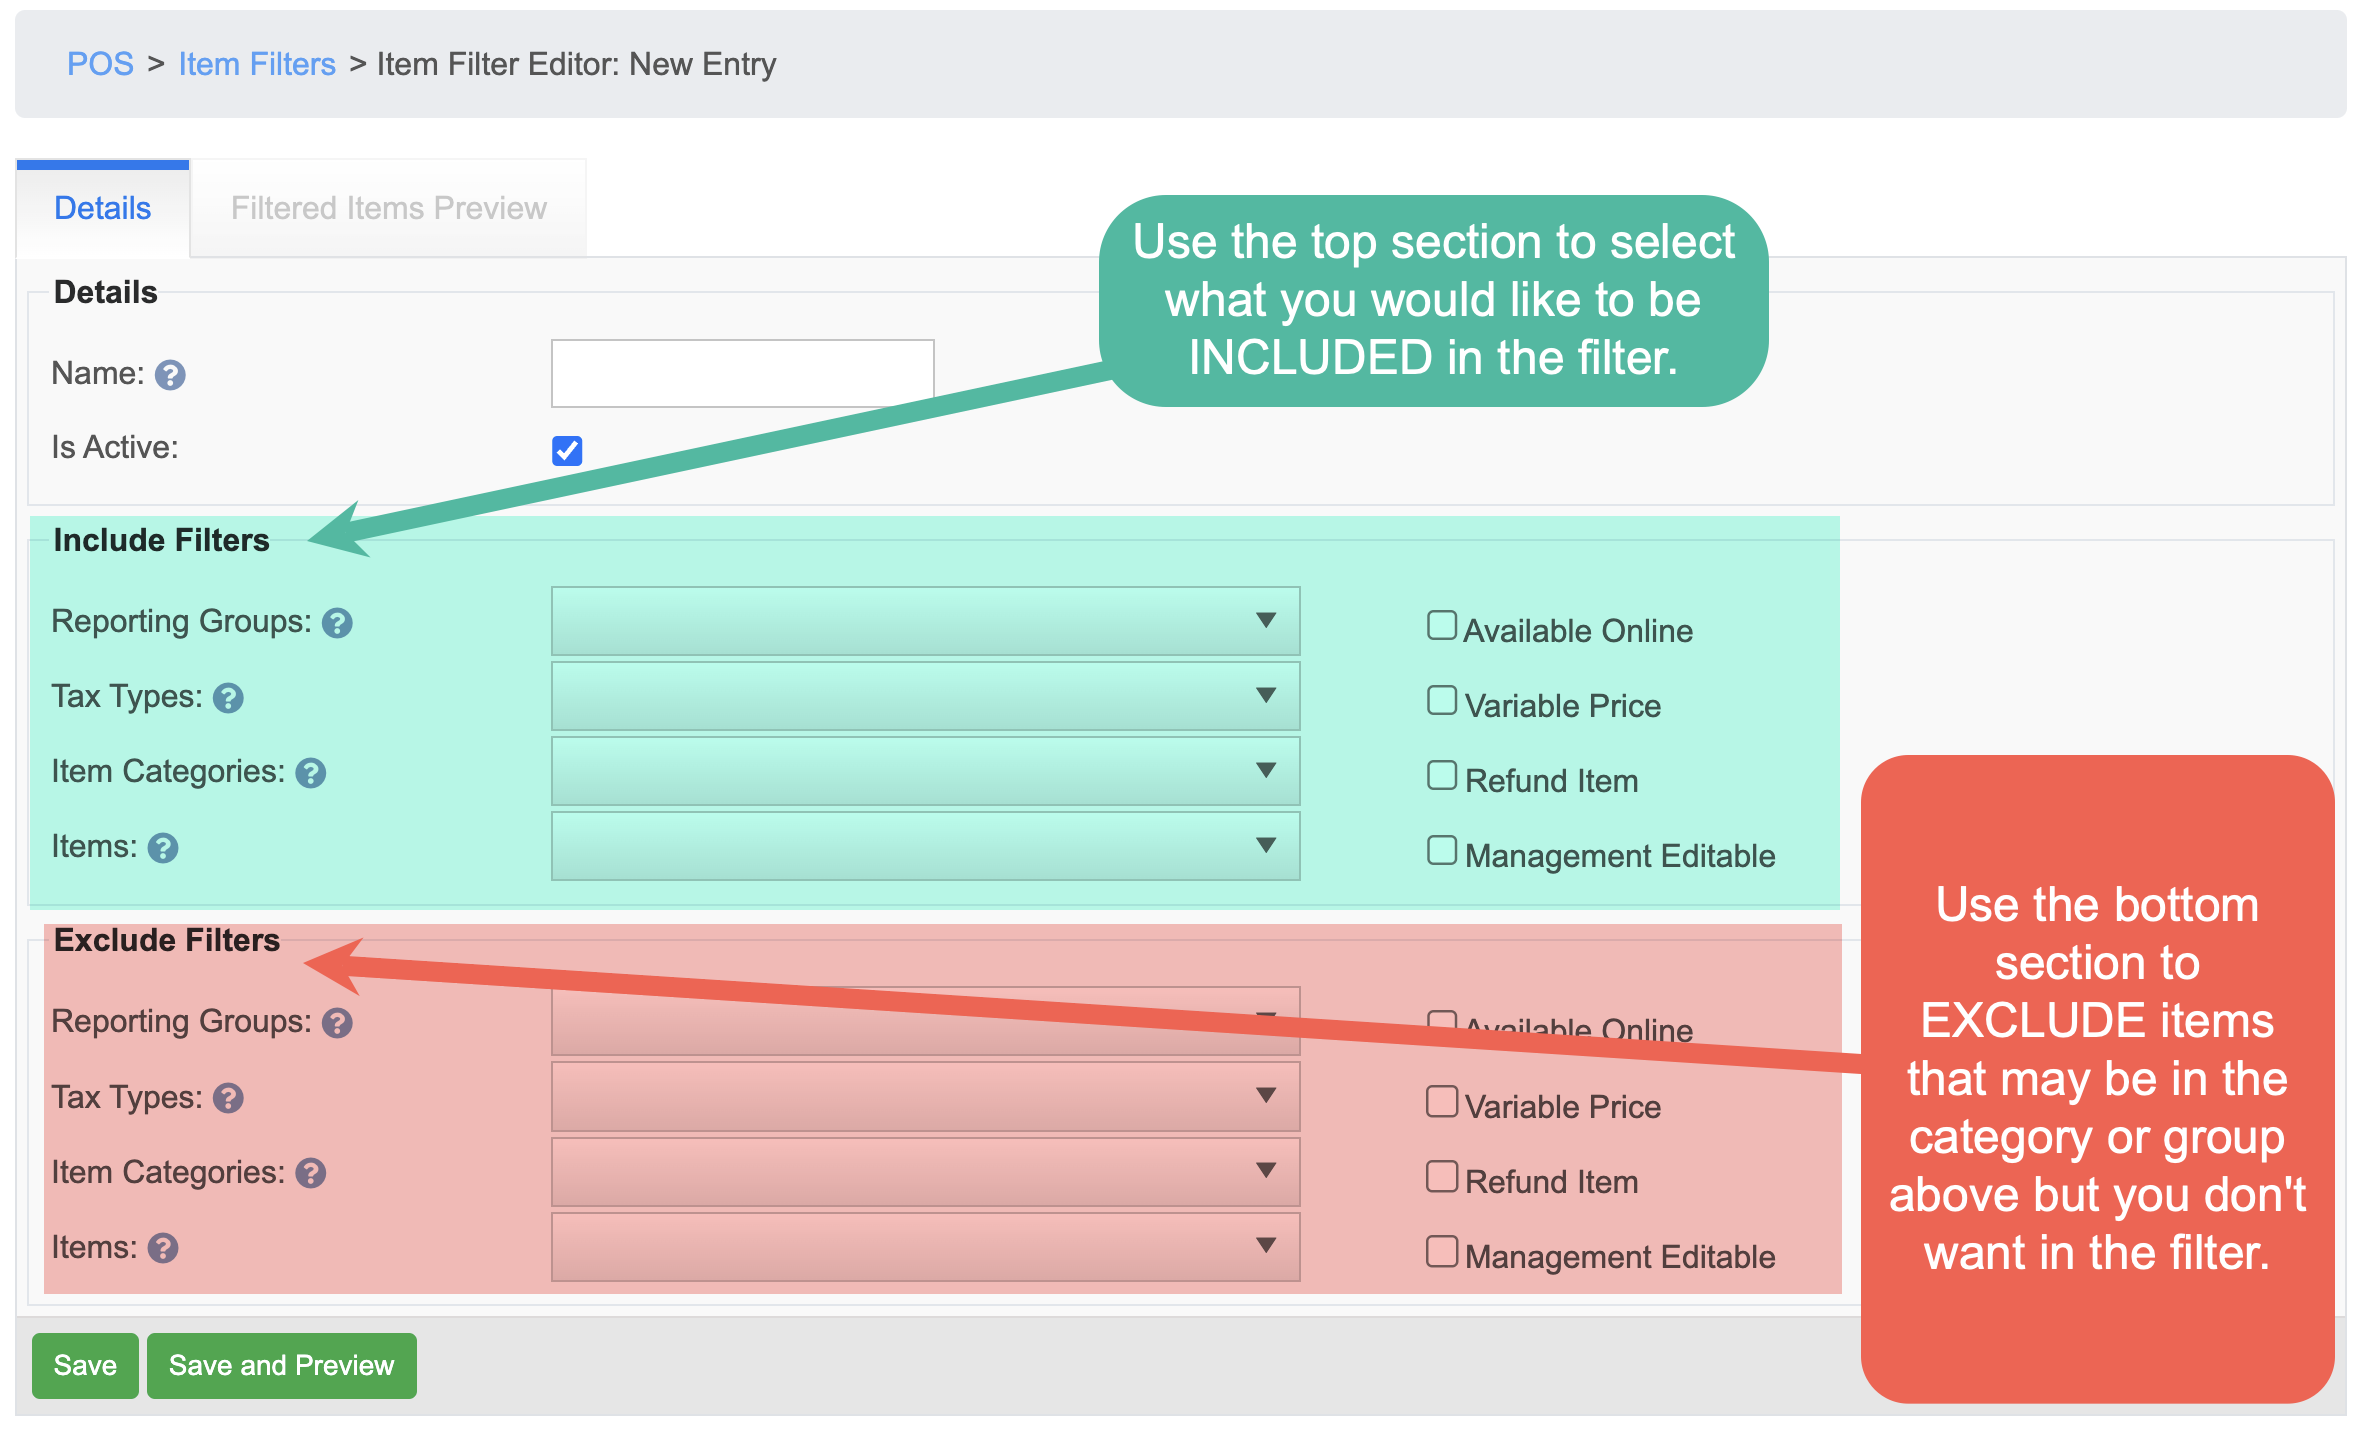
- I start with the Include section on top:
- I use the Reporting Groups filter to filter out just the Liquor reporting group, because I'd like this discount to include almost all of the liquor items.
- Then I use the Exclude section:
- I use the Item category to exclude everything that is in the Signature Cocktail category
- I also want to make sure that it is not allowing the discount on the "Open Liquor" button or the "Refund Liquor" button. so I exclude those as well.
- I start with the Include section on top:
- Now that my filter is created I want to double check to make sure everything I want in it is there, and nothing I don't want in it isn't there.
- To do this, I can click on "Save and Preview" or I can just click on the "Filtered Items Preview" tab at the top.
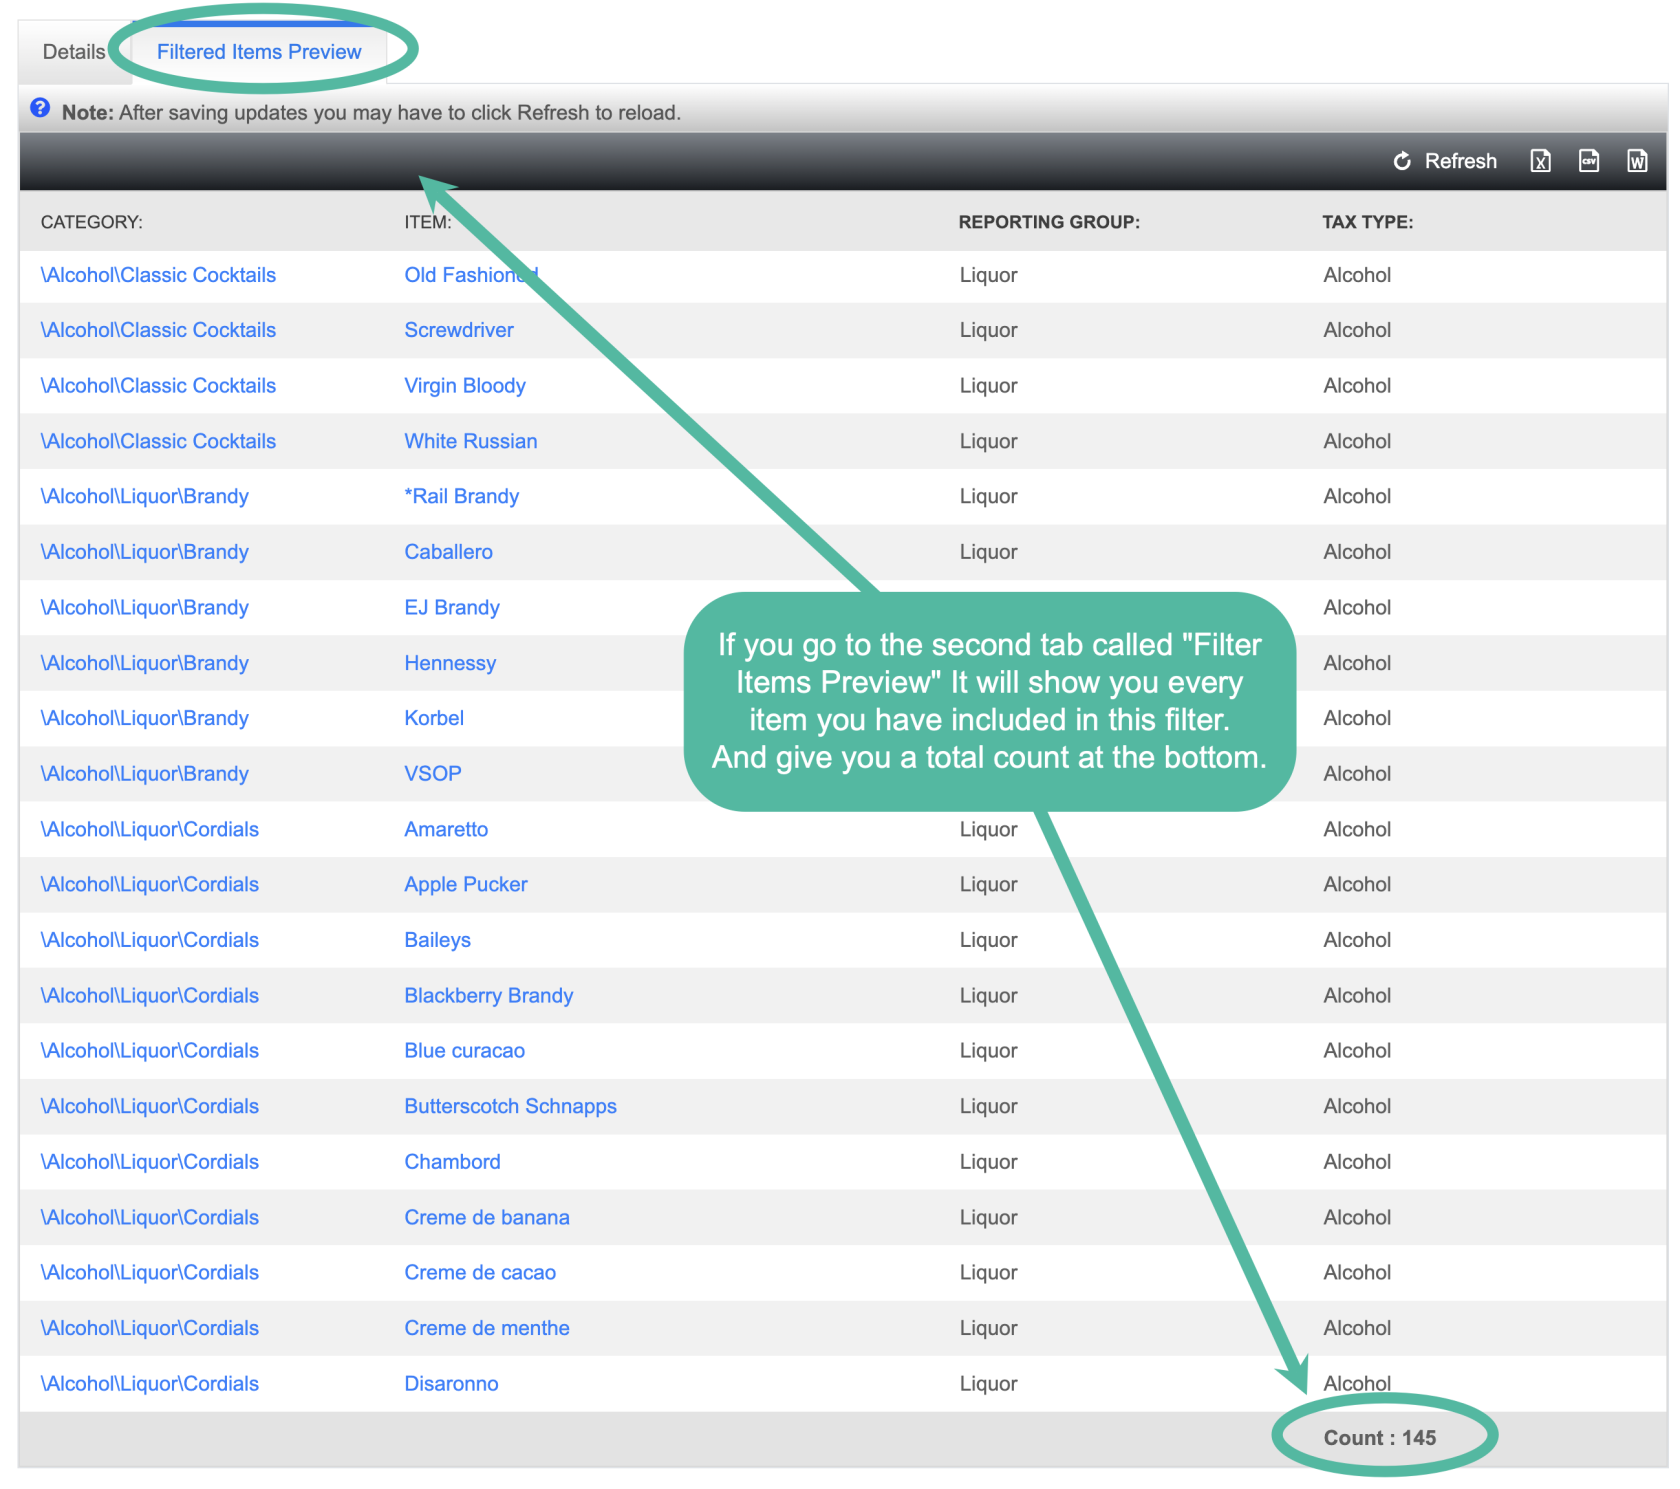
- To do this, I can click on "Save and Preview" or I can just click on the "Filtered Items Preview" tab at the top.
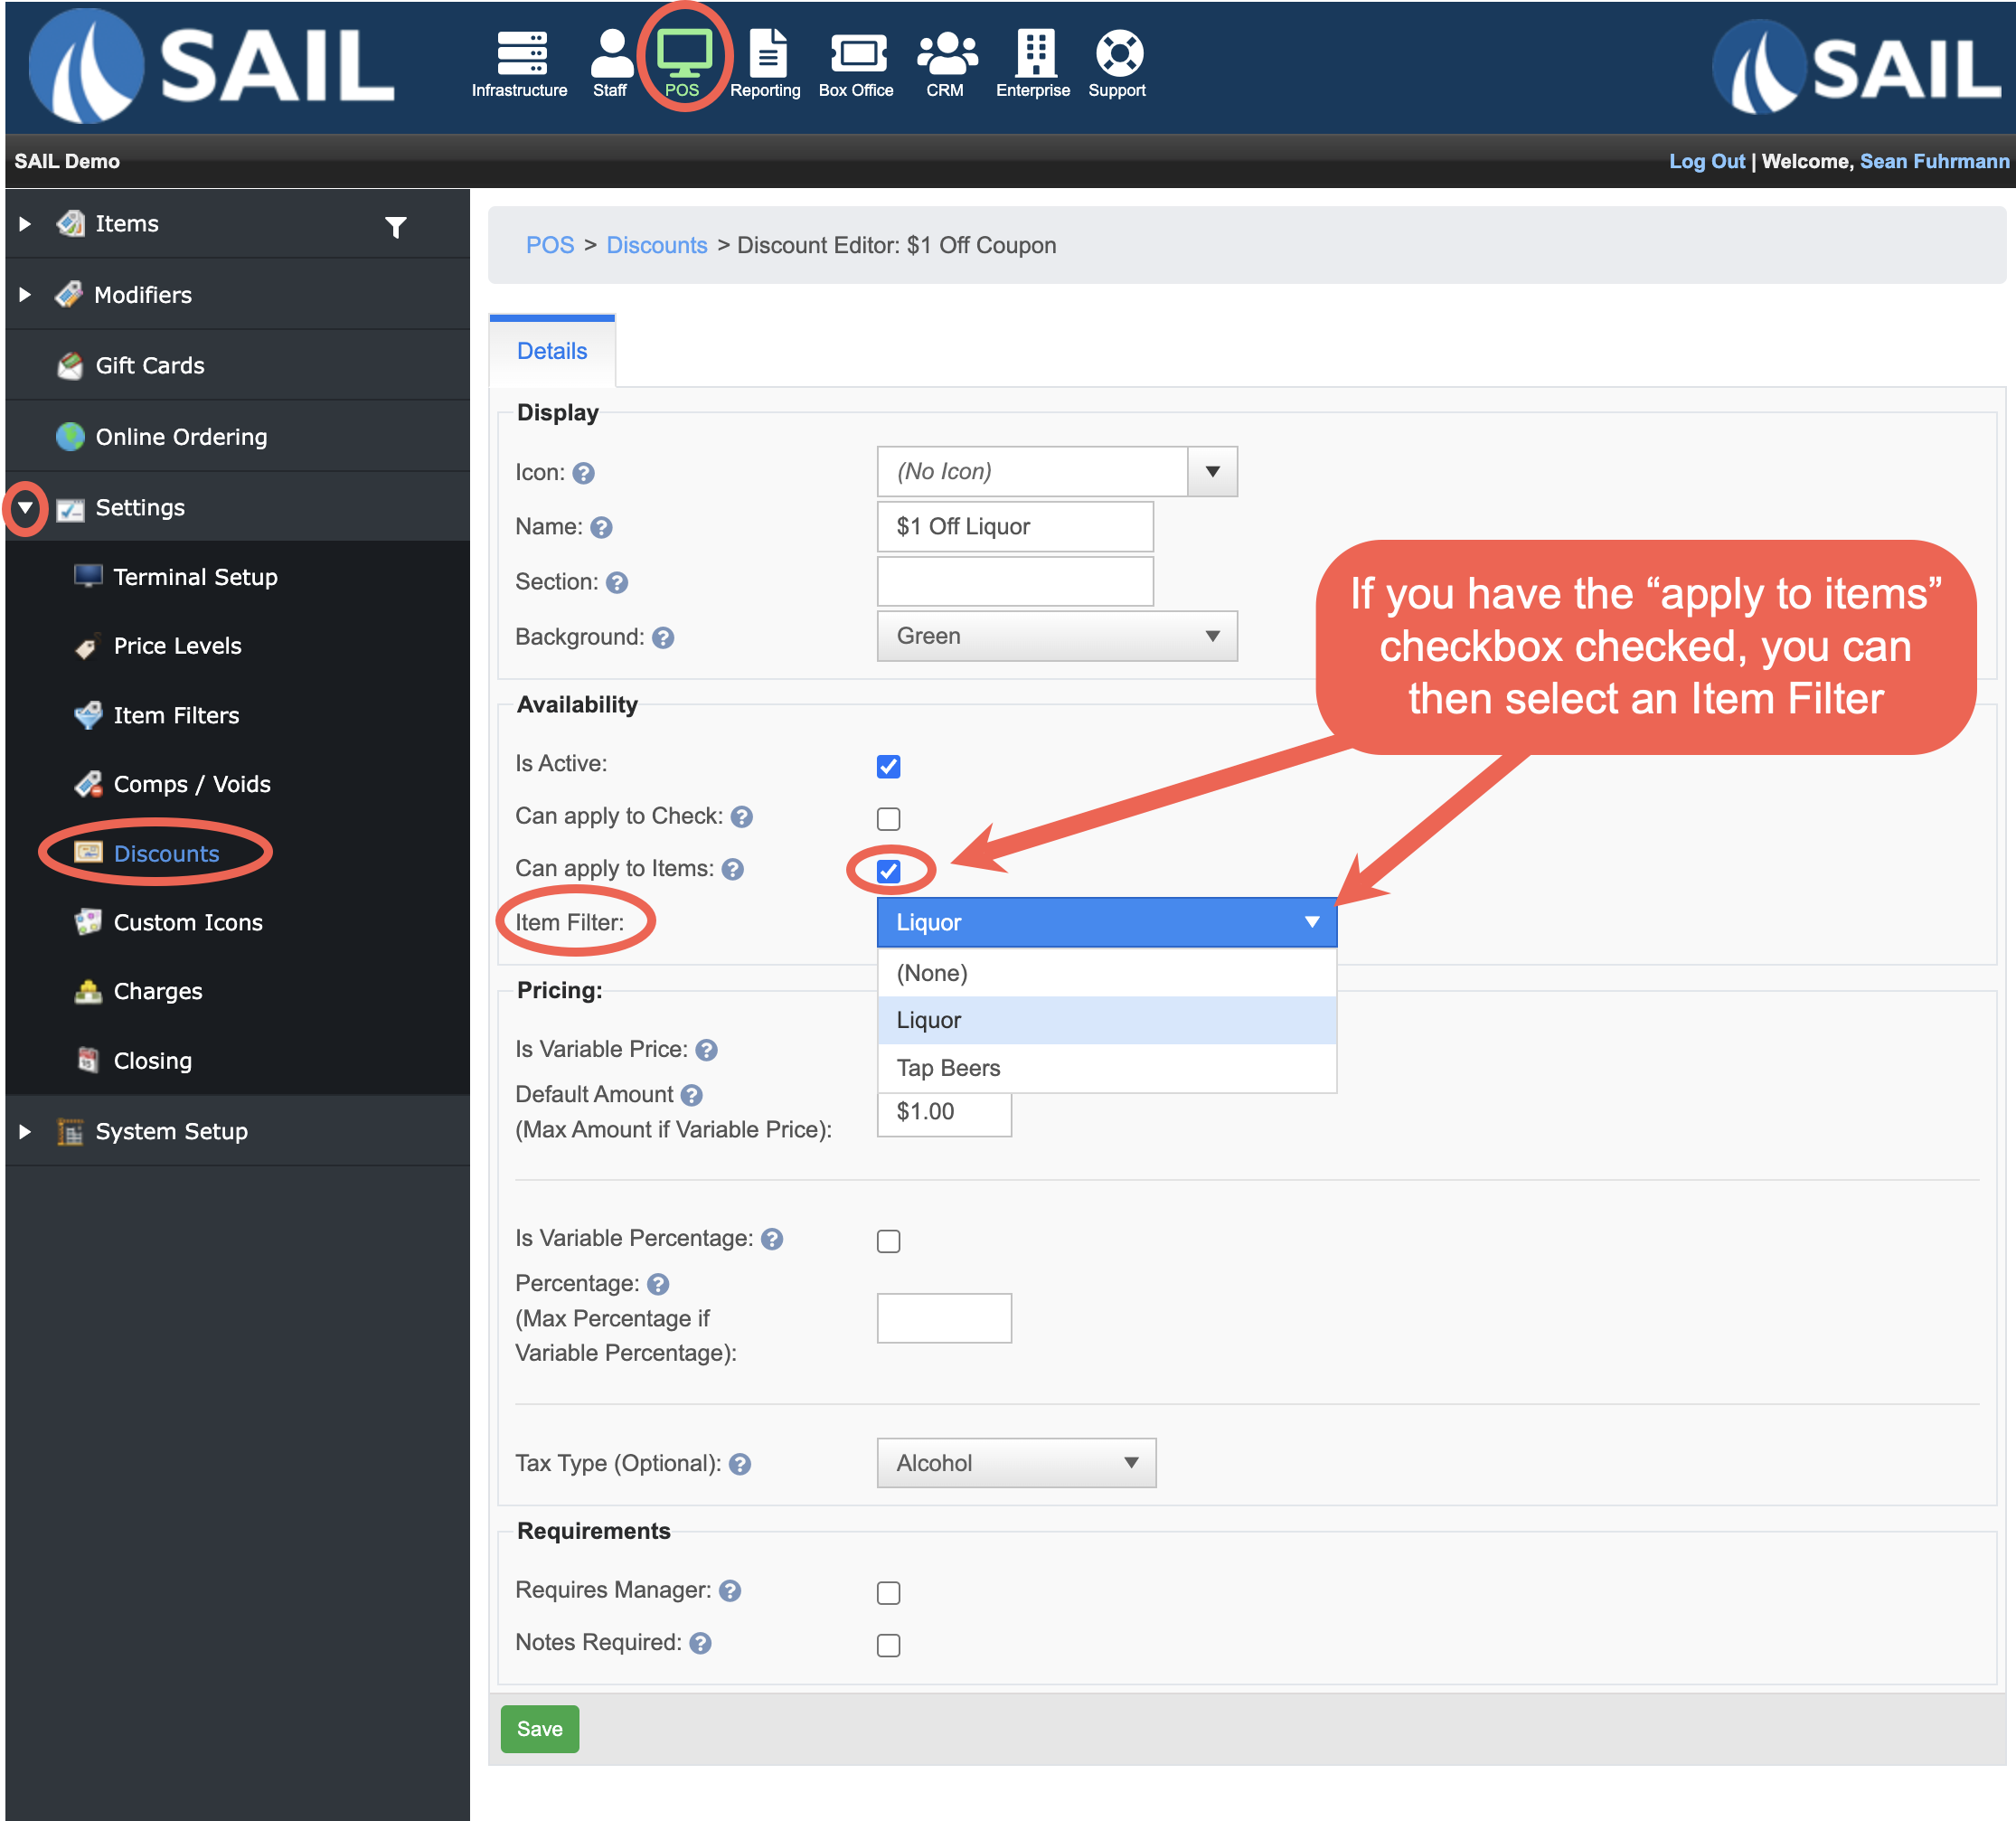
- Last I am going to attached this item filter to my discount
- Navigate to the Discounts: POS --> Settings --> Discounts --> either create a new or edit an existing discount
- Item filter discounts can only be applied to "Item discounts"
- They can NOT be applied to a check level discount
- Once the "Can apply to Items" checkbox is check you will get a drop down to select the Item filter you created for this discount.
- Item filter discounts can only be applied to "Item discounts"
- Now when you use this $1 off Liquor discount it will only be available to be used on the Liquor items you put in this item filter!


Item Filter Example #2 (KVS ADC)
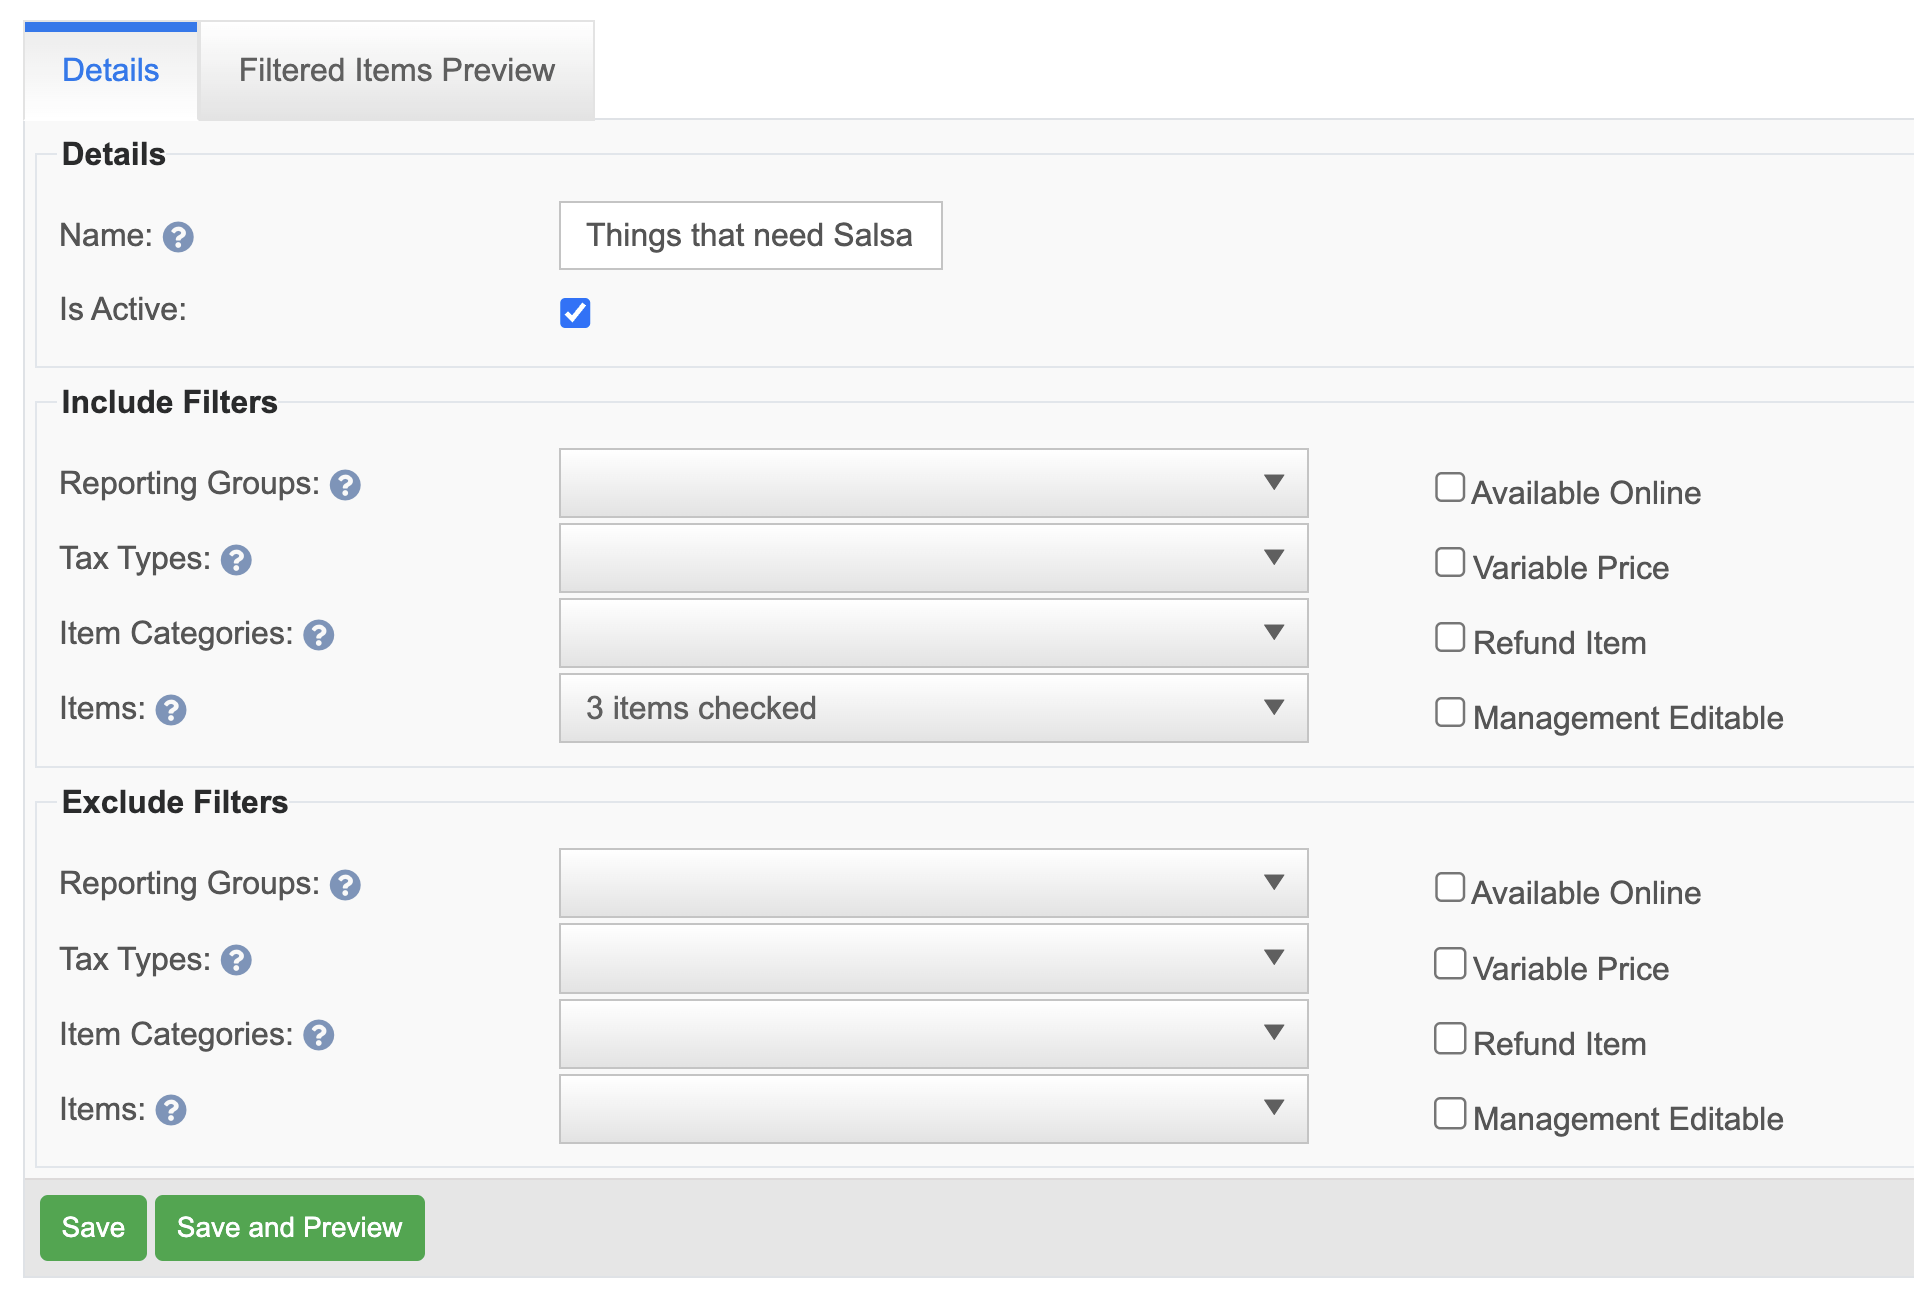
- This filter is going to be use for an All Day Count (ADC) on the Kitchen Video Screen (KVS).
- I would like an ADC to put on my expo screen to show how many salsas I need
- I start by using the Include section.
- Because there are not very many items that need a salsa, I'm just going to use the "Items" filter to find the 3 items the are served with a salsa. (Keep in mind that you can also selected modifier items.)
- Because I only selected the 3 items i need, I don't need to use the Exclude section on the bottom.
- I start by using the Include section.
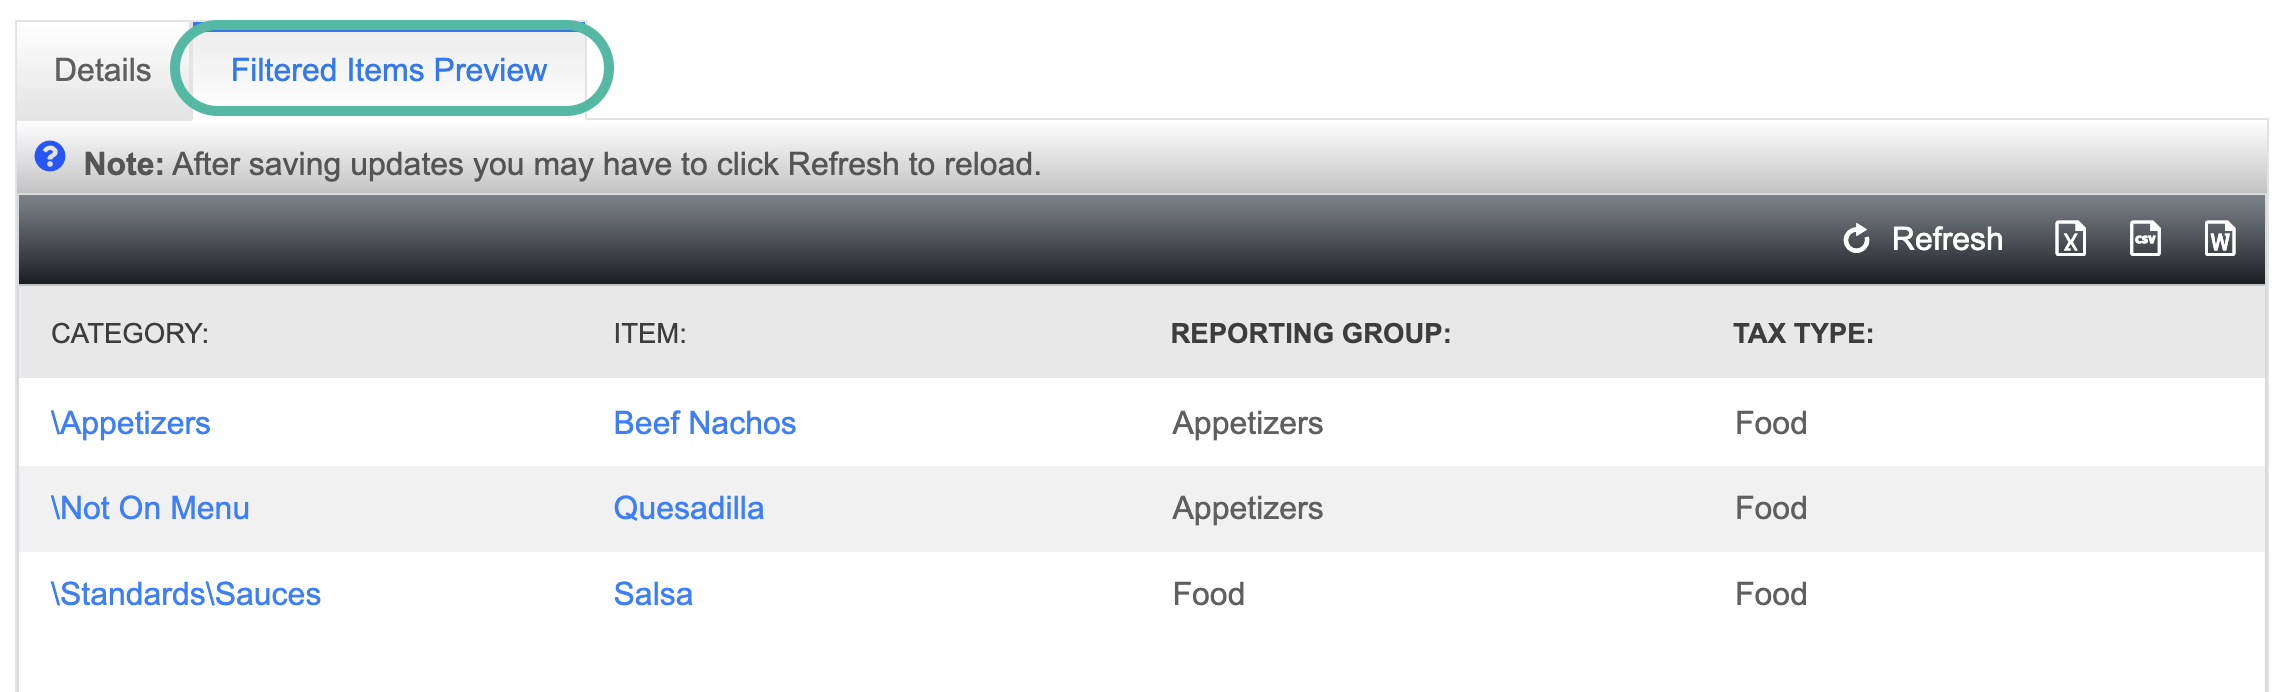
- Now that my filter is created I want to double check to make sure only the 3 items I selected are on the filter.

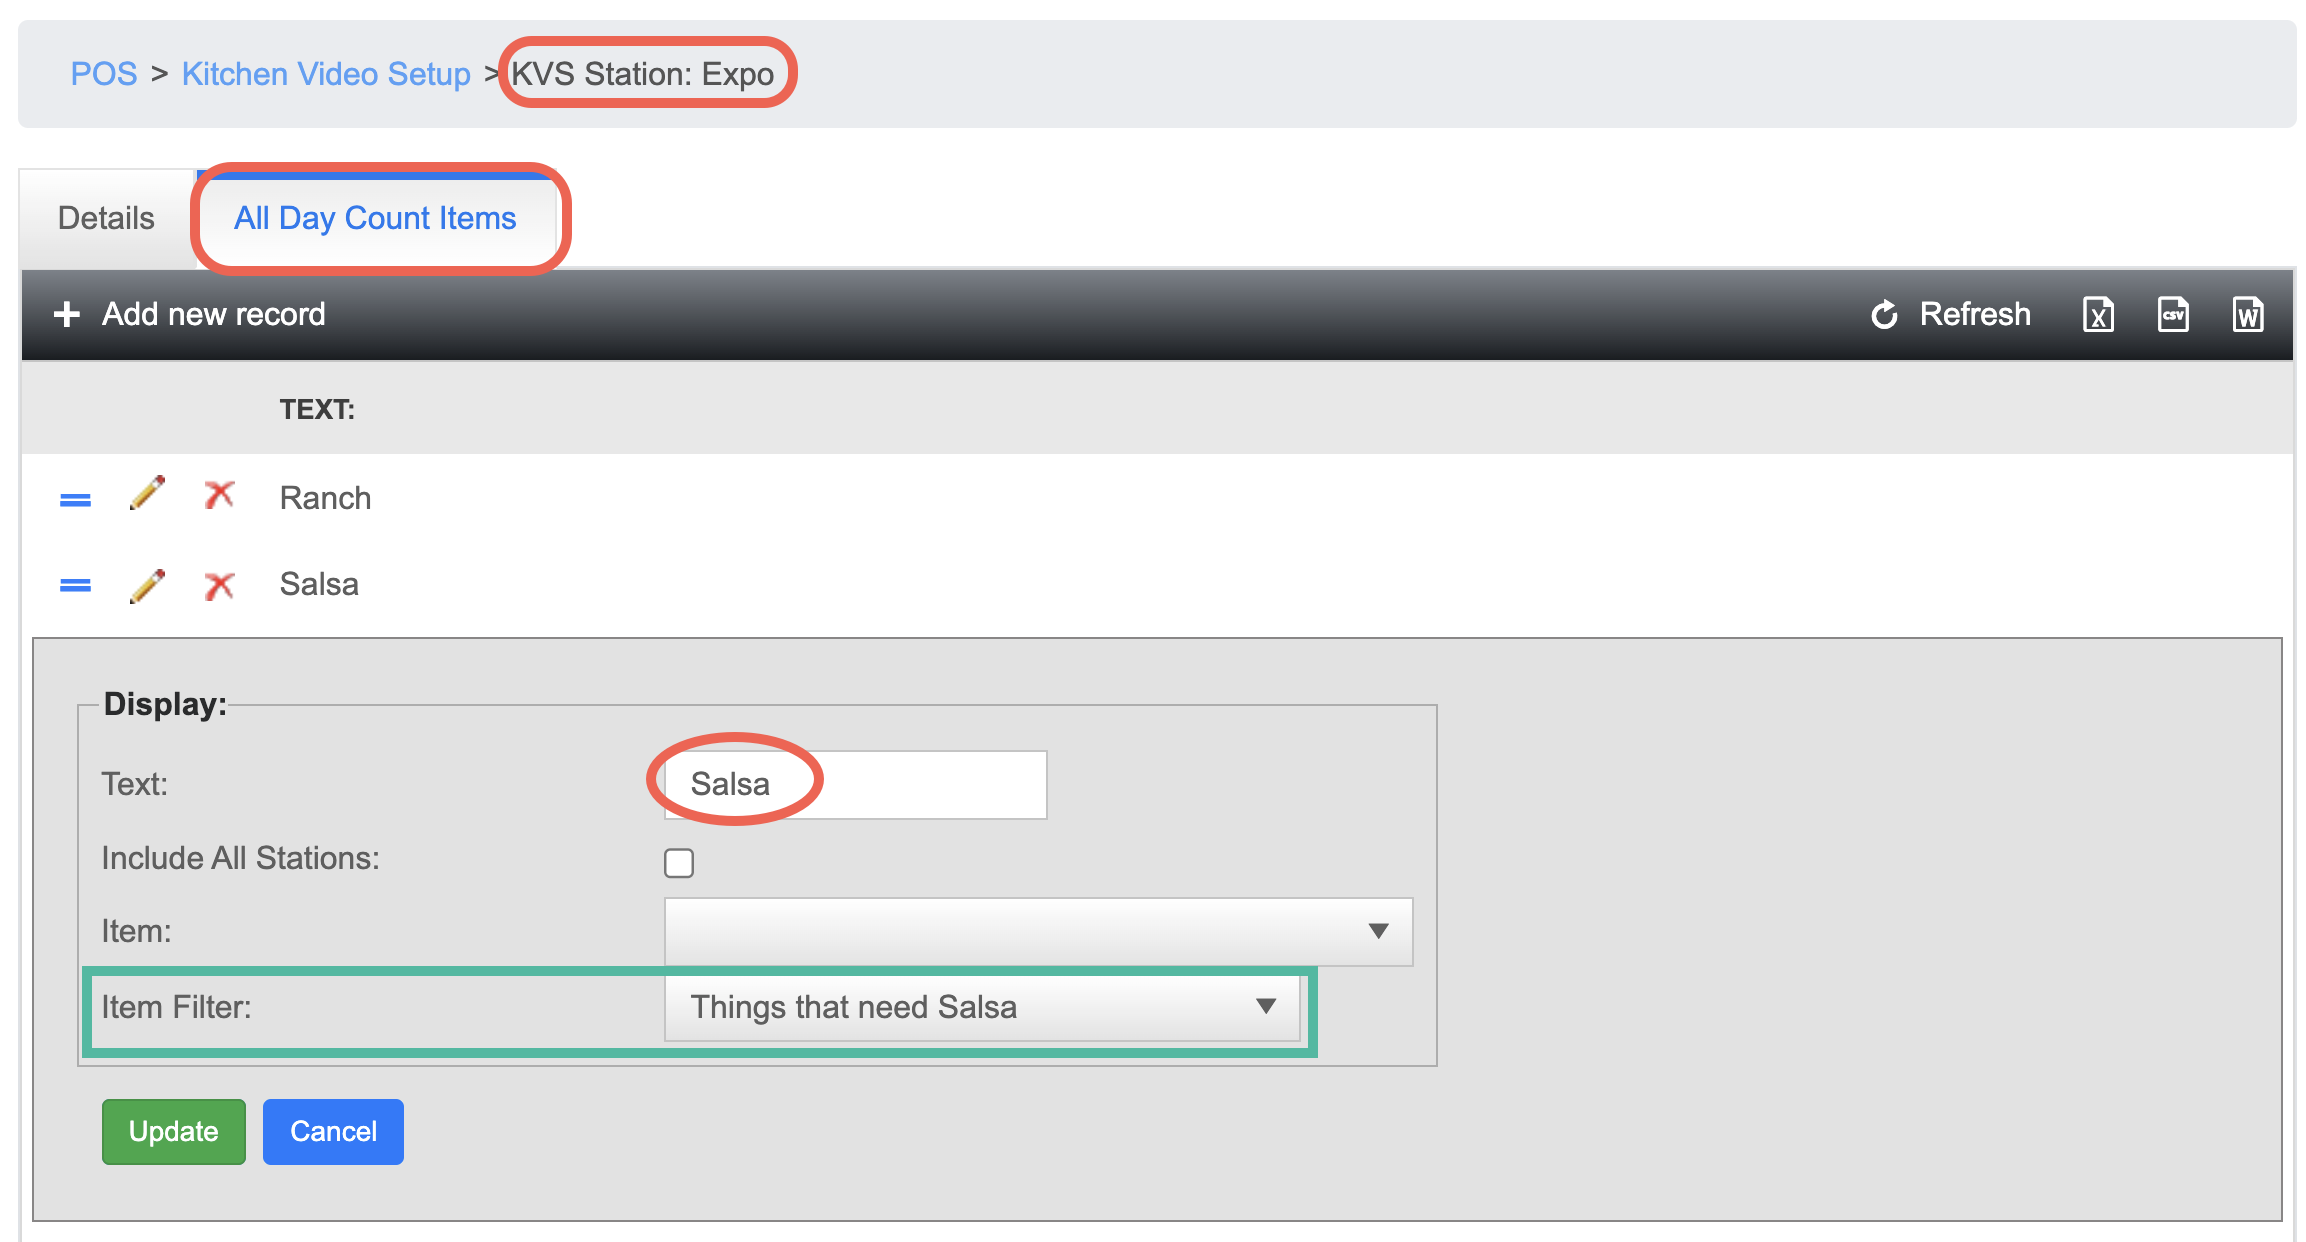
- Last, I need to go apply this filter to the Expo Screen
- To find this: POS --> System SEtup --> Kitchen Setup --> Kitchen Video --> Click on the Stations Tab --> Click on the pencil next to the Expo Station --> Click on the All Day Count Items tab
- In the "Text" box, this is what will show up on the KVS expo screen. So shorter words are better.
- Now use the "Item Filter" drop down to find the filter you created for this.
- Once finished, anytime one of those three item are rang in the ADC will go up on the Expo Screen
No Comments