How to create a Carousel Digital Sign
This document will walk you thru the steps of creating a carousel digital sign for Online Ordering
Step 1: Upload images
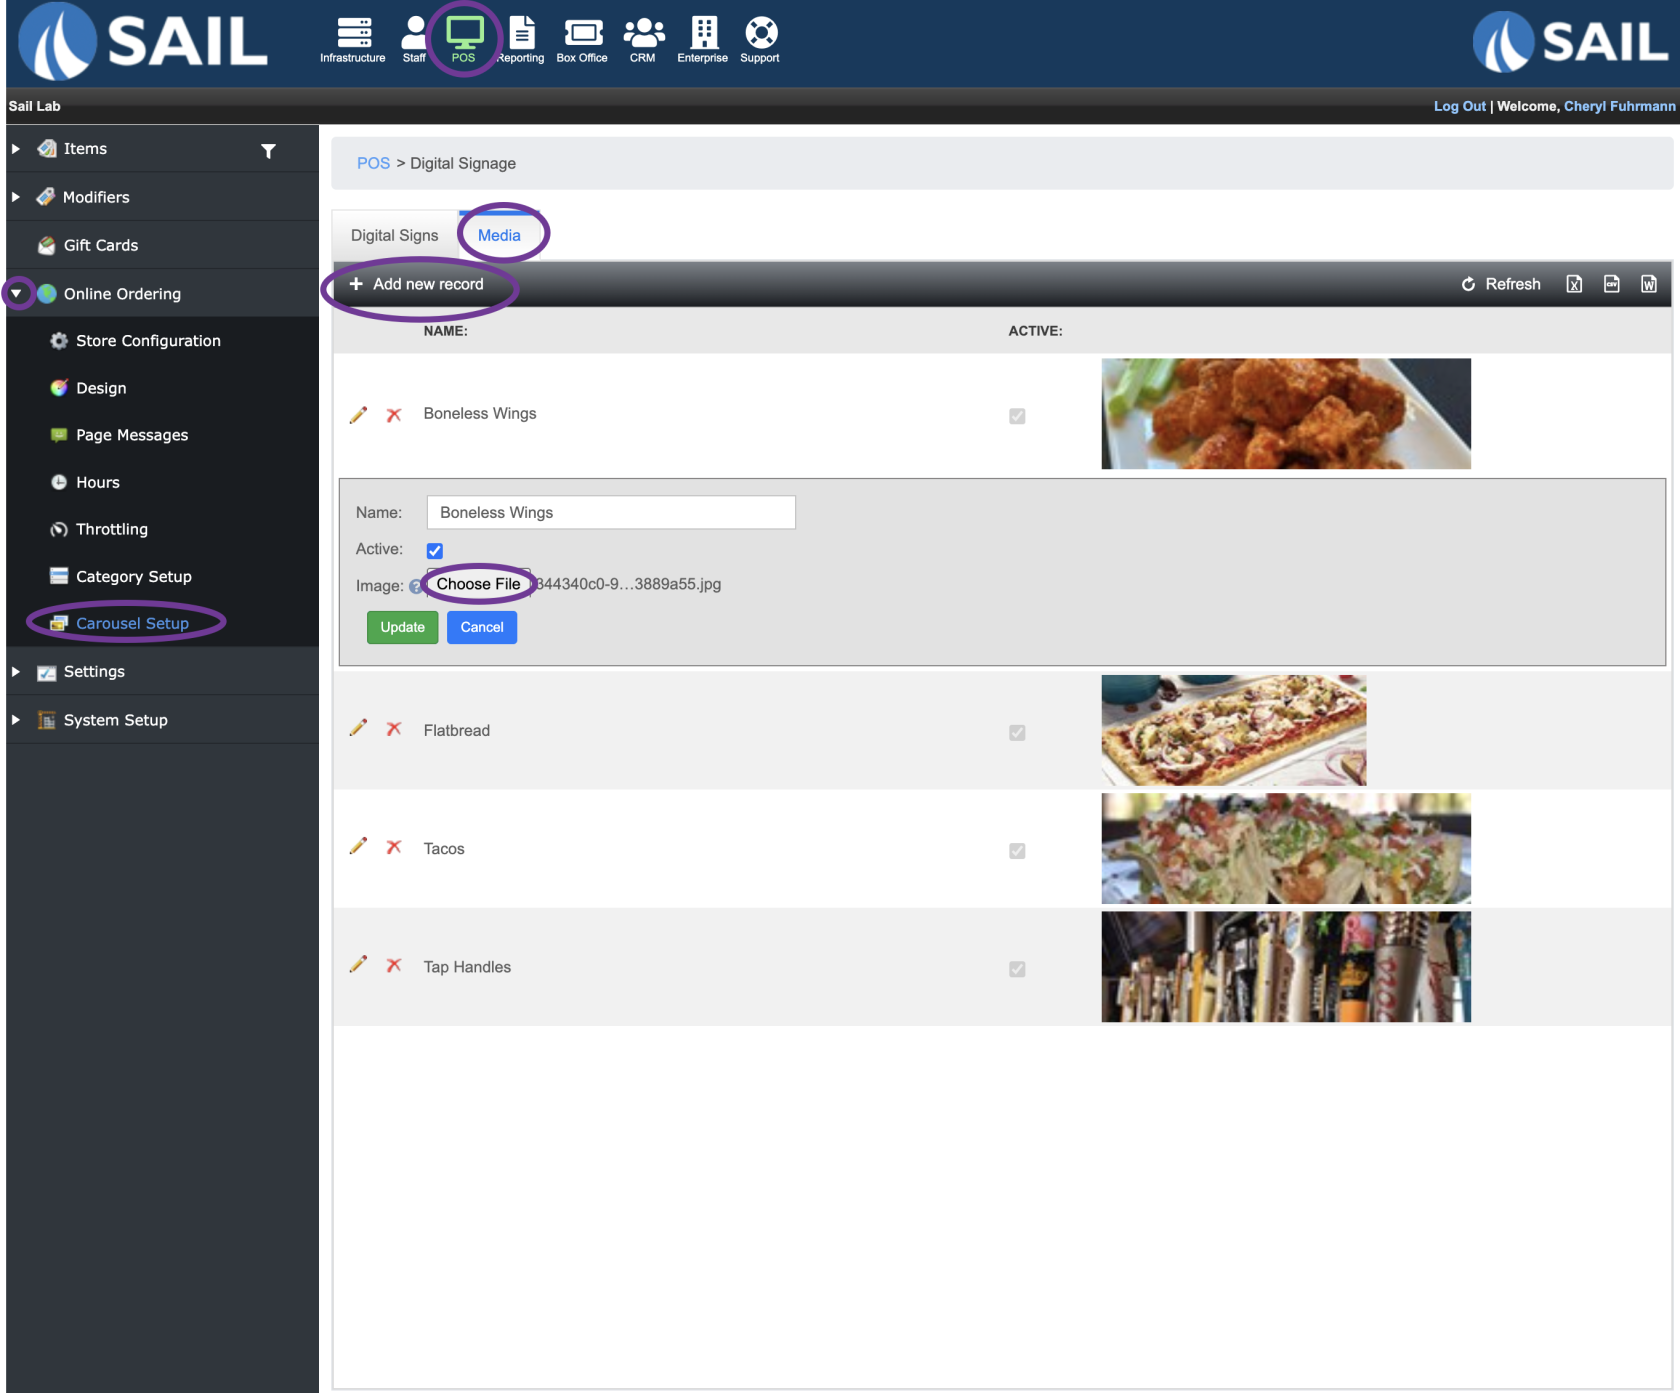
- POS --> Online Ordering --> Carousel Setup --> Media Tab
- Click Add new record
- Name the image
- Click "Choose File" to find the image on your computer.
- JPG and PNG files are supported. A wide and short image is preferred. 1700x500 is a good starting point depending on the height of your carousel.
- Please note that the size of the carousel banner will change depending on the size of the device or browser window.
- Click Insert
- You can add as many images as you'd like
Step 2: Set up the details of your digital sign
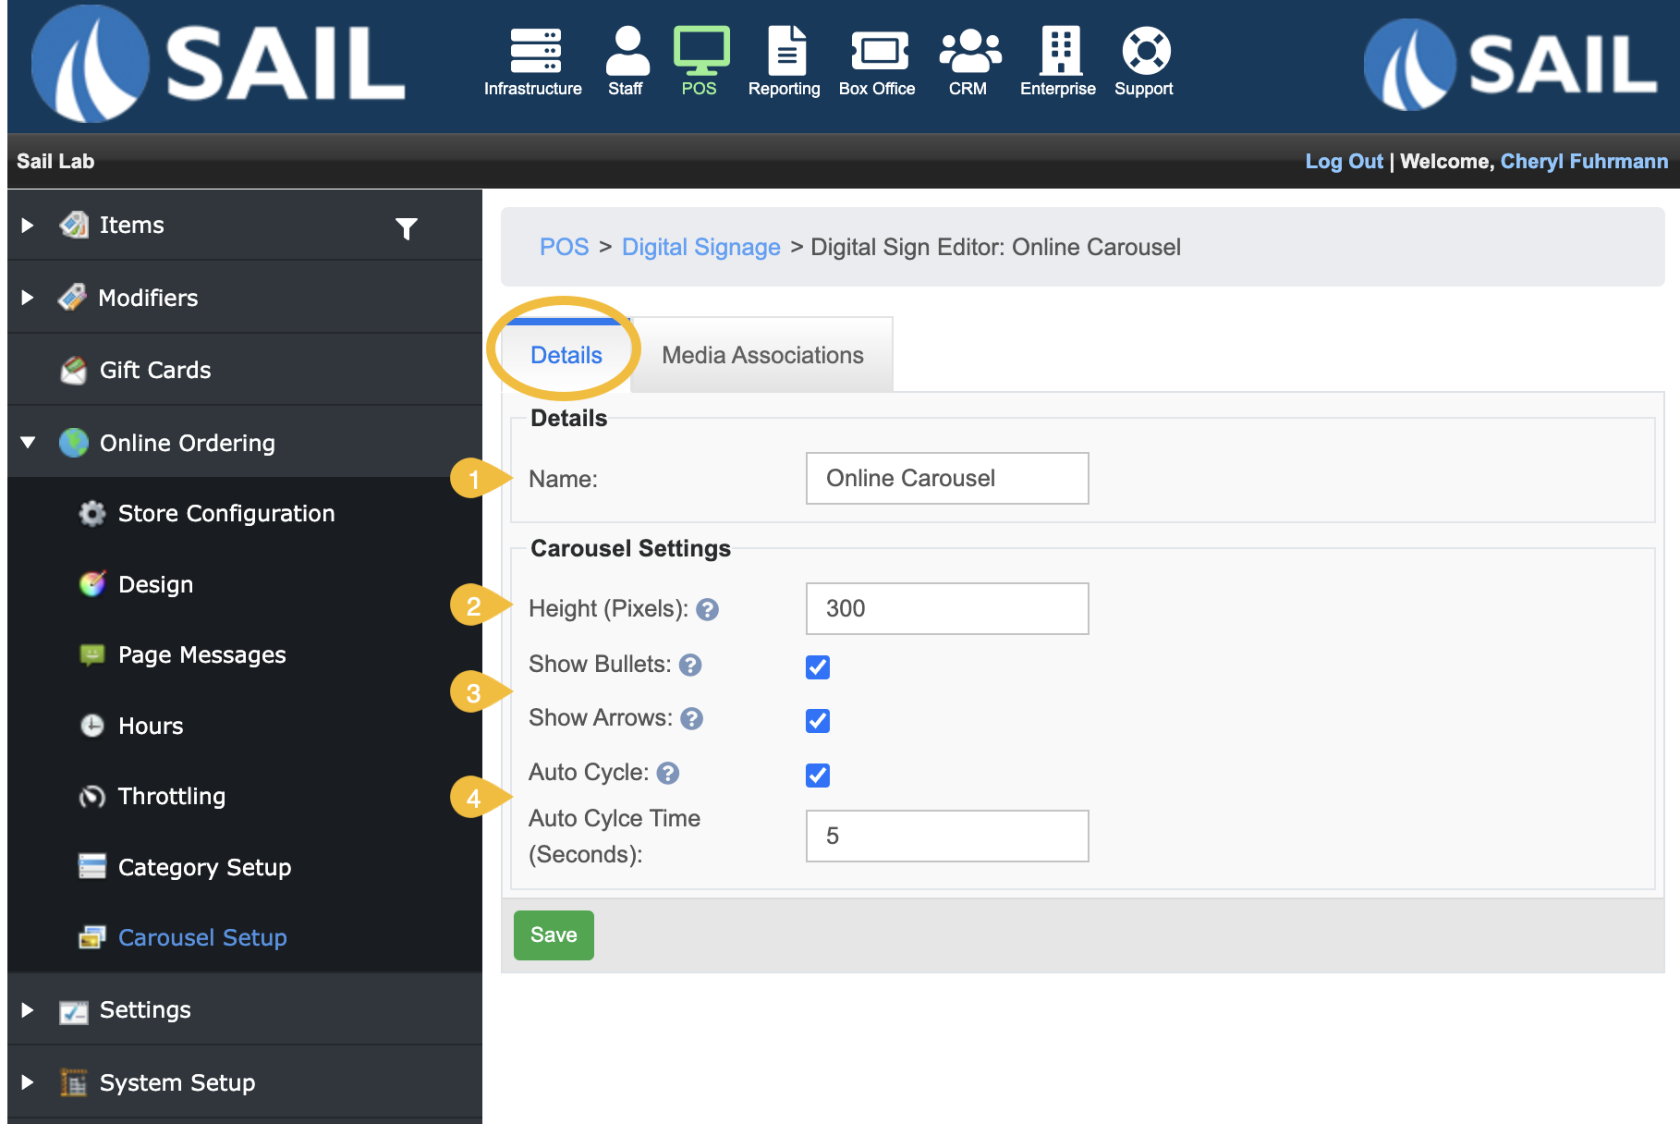
- On the Digital Signs tab, click Add new record
- Name your sign
- Set the height - It can be between 50 - 500 Pixels
- Decide if you'd like to use Bullets or Arrows or both for the guests to be able to move through the photos (See photo below to see what they look like)
- Decide if you'd like the photos to auto cycle and if so, how many second in-between
- Click Save
Step 3: Add media to your sign
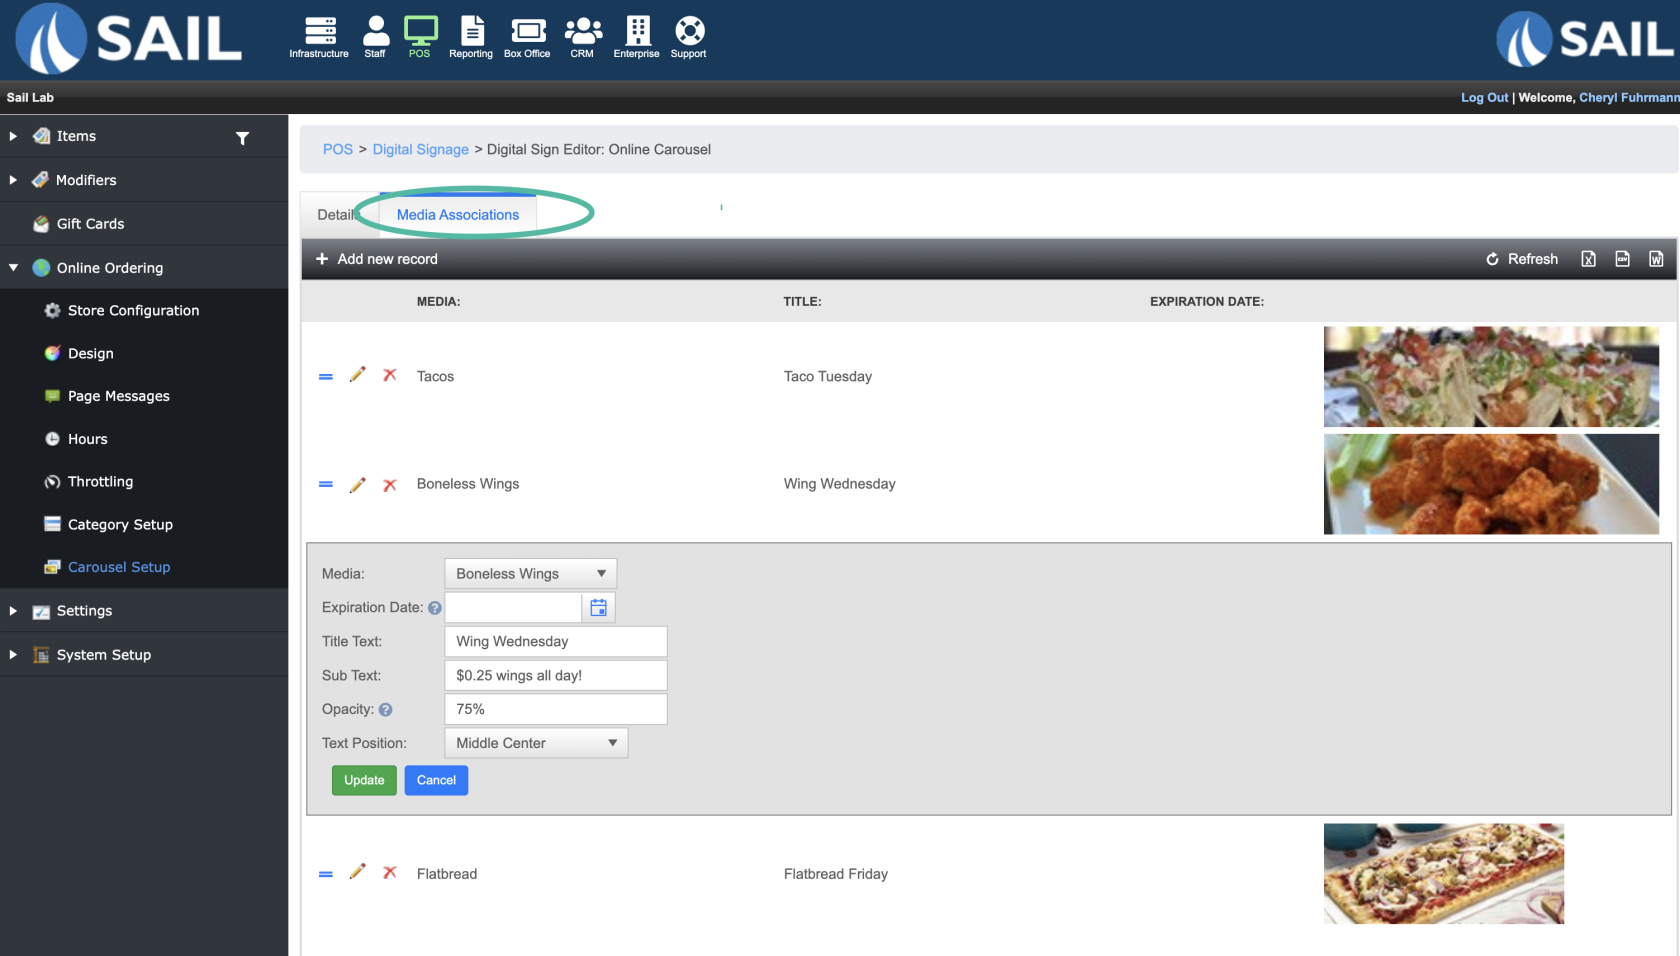
- Click on the Media Associations Tab
- Click Add new record
- Use the dropdown to select one of the media image you've previously uploaded
- Decide if you'd like an expiration date - you can optionally set up a date for the image to "expire." The image will no longer be shown on the date you select.
- Optionally choose a title and sub text
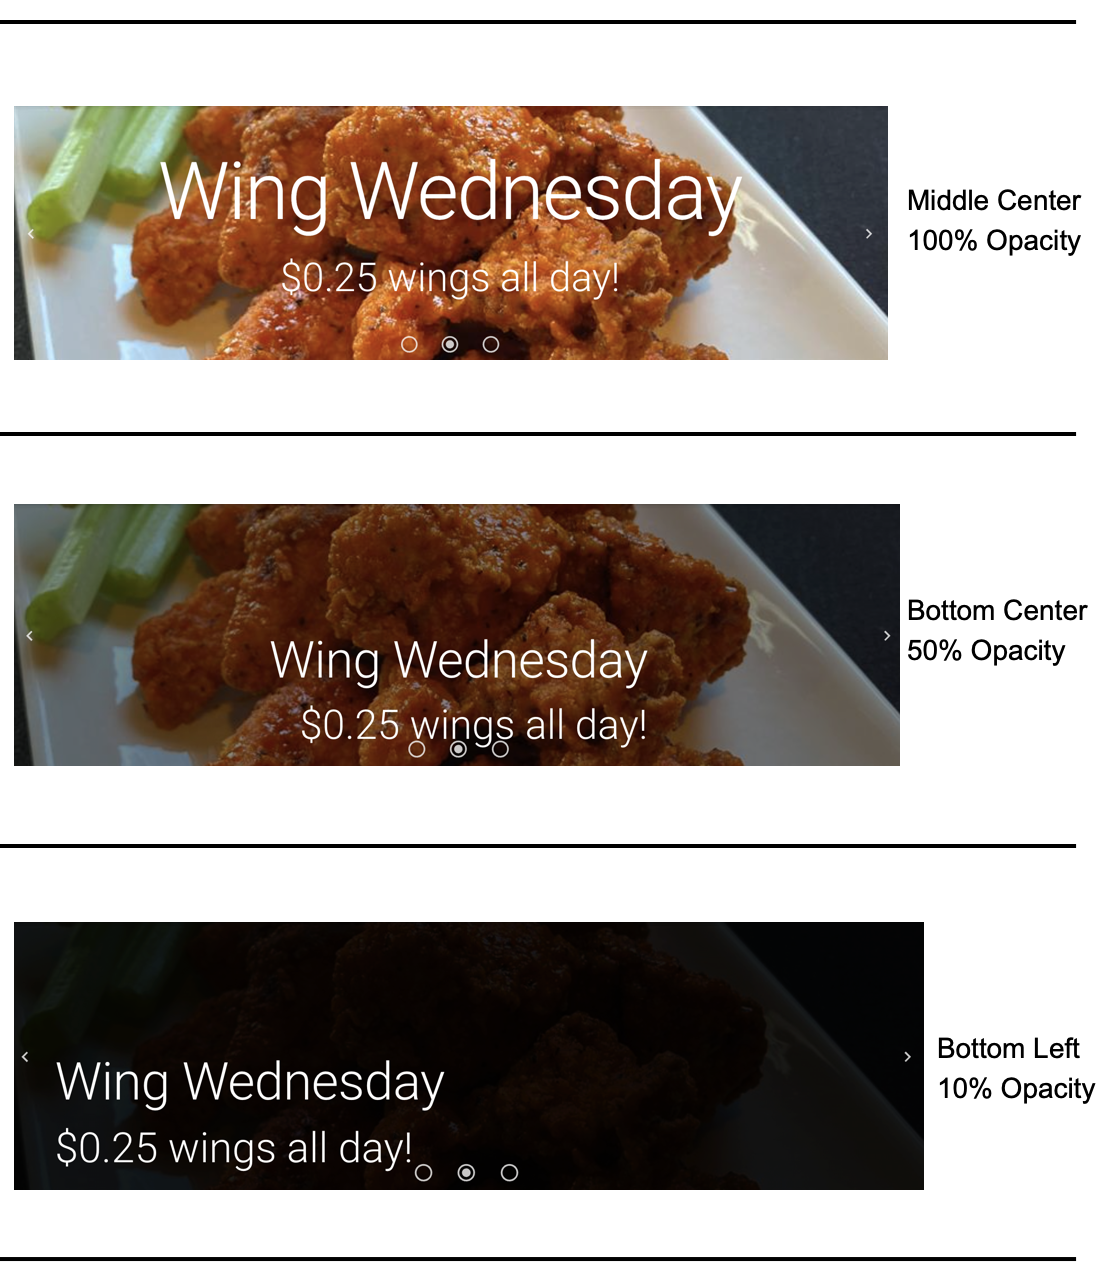
- Set Opacity - the default is 100% and would have no change to the image. 50% would be dimmed and 0% would be completely black. (See image below for opacity examples)
- Choose your text position (See image below for positioning examples)
- Click Update
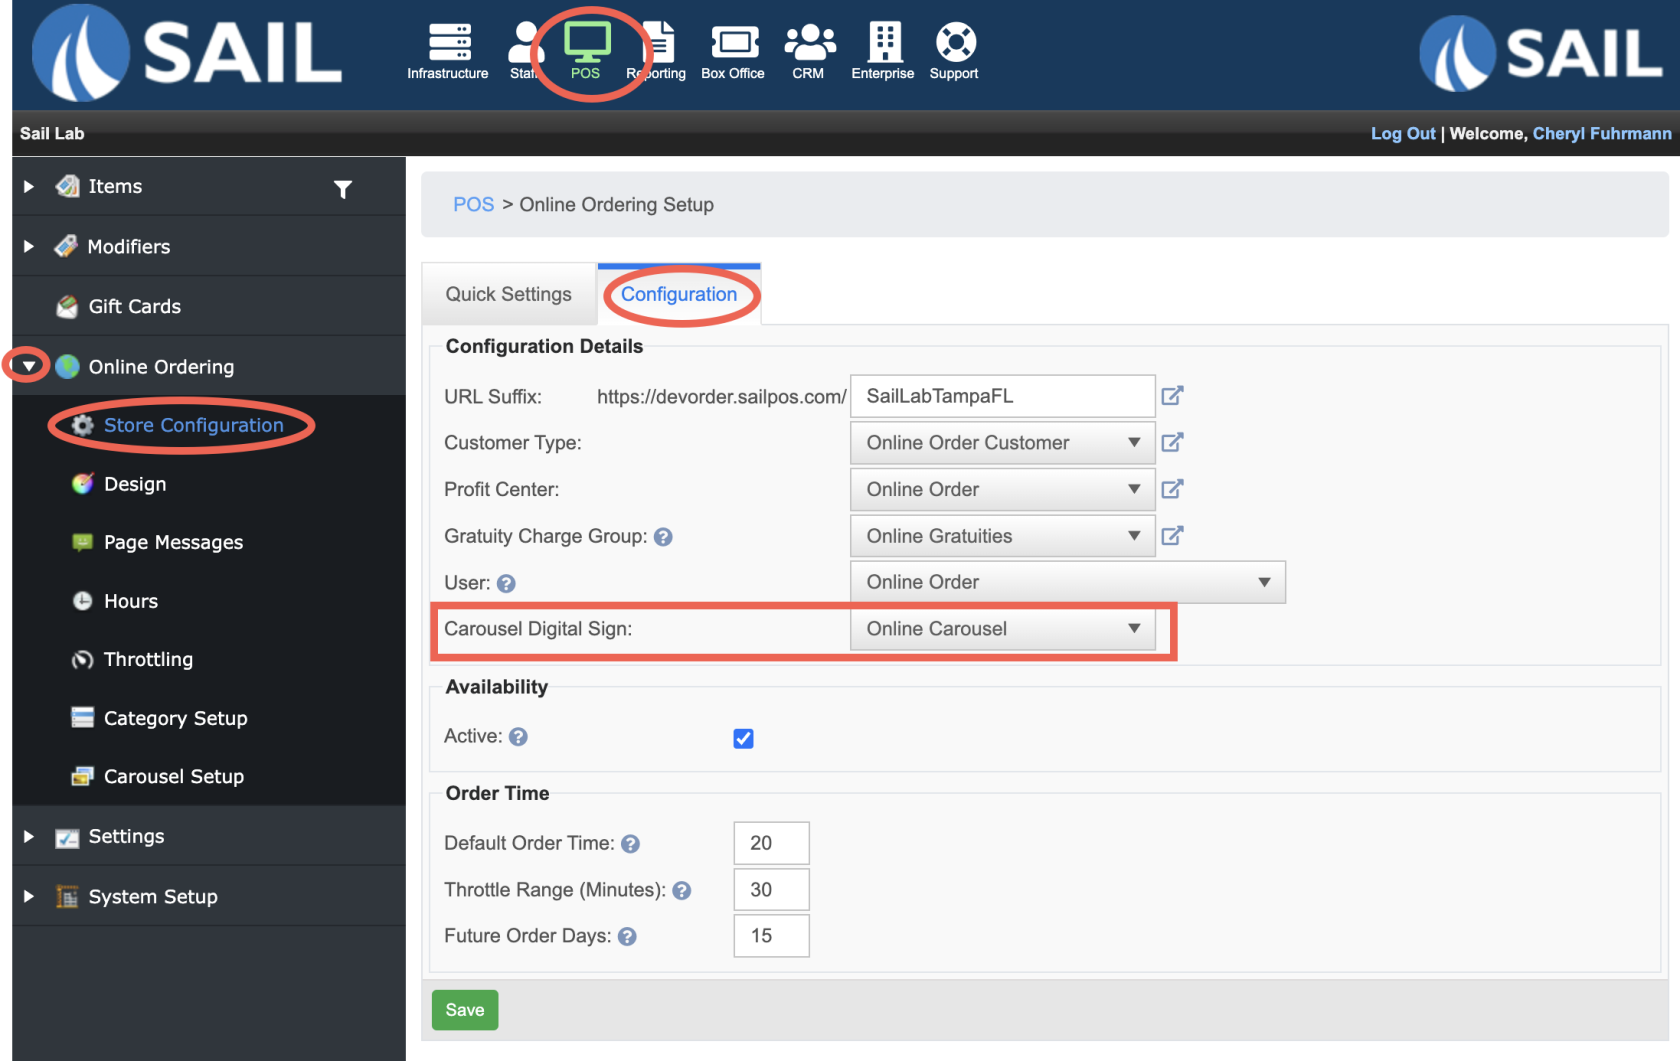
Step 4: Set the carousel sign on online configuration
- Go to POS --> Online Ordering --> Store Configuration --> Configuration Tab
- Use the dropdown for "Carousel Digital Sign" and choose the sign you'd like to show online


No Comments