
How to set up timed menu items for Online Ordering
This document will show you how to set up timed menus for online ordering
In the example below the store has breakfast only available from 8am-10am, then after 10am breakfast stops and the rest of the menu is available.
Step 1: Create Item Filters
- Navigate to Item Filters: POS --> Setting --> Item Filters
- Add new record
- Name the filter
- Select what needs to be included and/or excluded
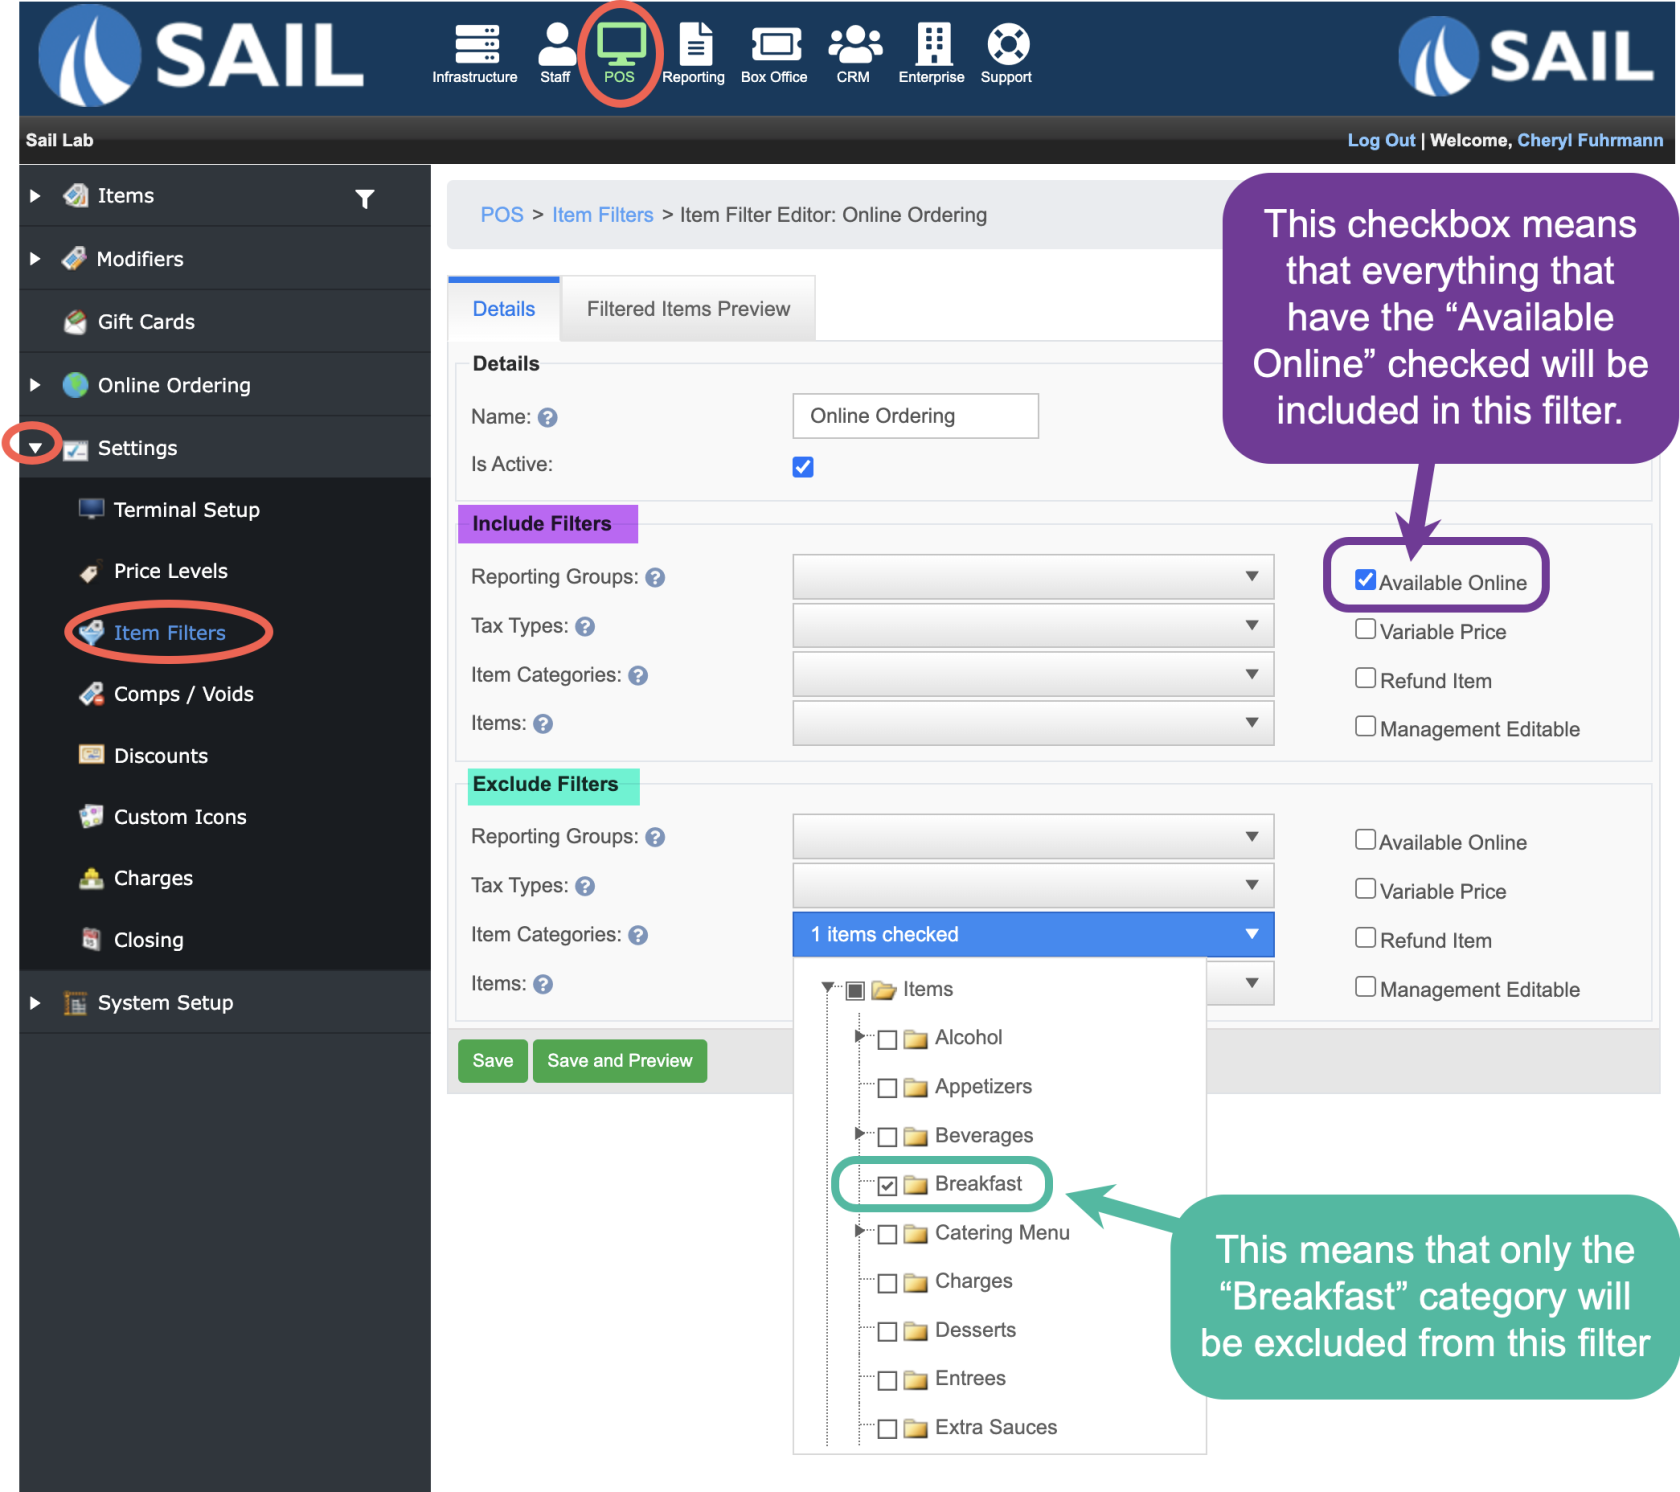
- Filter #1
- In this example called "Online Ordering" is for when the entire menu is available except the breakfast menu.
- So I check the box for "Available online." This will include every menu item that is available online (including the breakfast)
- Next I need to use the "Exclude filter" section to exclude Breakfast from this menu
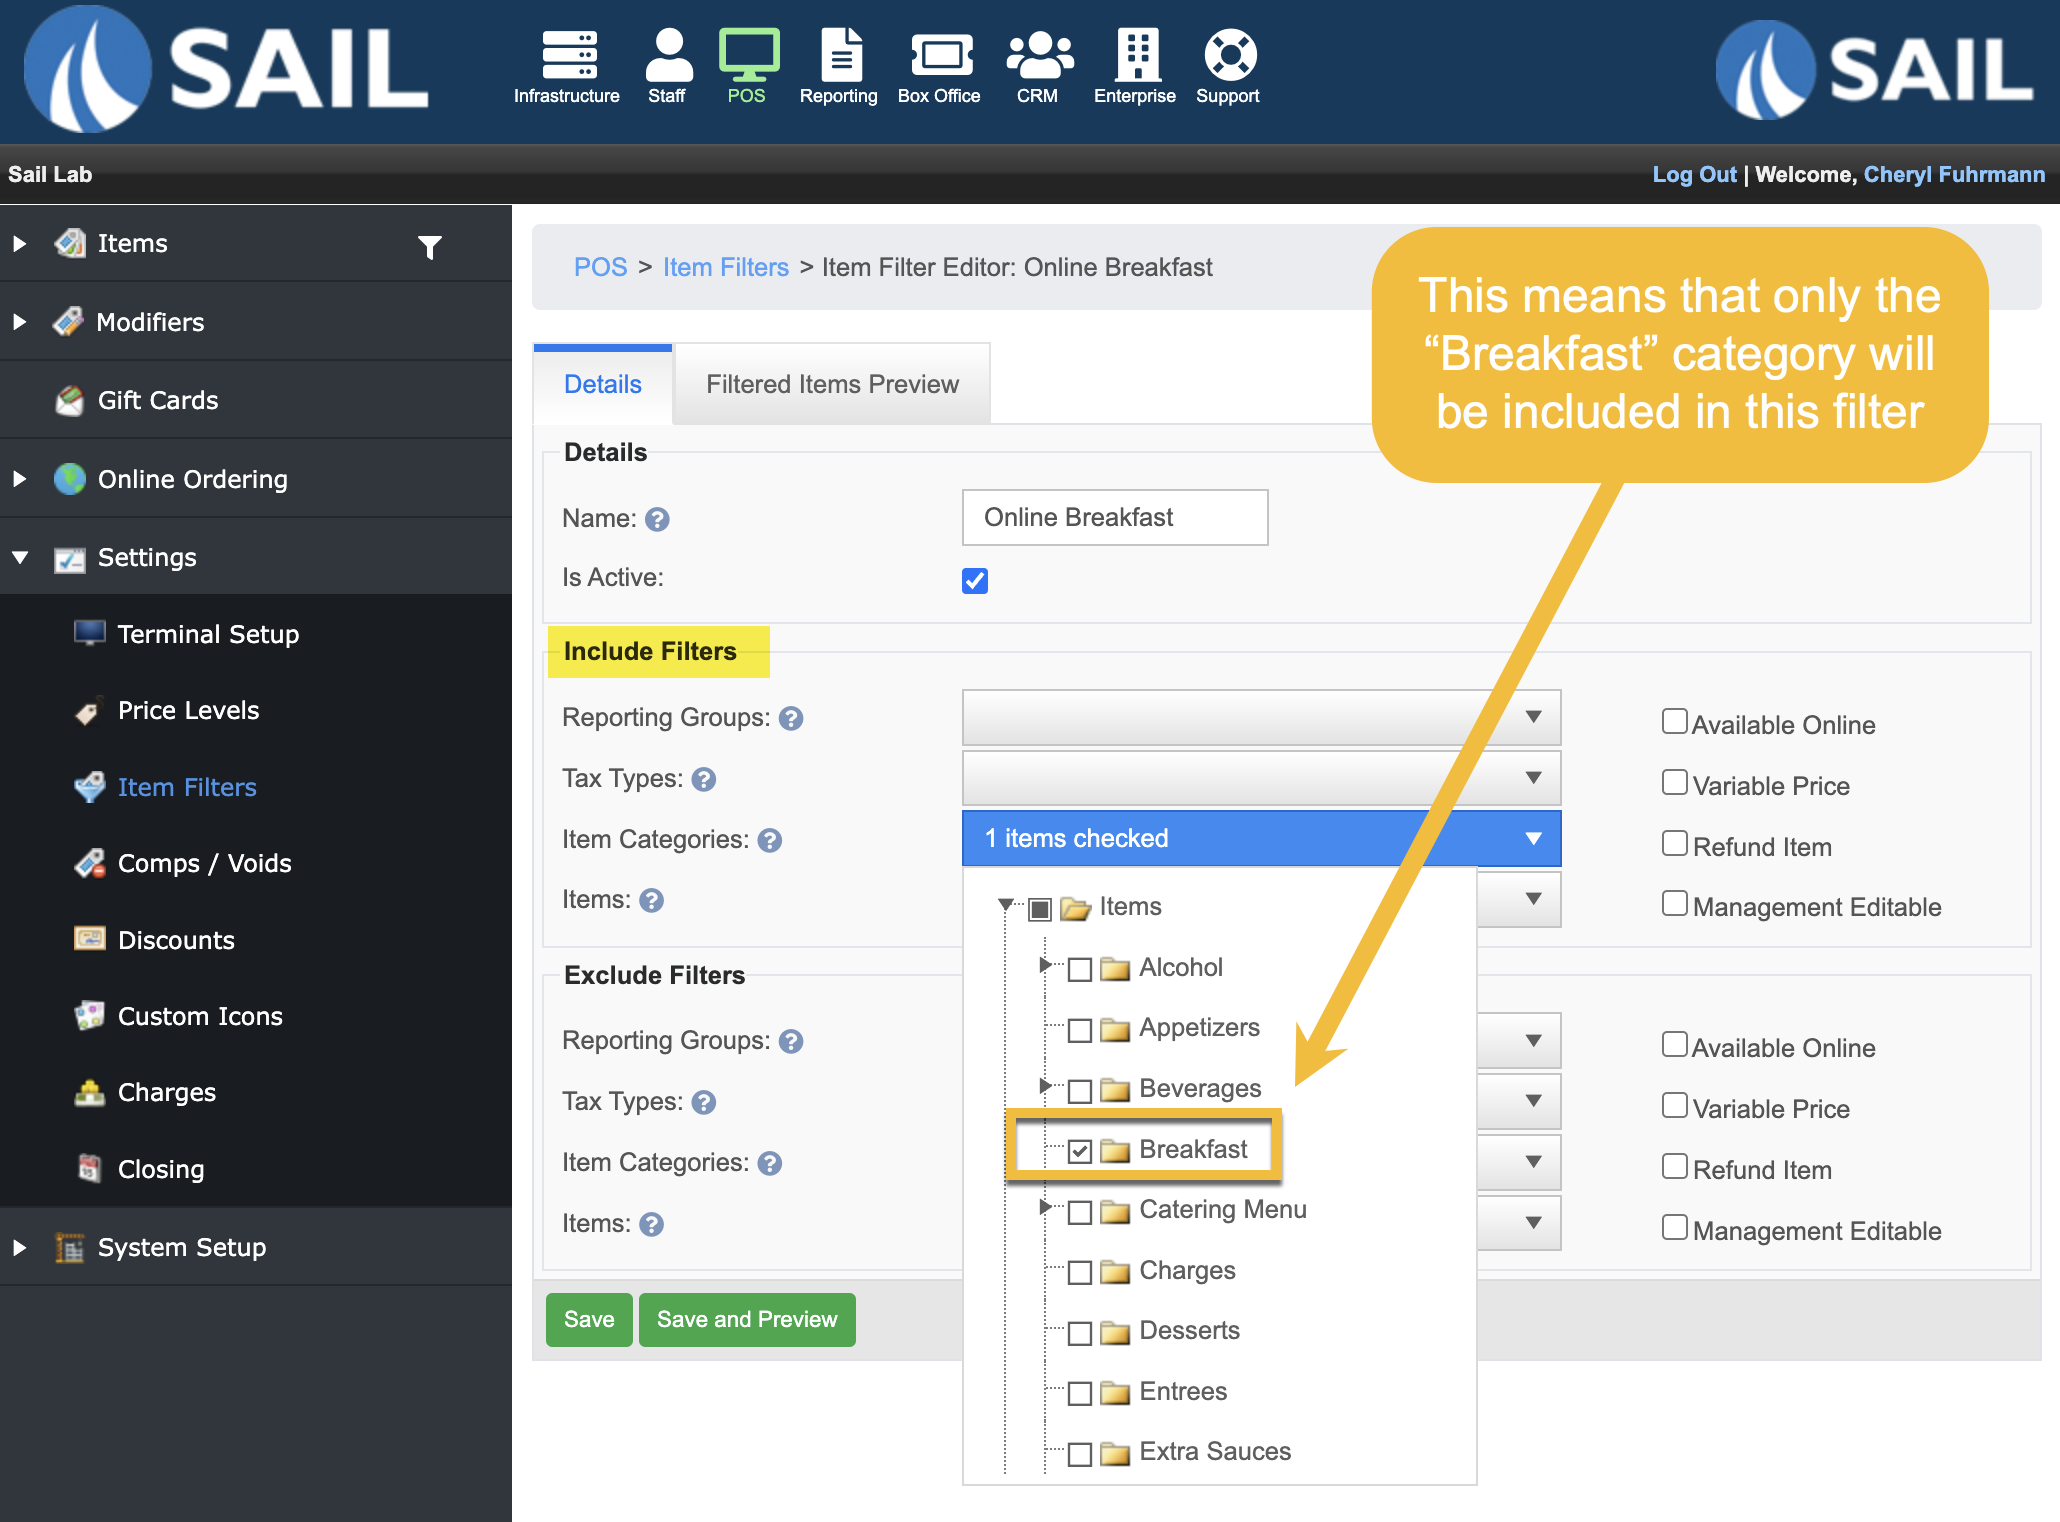
- Filter #2
- In this example called "Online Breakfast" is for when only the breakfast menu is available
- Use the "Include Filter" section to select the Breakfast item category.


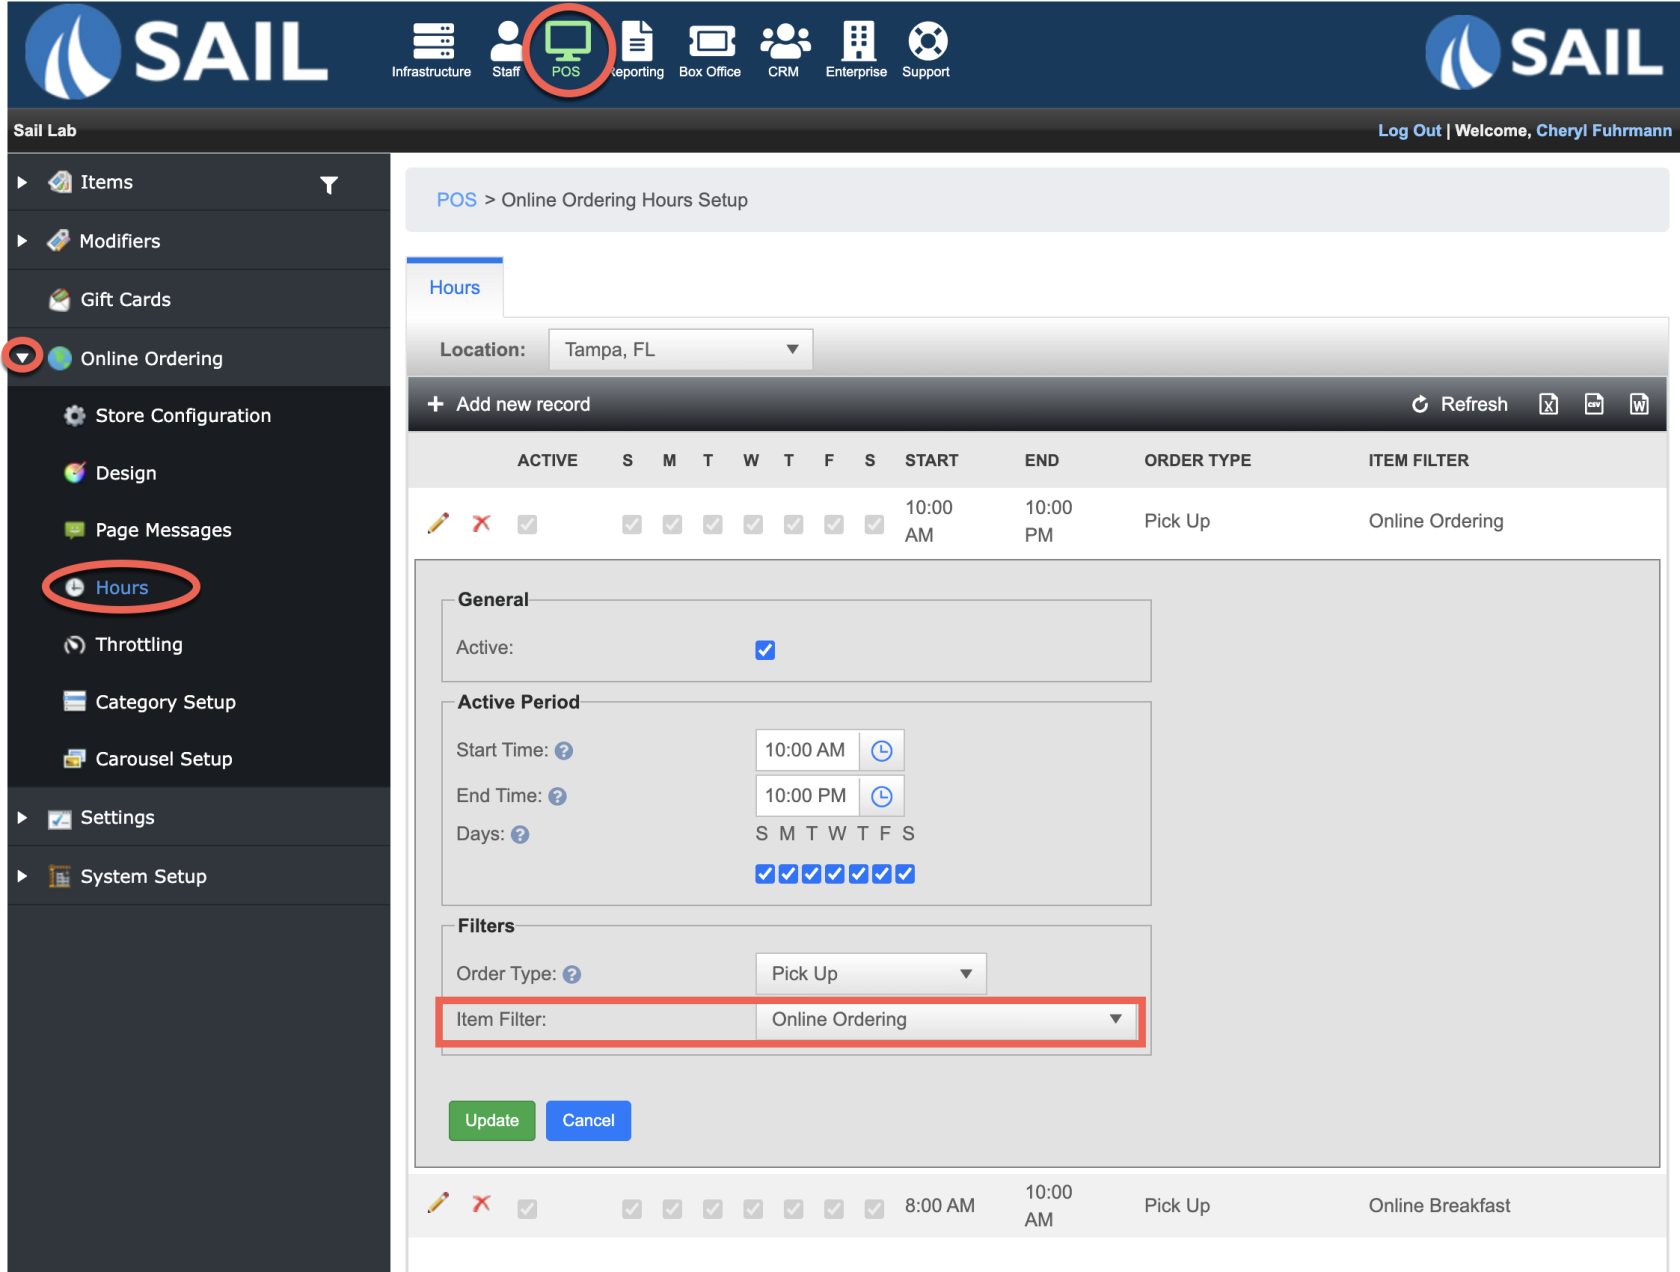
Step 2: Configure store hours online
- Navigate to Online Hours: POS --> Online Ordering --> Hours
- Click Add new record
- Set the active start and end times and days of the week
- Use the Item Filter drop down to select the item filter you created for this time period.
- Timed Menu #1
- The "Online Ordering" filter I created for the entire menu (excluding breakfast) is available all week from 10am-10pm
- The "Online Ordering" filter I created for the entire menu (excluding breakfast) is available all week from 10am-10pm
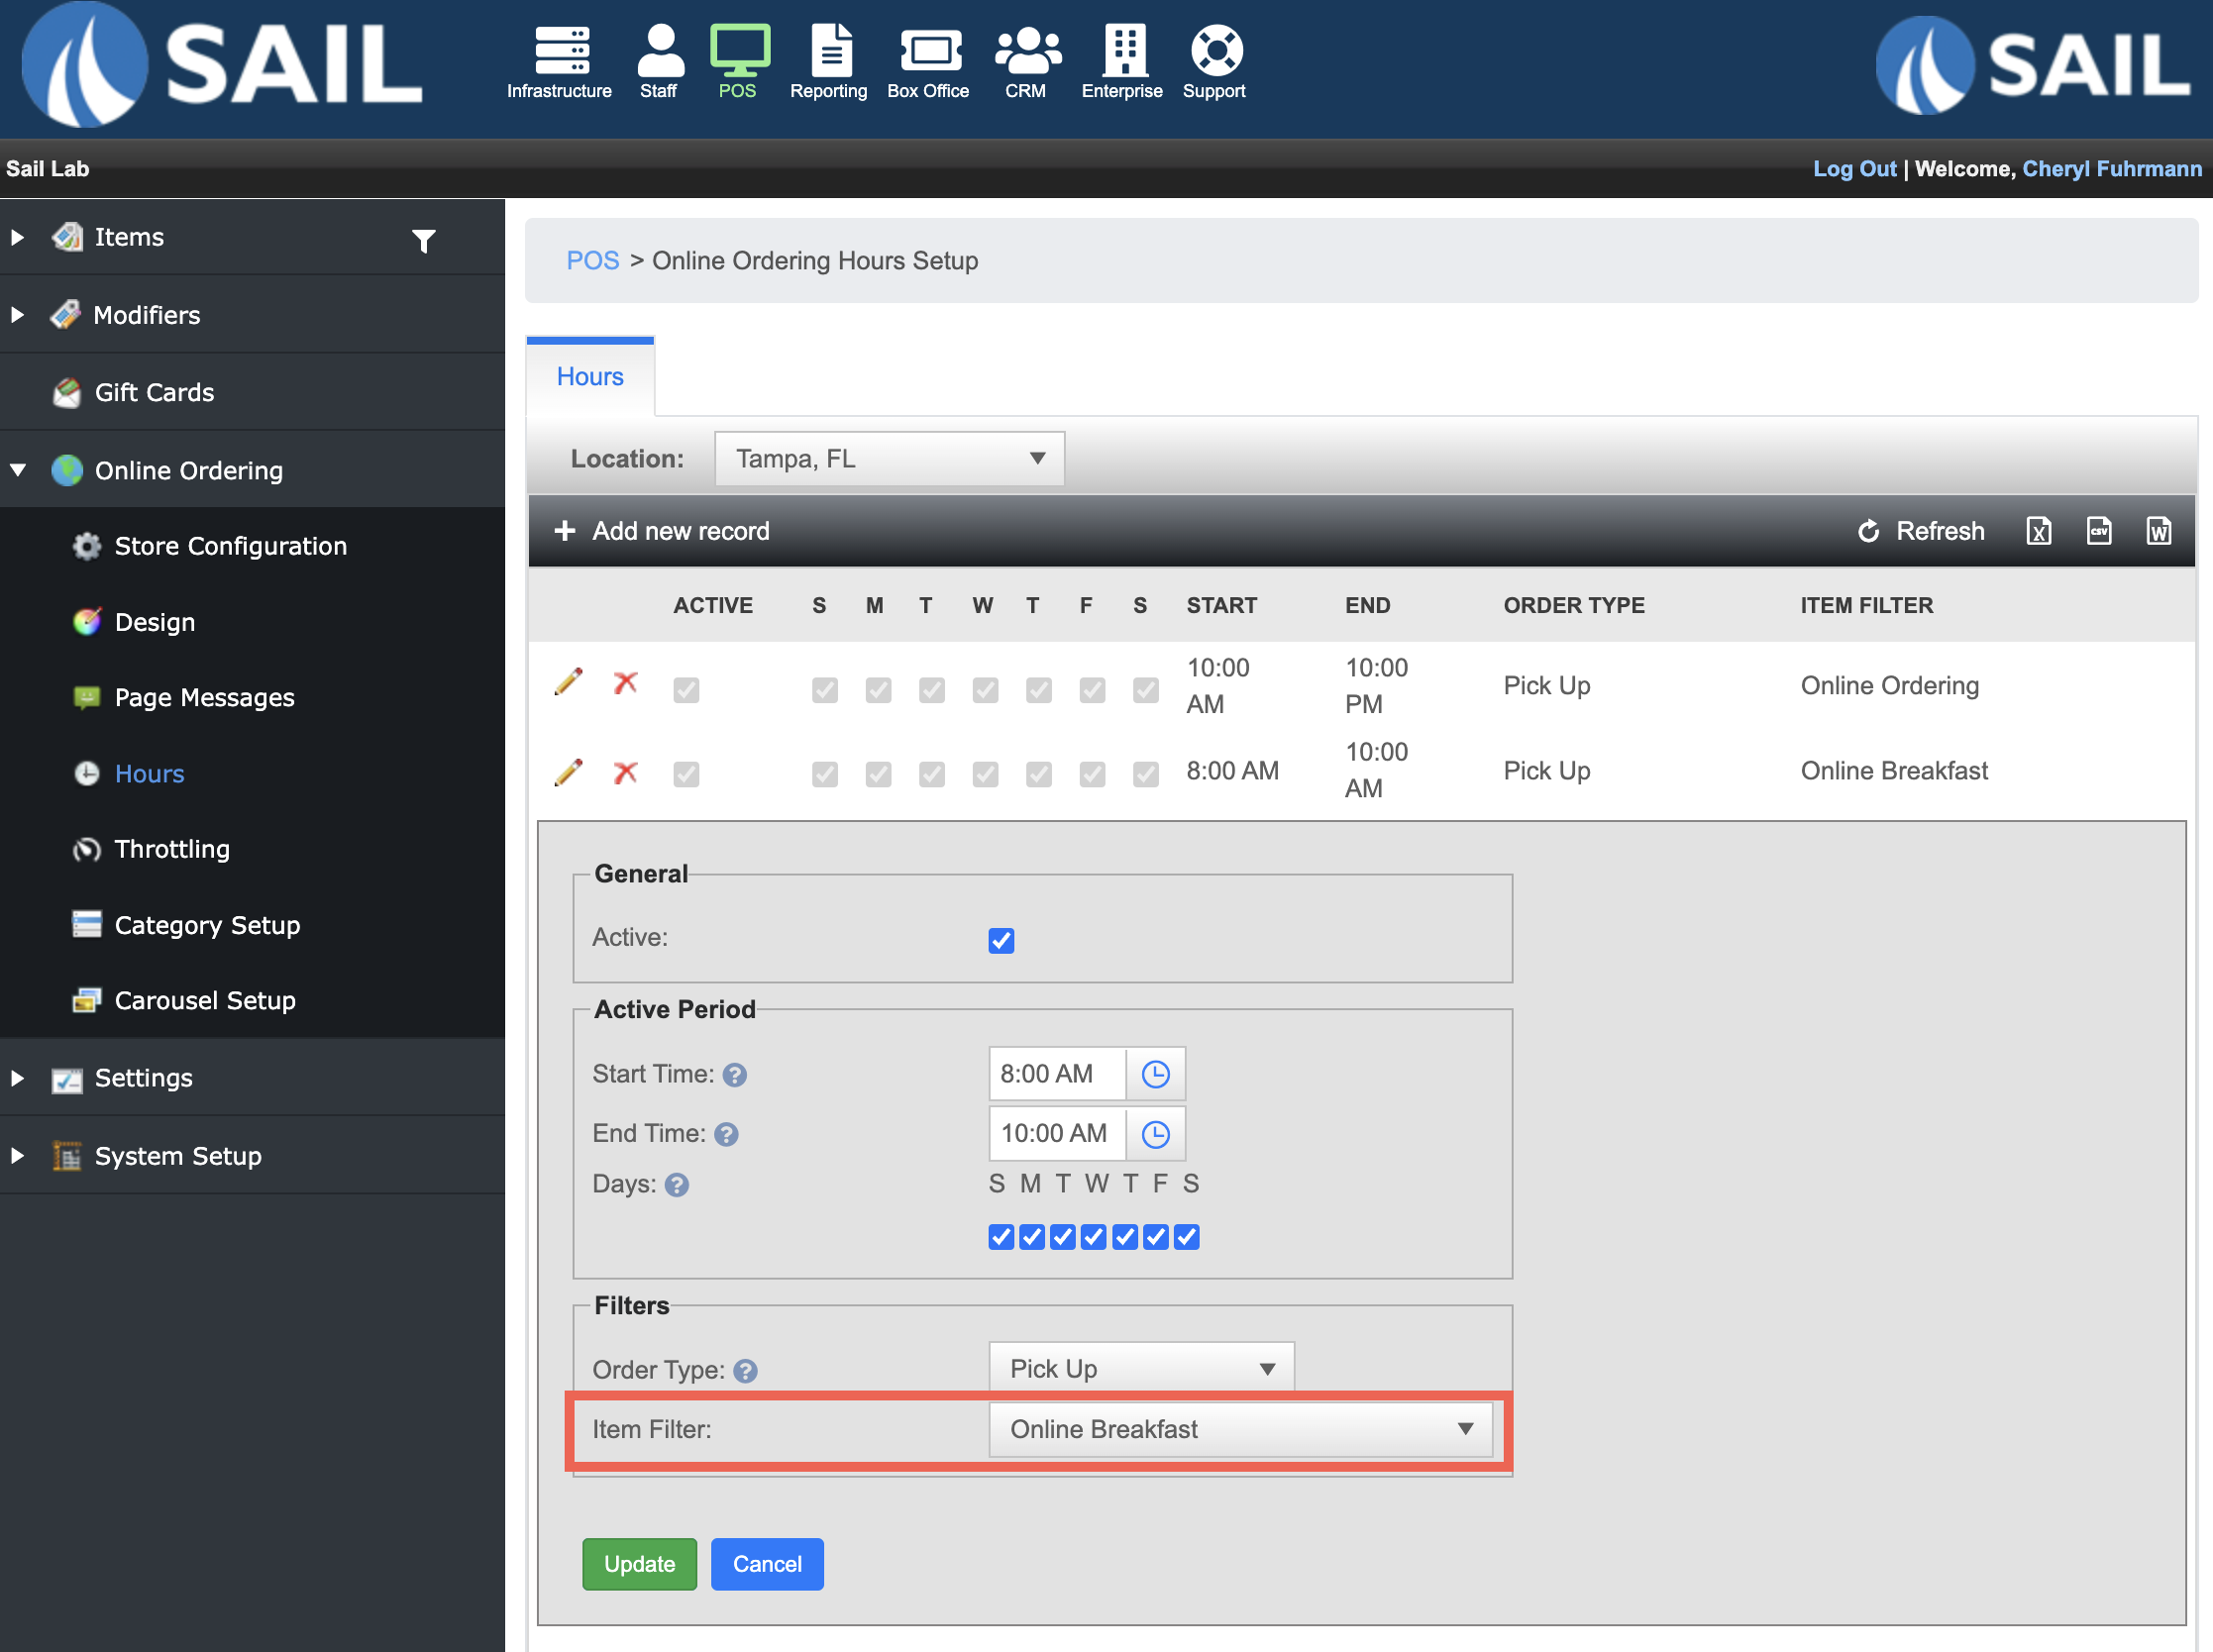
- Timed Menu #2
- The "Online Breakfast" filter I created for just the breakfast menu is available all week from 8am-10am

- The "Online Breakfast" filter I created for just the breakfast menu is available all week from 8am-10am

No Comments