
PLU: Steering
This document will detail the steering section of a PLU in back office.
-
Store section:
-
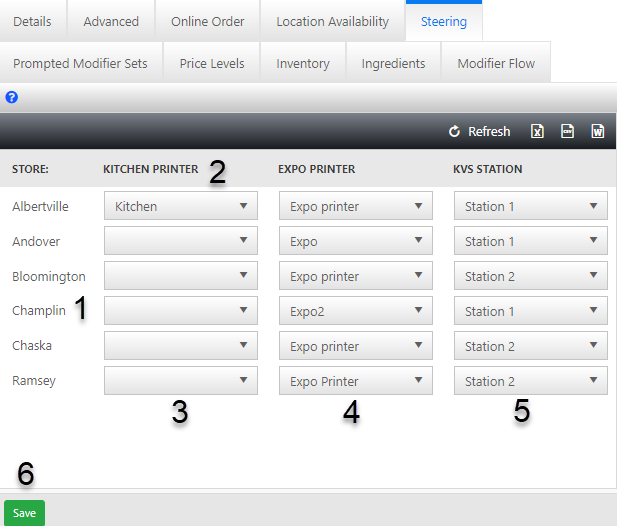
This section denotes what location your store is in. If you have more than one location each location will have a separate section that you may use to choose what station will receive the order.

-
-
Ticket routing options:
-
Each drop box is a selector for what printer or KVS station you would like the PLU to receive the order.

-
-
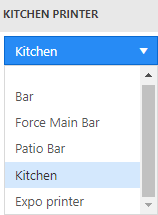
Kitchen printer:
-
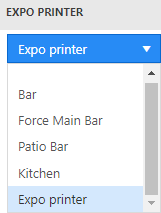
Used in locations where a ticket gets printed in the kitchen. This is also where you would set a bar printer. The drop box will have a list of printers for you to select from. Select the printer that matches the location you would like to have your item print.

-
-
Expo printer:
-
This is set if you would like your item to print at the expo station.
-
If your location uses a kitchen printer this will automatically print a receipt at an expo station at the same time to be paired with an order.
-
If your location uses KVS then after the cook bumps the ticket it will appear on the Expo screen where there will be an option to print a ticket to go with the order.
-
-
-
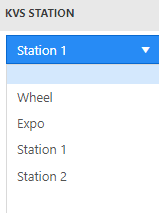
KVS Station:
-
KVS stands for kitchen video screen. If your location uses KVS instead of or alongside Kitchen ticket printers this is where you will set your item to appear on kitchen video screens.
-
KVS will generally replace a kitchen printer so you will have KVS options that would match each station that a printer would normally be at for your location.

-
A breakdown on how KVS routing works:
-
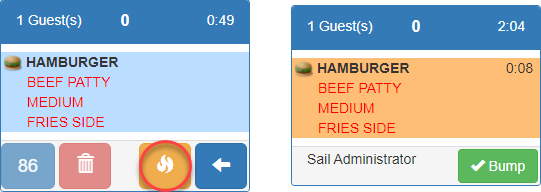
When something is set to KVS the item is always sent to the Wheel screen. The Wheel screen will then either “Fire” (start cooking) the item or “Send” the item to the station that prepares it.
-
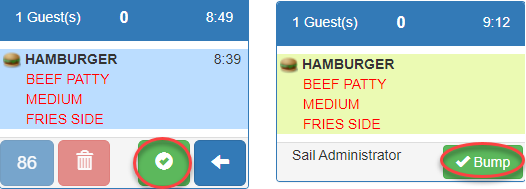
If you set the KVS station to Wheel it will set the send button to “Fire” the item. This will change the items color and start a timer.
-
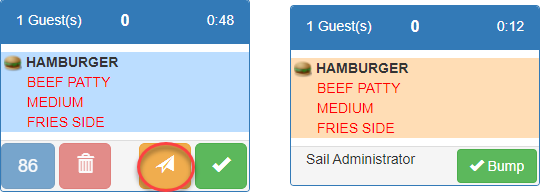
When you select a KVS station other than wheel it will “Send” the item to the station. The wheel cook can control timing by deciding when to send items to other stations. When something is sent it stays on the wheel screen and turns color but does not start a timer.
-
The item will then appear at the stations KVS where they will press the fire button to signal that the item has started cooking.
-
Once the item is finished the station will press the “Done” button. Once it is set to done the item will turn green on the wheel to let the cook know its finished. Once the cook is ready to push the item over to the expo station so that it can go out to the guest he will press the bump button.
-
-
-
Save:
-
Once you have made adjustments to steering press the Save button to save the changes.
-


No Comments