
Size Groups
This document will walk you thru all things Size Groups. From how to set them up, how to ring them in, and how they look in reporting.
How to create a size group
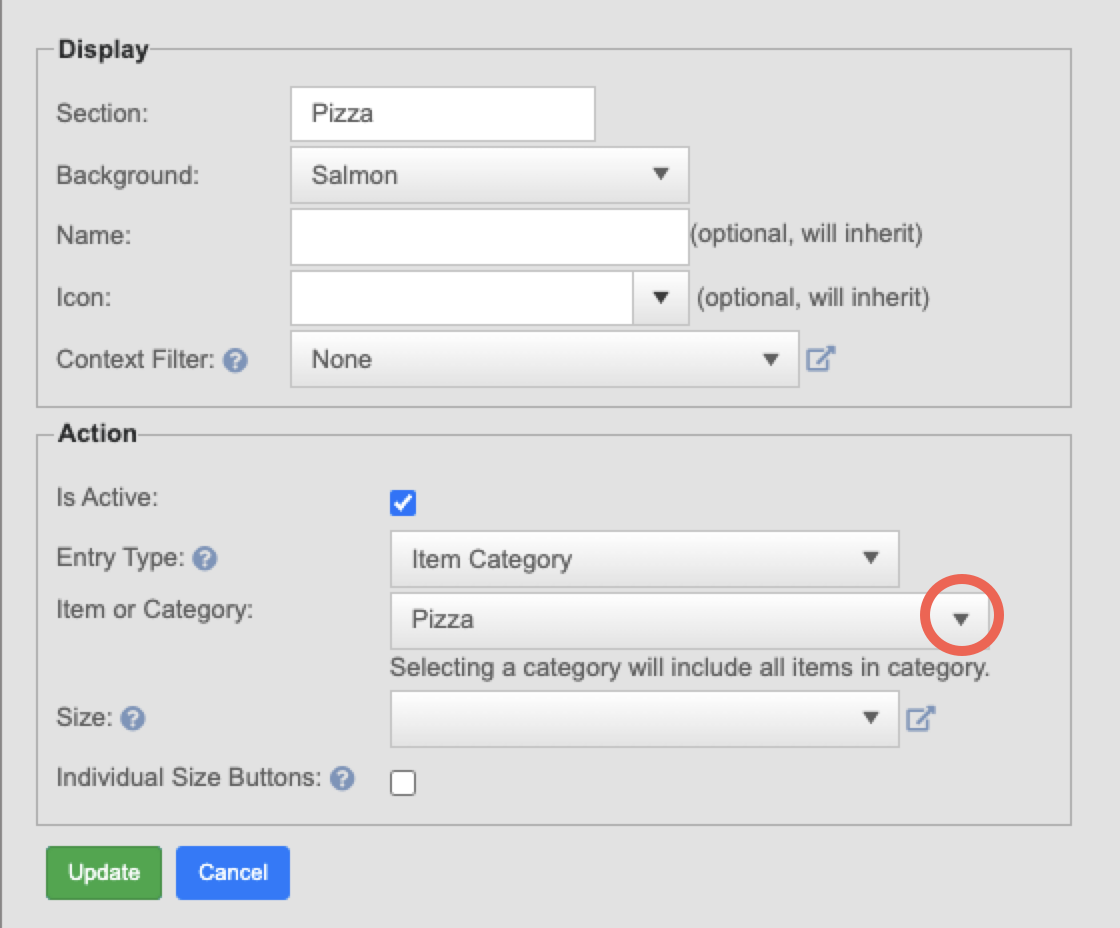
- To create a size group go to Backoffice --> POS --> Settings --> Size Groups --> Add New Record

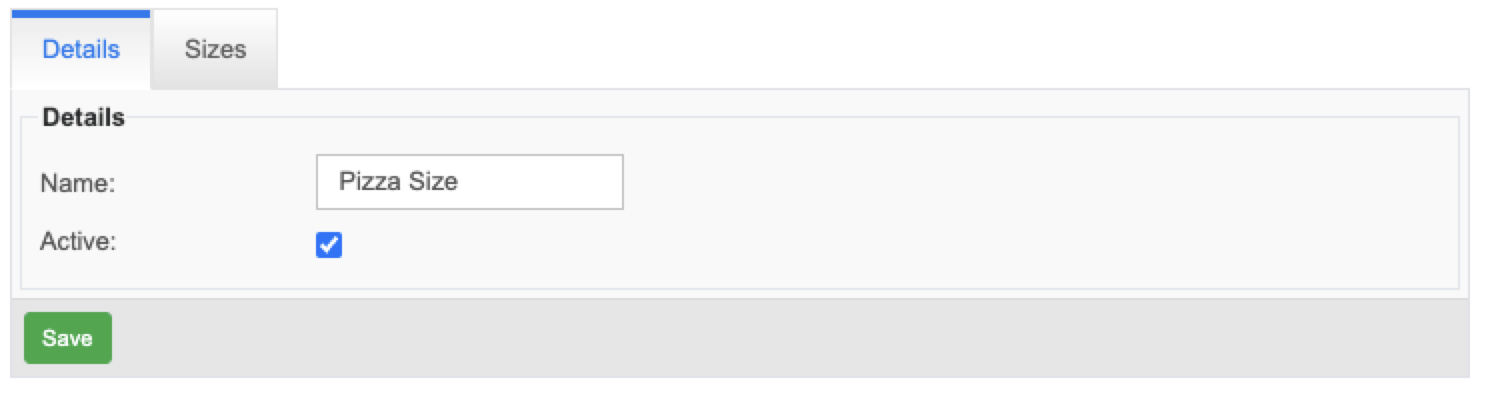
- It will first ask you to name it and set it active

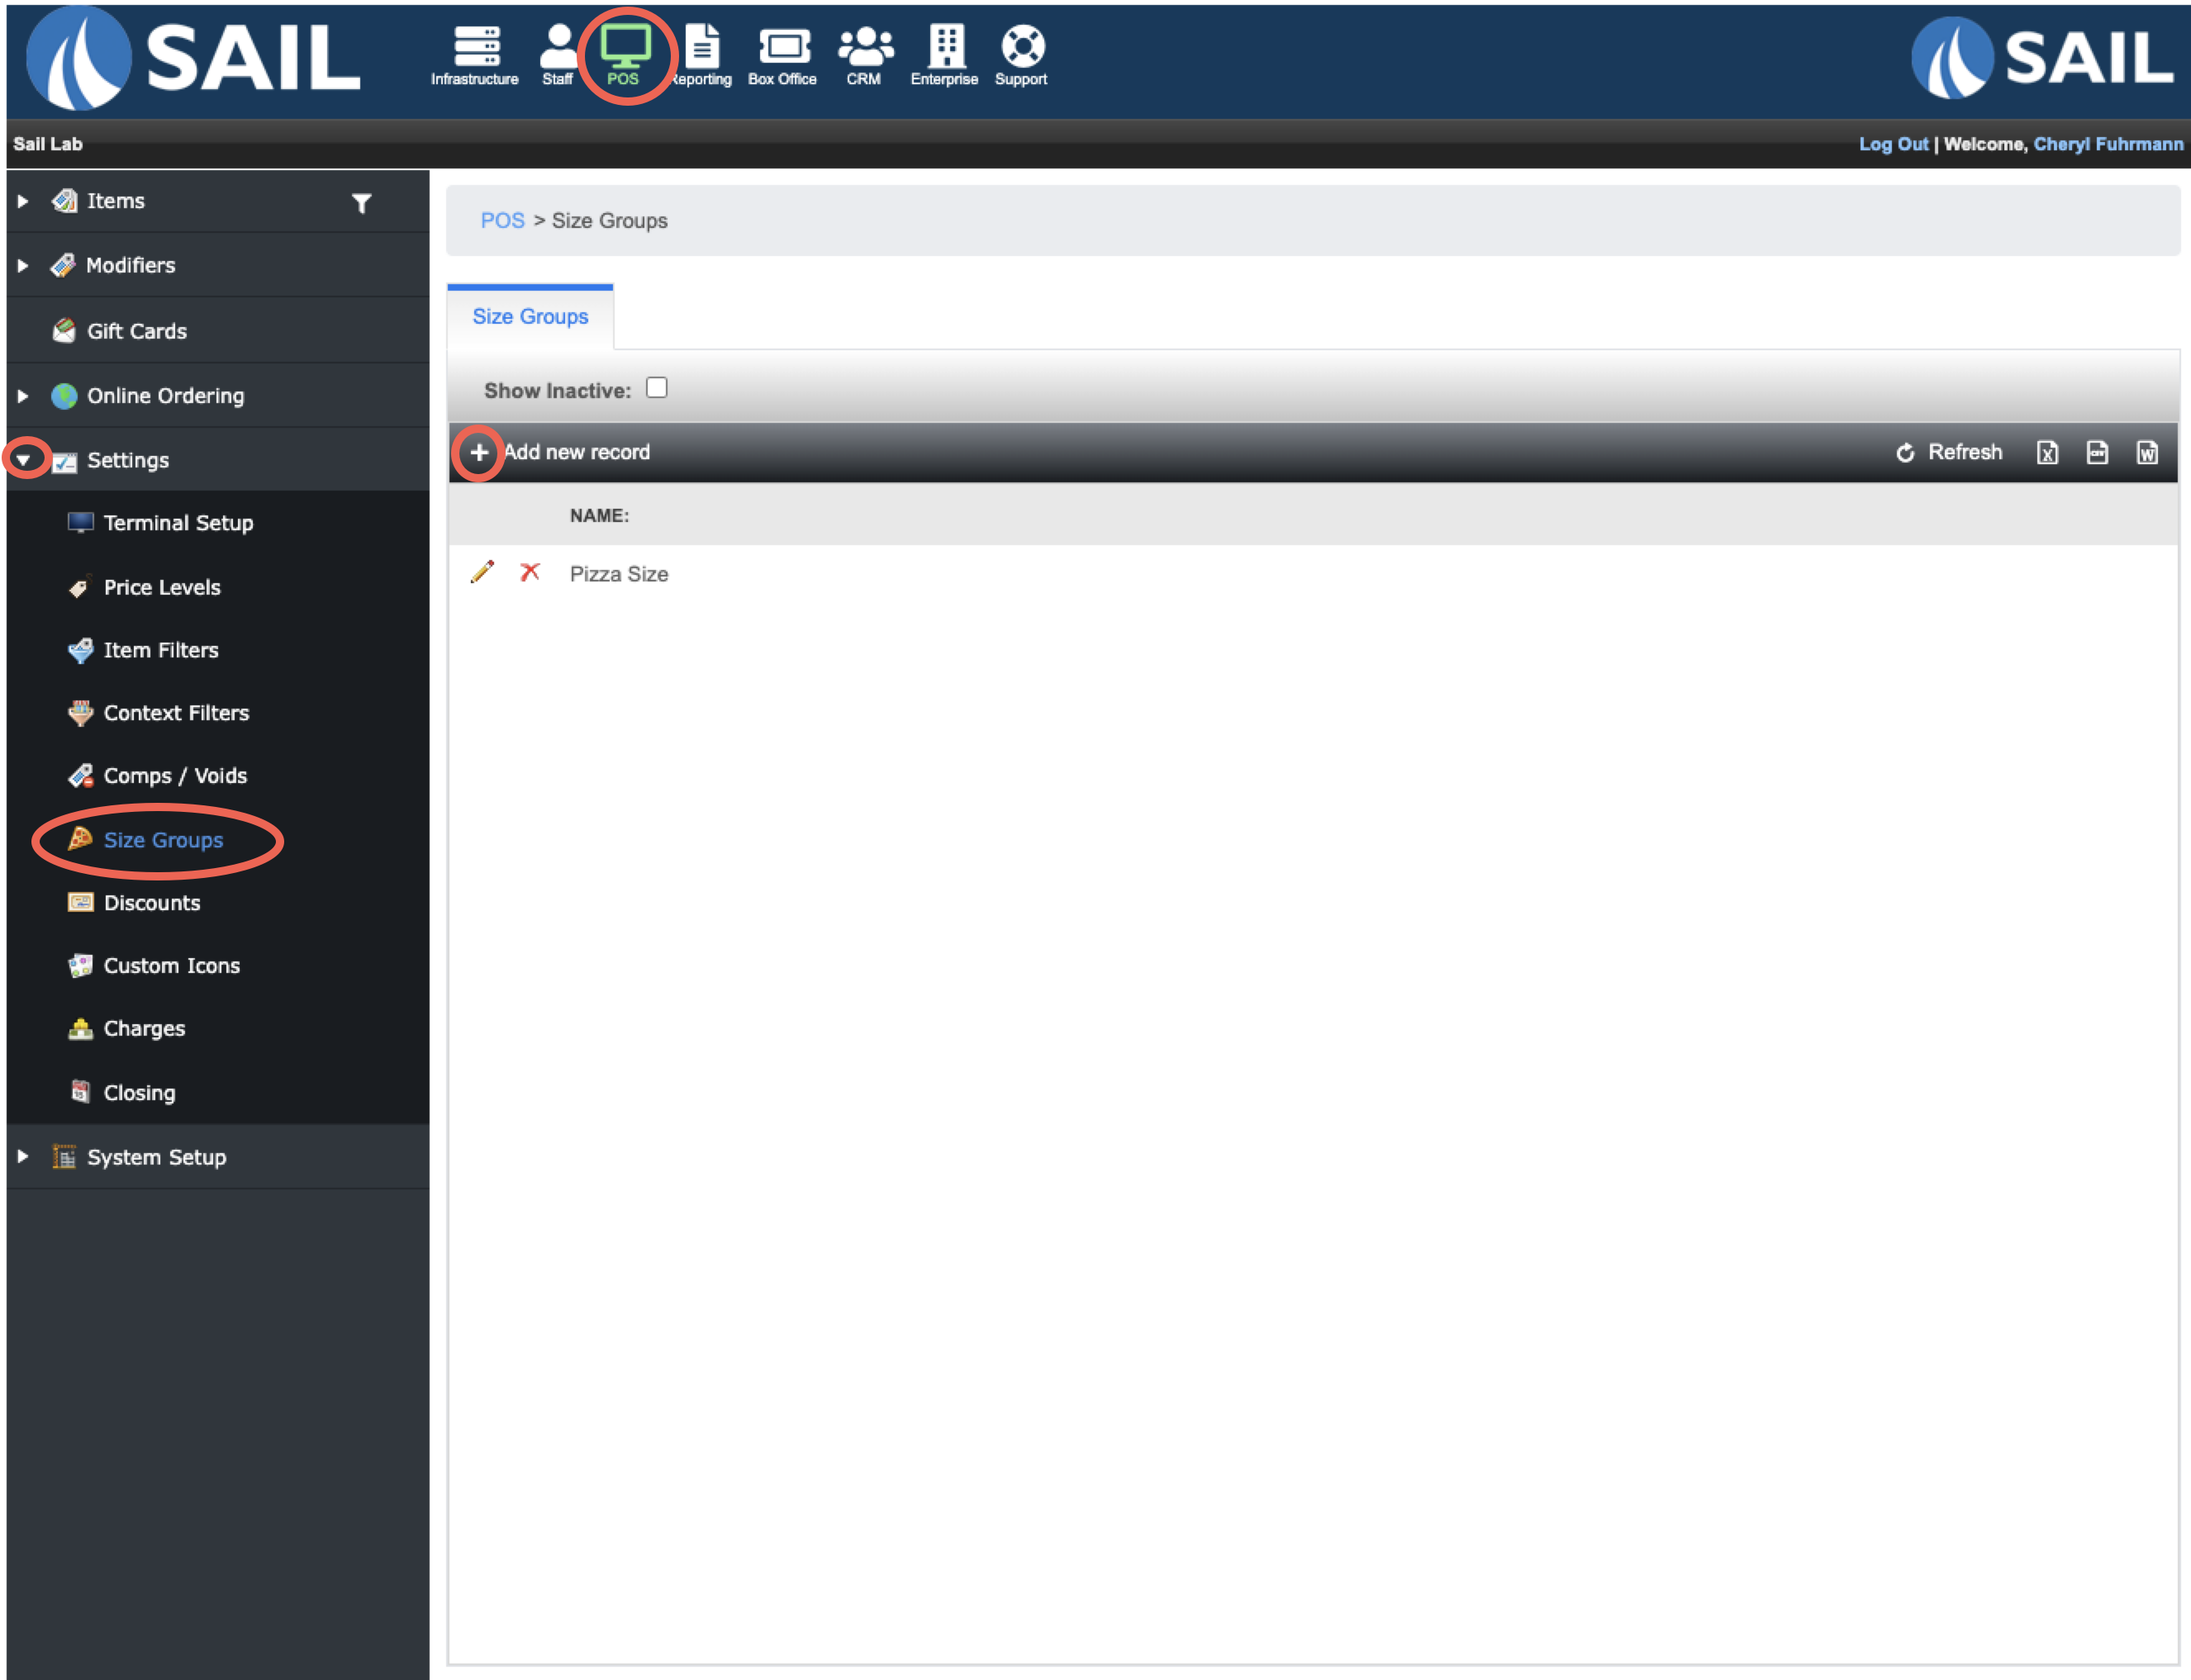
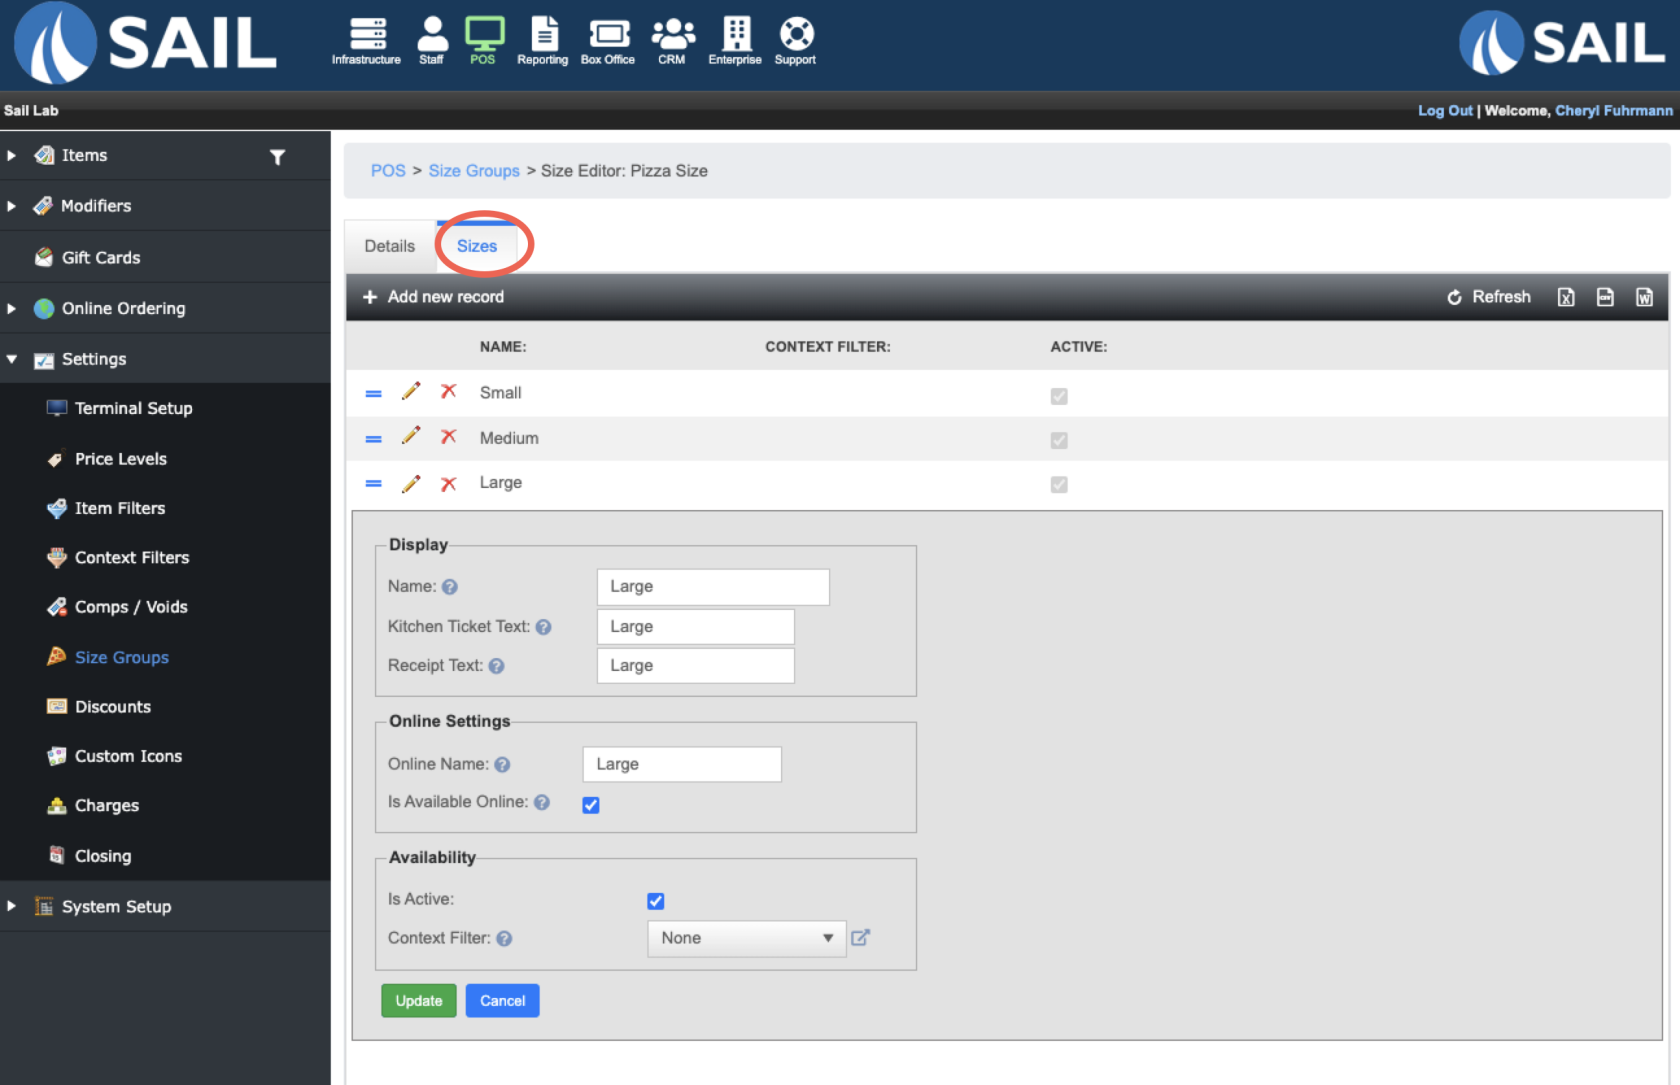
- Next go to the "Sizes" tab
- Here you will name all the different sizes you need for this size group
- Keep in mind that the name of the size will go in front of the item its on, so you may need to use abbreviations for the kitchen ticket text.

How to attach a size group to an item
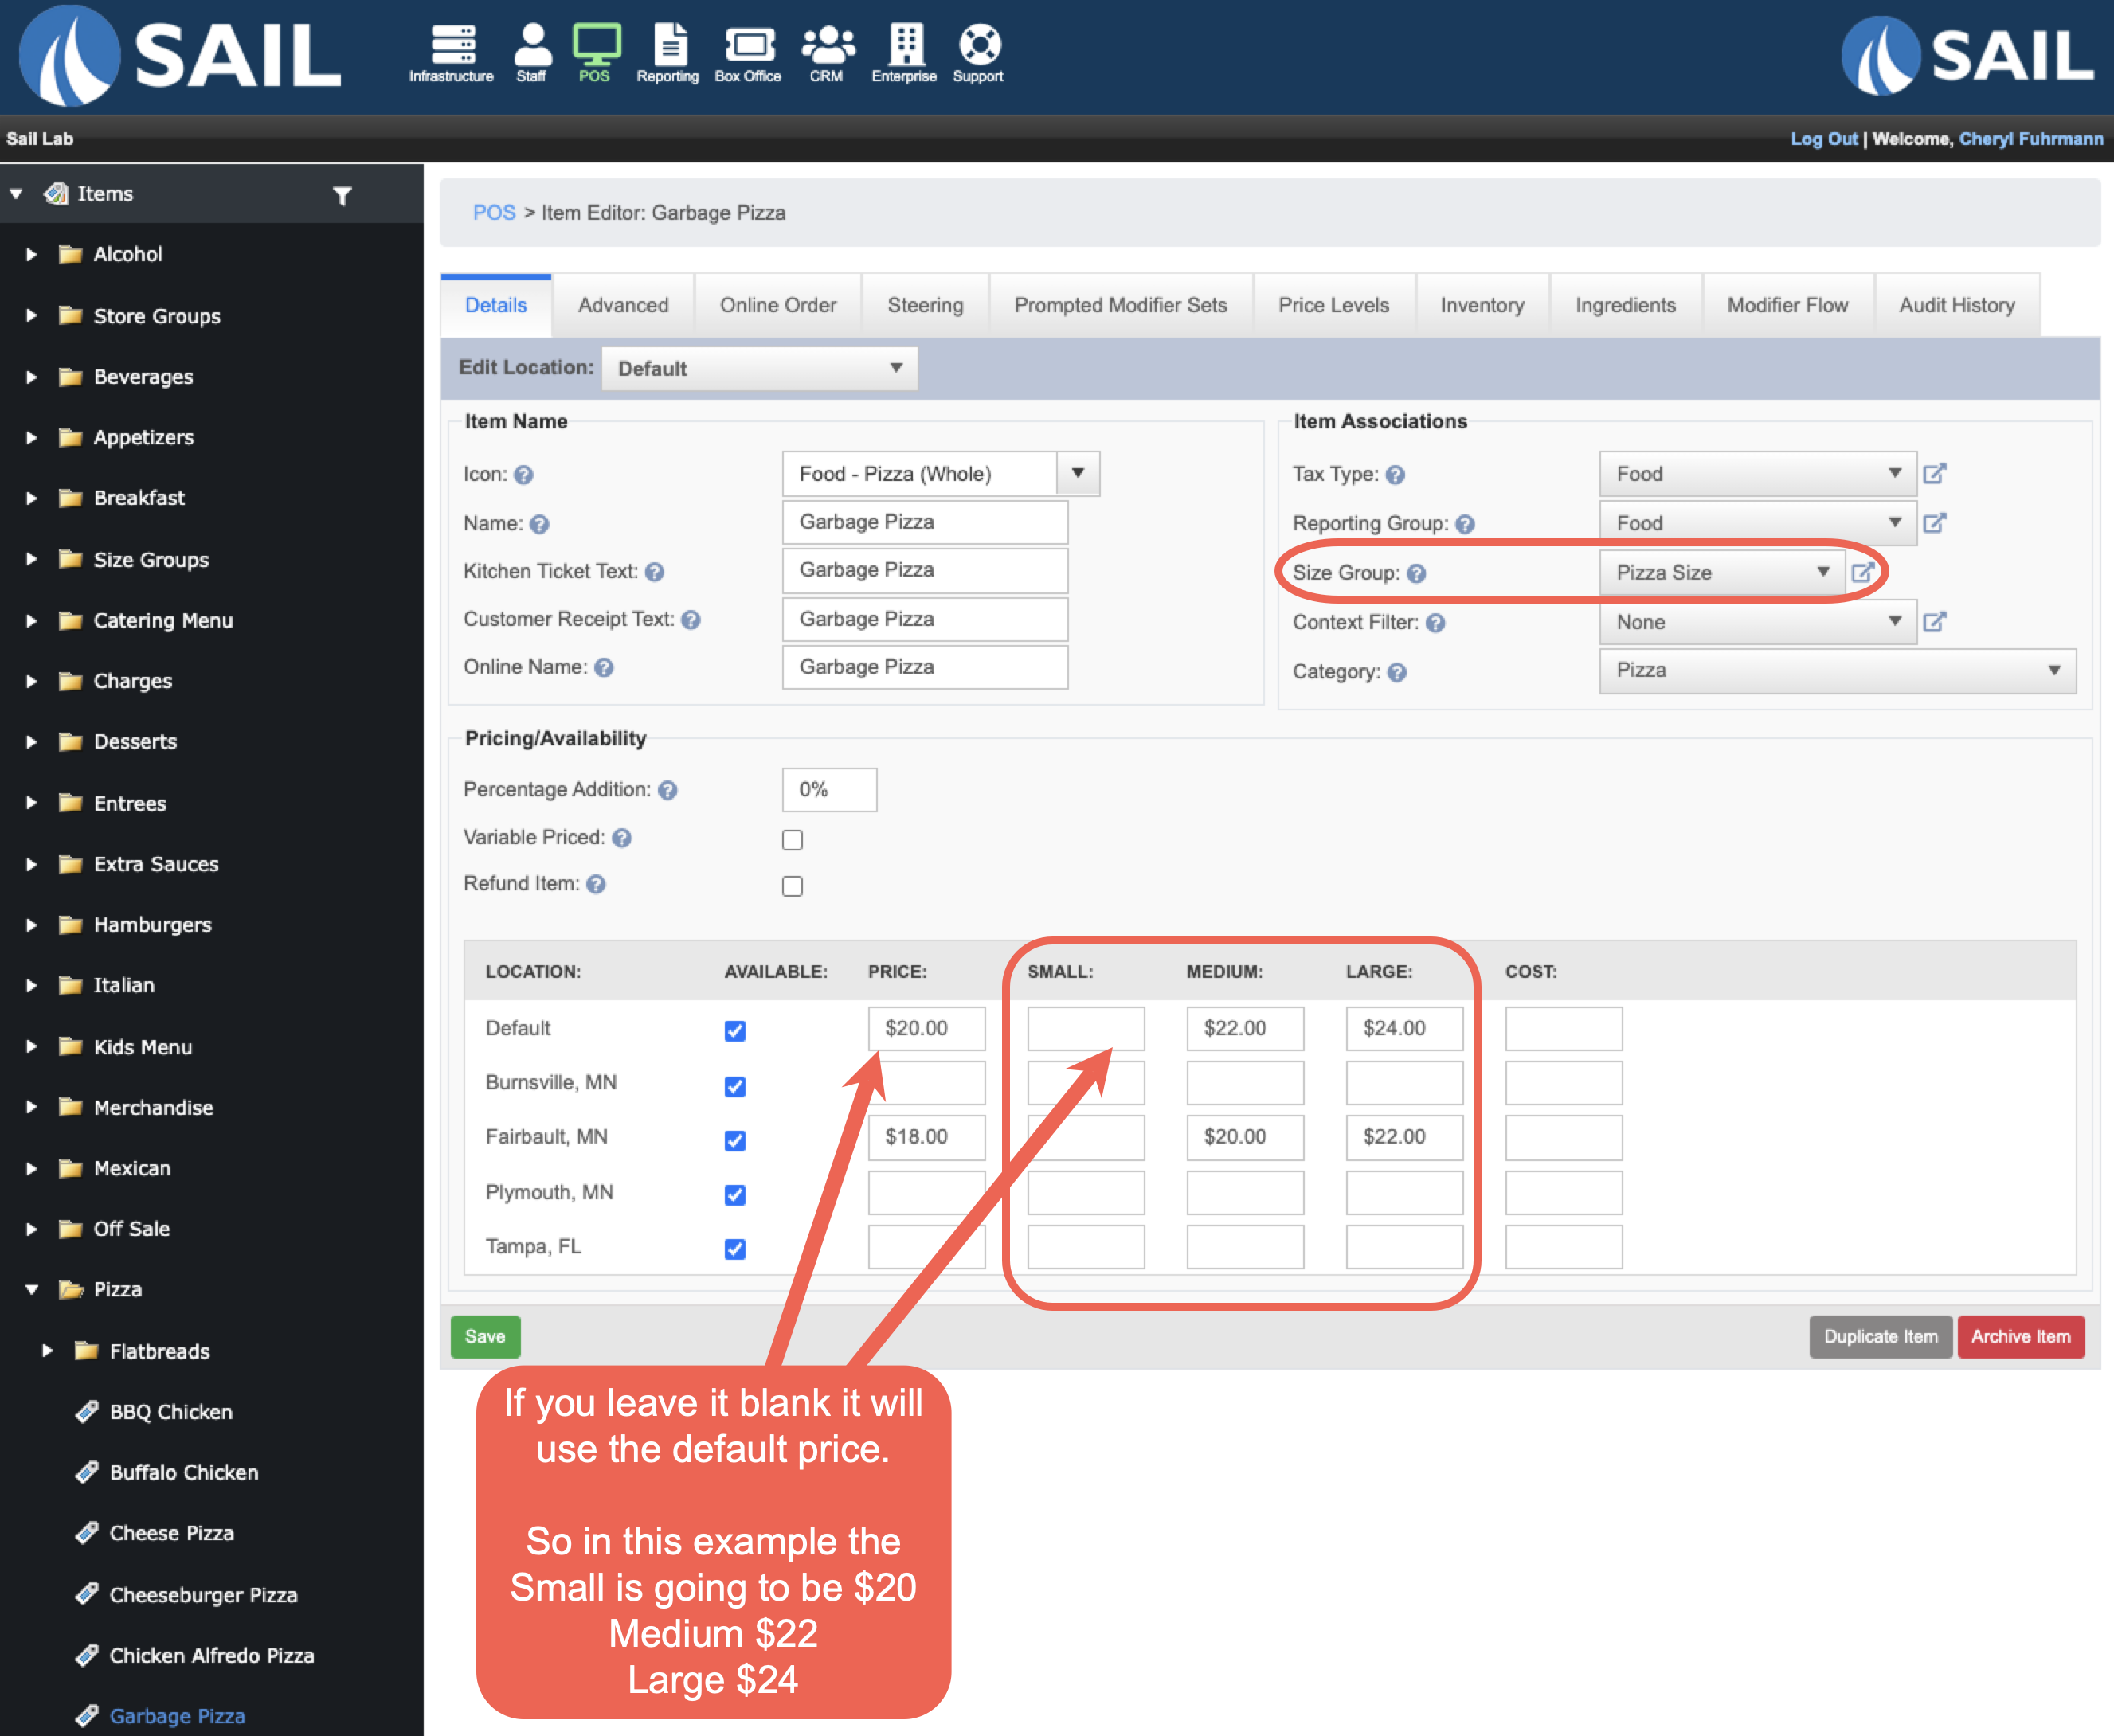
- Go to the item
- There is now a drop down on the right side called "Size group" for you to select the size group you'd like to assign to this item. Click save
- Then the different size names you created will appear in the pricing section
- You can now assign different prices to the different sizes
- For Multi Store, if you just put in prices on the top of the default line, all locations will use that price
- If you'd like a location to have different prices you can fill in other prices for each size in the locations line. (In the example below the Fairbault location has different prices than the other locations.)

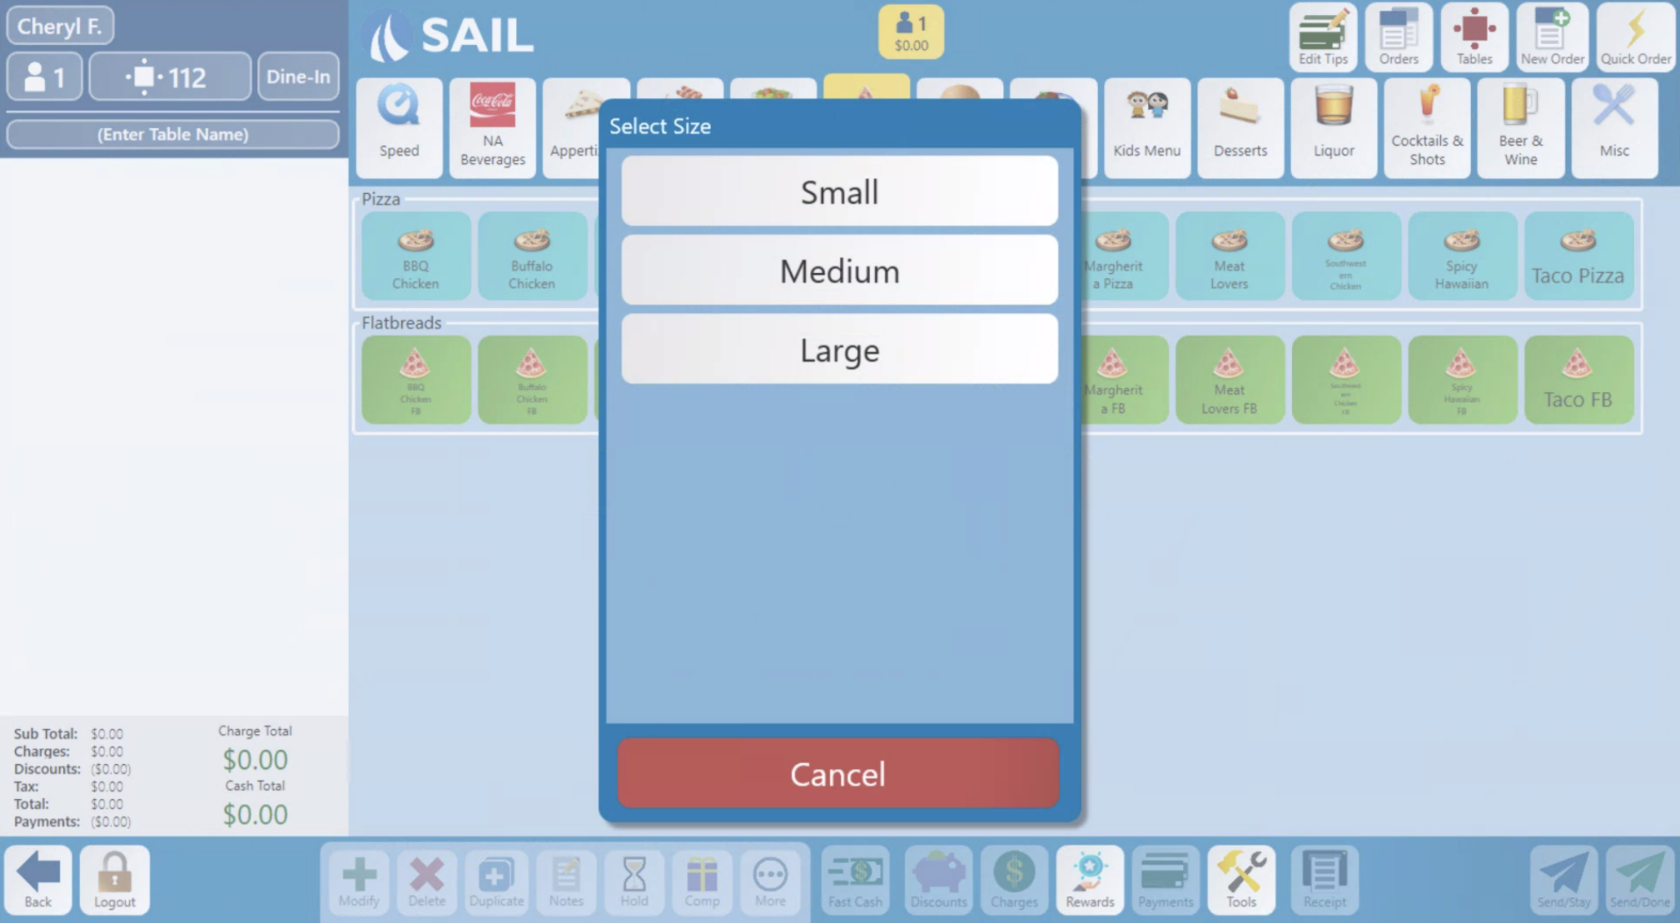
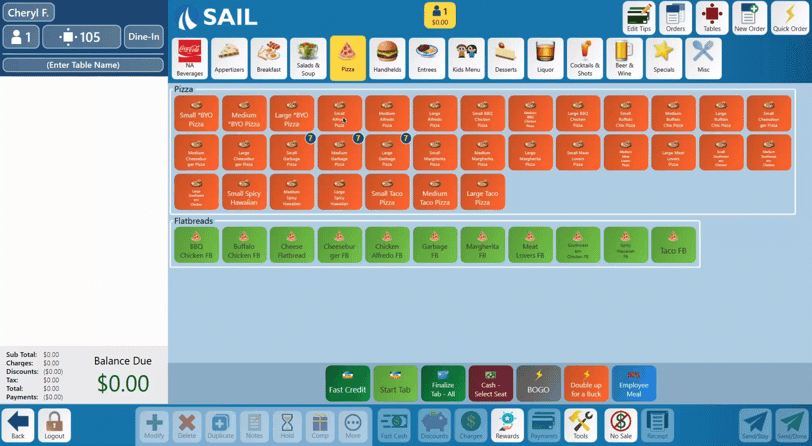
- Here is what it will look like on a terminal when you select this Garbage Pizza
- It will put the word "Medium" in front of the name of the pizza on the check on the left, on the kitchen ticket, and on the customer receipt.

How to use size groups with Modifiers
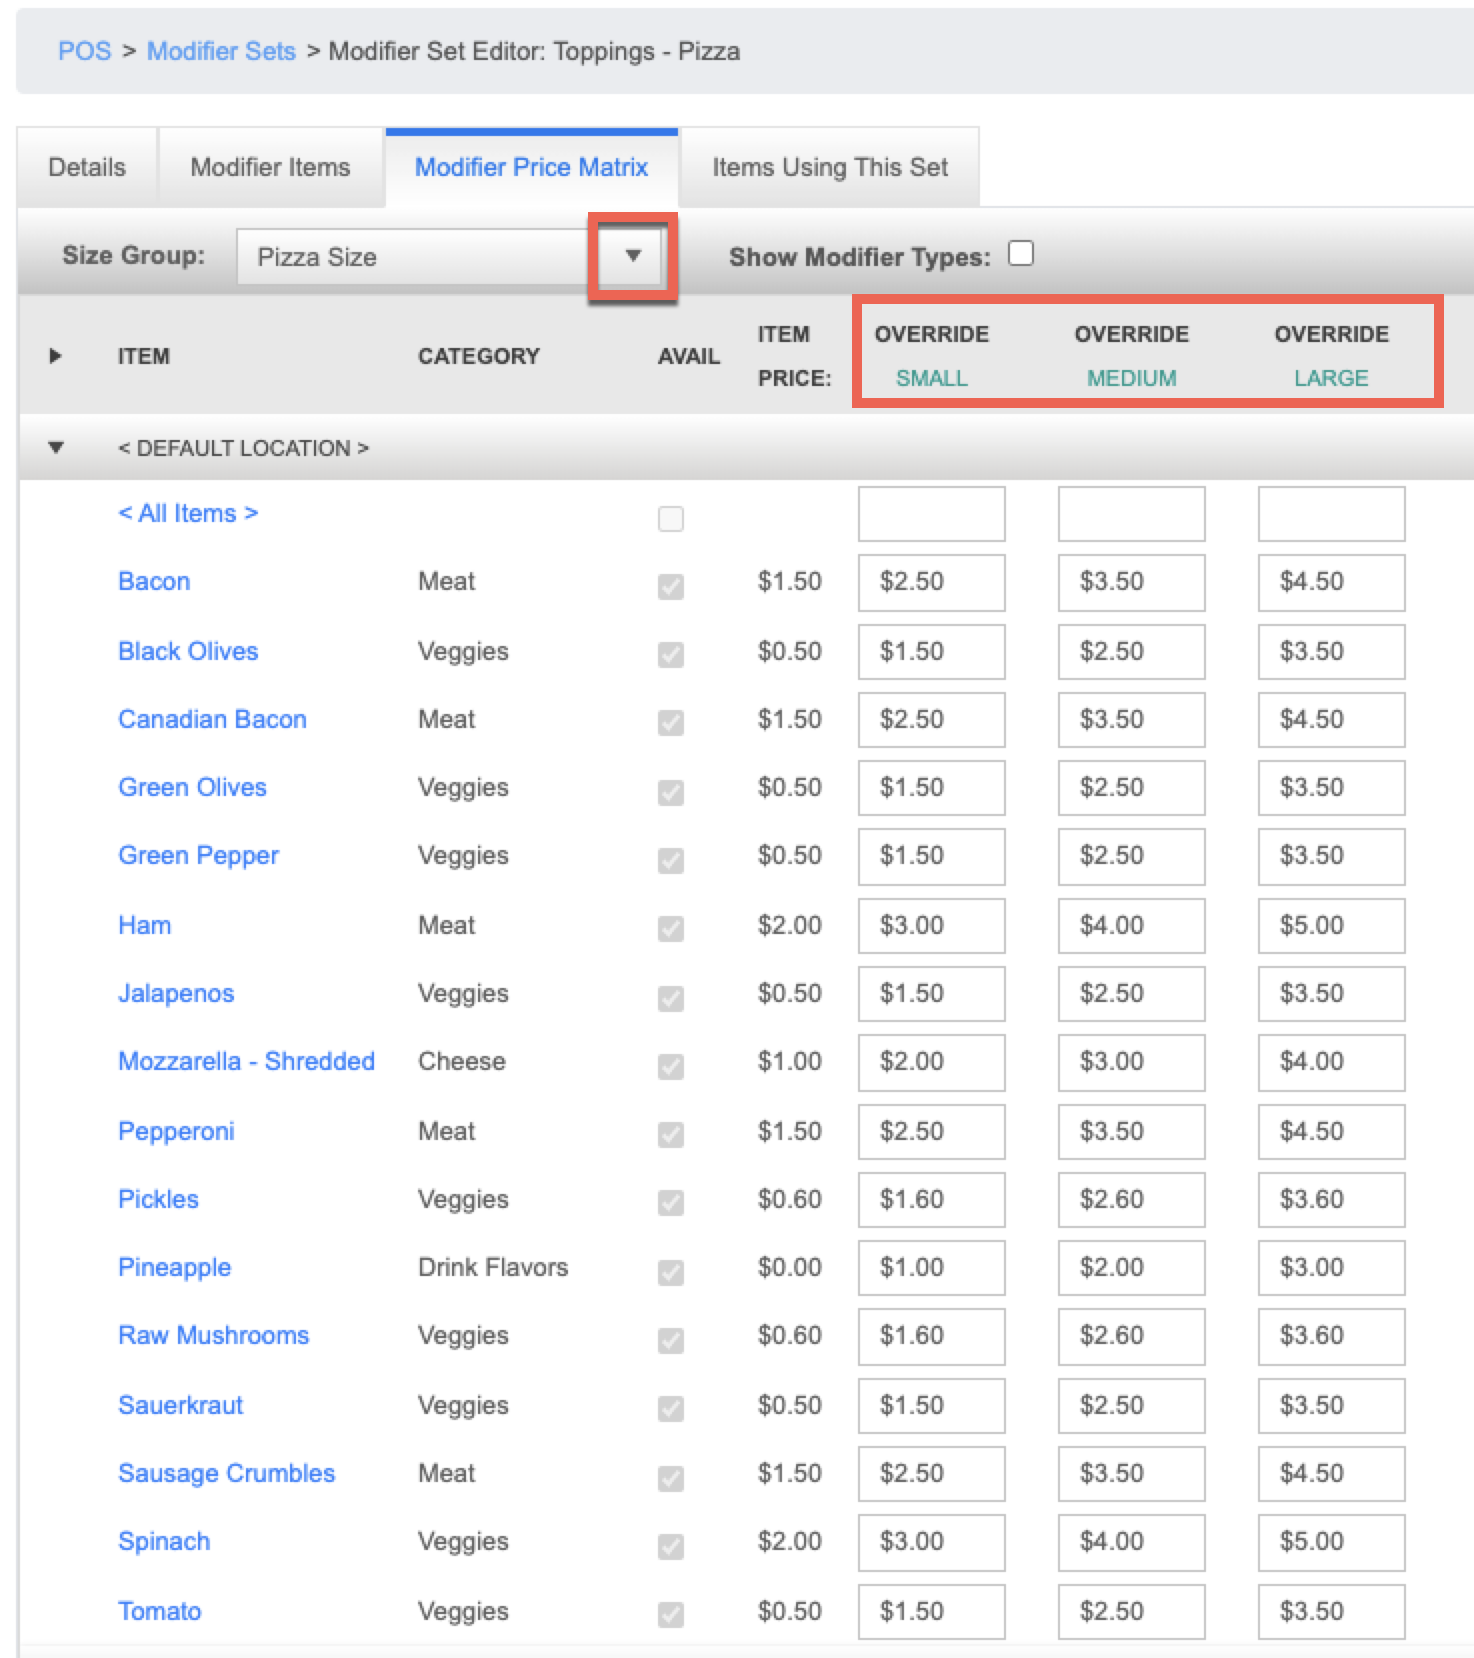
- Find the modifier set that you'd like to use the size group with
- Go to the Modifier Price Matrix tab
- Use the Size group drop down to select the size group that you'd like to change pricing on
- The size names you create will appear at the top so you can put in different prices for each of the different sizes

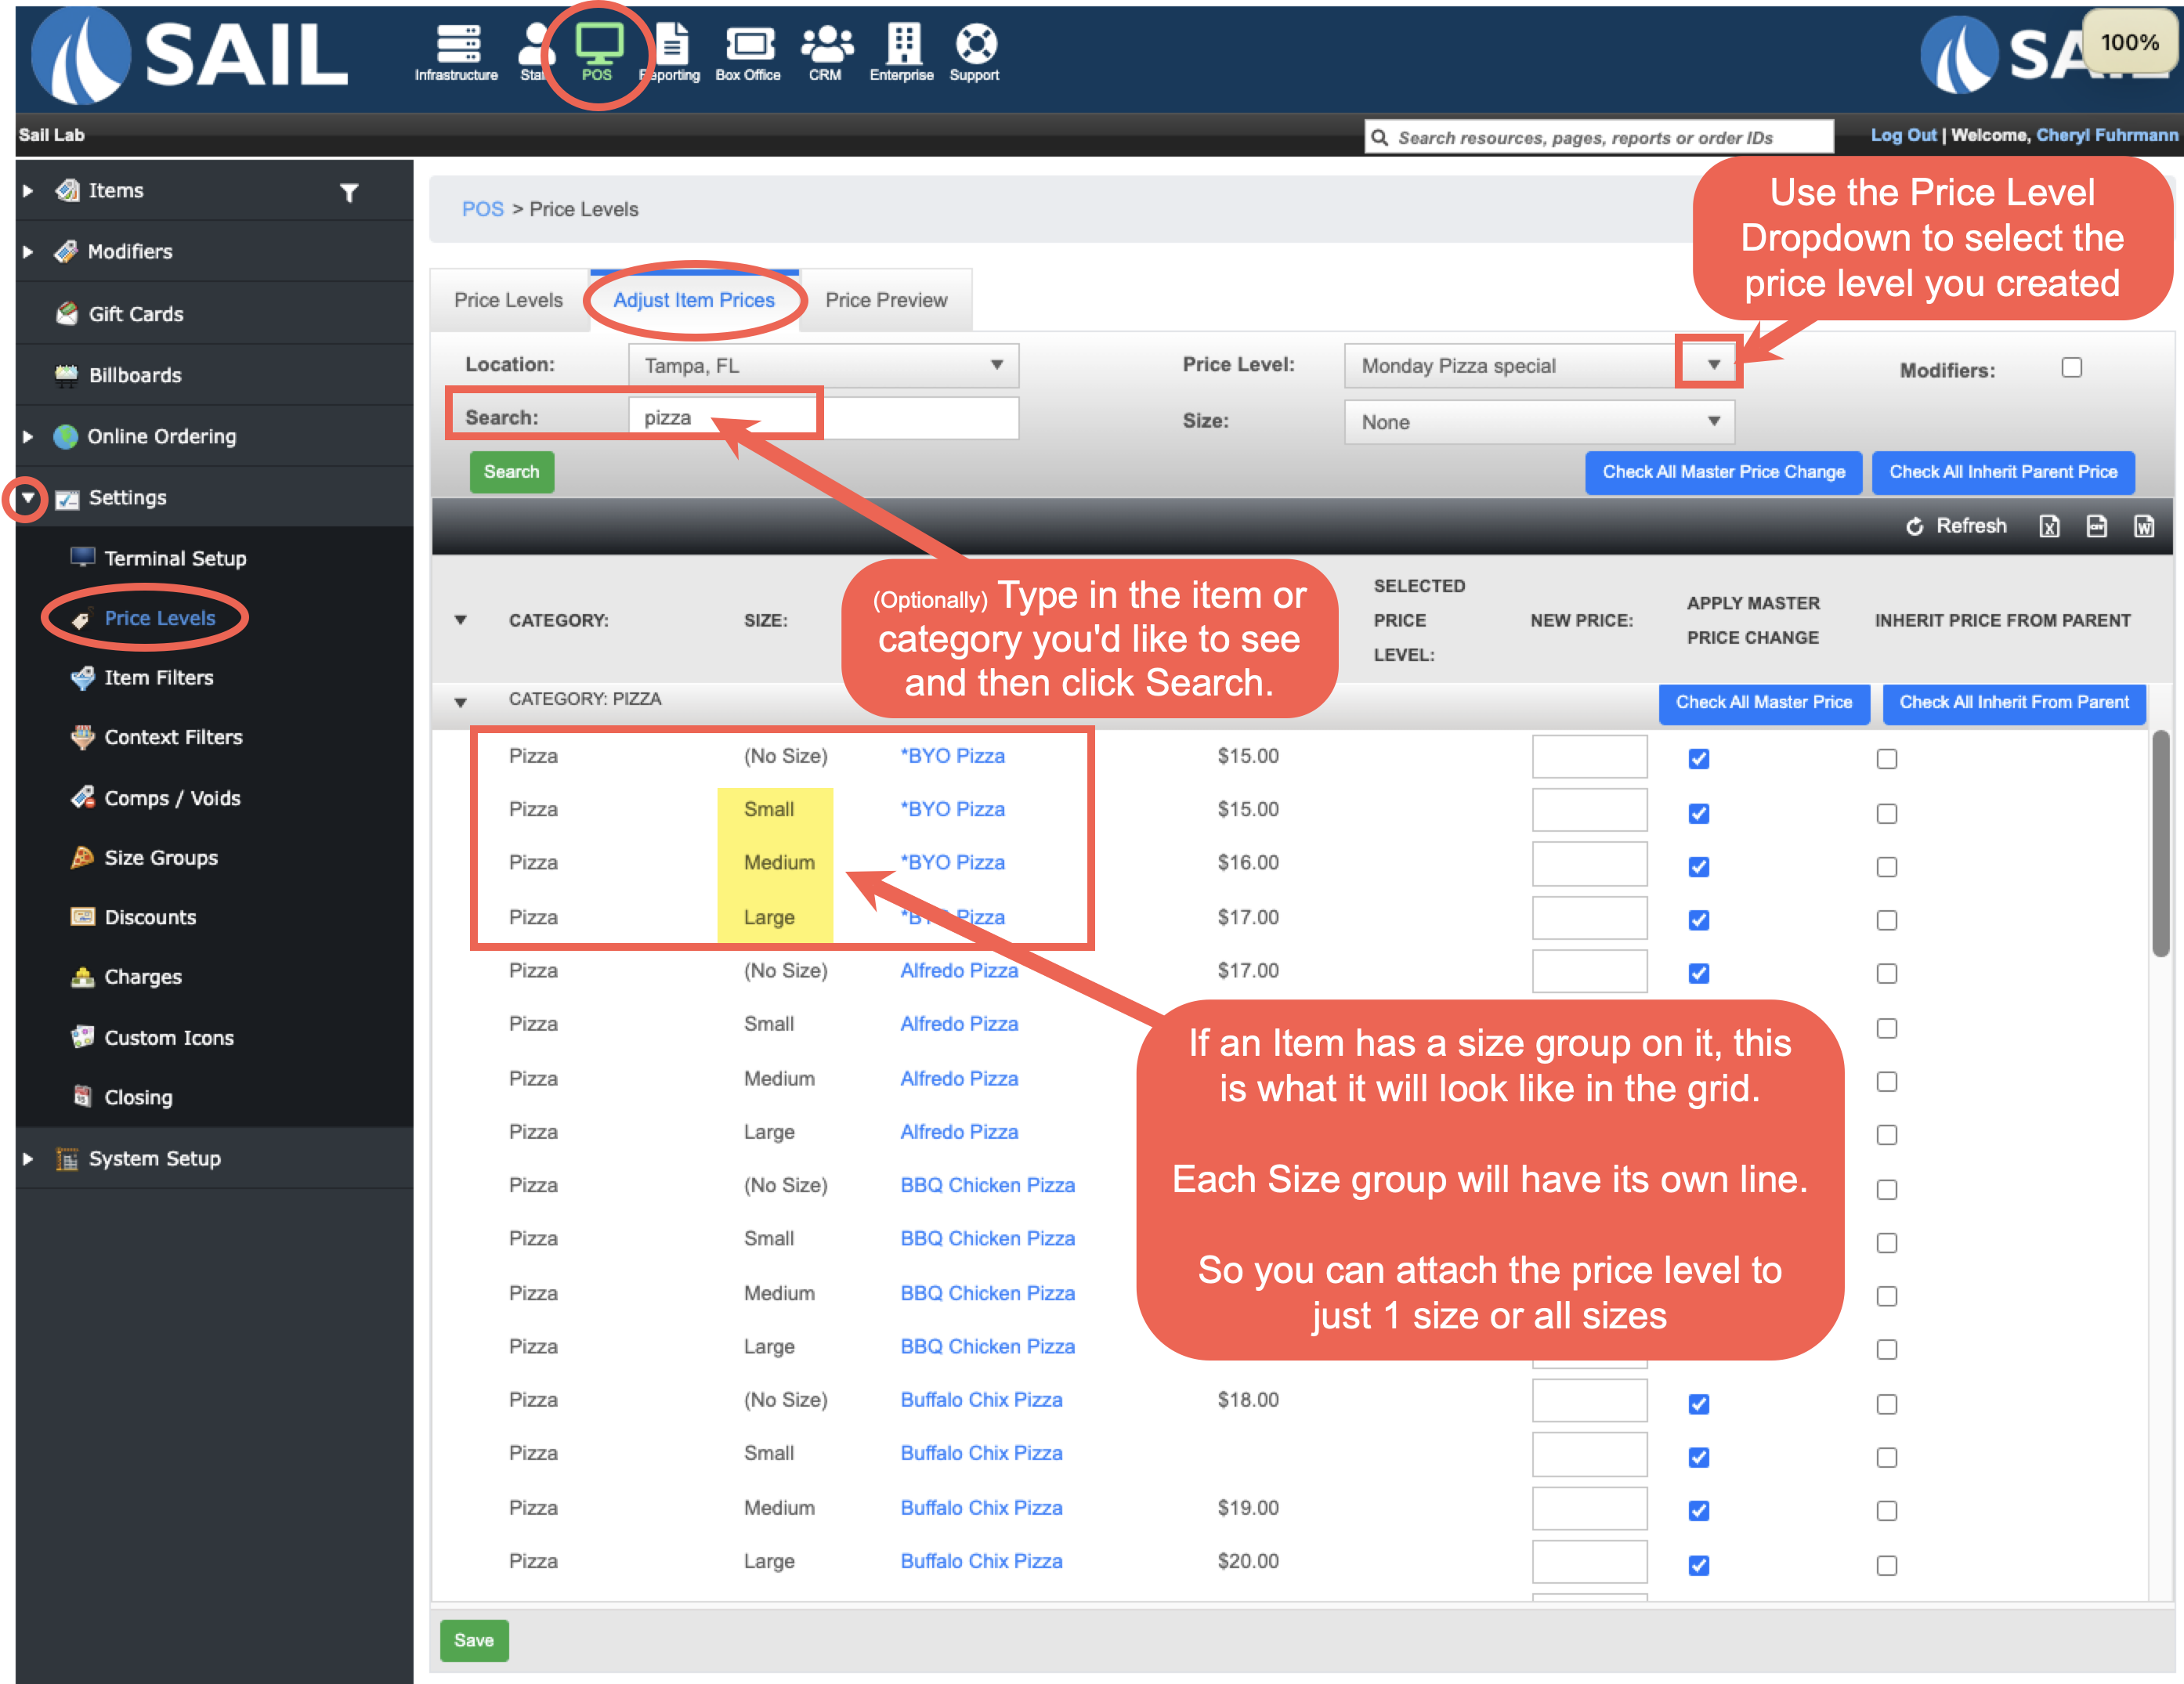
How size groups work with Price Levels
- Backoffice --> POS --> Settings --> Price Levels --> Adjust Item Prices Tab
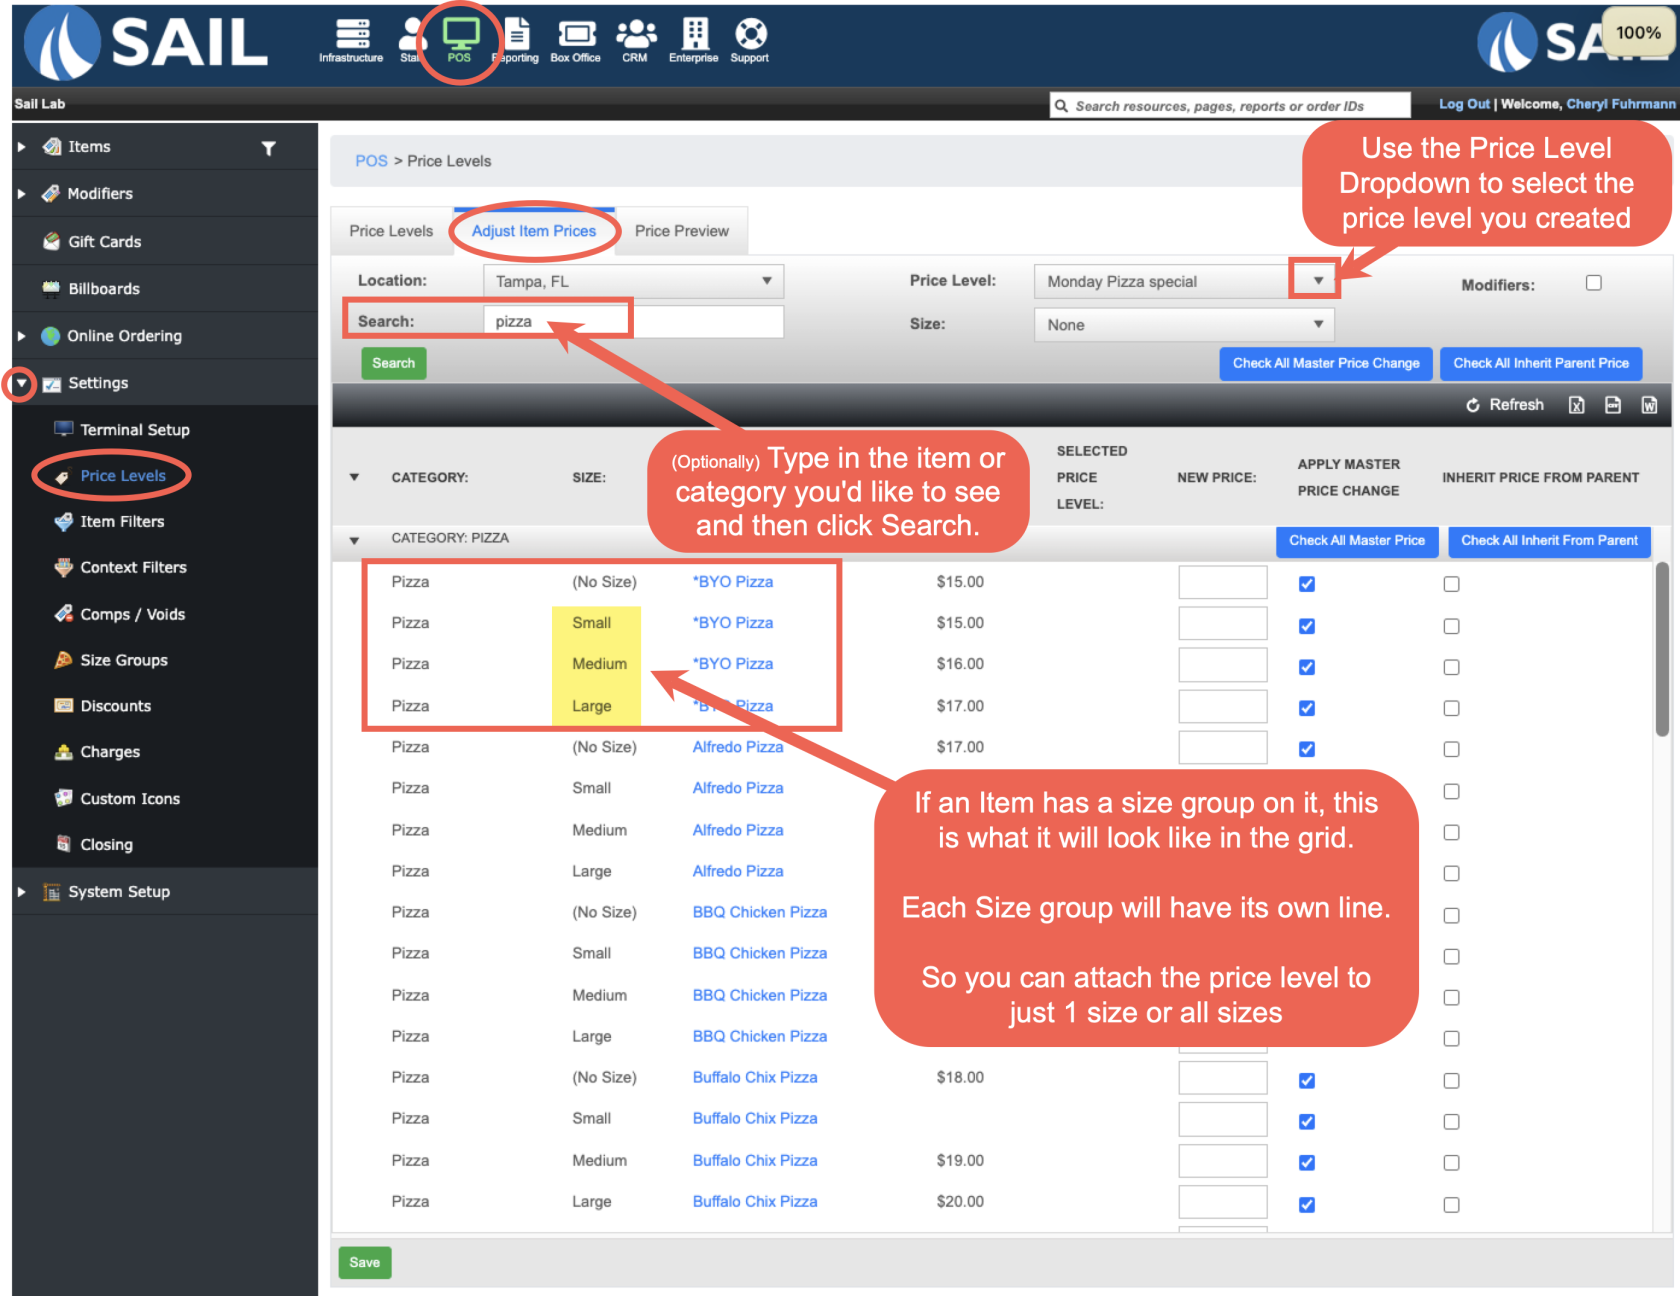
- If an item has a size group on it, it will have a line for each of its sizes
- Example above: I created a price level for $2.00 off pizzas on Mondays.
- So I searched for pizzas and applied the master price change to each of the sizes.
- If you want just the Medium pizzas to respect the price level then it would look like this:
- Check the box on just the medium sizes for each pizza
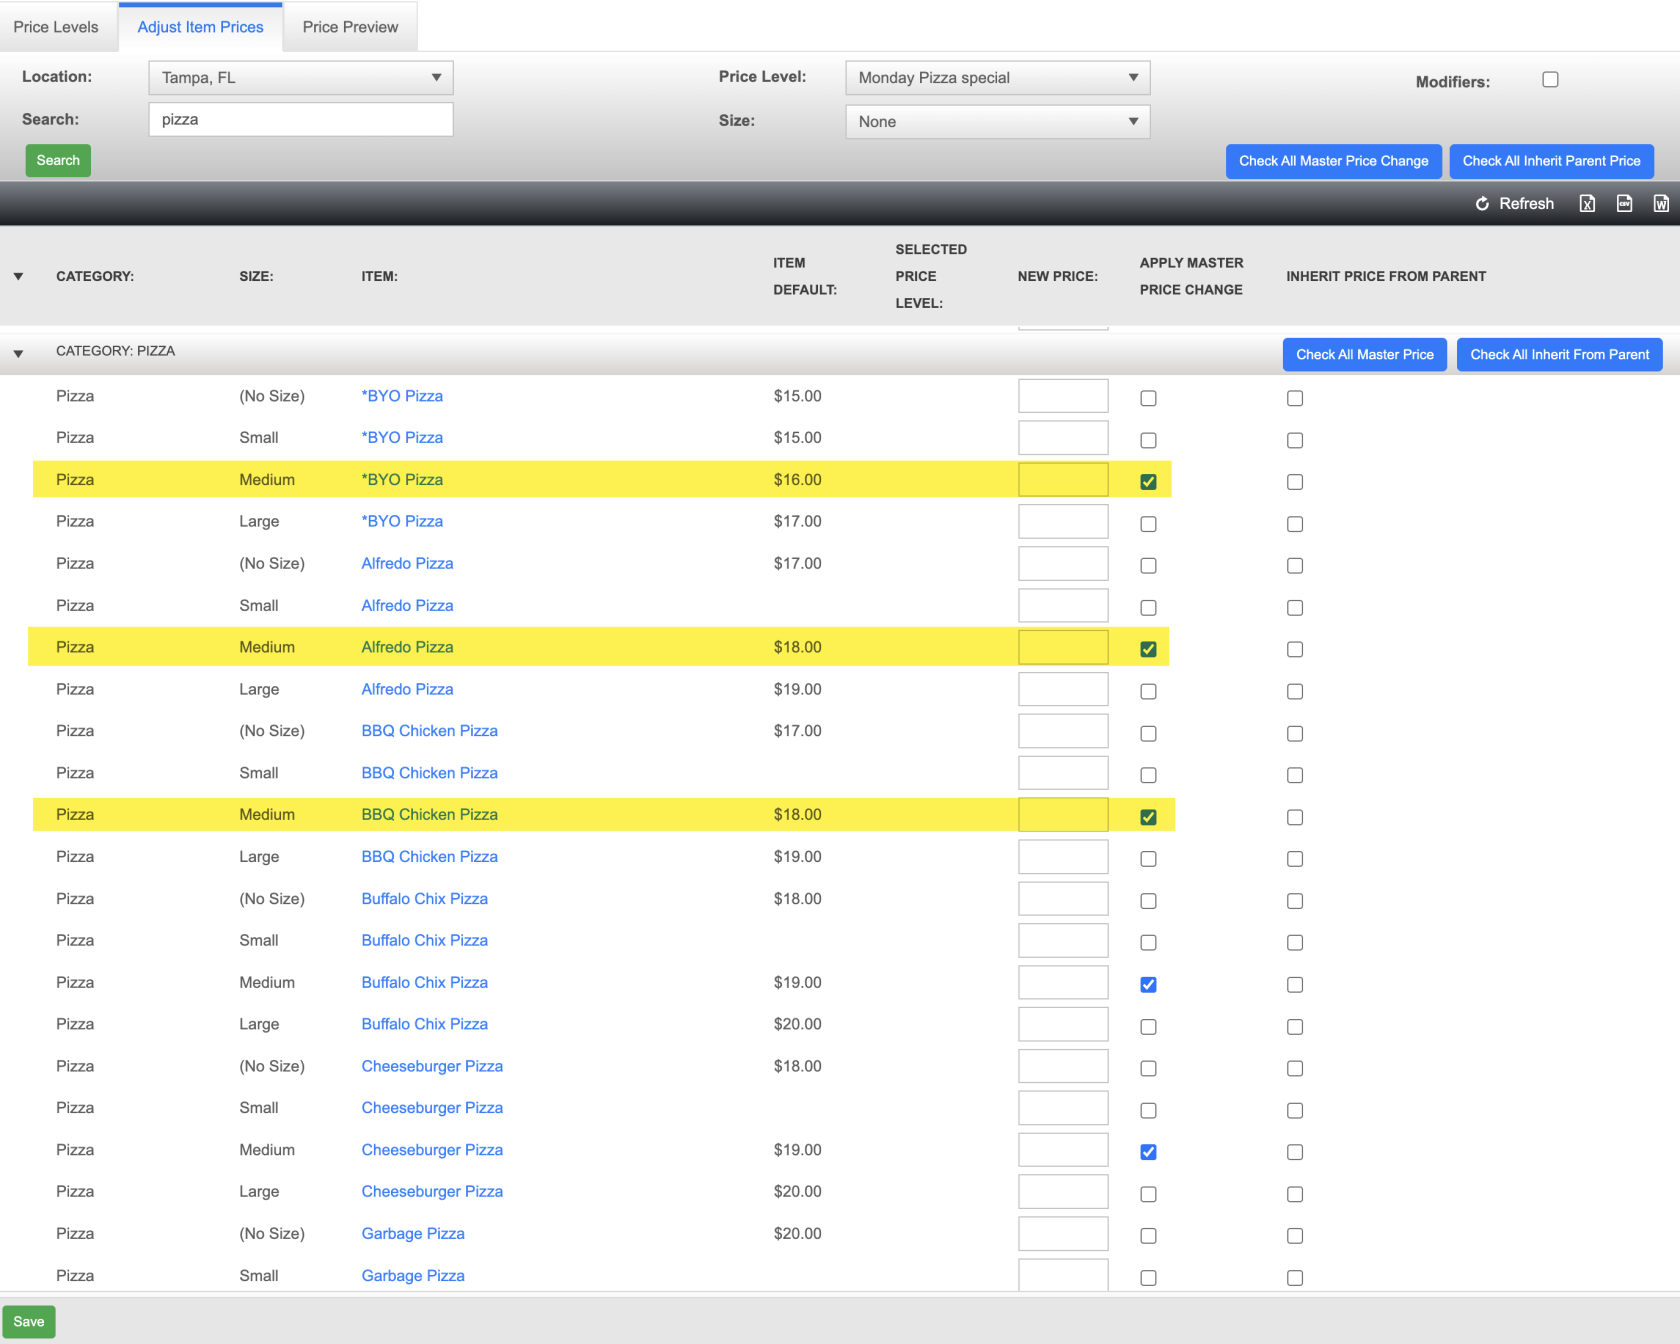
- Check the box on just the medium sizes for each pizza

How to manage Size Groups on the terminal
- There are 3 different ways Size groups can be represented on the terminals
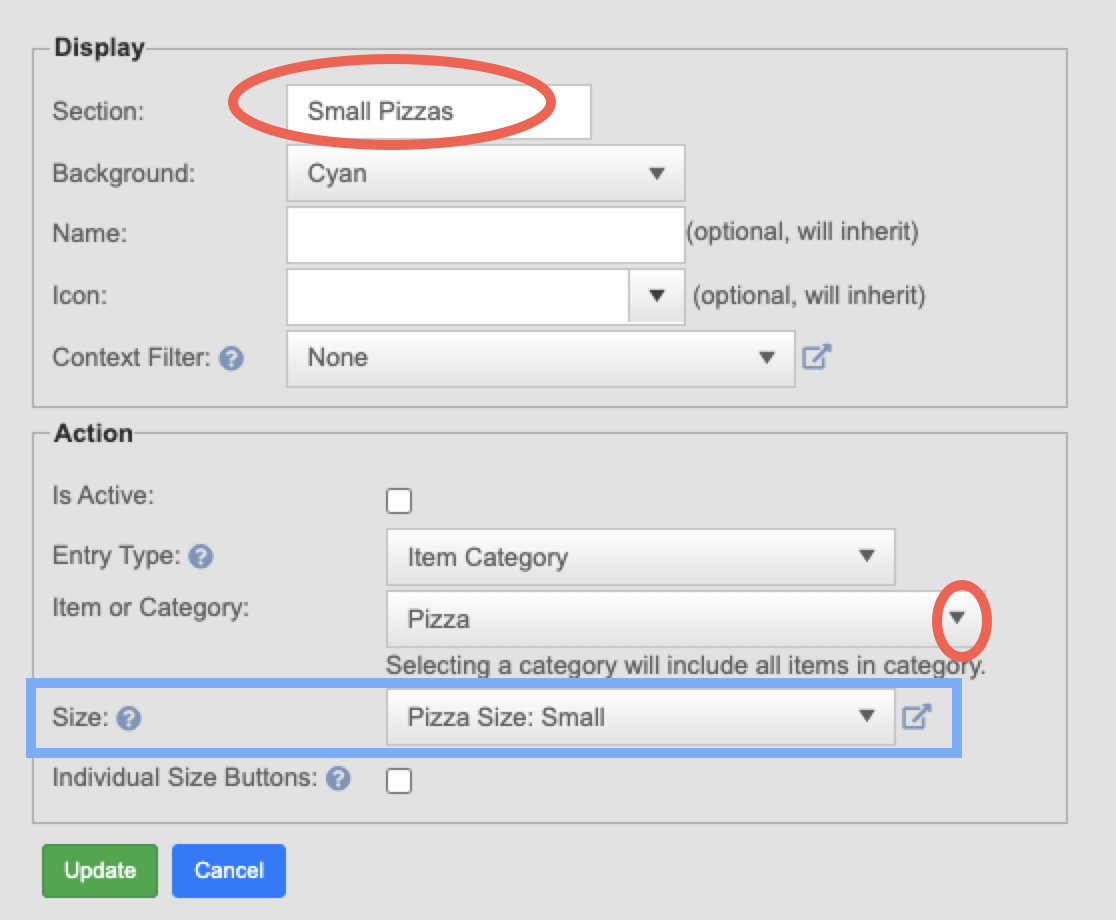
- Option #1 - Size prompt
- When setting it up in the terminal settings, you do it as you normally would; Name your section, Select the color you'd like displayed, and then select the category

Then here is what it would look like on a terminal:
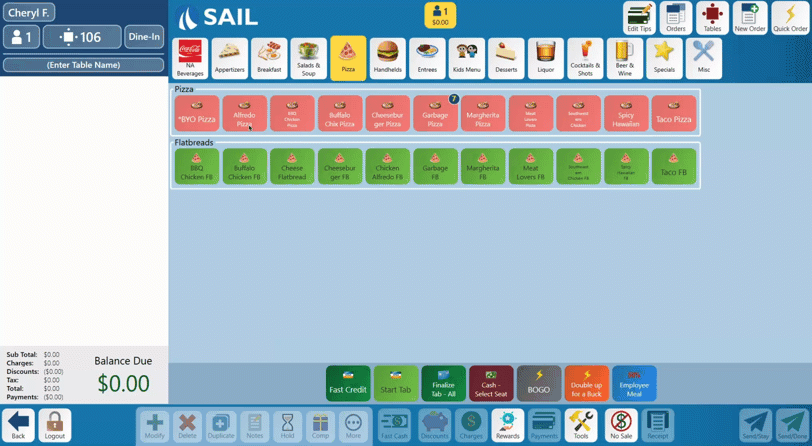
- When setting it up in the terminal settings, you do it as you normally would; Name your section, Select the color you'd like displayed, and then select the category
- Option #2 - Each Size in its own section
- When setting it up in terminal settings, Make sure to name the section the size you're going to put in that section. Then select the display color. Then select the category.
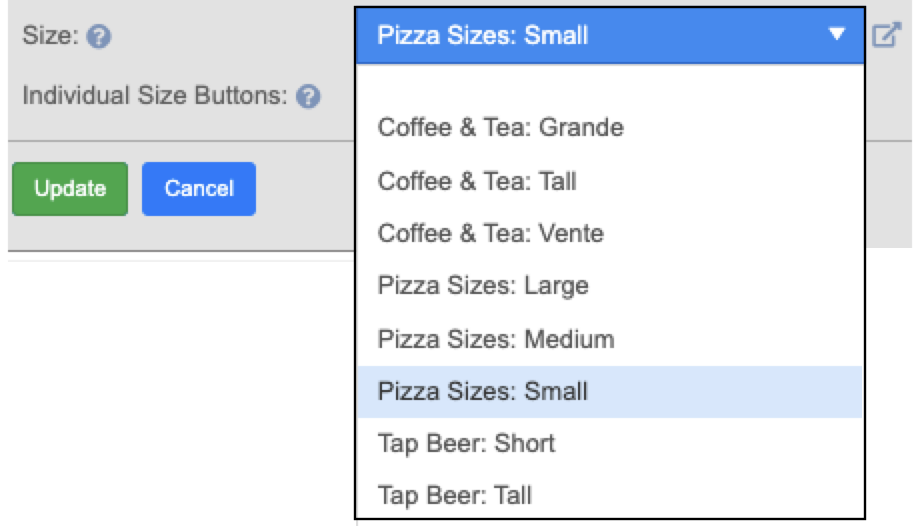
- Then use the "Size" dropdown to select from a list of all the size groups you have created. This will pre-select a size to skip the size selection prompt for that item
Here is what it will look like on the terminal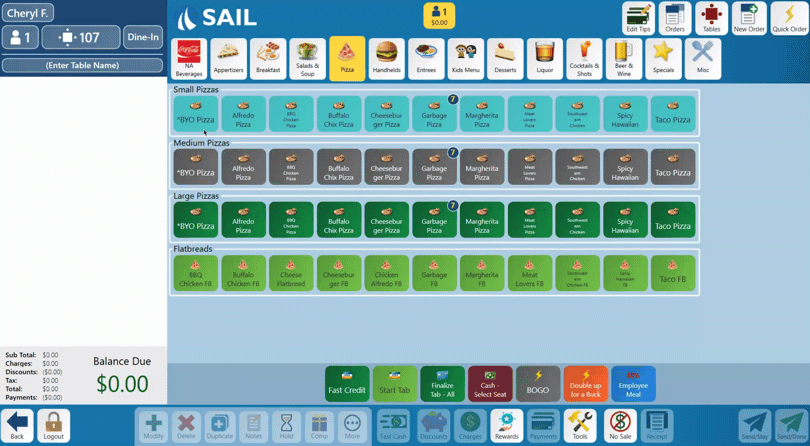
- Option #3 - Individual buttons for each size in 1 section
- When setting it up in terminal settings, Name your section, Select the color you'd like displayed, and then select the category.
- Then select the checkbox for Individual Size buttons. This will have a button for each size, but all together in the 1 section
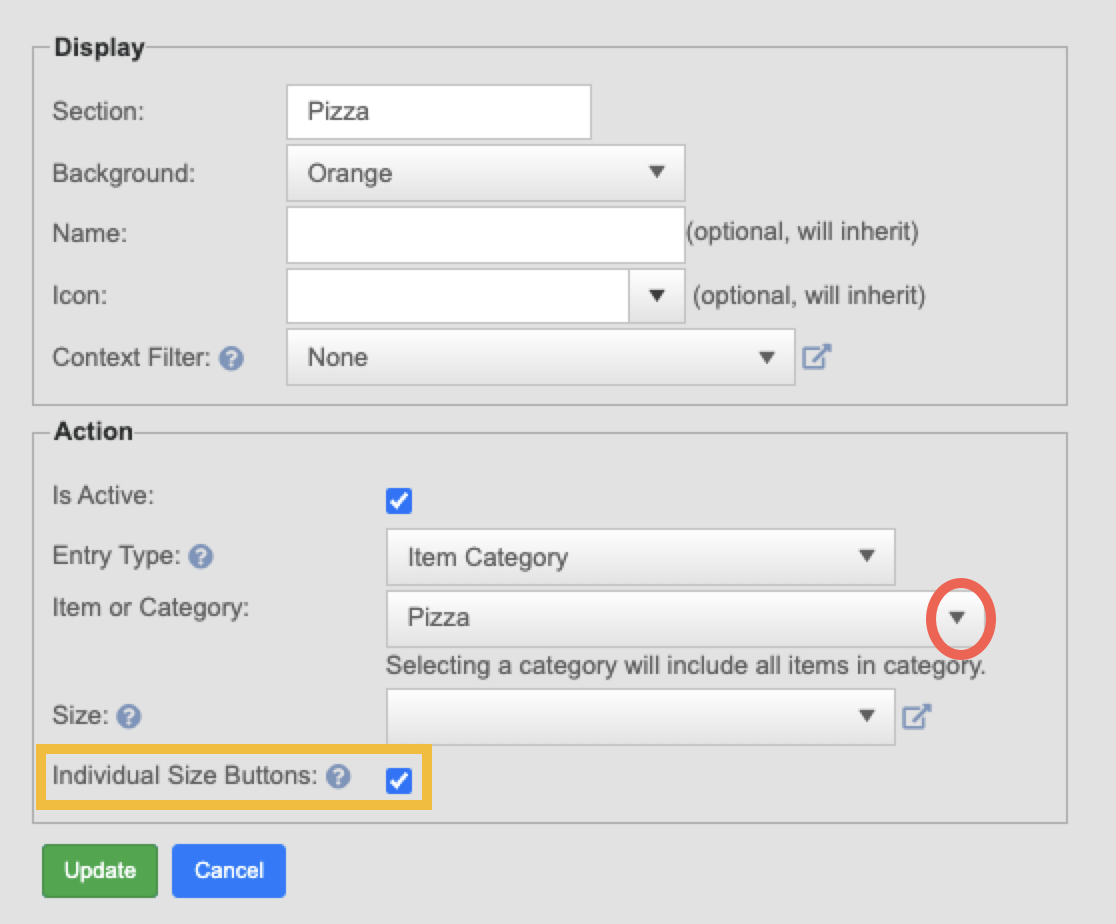
Here is what it looks like on the terminal
- Option #1 - Size prompt
- There is only 1 option for Handhelds
- All size groups on the handheld will show the item and prompt for the size
- All size groups on the handheld will show the item and prompt for the size
 .
. 

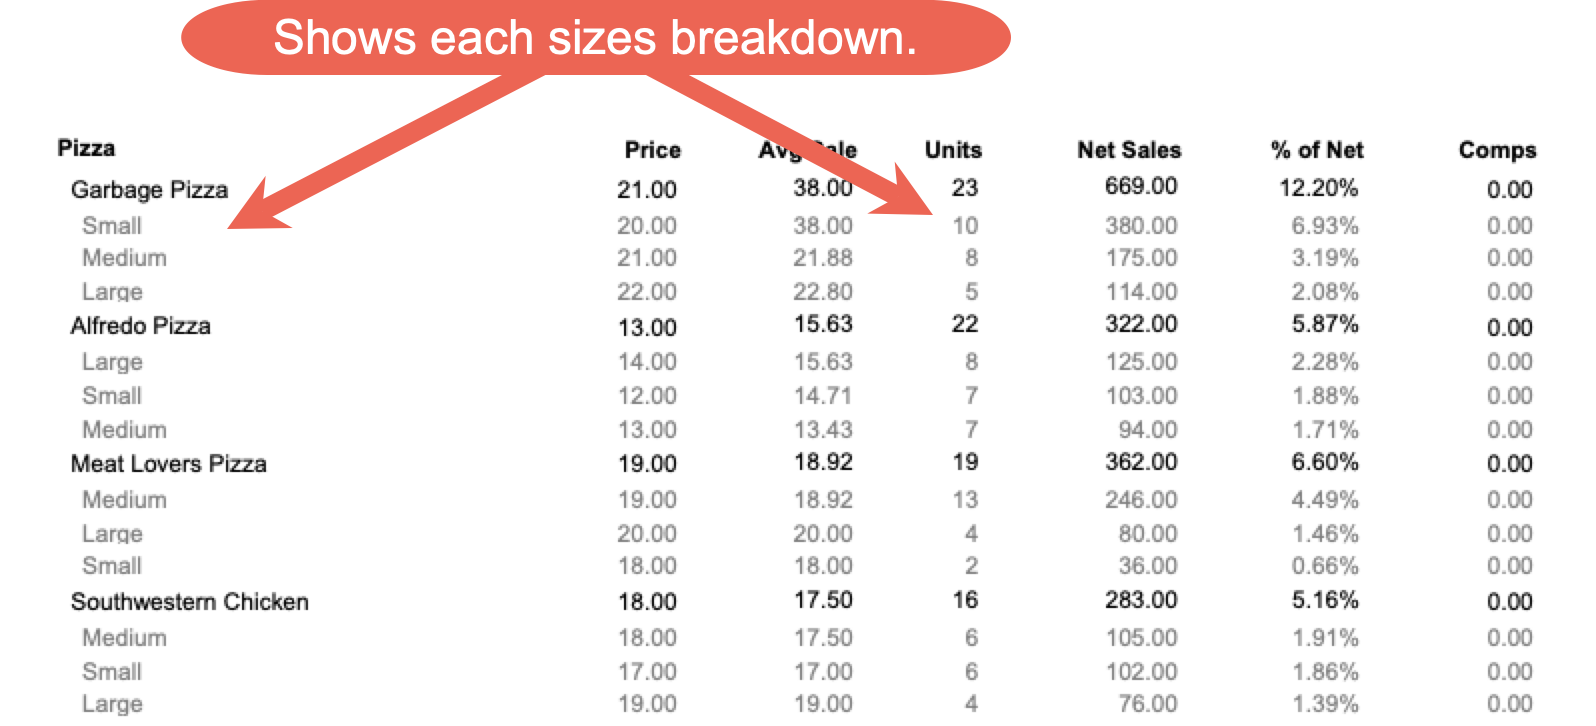
How Size Groups Appear in Reports
- In reporting, each size is listed on its own line beneath the main menu item.
-
The top line shows the combined totals for all sizes of that item.
-
The indented lines show the breakdown for each size, including units sold, sales amount, and other metrics.
-
-
Example: In the report, Garbage Pizza shows a total of 23 units sold and $669 in net sales.
-
Small: 10 units – $380
-
Medium: 8 units – $175
-
Large: 5 units – $114
-
-
This breakdown makes it easy to see which sizes are selling best and contributing most to sales.
No Comments