
How to add a new employee
This article will walk you through adding a new employee.
-
Log into back office.
-
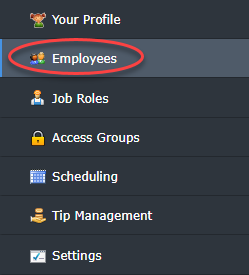
Click on Staff.

-
Click on employees.
-
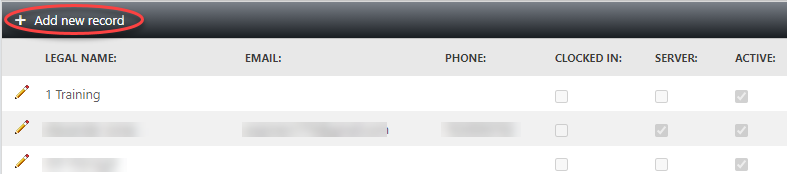
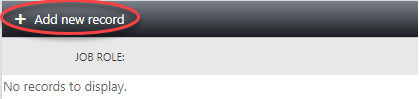
Click on “Add new record.”
-
This will open a record for you to fill out your new employees information in order to add them to the system.
-
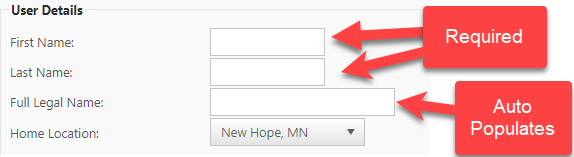
User Detail

-
This section is not optional and must be completed in order to create the new employee.
-
Enter the preferred first name and last name as these will be displayed throughout the system.
-
The “Full Legal Name” field can be modified if it is different than the preferred name. The full legal name will only be shown on Payroll reports.
-
-
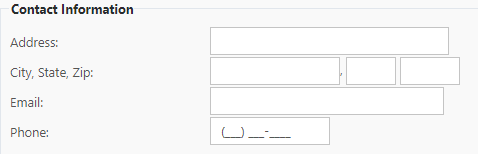
Contact information.
-
This section is optional when creating a new employee.
-
This section is where you can store the employees contact information and address.
-
The Phone number will show up on the employee schedule.
-
-
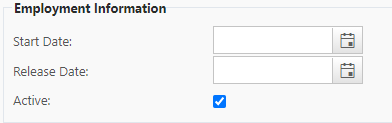
Employment information.

-
This section is optional when creating a new employee.
-
This is where you can place the employees start and end dates.
-
Making an employee active allows them to log into and out of the terminals and devices.
-
-
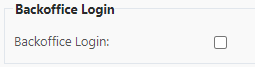
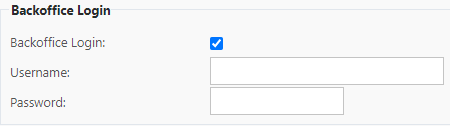
Back office log in.

-
This section is optional when creating a new employee.
-
This creates a Back Office login for the employee. (You will need to check this box for anyone who will need to use Back Office)
-
Once selected it will open fields right below the box that you checked. This is where you create a username and password for the employee to log into back office.

-
It will auto populate their email address if you entered that in above. You can use that, or erase it and change it to whatever they prefer.
-
The employee will need to enter a password. This is not be visible to anyone (including management or owners).
-
Please keep in mind that the username and password are case sensitive
-
-
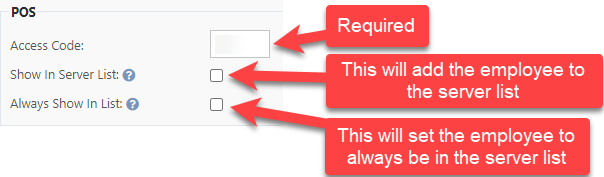
The POS section.
-
This section is not optional and must be completed in order to create the new employee.
-
The employee “Access Code” is their personal log in number for the terminals and handheld devices. (It can be any number of digits long)
-
“Show in Server List” if selected this employee will be visible in any of the server selection screens throughout the system. This box will need to be checked for any employee who plans on ringing in any orders.
-
“Always Show in List” will force this employee to always be shown in the server list whether they are clocked in or not. This is generally used for generic ‘Bartender’ users that don't clock in and out.
-
-
-
Once you have filled out the new employees information click save to add the new record. Once the record is saved additional options will become available on the new employees record.

-
Details: This section stays the same after you create the new employee profile.

-
You would use this to edit the profile as discussed above after it has been created.
-
-
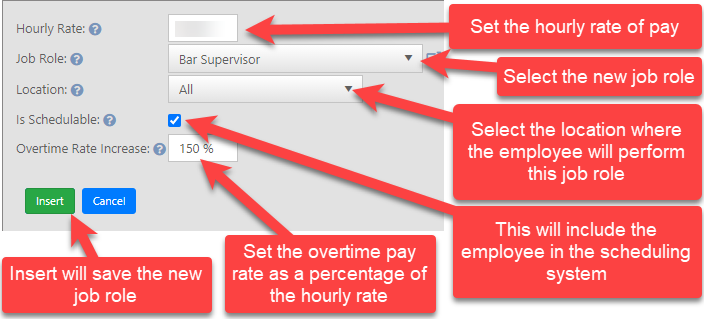
Job Roles: this section is where you can assign job roles to your staff. (There are no limits on the number of job roles an employee can have.)

-
first select the new record plus sign to create a Job Role for the employee.
-
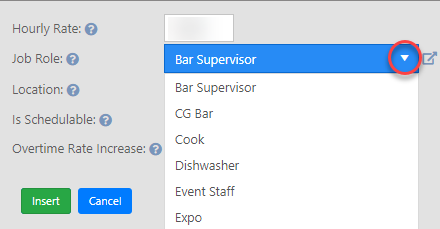
This opens a window to insert a job role into the employees profile.

-
The job Role will be selected from a drop down list of pre existing job Roles. Job Roles can be created and edited in the Job Roles tab in back office.
-
Setting a Job role to be schedulable for the employee will only work if the job role itself is also set up to be schedulable. (This only needs to be checked if you are using our scheduling system.)
-
-


No Comments