
How to set up Scheduled Reports
Scheduled Reports allow you to automatically receive any report from the system via email, on a schedule that works for you. You can choose which report you want, who it gets sent to, and how often it’s delivered. Frequency options include daily, weekly, monthly, or at the end of the pay period—making it easy to stay informed without having to log in and run reports manually.
Set up steps
- Navigate to the Report: Go to the specific report you’d like to schedule.
- Set the Parameters: Use the available drop-downs and checkboxes to configure the report (e.g., location, filters, views, and grouping, etc.).
- Do not set the Beginning or End Date—these will be automatically controlled by the schedule you choose.
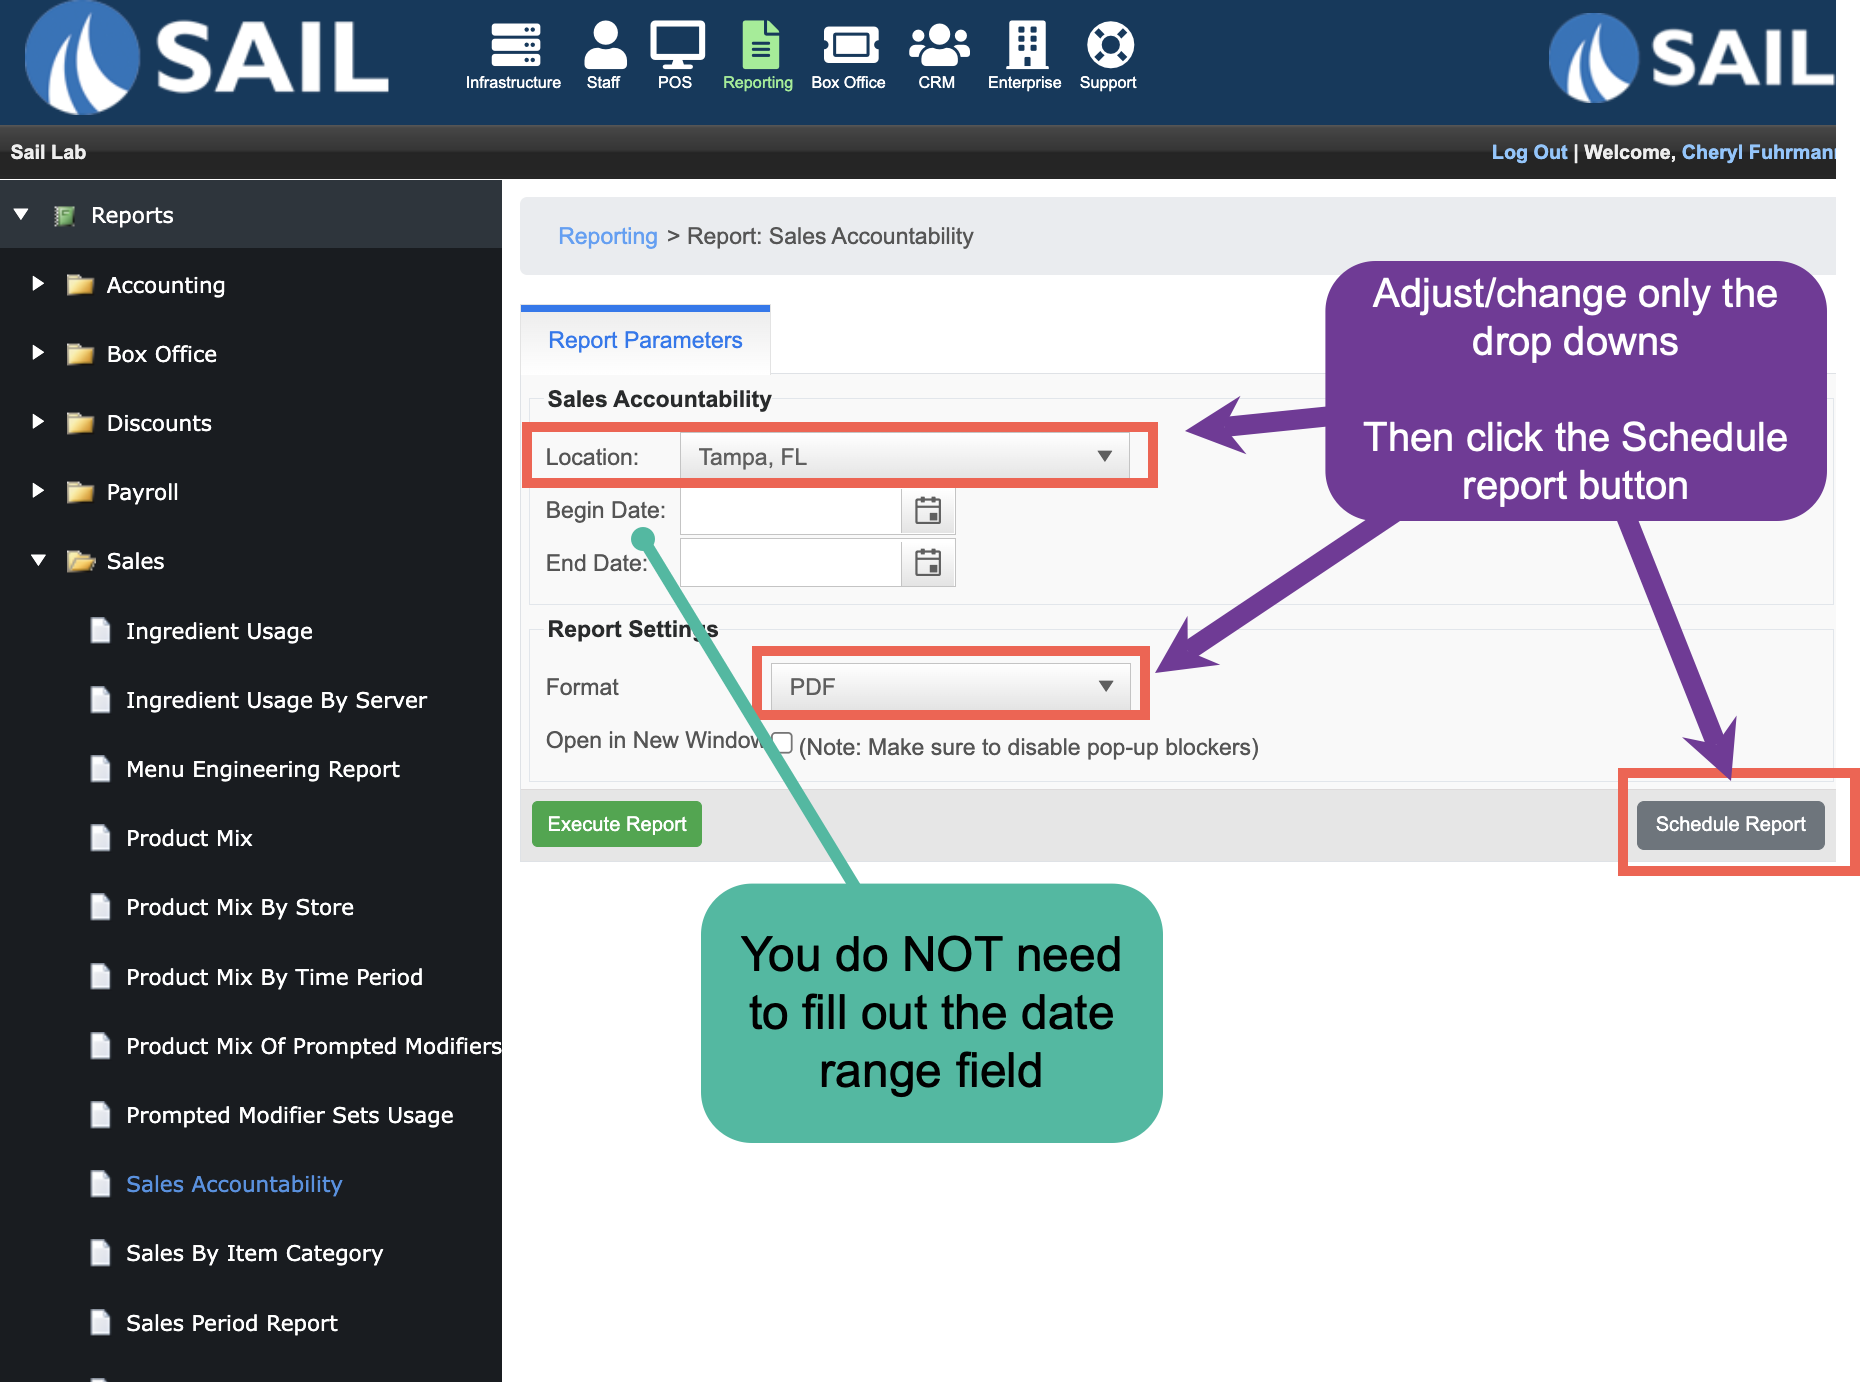
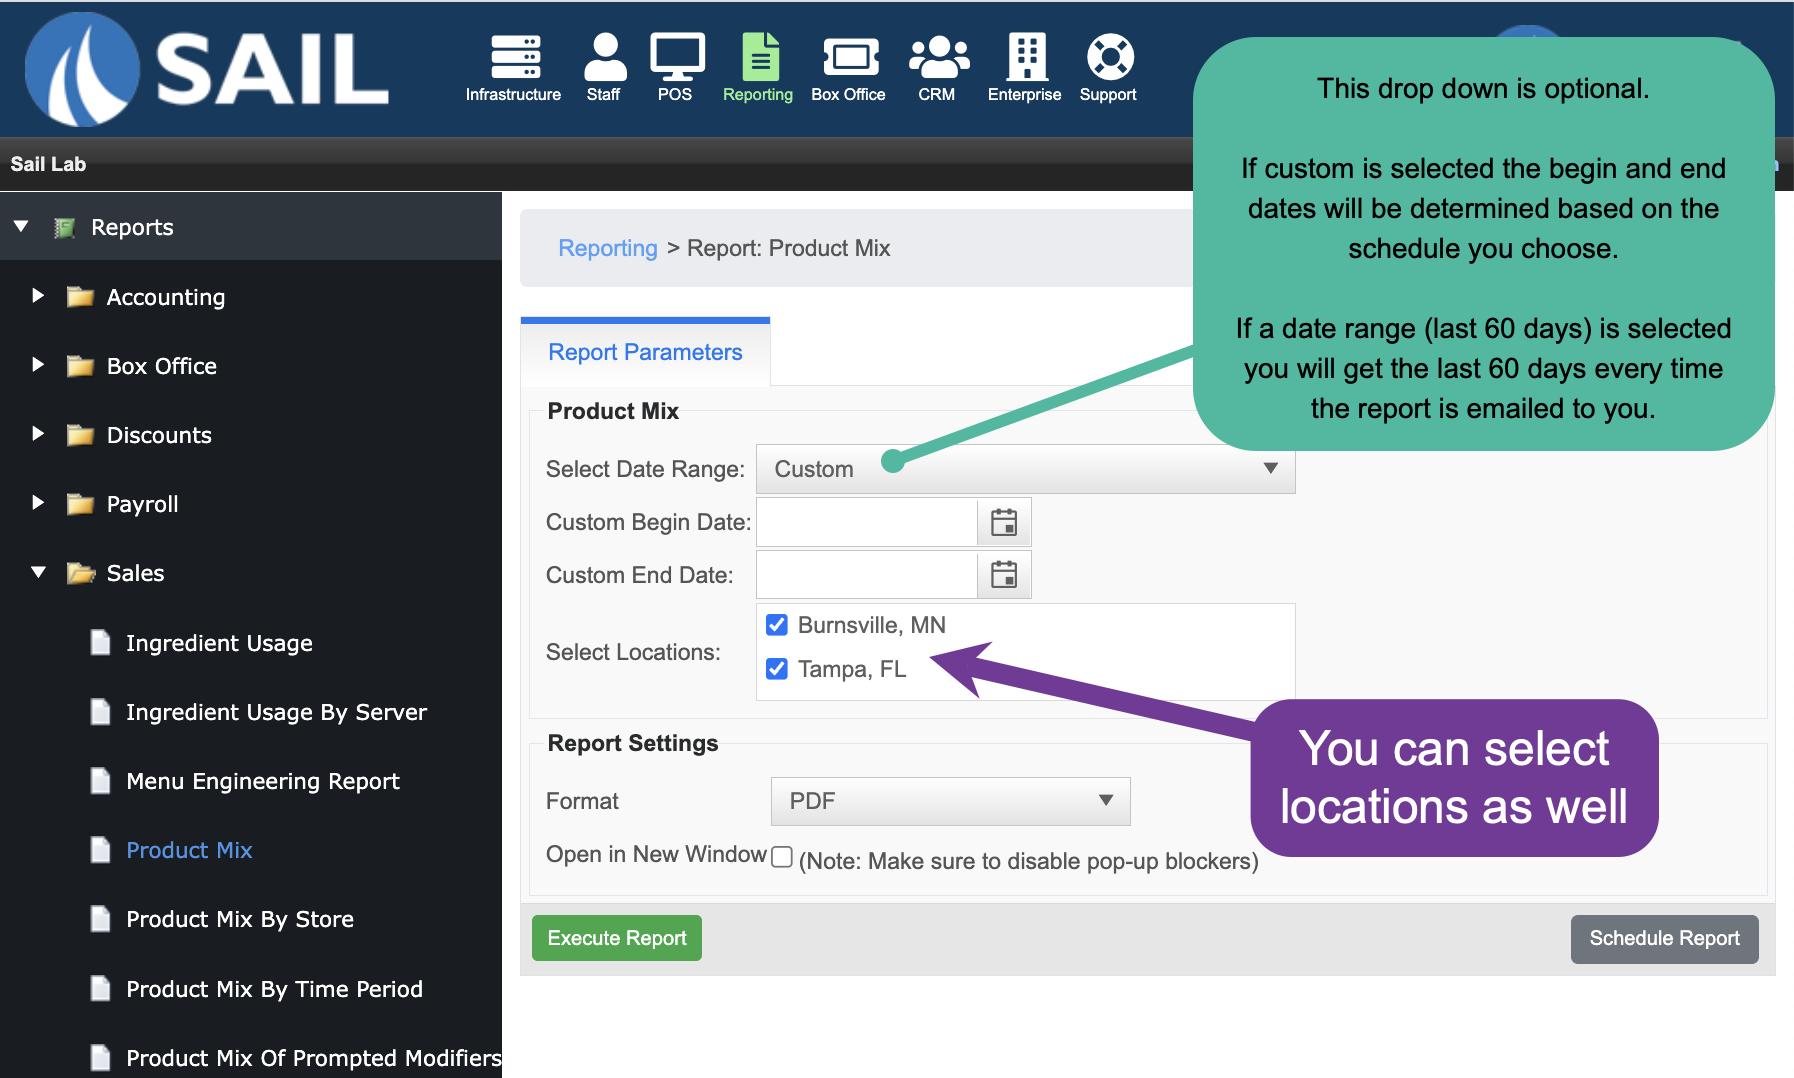
- Do not set the Beginning or End Date—these will be automatically controlled by the schedule you choose.
- Click “Schedule Report”: This will take you to the Scheduled Report Settings page.
- Fill Out the Schedule Details:
- Report Name: This will appear as the subject line in the email.
- Recipients: Enter one or more email addresses, separated by semicolons ( ; ).
- Send Time: Choose the time of day the report should be generated and emailed.
- Tip: Set this shortly after your daily close to ensure the report includes all final data.
- Tip: Set this shortly after your daily close to ensure the report includes all final data.
- Frequency: Choose how often the report should be sent:
- Daily: Sends a report for the previous day.
- Example: If it sends on Sunday, 9/1, it includes data for Saturday, 8/31.
- Weekly: Sends a report for the full week prior to the selected send day.
- You’ll select the day of the week to receive it.
- Example: If set to send on Sunday, 9/1, it includes Sunday, 8/25 – Saturday, 8/31.
- Monthly: Sends a report for the entire previous month.
- You’ll select the day of the month to receive it.
- Example: If it sends on 9/1, it includes data from 8/1 – 8/31.
- End of Pay Period: Sends a report with the previous pay period’s data on the day a new pay period starts.
- Example: If your bi-monthly payroll starts on 9/1, the report will include 8/16 – 8/31.
- Daily: Sends a report for the previous day.


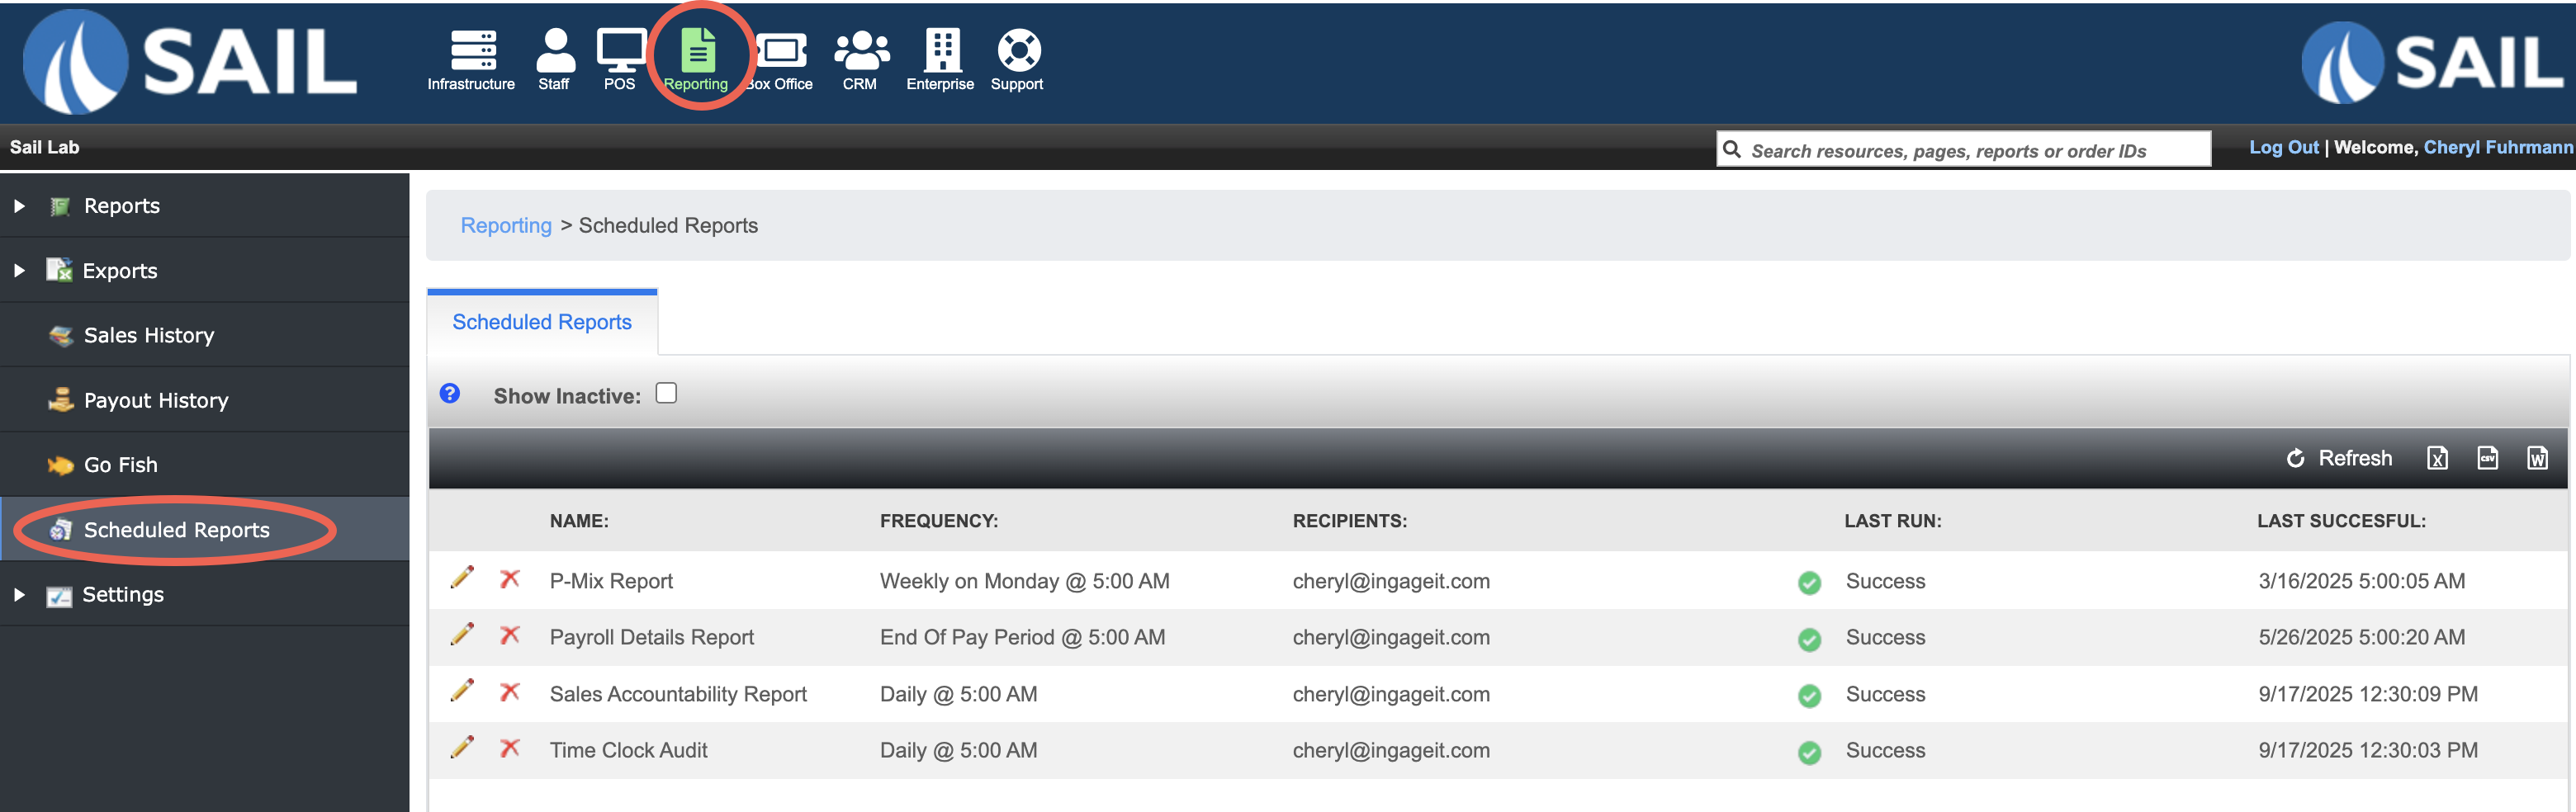
Viewing and Managing Scheduled Reports
-
You can easily view and manage all of your scheduled reports from one place in Backoffice.
- Backoffice --> Reporting --> Scheduled Reports
-
You’ll see a list of all the reports you’ve scheduled, along with key details:
- The grid will show you the name of the report, the frequency, who the recipients are, and if the last sent report was successful.
-
Managing Scheduled Reports:
-
Delete: Click the red X icon to remove the scheduled report entirely.
-
Edit: Click the pencil icon to edit the report's schedule settings—including the name, recipients, send time, and frequency.
-
Note: You cannot change the report parameters (locations, filters, selections, etc.) from here. To do that, delete the current report and create a new one with your desired settings.
-
-
No Comments