
Focus to Sail Employee Export/Import
This document covers the steps to export a current employee list from Focus POS and prepare it for import into Sail.
Exporting Employees from Focus
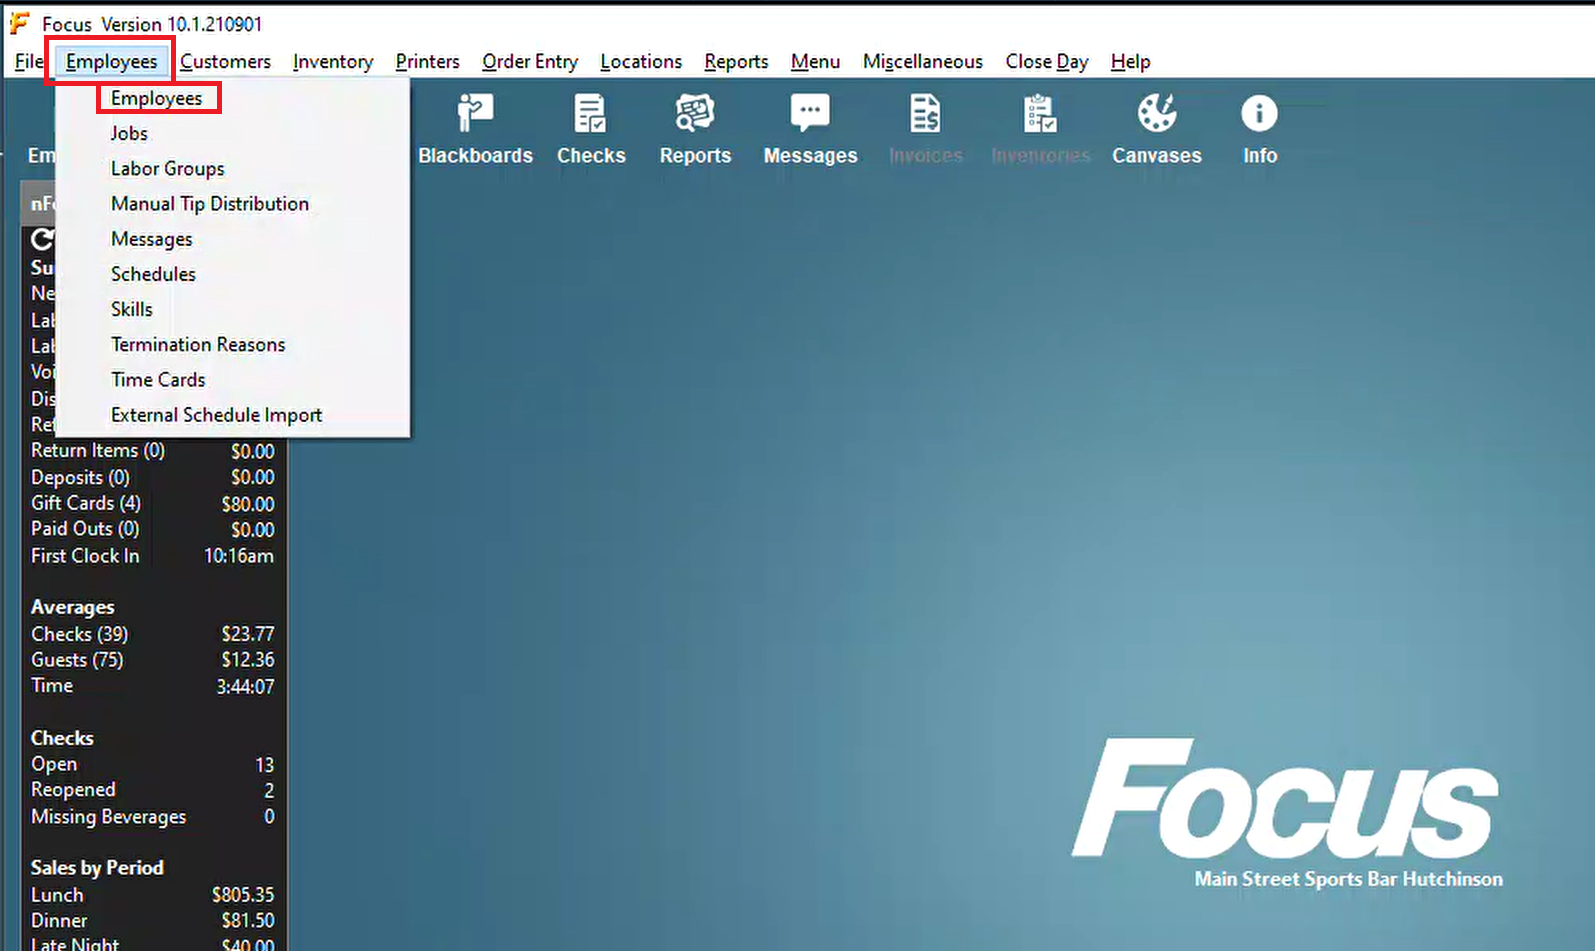
- Log into Focus and enter the Setup (wrench). Navigate to Employees -> Employees
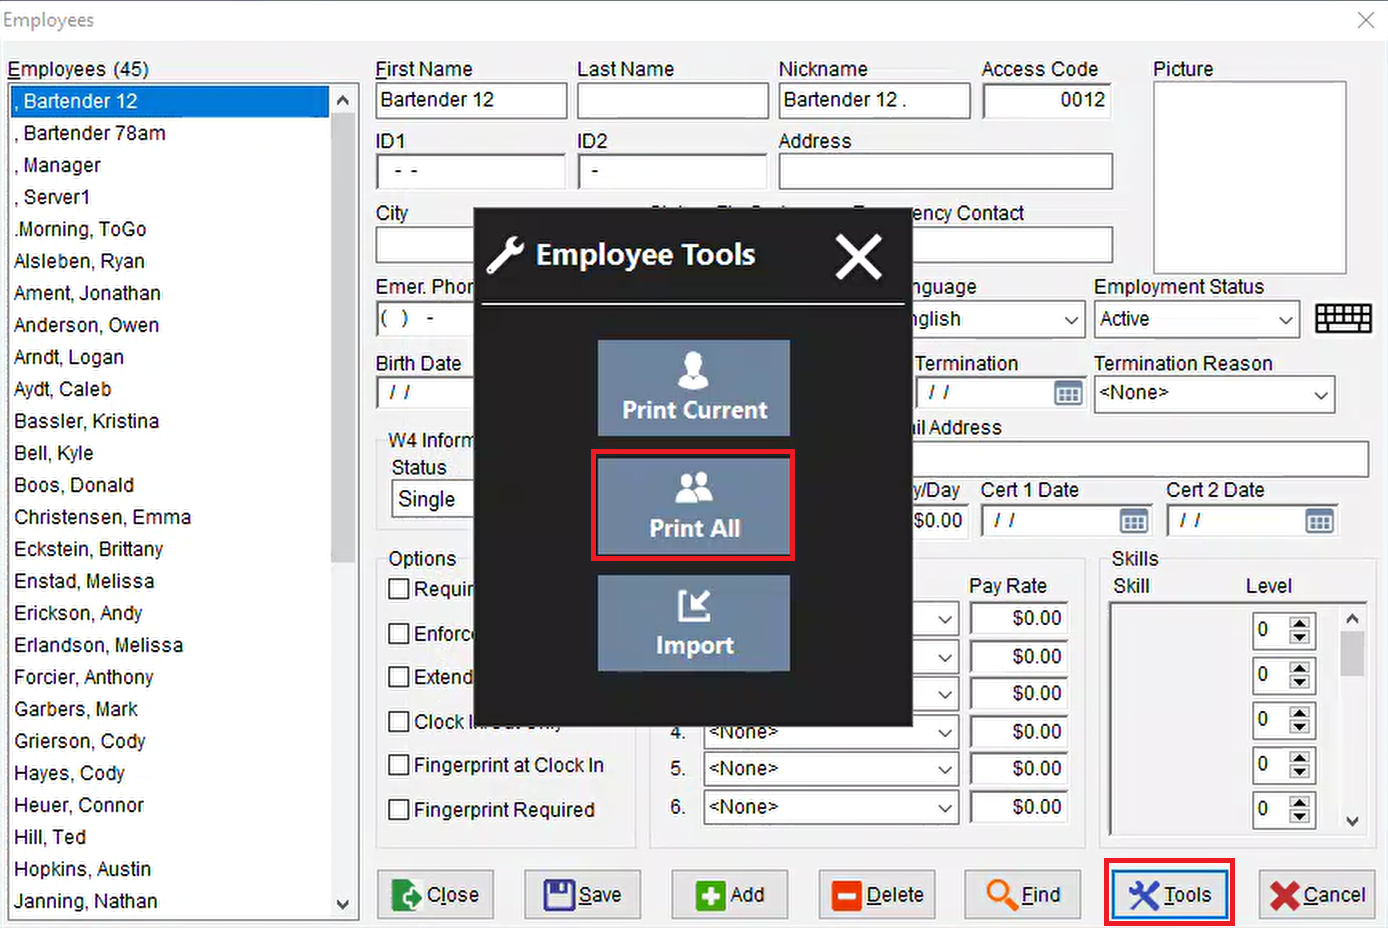
Next hit Tools, then Print All
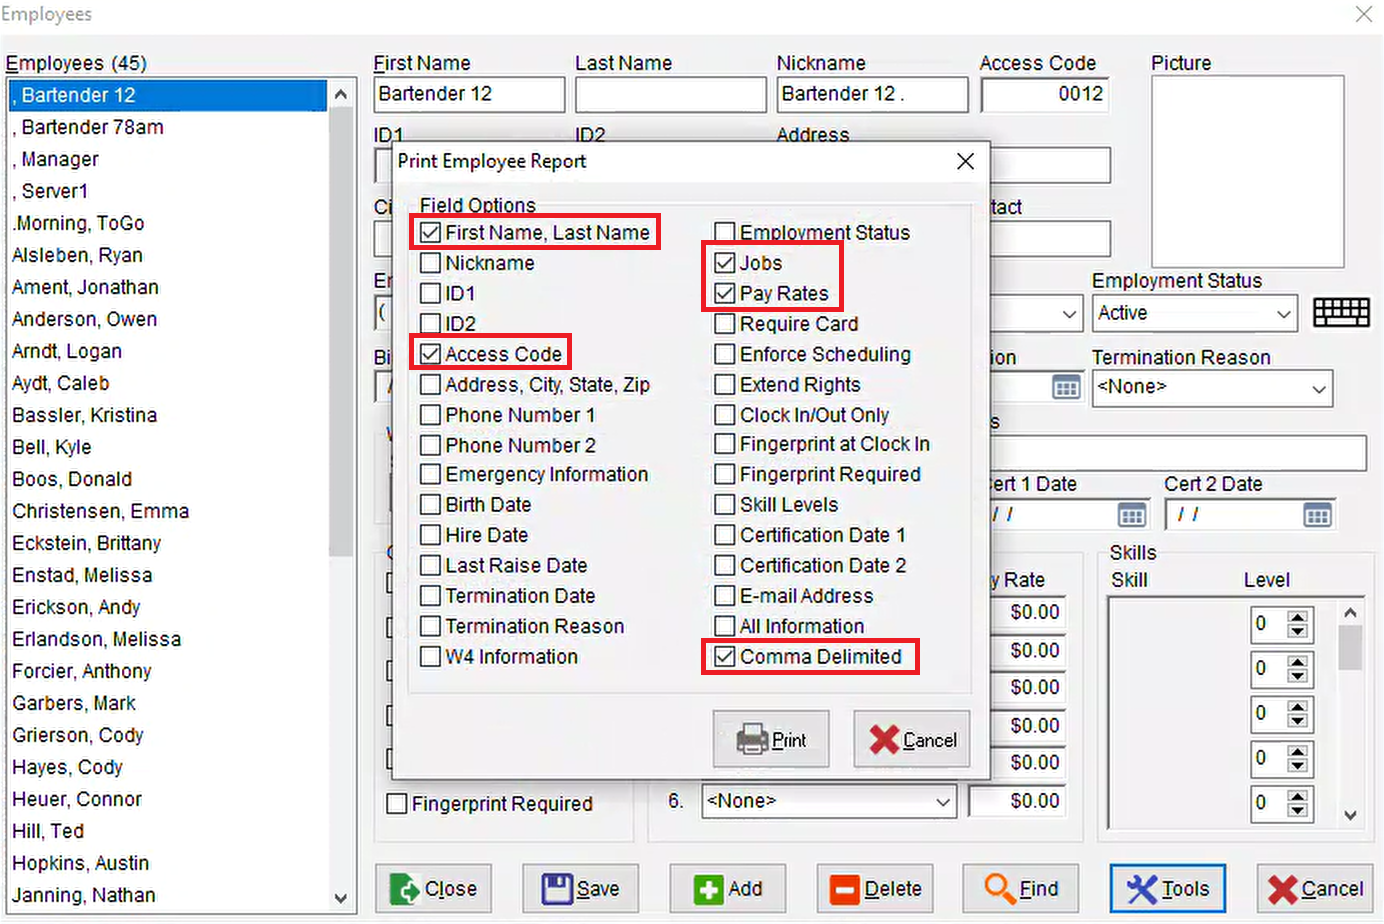
- From here we need to select which information you want to export to a .csv file which we will use to copy into Sail's Employee Import.
- We recommend including the following required fields:
- First Name, Last Name
- Access Code
- Jobs
- Pay Rates
- Comma Delimited
- Optional fields can also be included if this information is available. Sail has columns for these, so importing them can save time later:
-
Nickname
-
Address, city, state, zip
-
Phone number 1
-
Email Address
-
Hire Date
-
Skill levels
-
- We recommend including the following required fields:
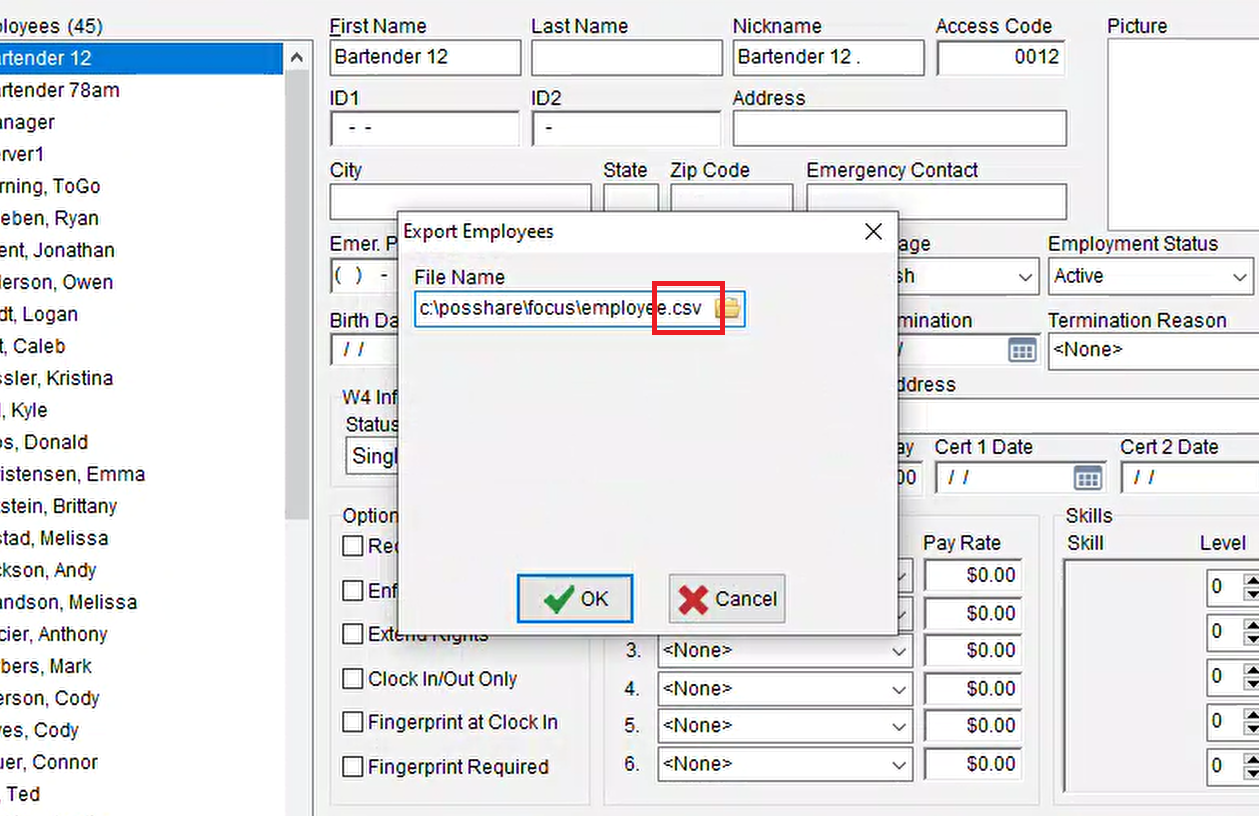
- On the next screen, you can rename this file type to .csv. A .txt file will still be able to be used, but .csv is best practice.
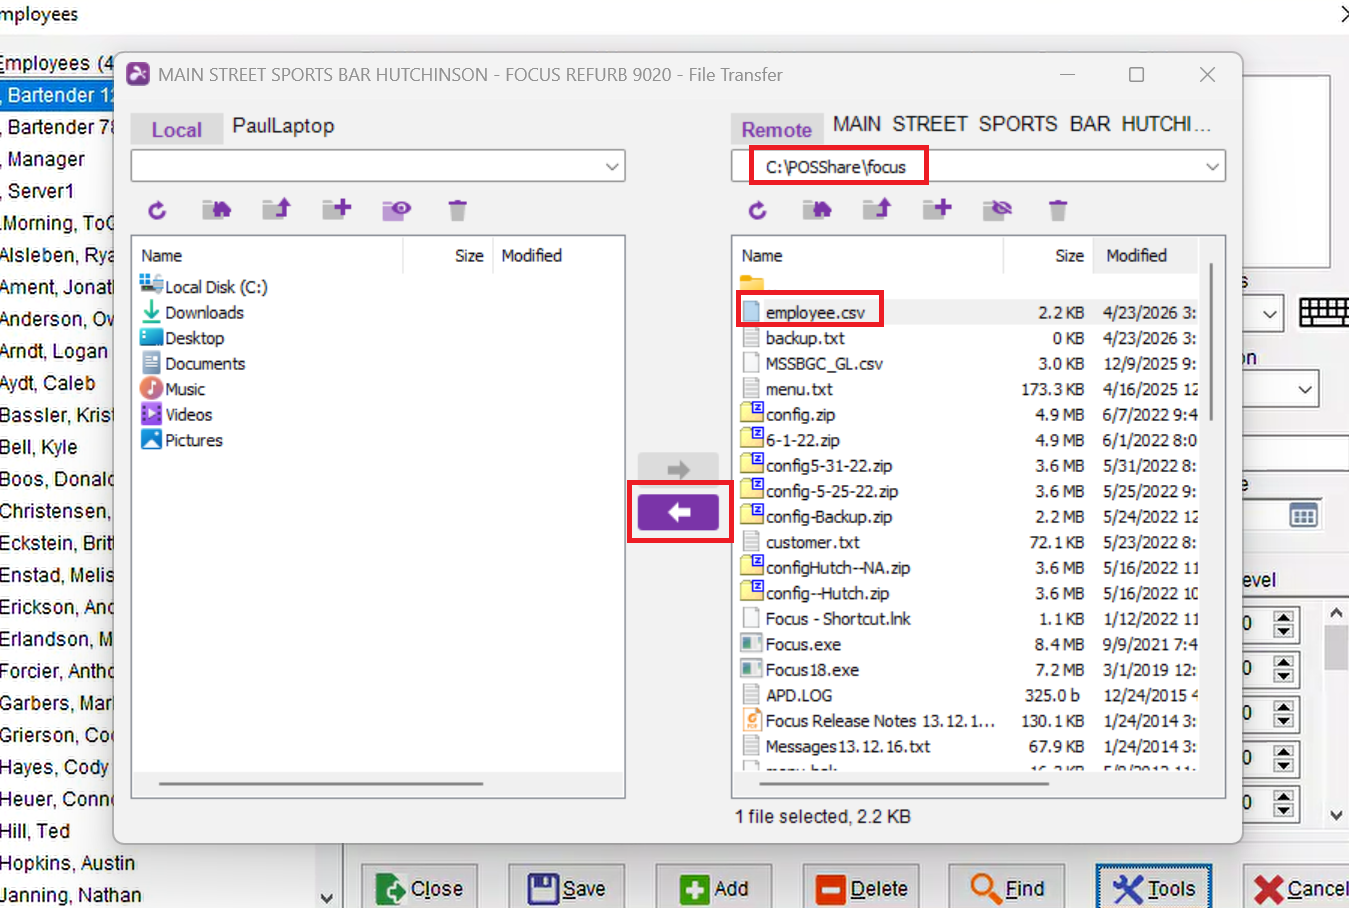
- Next we need to grab that newly created file from the Focus folder. The following example is using Splashtop for remote access and file transfers, so it may vary depending on what application you are using. Navigate to the Focus folder and find the file "employee.csv" and move it over to your computer.
Preparing the file for Import into Sail POS
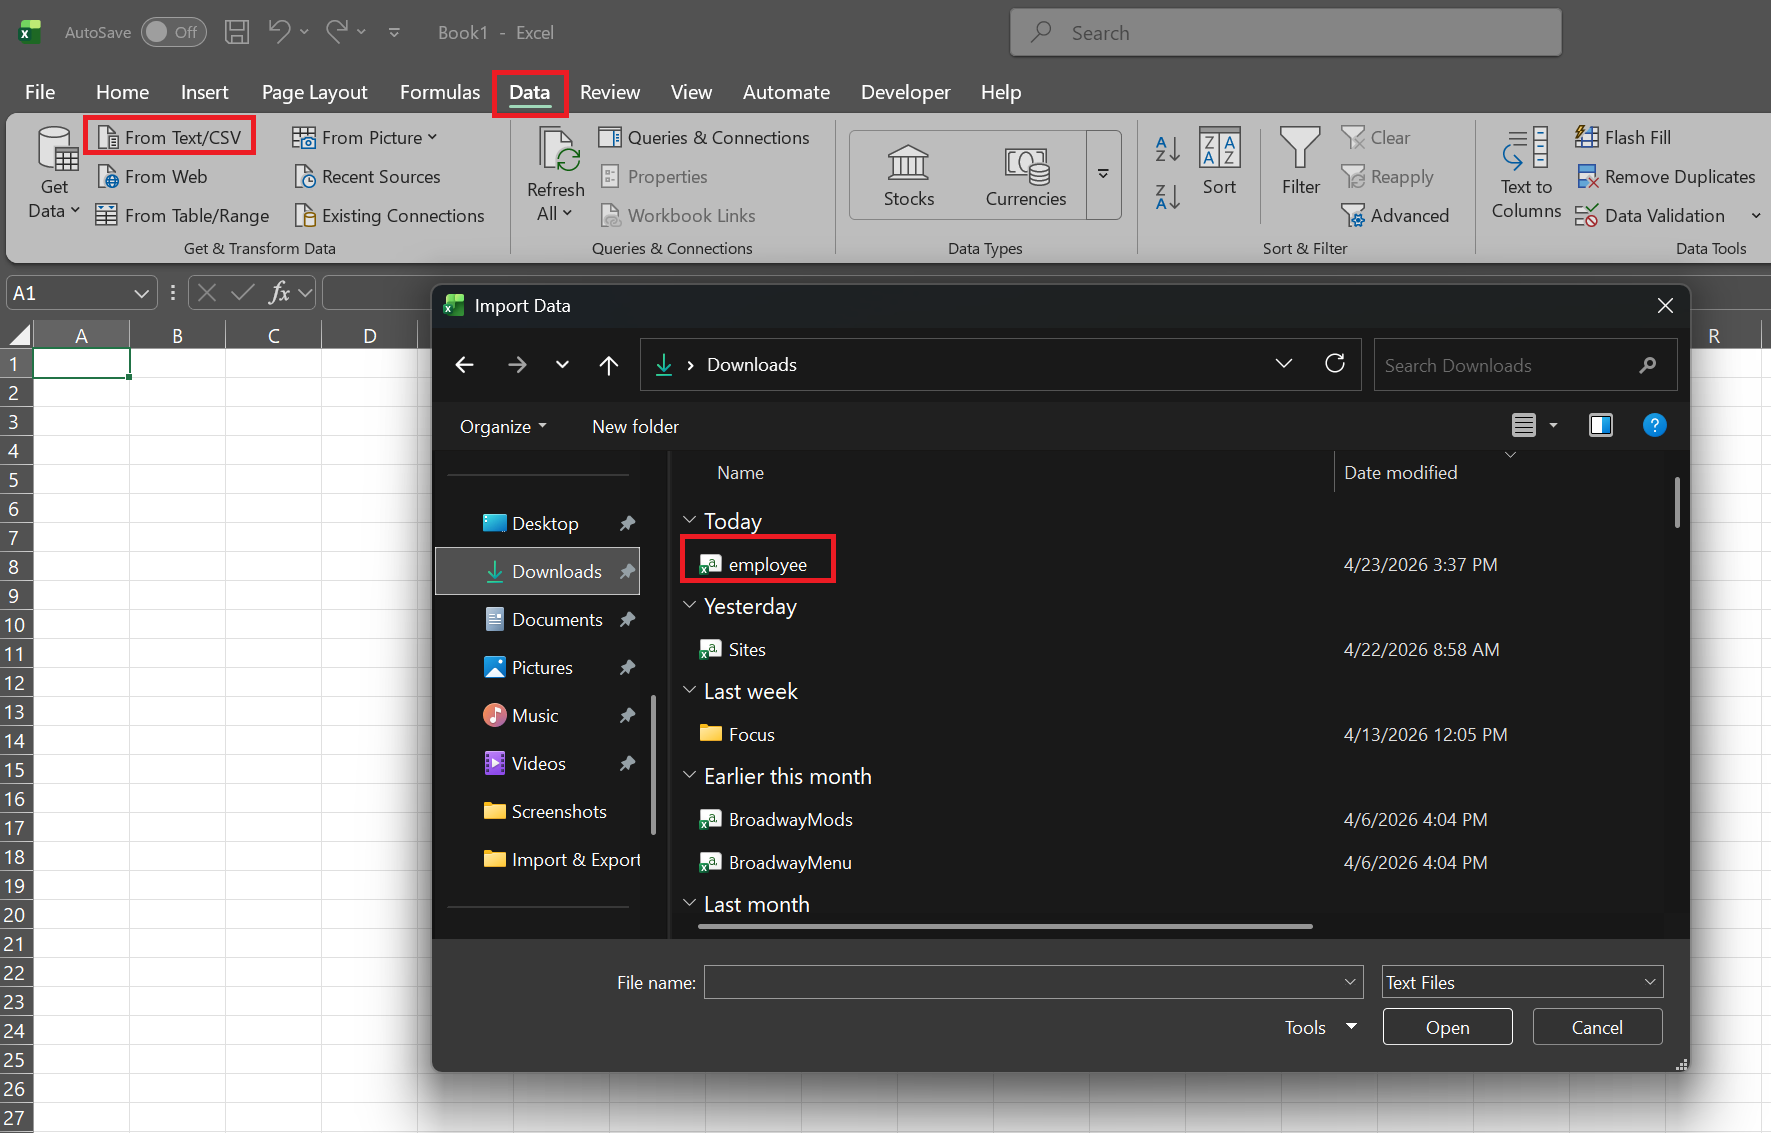
- Open up a new Excel workbook and then Navigate to Data -> From Text/CSV -> employee.csv
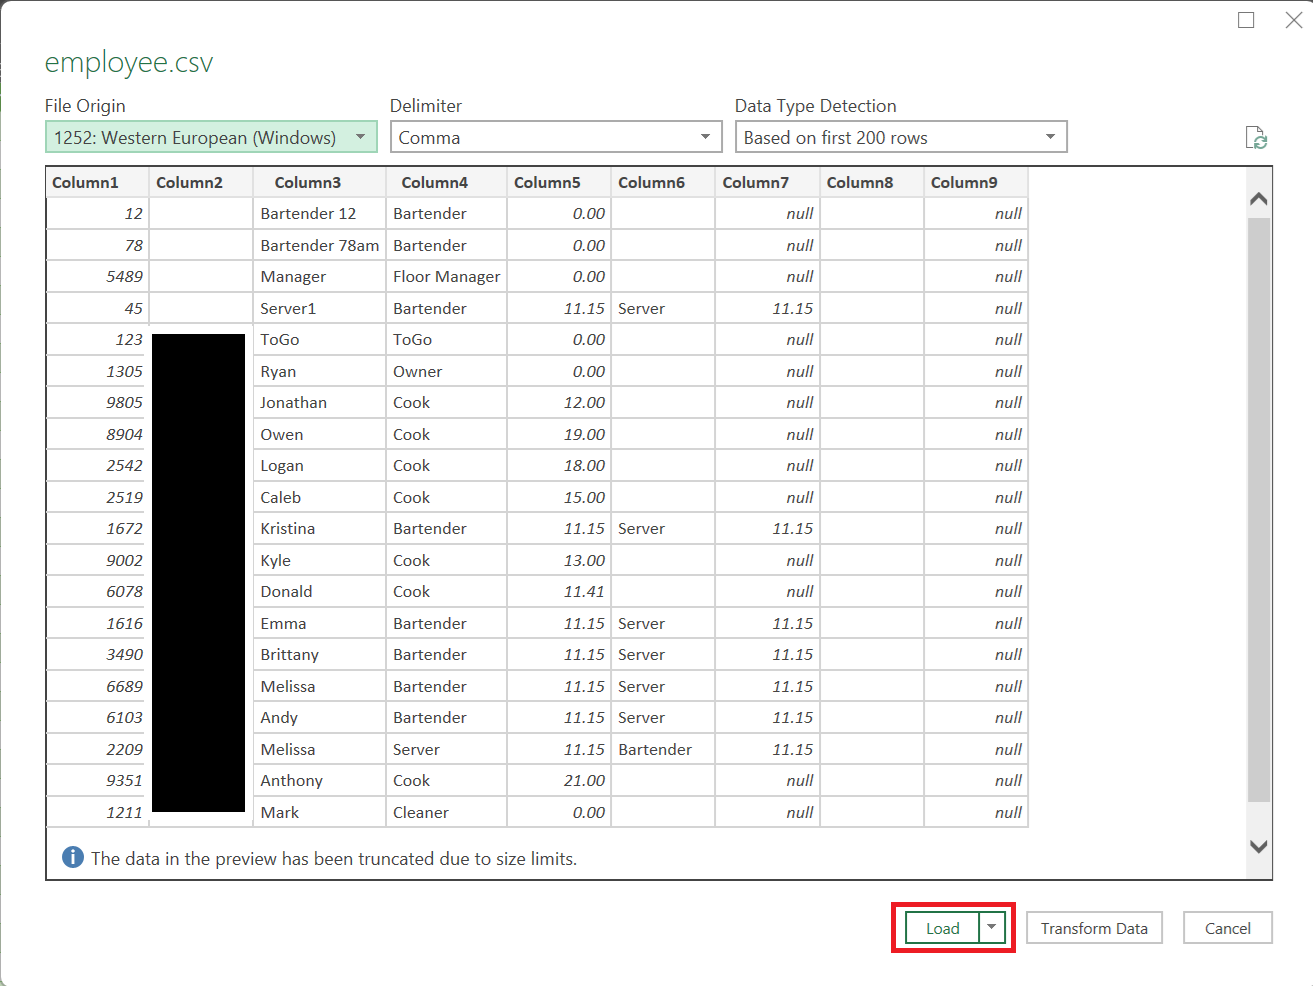
- On the next screen, quickly review the data to make sure it looks correct before hitting Load Data
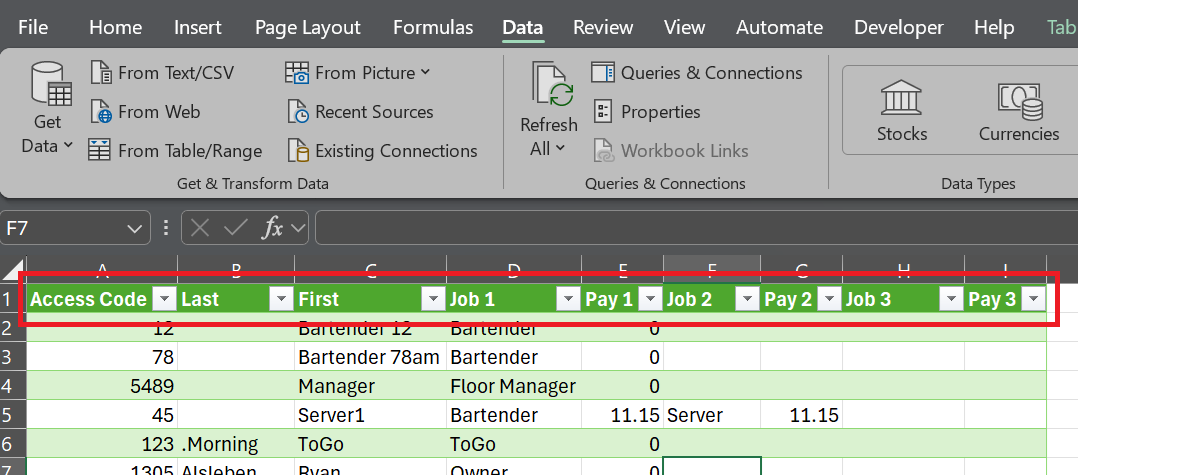
- Next part is not required, but does make copying the columns into the Sail import much easier. You can rename all columns to what their data field contains (Access Code, Last Name, First Name, Job 1, Pay 1, Job 2, etc.)
- Finally, remove any employees (generic or otherwise) that you do not need to import.
We are now ready to move that data into the Sail import. The next steps will show us how to complete that work.
Moving the data into the Sail POS Import
Before continuing to the next step, ensure ALL Job Roles that exist in the Focus file have been created in Sail. See How to create and/or edit a job role for help.
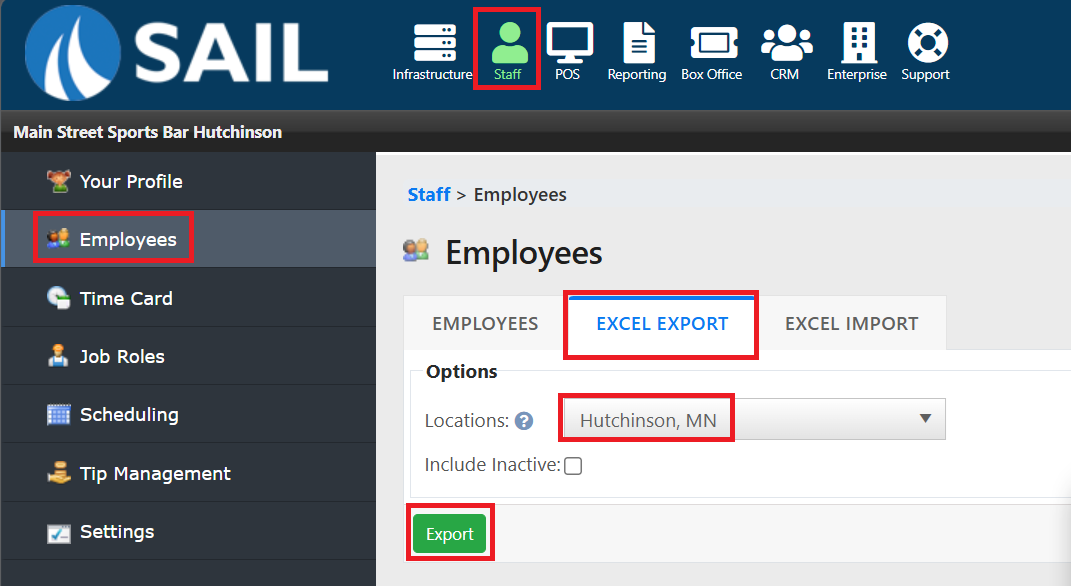
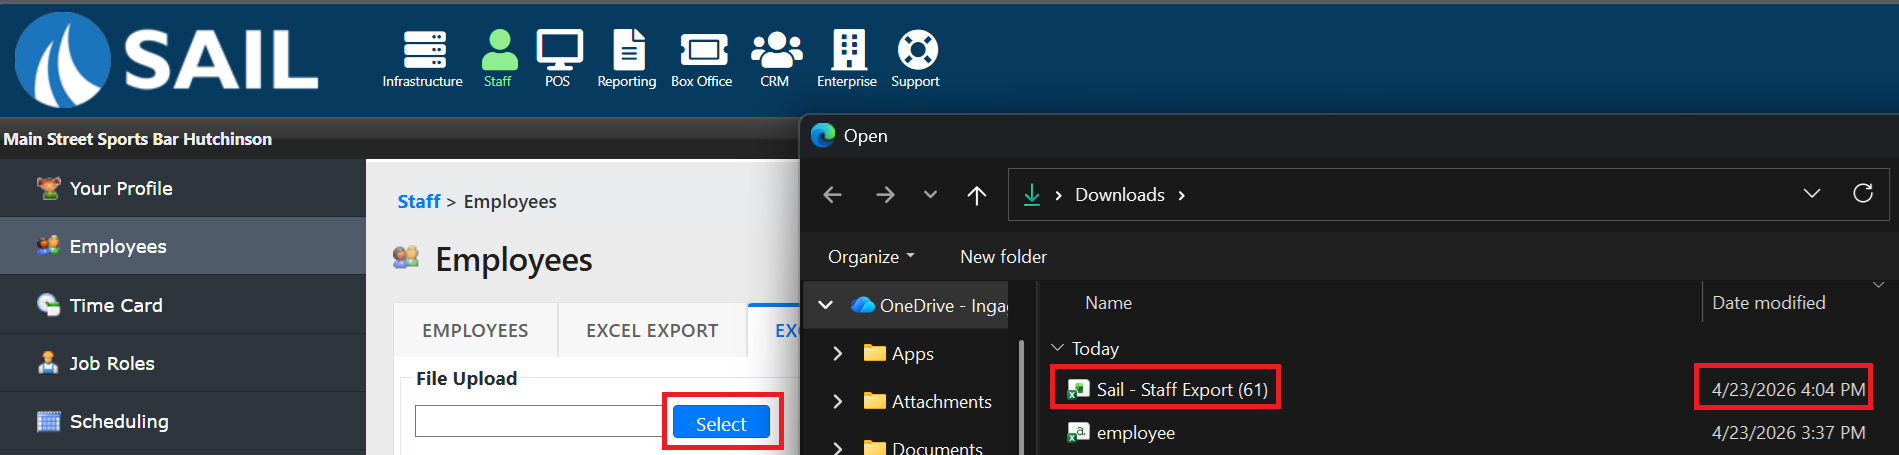
- First we need to get the file from Backoffice. Navigate to Staff -> Employees -> Excel Export. Then select the Location and click Export. This will download the current employees into an Excel spreadsheet.
If this is a multi-store location then you will need to make sure you are selecting the correct location for export
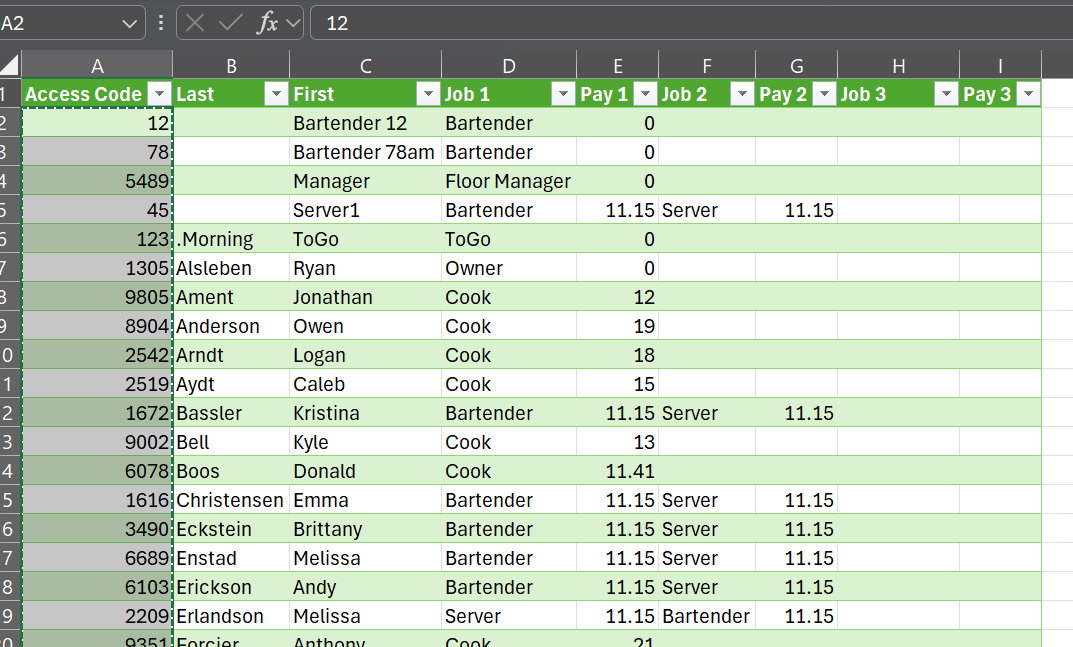
- Next, open the file you just downloaded. It will be named "Sail Staff Export (##)". We then need to copy the fields from the workbook that has the Focus data, into the new Sail Staff Export. It is easier if you "Hide" some of the columns that we are not importing such as email, address, phone number, etc.

- You want to copy Rows 2 down through as many rows as you have employees. Do not copy Row 1.
- When you paste the data into the Sail export/import file you will want to only keep the values. This ensures you don't end up with references instead of actual data values in the field
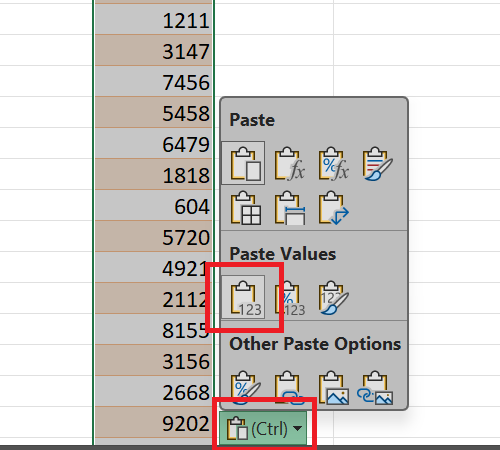
Make sure you do not paste the "Access Code" column into the Employee Number column. That column is auto generated when the import is performed, though if needed can be filled out.
Once you have moved over all fields from the Focus file, we still need to add some additional information that Sail requires, as well as a few fields that are much easier to do in Excel than they are in Backoffice.
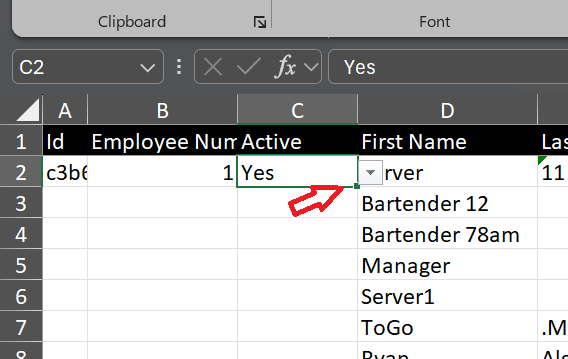
- First, double click the dot in the lower right hand corner of the cell C2 for the Active Column. This will fill all rows and mark the employees as Active
- Next we want to fill in the Legal Name. This part is important if you want your Payroll reports to be sorted alphabetically by Last Name instead of First Name. Enter the following formula into cell F3:
=E3&" "&D3
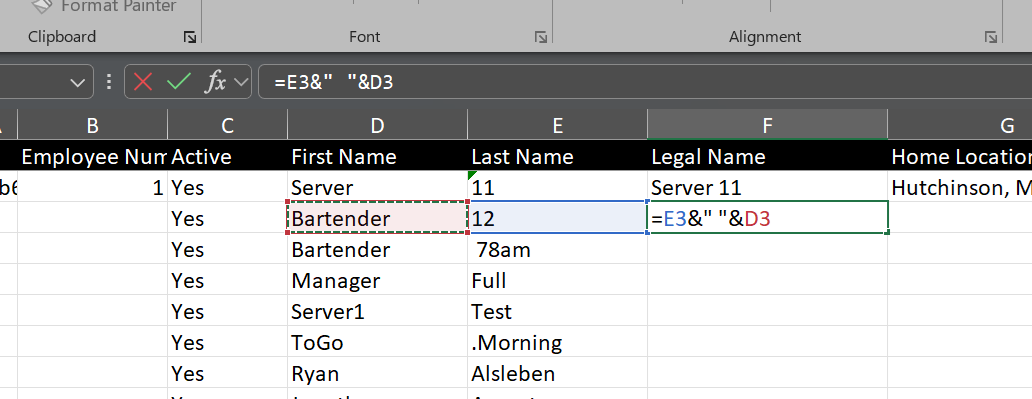
- Then click the dot in the lower right hand corner of cell F3 to auto fill the rest of the column (similar to the previous step). This also needs to be done in Column G to fill in Home Location.
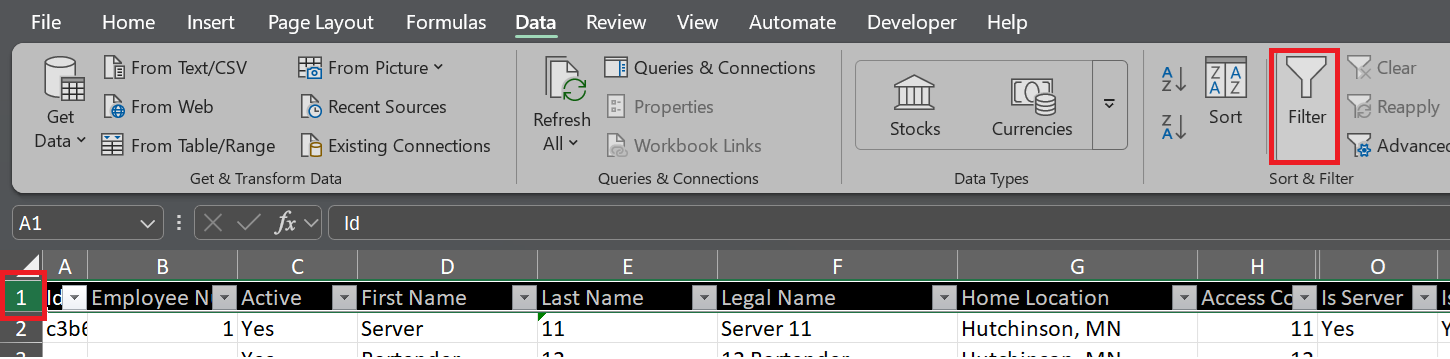
- For Column O "Is Server", it is easiest to filter out the employees that will not need to be shown in the Server List for receiving transfers or running a server close. You can do this by click on Row 1 and then going to Data -> Filter
- Now we can Filter Job 1 to only include Job Roles that should show in the Server List:
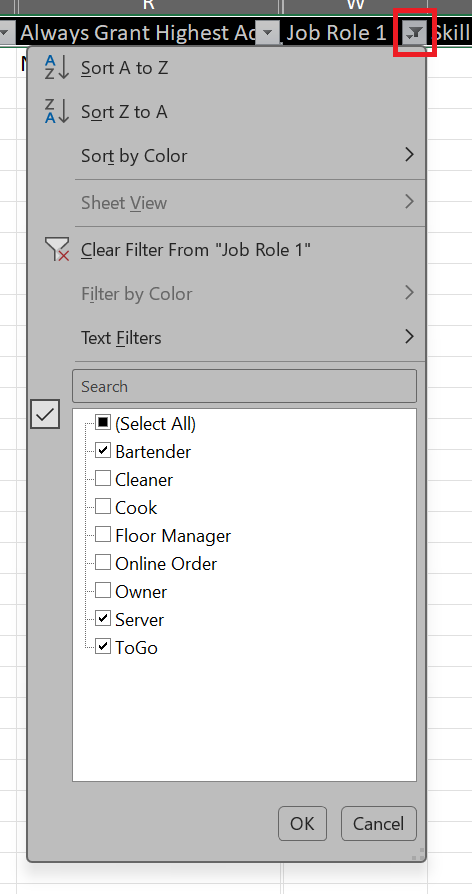
- Now we can click "Yes" from the dropdown in cell O3 and then copy that using the dot in the lower right hand corner like we have done previously. This can be done for Job 2 and Job 3 as well to make sure we select everyone who is needed.
- Do this the same way for "Is Tippable Employee" as anyone who is receiving tables/orders, is also likely required to claim cash tips at the end of their shift.
- You can also do this for the "Always Grant Highest Access" or "Skip Clock In Prompt" if you would like as well.
- Remove all filters and unhide all columns, then Save the workbook after reviewing the information for accuracy
Importing into Sail POS
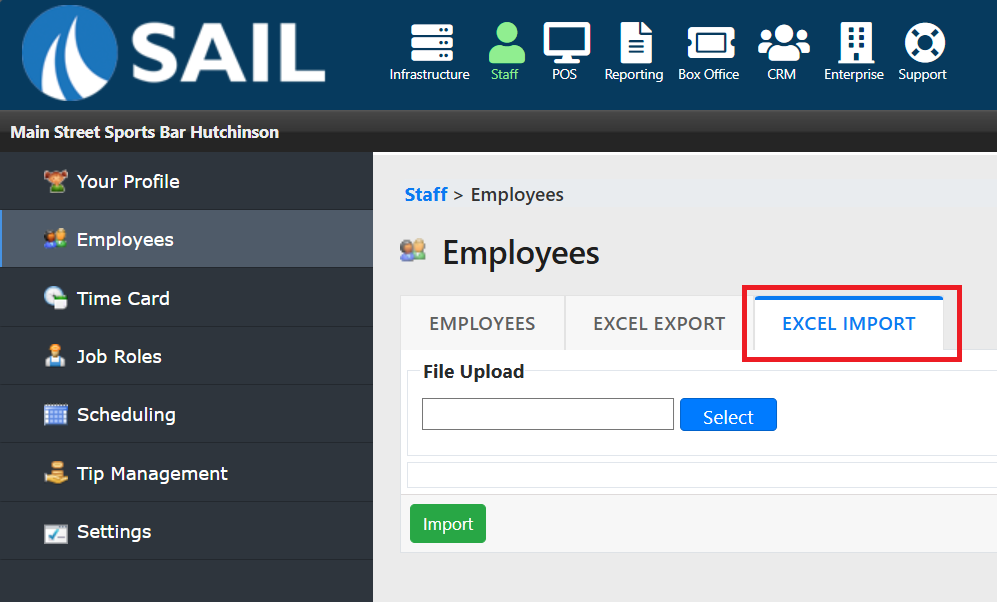
- Now we are ready to import the employees into Backoffice. Return to Backoffice and navigate to the Excel Import tab of Employees
- Click Select and locate the file that you just built for import. Keeping the file in your Downloads folder allows you to see the last modified file in that folder which should be the Sail Export you just saved.
- Now click Import. If successful you will see a message that says "Successfully Updated/Added ## record". If it fails you will see rows of messages that will direct you to the cells on the import file to address. These messages are typically missing job codes or pay rates for the job codes as $0 rates do need to be entered. Address those failed records and try the import again until successful. After successfully importing, navigate back to the Employee List to verify all Staff are showing.
No Comments